

परिचय
Multi-Brand की मदद से आप एक सत्यापित व्यवसाय के अंतर्गत कई brands चला सकते हैं। प्रत्येक brand का अपना नाम, लोगो, statement descriptor और URL होता है। आपका payout account, fees और KYC business स्तर पर साझा रहते हैं, जबकि प्रत्येक product, payment link, subscription, invoice और transaction को किसी विशिष्ट brand के अंतर्गत दर्ज किया जाता है। किसी नए niche को आज़माने, localized site चलाने या B2B और B2C product lines को अलग करने के लिए brands का उपयोग करें, बिना कोई दूसरा business account खोले। जिस brand को अपनी legal entity, KYC या payout account की आवश्यकता हो, उसके लिए अलग business चाहिए। Managing Multiple Businesses देखें।Merchant Dashboard Flow
1
Open Settings → Business
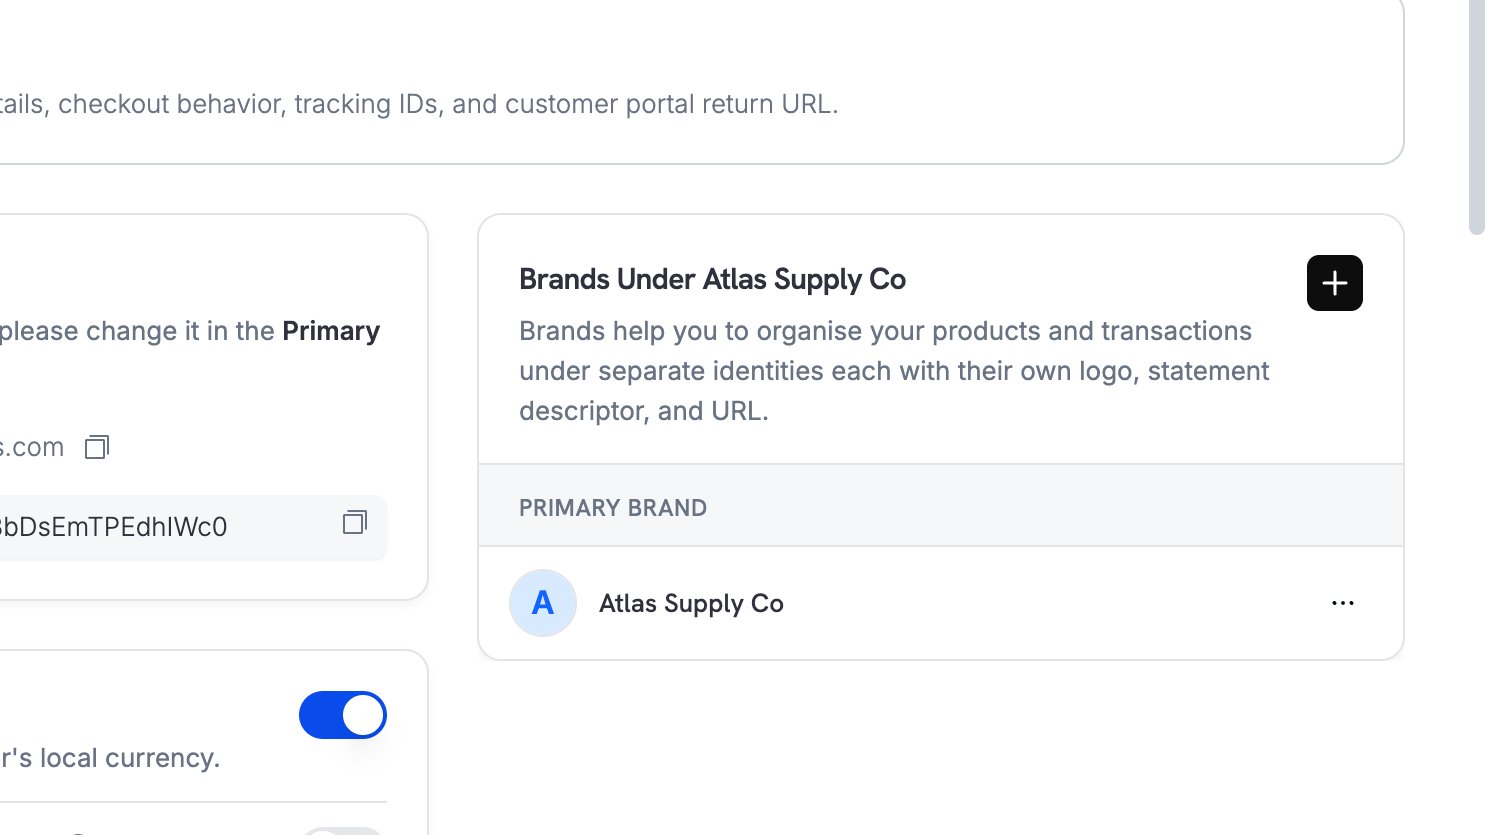
Settings → Business पर जाएँ। Brands Under [Your Business] panel में आपका Primary Brand और कोई भी Secondary Brands सूचीबद्ध होते हैं।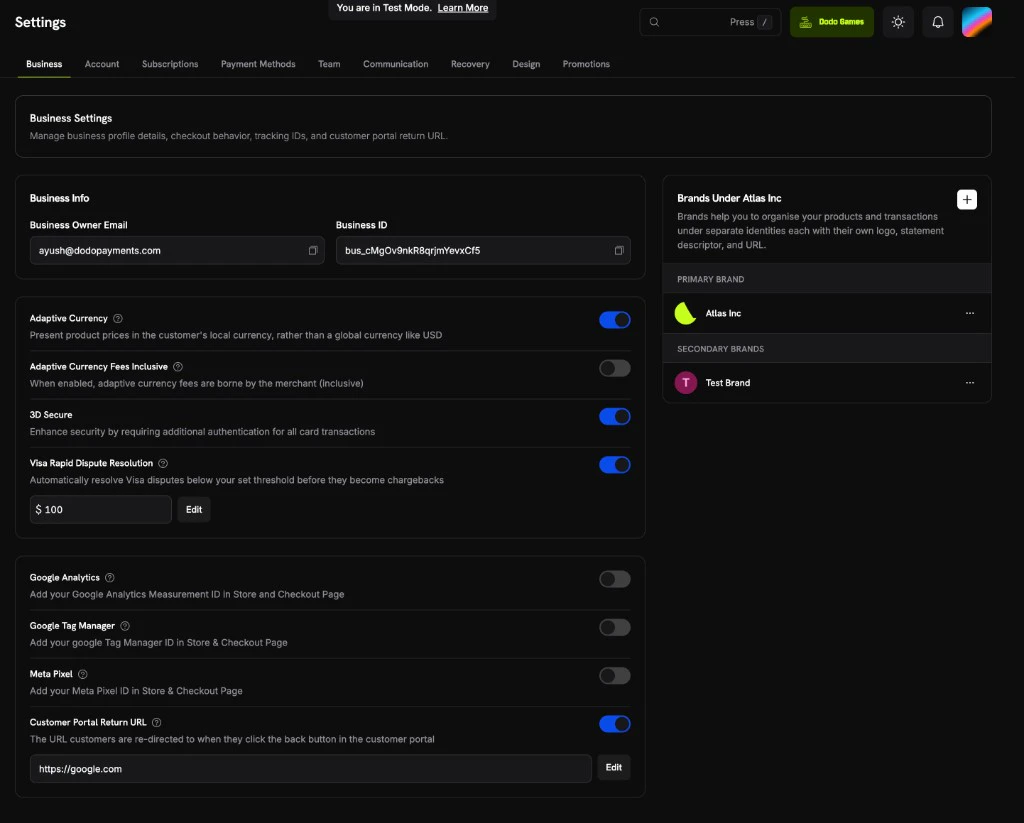
2
Click the + Button
नया brand form खोलने के लिए Brands panel के ऊपरी-दाएँ कोने में + button पर click करें।
3
Fill In the Brand Details
निम्न fields भरें:
- Brand Name (required): कम से कम 2 characters और आपके अन्य brands के नामों से अलग होना चाहिए।
- Support Email: वह address जिसका उपयोग customers इस brand के support से संपर्क करने के लिए करते हैं।
- Brand Description (required): कम से कम 10 characters। Brand, उसके products और उसे विशिष्ट बनाने वाली बातों का वर्णन करें।
- Brand Logo: checkout, invoices और payment links पर brand का प्रतिनिधित्व करता है। स्वीकार किए जाने वाले formats PNG, JPEG, GIF, WebP, ICO और SVG हैं। किसी अन्य format को
422error के साथ reject कर दिया जाता है।
... menu खोलें और Edit चुनें।4
Select the Brand on Products
Product बनाते समय Brand field में उसका brand चुनें।
5
Find the Brand ID in Transactions
Transactions और subscriptions में Brand ID दिखाई देता है, जिससे आप जान सकते हैं कि प्रत्येक किस brand से संबंधित है।
Additional Points
- payout में कोई बदलाव नहीं: Funds, payout cycles और fees business स्तर पर ही रहते हैं और business wallet तथा आपके bank account में जाते हैं।
- webhooks पर Brand ID: Payment, subscription, refund, license key, credit ledger entry, credit balance low, entitlement grant, dunning attempt और abandoned checkout payloads में एक
brand_idशामिल होता है, जिससे आप प्रत्येक event को किसी brand से जोड़ सकते हैं। जब किसी entity का अपना कोई brand नहीं होता, तोbrand_idbusiness का primary brand होता है। Dispute payloads में कोईbrand_idनहीं होता, इसलिए payment पर brand खोजने के लिए उनकेpayment_idका उपयोग करें। Payout payloads business स्तर के होते हैं और इनमें कोईbrand_idनहीं होता। - Suspensions: यदि कोई brand suspended है, तो वह नए payments, checkout sessions या subscriptions स्वीकार नहीं कर सकता। उसी business के अंतर्गत आने वाले अन्य brands में transactions जारी रहते हैं।
- Invoices: प्रत्येक invoice में उस brand का नाम और logo दिखता है जिससे payment संबंधित होता है।
- Storefront, license keys, discount codes, payout settings और business स्तर की अन्य सुविधाएँ single brand के साथ भी इसी तरह काम करती हैं।
Archiving a Brand
जिस brand के अंतर्गत अब आप बिक्री नहीं करते, उसे archive करें। Archiving से brand retire हो जाता है और उसके products, live subscriptions तथा product collections एक ही step में उसी business के किसी अन्य brand में move हो जाते हैं।Archive a Brand from the Dashboard
1
Open the Brand's Actions Menu
Settings → Business पर जाएँ। Brands Under [Your Business] panel में secondary brand के पास मौजूद 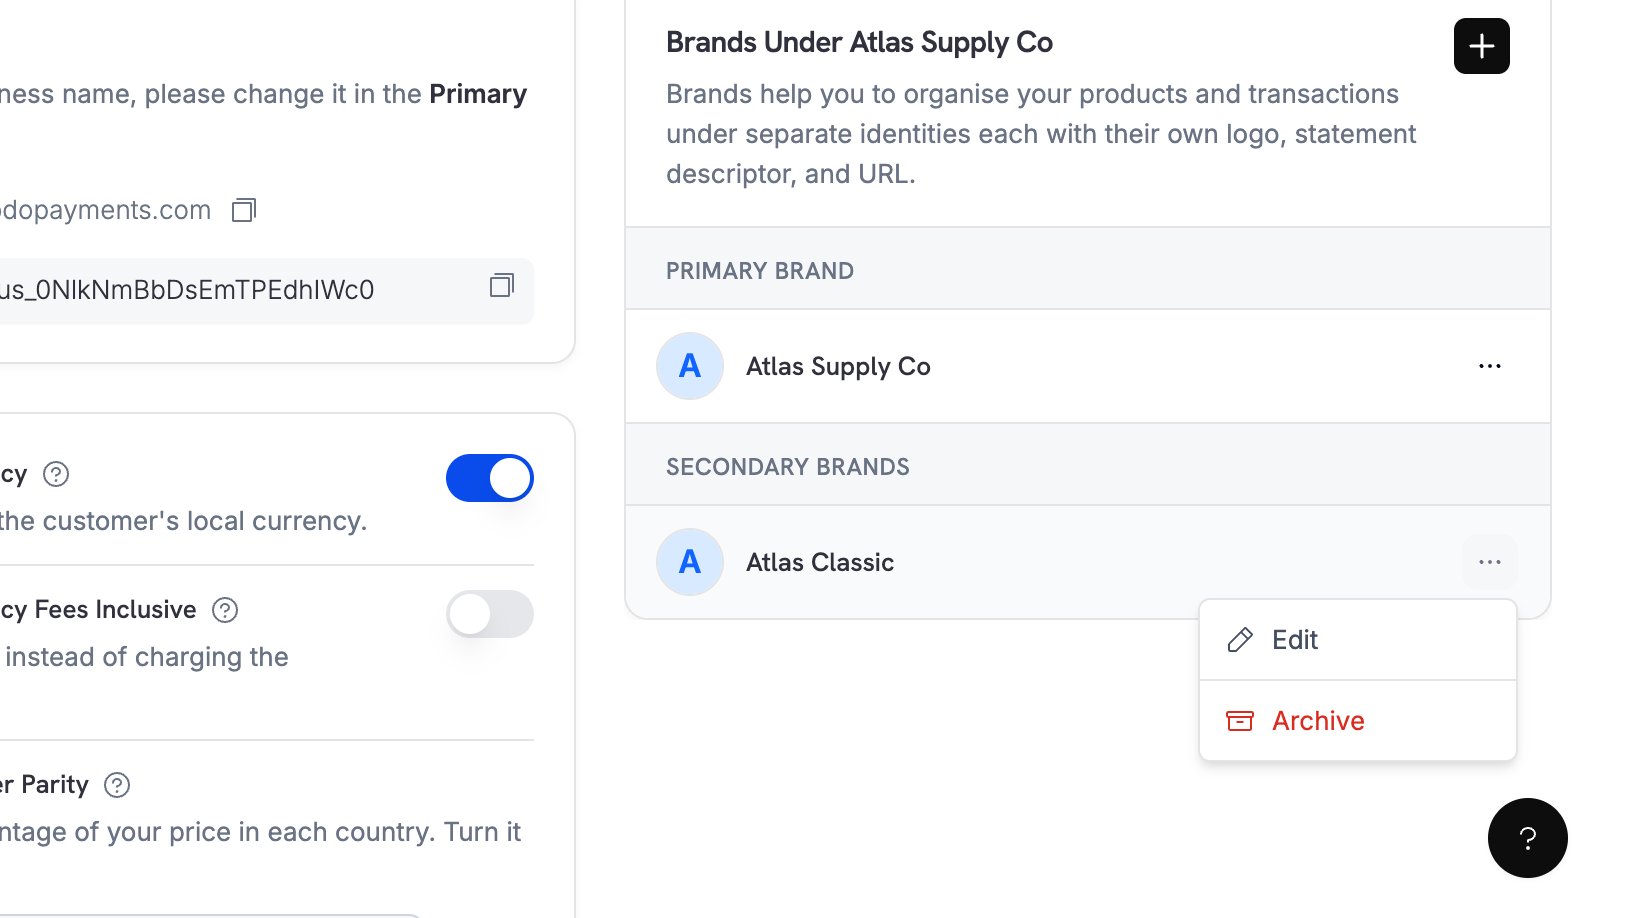
... menu खोलें और Archive चुनें। Primary brand के लिए Archive option नहीं होता।2
Confirm the Archive
Warning पढ़ें और Continue चुनें।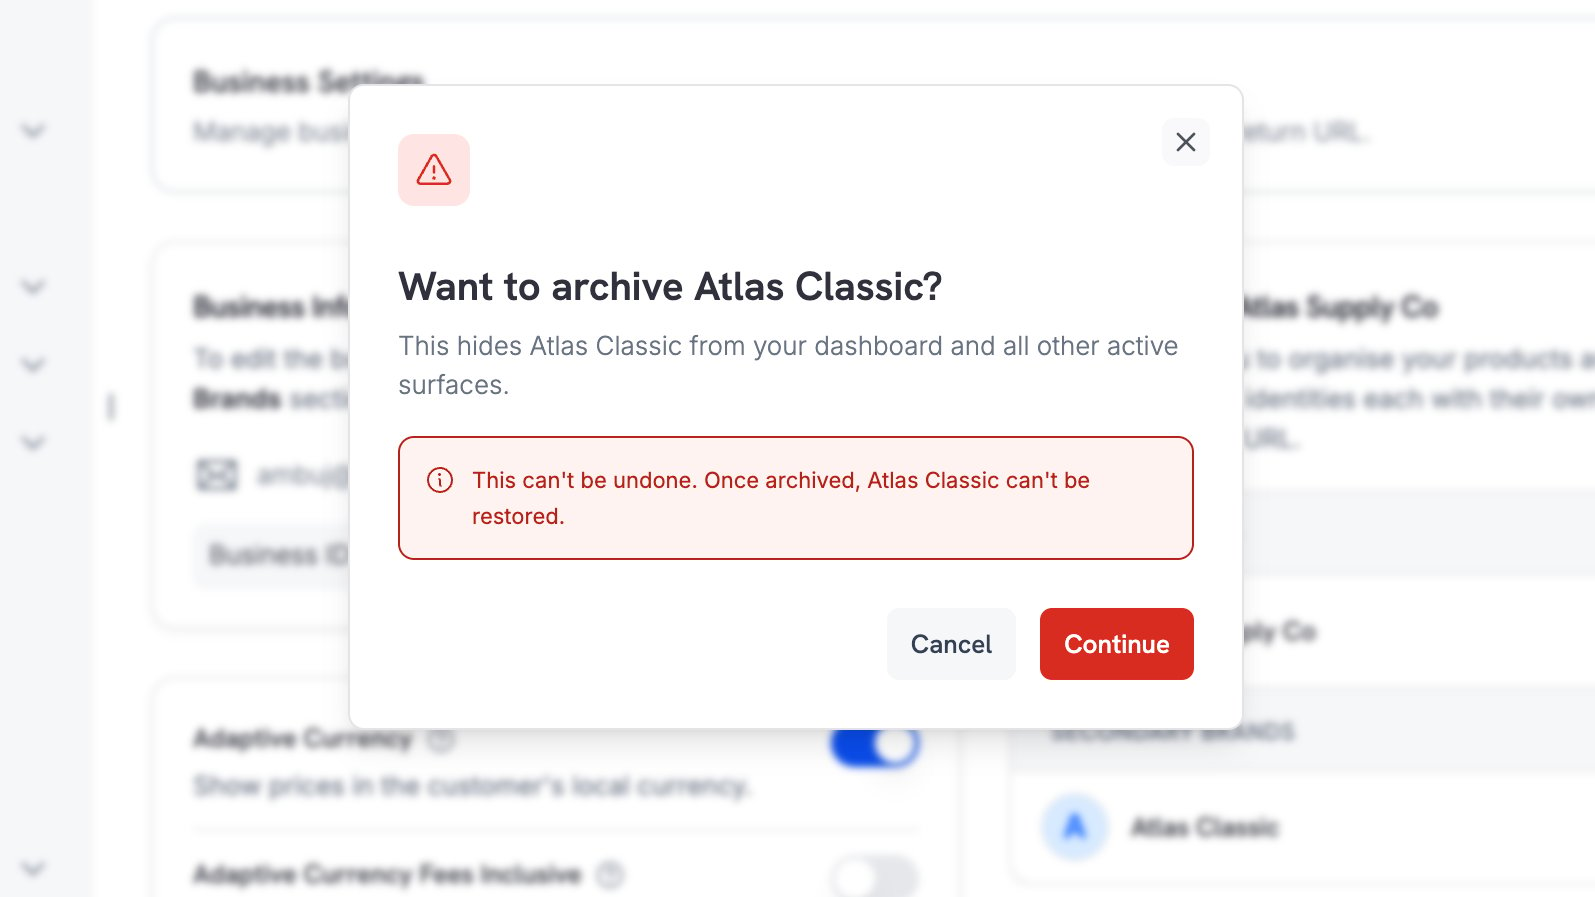
3
Choose the Brand That Takes Over
Move products to में वह brand चुनें जिसे products, live subscriptions और collections प्राप्त होंगे। Primary brand default होता है। Records को move करने और brand को एक ही action में archive करने के लिए Move & Archive चुनें।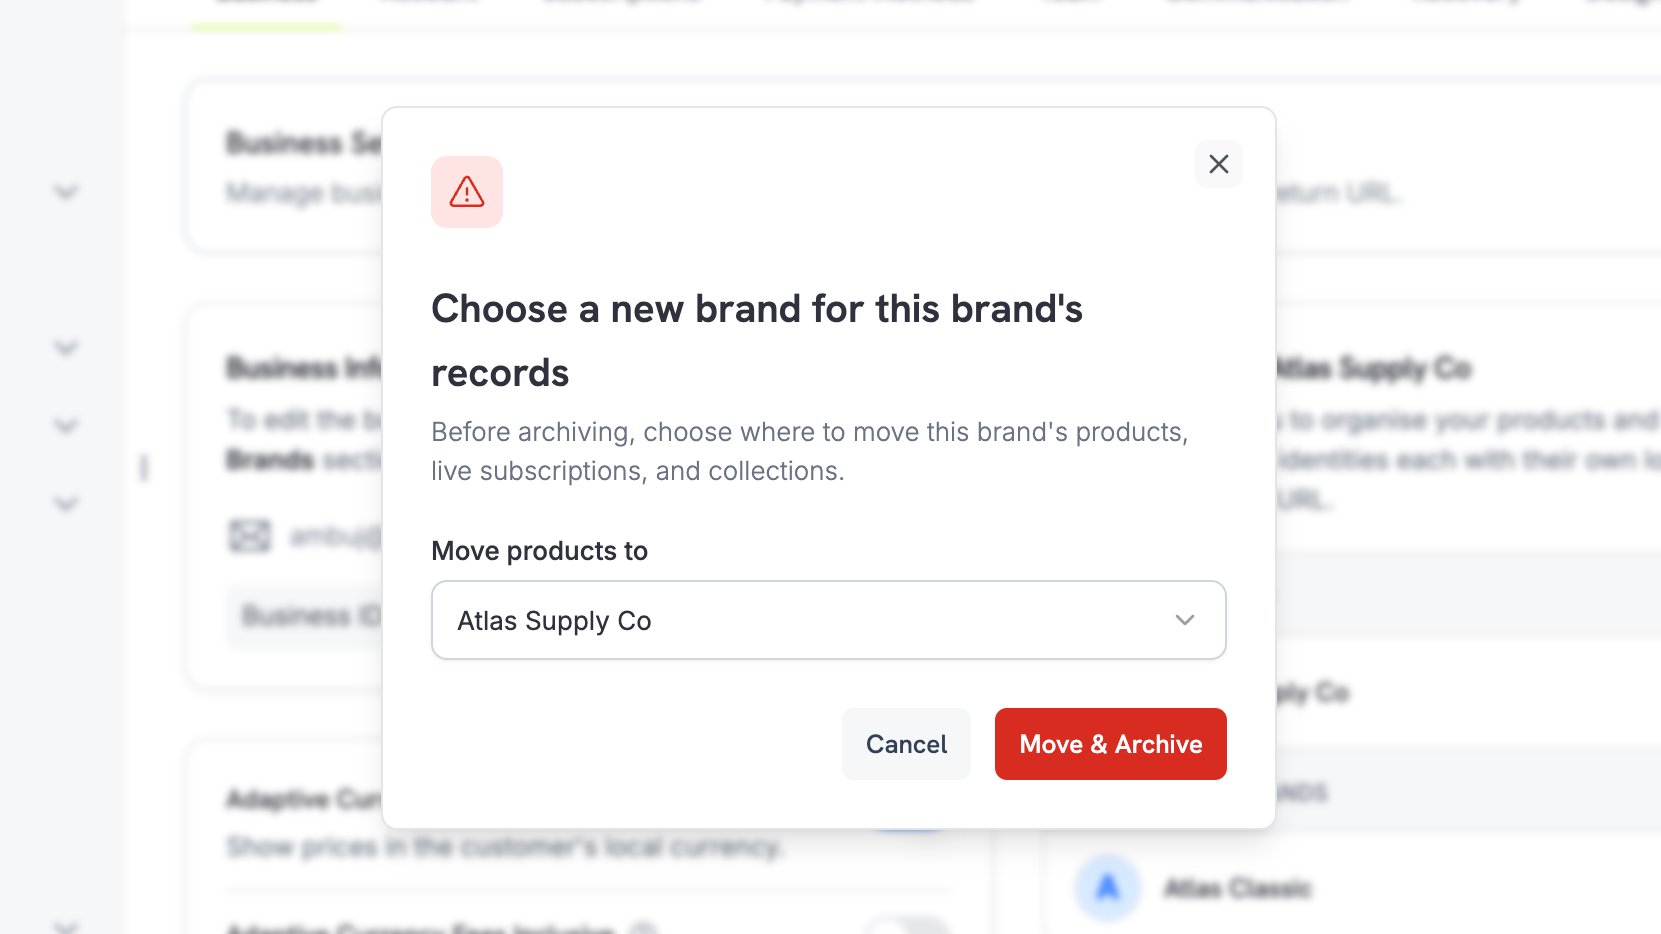
4
Check the Result
Confirmation में records प्राप्त करने वाले brand का नाम दिखता है।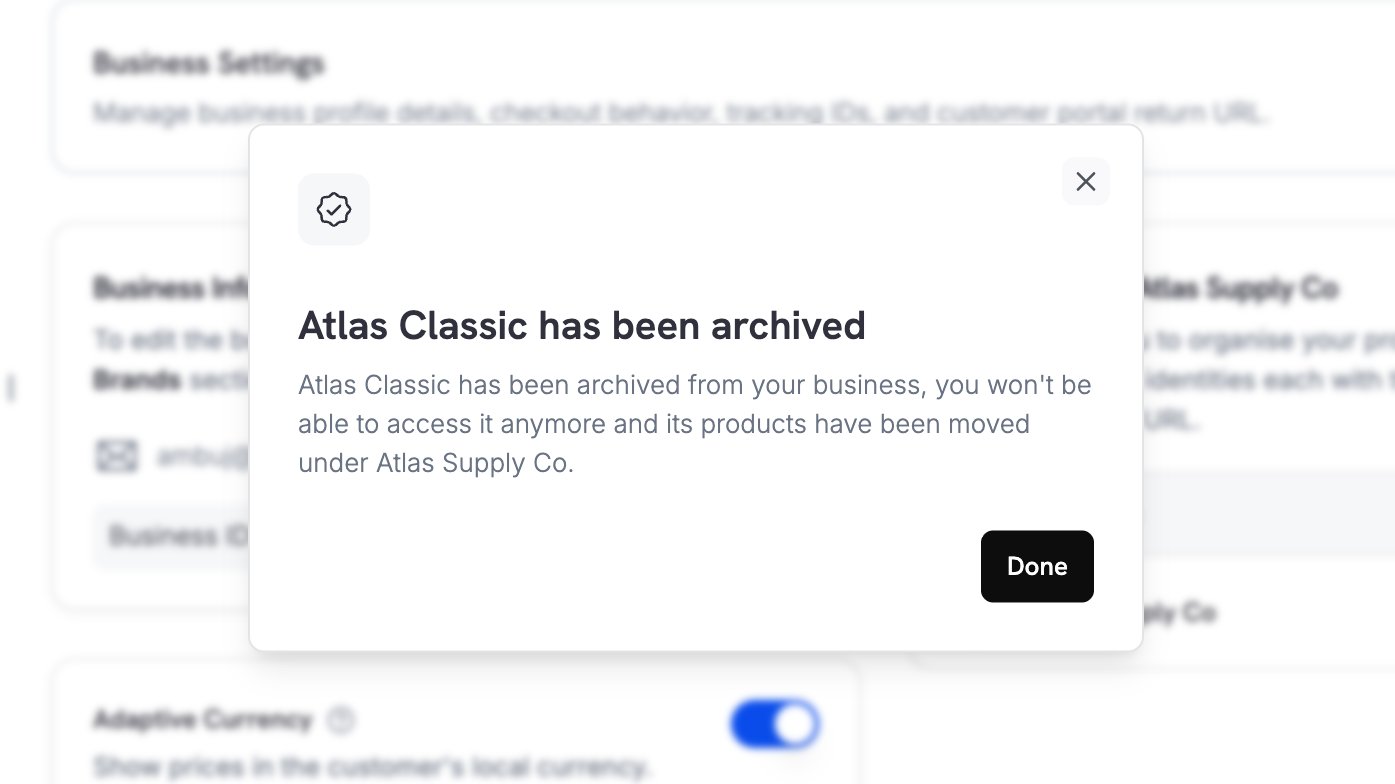
What Happens When You Archive
आप जिस brand को archive करते हैं, उसकी जगह लेने के लिए एक target brand चुनते हैं। Dashboard हमेशा इसके लिए पूछता है और API इसेmove_products_to के रूप में लेती है। एक atomic action में, Dodo Payments:
- प्रत्येक product को target brand में move करता है।
- प्रत्येक live subscription को target brand में move करता है, ताकि renewals उसी के अंतर्गत bill हों।
- प्रत्येक product collection को target brand में move करता है।
- Original brand को archive और disable करता है।
Primary brand को archive नहीं किया जा सकता और API request को
CANNOT_ARCHIVE_PRIMARY_BRAND के साथ reject करती है। यह वह brand है जिस पर आपका business fallback करता है, इसलिए कम से कम एक brand हमेशा बना रहता है।An Archived Brand Is Read-Only
API archived brand में किए गए हर बदलाव और उसके अंतर्गत बनाए गए हर नए record को reject करती है:
Archived brands brand pickers से hidden रहते हैं, इसलिए आप उन्हें नए records assign नहीं कर सकते। वे analytics filters के रूप में उपलब्ध रहते हैं, जिससे उस अवधि के लिए आपकी per-brand reporting पूरी रहती है जब brand सक्रिय था। Analytics देखें।
Archiving Through the API
किसी brand को archive करने के लिए archive endpoint को उस brand के साथ call करें जिसे आप retire कर रहे हैं और उस brand के साथ भी जो उसकी जगह लेगा:moved_to_brand_id, null होता है।
403, unknown brand के लिए 404, पहले से archived brand के लिए 409 और missing या invalid move_products_to target के लिए 422 लौटाता है।
Archived brands सहित brands की सूची बनाने के लिए list endpoint पर include_archived सेट करें। Archived brands default रूप से excluded होते हैं। प्रत्येक brand में archived_at field होता है, जो brand के active रहने के दौरान null होता है।
cURL