

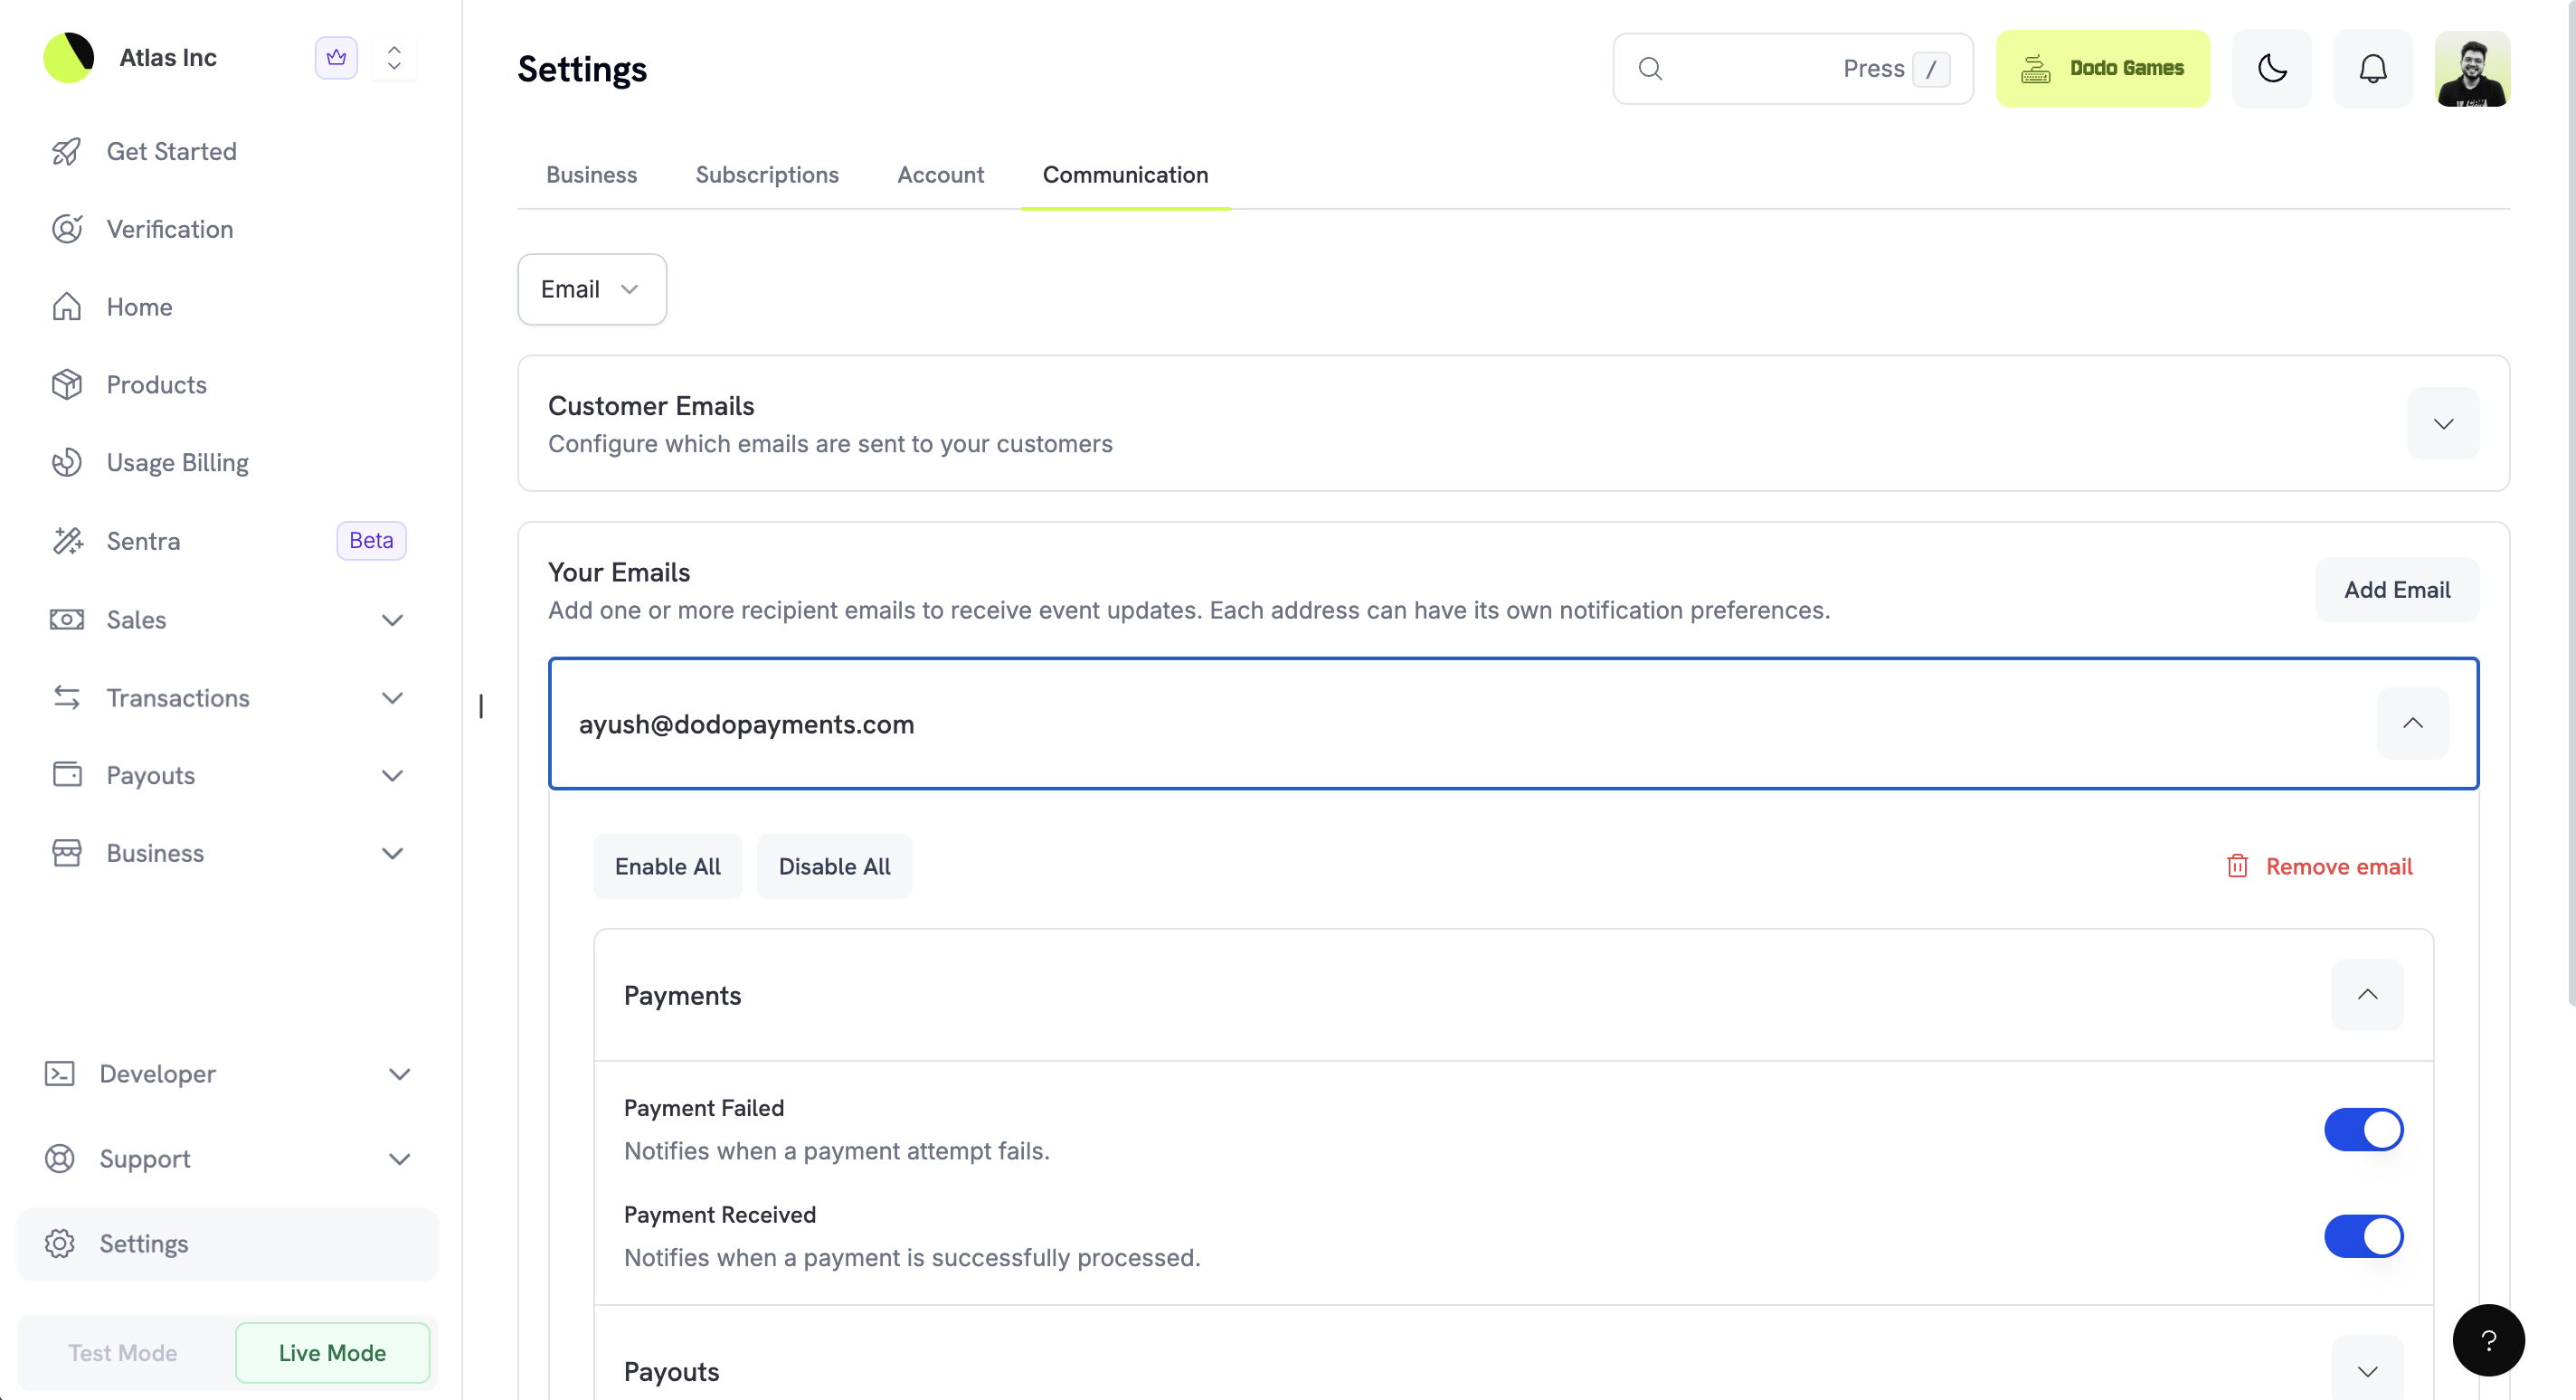
Communication Preferences यह नियंत्रित करता है कि आपके Dodo Payments account में होने वाली घटनाओं के बारे में आपको कब और कैसे सूचित किया जाए। आप अपने लिए notifications configure कर सकते हैं, team email recipients को उनकी अपनी preferences के साथ जोड़ सकते हैं और email, in-app तथा push channels में से चुन सकते हैं। यही page यह भी नियंत्रित करता है कि आपके customers को कौन-से transactional emails प्राप्त हों।
संचार प्राथमिकताओं तक पहुंच
अपनी संचार प्राथमिकताओं को कॉन्फ़िगर करने के लिए:- अपने Dodo Payments डैशबोर्ड में Settings पर जाएँ।
- Communication टैब पर क्लिक करें।
- नोटिफिकेशन चैनलों के बीच स्विच करने के लिए टैब का उपयोग करें: Email, In-App, और Push Notifications।
सूचना चैनल
Dodo Payments तीन notification channels का support करता है, जिनमें से प्रत्येक अलग use case के लिए उपयुक्त है। आप प्रत्येक channel को स्वतंत्र रूप से configure करते हैं।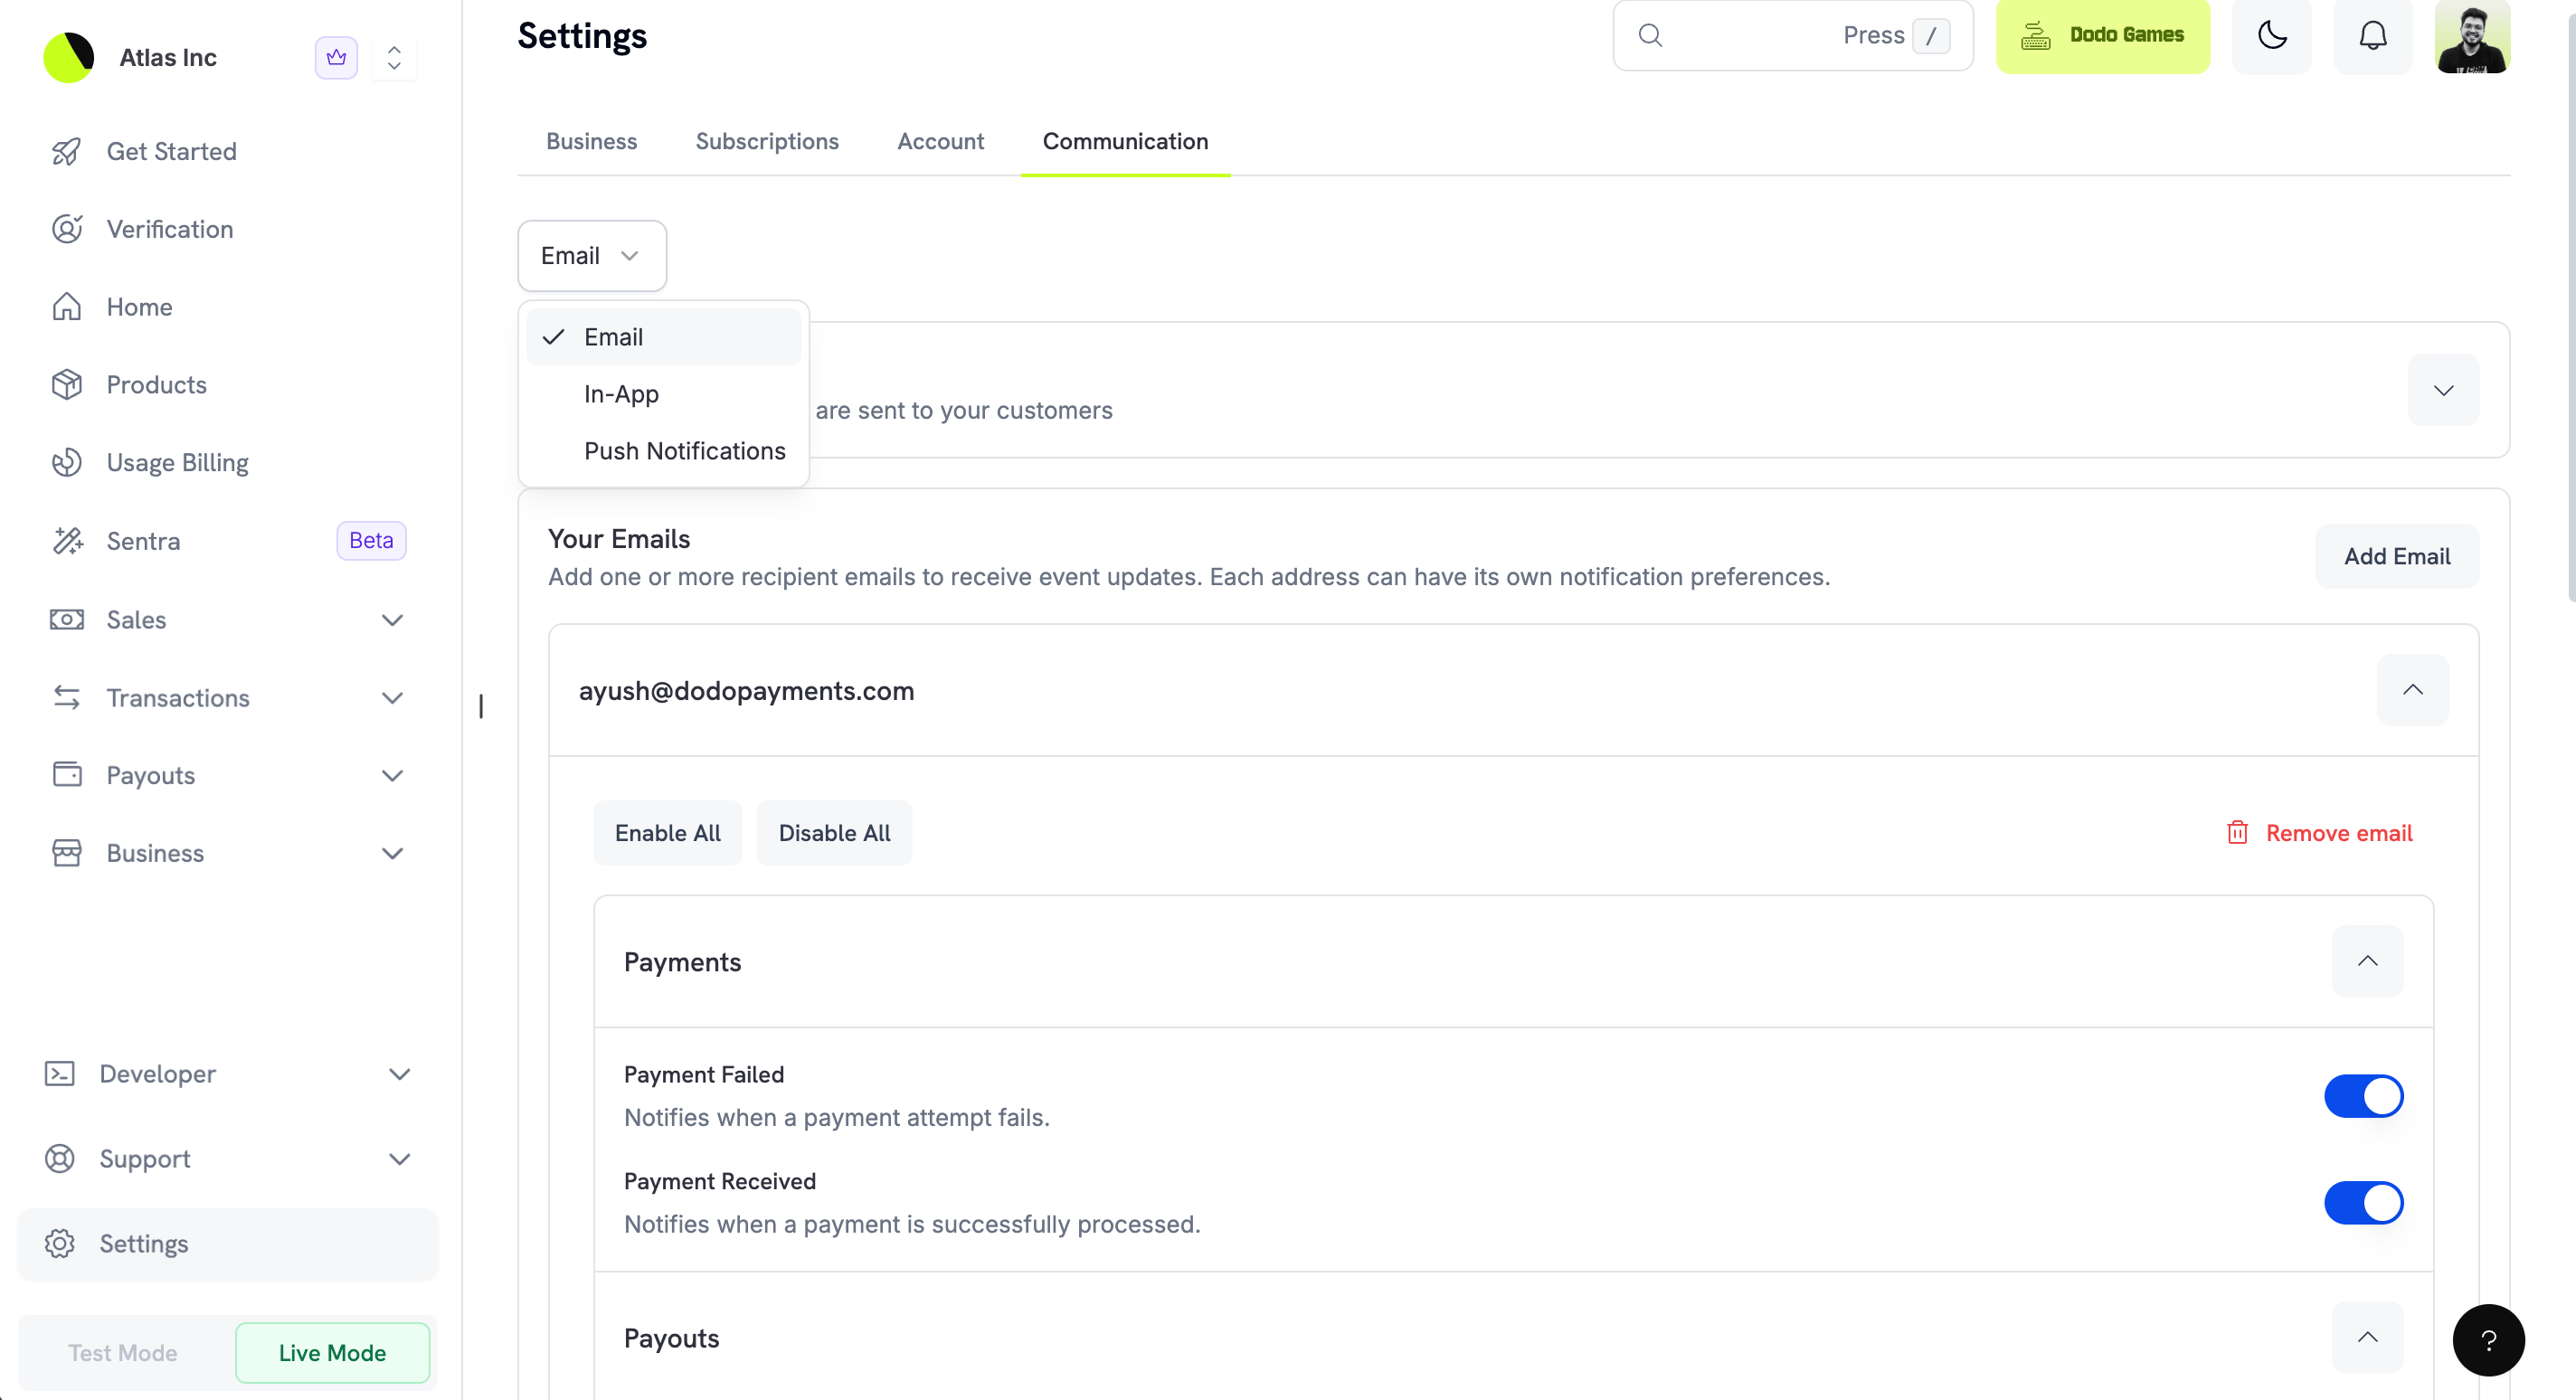
एक business में email, in-app और push को मिलाकर कुल 10 notification channels तक हो सकते हैं।
Email Notifications
Email सबसे flexible channel है। आप कई recipient addresses जोड़ सकते हैं और प्रत्येक recipient की अपनी notification preferences होती हैं। इसका उपयोग specific notifications को अलग-अलग team members तक पहुँचाने के लिए करें। उदाहरण के लिए, आपकी finance team को payout notifications और आपकी support team को dispute notifications प्राप्त हो सकती हैं।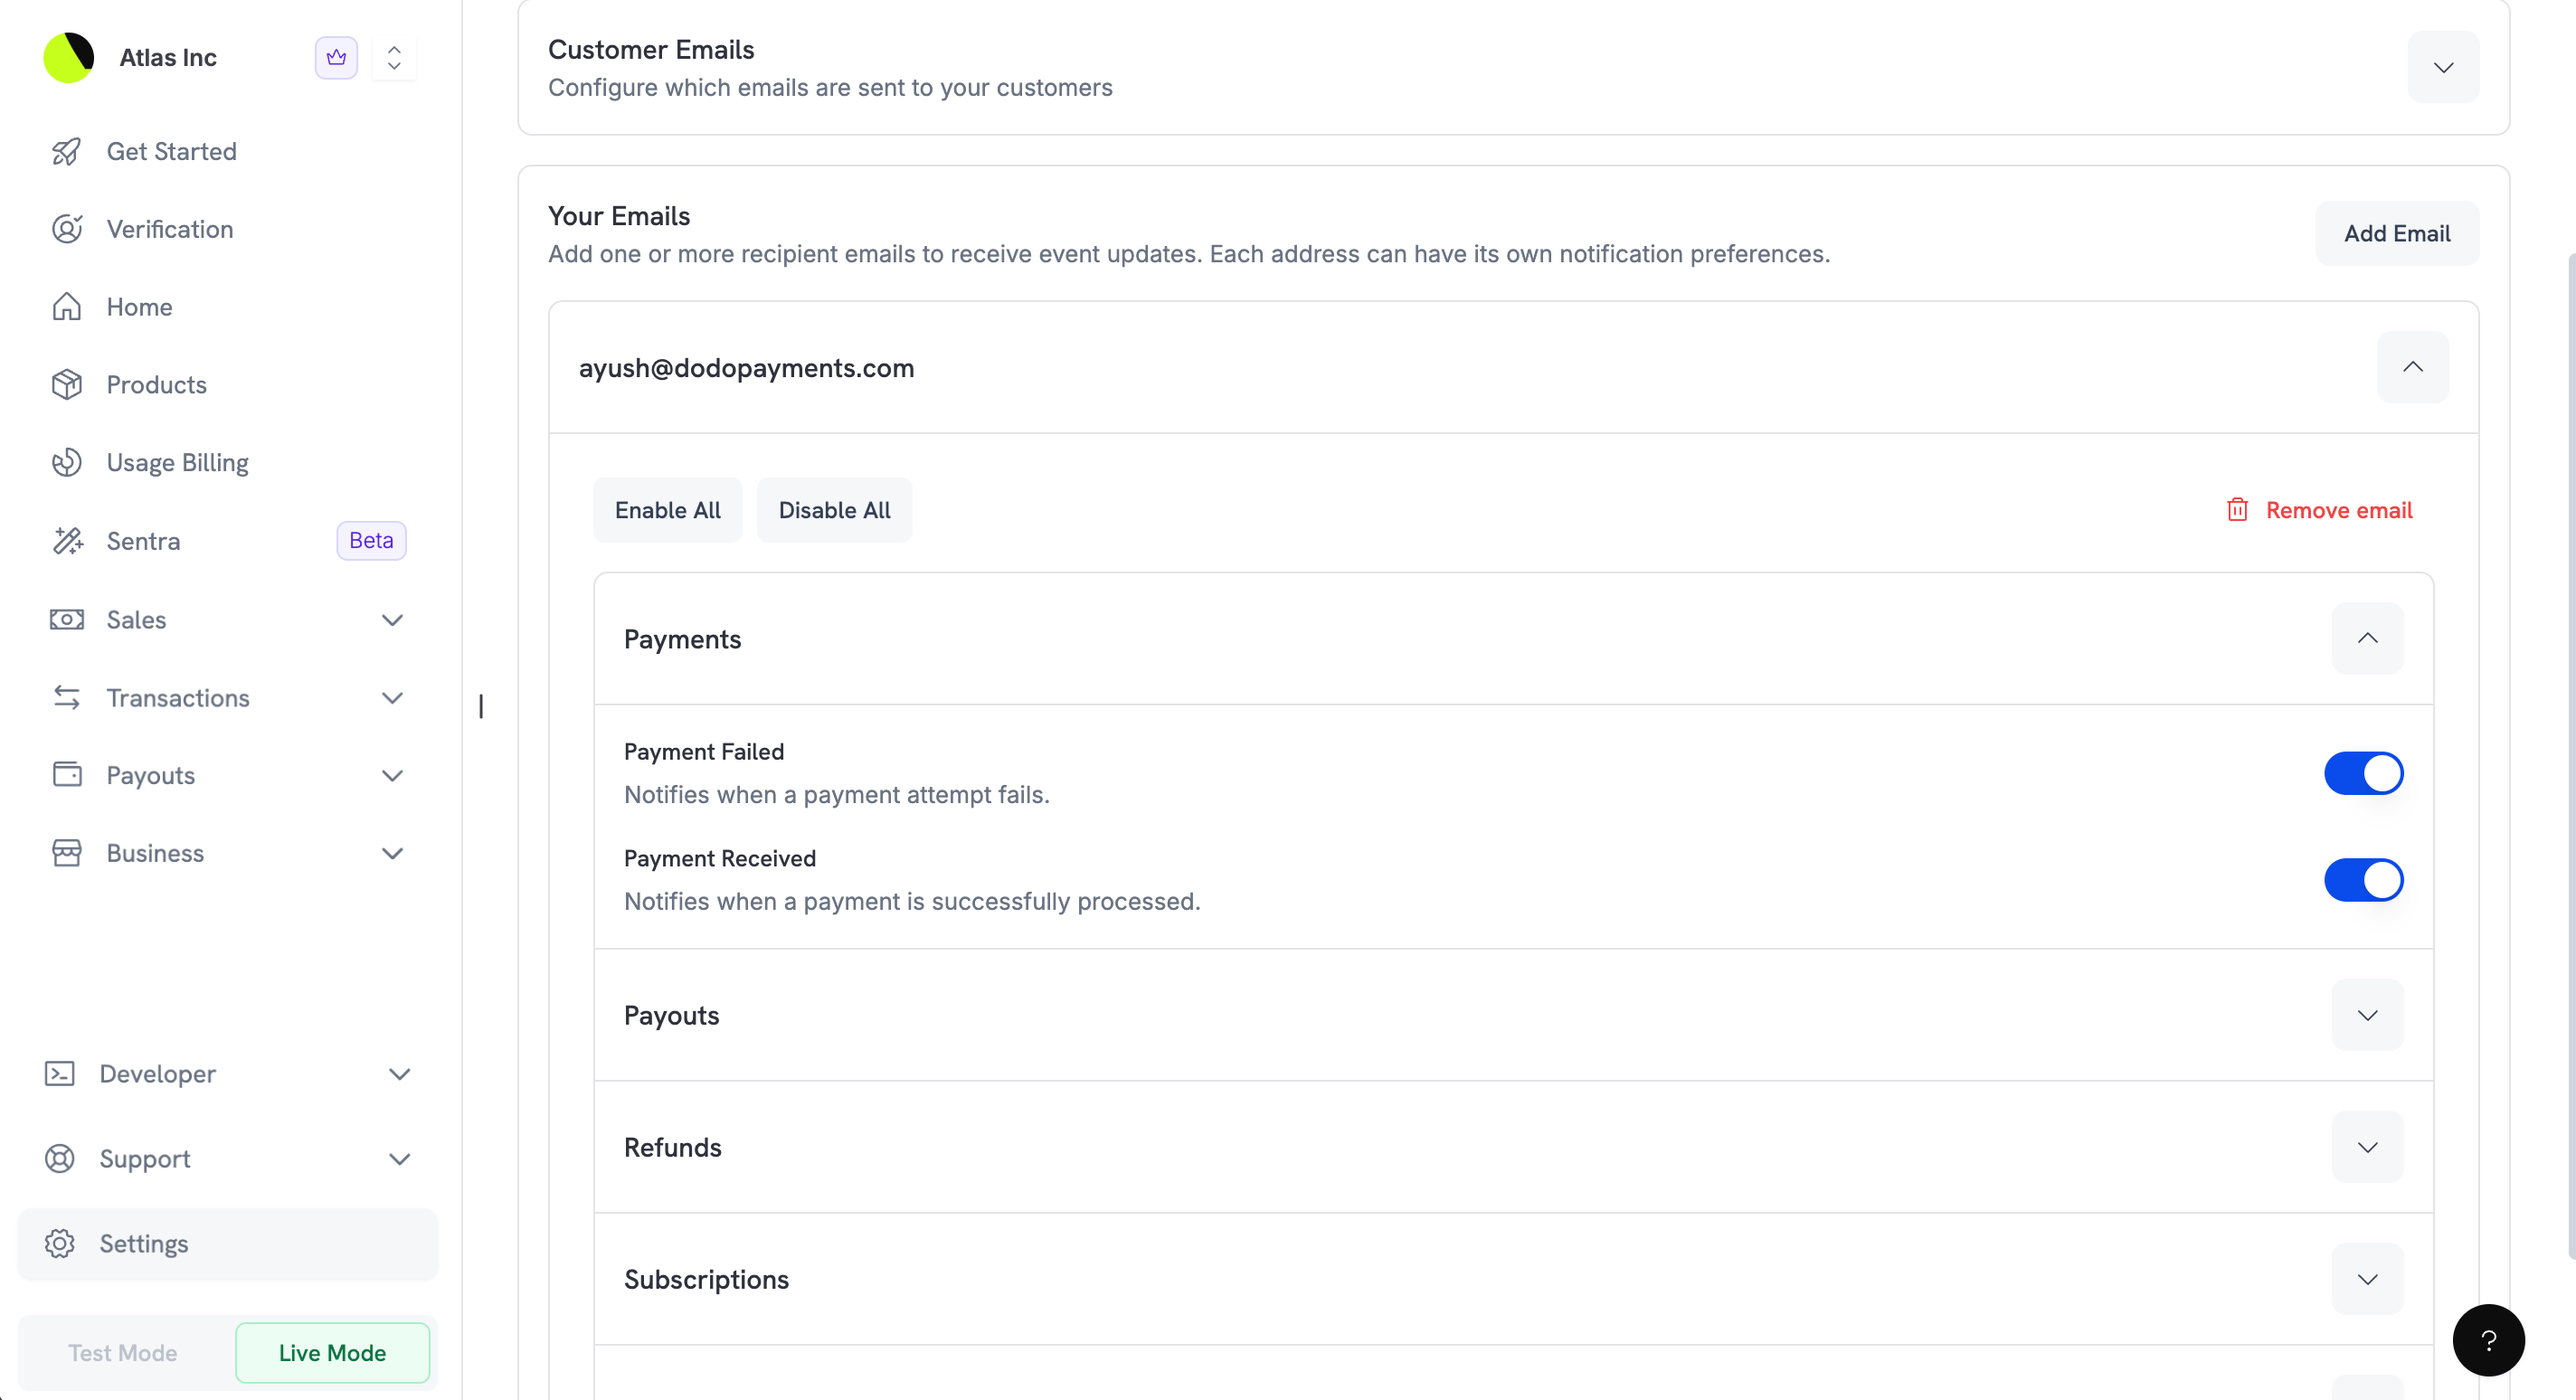
- 10-channel limit तक email recipients जोड़ सकते हैं
- प्रत्येक recipient के लिए notification preferences configure कर सकते हैं
- Enable All या Disable All के साथ सभी notifications को एक साथ on या off कर सकते हैं
- Team members बदलने पर email addresses हटा सकते हैं
In-App Notifications
In-app notifications आपके Dodo Payments dashboard के notification center में दिखाई देती हैं। Dashboard में काम करते समय informed रहने के लिए इनका उपयोग करें, बिना अपने email inbox में अतिरिक्त emails जोड़े।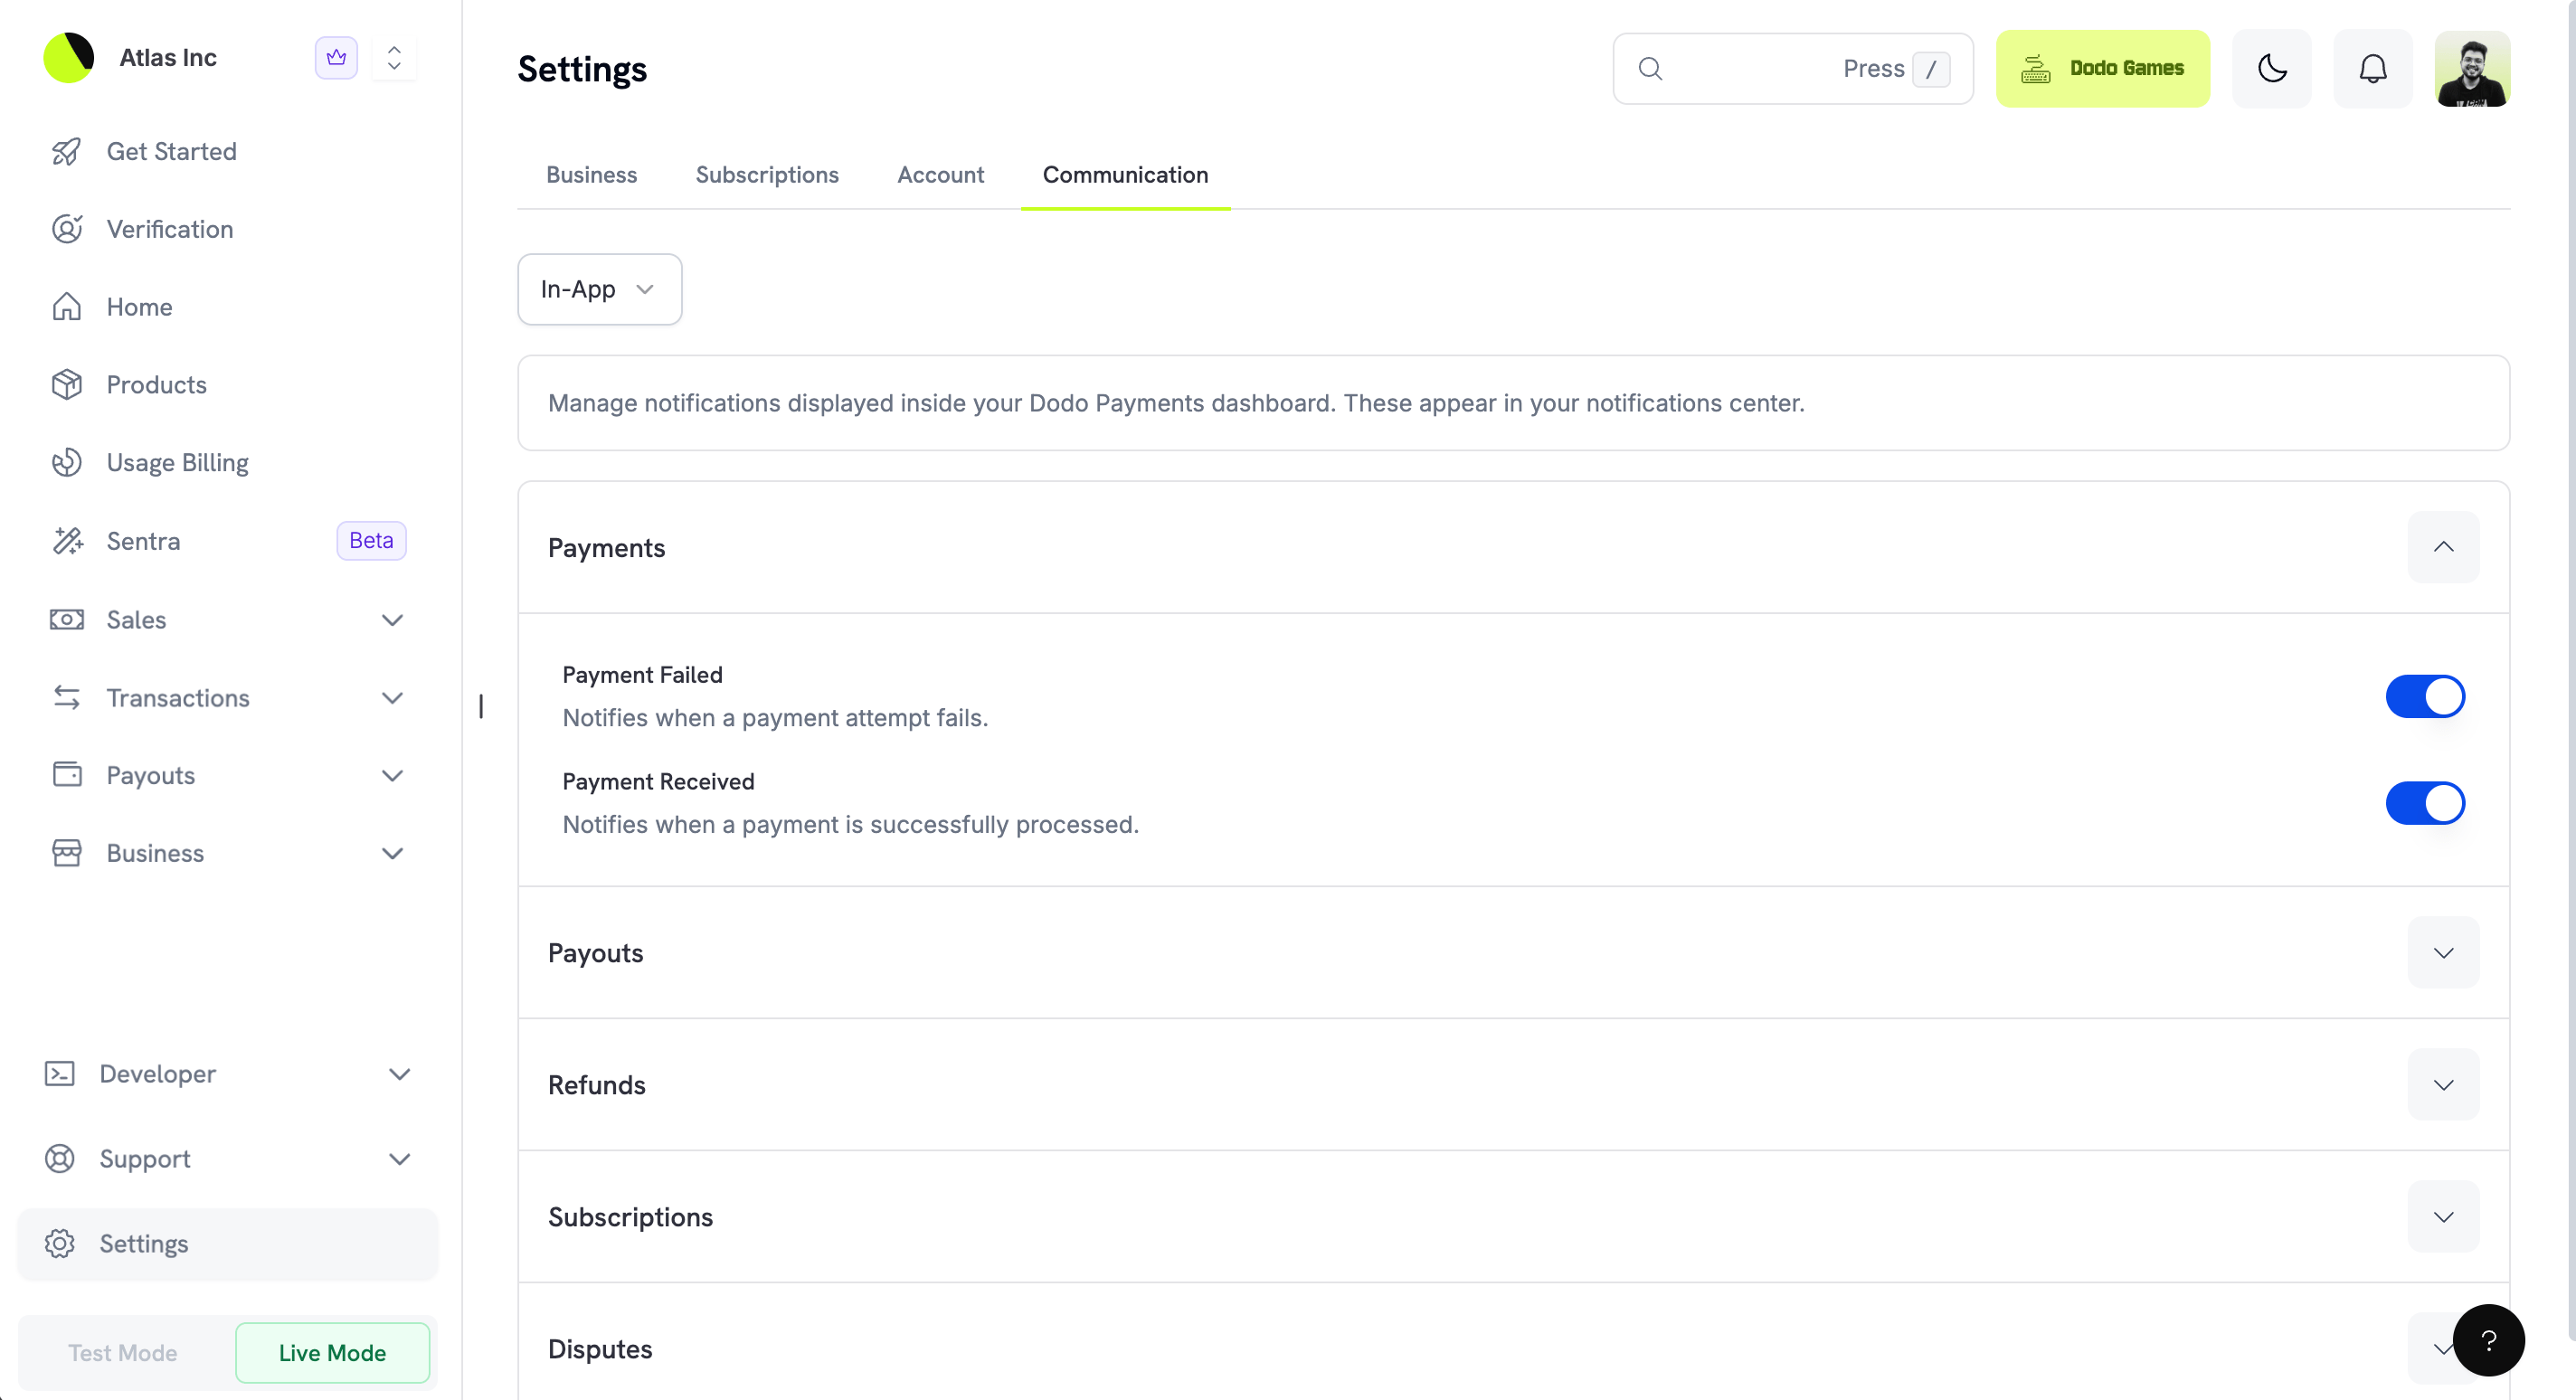
Push Notifications
Push notifications आपके registered devices पर mobile alerts भेजती हैं। इस channel का उपयोग उन events के लिए करें जिन पर तुरंत ध्यान देने की आवश्यकता होती है, जैसे payment failures या new disputes।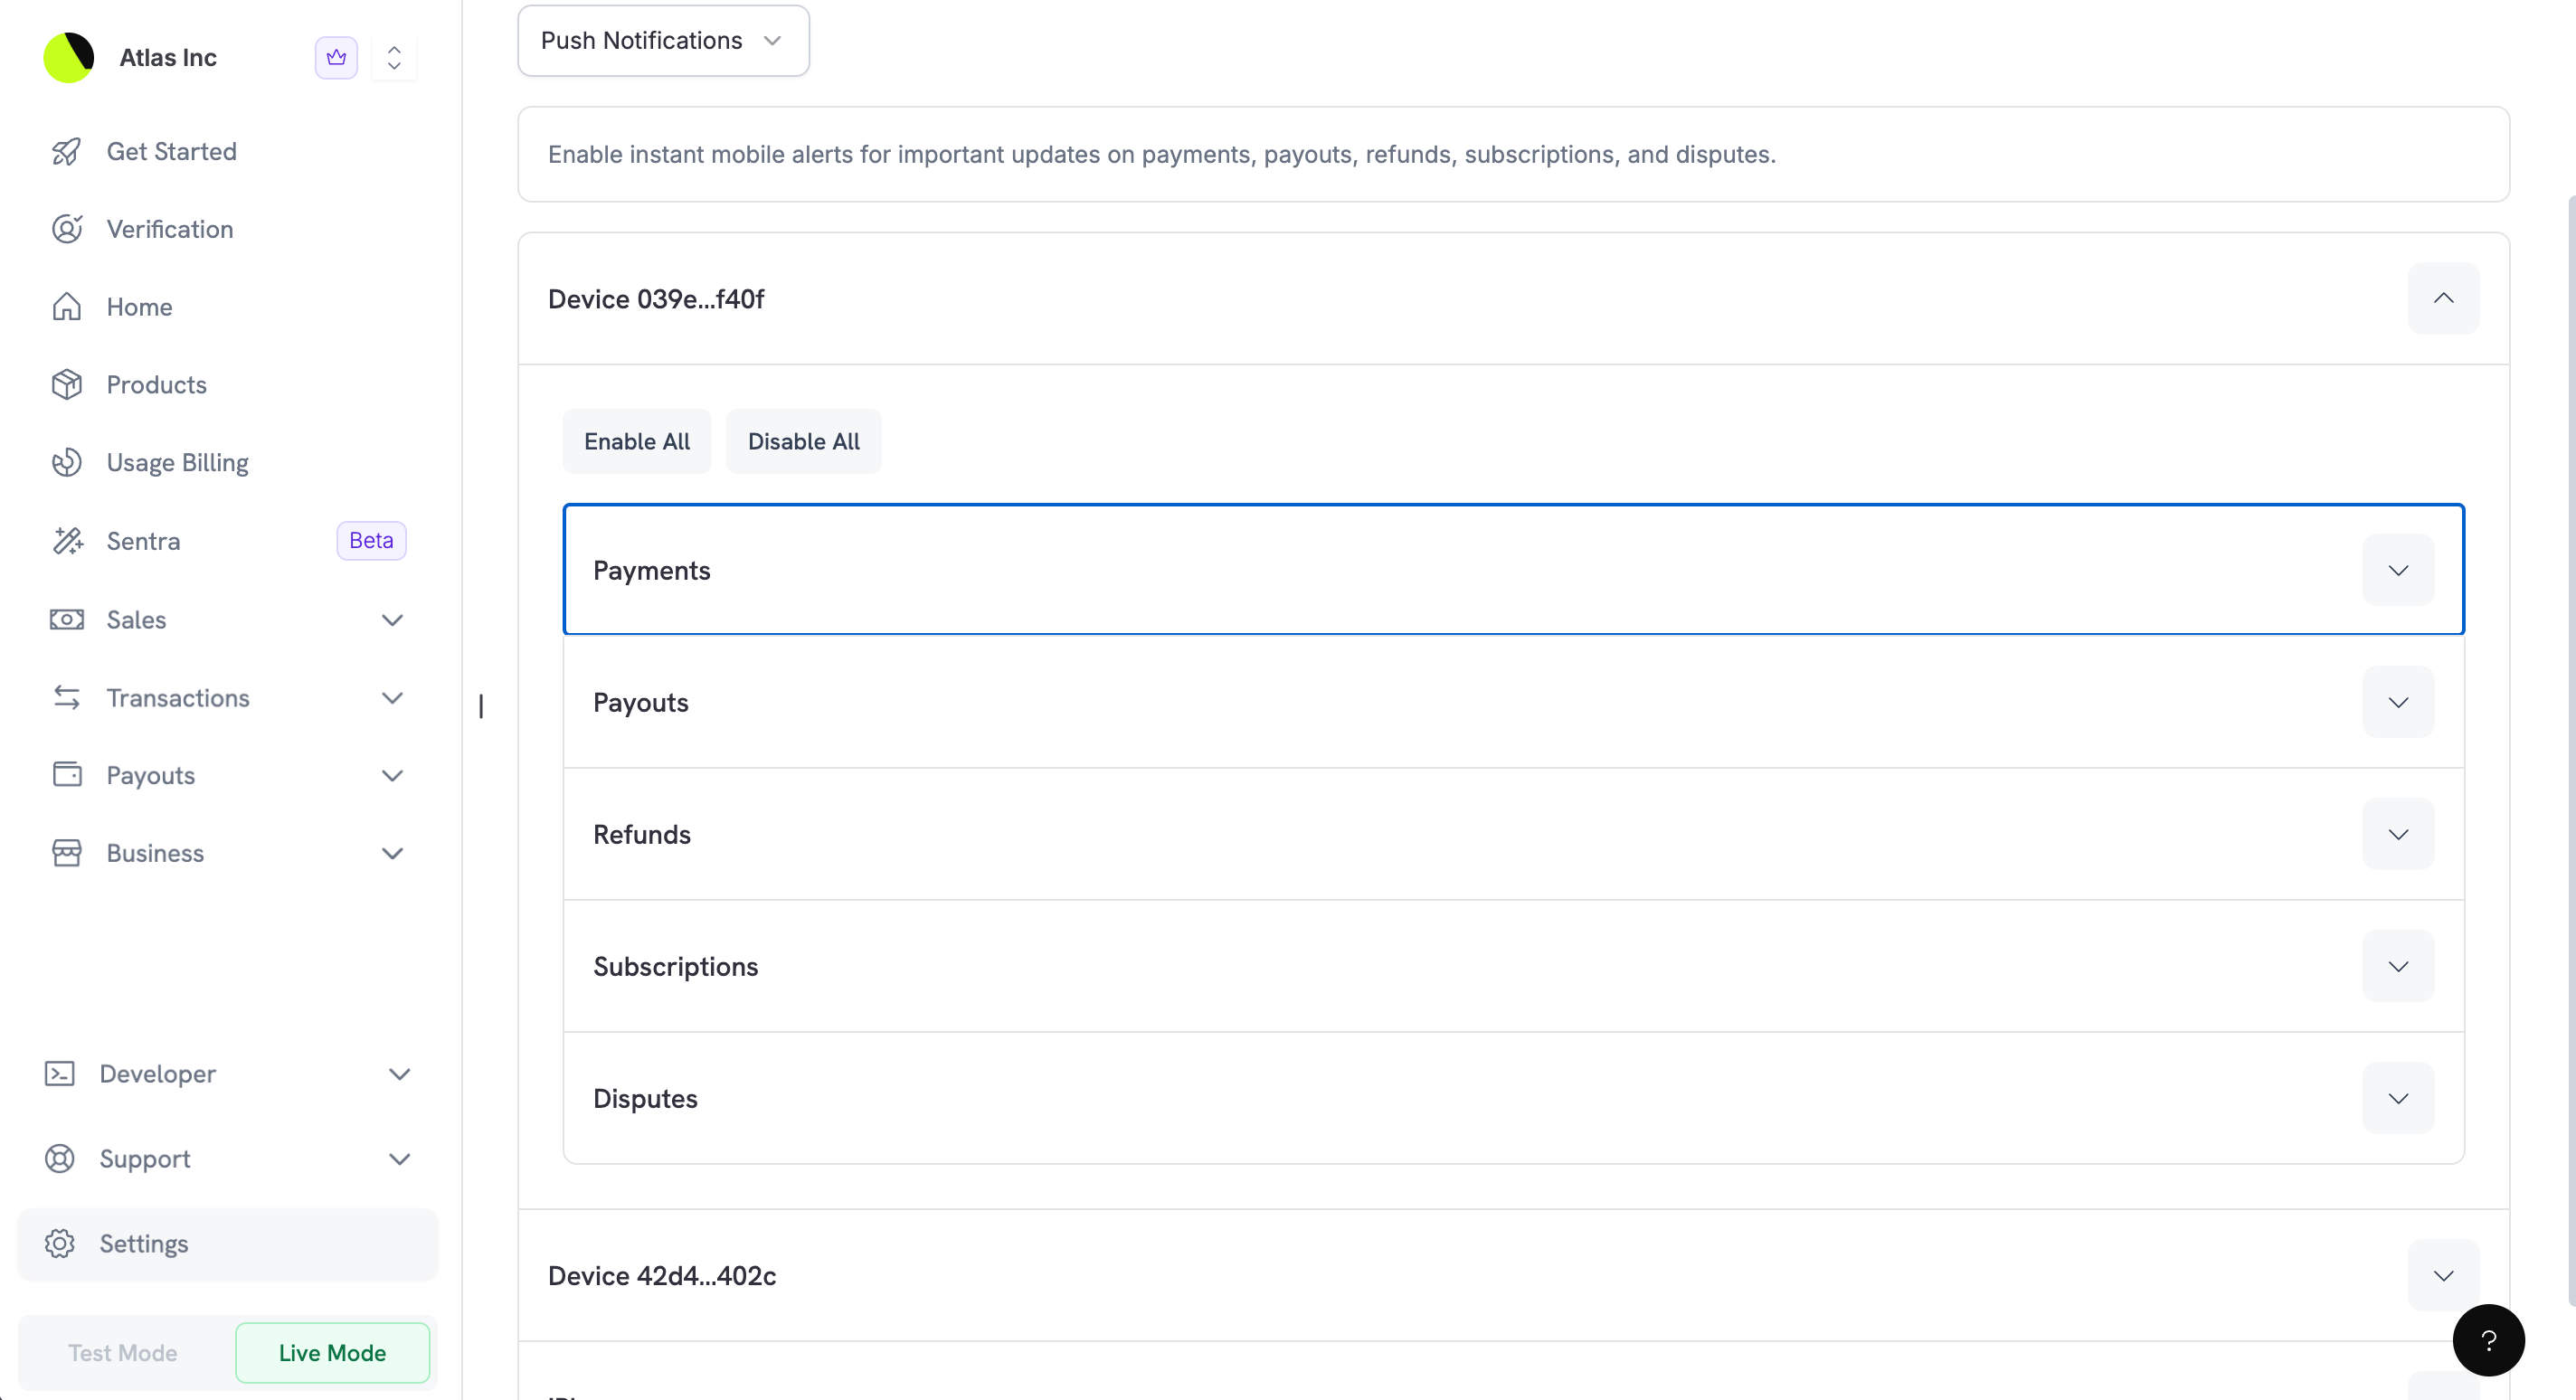
- किसी specific device के लिए notifications enable या disable कर सकते हैं
- प्रत्येक device पर push notifications trigger करने वाले events चुन सकते हैं
- कई devices manage कर सकते हैं, जैसे phone और tablet
Email Recipients Manage करना
Email channel कई recipient addresses स्वीकार करता है, इसलिए आप अपनी पूरी team को उनसे संबंधित events के बारे में informed रख सकते हैं।New Email Recipient जोड़ना
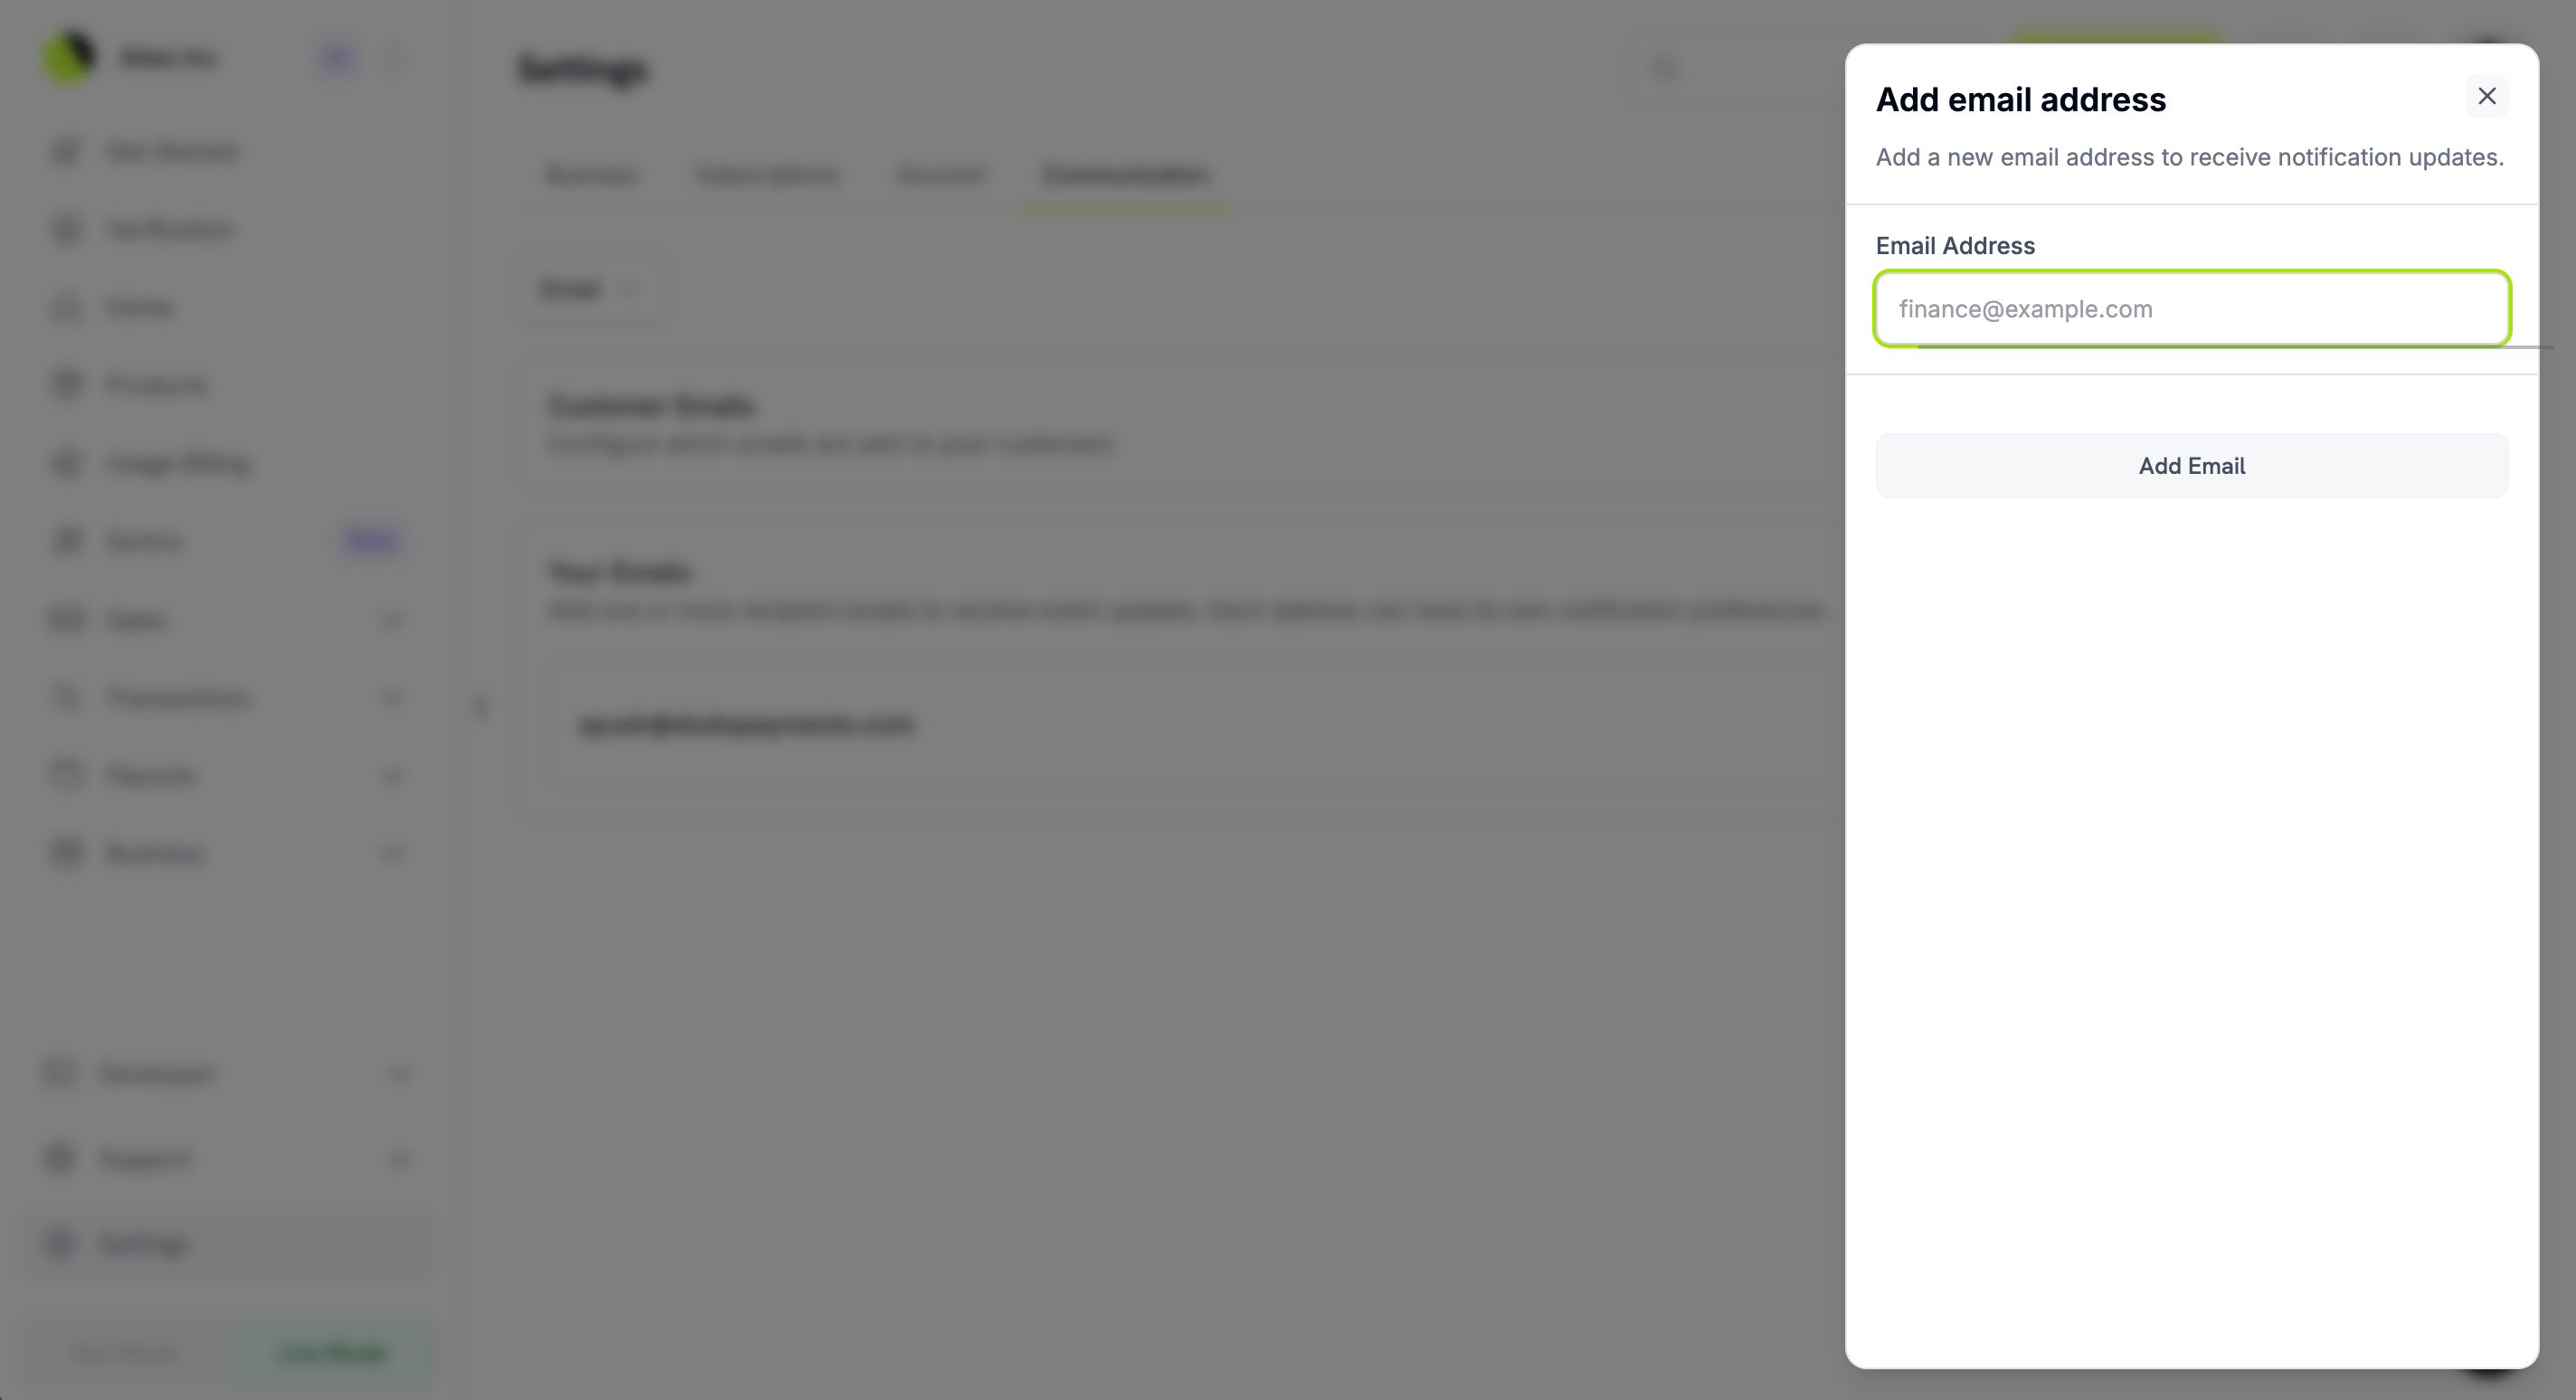
- Your Emails section में Add Email पर click करें।
- खुलने वाले dialog के Email Address field में address दर्ज करें।
- पुष्टि करने के लिए Add Email पर click करें।
Email Preferences Configure करना
- Notification options expand करने के लिए किसी email address पर click करें।
- प्रत्येक event की notification को on या off करने के लिए उसके पास मौजूद toggle का उपयोग करें।
- Enable All: इस email address के लिए प्रत्येक notification को on करता है।
- Disable All: इस email address के लिए प्रत्येक notification को off करता है।
Email Recipient हटाना
Email address हटाने के लिए email entry को expand करें और Remove email पर click करें। उस address पर notifications तुरंत बंद हो जाती हैं।Your Notification Events
ये notifications आपको और आपकी team को आपके business को प्रभावित करने वाले events के बारे में informed रखती हैं। आप प्रत्येक notification channel के लिए हर event को अलग-अलग configure करते हैं।Payments
Payment notifications आपके products की payment activity को cover करती हैं।Payouts
Payout notifications आपके Dodo Payments account से bank account में funds के movement को track करती हैं।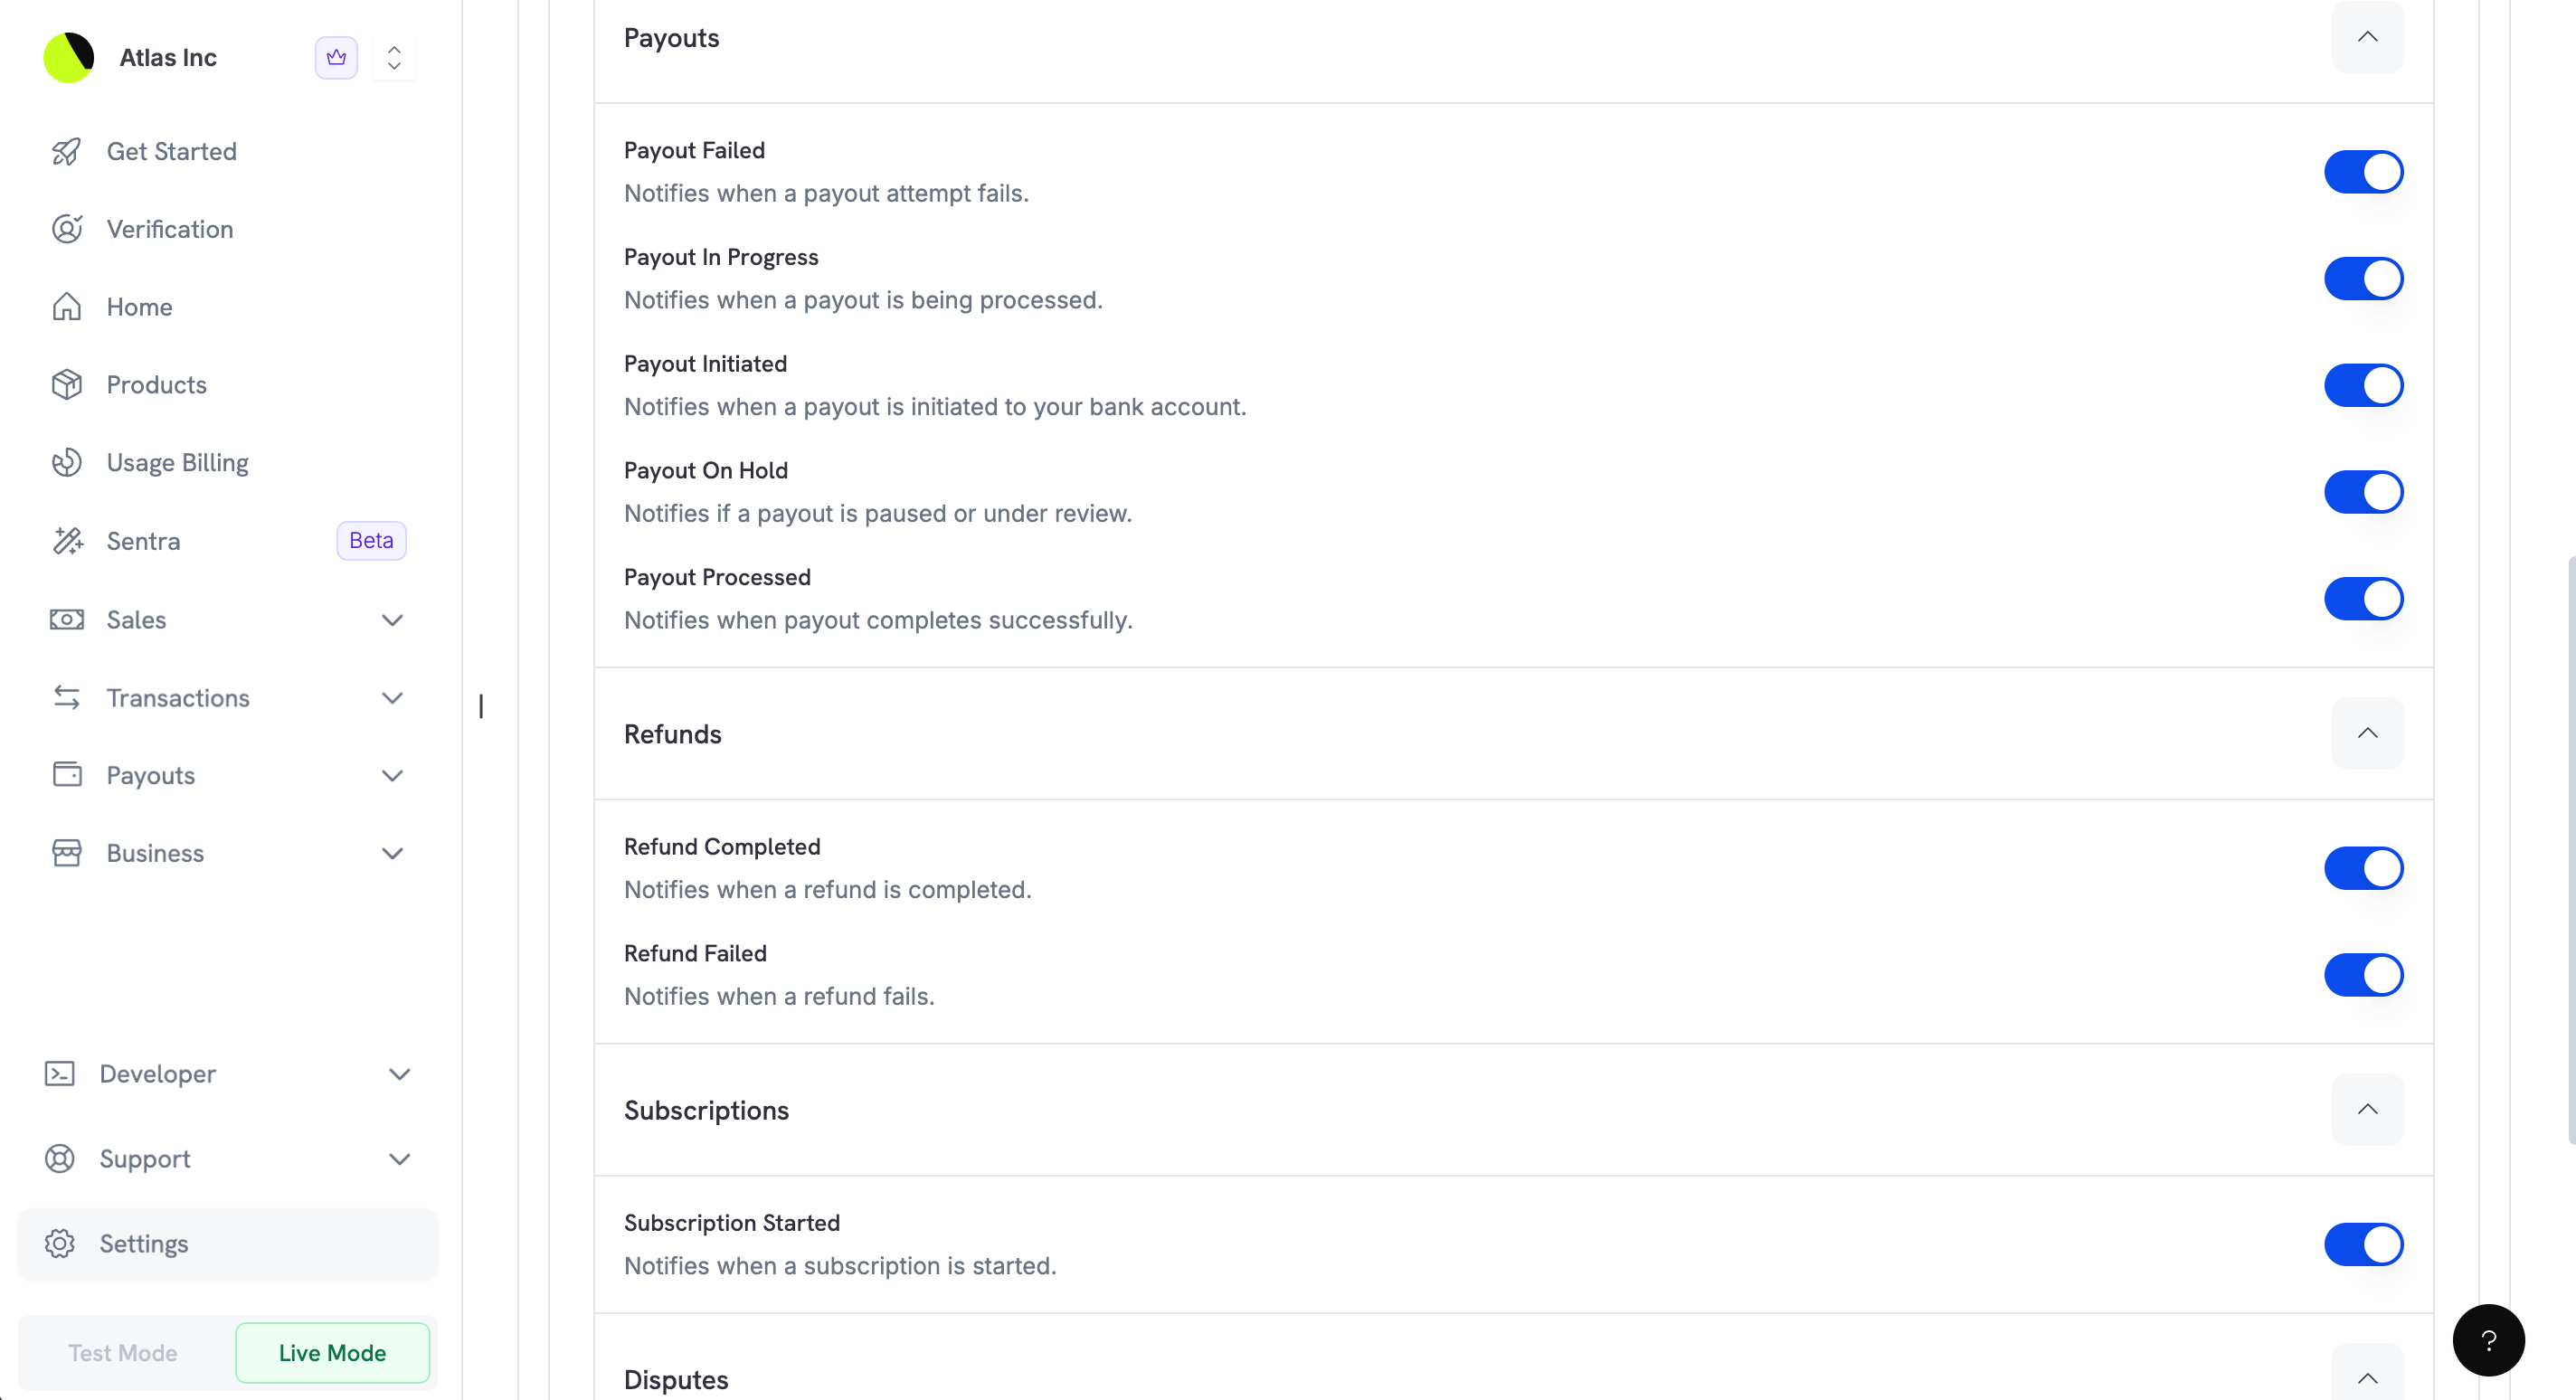
जब कोई बैंक अवकाश आपकी अगली payout तारीख को बदलता है, तो in-app नोटिफिकेशन वाले प्रत्येक टीम सदस्य को Payout date moved नोटिस भी मिलता है, जिसमें पुरानी और नई तारीखें दी होती हैं। When Your Payout Date Moves देखें।
Refunds
Refund नोटिफिकेशन आपके transactions में refund गतिविधि को कवर करते हैं।Subscriptions
Subscription नोटिफिकेशन subscription lifecycle को ट्रैक करते हैं। आपके बदलाव करने से पहले प्रत्येक नोटिफिकेशन चालू है या नहीं, यह Default कॉलम में दिखाया जाता है।
इस पेज पर टीम के अन्य सभी नोटिफिकेशन डिफ़ॉल्ट रूप से enabled हैं।
Disputes
Disputes के लिए आपके व्यवसाय की सुरक्षा हेतु तुरंत प्रतिक्रिया आवश्यक होती है, और ये नोटिफिकेशन आपको dispute में होने वाले प्रत्येक बदलाव के बारे में बताते हैं।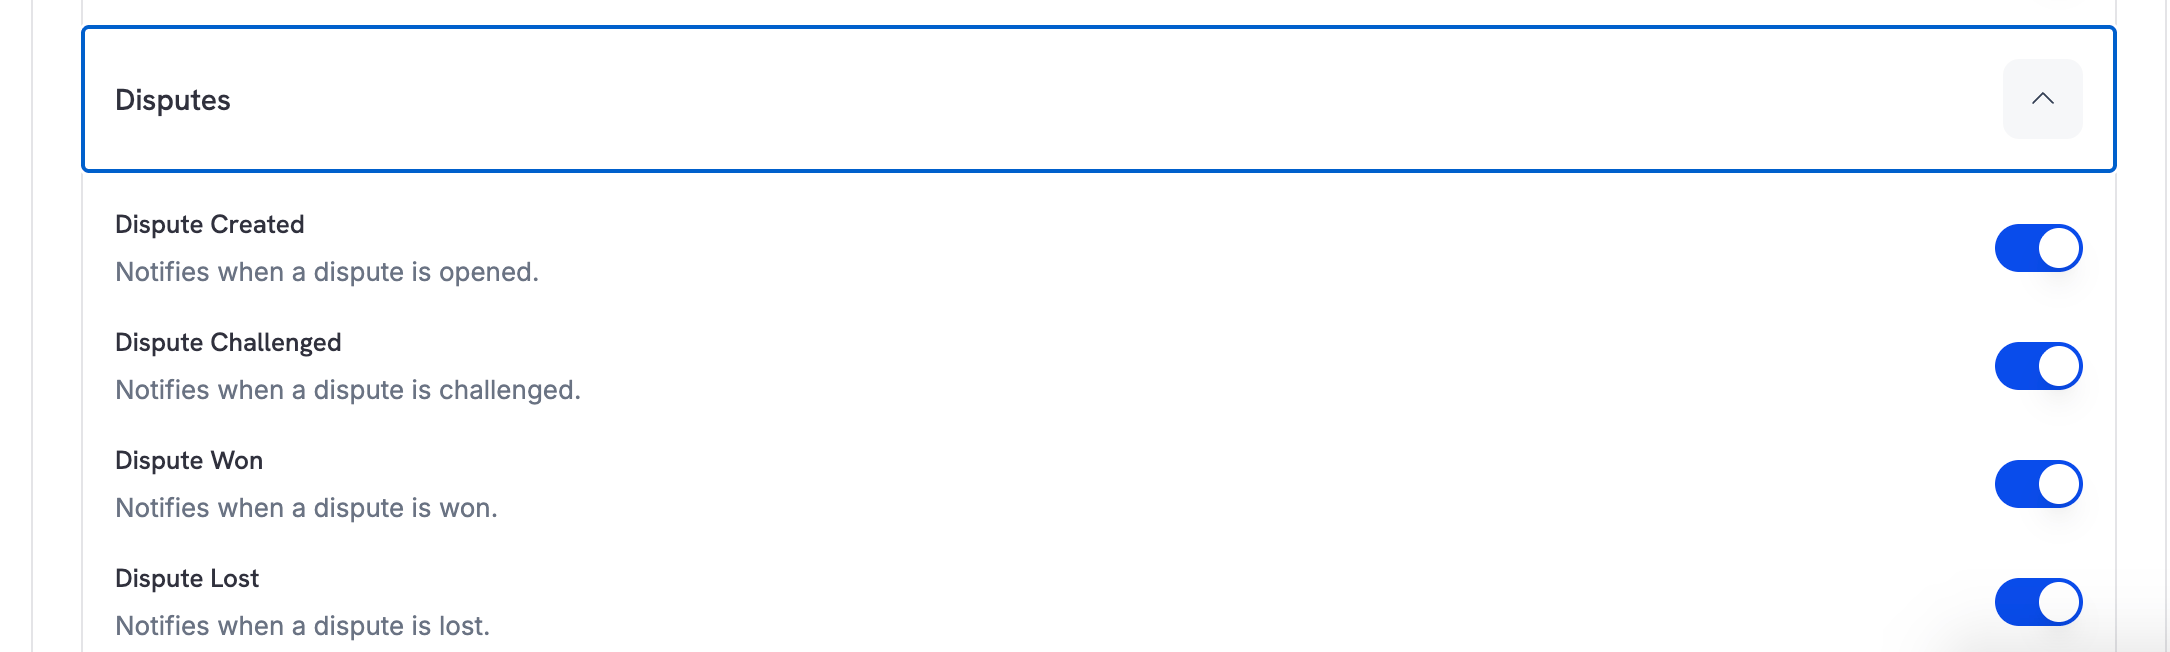
Customer Emails
आपकी टीम के लिए नोटिफिकेशन के अलावा, आप चुन सकते हैं कि Dodo Payments आपके ग्राहकों को कौन-से transactional emails अपने-आप भेजे। Dodo Payments आपकी ओर से ये emails भेजता है, ताकि ग्राहक अपनी purchases के बारे में जानकारी रखते रहें।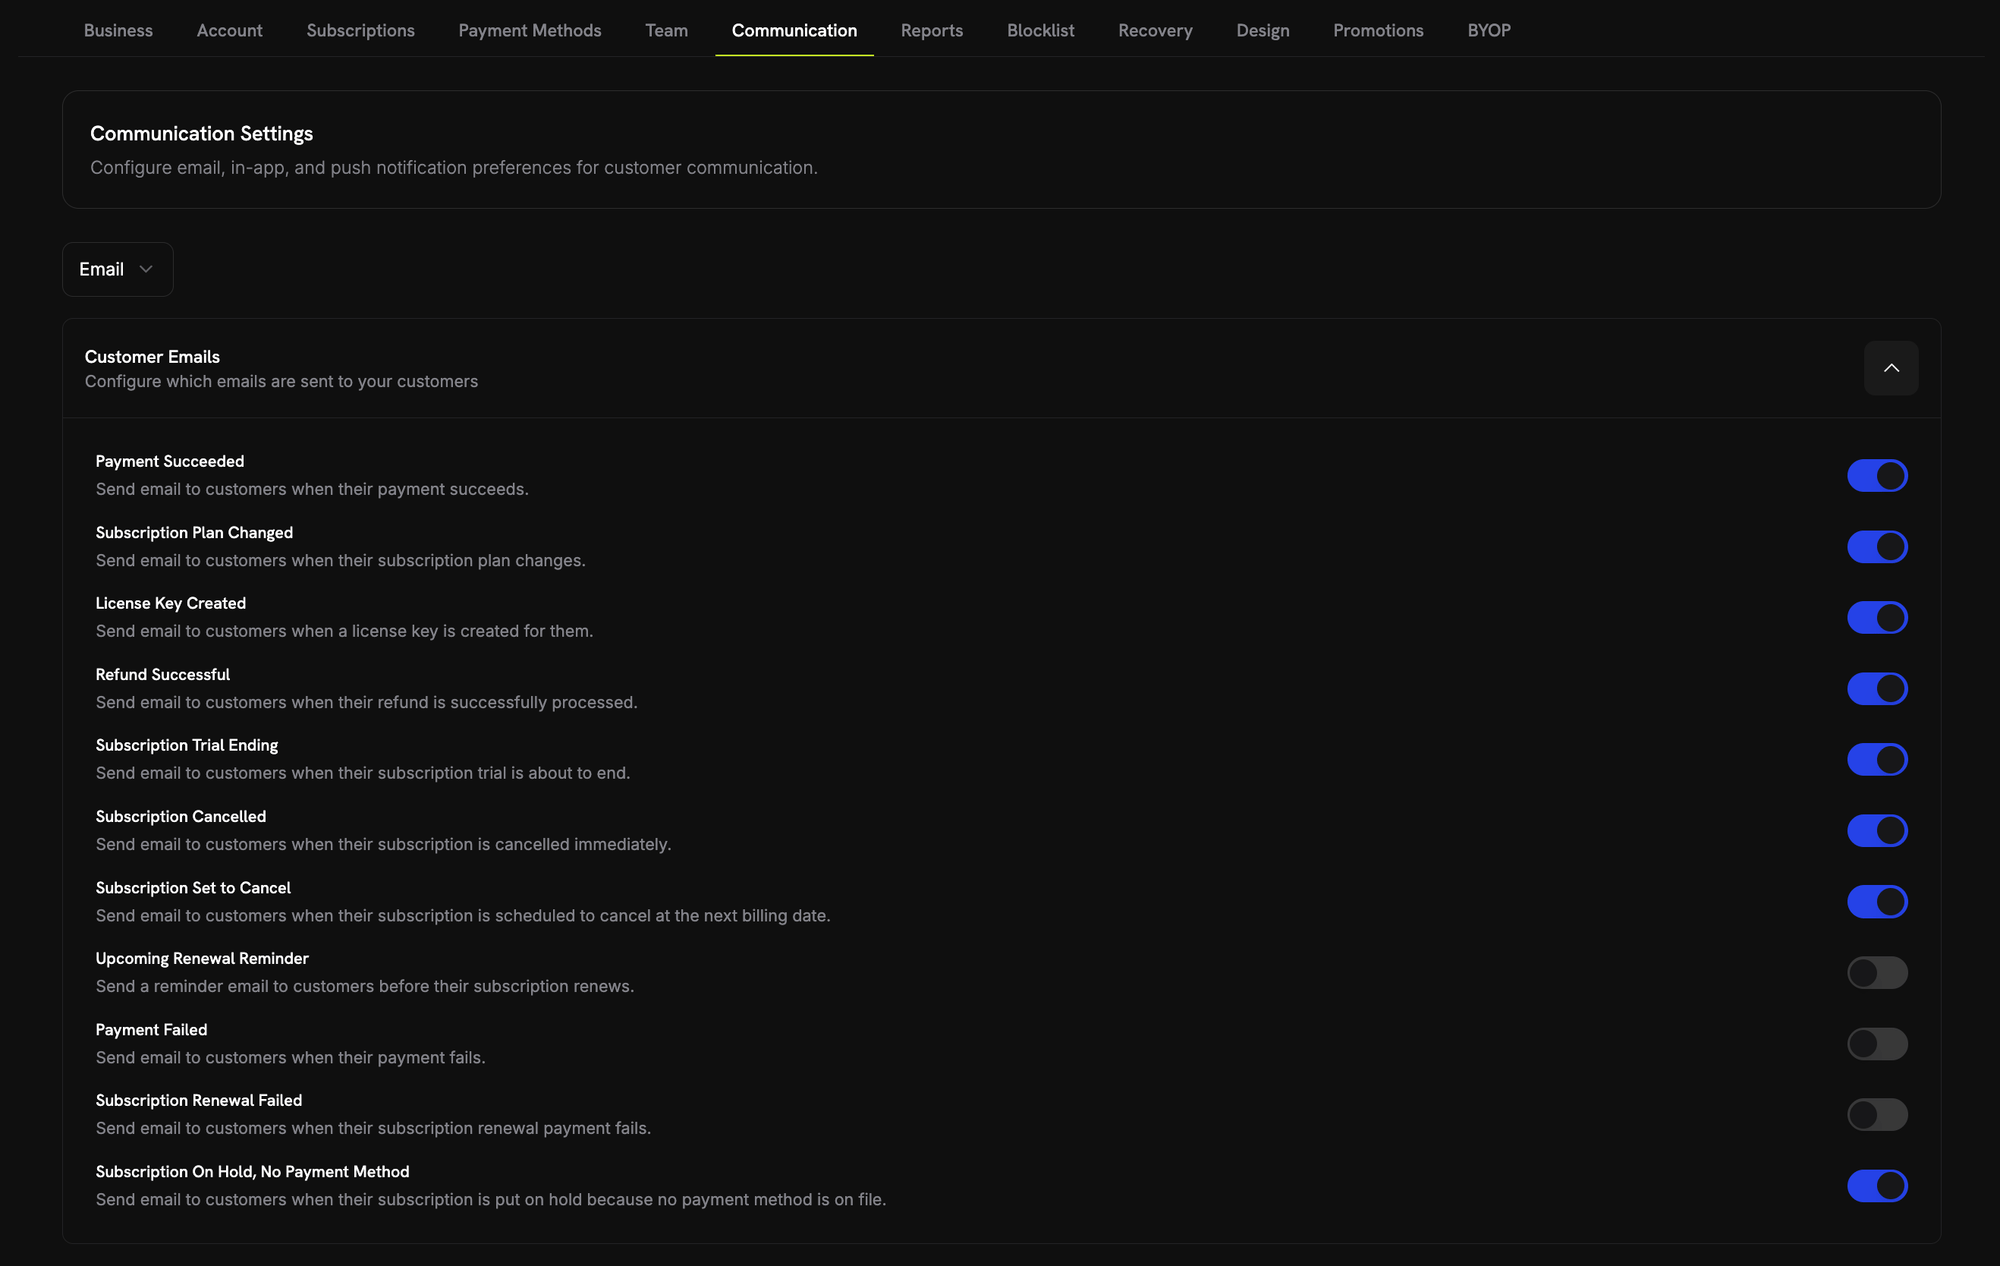
Customer emails आपकी टीम को भेजे जाने वाले notification emails से अलग होते हैं। Customer email बंद करने से उसी event के बारे में आपकी टीम के notifications प्रभावित नहीं होते।
Test Mode Emails
Email टैब पर Customer Emails list के नीचे मौजूद Test Mode Emails switch यह नियंत्रित करता है कि test mode में customer emails भेजे जाएँ या नहीं। यह डिफ़ॉल्ट रूप से on होता है।- On: Test mode में customer emails वास्तविक recipient को भेजे जाते हैं, और प्रत्येक subject की शुरुआत में
[TEST MODE]होता है। कोई business प्रति सप्ताह अधिकतम 100 test mode emails भेज सकता है। - Off: Test mode में कोई customer email नहीं भेजा जाता। जो emails नहीं भेजे जाते, वे weekly allowance में शामिल नहीं होते, और dashboard ग्राहक के Sent Emails टैब से resend को अस्वीकार कर देता है।
Best Practices
ये recommendations आपको communication preferences प्रभावी ढंग से configure करने में मदद करती हैं:-
Role के अनुसार notifications route करें: अलग-अलग notification types के लिए team addresses जोड़ें। उदाहरण के लिए:
- payout notifications के लिए
finance@yourcompany.com - dispute notifications के लिए
support@yourcompany.com - payment notifications के लिए
sales@yourcompany.com
- payout notifications के लिए
- कई channels पर critical notifications enable करें: Disputes जैसे समय-संवेदी events के लिए email और push notifications दोनों चालू करें, ताकि आप उन्हें miss न करें।
- Preferences की नियमित समीक्षा करें: आपकी team के बढ़ने या बदलने पर जाँच करें कि सही लोगों को सही notifications मिल रहे हैं।
- Customer emails enabled रखें: जब तक उन्हें बंद करने का कोई विशेष कारण न हो, customer emails ग्राहकों को बेहतर experience देते हैं और support requests कम करते हैं।