 * Released Policy Generator tool for automatic generation of privacy policy, terms of service, and refund policy documents. [Try Policy Generator](https://dodopayments.com/tools/policy-generator).
### Documentation Improvements
* Published comprehensive guides:
* [Subscription Integration Guide](/developer-resources/subscription-integration-guide)
* [Webhook Events Guide](/developer-resources/webhooks/intents/webhook-events-guide)
## Improvements and Bug Fixes 🔧
### API Updates
* Added `trial_period_days` parameter to [Create Subscription API](/api-reference/subscriptions/post-subscriptions) to override product-level trial periods.
* Enhanced customer identification logic: now using consistent `customer_id` across payments and subscriptions for the same email.
* Implemented various performance optimizations and fixed minor bugs.
# v0.16.1 (11 Jan 2025)
Source: https://docs.dodopayments.com/changelog/v0.16.1
Added Account Summary feature, enhanced API documentation, and improved postal code validation.
## New Features 🚀
* **Account Summary Feature**: Provides detailed visibility into transaction and payout ledgers.
* Released Policy Generator tool for automatic generation of privacy policy, terms of service, and refund policy documents. [Try Policy Generator](https://dodopayments.com/tools/policy-generator).
### Documentation Improvements
* Published comprehensive guides:
* [Subscription Integration Guide](/developer-resources/subscription-integration-guide)
* [Webhook Events Guide](/developer-resources/webhooks/intents/webhook-events-guide)
## Improvements and Bug Fixes 🔧
### API Updates
* Added `trial_period_days` parameter to [Create Subscription API](/api-reference/subscriptions/post-subscriptions) to override product-level trial periods.
* Enhanced customer identification logic: now using consistent `customer_id` across payments and subscriptions for the same email.
* Implemented various performance optimizations and fixed minor bugs.
# v0.16.1 (11 Jan 2025)
Source: https://docs.dodopayments.com/changelog/v0.16.1
Added Account Summary feature, enhanced API documentation, and improved postal code validation.
## New Features 🚀
* **Account Summary Feature**: Provides detailed visibility into transaction and payout ledgers.
 * **Enhanced API Documentation**: Includes comprehensive parameter descriptions and usage examples.
## Improvements and Bug Fixes 🔧
* **Postal Code Validation**: Updated `Zipcode` field validation to support alphanumeric postal codes.
* **System Optimizations**: Implemented various bug fixes and optimizations to improve overall performance.
# v0.18.0 (20 Jan 2025)
Source: https://docs.dodopayments.com/changelog/v0.18.0
Added AI chat support, enhanced APIs, inclusive tax pricing, automated country selection, and more.
## New Features 🚀
* **AI Chat Support**: Now you can chat with our AI assistant to get help with your technical queries or check the documentation more effectively.
* **Enhanced API Documentation**: Includes comprehensive parameter descriptions and usage examples.
## Improvements and Bug Fixes 🔧
* **Postal Code Validation**: Updated `Zipcode` field validation to support alphanumeric postal codes.
* **System Optimizations**: Implemented various bug fixes and optimizations to improve overall performance.
# v0.18.0 (20 Jan 2025)
Source: https://docs.dodopayments.com/changelog/v0.18.0
Added AI chat support, enhanced APIs, inclusive tax pricing, automated country selection, and more.
## New Features 🚀
* **AI Chat Support**: Now you can chat with our AI assistant to get help with your technical queries or check the documentation more effectively.
 * **Enhanced APIs**: Added APIs to filter payments, refunds, subscriptions, and disputes based on `customer_id`, time period, and status, providing more flexibility in data retrieval.
* **Inclusive Tax Pricing**: Added support to make the product price inclusive of tax while creating/updating the product. The tax amount will be calculated automatically based on the tax rate.
* **Automated Country Selection**: Implemented IP-based country auto-selection in static payment links. The country will be auto-selected based on the user's IP address when they open the static payment links.
* **Query Parameter Removal**: Query parameters are now removed as soon as the static payment link loads, preventing end customers from changing URL parameters and tampering with the static payment link.
## Improvements and Bug Fixes 🔧
* **Minor Enhancements and Fixes**: Various minor enhancements and fixes to improve overall performance and user experience.
# v0.19.0 (24 Jan 2025)
Source: https://docs.dodopayments.com/changelog/v0.19.0
Added support for UPI and Indian Rupay cards, released PHP SDK, and introduced product archiving.
## New Features 🚀
* **UPI and Indian Rupay Card Support**: Added support for UPI and Indian Rupay cards for processing payments in India, currently limited to one-time purchases only. You can now accept payments from customers using UPI and Rupay cards. Additionally, enabled the creation of products with INR pricing on the Dodo Payments Dashboard.
* **PHP SDK Release**: Launched a new PHP SDK for Dodo Payments, simplifying the integration of Dodo Payments into PHP applications.
* **Enhanced APIs**: Added APIs to filter payments, refunds, subscriptions, and disputes based on `customer_id`, time period, and status, providing more flexibility in data retrieval.
* **Inclusive Tax Pricing**: Added support to make the product price inclusive of tax while creating/updating the product. The tax amount will be calculated automatically based on the tax rate.
* **Automated Country Selection**: Implemented IP-based country auto-selection in static payment links. The country will be auto-selected based on the user's IP address when they open the static payment links.
* **Query Parameter Removal**: Query parameters are now removed as soon as the static payment link loads, preventing end customers from changing URL parameters and tampering with the static payment link.
## Improvements and Bug Fixes 🔧
* **Minor Enhancements and Fixes**: Various minor enhancements and fixes to improve overall performance and user experience.
# v0.19.0 (24 Jan 2025)
Source: https://docs.dodopayments.com/changelog/v0.19.0
Added support for UPI and Indian Rupay cards, released PHP SDK, and introduced product archiving.
## New Features 🚀
* **UPI and Indian Rupay Card Support**: Added support for UPI and Indian Rupay cards for processing payments in India, currently limited to one-time purchases only. You can now accept payments from customers using UPI and Rupay cards. Additionally, enabled the creation of products with INR pricing on the Dodo Payments Dashboard.
* **PHP SDK Release**: Launched a new PHP SDK for Dodo Payments, simplifying the integration of Dodo Payments into PHP applications.
 * **Tax ID on Checkout**: Customers can now add their Tax ID on the checkout page for invoicing and tax purposes.
* **Dashboard Restructure**: The entire Dodo Payments Dashboard has been restructured to be more intuitive and user-friendly.
* **Self-Serve Onboarding Guides**: New users can now get started with Dodo Payments using self-serve onboarding guides.
* **Multi-Language Support**: Added support for 14+ languages on the checkout page, allowing customers to pay in their preferred language. Supported languages include:
* English (en)
* العربية (ar) // Arabic
* Català (ca) // Catalan
* 中文 (cn) // Chinese
* Deutsch (de) // German
* Español (es) // Spanish
* Français (fr) // French
* עברית (he) // Hebrew
* Italiano (it) // Italian
* 日本語 (ja) // Japanese
* Nederlands (nl) // Dutch
* Polski (pl) // Polish
* Português (pt) // Portuguese
* Svenska (sv) // Swedish
* **Invoice PDF Makeover**: The invoice PDFs have been given a new, clearer, and more effective design.
* **Centralized Help Widget**: Added a centralized Help widget to streamline and improve support.
* **Tax ID on Checkout**: Customers can now add their Tax ID on the checkout page for invoicing and tax purposes.
* **Dashboard Restructure**: The entire Dodo Payments Dashboard has been restructured to be more intuitive and user-friendly.
* **Self-Serve Onboarding Guides**: New users can now get started with Dodo Payments using self-serve onboarding guides.
* **Multi-Language Support**: Added support for 14+ languages on the checkout page, allowing customers to pay in their preferred language. Supported languages include:
* English (en)
* العربية (ar) // Arabic
* Català (ca) // Catalan
* 中文 (cn) // Chinese
* Deutsch (de) // German
* Español (es) // Spanish
* Français (fr) // French
* עברית (he) // Hebrew
* Italiano (it) // Italian
* 日本語 (ja) // Japanese
* Nederlands (nl) // Dutch
* Polski (pl) // Polish
* Português (pt) // Portuguese
* Svenska (sv) // Swedish
* **Invoice PDF Makeover**: The invoice PDFs have been given a new, clearer, and more effective design.
* **Centralized Help Widget**: Added a centralized Help widget to streamline and improve support.
 ## Improvements and Bug Fixes 🔧
* **Rate Limiting**: Added rate limiting in the invoice API to prevent abuse and ensure system stability.
* **Metadata in Static Payment Links**: Added support for metadata in static payment links. For more details, refer to the [documentation](/developer-resources/integration-guide#1-static-payment-links).
* **Minor Enhancements and Fixes**: Various minor enhancements and fixes to improve overall performance and user experience.
# v0.24.0 (15 Feb 2025)
Source: https://docs.dodopayments.com/changelog/v0.24.0
Introduced discount coupons, support for over 25 local payment methods, customizable statement descriptors, and a complete UI makeover of the login page.
## New Features 🚀
* Introduced the functionality to create and add Discount Coupons to your products and services. You can create coupons with percentage discounts, set expiry dates, and more. Go to `Dashboard > Sales > Discounts` to create and manage discount coupons.
* Dodo Payments now supports over 25 local payment methods, including Apple Pay, Google Pay, Klarna, Affirm, Cash App, UPI, and all major credit/debit cards. This helps boost conversions and reduce checkout drop-offs.
* Added functionality to customize the statement descriptor that appears on your customers' bank statements when they make a payment. You can find the option to customize the statement descriptor under `Dashboard > Business > Business Profile`.
* Complete UI makeover of the Dodo Payments login page.
## Improvements and Bug Fixes 🔧
* Security enhancements, performance improvements, and minor fixes.
# v1.0.0 (23 Feb 2025)
Source: https://docs.dodopayments.com/changelog/v1.0.0
Public release of Dodo Payments with Customer Portal and Customer Portal Session API.
This marks the first changelog since Dodo Payments exited Beta and is now publicly available. 🎉
## New Features 🚀
* **Customer Portal**: Introduced the `Customer Portal` feature, allowing customers to manage their subscriptions, invoices, and payment methods. You can create static or dynamic Customer Portal links for your customers via the Dodo Payments Dashboard or through APIs. On the dashboard, navigate to `Sales > Customers > Share Invite`.
* **Customer Portal Session API**: Added the `Customer Portal Session` API to create a session of the Customer Portal for a specific customer. Note that the session is valid for only 24 hours. Check the [API Reference](/api-reference/customers/create-customer-portal-session) for more details.
* **Others**: Minor improvements and bug fixes.
# v1.10.1 (21 March 2025)
Source: https://docs.dodopayments.com/changelog/v1.10.1
Introduced Checkout 2.0, configurable payment methods, dynamic tax calculation, and on-demand subscriptions.
## New Features 🚀
* **Checkout 2.0**: Introducing a completely redesigned checkout experience featuring:
* Streamlined, modern interface for improved user experience
* New Query Collector System that stores parameters in session storage with unique IDs (e.g., `sess_1a2b3c4d`)
* Persistent data availability throughout the entire checkout flow
* More enhancements planned for future releases!
## Improvements and Bug Fixes 🔧
* **Rate Limiting**: Added rate limiting in the invoice API to prevent abuse and ensure system stability.
* **Metadata in Static Payment Links**: Added support for metadata in static payment links. For more details, refer to the [documentation](/developer-resources/integration-guide#1-static-payment-links).
* **Minor Enhancements and Fixes**: Various minor enhancements and fixes to improve overall performance and user experience.
# v0.24.0 (15 Feb 2025)
Source: https://docs.dodopayments.com/changelog/v0.24.0
Introduced discount coupons, support for over 25 local payment methods, customizable statement descriptors, and a complete UI makeover of the login page.
## New Features 🚀
* Introduced the functionality to create and add Discount Coupons to your products and services. You can create coupons with percentage discounts, set expiry dates, and more. Go to `Dashboard > Sales > Discounts` to create and manage discount coupons.
* Dodo Payments now supports over 25 local payment methods, including Apple Pay, Google Pay, Klarna, Affirm, Cash App, UPI, and all major credit/debit cards. This helps boost conversions and reduce checkout drop-offs.
* Added functionality to customize the statement descriptor that appears on your customers' bank statements when they make a payment. You can find the option to customize the statement descriptor under `Dashboard > Business > Business Profile`.
* Complete UI makeover of the Dodo Payments login page.
## Improvements and Bug Fixes 🔧
* Security enhancements, performance improvements, and minor fixes.
# v1.0.0 (23 Feb 2025)
Source: https://docs.dodopayments.com/changelog/v1.0.0
Public release of Dodo Payments with Customer Portal and Customer Portal Session API.
This marks the first changelog since Dodo Payments exited Beta and is now publicly available. 🎉
## New Features 🚀
* **Customer Portal**: Introduced the `Customer Portal` feature, allowing customers to manage their subscriptions, invoices, and payment methods. You can create static or dynamic Customer Portal links for your customers via the Dodo Payments Dashboard or through APIs. On the dashboard, navigate to `Sales > Customers > Share Invite`.
* **Customer Portal Session API**: Added the `Customer Portal Session` API to create a session of the Customer Portal for a specific customer. Note that the session is valid for only 24 hours. Check the [API Reference](/api-reference/customers/create-customer-portal-session) for more details.
* **Others**: Minor improvements and bug fixes.
# v1.10.1 (21 March 2025)
Source: https://docs.dodopayments.com/changelog/v1.10.1
Introduced Checkout 2.0, configurable payment methods, dynamic tax calculation, and on-demand subscriptions.
## New Features 🚀
* **Checkout 2.0**: Introducing a completely redesigned checkout experience featuring:
* Streamlined, modern interface for improved user experience
* New Query Collector System that stores parameters in session storage with unique IDs (e.g., `sess_1a2b3c4d`)
* Persistent data availability throughout the entire checkout flow
* More enhancements planned for future releases!
 * **Configurable Payment Methods**: New `allowed_payment_methods` configuration enables merchants to customize available payment options during checkout. See the [Allowed Payment Methods](/developer-resources/allowed-payment-methods) documentation for implementation details.
* **Dynamic Tax Calculation**: Real-time calculation of tax rates based on customer billing addresses for more accurate pricing on the static payment links.
* **On-Demand Subscriptions**: New API endpoints for flexible subscription billing (available for select merchants). Learn more in the [On-Demand Subscriptions](/features/subscription#enabling-on-demand-subscriptions) guide.
* **Additional Updates**:
* Performance optimizations
* Bug fixes
* General system improvements
# v1.11.0 (28 March 2025)
Source: https://docs.dodopayments.com/changelog/v1.11.0
Introduced address autofill for checkout page, notifications center, payment link query builder, saved payment methods, and billing currency control.
## New Features 🚀
* **Address Autofill**: Streamlined checkout process with smart address field auto-completion based on user input.
* **Configurable Payment Methods**: New `allowed_payment_methods` configuration enables merchants to customize available payment options during checkout. See the [Allowed Payment Methods](/developer-resources/allowed-payment-methods) documentation for implementation details.
* **Dynamic Tax Calculation**: Real-time calculation of tax rates based on customer billing addresses for more accurate pricing on the static payment links.
* **On-Demand Subscriptions**: New API endpoints for flexible subscription billing (available for select merchants). Learn more in the [On-Demand Subscriptions](/features/subscription#enabling-on-demand-subscriptions) guide.
* **Additional Updates**:
* Performance optimizations
* Bug fixes
* General system improvements
# v1.11.0 (28 March 2025)
Source: https://docs.dodopayments.com/changelog/v1.11.0
Introduced address autofill for checkout page, notifications center, payment link query builder, saved payment methods, and billing currency control.
## New Features 🚀
* **Address Autofill**: Streamlined checkout process with smart address field auto-completion based on user input.
 * **Notifications Center**: Stay informed with a new dedicated notifications tab for important system events and updates.
 * **Payment Link Query Builder**: Create and customize payment links more efficiently with our new visual query builder.
 * **Saved Payment Methods**: Enable display of previously used payment methods during checkout by setting `show_saved_payment_methods: true` in payment link configuration.
* **Billing Currency Control**: Enforce specific billing currencies for payment links by setting the `billing_currency` parameter.
* **Improvements**: Various improvements and bug fixes.
# v1.13.0 (9th April 2025)
Source: https://docs.dodopayments.com/changelog/v1.13.0
New features including Adaptive Currency Support, MCP Server for AI integration, mobile apps, Custom GPT, and Dodo Dash game
## New Features 🚀
* **[Adaptive Currency Support](/features/adaptive-currency)** 💱
* Automatically display prices in customers' local currencies based on their location.
* Merchants receive payments in their preferred currency, while customers pay in their local currency.
* Transparent conversion fee structure ranging from 2% to 4%, depending on the order value.
* Support for over 25 new currencies has been added:
* **Middle East**: AED (UAE Dirham), SAR (Saudi Riyal)
* **Asia Pacific**: AUD (Australian Dollar), CNY (Chinese Yuan), HKD (Hong Kong Dollar), IDR (Indonesian Rupiah), KRW (South Korean Won), SGD (Singapore Dollar), TWD (New Taiwan Dollar)
* **Europe**: ALL (Albanian Lek), CHF (Swiss Franc), CZK (Czech Koruna), DKK (Danish Krone), EUR (Euro), GBP (British Pound), HUF (Hungarian Forint), NOK (Norwegian Krone), PLN (Polish Zloty), RON (Romanian Leu), RSD (Serbian Dinar), SEK (Swedish Krona), TRY (Turkish Lira)
* **Americas**: BRL (Brazilian Real), CAD (Canadian Dollar), MXN (Mexican Peso)
* **Saved Payment Methods**: Enable display of previously used payment methods during checkout by setting `show_saved_payment_methods: true` in payment link configuration.
* **Billing Currency Control**: Enforce specific billing currencies for payment links by setting the `billing_currency` parameter.
* **Improvements**: Various improvements and bug fixes.
# v1.13.0 (9th April 2025)
Source: https://docs.dodopayments.com/changelog/v1.13.0
New features including Adaptive Currency Support, MCP Server for AI integration, mobile apps, Custom GPT, and Dodo Dash game
## New Features 🚀
* **[Adaptive Currency Support](/features/adaptive-currency)** 💱
* Automatically display prices in customers' local currencies based on their location.
* Merchants receive payments in their preferred currency, while customers pay in their local currency.
* Transparent conversion fee structure ranging from 2% to 4%, depending on the order value.
* Support for over 25 new currencies has been added:
* **Middle East**: AED (UAE Dirham), SAR (Saudi Riyal)
* **Asia Pacific**: AUD (Australian Dollar), CNY (Chinese Yuan), HKD (Hong Kong Dollar), IDR (Indonesian Rupiah), KRW (South Korean Won), SGD (Singapore Dollar), TWD (New Taiwan Dollar)
* **Europe**: ALL (Albanian Lek), CHF (Swiss Franc), CZK (Czech Koruna), DKK (Danish Krone), EUR (Euro), GBP (British Pound), HUF (Hungarian Forint), NOK (Norwegian Krone), PLN (Polish Zloty), RON (Romanian Leu), RSD (Serbian Dinar), SEK (Swedish Krona), TRY (Turkish Lira)
* **Americas**: BRL (Brazilian Real), CAD (Canadian Dollar), MXN (Mexican Peso)
 * **[Dodo Payments MCP Server](/developer-resources/mcp-server)** 🤖
* Introducing the new Model Context Protocol (MCP) Server for seamless AI model integration.
* Provides a standardized interface for interacting with the DodoPayments API.
* Simple installation via `npx` or through MCP client integration.
* Offers a comprehensive tool suite for managing payments, subscriptions, and more.
* Includes advanced features such as tool filtering and enhanced security controls.
* [Mobile App](/features/mobile-app): Now available for iOS and Android, bringing the complete dashboard experience to your mobile device. Key features include:
* Real-time notifications for transactions, payouts, and subscription renewals
* Full dashboard access with revenue tracking and performance graphs
* Complete subscription and product management capabilities
* Business operations including test/live mode switching and verification management
* Developer tools with API key management and webhook monitoring
Download now on the [App Store](https://apps.apple.com/in/app/dodo-payments/id6743651329) or [Google Play](https://play.google.com/store/apps/details?id=com.dodopayments.app).
* **Custom GPT for Dodo Payments**: Available on the ChatGPT Marketplace, trained on our documentation to assist with technical questions or issues. Access it here, [https://dodo.pe/custom-gpt](https://dodo.pe/custom-gpt)
* **Dodo Dash**: Experience the thrill of our endless runner game, Dodo Dash! Guide a daring dodo bird as it sprints, jumps, and dodges obstacles to survive. Give it a try here, [https://dash.dodopayments.com](https://dash.dodopayments.com).
* Various other bug fixes and improvements have been implemented.
# v1.14.0 (12th April 2025)
Source: https://docs.dodopayments.com/changelog/v1.14.0
Introduced new European payment methods, subscription billing address updates, and various improvements.
## New Features 🚀
* **New European Payment Methods**: We've expanded our payment options with four new European payment methods:
* **iDEAL** - Netherlands
* **Bancontact** - Belgium
* **Przelewy24 (P24)** - Poland
* **EPS** - Austria
* **[Dodo Payments MCP Server](/developer-resources/mcp-server)** 🤖
* Introducing the new Model Context Protocol (MCP) Server for seamless AI model integration.
* Provides a standardized interface for interacting with the DodoPayments API.
* Simple installation via `npx` or through MCP client integration.
* Offers a comprehensive tool suite for managing payments, subscriptions, and more.
* Includes advanced features such as tool filtering and enhanced security controls.
* [Mobile App](/features/mobile-app): Now available for iOS and Android, bringing the complete dashboard experience to your mobile device. Key features include:
* Real-time notifications for transactions, payouts, and subscription renewals
* Full dashboard access with revenue tracking and performance graphs
* Complete subscription and product management capabilities
* Business operations including test/live mode switching and verification management
* Developer tools with API key management and webhook monitoring
Download now on the [App Store](https://apps.apple.com/in/app/dodo-payments/id6743651329) or [Google Play](https://play.google.com/store/apps/details?id=com.dodopayments.app).
* **Custom GPT for Dodo Payments**: Available on the ChatGPT Marketplace, trained on our documentation to assist with technical questions or issues. Access it here, [https://dodo.pe/custom-gpt](https://dodo.pe/custom-gpt)
* **Dodo Dash**: Experience the thrill of our endless runner game, Dodo Dash! Guide a daring dodo bird as it sprints, jumps, and dodges obstacles to survive. Give it a try here, [https://dash.dodopayments.com](https://dash.dodopayments.com).
* Various other bug fixes and improvements have been implemented.
# v1.14.0 (12th April 2025)
Source: https://docs.dodopayments.com/changelog/v1.14.0
Introduced new European payment methods, subscription billing address updates, and various improvements.
## New Features 🚀
* **New European Payment Methods**: We've expanded our payment options with four new European payment methods:
* **iDEAL** - Netherlands
* **Bancontact** - Belgium
* **Przelewy24 (P24)** - Poland
* **EPS** - Austria
 * **New Java and Kotlin SDKs**: Released native SDKs for Java and Kotlin to support Android development and enterprise Java applications. The SDKs include comprehensive documentation, sample code, and full support for Dodo Payments features including payments, subscriptions, and refunds. Available on GitHub: [Java SDK](https://github.com/dodopayments/dodopayments-java) and [Kotlin SDK](https://github.com/dodopayments/dodopayments-kotlin).
* **Afterpay/Clearpay Integration**: Added support for Afterpay/Clearpay as a Buy Now, Pay Later (BNPL) payment method, enabling customers to split payments into 4 interest-free installments.
* **Google Sign-In**: Implemented Google Sign-In as a new authentication option, allowing users to log in using their Google accounts. This OAuth 2.0-compliant integration supports both personal and workspace Google accounts for enhanced security and convenience.
# v1.18.3 (26th April 2025)
Source: https://docs.dodopayments.com/changelog/v1.18.3
Introduced Subscription Plan Change API, enhanced onboarding guidance, notification preferences center, and improved adaptive currency information.
## New Features 🚀
* **Subscription Plan Change API**: Launched a new API that enables seamless upgrades or downgrades of subscriptions between different product plans. For implementation details, see the [API reference](/api-reference/subscriptions/change-plan).
* **Enhanced Onboarding Guidance**: Improved sidebar nudges to provide clearer direction on next steps in your Dodo Payments onboarding journey.
* **New Java and Kotlin SDKs**: Released native SDKs for Java and Kotlin to support Android development and enterprise Java applications. The SDKs include comprehensive documentation, sample code, and full support for Dodo Payments features including payments, subscriptions, and refunds. Available on GitHub: [Java SDK](https://github.com/dodopayments/dodopayments-java) and [Kotlin SDK](https://github.com/dodopayments/dodopayments-kotlin).
* **Afterpay/Clearpay Integration**: Added support for Afterpay/Clearpay as a Buy Now, Pay Later (BNPL) payment method, enabling customers to split payments into 4 interest-free installments.
* **Google Sign-In**: Implemented Google Sign-In as a new authentication option, allowing users to log in using their Google accounts. This OAuth 2.0-compliant integration supports both personal and workspace Google accounts for enhanced security and convenience.
# v1.18.3 (26th April 2025)
Source: https://docs.dodopayments.com/changelog/v1.18.3
Introduced Subscription Plan Change API, enhanced onboarding guidance, notification preferences center, and improved adaptive currency information.
## New Features 🚀
* **Subscription Plan Change API**: Launched a new API that enables seamless upgrades or downgrades of subscriptions between different product plans. For implementation details, see the [API reference](/api-reference/subscriptions/change-plan).
* **Enhanced Onboarding Guidance**: Improved sidebar nudges to provide clearer direction on next steps in your Dodo Payments onboarding journey.
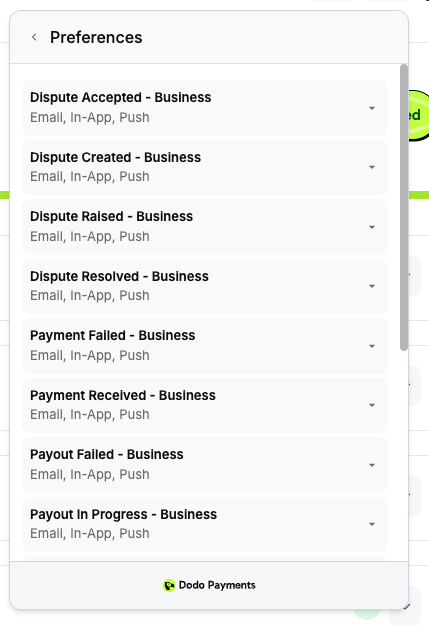
 * **Notification Preferences Center**: Added a dedicated section for managing your notification settings. Access it by clicking the bell icon in the top right corner and then selecting the settings icon.
 * **Enhanced Adaptive Currency Information**: Added new fields to the payment response including `settlement_amount`, `settlement_currency`, and `settlement_tax` to provide greater transparency on settlement details.
* **General Improvements**: Various minor enhancements and bug fixes to improve overall platform performance.
# v1.21.0 (3rd May 2025)
Source: https://docs.dodopayments.com/changelog/v1.21.0
Added support for addons to subscriptions, made dispute handling more robust, and added customer billing details to payment responses.
## New Features 🚀
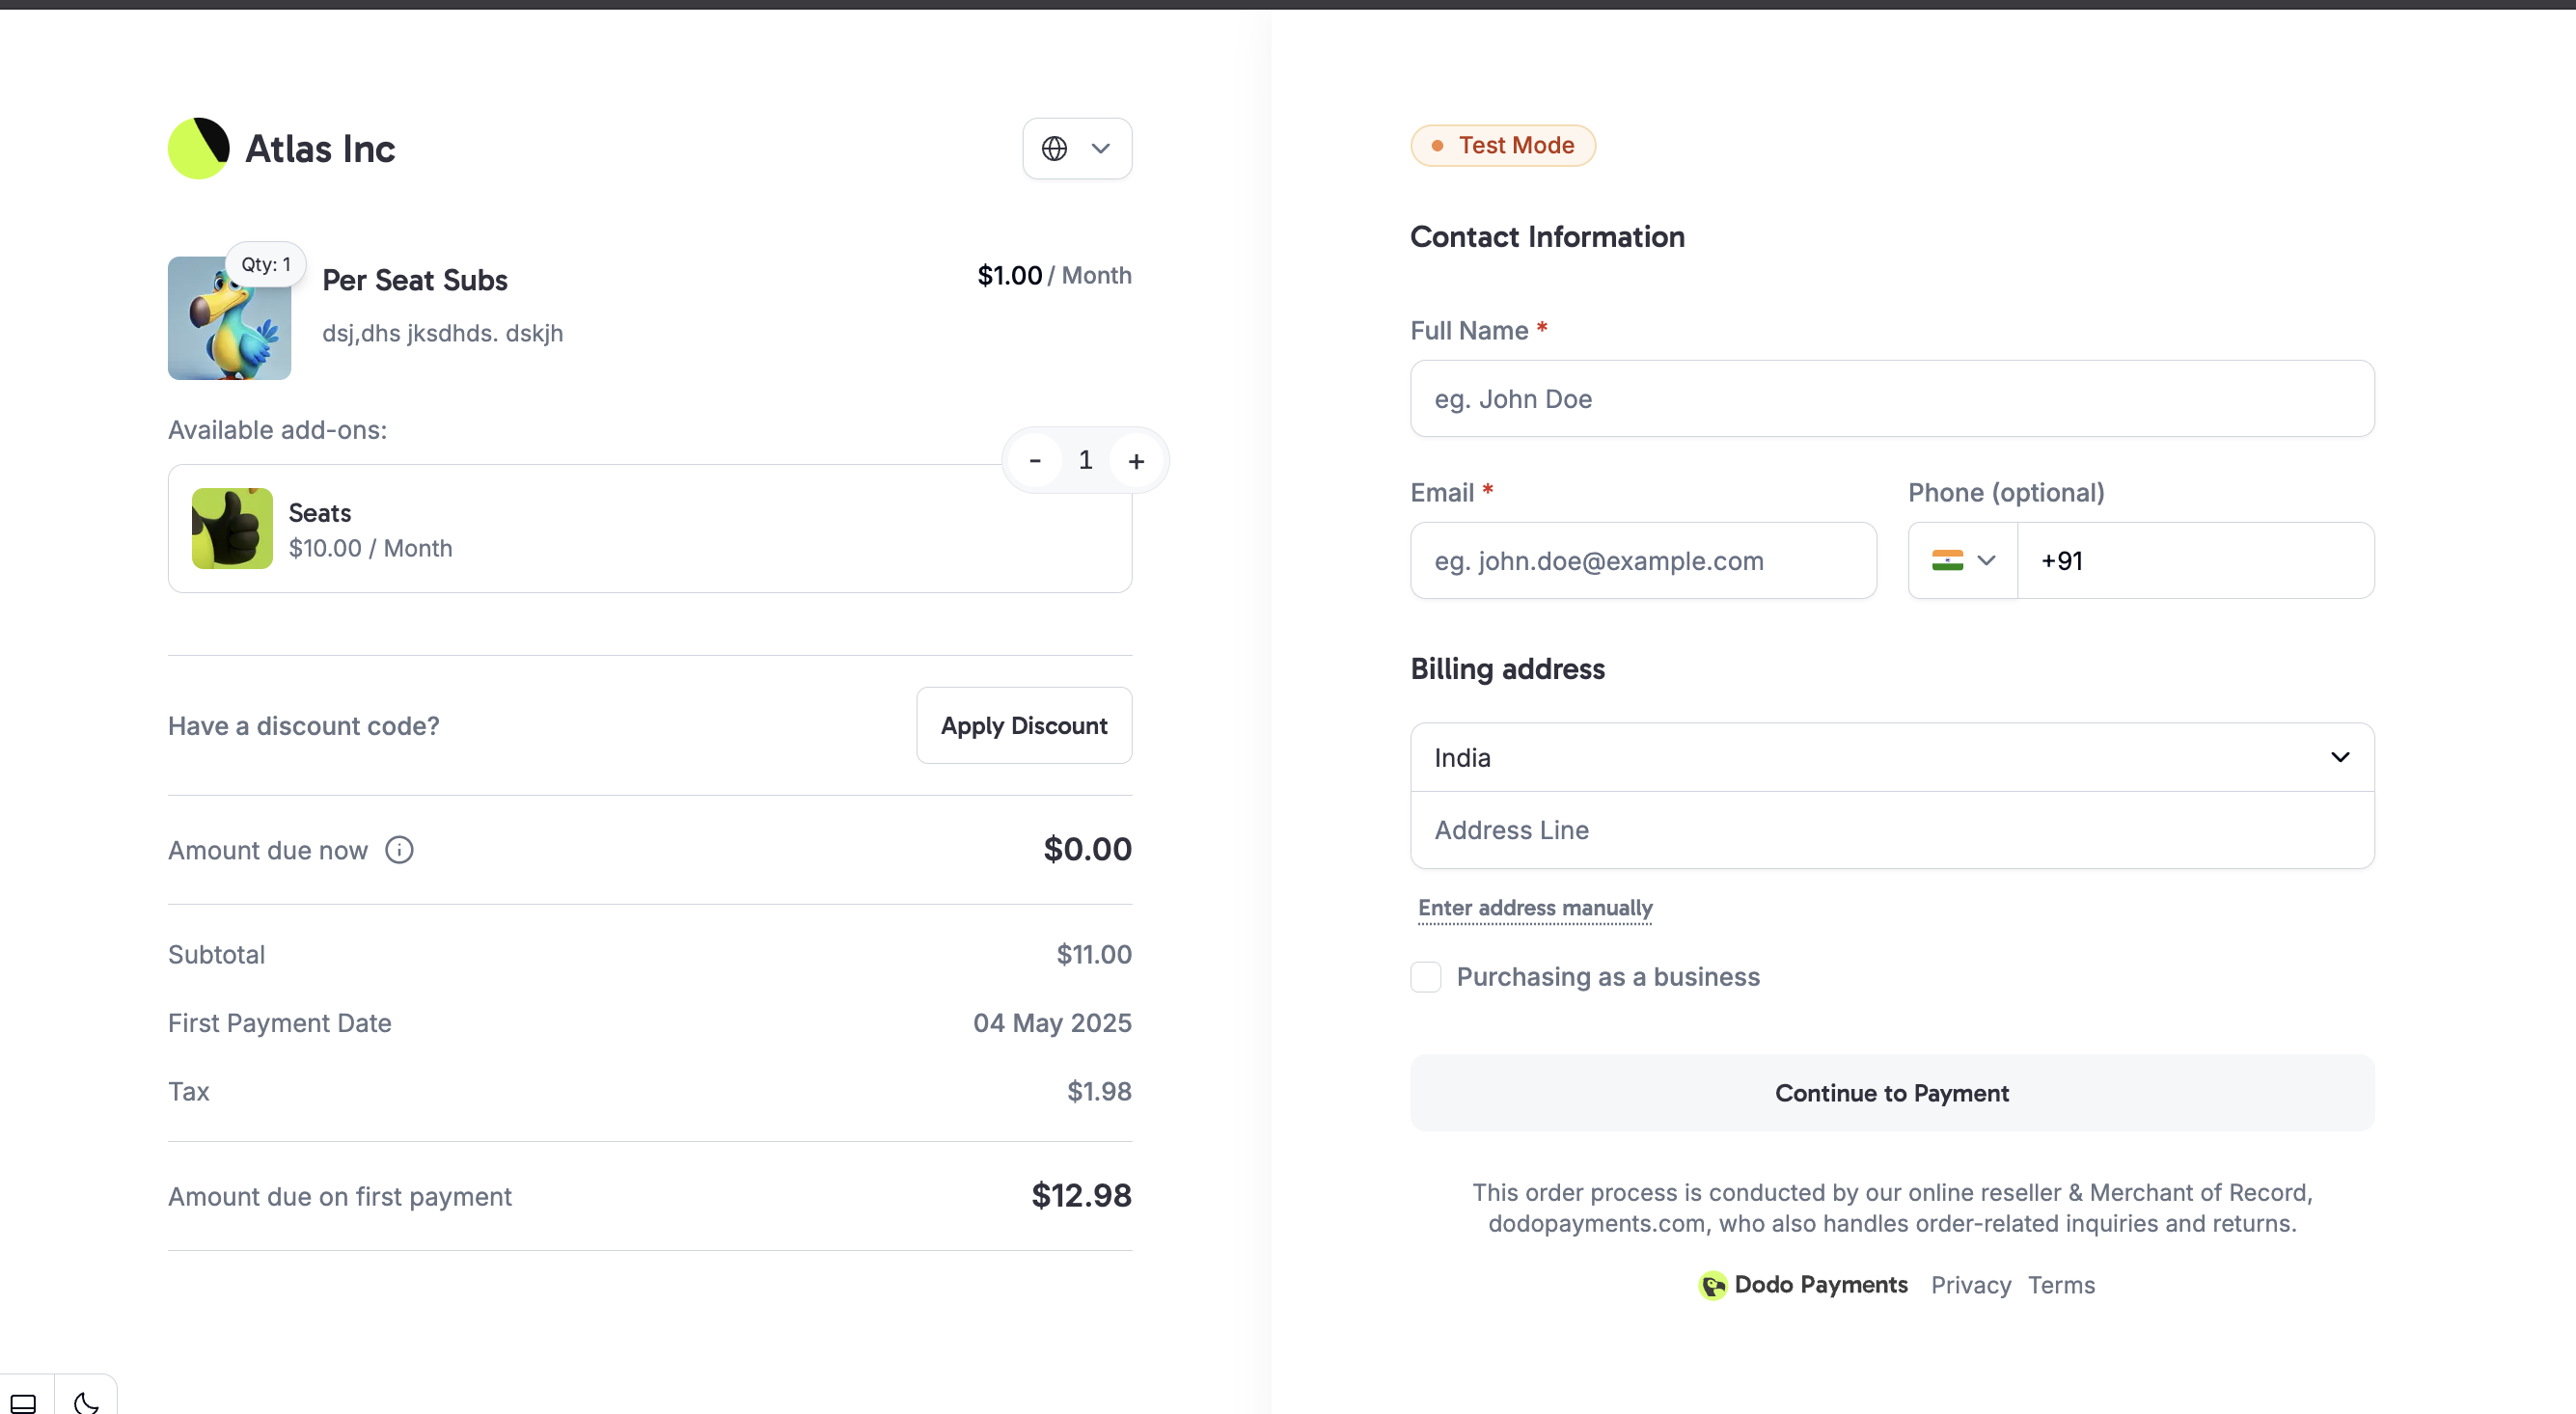
* **Subscription Addons**: Introduced support for addons to subscription products. In the Products section, you'll find a new Addons tab where you can create addons such as "Seats". Once created, you can edit your subscription products to include these addons. This feature is available both on the dashboard and via API.
* [Create Addon](/api-reference/addons/create-addon)
* [List Addons](/api-reference/addons/list-addons)
* [Get Addon](/api-reference/addons/get-addon)
* [Update Addon](/api-reference/addons/update-addon)
* [Update Addon Images](/api-reference/addons/update-addon-images)
With addons, you unlock new billing options such as seat-based billing or variable billing per customer. Get creative with addons to design flexible billing models for your business.
* **Enhanced Adaptive Currency Information**: Added new fields to the payment response including `settlement_amount`, `settlement_currency`, and `settlement_tax` to provide greater transparency on settlement details.
* **General Improvements**: Various minor enhancements and bug fixes to improve overall platform performance.
# v1.21.0 (3rd May 2025)
Source: https://docs.dodopayments.com/changelog/v1.21.0
Added support for addons to subscriptions, made dispute handling more robust, and added customer billing details to payment responses.
## New Features 🚀
* **Subscription Addons**: Introduced support for addons to subscription products. In the Products section, you'll find a new Addons tab where you can create addons such as "Seats". Once created, you can edit your subscription products to include these addons. This feature is available both on the dashboard and via API.
* [Create Addon](/api-reference/addons/create-addon)
* [List Addons](/api-reference/addons/list-addons)
* [Get Addon](/api-reference/addons/get-addon)
* [Update Addon](/api-reference/addons/update-addon)
* [Update Addon Images](/api-reference/addons/update-addon-images)
With addons, you unlock new billing options such as seat-based billing or variable billing per customer. Get creative with addons to design flexible billing models for your business.
 * **Enhanced Dispute Management**: Improved dispute handling to be more robust and easier to manage through your Dodo Payments dashboard.
* **Expanded Response Data**: Added customer billing details to payment responses, subscription responses, and webhooks.
* **General Improvements**: Various minor enhancements and bug fixes to improve overall platform performance.
# v1.22.0 (9th May 2025)
Source: https://docs.dodopayments.com/changelog/v1.22.0
Added unified search to the dashboard, added support for upgrading and downgrading subscriptions with addons, and added comprehensive card information to payment responses.
## New Features 🚀
* **Unified Dashboard Search**: We've implemented a powerful search functionality across the entire dashboard. You can now quickly find:
* **Identifiers**: Payment, Refund, Dispute, Customer, Discount, Product, and Addon IDs
* **Names**: Products, Addons, and Customers
* **Contact Information**: Customer Email addresses
* **Metadata**: Payment and Subscription metadata
* **Navigation**: All pages within the Dodo Payments dashboard
* **Enhanced Dispute Management**: Improved dispute handling to be more robust and easier to manage through your Dodo Payments dashboard.
* **Expanded Response Data**: Added customer billing details to payment responses, subscription responses, and webhooks.
* **General Improvements**: Various minor enhancements and bug fixes to improve overall platform performance.
# v1.22.0 (9th May 2025)
Source: https://docs.dodopayments.com/changelog/v1.22.0
Added unified search to the dashboard, added support for upgrading and downgrading subscriptions with addons, and added comprehensive card information to payment responses.
## New Features 🚀
* **Unified Dashboard Search**: We've implemented a powerful search functionality across the entire dashboard. You can now quickly find:
* **Identifiers**: Payment, Refund, Dispute, Customer, Discount, Product, and Addon IDs
* **Names**: Products, Addons, and Customers
* **Contact Information**: Customer Email addresses
* **Metadata**: Payment and Subscription metadata
* **Navigation**: All pages within the Dodo Payments dashboard
 * **Addons Plan Changes**: Added support for upgrading and downgrading subscriptions that include addons.
* **Expanded Payment Card Details**: Payment responses now include comprehensive card information:
* `card_issuing_country`: Country where the card was issued
* `card_last_four`: Last 4 digits of the card number
* `card_brand`: Card brand (Visa, Mastercard, etc.)
* `card_type`: Card type (credit, debit, prepaid)
* **Platform Enhancements**: Various performance optimizations, bug fixes, and minor improvements across the platform.
# v1.25.0 (20th May 2025)
Source: https://docs.dodopayments.com/changelog/v1.25.0
Introduced Overlay Checkout Beta, a modern TypeScript library for embedded payments, and a new subscription.plan_changed webhook event for better subscription lifecycle management.
## New Features 🚀
* **Overlay Checkout Beta**: We're excited to announce the beta release of our new overlay checkout experience. This modern TypeScript library provides a seamless way to integrate our payment overlay into your web application with real-time event handling and customizable themes. Key features include:
* **Real-time Event Handling**: Listen to checkout events like payment creation, success, and failure
* **TypeScript Support**: Fully typed APIs for better developer experience
* **Customizable Themes**: Support for light and dark themes
* **Browser Compatibility**: Works across all modern browsers including Chrome, Firefox, Safari, Edge, and IE11+
* **PCI Compliance**: Maintains security standards while providing an embedded experience
* **Addons Plan Changes**: Added support for upgrading and downgrading subscriptions that include addons.
* **Expanded Payment Card Details**: Payment responses now include comprehensive card information:
* `card_issuing_country`: Country where the card was issued
* `card_last_four`: Last 4 digits of the card number
* `card_brand`: Card brand (Visa, Mastercard, etc.)
* `card_type`: Card type (credit, debit, prepaid)
* **Platform Enhancements**: Various performance optimizations, bug fixes, and minor improvements across the platform.
# v1.25.0 (20th May 2025)
Source: https://docs.dodopayments.com/changelog/v1.25.0
Introduced Overlay Checkout Beta, a modern TypeScript library for embedded payments, and a new subscription.plan_changed webhook event for better subscription lifecycle management.
## New Features 🚀
* **Overlay Checkout Beta**: We're excited to announce the beta release of our new overlay checkout experience. This modern TypeScript library provides a seamless way to integrate our payment overlay into your web application with real-time event handling and customizable themes. Key features include:
* **Real-time Event Handling**: Listen to checkout events like payment creation, success, and failure
* **TypeScript Support**: Fully typed APIs for better developer experience
* **Customizable Themes**: Support for light and dark themes
* **Browser Compatibility**: Works across all modern browsers including Chrome, Firefox, Safari, Edge, and IE11+
* **PCI Compliance**: Maintains security standards while providing an embedded experience
 * **Multi-Brand Support**: We're launching Multi-Brand Support, enabling you to manage multiple brands and websites under a single verified business account. This feature is ideal for launching new product lines, creating regional microsites, or separating different offerings while maintaining a streamlined operation.
Key features include:
* **Rapid Verification**: Most brands are approved within 24 working hours through our streamlined website review process
* **Branded Checkout Experience**: Customers see the specific brand's logo, name, and descriptor during checkout
* **Seamless Brand Creation**: Create additional brands through Business Settings ▸ Brands ▸ Add Brand
* **Detailed Transaction Analytics**: Each transaction clearly indicates its associated brand for better business insights
* **Simplified Payouts**: All revenue consolidates into your existing account without additional verification requirements
* **Multi-Brand Support**: We're launching Multi-Brand Support, enabling you to manage multiple brands and websites under a single verified business account. This feature is ideal for launching new product lines, creating regional microsites, or separating different offerings while maintaining a streamlined operation.
Key features include:
* **Rapid Verification**: Most brands are approved within 24 working hours through our streamlined website review process
* **Branded Checkout Experience**: Customers see the specific brand's logo, name, and descriptor during checkout
* **Seamless Brand Creation**: Create additional brands through Business Settings ▸ Brands ▸ Add Brand
* **Detailed Transaction Analytics**: Each transaction clearly indicates its associated brand for better business insights
* **Simplified Payouts**: All revenue consolidates into your existing account without additional verification requirements
 To create additional brands, navigate to Business `Settings ▸ Brands ▸ Add Brand` and complete the required details.
* **Platform Enhancements**: Various performance optimizations, bug fixes, and minor improvements across the platform.
# v1.3.2 (28 Feb 2025)
Source: https://docs.dodopayments.com/changelog/v1.3.2
Introduced the Teams Feature, enhanced success/failure screens, and minor improvements.
## New Features 🚀
* **Teams Feature**: We have introduced the highly requested Teams Feature. Now, you can invite `Editors` and `Viewers` to your Business and collaborate with them seamlessly. To try it out, navigate to the `Business > Teams` section in the Dashboard.
To create additional brands, navigate to Business `Settings ▸ Brands ▸ Add Brand` and complete the required details.
* **Platform Enhancements**: Various performance optimizations, bug fixes, and minor improvements across the platform.
# v1.3.2 (28 Feb 2025)
Source: https://docs.dodopayments.com/changelog/v1.3.2
Introduced the Teams Feature, enhanced success/failure screens, and minor improvements.
## New Features 🚀
* **Teams Feature**: We have introduced the highly requested Teams Feature. Now, you can invite `Editors` and `Viewers` to your Business and collaborate with them seamlessly. To try it out, navigate to the `Business > Teams` section in the Dashboard.
 * **Enhanced Success/Failure Screens**: The default success and failure screens have been updated for cases where no `redirect_url` is provided. These screens now offer greater visibility to your customers and include an option to download the invoice.
 * **Others**: Minor improvements and bug fixes.
# v1.30.0 (2nd June 2025)
Source: https://docs.dodopayments.com/changelog/v1.30.0
Added support for $0 payments and 100% discount codes for one-time products, enabling free product offerings, payout threshold for USD wallet, and standardized API error codes and messages.
## New Features 🚀
* **Zero-Dollar Payments**: Added support for \$0 payments and 100% discount codes for one-time products, enabling free product offerings and promotional campaigns.
* **Custom Payout Threshold**: Added the ability to set minimum payout amounts for USD wallets, helping merchants optimize payout processing and reduce fees for small transactions. Access this feature at `Payouts ▸ USD Wallet ▸ Edit Payout Threshold`.
* **Others**: Minor improvements and bug fixes.
# v1.30.0 (2nd June 2025)
Source: https://docs.dodopayments.com/changelog/v1.30.0
Added support for $0 payments and 100% discount codes for one-time products, enabling free product offerings, payout threshold for USD wallet, and standardized API error codes and messages.
## New Features 🚀
* **Zero-Dollar Payments**: Added support for \$0 payments and 100% discount codes for one-time products, enabling free product offerings and promotional campaigns.
* **Custom Payout Threshold**: Added the ability to set minimum payout amounts for USD wallets, helping merchants optimize payout processing and reduce fees for small transactions. Access this feature at `Payouts ▸ USD Wallet ▸ Edit Payout Threshold`.
 * **API Standardization**: Implemented standardized API error codes and messages as part of our ongoing API improvement initiative. This enhancement makes the API more consistent and developer-friendly. For detailed information, visit our [Error Codes Documentation](/api-reference/error-codes).
* **Transaction Decline Standardization**: Introduced unified transaction decline codes and messages, providing clearer insights into failure reasons and distinguishing between user errors and system issues. Learn more in our [Transaction Failures Documentation](/api-reference/transaction-failures).
# v1.32.0 (9th June 2025)
Source: https://docs.dodopayments.com/changelog/v1.32.0
Added support for Affiliates with Affonso, multiple webhook support, enhanced fraud prevention, subscription schedule cancellation, and static payment links.
## New Features 🚀
* **Affiliate Program Integration**: Launched integration with Affonso, enabling you to create and manage affiliate programs directly through Dodo Payments. Track referrals, handle commissions, and grow your revenue with trusted affiliate partnerships. Learn more in our [Affiliates](/features/affiliates) documentation.
* **API Standardization**: Implemented standardized API error codes and messages as part of our ongoing API improvement initiative. This enhancement makes the API more consistent and developer-friendly. For detailed information, visit our [Error Codes Documentation](/api-reference/error-codes).
* **Transaction Decline Standardization**: Introduced unified transaction decline codes and messages, providing clearer insights into failure reasons and distinguishing between user errors and system issues. Learn more in our [Transaction Failures Documentation](/api-reference/transaction-failures).
# v1.32.0 (9th June 2025)
Source: https://docs.dodopayments.com/changelog/v1.32.0
Added support for Affiliates with Affonso, multiple webhook support, enhanced fraud prevention, subscription schedule cancellation, and static payment links.
## New Features 🚀
* **Affiliate Program Integration**: Launched integration with Affonso, enabling you to create and manage affiliate programs directly through Dodo Payments. Track referrals, handle commissions, and grow your revenue with trusted affiliate partnerships. Learn more in our [Affiliates](/features/affiliates) documentation.
 * **Multiple Webhook Support**: Enhanced webhook capabilities to support multiple endpoints, allowing you to send event notifications to different systems simultaneously.
* **Enhanced Fraud Prevention**: Added a new business setting to force 3D Secure authentication for all transactions, helping reduce fraud and chargebacks.
* **Subscription Schedule Cancellation**: Introduced the ability to schedule subscription cancellations to take effect at the end of the billing period, available through our API.
* **Static Payment Links**: Added two more query params for static payment links:
* `paymentCurrency`: Specifies the payment currency. Default is set as per the billing country.
* `showCurrencySelector`: Shows the currency selector. Default is true.
# v1.34.0 (18th June 2025)
Source: https://docs.dodopayments.com/changelog/v1.34.0
Added Digital Product Delivery, React Native SDK beta release, new proration modes, adaptive currency for subscriptions, and enhanced verification form management.
## New Features 🚀
* **Digital Product Delivery**: Streamlined digital product delivery system with automated fulfillment, ensuring customers receive their digital goods immediately after successful payment. Learn more in our [Digital Product Delivery](/features/digital-product-delivery) documentation.
* **Multiple Webhook Support**: Enhanced webhook capabilities to support multiple endpoints, allowing you to send event notifications to different systems simultaneously.
* **Enhanced Fraud Prevention**: Added a new business setting to force 3D Secure authentication for all transactions, helping reduce fraud and chargebacks.
* **Subscription Schedule Cancellation**: Introduced the ability to schedule subscription cancellations to take effect at the end of the billing period, available through our API.
* **Static Payment Links**: Added two more query params for static payment links:
* `paymentCurrency`: Specifies the payment currency. Default is set as per the billing country.
* `showCurrencySelector`: Shows the currency selector. Default is true.
# v1.34.0 (18th June 2025)
Source: https://docs.dodopayments.com/changelog/v1.34.0
Added Digital Product Delivery, React Native SDK beta release, new proration modes, adaptive currency for subscriptions, and enhanced verification form management.
## New Features 🚀
* **Digital Product Delivery**: Streamlined digital product delivery system with automated fulfillment, ensuring customers receive their digital goods immediately after successful payment. Learn more in our [Digital Product Delivery](/features/digital-product-delivery) documentation.
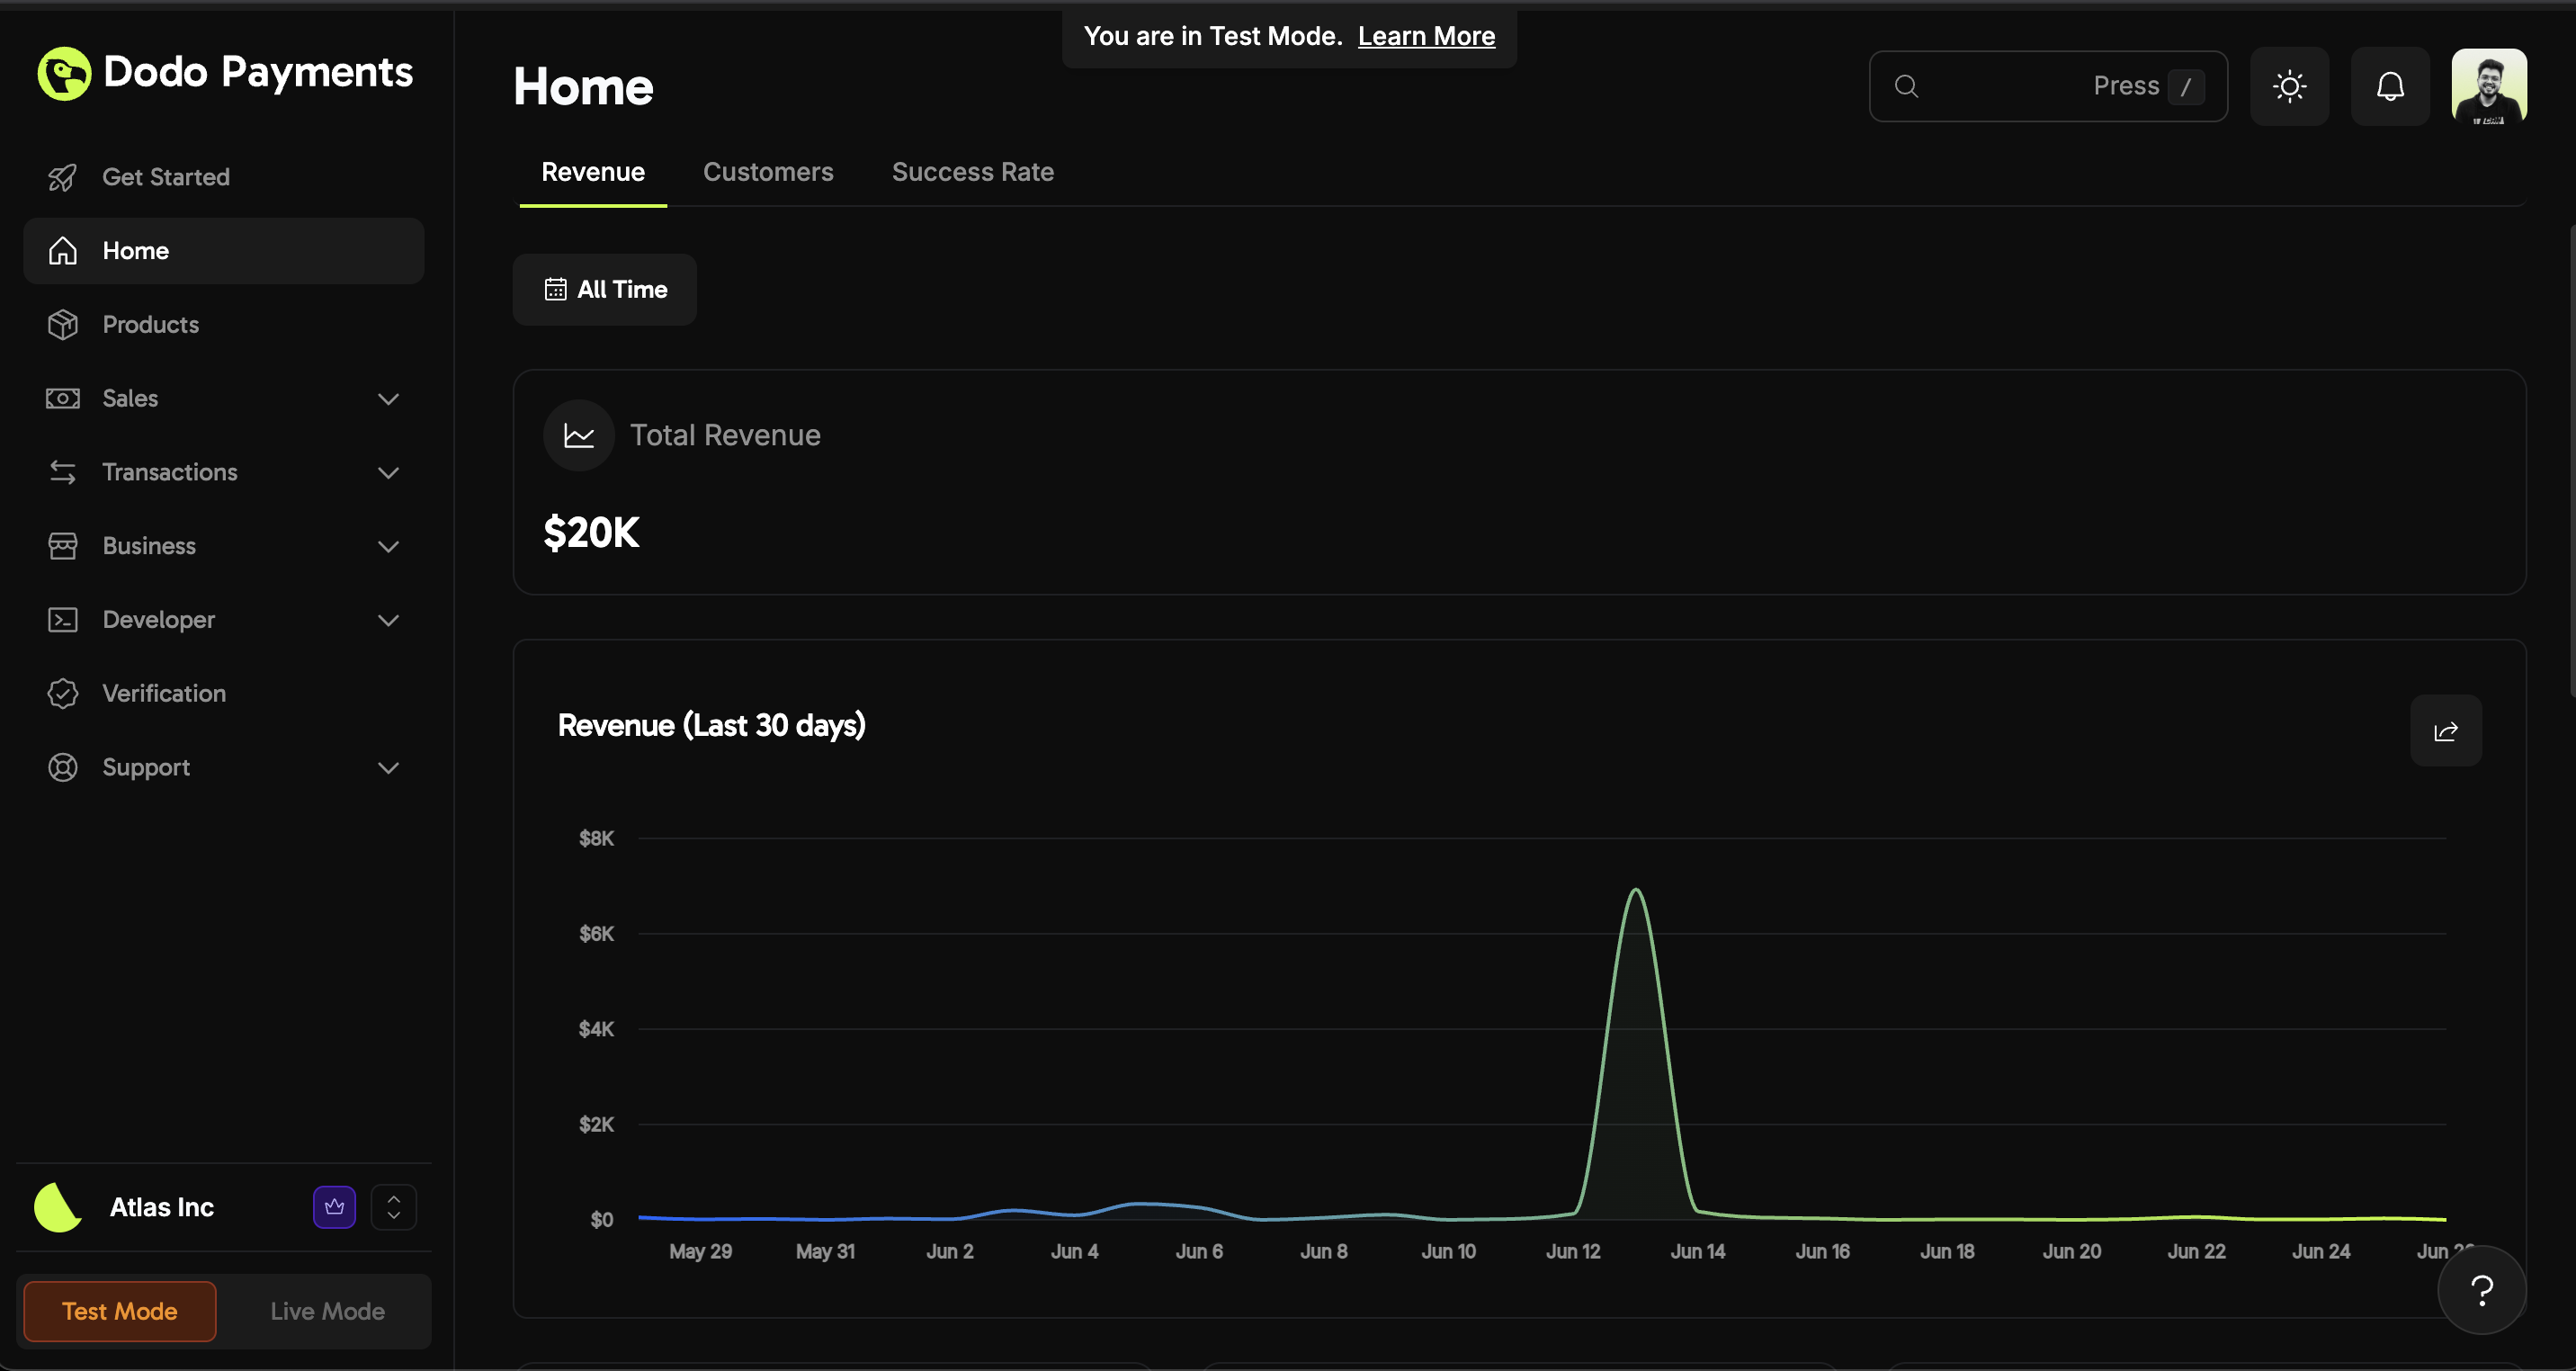 * **Customer Analytics**
* Average Revenue Per User (ARPU)
* Active Customers count
* Customer segmentation (new vs existing)
* Top 6 customers for current month
* **Customer Analytics**
* Average Revenue Per User (ARPU)
* Active Customers count
* Customer segmentation (new vs existing)
* Top 6 customers for current month
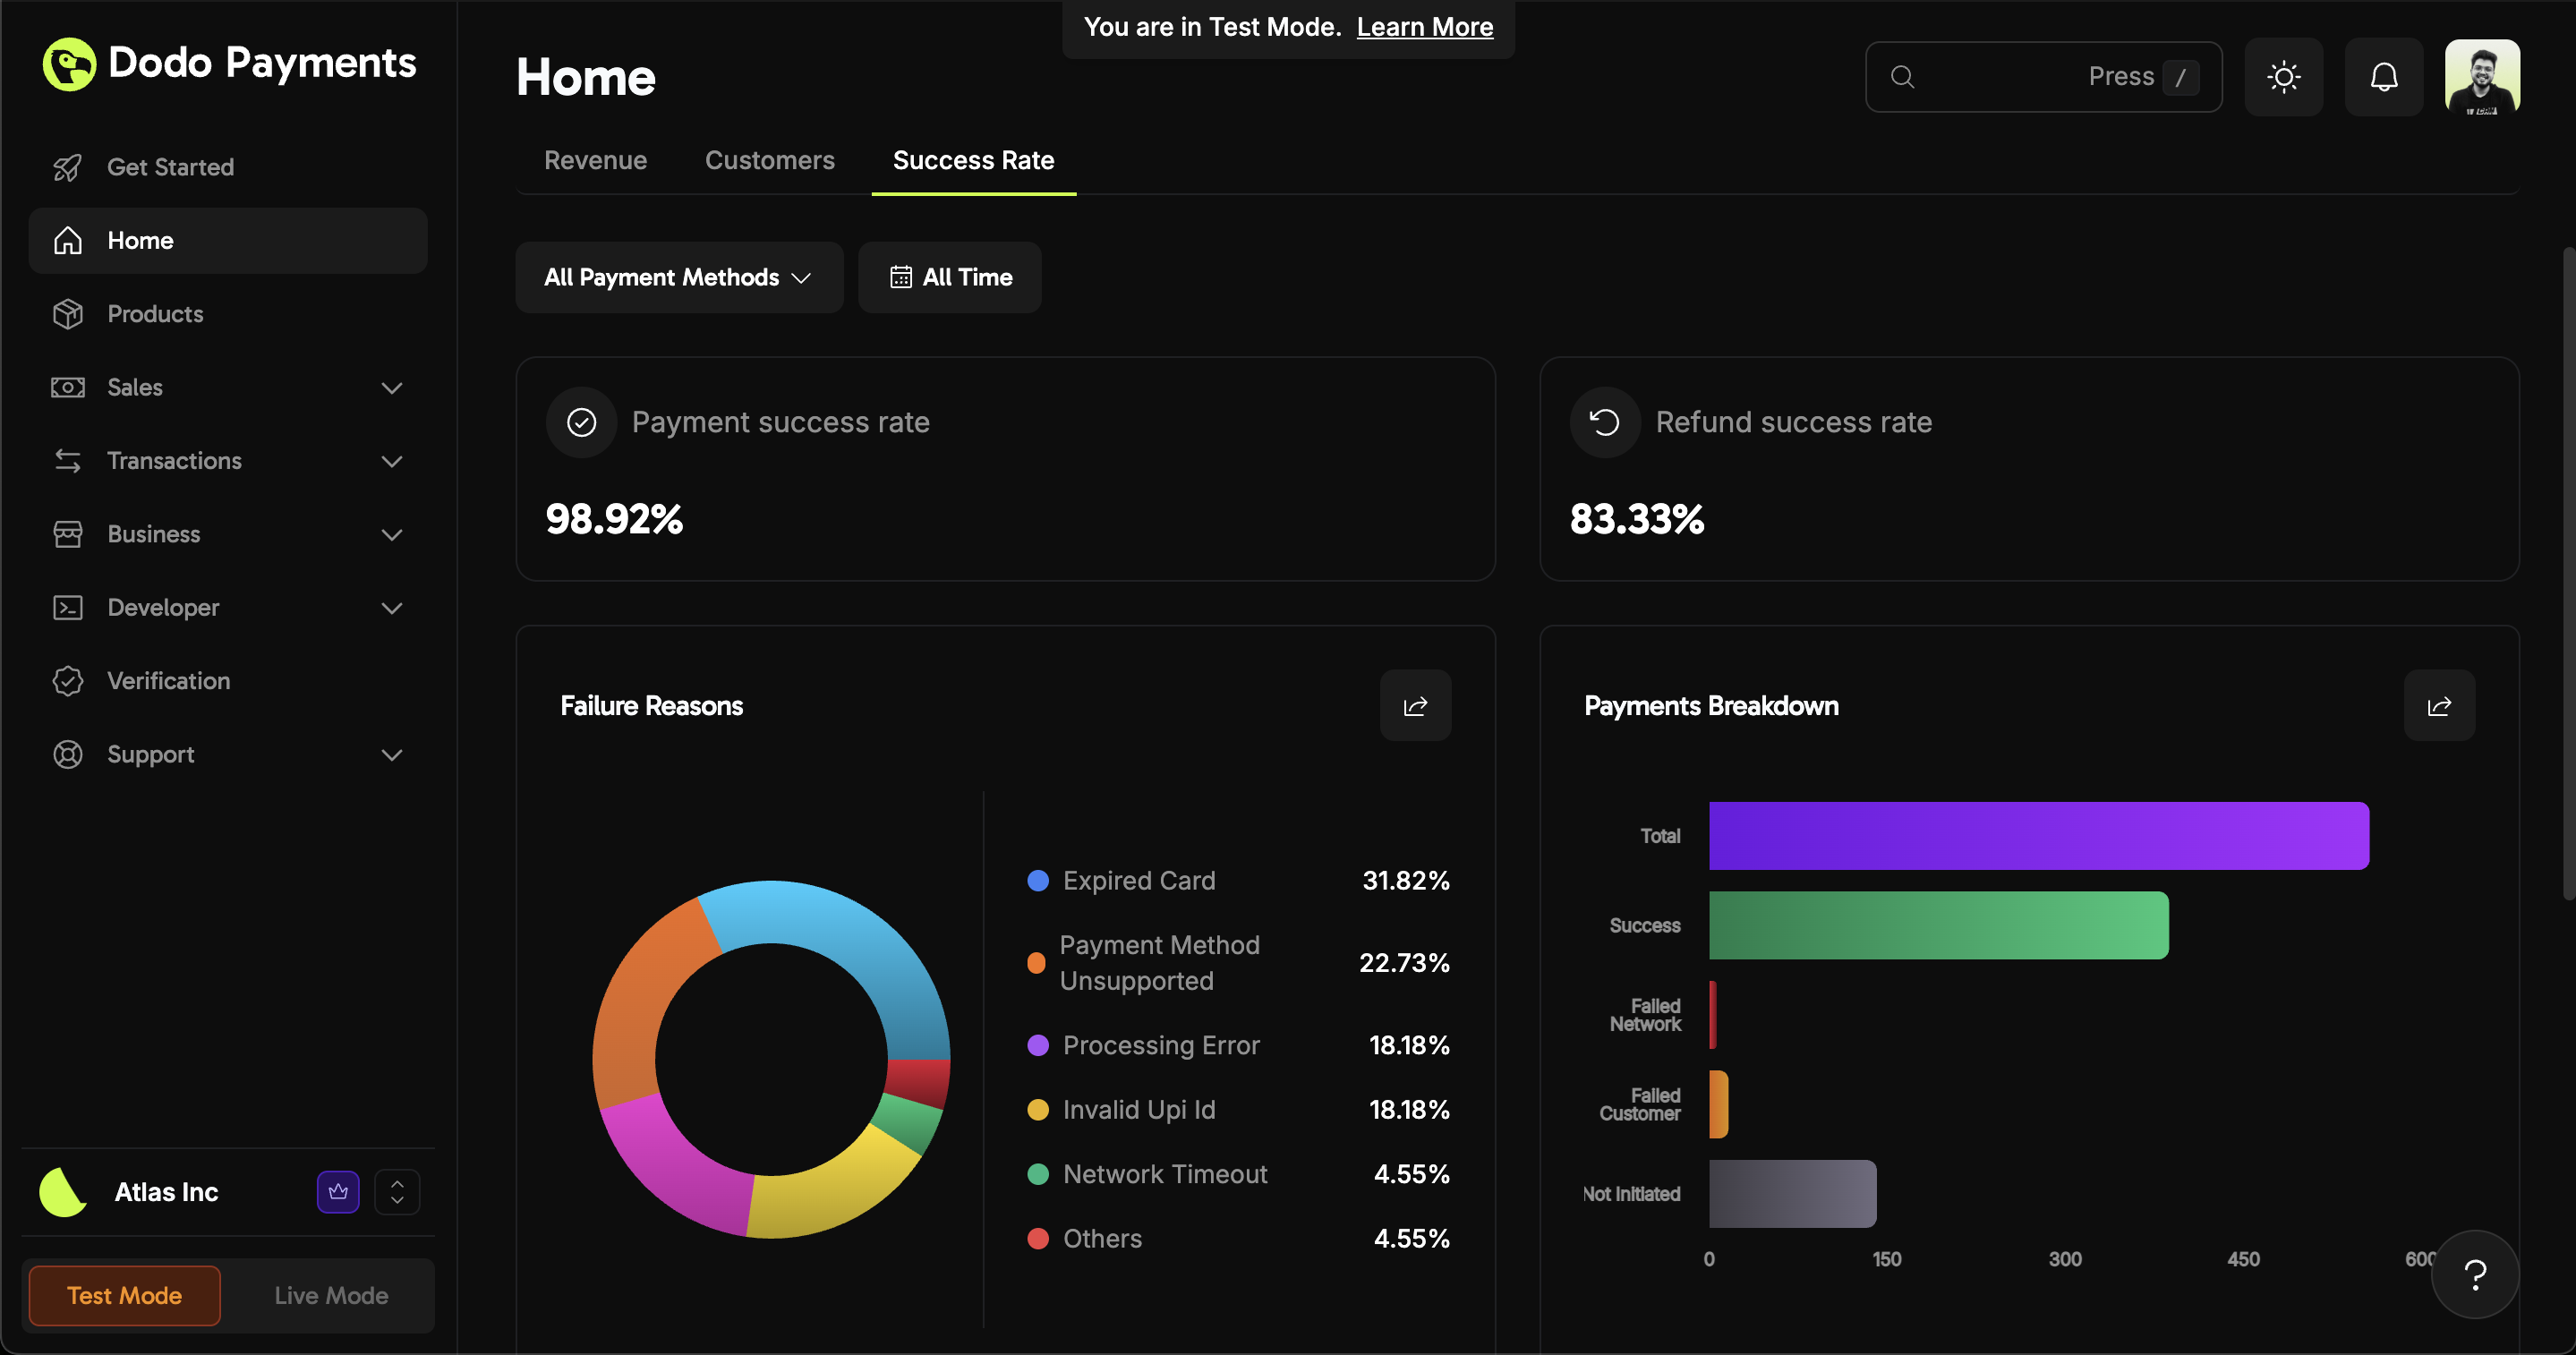
 * **Payment Success Rate Analytics**
* Payment Success Rate metrics
* Refund Success Rate tracking
* Failure Reasons breakdown
* Payments status distribution
* Monthly Success Rate trends
* **Payment Success Rate Analytics**
* Payment Success Rate metrics
* Refund Success Rate tracking
* Failure Reasons breakdown
* Payments status distribution
* Monthly Success Rate trends
 # v1.4.0 (6 Mar 2025)
Source: https://docs.dodopayments.com/changelog/v1.4.0
Introduced the Storefront Feature and Amazon Pay Integration.
## New Features 🚀
* **Storefront Feature**: Create a simple, branded, and mobile-friendly online store to showcase both One-Time Payment products and Subscription products. This feature eliminates the complexity of building an entire website, enabling you to quickly offer your products or services online without additional web development efforts.
# v1.4.0 (6 Mar 2025)
Source: https://docs.dodopayments.com/changelog/v1.4.0
Introduced the Storefront Feature and Amazon Pay Integration.
## New Features 🚀
* **Storefront Feature**: Create a simple, branded, and mobile-friendly online store to showcase both One-Time Payment products and Subscription products. This feature eliminates the complexity of building an entire website, enabling you to quickly offer your products or services online without additional web development efforts.
 * **Enhanced Customer Details**: View subscriptions, payments, and refunds for each customer in one place. Go to `Sales > Customers > arrow icon` on the dashboard.
 * **Detailed Payout Information**: Get more insights on payout amounts, cycles, and dates. Visit `Business > Payouts` on the dashboard.
 * **Official Ruby SDK**: Integrate Dodo Payments into your Ruby applications effortlessly. Check out the [Ruby SDK](https://github.com/dodopayments/dodopayments-ruby) for more details.
* **Enhanced API Filters**: Added filters like `customer_id`, `status`, etc., to relevant list APIs. Refer to the API documentation for more information.
* **Minor Improvements and Bug Fixes**: Various other minor improvements and bug fixes have been implemented.
# Configuring Allowed Payment Methods
Source: https://docs.dodopayments.com/developer-resources/allowed-payment-methods
The Allowed Payment Methods feature enables you to control which payment options are available to your customers during checkout. This configuration works for both one-time payments and subscriptions.
## Overview
By specifying allowed payment methods, you can:
* Control which payment options appear to customers
* Restrict payment methods based on your business requirements
* Maintain consistency across different payment flows
* Optimize checkout experience for your target audience
## Implementation
### Basic Usage
Include the `allowed_payment_method_types` field in your API requests to specify which payment methods should be available:
```json
{
"allowed_payment_method_types": [
"credit",
"debit",
"upi_collect"
]
}
```
### API Endpoints
This configuration can be used with:
* [POST /payments](/api-reference/payments/post-payments) - For one-time payments
* [POST /subscriptions](/api-reference/subscriptions/post-subscriptions) - For subscription payments
## Implementation Examples
### Basic Payment Request
```json
{
"amount": 1000,
"currency": "usd",
"allowed_payment_method_types": [
"credit",
"debit",
"apple_pay"
]
}
```
### Subscription Request
```json
{
"product_id": "prod_123",
"customer_id": "cust_456",
"allowed_payment_method_types": [
"credit",
"sepa",
"ideal"
]
}
```
## Important Considerations
### Availability Factors
Payment method availability depends on multiple factors:
1. **Customer Location**: Some payment methods are region-specific
2. **Merchant Settings**: Your account configuration and capabilities
3. **Currency**: Supported payment methods vary by currency
4. **Transaction Type**: Some methods may not support all transaction types
### Best Practices
1. **Default Behavior**
* If `allowed_payment_method_types` is not specified, all eligible payment methods will be available
* Only specify this field when you need to restrict payment methods
2. **Regional Considerations**
* Consider your target market when selecting payment methods
* Include region-specific payment methods for better conversion rates
3. **Testing**
* Test payment method availability in different regions
* Verify behavior with various customer profiles
4. **Monitoring**
* Track which payment methods are most used
* Adjust allowed methods based on customer preferences
### Limitations
* Payment methods not included in the list will never appear to customers
* Adding a payment method to the list doesn't guarantee its availability
* Some payment methods may require additional setup or verification
## Troubleshooting
### Common Issues
1. **Payment Method Not Appearing**
* Verify the payment method is correctly listed in `allowed_payment_method_types`
* Check if the payment method is supported for the customer's location
* Confirm the payment method is enabled in your merchant settings
2. **Unexpected Payment Methods**
* Review your `allowed_payment_method_types` configuration
* Check if the field is being properly passed in API requests
* Verify there are no conflicting configurations
### Support
If you encounter issues with payment method configuration:
1. Review the [API Reference](/api-reference)
2. Check your merchant dashboard settings
3. Contact DodoPayments Support for assistance
# Node.js, Python, PHP, Go, Ruby, Java & Kotlin
Source: https://docs.dodopayments.com/developer-resources/dodo-payments-sdks
Official SDKs of Node, Python, PHP, Go, Ruby, Java & Kotlin for integrating Dodo Payments
## Node.js
The Node.js SDK provides a simple and intuitive way to integrate Dodo Payments into your Node.js applications.
```bash
npm install dodopayments
```
**Features:**
* Type definitions included
* Promise-based API
* Comprehensive error handling
* Built-in TypeScript support
* **Official Ruby SDK**: Integrate Dodo Payments into your Ruby applications effortlessly. Check out the [Ruby SDK](https://github.com/dodopayments/dodopayments-ruby) for more details.
* **Enhanced API Filters**: Added filters like `customer_id`, `status`, etc., to relevant list APIs. Refer to the API documentation for more information.
* **Minor Improvements and Bug Fixes**: Various other minor improvements and bug fixes have been implemented.
# Configuring Allowed Payment Methods
Source: https://docs.dodopayments.com/developer-resources/allowed-payment-methods
The Allowed Payment Methods feature enables you to control which payment options are available to your customers during checkout. This configuration works for both one-time payments and subscriptions.
## Overview
By specifying allowed payment methods, you can:
* Control which payment options appear to customers
* Restrict payment methods based on your business requirements
* Maintain consistency across different payment flows
* Optimize checkout experience for your target audience
## Implementation
### Basic Usage
Include the `allowed_payment_method_types` field in your API requests to specify which payment methods should be available:
```json
{
"allowed_payment_method_types": [
"credit",
"debit",
"upi_collect"
]
}
```
### API Endpoints
This configuration can be used with:
* [POST /payments](/api-reference/payments/post-payments) - For one-time payments
* [POST /subscriptions](/api-reference/subscriptions/post-subscriptions) - For subscription payments
## Implementation Examples
### Basic Payment Request
```json
{
"amount": 1000,
"currency": "usd",
"allowed_payment_method_types": [
"credit",
"debit",
"apple_pay"
]
}
```
### Subscription Request
```json
{
"product_id": "prod_123",
"customer_id": "cust_456",
"allowed_payment_method_types": [
"credit",
"sepa",
"ideal"
]
}
```
## Important Considerations
### Availability Factors
Payment method availability depends on multiple factors:
1. **Customer Location**: Some payment methods are region-specific
2. **Merchant Settings**: Your account configuration and capabilities
3. **Currency**: Supported payment methods vary by currency
4. **Transaction Type**: Some methods may not support all transaction types
### Best Practices
1. **Default Behavior**
* If `allowed_payment_method_types` is not specified, all eligible payment methods will be available
* Only specify this field when you need to restrict payment methods
2. **Regional Considerations**
* Consider your target market when selecting payment methods
* Include region-specific payment methods for better conversion rates
3. **Testing**
* Test payment method availability in different regions
* Verify behavior with various customer profiles
4. **Monitoring**
* Track which payment methods are most used
* Adjust allowed methods based on customer preferences
### Limitations
* Payment methods not included in the list will never appear to customers
* Adding a payment method to the list doesn't guarantee its availability
* Some payment methods may require additional setup or verification
## Troubleshooting
### Common Issues
1. **Payment Method Not Appearing**
* Verify the payment method is correctly listed in `allowed_payment_method_types`
* Check if the payment method is supported for the customer's location
* Confirm the payment method is enabled in your merchant settings
2. **Unexpected Payment Methods**
* Review your `allowed_payment_method_types` configuration
* Check if the field is being properly passed in API requests
* Verify there are no conflicting configurations
### Support
If you encounter issues with payment method configuration:
1. Review the [API Reference](/api-reference)
2. Check your merchant dashboard settings
3. Contact DodoPayments Support for assistance
# Node.js, Python, PHP, Go, Ruby, Java & Kotlin
Source: https://docs.dodopayments.com/developer-resources/dodo-payments-sdks
Official SDKs of Node, Python, PHP, Go, Ruby, Java & Kotlin for integrating Dodo Payments
## Node.js
The Node.js SDK provides a simple and intuitive way to integrate Dodo Payments into your Node.js applications.
```bash
npm install dodopayments
```
**Features:**
* Type definitions included
* Promise-based API
* Comprehensive error handling
* Built-in TypeScript support
 * Live Demo: [https://atlas.dodopayments.com](https://atlas.dodopayments.com#overlay-checkout)
* Github code for demo: [https://github.com/dodopayments/dodo-checkout-demo](https://github.com/dodopayments/dodo-checkout-demo/blob/main/src/components/Home/OverlayCheckout.tsx)
## Installation
```bash
# Using npm
npm install dodopayments-checkout
# Using yarn
yarn add dodopayments-checkout
# Using pnpm
pnpm add dodopayments-checkout
```
## Quick Start
```typescript
import { DodoPayments } from "dodopayments-checkout";
// Initialize the SDK
DodoPayments.Initialize({
mode: "test", // 'test' or 'live'
onEvent: (event) => {
console.log("Checkout event:", event);
},
theme: "light", // 'light' or 'dark'
linkType: "static", // 'static' or 'dynamic'
displayType: "overlay"
});
// Open checkout
DodoPayments.Checkout.open({
products: [
{
productId: "pdt_your_product_id",
quantity: 1,
},
],
redirectUrl: "https://your-website.com/success",
});
```
## Configuration
### Initialize Options
```typescript
interface InitializeOptions {
mode: "test" | "live";
onEvent: (event: CheckoutEvent) => void;
theme?: "light" | "dark";
linkType?: "static" | "dynamic";
displayType: "overlay";
}
```
| Option | Type | Required | Description |
| ------------- | -------- | -------- | ---------------------------------------------- |
| `mode` | string | Yes | Environment mode: 'test' or 'live' |
| `onEvent` | function | Yes | Callback function for handling checkout events |
| `theme` | string | No | UI theme: 'light' or 'dark' |
| `linkType` | string | No | Payment link type: 'static' or 'dynamic' |
| `displayType` | string | Yes | Display type, must be 'overlay' |
### Checkout Options
```typescript
interface CheckoutOptions {
products?: {
productId: string;
quantity: number;
}[];
paymentLink?: string;
redirectUrl?: string;
queryParams?: Record
* Live Demo: [https://atlas.dodopayments.com](https://atlas.dodopayments.com#overlay-checkout)
* Github code for demo: [https://github.com/dodopayments/dodo-checkout-demo](https://github.com/dodopayments/dodo-checkout-demo/blob/main/src/components/Home/OverlayCheckout.tsx)
## Installation
```bash
# Using npm
npm install dodopayments-checkout
# Using yarn
yarn add dodopayments-checkout
# Using pnpm
pnpm add dodopayments-checkout
```
## Quick Start
```typescript
import { DodoPayments } from "dodopayments-checkout";
// Initialize the SDK
DodoPayments.Initialize({
mode: "test", // 'test' or 'live'
onEvent: (event) => {
console.log("Checkout event:", event);
},
theme: "light", // 'light' or 'dark'
linkType: "static", // 'static' or 'dynamic'
displayType: "overlay"
});
// Open checkout
DodoPayments.Checkout.open({
products: [
{
productId: "pdt_your_product_id",
quantity: 1,
},
],
redirectUrl: "https://your-website.com/success",
});
```
## Configuration
### Initialize Options
```typescript
interface InitializeOptions {
mode: "test" | "live";
onEvent: (event: CheckoutEvent) => void;
theme?: "light" | "dark";
linkType?: "static" | "dynamic";
displayType: "overlay";
}
```
| Option | Type | Required | Description |
| ------------- | -------- | -------- | ---------------------------------------------- |
| `mode` | string | Yes | Environment mode: 'test' or 'live' |
| `onEvent` | function | Yes | Callback function for handling checkout events |
| `theme` | string | No | UI theme: 'light' or 'dark' |
| `linkType` | string | No | Payment link type: 'static' or 'dynamic' |
| `displayType` | string | Yes | Display type, must be 'overlay' |
### Checkout Options
```typescript
interface CheckoutOptions {
products?: {
productId: string;
quantity: number;
}[];
paymentLink?: string;
redirectUrl?: string;
queryParams?: RecordPayment Successful!
Thank you for your purchase.
Payment Failed
Please try again or contact support.
 # Introduction
This guide will walk you through setting up and securely handling webhooks.
Our implementation follows the [Standard Webhooks](https://standardwebhooks.com/) specification.
## Getting Started
# Introduction
This guide will walk you through setting up and securely handling webhooks.
Our implementation follows the [Standard Webhooks](https://standardwebhooks.com/) specification.
## Getting Started
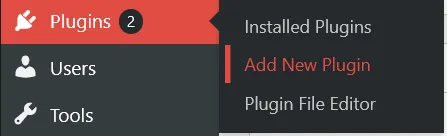 4. Click on the **Upload Plugin** button and a file selection dialog will appear

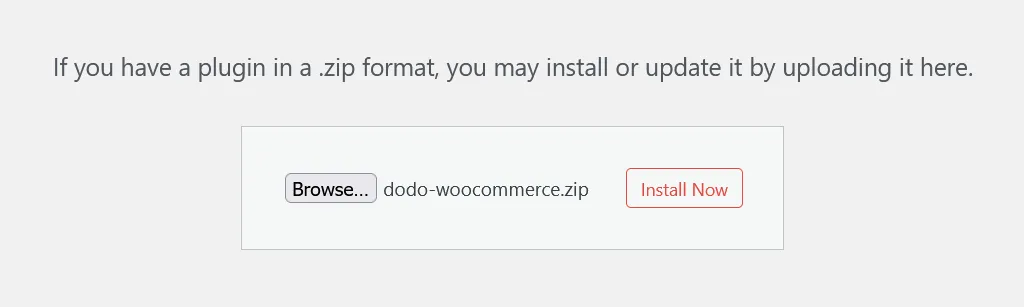
 5. Click **Browse…** and select the zip file you downloaded
6. Click the **Install Now** button to begin the installation process
5. Click **Browse…** and select the zip file you downloaded
6. Click the **Install Now** button to begin the installation process
 7. After installation completes, click **Activate Plugin** or activate it from the **Installed Plugins** section
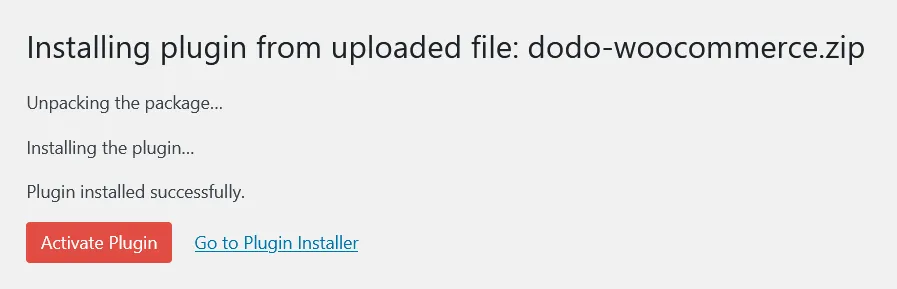 8. The plugin is now installed, but configuration is still required. Continue to the setup guide below.
## Configuration Guide
### Setting Up API Keys and Webhooks
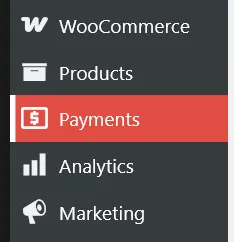
1. Navigate to **WooCommerce → Settings → Payments** or click the **Payments** button in the left sidebar below the WooCommerce menu item
8. The plugin is now installed, but configuration is still required. Continue to the setup guide below.
## Configuration Guide
### Setting Up API Keys and Webhooks
1. Navigate to **WooCommerce → Settings → Payments** or click the **Payments** button in the left sidebar below the WooCommerce menu item
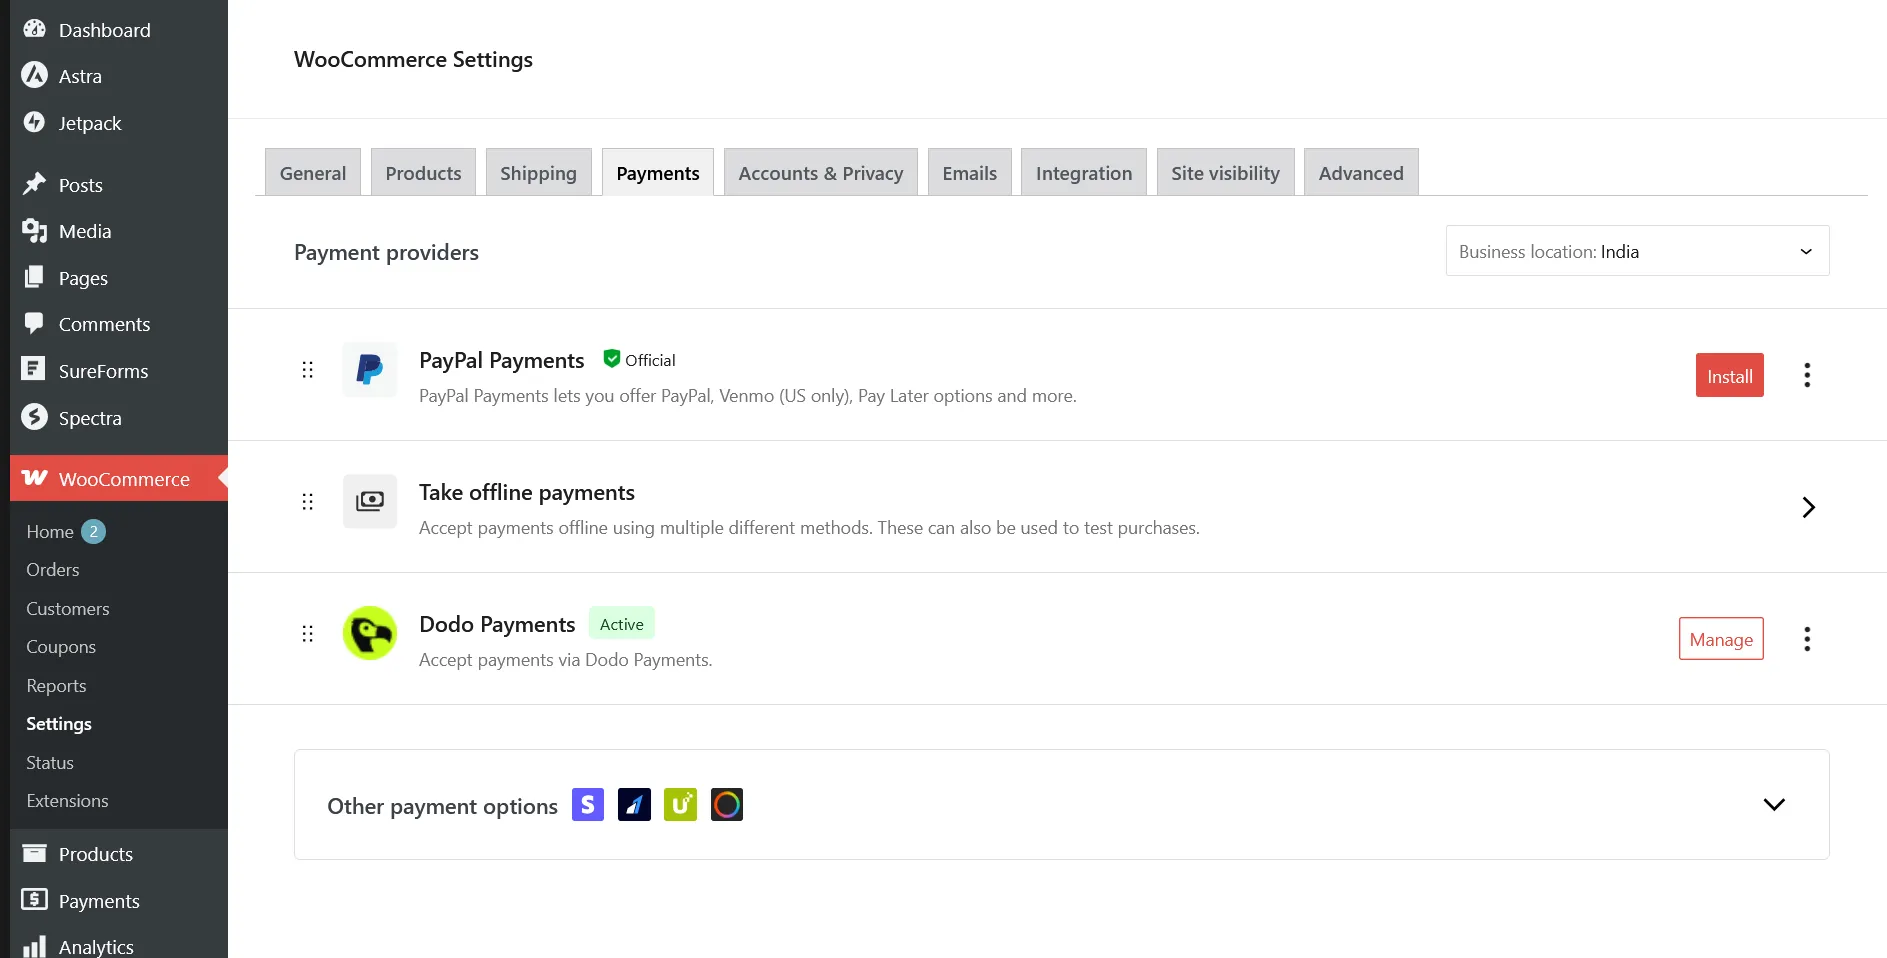
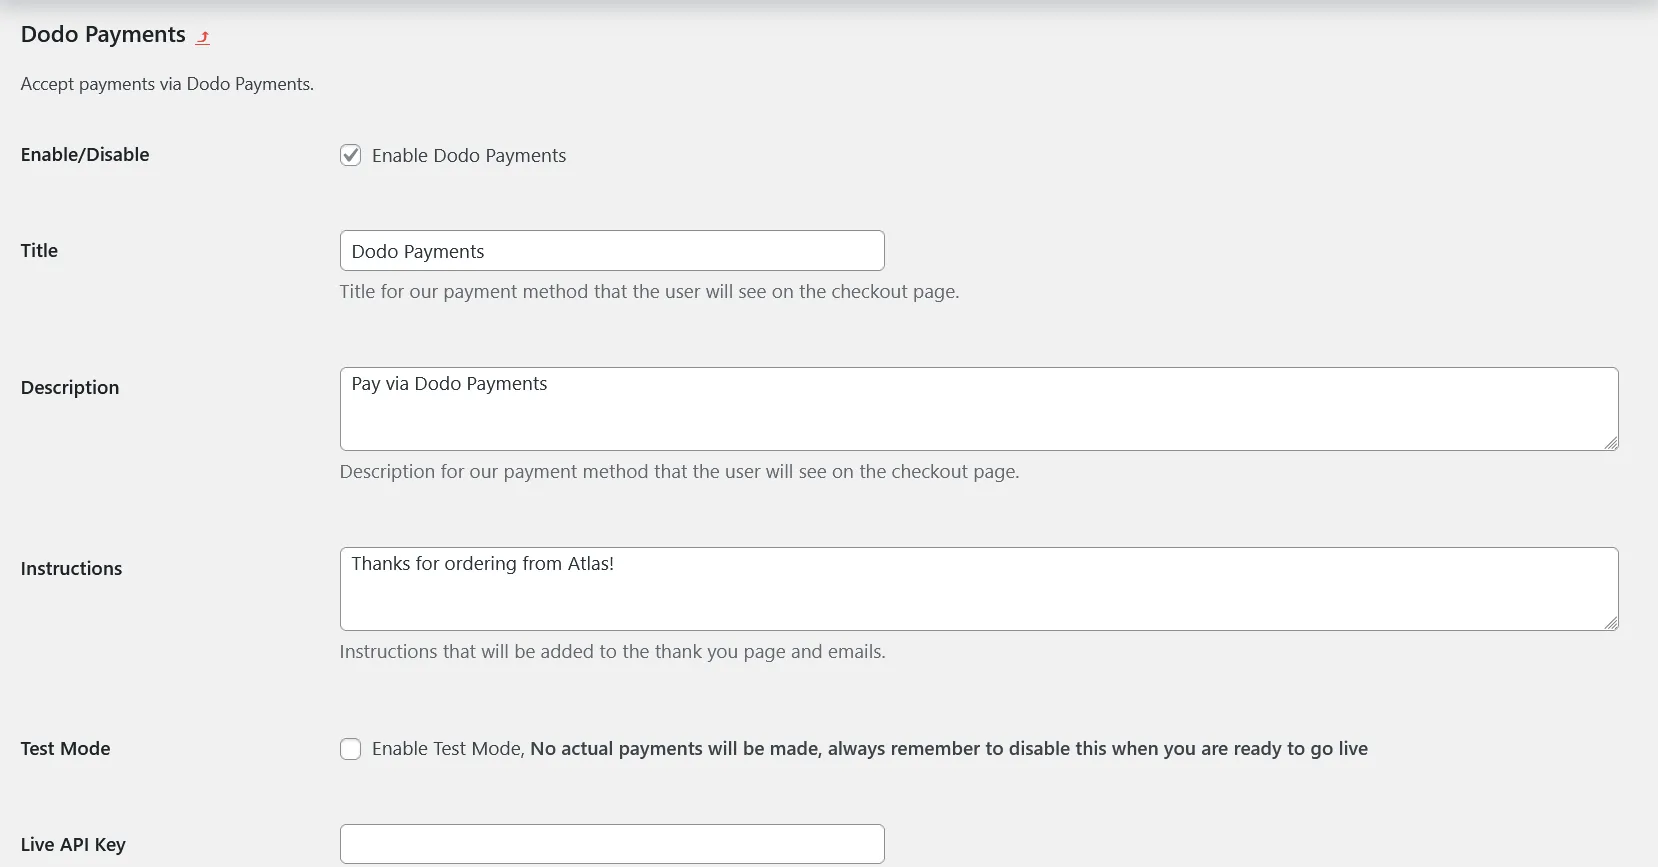
 2. Enable the **Dodo Payments** payment provider if not already enabled, then click **Manage** to configure the plugin
3. You'll see various configuration options, each with helpful explanatory text. Begin by setting up your Live API Key
2. Enable the **Dodo Payments** payment provider if not already enabled, then click **Manage** to configure the plugin
3. You'll see various configuration options, each with helpful explanatory text. Begin by setting up your Live API Key
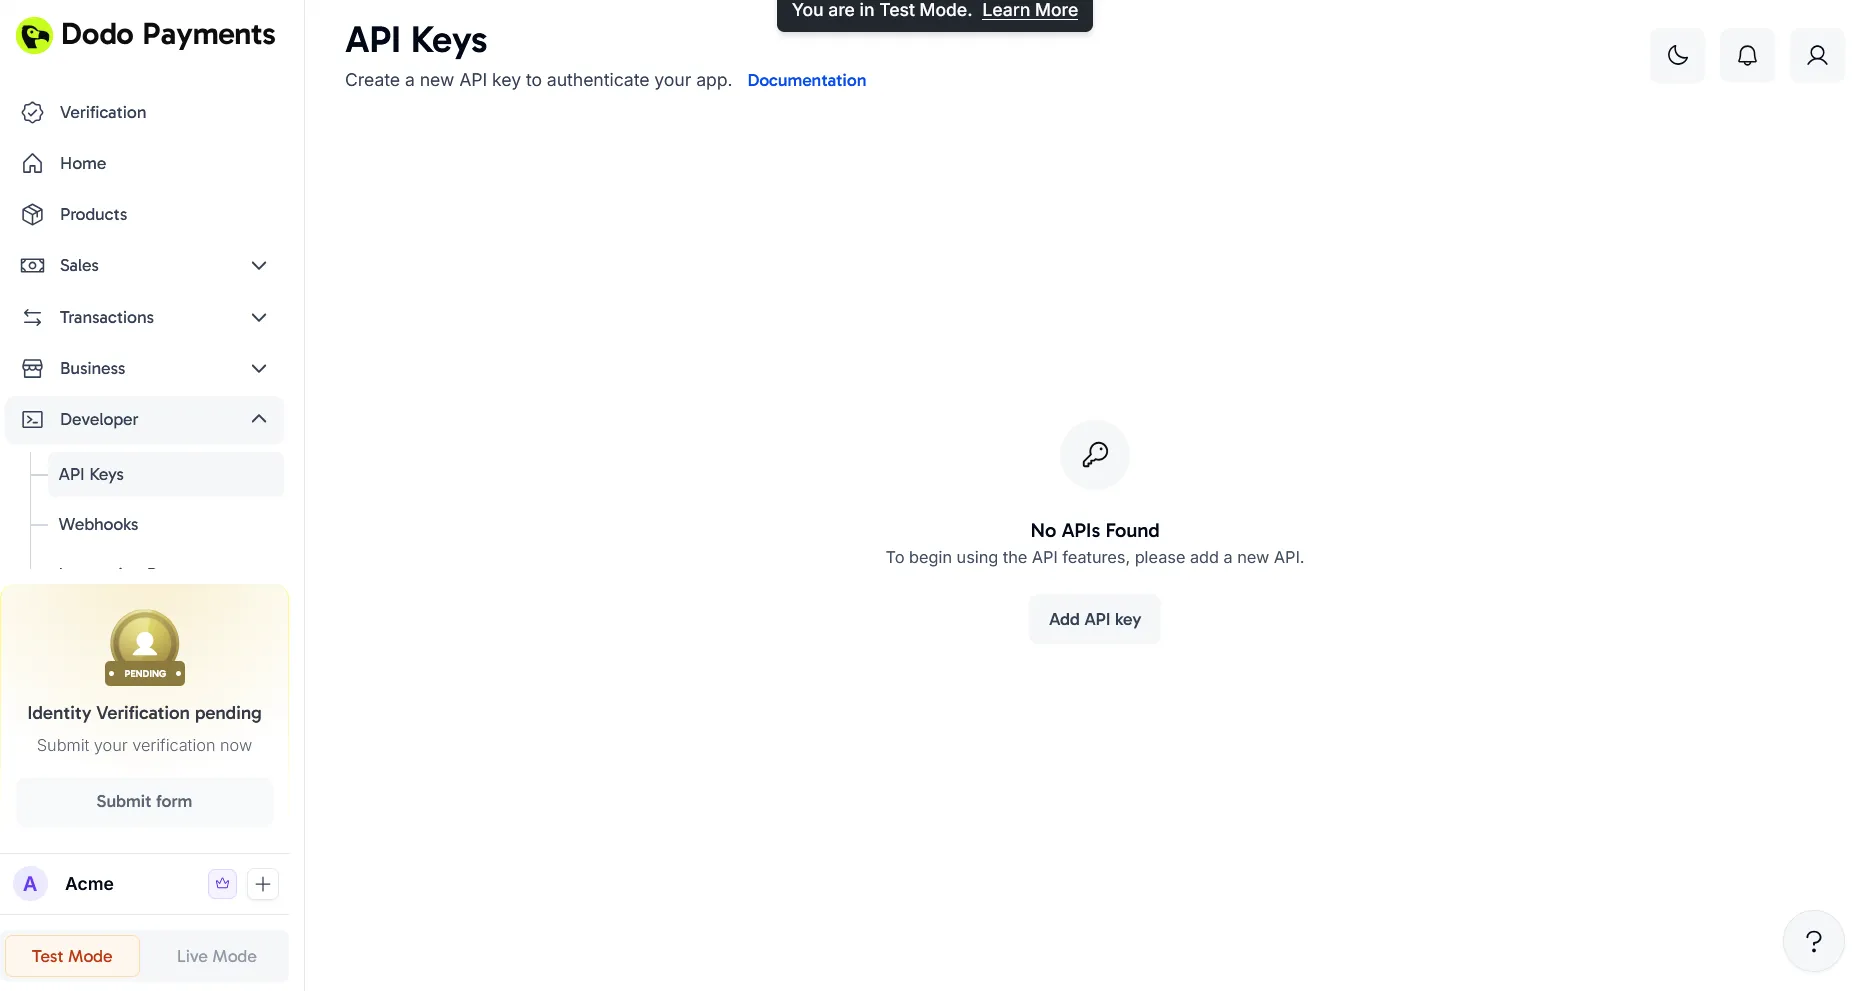
 4. Log in to your Dodo Payments dashboard in **Live Mode**, then navigate to **Dodo Payments (Live Mode) > Developer > API Keys** or visit [this direct link](https://app.dodopayments.com/developer/api-keys) and click **Add API Key**
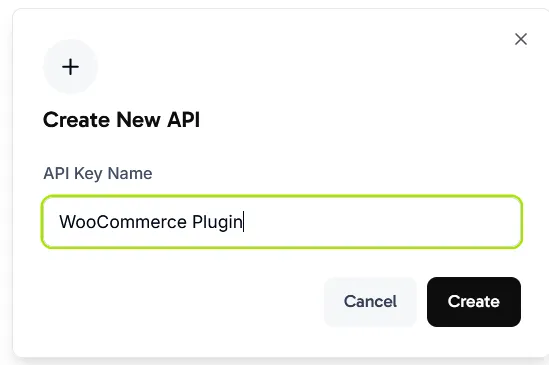
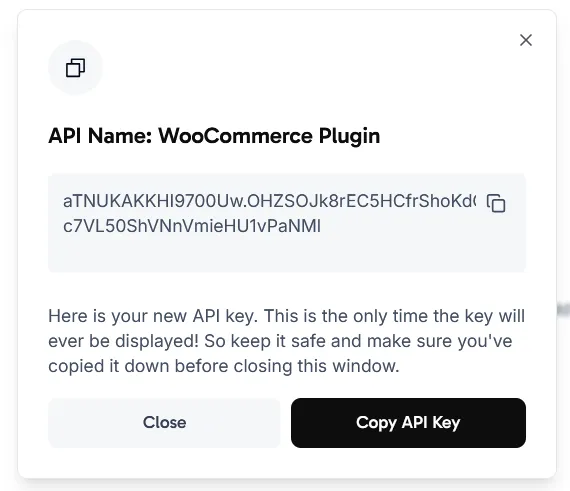
 5. Give your API Key a descriptive name and click **Create**
 6. Copy the generated API Key and paste it into the **Live API Key** field in your WooCommerce plugin settings
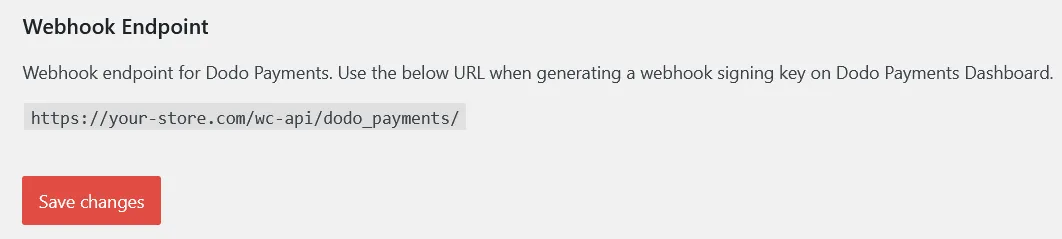
 7. Next, set up the Webhook Signing Key to enable payment status synchronization between Dodo Payments and WooCommerce
8. Scroll to the bottom of the plugin settings page and copy the webhook URL displayed there
7. Next, set up the Webhook Signing Key to enable payment status synchronization between Dodo Payments and WooCommerce
8. Scroll to the bottom of the plugin settings page and copy the webhook URL displayed there
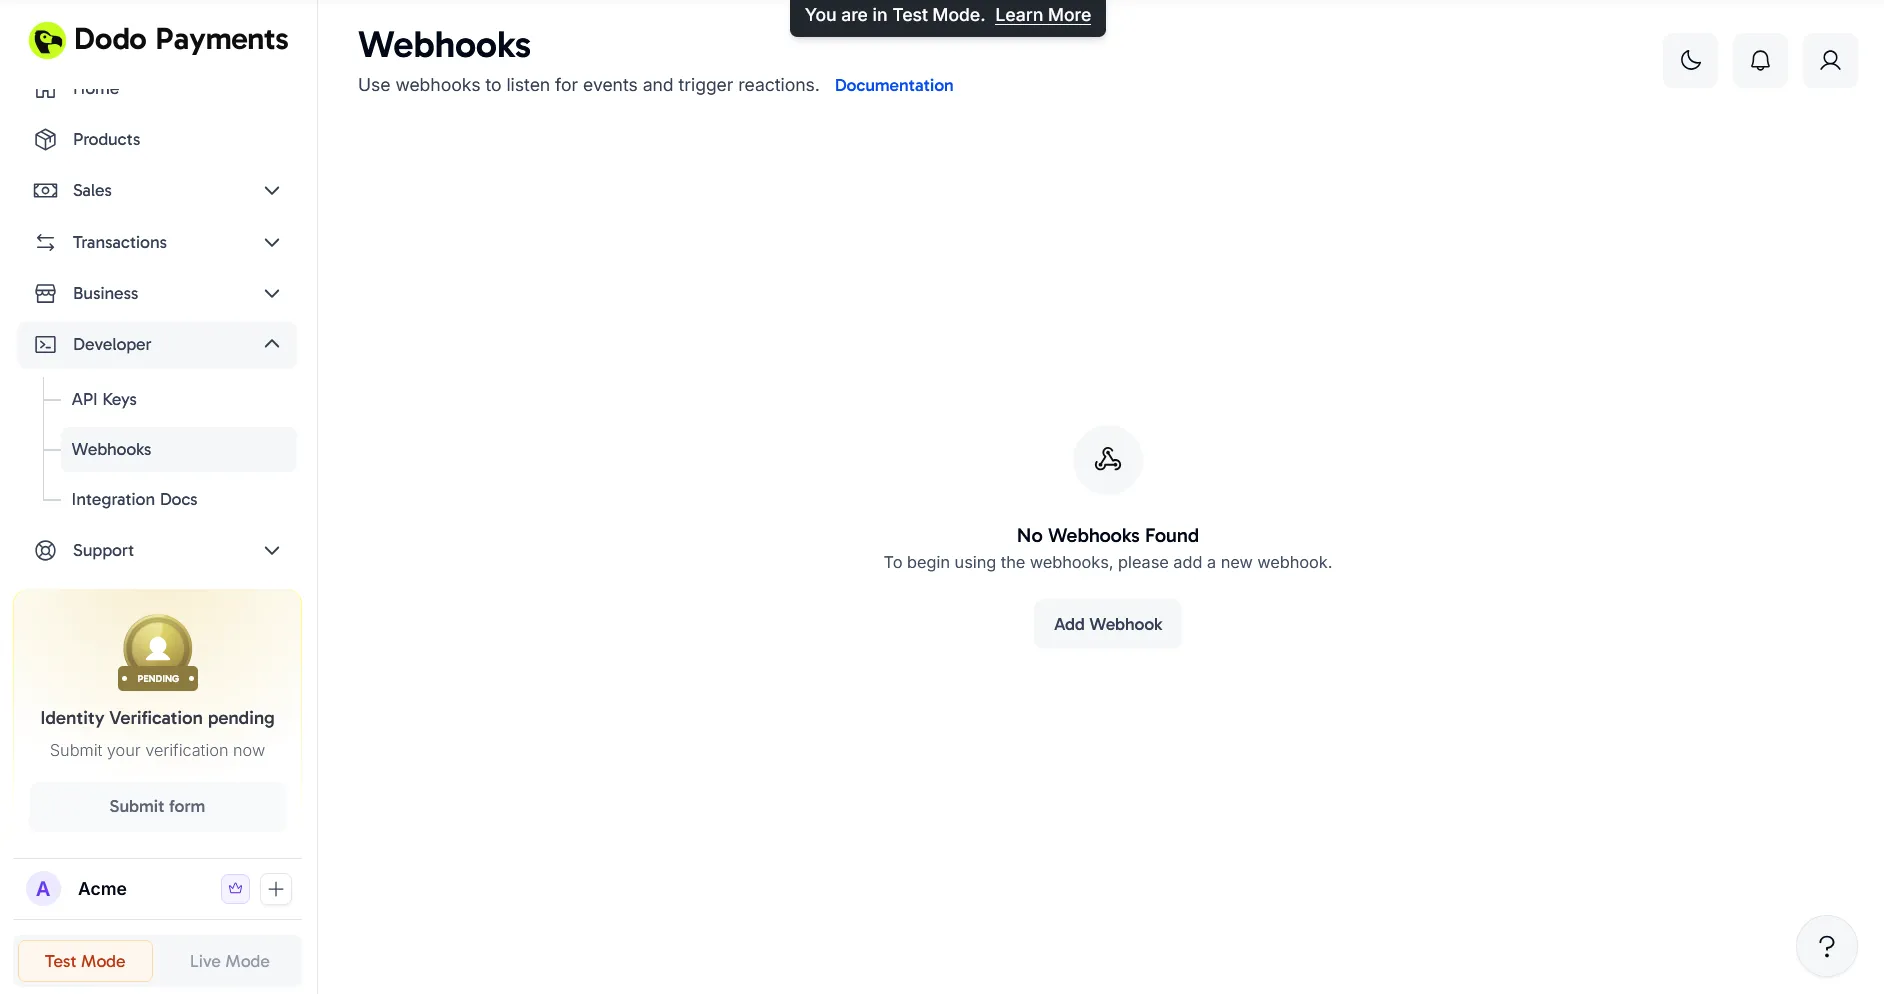
 9. Return to your Dodo Payments dashboard and navigate to **Dodo Payments (Live Mode) > Developer > Webhooks** and click **Add Webhook**
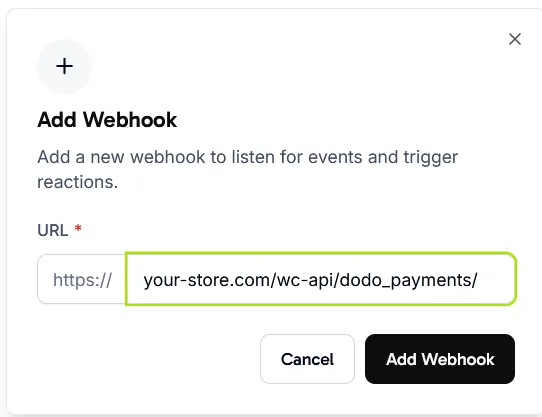
 10. Paste the URL you copied in step 8 into the dialog and click **Add Webhook**
 11. After creating the webhook, click the eye icon next to the redacted **Signing Key** to reveal and copy it
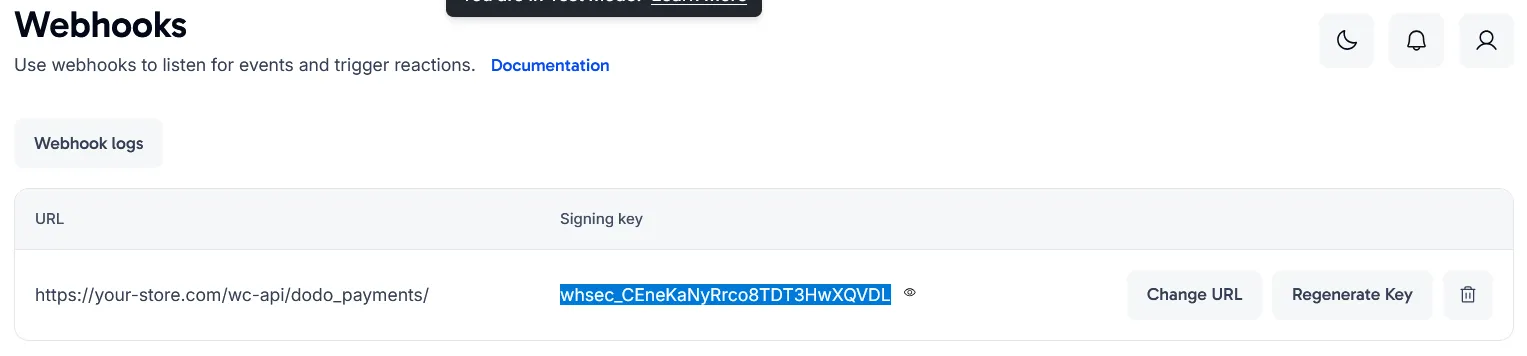 12. Paste the Signing Key into the **Live Webhook Signing Key** field in your plugin settings and save the changes
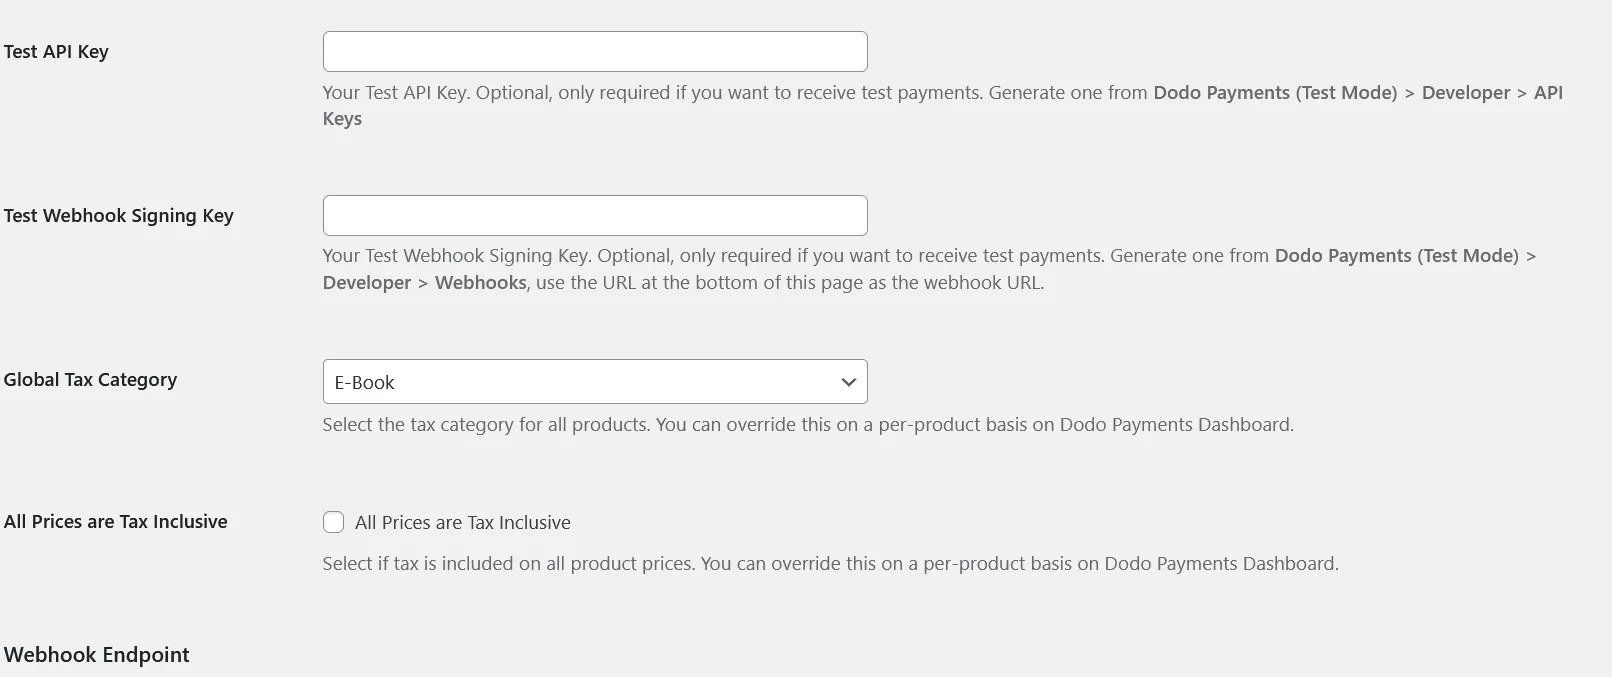
 13. Review the remaining settings such as **Global Tax Category** and **All Prices are Tax Inclusive**, as these options determine how products sync from WooCommerce to Dodo Payments. Note that **Test API Key** and **Test Webhook Signing Key** are only needed if you plan to use Test Mode
 ## You're All Set!
Your WooCommerce store is now integrated with Dodo Payments! Customers can select Dodo Payments at checkout to access all supported payment methods.
## You're All Set!
Your WooCommerce store is now integrated with Dodo Payments! Customers can select Dodo Payments at checkout to access all supported payment methods.
 When customers choose Dodo Payments, they'll be seamlessly redirected to the Dodo Payments checkout page to complete their transaction.
 ## Key Features
* **Seamless Checkout Experience**: Redirect customers to a secure, optimized checkout page
* **Multiple Payment Methods**: Support for various local and international payment options
* **Real-time Status Updates**: Instant order status synchronization via webhooks
* **Detailed Transaction Records**: Comprehensive payment history in your WooCommerce dashboard
* **Multi-currency Support**: Accept payments in multiple currencies
## Troubleshooting
### Common Issues
1. **Payment Processing Failures**
* Verify API keys are correctly configured
* Ensure webhook URL is properly set up
* Check that your SSL certificate is valid
2. **Webhook Synchronization Problems**
* Confirm webhook signing key matches
* Review server logs for potential errors
* Verify your server can receive incoming webhook requests
### Support Resources
For additional assistance:
* Contact us at [support@dodopayments.com](mailto:support@dodopayments.com)
* Refer to our [comprehensive documentation](https://docs.dodopayments.com)
## Maintenance Best Practices
1. Regularly update the plugin for security patches and new features
2. Test all payment flows in sandbox mode before processing live transactions
3. Keep WordPress and WooCommerce updated to the latest versions
4. Implement regular site backups
5. Monitor transaction logs for any unusual activity
6. Store API keys securely and never share them publicly
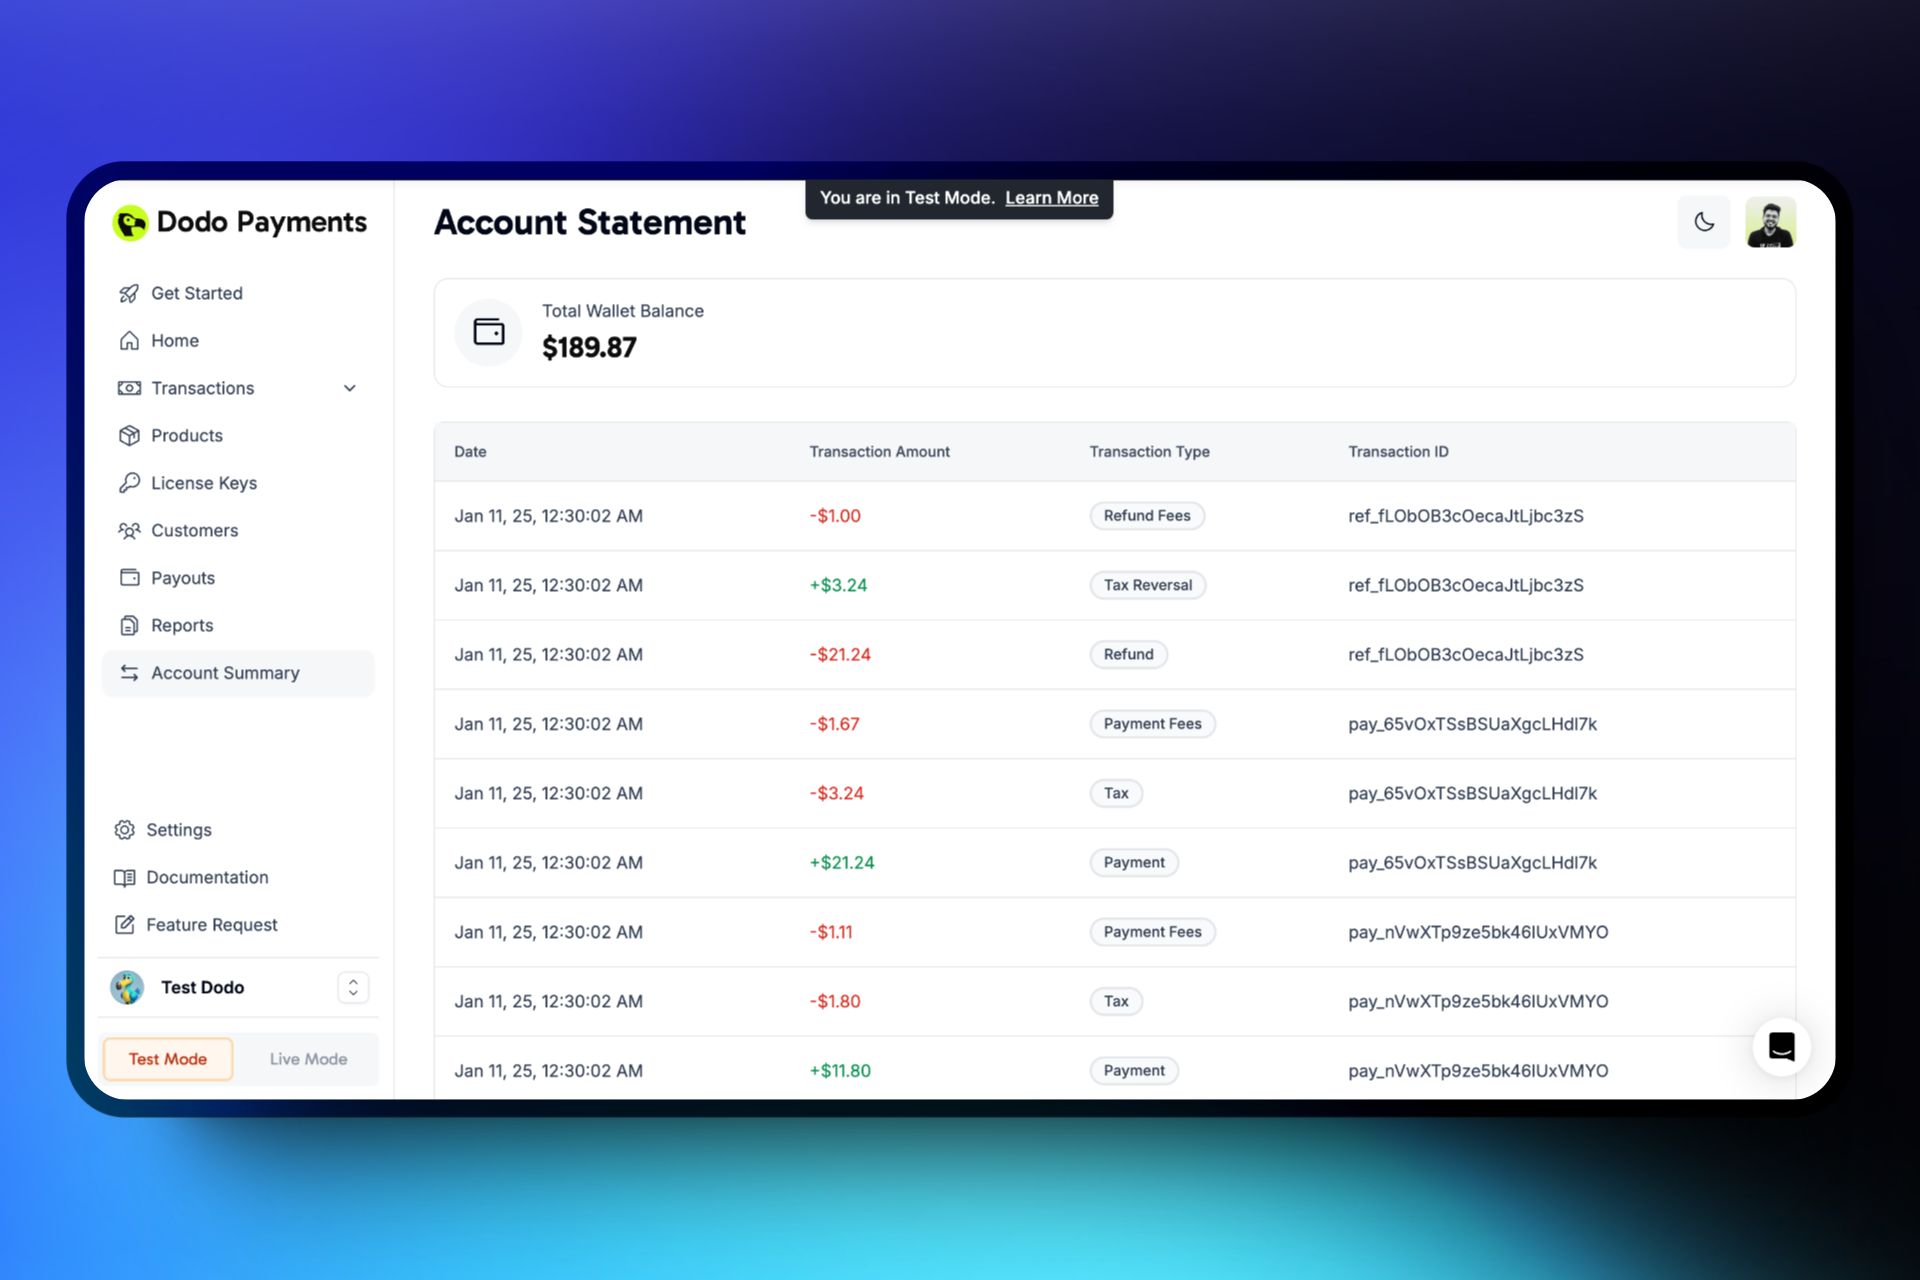
# Account Summary & Payout Wallet
Source: https://docs.dodopayments.com/features/account-summary-payout-wallet
Learn about the Account Summary and Payout Wallet features in Dodo Payments. This guide provides a comprehensive overview of transaction types, and amounts, as well as insights into managing your payout wallet for seamless financial operations.
## Introduction
The **Account Summary** offers a detailed breakdown of all financial transactions, including payments, refunds, payouts, transaction fees, and taxes. This ensures full visibility into the merchant’s earnings and deductions.
## Key Details
1. **Transaction Types**
* **Payment (+)**: Successful payments (Credit).
* **Refund (-)**: Returned amounts (Debit).
* **Transaction Fees (-)**: Processing fees for payments (Debit).
* **Refund Fees (-)**: Transaction fees for refunds (Debit).
* **Sales Tax (-)**: Tax charged on payments (Debit).
* **Sales Tax Refund (+)**: Refunded sales tax on refunds (Credit).
* **Payout (-)**: Amount paid out to the merchant (Debit).
* **Payout Fees (-)**: Transaction fees associated with the payout (Debit).
2. **Transaction Amount**
* Total amount associated with the transaction.
3. **Transaction Timestamp**
* Timestamp of each transaction.
4. **Transaction ID**
* Unique identifier for easy tracking.
## Payout Wallet
The **Payout Wallet** provides merchants with a clear overview of their eligible earnings. This feature simplifies the payout process, offering transparency over financial disbursements. The wallet amount summarizes all the transactions in the account summary and displays the amount eligible for the next payout cycle.
## Conclusion
Both the **Payout Wallet** and **Account Summary** features streamline financial operations for merchants, offering transparency. These tools ensure a seamless payout experience and accurate transaction tracking, vital for effective financial management. In case of any discrepancy noticed in the transactions, please reach out to us at [support@dodopayments.com](mailto:support@dodopayments.com) with the transaction ID and issue.
# Adaptive Currency
Source: https://docs.dodopayments.com/features/adaptive-currency
Adaptive Currency enables merchants to display prices in customers' local currencies, reducing friction at checkout and improving conversion rates by providing a localized payment experience with automatic currency detection and conversion.
## Introduction & Highlights
**What is Adaptive Currency?**
Adaptive Currency allows merchants to show product prices in the **customer's local currency** rather than a fixed global currency (e.g., USD or INR). This reduces friction at checkout, improves user trust, and increases the likelihood of successful payments.
**Key Benefits:**
* ✨ **Localized Payment Experience**: Show customers prices in their local currencies
* 🔓 **Unlock more payment methods**: Show customers more payment methods associated with their local currency
* 💱 **Same Currency Refunds**: Customers get refunded in the currency they paid with
## How to Enable It on the Dashboard
1. Log into your **Merchant Dashboard**
2. Navigate to Business **→ Business Settings**
3. Toggle the switch to **Enable Adaptive Pricing**
4. You can disable it at any time
5. Changes apply **only to future transactions**
## Key Features
* **Seamless Checkout Experience**: Redirect customers to a secure, optimized checkout page
* **Multiple Payment Methods**: Support for various local and international payment options
* **Real-time Status Updates**: Instant order status synchronization via webhooks
* **Detailed Transaction Records**: Comprehensive payment history in your WooCommerce dashboard
* **Multi-currency Support**: Accept payments in multiple currencies
## Troubleshooting
### Common Issues
1. **Payment Processing Failures**
* Verify API keys are correctly configured
* Ensure webhook URL is properly set up
* Check that your SSL certificate is valid
2. **Webhook Synchronization Problems**
* Confirm webhook signing key matches
* Review server logs for potential errors
* Verify your server can receive incoming webhook requests
### Support Resources
For additional assistance:
* Contact us at [support@dodopayments.com](mailto:support@dodopayments.com)
* Refer to our [comprehensive documentation](https://docs.dodopayments.com)
## Maintenance Best Practices
1. Regularly update the plugin for security patches and new features
2. Test all payment flows in sandbox mode before processing live transactions
3. Keep WordPress and WooCommerce updated to the latest versions
4. Implement regular site backups
5. Monitor transaction logs for any unusual activity
6. Store API keys securely and never share them publicly
# Account Summary & Payout Wallet
Source: https://docs.dodopayments.com/features/account-summary-payout-wallet
Learn about the Account Summary and Payout Wallet features in Dodo Payments. This guide provides a comprehensive overview of transaction types, and amounts, as well as insights into managing your payout wallet for seamless financial operations.
## Introduction
The **Account Summary** offers a detailed breakdown of all financial transactions, including payments, refunds, payouts, transaction fees, and taxes. This ensures full visibility into the merchant’s earnings and deductions.
## Key Details
1. **Transaction Types**
* **Payment (+)**: Successful payments (Credit).
* **Refund (-)**: Returned amounts (Debit).
* **Transaction Fees (-)**: Processing fees for payments (Debit).
* **Refund Fees (-)**: Transaction fees for refunds (Debit).
* **Sales Tax (-)**: Tax charged on payments (Debit).
* **Sales Tax Refund (+)**: Refunded sales tax on refunds (Credit).
* **Payout (-)**: Amount paid out to the merchant (Debit).
* **Payout Fees (-)**: Transaction fees associated with the payout (Debit).
2. **Transaction Amount**
* Total amount associated with the transaction.
3. **Transaction Timestamp**
* Timestamp of each transaction.
4. **Transaction ID**
* Unique identifier for easy tracking.
## Payout Wallet
The **Payout Wallet** provides merchants with a clear overview of their eligible earnings. This feature simplifies the payout process, offering transparency over financial disbursements. The wallet amount summarizes all the transactions in the account summary and displays the amount eligible for the next payout cycle.
## Conclusion
Both the **Payout Wallet** and **Account Summary** features streamline financial operations for merchants, offering transparency. These tools ensure a seamless payout experience and accurate transaction tracking, vital for effective financial management. In case of any discrepancy noticed in the transactions, please reach out to us at [support@dodopayments.com](mailto:support@dodopayments.com) with the transaction ID and issue.
# Adaptive Currency
Source: https://docs.dodopayments.com/features/adaptive-currency
Adaptive Currency enables merchants to display prices in customers' local currencies, reducing friction at checkout and improving conversion rates by providing a localized payment experience with automatic currency detection and conversion.
## Introduction & Highlights
**What is Adaptive Currency?**
Adaptive Currency allows merchants to show product prices in the **customer's local currency** rather than a fixed global currency (e.g., USD or INR). This reduces friction at checkout, improves user trust, and increases the likelihood of successful payments.
**Key Benefits:**
* ✨ **Localized Payment Experience**: Show customers prices in their local currencies
* 🔓 **Unlock more payment methods**: Show customers more payment methods associated with their local currency
* 💱 **Same Currency Refunds**: Customers get refunded in the currency they paid with
## How to Enable It on the Dashboard
1. Log into your **Merchant Dashboard**
2. Navigate to Business **→ Business Settings**
3. Toggle the switch to **Enable Adaptive Pricing**
4. You can disable it at any time
5. Changes apply **only to future transactions**
 ## Customer Flow
1. 🏁 **User Begins Checkout**
* System detects the user's country based on billing address
2. 💵 **Currency Selection**
* If Adaptive Pricing is enabled and the country is supported, prices are shown in the local currency by default
* Users can switch to global currency (USD) if preferred
3. 🔄 **Conversion & Fees**
Adaptive Currency allows your customer to pay in their local currency using the latest exchange rates
**Fees**
* **You Pay 0%**
* **Your customers pay 2-4% based on the order value**
You (the business) don’t directly pay any additional fees for adaptive currency as all the fees are borne by your customer. We have a tiered fees structure which will be applied during checkout as mentioned below
* Fees are tiered:
* 4% for orders under \$500
* 3% for \$500–\$1,500
* 2% for over \$1,500
4. 💳 **Payment Experience**
* User sees localized payment methods (where applicable)
* Checkout and payment are completed in the selected currency
5. 📝 **Transaction Record**
* Merchant dashboard shows the transaction in global currency (USD) only
## Supported Currencies
| Currency Code | **Currency Name** | **Countries** | **Min Amount** |
| ------------- | ------------------------------ | ------------------------------------------------------------------------------------------------------------------------------------------------------------------------------------------------------------ | -------------- |
| AED | UAE Dirham | United Arab Emirates | 2.00 AED |
| ALL | Albanian Lek | Albania | 50 ALL |
| AUD | Australian Dollar | Australia, Nauru | \$0.50 |
| BRL | Brazilian Real | Brazil | R\$0.50 |
| CAD | Canadian Dollar | Canada | \$0.50 |
| CHF | Swiss Franc | Switzerland, Liechtenstein | 0.50 Fr |
| CNY | Chinese Yuan | China | 4 Yuan |
| CZK | Czech Koruna | Czech Republic | 15.00Kč |
| DKK | Danish Krone | Denmark, Greenland | 2.50-kr. |
| EUR | Euro | Austria, Belgium, Cyprus, Estonia, Finland, France, Germany, Greece, Ireland, Italy, Latvia, Lithuania, Luxembourg, Malta, Netherlands, Portugal, Slovakia, Slovenia, Spain, Andorra, San Marino, Montenegro | €0.50 |
| GBP | Pound Sterling (British Pound) | United Kingdom | £0.30 |
| HKD | Hong Kong Dollar | Hong Kong | \$4.00 |
| HUF | Hungarian Forint | Hungary | 175.00 Ft |
| IDR | Indonesian Rupiah | Indonesia | 8500 IDR |
| MXN | Mexican Peso | Mexico | Mex\$10 |
| NOK | Norwegian Krone | Norway | 3.00-kr. |
| PLN | Polish Zloty | Poland | 2.00 zł |
| RON | Romanian Leu | Romania | lei2.00 |
| RSD | Serbian Dinar | Serbia | 60 RSD |
| SAR | Saudi Riyal | Saudi Arabia | 2 SAR |
| SEK | Swedish Krona | Sweden | 3.00-kr. |
| SGD | Singapore Dollar | Singapore | \$0.50 |
| TRY | Turkish Lira | Turkey | 20 TRY |
| TWD | New Taiwan Dollar | Taiwan | 20NT\$ |
## Additional Details
### 🔄 Refunds
Dodo Payments pays out refunds in the currency your customer pays in using the latest exchange rate. The global currency (USD) amount remains fixed and the same will be shown on your dashboard and invoices and the same is refunded. This means that your customer may get more or less than the original paid amount depending on how the exchange rate changes during refund transfer. Adaptive Currency fees are not refunded.
#### Example Refund
We ignore Dodo Payment fees in this example for simplicity. Suppose:
1. You’re a US business that uses Checkout to sell a product for 100 USD and have activated Adaptive Currency
2. A customer in Canada views your Checkout page, sees the localized price of 137 CAD at an exchange rate of 1.37 CAD per 1 USD, and completes the purchase.
3. We process the payment, converting the 137 CAD to 100 USD to pay you in your settlement currency.
4. Later, when the exchange rate has changed to 1.40 CAD per 1 USD, you issue a full refund to the customer.
5. We deduct 100 USD from your account and transfer the same to your customer. He will receive 140 CAD as the refund amount.
**📄 Invoice & Taxation**
* Invoices show only the **global currency (USD)** value.
* Taxes and platform fees are calculated based on this global amount.
* For example, a \$10 sale converted to 36 AED will still reflect as \$10 in the Dashboard and invoices
**🔢 Fee Rounding**
* All amounts are rounded according to Dodo Payments internal rounding logic
# Affiliates
Source: https://docs.dodopayments.com/features/affiliates
Launch and manage your affiliate program while processing transactions through Dodo Payments.
## Introduction
This guide walks you through how to track affiliate referrals, handle commission events, and grow your revenue with trusted affiliate partnerships via Dodo Payments.
## Key Features
## Customer Flow
1. 🏁 **User Begins Checkout**
* System detects the user's country based on billing address
2. 💵 **Currency Selection**
* If Adaptive Pricing is enabled and the country is supported, prices are shown in the local currency by default
* Users can switch to global currency (USD) if preferred
3. 🔄 **Conversion & Fees**
Adaptive Currency allows your customer to pay in their local currency using the latest exchange rates
**Fees**
* **You Pay 0%**
* **Your customers pay 2-4% based on the order value**
You (the business) don’t directly pay any additional fees for adaptive currency as all the fees are borne by your customer. We have a tiered fees structure which will be applied during checkout as mentioned below
* Fees are tiered:
* 4% for orders under \$500
* 3% for \$500–\$1,500
* 2% for over \$1,500
4. 💳 **Payment Experience**
* User sees localized payment methods (where applicable)
* Checkout and payment are completed in the selected currency
5. 📝 **Transaction Record**
* Merchant dashboard shows the transaction in global currency (USD) only
## Supported Currencies
| Currency Code | **Currency Name** | **Countries** | **Min Amount** |
| ------------- | ------------------------------ | ------------------------------------------------------------------------------------------------------------------------------------------------------------------------------------------------------------ | -------------- |
| AED | UAE Dirham | United Arab Emirates | 2.00 AED |
| ALL | Albanian Lek | Albania | 50 ALL |
| AUD | Australian Dollar | Australia, Nauru | \$0.50 |
| BRL | Brazilian Real | Brazil | R\$0.50 |
| CAD | Canadian Dollar | Canada | \$0.50 |
| CHF | Swiss Franc | Switzerland, Liechtenstein | 0.50 Fr |
| CNY | Chinese Yuan | China | 4 Yuan |
| CZK | Czech Koruna | Czech Republic | 15.00Kč |
| DKK | Danish Krone | Denmark, Greenland | 2.50-kr. |
| EUR | Euro | Austria, Belgium, Cyprus, Estonia, Finland, France, Germany, Greece, Ireland, Italy, Latvia, Lithuania, Luxembourg, Malta, Netherlands, Portugal, Slovakia, Slovenia, Spain, Andorra, San Marino, Montenegro | €0.50 |
| GBP | Pound Sterling (British Pound) | United Kingdom | £0.30 |
| HKD | Hong Kong Dollar | Hong Kong | \$4.00 |
| HUF | Hungarian Forint | Hungary | 175.00 Ft |
| IDR | Indonesian Rupiah | Indonesia | 8500 IDR |
| MXN | Mexican Peso | Mexico | Mex\$10 |
| NOK | Norwegian Krone | Norway | 3.00-kr. |
| PLN | Polish Zloty | Poland | 2.00 zł |
| RON | Romanian Leu | Romania | lei2.00 |
| RSD | Serbian Dinar | Serbia | 60 RSD |
| SAR | Saudi Riyal | Saudi Arabia | 2 SAR |
| SEK | Swedish Krona | Sweden | 3.00-kr. |
| SGD | Singapore Dollar | Singapore | \$0.50 |
| TRY | Turkish Lira | Turkey | 20 TRY |
| TWD | New Taiwan Dollar | Taiwan | 20NT\$ |
## Additional Details
### 🔄 Refunds
Dodo Payments pays out refunds in the currency your customer pays in using the latest exchange rate. The global currency (USD) amount remains fixed and the same will be shown on your dashboard and invoices and the same is refunded. This means that your customer may get more or less than the original paid amount depending on how the exchange rate changes during refund transfer. Adaptive Currency fees are not refunded.
#### Example Refund
We ignore Dodo Payment fees in this example for simplicity. Suppose:
1. You’re a US business that uses Checkout to sell a product for 100 USD and have activated Adaptive Currency
2. A customer in Canada views your Checkout page, sees the localized price of 137 CAD at an exchange rate of 1.37 CAD per 1 USD, and completes the purchase.
3. We process the payment, converting the 137 CAD to 100 USD to pay you in your settlement currency.
4. Later, when the exchange rate has changed to 1.40 CAD per 1 USD, you issue a full refund to the customer.
5. We deduct 100 USD from your account and transfer the same to your customer. He will receive 140 CAD as the refund amount.
**📄 Invoice & Taxation**
* Invoices show only the **global currency (USD)** value.
* Taxes and platform fees are calculated based on this global amount.
* For example, a \$10 sale converted to 36 AED will still reflect as \$10 in the Dashboard and invoices
**🔢 Fee Rounding**
* All amounts are rounded according to Dodo Payments internal rounding logic
# Affiliates
Source: https://docs.dodopayments.com/features/affiliates
Launch and manage your affiliate program while processing transactions through Dodo Payments.
## Introduction
This guide walks you through how to track affiliate referrals, handle commission events, and grow your revenue with trusted affiliate partnerships via Dodo Payments.
## Key Features
 ## Introduction
The Analytics and Reporting feature in Dodo Payments provides merchants with powerful insights into their business' financial health and performance. This feature enables merchants to track key metrics, analyze sales data, review customer behavior, and monitor overall transaction activity. By offering a wide range of customizable reports, Dodo Payments helps businesses make data-driven decisions to optimize their payment flows, product offerings, and revenue growth.
## Key Highlights
## Introduction
The Analytics and Reporting feature in Dodo Payments provides merchants with powerful insights into their business' financial health and performance. This feature enables merchants to track key metrics, analyze sales data, review customer behavior, and monitor overall transaction activity. By offering a wide range of customizable reports, Dodo Payments helps businesses make data-driven decisions to optimize their payment flows, product offerings, and revenue growth.
## Key Highlights
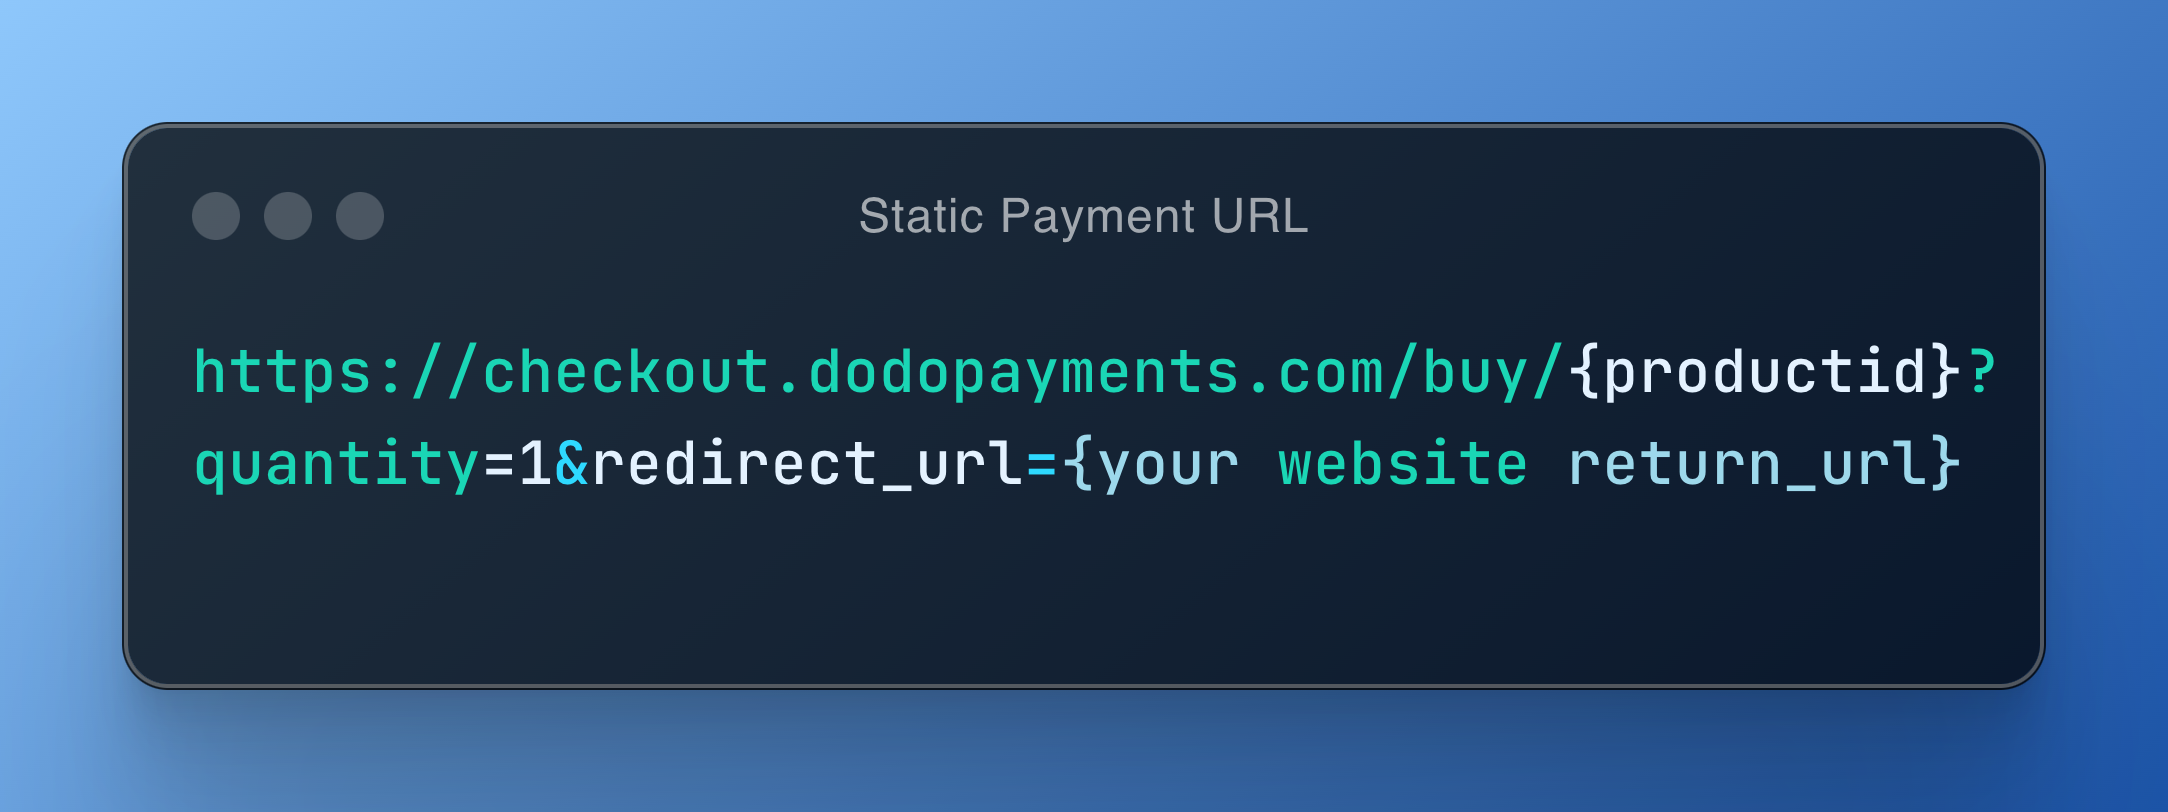
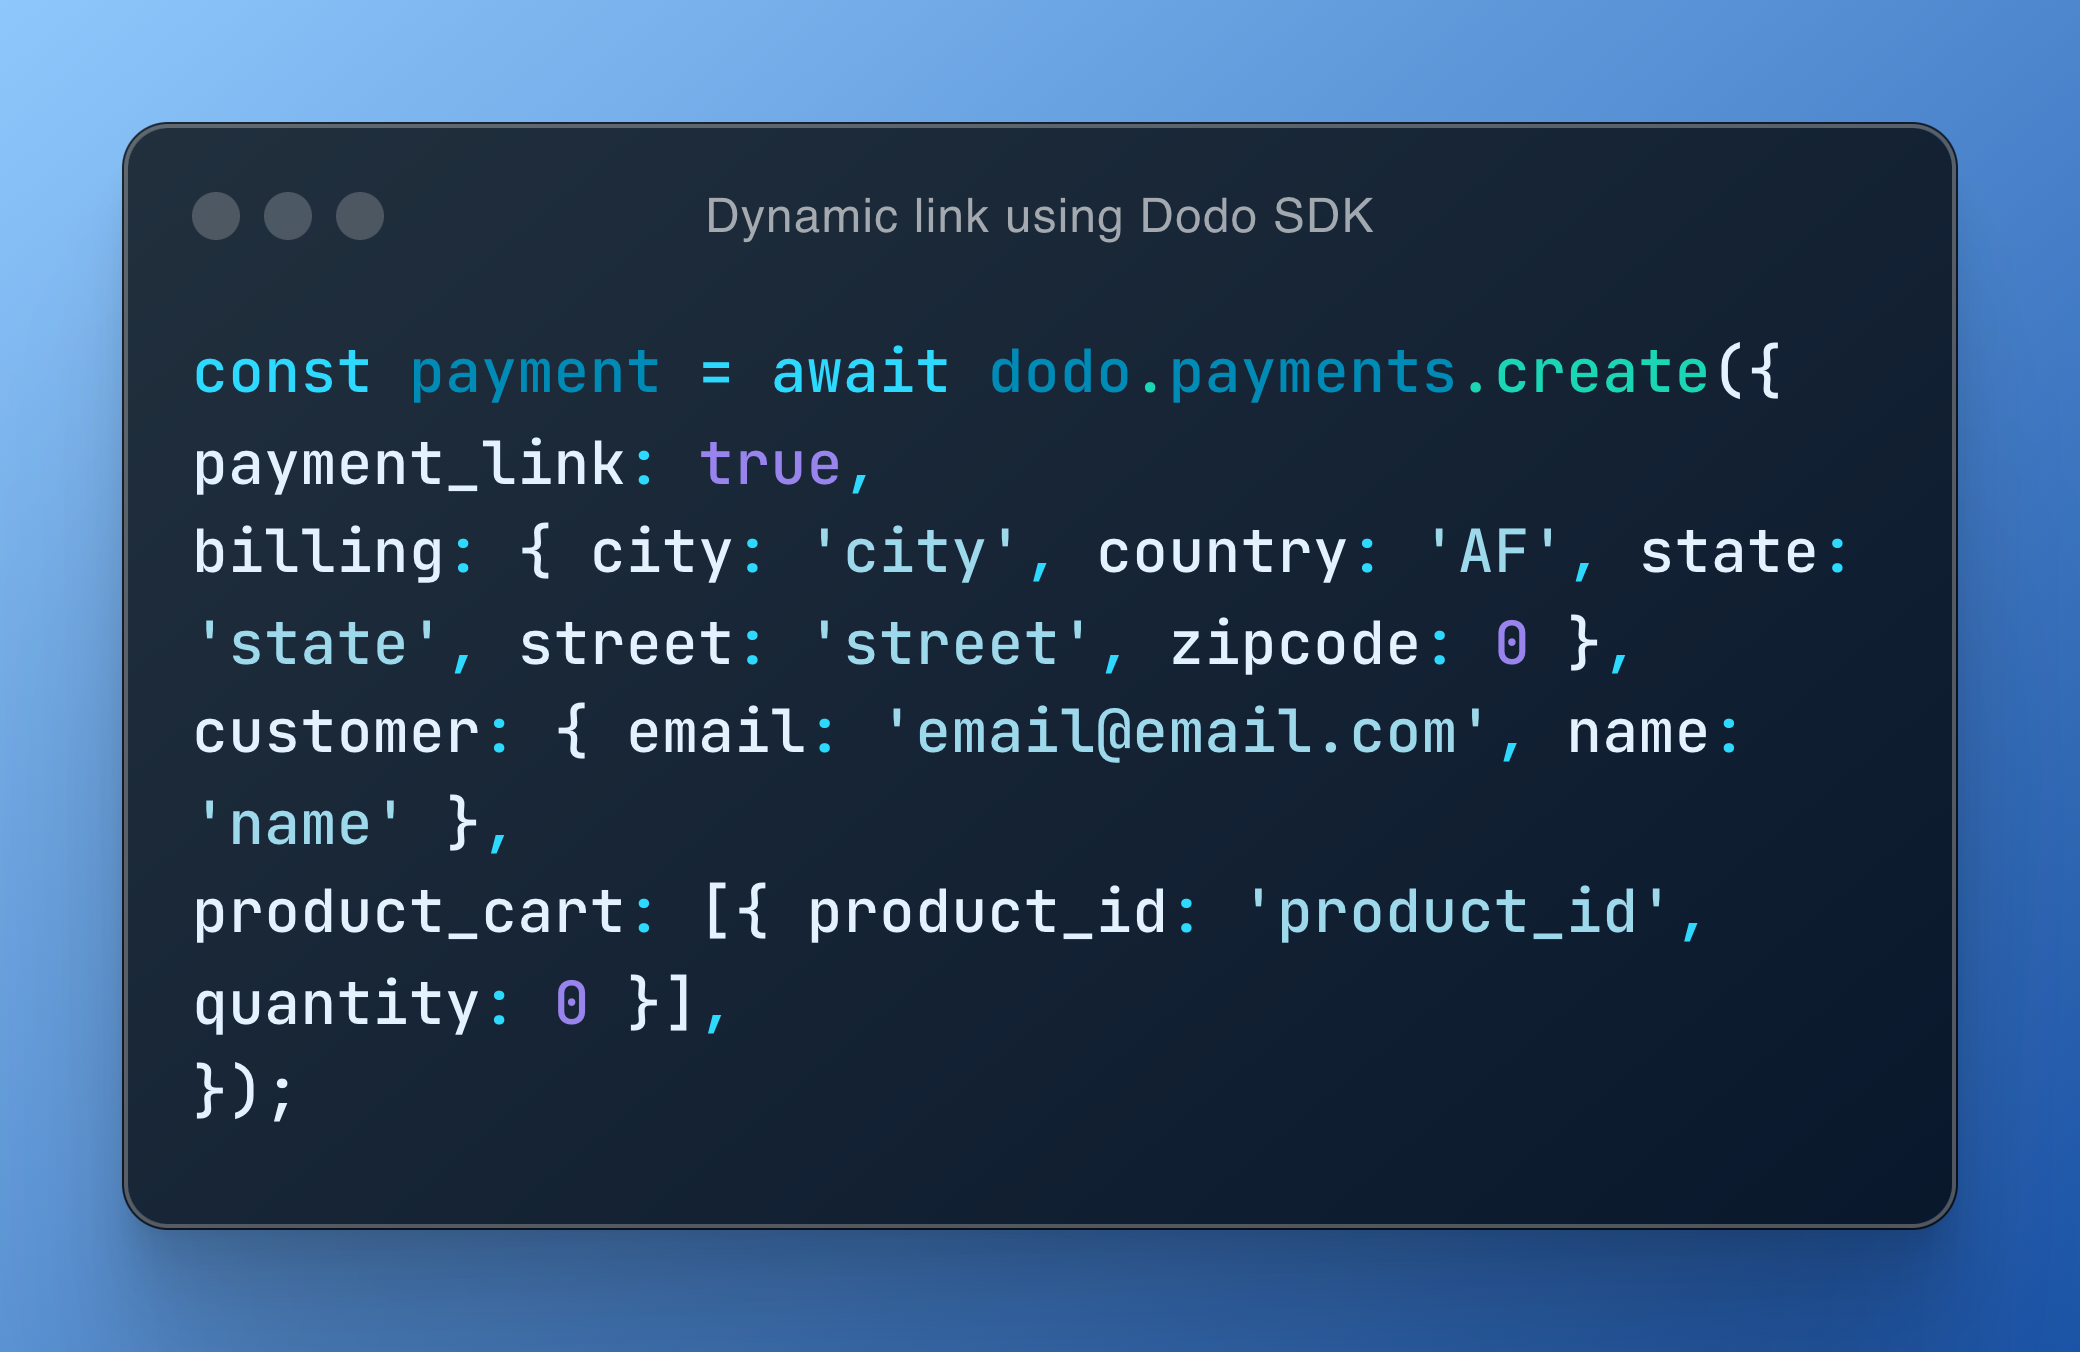 Atlas is powered by [Dodo Payments Node SDK](https://github.com/dodopayments/dodopayments-node.git) which is just a few lines of code
Follow this guide for integration: [Guide](/developer-resources/integration-guide)
This project is open source check it out [here](https://github.com/dodopayments/dodo-checkout-demo.git)
The **Atlas Demo Product** is a **realistic** environment demonstrating how merchants can **embed** Dodo Payments' checkout flows for both **subscription** and **one-time** transactions. A **post-purchase "My Account"** feature further illustrates how purchased digital assets can be managed and accessed, ensuring a smooth and professional user journey.
# B2B Payments
Source: https://docs.dodopayments.com/features/b2b-payments
The B2B Payments feature ensures that merchants processing B2B transactions have their customer’s Tax IDs verified during checkout, ensuring accurate tax application based on the customer's country and applicable regulations. This validation helps determine whether input tax collection applies or if the transaction falls under a reverse charge mechanism.
## **Tax ID Validation for B2B Transactions**
* If a **valid Tax ID** is provided during checkout, the invoice will include:
* The **customer’s Tax ID**.
* Tax deductions will be determined based on the applicable regulations for the customer’s country.
* The invoice will include **Dodo Payments’ tax details**, along with the tax applied to the transaction.
## **Tax Treatment for B2C Transactions**
* Transactions where a valid Tax ID is **not provided** will be treated as **B2C transactions**, and tax will be deducted as per the applicable tax regulations in the customer’s country.
* The invoice will include **Dodo Payments’ tax details**, along with the tax applied to the transaction.
## Reverse Charge Mechanism
Generally, the supplier of goods or services is liable to pay VAT/Service Tax/GST.
However, in specified cases like imports and other notified supplies, the liability is on the recipient (customer) under the reverse charge mechanism. Reverse Charge means the liability to pay tax is on the recipient of supply of goods or services instead of the supplier of such goods or services in respect of notified categories of supply.
## **Reverse Charge Applicability**
* In certain cases, where applicable by law, tax will **not be deducted** at checkout and the transaction will be subject to a **reverse charge mechanism**.
* The invoice will clearly indicate when a reverse charge applies, as per regulatory requirements.
# Customers
Source: https://docs.dodopayments.com/features/customers
The Customers Page in Dodo Payments allows merchants to manage their customer relationships by providing a detailed view of all customers who have made a purchase.
Atlas is powered by [Dodo Payments Node SDK](https://github.com/dodopayments/dodopayments-node.git) which is just a few lines of code
Follow this guide for integration: [Guide](/developer-resources/integration-guide)
This project is open source check it out [here](https://github.com/dodopayments/dodo-checkout-demo.git)
The **Atlas Demo Product** is a **realistic** environment demonstrating how merchants can **embed** Dodo Payments' checkout flows for both **subscription** and **one-time** transactions. A **post-purchase "My Account"** feature further illustrates how purchased digital assets can be managed and accessed, ensuring a smooth and professional user journey.
# B2B Payments
Source: https://docs.dodopayments.com/features/b2b-payments
The B2B Payments feature ensures that merchants processing B2B transactions have their customer’s Tax IDs verified during checkout, ensuring accurate tax application based on the customer's country and applicable regulations. This validation helps determine whether input tax collection applies or if the transaction falls under a reverse charge mechanism.
## **Tax ID Validation for B2B Transactions**
* If a **valid Tax ID** is provided during checkout, the invoice will include:
* The **customer’s Tax ID**.
* Tax deductions will be determined based on the applicable regulations for the customer’s country.
* The invoice will include **Dodo Payments’ tax details**, along with the tax applied to the transaction.
## **Tax Treatment for B2C Transactions**
* Transactions where a valid Tax ID is **not provided** will be treated as **B2C transactions**, and tax will be deducted as per the applicable tax regulations in the customer’s country.
* The invoice will include **Dodo Payments’ tax details**, along with the tax applied to the transaction.
## Reverse Charge Mechanism
Generally, the supplier of goods or services is liable to pay VAT/Service Tax/GST.
However, in specified cases like imports and other notified supplies, the liability is on the recipient (customer) under the reverse charge mechanism. Reverse Charge means the liability to pay tax is on the recipient of supply of goods or services instead of the supplier of such goods or services in respect of notified categories of supply.
## **Reverse Charge Applicability**
* In certain cases, where applicable by law, tax will **not be deducted** at checkout and the transaction will be subject to a **reverse charge mechanism**.
* The invoice will clearly indicate when a reverse charge applies, as per regulatory requirements.
# Customers
Source: https://docs.dodopayments.com/features/customers
The Customers Page in Dodo Payments allows merchants to manage their customer relationships by providing a detailed view of all customers who have made a purchase.
 ## **Customers Page**
Merchants begin by logging into the Dodo Payments dashboard and navigating to the **Customers** section. This section provides a complete view of all customers who have interacted with the business.
* **How to Access**:
1. From the dashboard, click on **Customers** in the navigation menu.
2. The Customers Page will display a list of all current and past customers.
## **Customer Details**
On the **Customers Page**, merchants can see an overview of their entire customer base. This list provides basic information for each customer, such as:
* **Customer Name**: The full name of the customer.
* **Email Address**: The customer’s email address for communication.
* **Last Transaction**: The date of the customer’s most recent purchase or payment.
* **Subscription Status**: If applicable, shows whether the customer has an active, paused, or canceled subscription.
* **Search and Filter**: Merchants can search for specific customers or use filters to narrow down the list by purchase history, subscription status, or recent activity.
* **Download :** Merchants can download the list of merchants for the selected date range in CSV format
## Customer Portal
The Customer Portal offers a seamless self-service experience, allowing customers to manage Subscriptions, Billing, License Keys and Profile information.
## How it works?
Your customers can access the Customer Portal through a link that you share with them. This can be either a static or a dynamic link.
## **Customers Page**
Merchants begin by logging into the Dodo Payments dashboard and navigating to the **Customers** section. This section provides a complete view of all customers who have interacted with the business.
* **How to Access**:
1. From the dashboard, click on **Customers** in the navigation menu.
2. The Customers Page will display a list of all current and past customers.
## **Customer Details**
On the **Customers Page**, merchants can see an overview of their entire customer base. This list provides basic information for each customer, such as:
* **Customer Name**: The full name of the customer.
* **Email Address**: The customer’s email address for communication.
* **Last Transaction**: The date of the customer’s most recent purchase or payment.
* **Subscription Status**: If applicable, shows whether the customer has an active, paused, or canceled subscription.
* **Search and Filter**: Merchants can search for specific customers or use filters to narrow down the list by purchase history, subscription status, or recent activity.
* **Download :** Merchants can download the list of merchants for the selected date range in CSV format
## Customer Portal
The Customer Portal offers a seamless self-service experience, allowing customers to manage Subscriptions, Billing, License Keys and Profile information.
## How it works?
Your customers can access the Customer Portal through a link that you share with them. This can be either a static or a dynamic link.
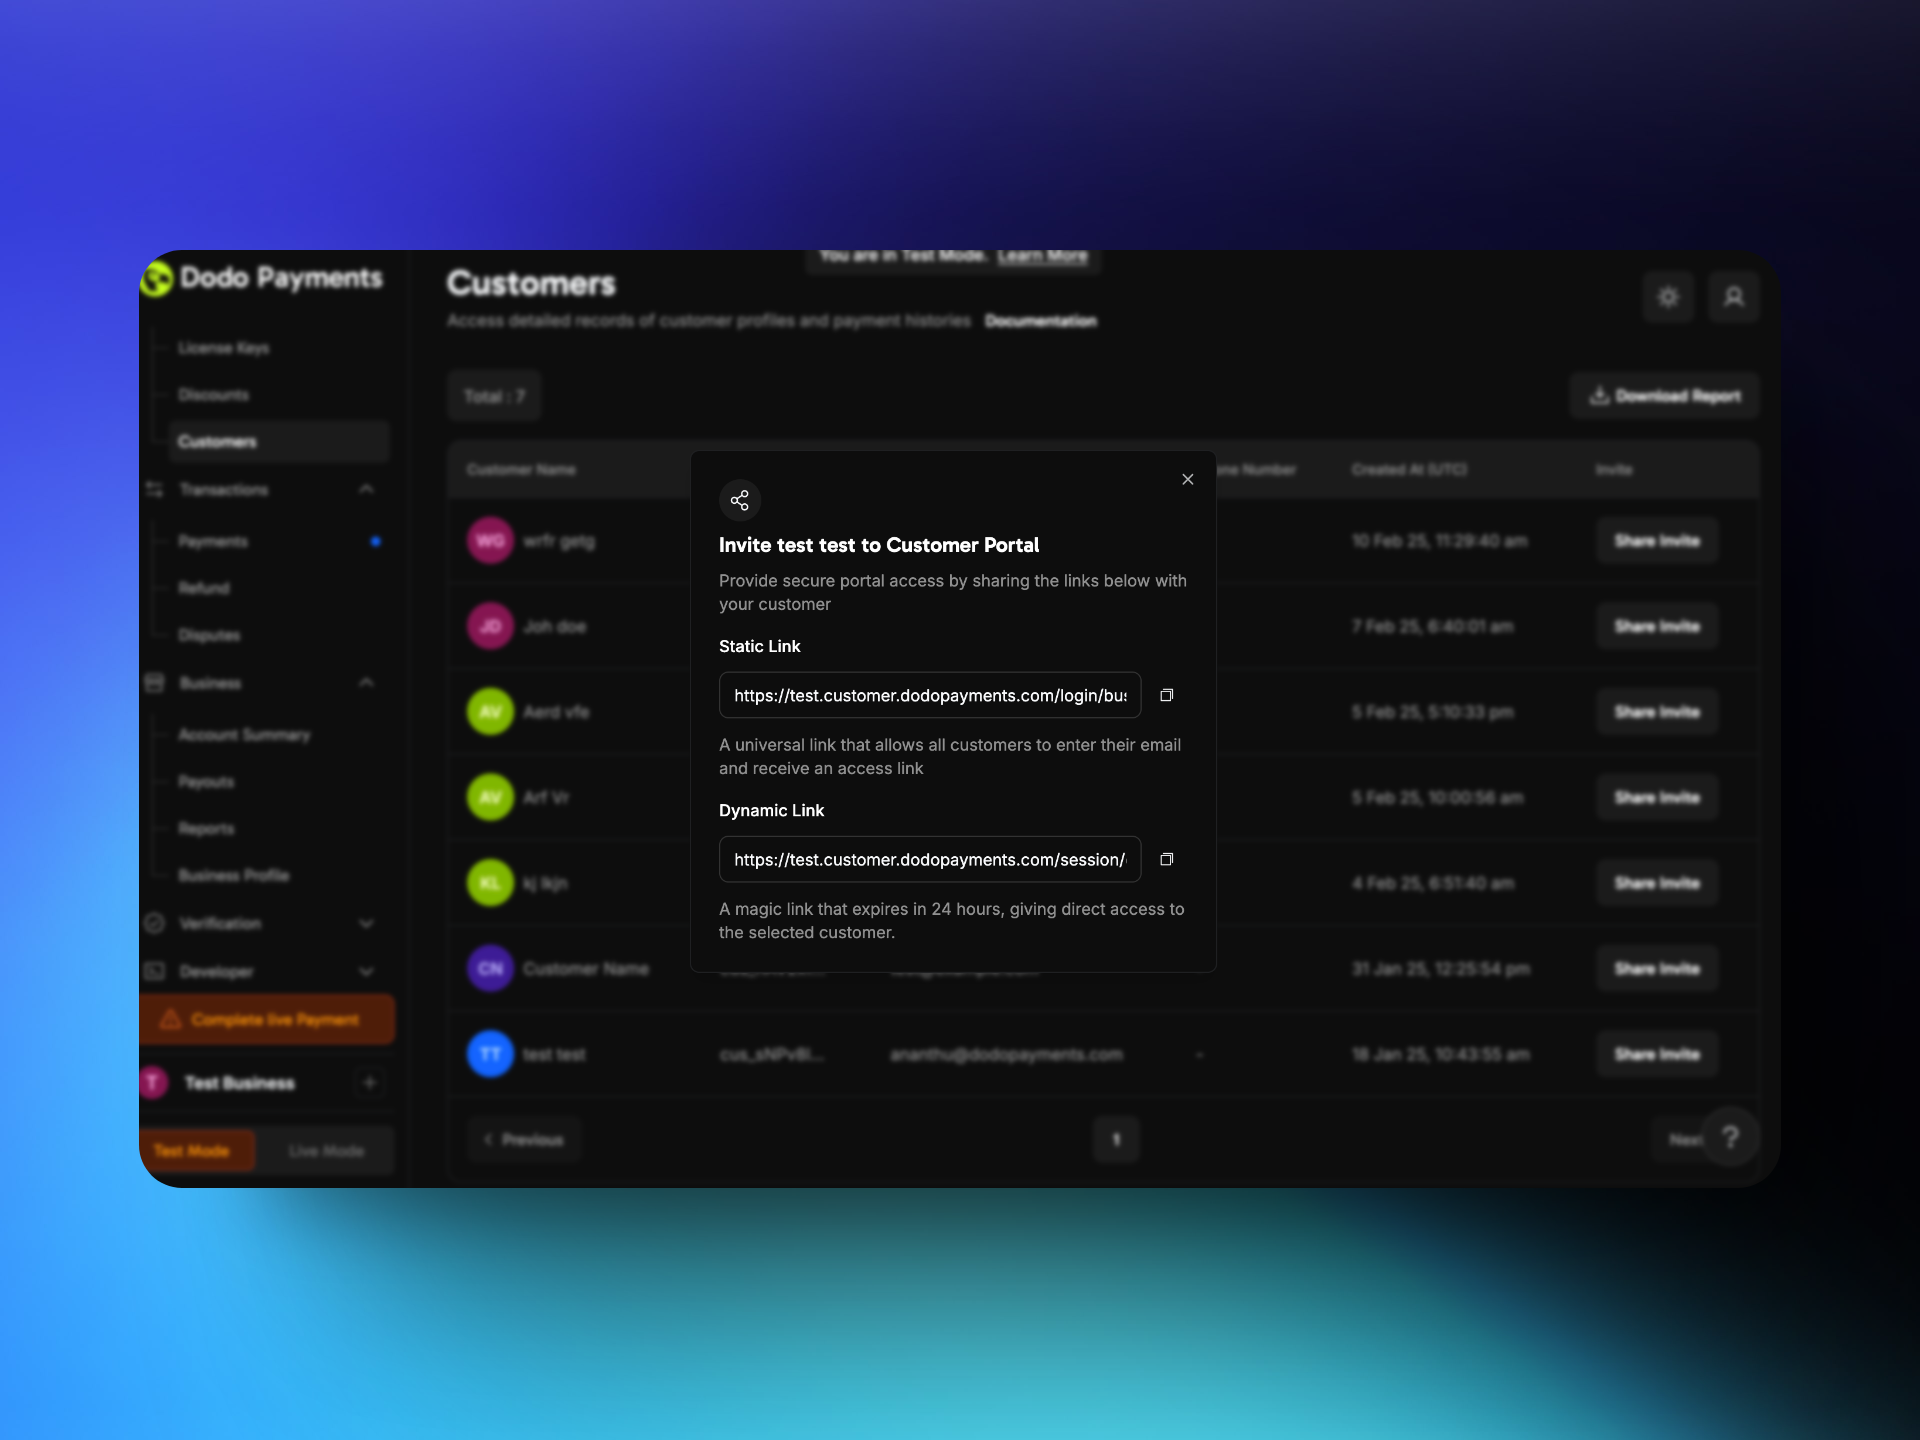 ## Static Link
A static link allows any customer to request access to the Customer Portal by entering their email address. This link never expires.
**Merchant Flow**
1. Go to Sales→Customer.
2. Click on ***share invite***
3. Copy the link under *static link* to share it with your customer.
**Customer Flow**
1. Customer visits the static link you share.
2. Customer enters their email address
3. Receives a link to login to their customer portal.
## Dynamic Link
A dynamic link is a personalized, one-time link that grants direct access to the Customer Portal. This magic link expires in 24 hours.
**Merchant Flow**
1. Go to Sales→Customer.
2. Click on ***share invite***
3. Copy the link under *Dynamic link* to share it with your customer.
**Customer Flow**
1. Customer visits the *Dynamic link* you share.
2. They are taken directly to the Customer Portal without needing an access link.
## Customer Portal Features
### Billing History
## Static Link
A static link allows any customer to request access to the Customer Portal by entering their email address. This link never expires.
**Merchant Flow**
1. Go to Sales→Customer.
2. Click on ***share invite***
3. Copy the link under *static link* to share it with your customer.
**Customer Flow**
1. Customer visits the static link you share.
2. Customer enters their email address
3. Receives a link to login to their customer portal.
## Dynamic Link
A dynamic link is a personalized, one-time link that grants direct access to the Customer Portal. This magic link expires in 24 hours.
**Merchant Flow**
1. Go to Sales→Customer.
2. Click on ***share invite***
3. Copy the link under *Dynamic link* to share it with your customer.
**Customer Flow**
1. Customer visits the *Dynamic link* you share.
2. They are taken directly to the Customer Portal without needing an access link.
## Customer Portal Features
### Billing History
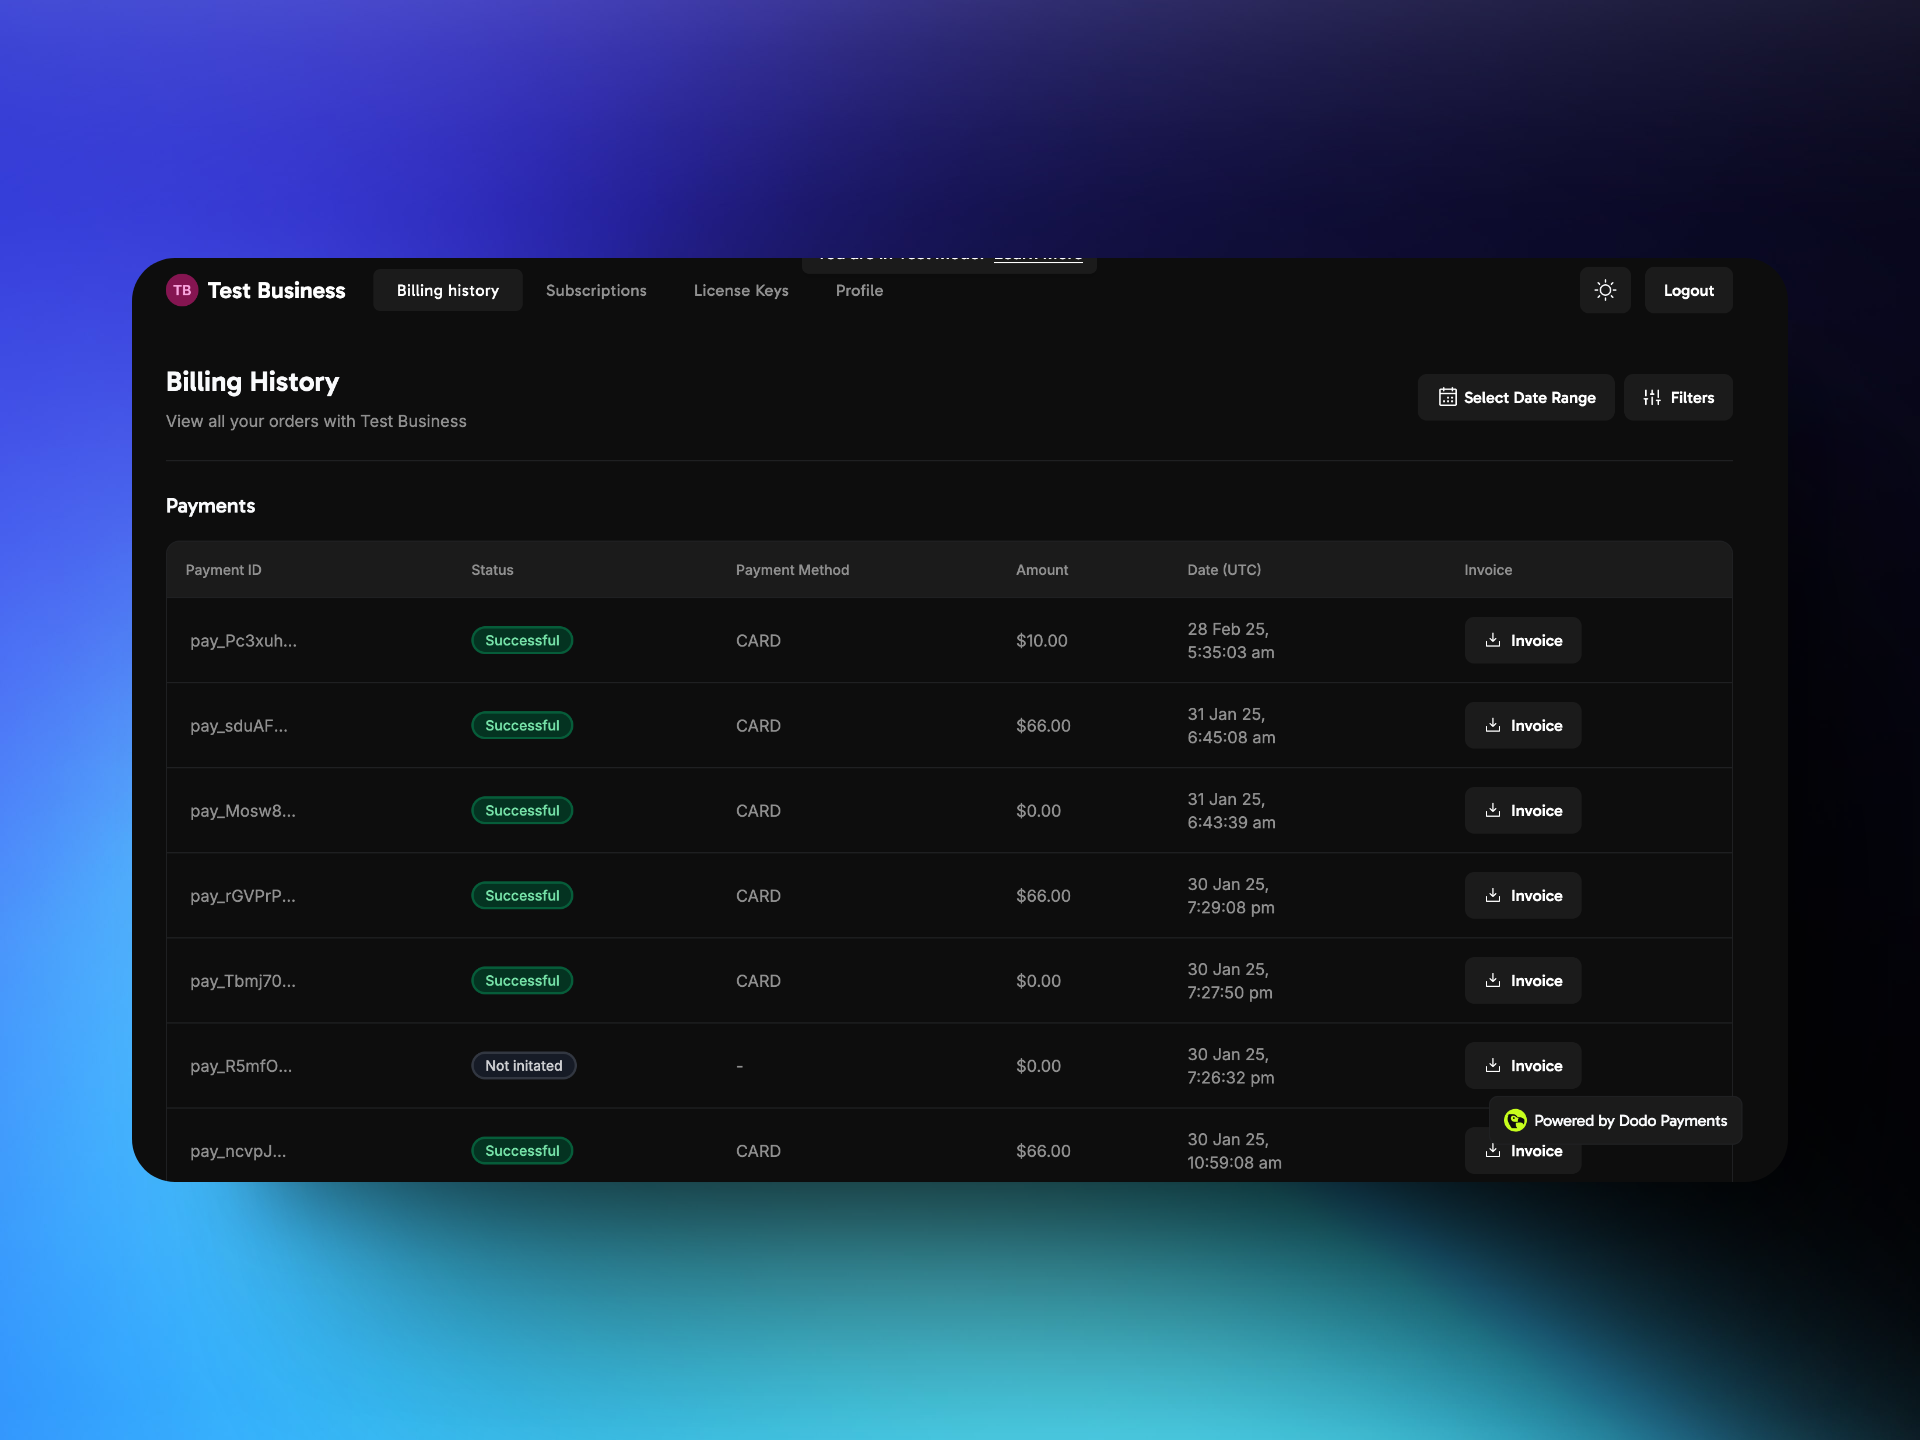 * Displays a list of all past transactions.
* Provides an option to download invoices.
### Subscriptions Management
* Displays a list of all past transactions.
* Provides an option to download invoices.
### Subscriptions Management
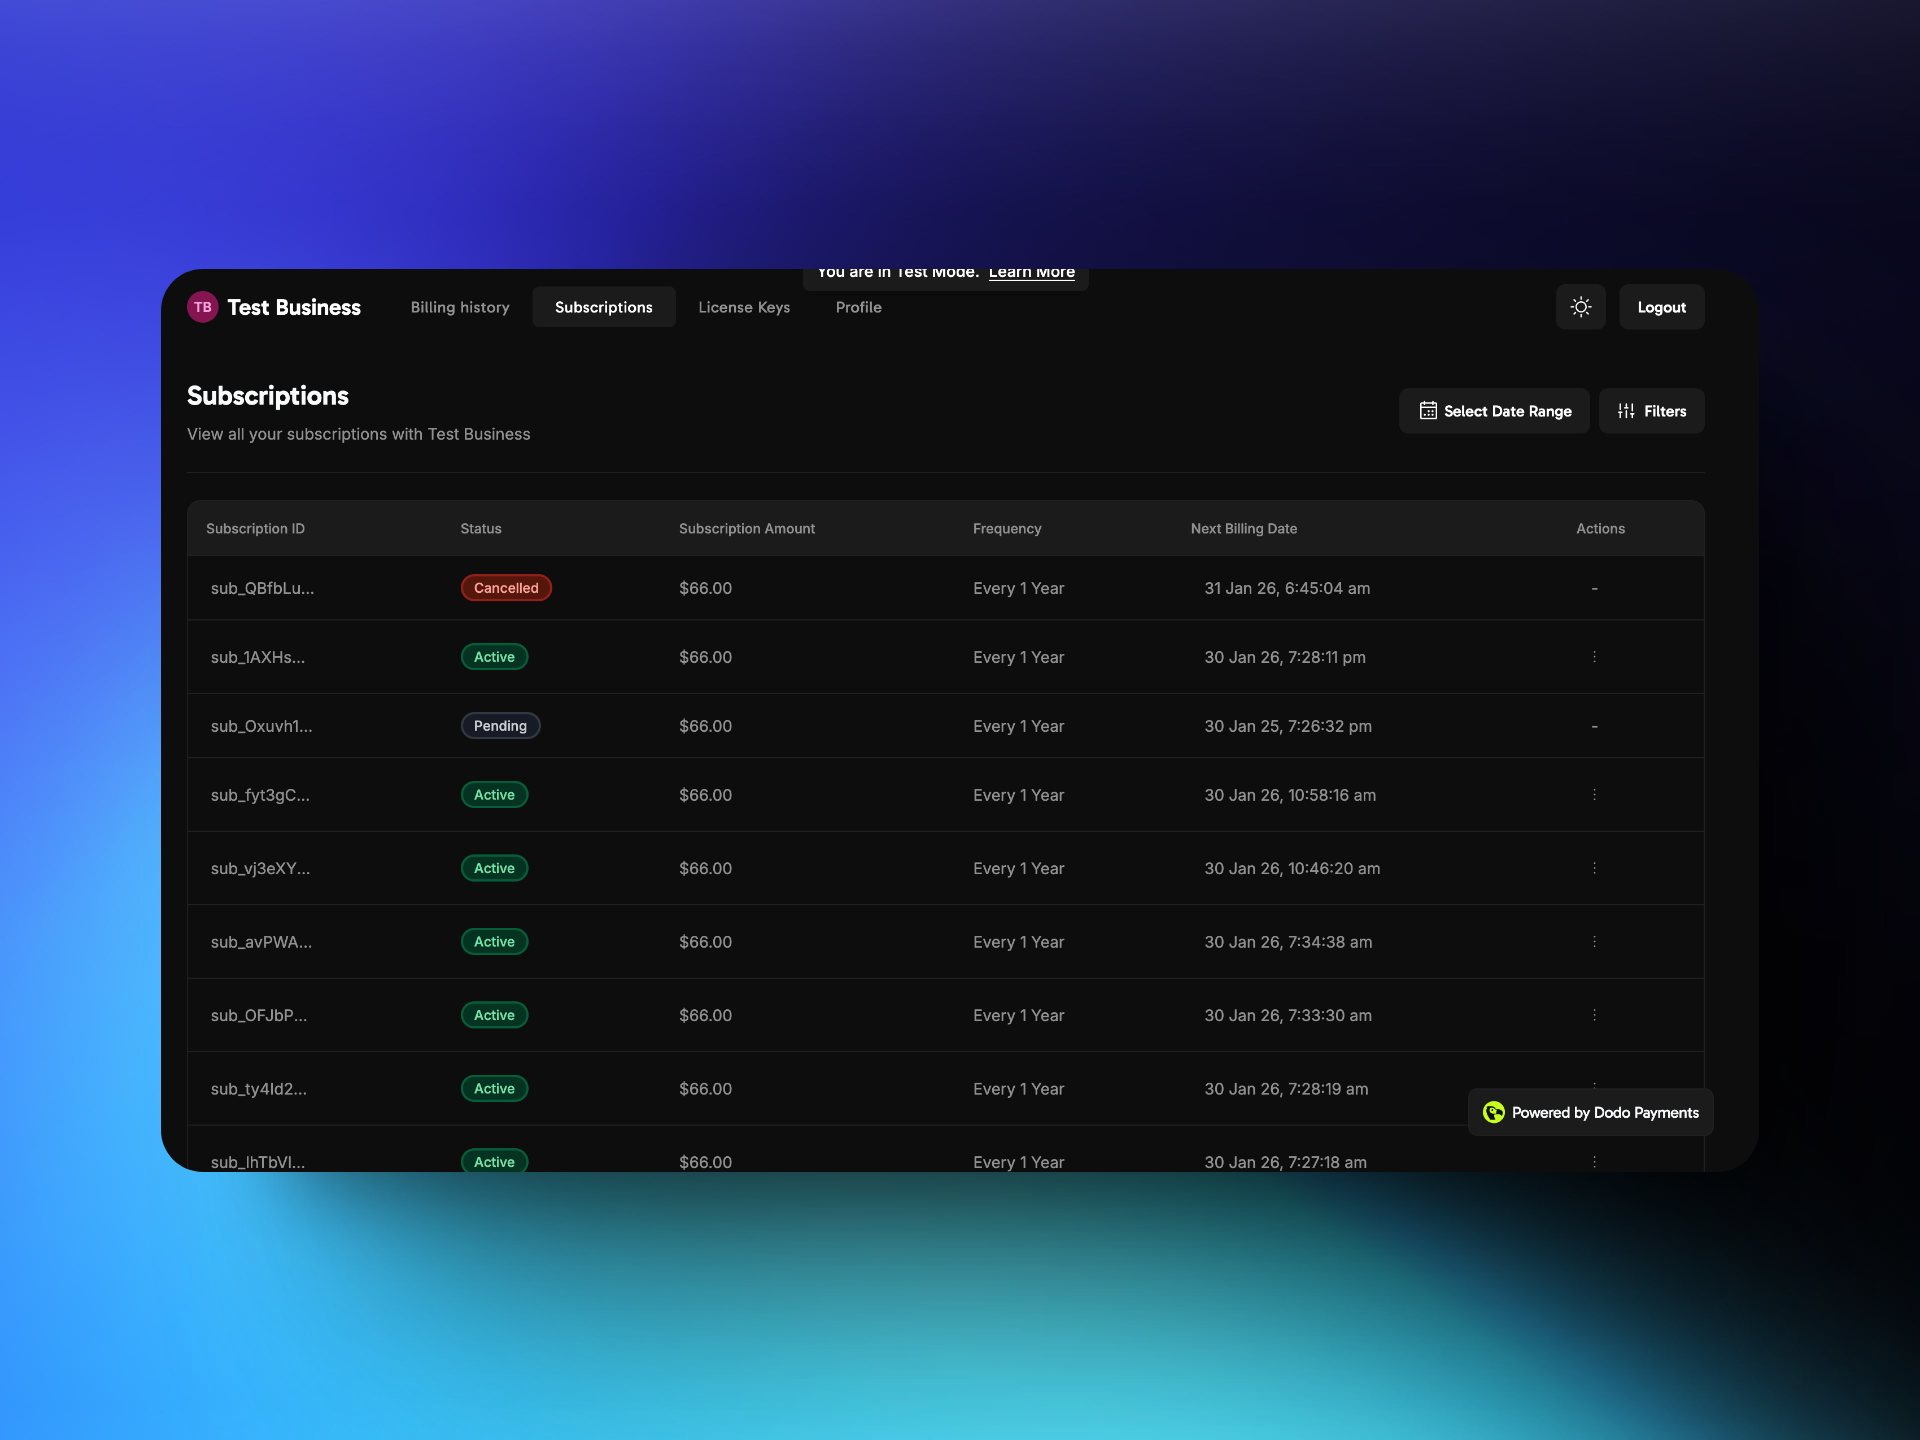 Lists all subscriptions.
Allows customers to cancel their active subscriptions.
### License Keys
Lists all subscriptions.
Allows customers to cancel their active subscriptions.
### License Keys
 Shows all license keys issued to the customer.
### Profile
Shows all license keys issued to the customer.
### Profile
 Displays the customer's configured name, email, and phone number.
# Digital Product Delivery
Source: https://docs.dodopayments.com/features/digital-product-delivery
The Digital Product Delivery feature in Dodo Payments allows merchants to deliver digital products to their customers.
## Overview
The **Digital Product Delivery** feature enables merchants to automatically deliver digital files to customers after successful purchases. Whether you're selling e-books, design templates, software, or media packs, you can attach downloadable content to your products, providing instant access via email and the customer portal.
This feature supports both hosted file uploads and external download links, offering flexibility for various use cases.
## Key Features
Displays the customer's configured name, email, and phone number.
# Digital Product Delivery
Source: https://docs.dodopayments.com/features/digital-product-delivery
The Digital Product Delivery feature in Dodo Payments allows merchants to deliver digital products to their customers.
## Overview
The **Digital Product Delivery** feature enables merchants to automatically deliver digital files to customers after successful purchases. Whether you're selling e-books, design templates, software, or media packs, you can attach downloadable content to your products, providing instant access via email and the customer portal.
This feature supports both hosted file uploads and external download links, offering flexibility for various use cases.
## Key Features
 ### Customer Portal Access
Customers can access their digital products through the Customer Portal:
* Log in to view all past purchases
* Download files or access external links for each product
* Persistent access to purchased digital content
### Customer Portal Access
Customers can access their digital products through the Customer Portal:
* Log in to view all past purchases
* Download files or access external links for each product
* Persistent access to purchased digital content
 ## **How to Create Discount Codes**
1. Go to the dashboard and, on the left navigation bar, click on **"Discounts"** under **Sales**.
2. Click **"New Discount Code"** to create a new discount code.
3. Enter the desired ***Discount Percentage*** and provide a name under ***Discount Name***.
4. For the ***Discount Code***, you can either create one manually or use the **"Generate Random Code"** option. And click on
## **How to Create Discount Codes**
1. Go to the dashboard and, on the left navigation bar, click on **"Discounts"** under **Sales**.
2. Click **"New Discount Code"** to create a new discount code.
3. Enter the desired ***Discount Percentage*** and provide a name under ***Discount Name***.
4. For the ***Discount Code***, you can either create one manually or use the **"Generate Random Code"** option. And click on
 ## Features
### Discount Code Expiration
You can set an expiration date for discount codes. Once expired, the discount codes will no longer be valid when used by customers. This feature allows you to run limited-time offers effectively.
**To set an expiration date for a discount code:**
1. Check the box next to **Set an expiration date for the discount** on the discount details page.
2. Click **Pick a Date**, then select the desired expiration date.
### Usage Limit
You can limit the number of times a discount code can be redeemed. This is useful for offering discounts to early adopters or controlling promotional usage.
**To set a redemption limit for a discount code:**
1. Check the box next to **Limit the number of times this discount can be redeemed** on the discount details page.
2. Enter the maximum number of redemptions in the input field that appears below.
### Limit Discount to Specific Products
You can restrict discount codes to specific products instead of applying them to all products by default.
**To limit a discount code to specific products:**
1. Enable the toggle **Limit discount to selected products**.
2. Select the products to which this discount code should be applied.
**Note:** If no products are selected, the discount code can be applied to all products by default.
## Checkout experience
## Features
### Discount Code Expiration
You can set an expiration date for discount codes. Once expired, the discount codes will no longer be valid when used by customers. This feature allows you to run limited-time offers effectively.
**To set an expiration date for a discount code:**
1. Check the box next to **Set an expiration date for the discount** on the discount details page.
2. Click **Pick a Date**, then select the desired expiration date.
### Usage Limit
You can limit the number of times a discount code can be redeemed. This is useful for offering discounts to early adopters or controlling promotional usage.
**To set a redemption limit for a discount code:**
1. Check the box next to **Limit the number of times this discount can be redeemed** on the discount details page.
2. Enter the maximum number of redemptions in the input field that appears below.
### Limit Discount to Specific Products
You can restrict discount codes to specific products instead of applying them to all products by default.
**To limit a discount code to specific products:**
1. Enable the toggle **Limit discount to selected products**.
2. Select the products to which this discount code should be applied.
**Note:** If no products are selected, the discount code can be applied to all products by default.
## Checkout experience
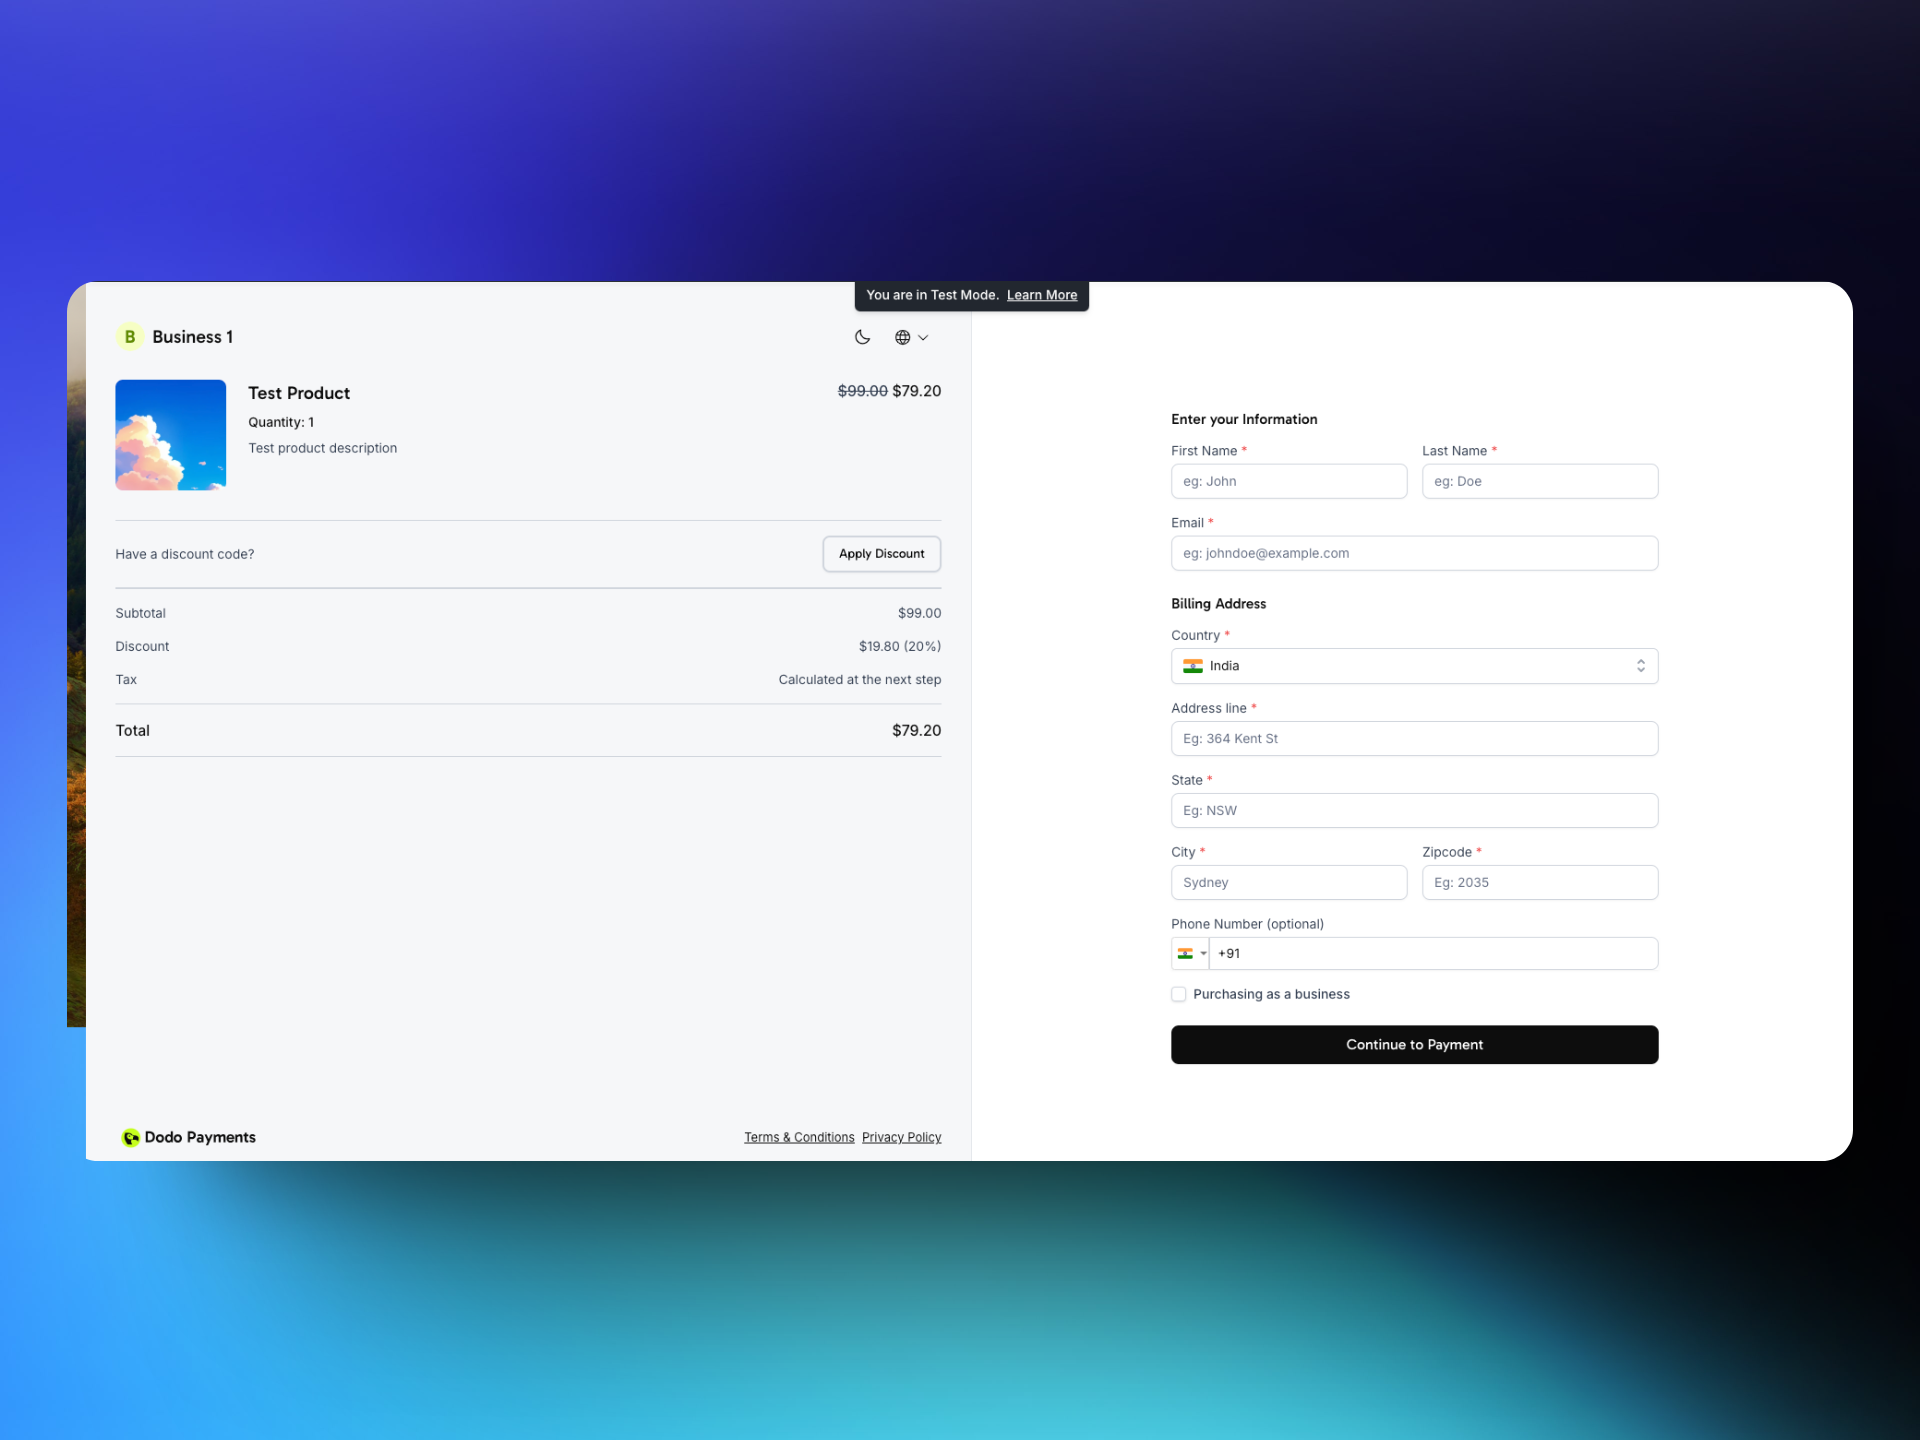 1. Customer clicks on ***Apply Discount*** and enters the discount code.
2. Once discount code is applied, the product price would be adjusted based on it.
## Dashboard
Open Sales → Discounts section to view the status of all the discount codes used.
1. Customer clicks on ***Apply Discount*** and enters the discount code.
2. Once discount code is applied, the product price would be adjusted based on it.
## Dashboard
Open Sales → Discounts section to view the status of all the discount codes used.
 The following information can be seen on the dashboard associated to discount codes
1. **Discount Details**:
* Discount Name
* Discount unique ID
* Status
* Discount Code
2. **Usage Activity**:
* Uses : Number of times discount is redeemed.
3. **Expiry and Limits**:
* Discount expiry date
* Number of times the discount code can be used
# Feature Request and Roadmap
Source: https://docs.dodopayments.com/features/feature-request
We value feedback from our merchants and aim to continuously improve Dodo Payments to meet your business needs. The **Feature Request and Roadmap** section allows you to directly contribute to our product development by suggesting new features, voting on existing requests, and staying informed about upcoming updates.
## **Request a New Feature**
If you have an idea for a feature that would enhance your experience with Dodo Payments, you can submit a feature request.
The following information can be seen on the dashboard associated to discount codes
1. **Discount Details**:
* Discount Name
* Discount unique ID
* Status
* Discount Code
2. **Usage Activity**:
* Uses : Number of times discount is redeemed.
3. **Expiry and Limits**:
* Discount expiry date
* Number of times the discount code can be used
# Feature Request and Roadmap
Source: https://docs.dodopayments.com/features/feature-request
We value feedback from our merchants and aim to continuously improve Dodo Payments to meet your business needs. The **Feature Request and Roadmap** section allows you to directly contribute to our product development by suggesting new features, voting on existing requests, and staying informed about upcoming updates.
## **Request a New Feature**
If you have an idea for a feature that would enhance your experience with Dodo Payments, you can submit a feature request.
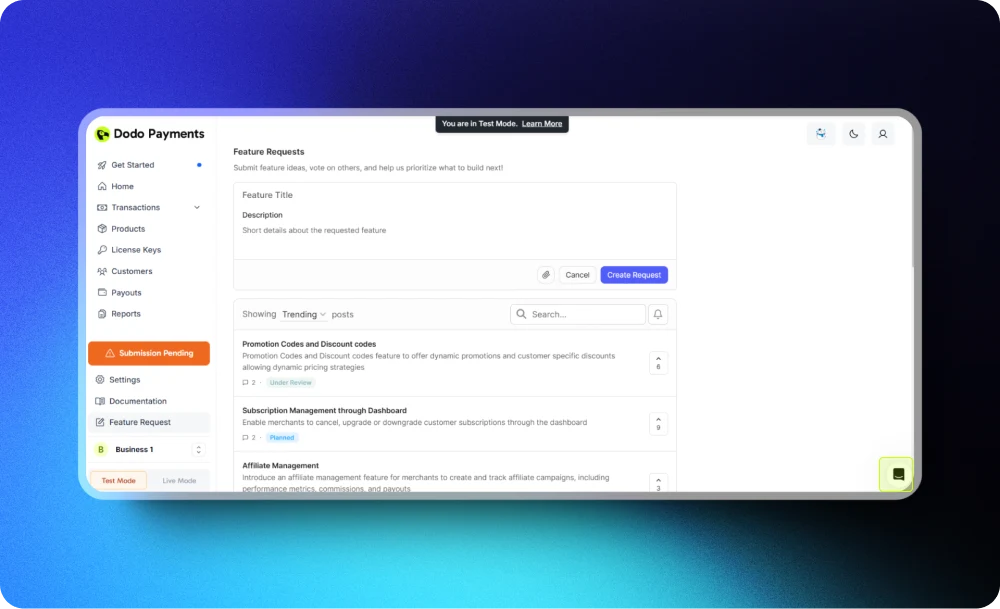 * **How to Request a Feature**:
1. Navigate to the **Feature Request** section on the dashboard.
2. Click on **"Request a New Feature"**.
3. Provide the following details:
* **Feature Name**: A concise title for your feature idea.
* **Feature Description**: A brief explanation of the feature, including why it’s important and how it will help your business.
4. Submit the request.
* **Tips for Effective Requests**:
* Be clear and concise.
* Highlight the business impact of the feature.
* Provide examples, if applicable.
## **Vote for Existing Feature Requests**
We prioritize features that benefit the most merchants. You can browse existing feature requests and vote for those you find valuable.
* **How to Vote**:
1. Go to the **Feature Request** section.
2. Scroll through the list of submitted requests.
3. Click the **"Upvote"** button next to the feature(s) you support.
* **Benefits of Voting**:
* Influence the development priority for features you care about.
* Help our team identify features that have widespread demand.
## **View the Product Roadmap**
Stay informed about the status of feature development through the **Roadmap** section.
* **Roadmap Features**:
* **Planned**: Features that have been approved and are scheduled for development.
* **In Progress**: Features currently being worked on by our team.
* **Completed**: Features that have been successfully implemented and are live.
* **How to Access**:
* Navigate to the **Roadmap** tab within the Feature Request section.
* Browse the feature categories and their current statuses.
# Fraud Detection & Security
Source: https://docs.dodopayments.com/features/fraud-detection
The Fraud Detection & Security feature in Dodo Payments helps merchants protect their business from fraudulent activities and secure customer transactions.
* **How to Request a Feature**:
1. Navigate to the **Feature Request** section on the dashboard.
2. Click on **"Request a New Feature"**.
3. Provide the following details:
* **Feature Name**: A concise title for your feature idea.
* **Feature Description**: A brief explanation of the feature, including why it’s important and how it will help your business.
4. Submit the request.
* **Tips for Effective Requests**:
* Be clear and concise.
* Highlight the business impact of the feature.
* Provide examples, if applicable.
## **Vote for Existing Feature Requests**
We prioritize features that benefit the most merchants. You can browse existing feature requests and vote for those you find valuable.
* **How to Vote**:
1. Go to the **Feature Request** section.
2. Scroll through the list of submitted requests.
3. Click the **"Upvote"** button next to the feature(s) you support.
* **Benefits of Voting**:
* Influence the development priority for features you care about.
* Help our team identify features that have widespread demand.
## **View the Product Roadmap**
Stay informed about the status of feature development through the **Roadmap** section.
* **Roadmap Features**:
* **Planned**: Features that have been approved and are scheduled for development.
* **In Progress**: Features currently being worked on by our team.
* **Completed**: Features that have been successfully implemented and are live.
* **How to Access**:
* Navigate to the **Roadmap** tab within the Feature Request section.
* Browse the feature categories and their current statuses.
# Fraud Detection & Security
Source: https://docs.dodopayments.com/features/fraud-detection
The Fraud Detection & Security feature in Dodo Payments helps merchants protect their business from fraudulent activities and secure customer transactions.
 ## **Introduction**
At Dodo Payments, keeping your business and customer data safe is a top priority. We provide robust fraud prevention tools and security features designed to protect against fraudulent transactions, data breaches, and unauthorized access. Our security measures ensure that your payment processing is secure and compliant with industry standards, so you can focus on growing your business without worrying about fraud or data security.
## **Key Security Features**
**PCI-DSS Compliance**
Dodo Payments is fully compliant with the **Payment Card Industry Data Security Standard (PCI-DSS)**, which means we meet the highest security standards for handling, processing, and storing card information. This compliance ensures that all card transactions are processed securely and reduces the risk of data breaches.
**Data Encryption**
All sensitive data, such as payment information and personal details, is encrypted using the latest encryption technology. This ensures that your data is protected during transmission and storage, making it unreadable to unauthorized parties.
**Tokenization**
Instead of storing sensitive card information, Dodo Payments uses **tokenization**. This means that sensitive data is replaced with a unique identifier (token), ensuring that no card details are ever stored directly in our systems. This adds an extra layer of protection against fraud.
## **Fraud Prevention Tools**
**Fraud Detection**
Dodo Payments uses real-time fraud detection tools that monitor transactions for suspicious activity. This includes looking for unusual purchasing patterns, multiple failed payment attempts, or signs of account takeover. Any flagged transactions are immediately investigated, and merchants are notified if additional verification is needed.
## **Monitoring and Alerts**
Dodo Payments provides continuous monitoring of all transactions and account activity. If any unusual behavior or potential security threats are detected, we will block the transactions. These include suspicious login attempts, unusual transaction volumes, or possible fraud attempts.
## **Best Practices for Merchants**
To help keep your business secure, we recommend the following best practices
* **Monitor Transactions Regularly**: Keep an eye on your transaction history for any suspicious activity.
* **Use Strong Passwords**: Use unique, complex passwords for your account and change them regularly.
* **Report** any suspicious activity to our support team
# Feature Prioritization Tools
Source: https://docs.dodopayments.com/features/gtm-tools/feature-prioritization-tool
The **Feature Prioritization Tool** helps SaaS product teams prioritize feature development using the **RICE (Reach, Impact, Confidence, Effort) framework**. By assigning a RICE score to each feature, this tool ensures that high-impact, low-effort features are prioritized, maximizing development efficiency and business value.
## **Start Prioritizing Features for Maximum Impact**
Use the **Feature Prioritization Tool** to optimize product development and ensure your SaaS team focuses on features that drive engagement, user satisfaction, and revenue growth.
Link: [https://dodopayments.com/tools/product-prioritization-tool](https://dodopayments.com/tools/product-prioritization-tool)
## **Why Feature Prioritization is Essential for SaaS Businesses**
Prioritizing product features ensures that development teams focus on features with the highest user impact while efficiently managing resources. A structured prioritization process helps:
1. Improve customer satisfaction by delivering high-value features first
2. Maximize ROI on development efforts
3. Reduce time-to-market for essential features
4. Align product development with business objectives
By leveraging data-driven prioritization, SaaS companies can build products that drive engagement, retention, and revenue growth.
## **Key Input Metrics**
### **1. Reach Score (1-10)**
Represents the estimated number of users who will benefit from the feature within a specific period. High-reach features impact a large portion of the user base.
### **2. Impact Score (1-10)**
Measures the feature’s value to affected users. Higher impact scores indicate features that significantly enhance the user experience or solve a critical problem.
### **3. Confidence Level (%)**
Reflects the certainty of reach and impact estimates. A higher confidence percentage ensures that decisions are based on reliable data and user insights.
### **4. Effort Score (1-10)**
Represents the estimated resources required to implement the feature, including development time, personnel, and budget. Features requiring lower effort with high impact should be prioritized.
## **How the Feature Prioritization Tool Works**
Using the **RICE framework**, the tool ranks product features based on their potential value vs. effort. It provides:
1. A structured scoring system to evaluate feature importance
2. Automated ranking to ensure optimal resource allocation
3. Data-driven prioritization for faster decision-making
The tool generates a prioritized feature list, ensuring that the highest-impact features with the lowest resource investment are developed first.
## **Key Output Metrics**
### **1. Prioritized Feature List**
A feature ranking list is generated based on the RICE score, displayed in descending order. This list helps SaaS product teams focus on the most impactful features first, ensuring efficient roadmap planning.
## **Frequently Asked Questions (FAQs)**
### **FAQs:**
1. **What is the RICE framework?**
* The RICE framework is a prioritization method used to rank product features based on four factors: Reach (how many users it will affect), Impact (how much value it provides), Confidence (how sure you are of the estimates), and Effort (how much work it requires).
2. **How do I calculate Reach for a feature?**
* Reach is the estimated number of users who will benefit from the feature. For example, if a feature impacts 1,000 users per month, your reach score would reflect this number.
3. **Why is Confidence important in the RICE framework?**
* Confidence helps ensure that you’re making decisions based on reliable estimates. If you’re unsure about the impact or reach of a feature, a lower confidence score will prevent you from over-prioritizing a feature that may not deliver the expected value.
4. **How do I decide which features to prioritize?**
* Features with the highest RICE scores should be prioritized first because they offer the most value relative to the effort required. This ensures your team focuses on tasks that deliver maximum results quickly.
5. **What should I do if two features have the same RICE score?**
* If two features have the same RICE score, consider qualitative factors such as strategic importance, user feedback, or alignment with long-term business goals. You can also reassess confidence levels or adjust the impact estimate to break the tie.
# Freemium Model
Source: https://docs.dodopayments.com/features/gtm-tools/freemium-model
The Freemium Model ROI Analysis Tool helps SaaS businesses evaluate the effectiveness and financial viability of a freemium strategy. It provides insights into the costs associated with supporting free users and the revenue generated from conversions to paid plans. This tool enables businesses to assess whether their freemium model is sustainable and profitable.
## **Start Optimizing Your Freemium Strategy Today**
Evaluate your freemium model’s profitability with the Freemium Model ROI Calculator.
Link: [https://dodopayments.com/tools/freemium-model-calculator](https://dodopayments.com/tools/freemium-model-calculator)
Make data-driven decisions to maximize conversions and revenue!
## Importance of ROI Analysis for Freemium Models
Freemium models attract a large user base by offering free access to basic features, with the expectation that a percentage of users will convert to paid plans. However, if conversion rates are too low or operational costs are too high, the free tier can become unsustainable. Understanding the ROI of a freemium strategy is critical for:
* Evaluating the financial impact of supporting free users.
* Optimizing conversion strategies to increase paid users.
* Identifying cost inefficiencies and areas for improvement.
* Enhancing pricing models to maximize revenue potential.
## **Key Metrics Analyzed**
This tool provides insights into the following key factors affecting freemium profitability:
### **1. Free User Base**
Understanding the size of the free user base is essential, as these users form the primary pool for potential paid conversions.
### **2. Operational Costs**
The costs associated with supporting free users, including server infrastructure, customer support, and product maintenance, directly impact the financial sustainability of a freemium model.
### **3. Free-to-Paid Conversion Rate**
The percentage of free users upgrading to paid plans is a critical indicator of monetization success. A low conversion rate may suggest issues with feature differentiation, pricing, or user engagement.
### **4. Paid User Revenue & Costs**
Revenue generated from paid subscribers must offset both acquisition costs and the cost of maintaining free users. Understanding the balance between these factors ensures long-term profitability.
## **How This Tool Helps SaaS Businesses**
By analyzing these metrics, the Freemium Model ROI Analysis Tool enables businesses to:
1. Assess the financial impact of free users and determine if the model is sustainable.
2. Optimize the free-to-paid conversion funnel to improve monetization.
3. Identify opportunities to reduce costs while maintaining product quality.
4. Fine-tune pricing and feature differentiation to increase revenue.
## **Strategic Considerations**
* **ROI (Return on Investment)**: The tool provides an ROI percentage, showing the profitability of your freemium model. A positive ROI indicates that your free users are converting into paying customers at a rate that covers your costs and generates profit.
If the analysis indicates a negative ROI, businesses may need to:
* Refine pricing models by adjusting free and premium feature allocations.
* Enhance product value to improve user retention and encourage upgrades.
* Reduce operational costs associated with maintaining free users.
* Optimize conversion tactics, such as targeted promotions and in-app nudges.
### **FAQs:**
1. **What is a good conversion rate for freemium models?**
* A typical conversion rate for freemium models is between 2% and 5%, but it can vary depending on your product and market. Higher conversion rates indicate that your free users are finding enough value to upgrade to a paid plan.
2. **How do I reduce the costs of supporting free users?**
* You can reduce costs by optimizing server resources, automating customer support for free users, and limiting the features available in the free tier to reduce usage costs.
3. **What are the risks of a freemium model?**
* The biggest risk is that too many users stay on the free plan without converting to paid plans. This can lead to high costs without generating sufficient revenue. Balancing the value of the free tier and making the upgrade path attractive is key.
4. **How can I improve my freemium conversion rate?**
* You can improve conversion by offering clear value in the paid tiers, such as premium features, better support, or advanced analytics. Offering timely nudges to ask the user to upgrade may push the conversion
5. **What should I do if my freemium ROI is negative?**
* If your freemium ROI is negative, it’s important to reevaluate the value you’re offering in the free tier. Consider reducing the free features or increasing the incentives to upgrade to a paid plan to make your strategy more profitable.
# SaaS KPI Measurement
Source: https://docs.dodopayments.com/features/gtm-tools/saas-kpi-measurement
The SaaS KPI Measurement Tool enables SaaS businesses to monitor their key performance indicators (KPIs) such as Annual Recurring Revenue (ARR), Churn Rate, and Customer Lifetime Value (CLTV). By consolidating critical financial metrics in a single dashboard, businesses can gain insights into growth trends, customer retention, and long-term profitability.
## **Start Tracking Your SaaS KPIs Today**
Gain valuable business insights with the **SaaS KPI Measurement Tool**.
Link: [https://dodopayments.com/tools/saas-kpi-measurement](https://dodopayments.com/tools/saas-kpi-measurement)
**Optimize revenue, monitor churn, and scale with confidence!**
## **Why KPI Measurement is Essential for SaaS Businesses**
Accurate KPI tracking helps SaaS companies:
1. Understand monthly and annual revenue trends
2. Identify customer retention challenges and reduce churn
3. Forecast long-term financial performance
4. Optimize pricing and revenue models
5. Improve customer lifetime value (CLTV) and ROI
Tracking these KPIs consistently ensures better decision-making and business sustainability.
## **Key Input Metrics**
To generate accurate SaaS KPIs, the tool requires the following inputs:
### 1. Monthly Recurring Revenue (MRR)
The total recurring revenue generated per month from customer subscriptions. This metric is the foundation for calculating ARR and CLTV.
### 2. New Customers Added This Month
The number of new customers acquired during the current month. This input is essential for tracking growth and understanding customer acquisition effectiveness.
### 3. Customers Last Month
The total customer base at the start of the month. This metric is used to assess churn rate and retention trends.
### 4. Current Customer Base This Month
The number of active customers at the end of the month. This figure helps determine if the company is retaining or losing customers.
### 5. Average Customer Retention Period
The average length of time a customer remains subscribed (in months or years). This is crucial for calculating CLTV and evaluating long-term revenue potential.
## **How the SaaS KPI Measurement Tool Works**
The tool performs real-time calculations based on the provided inputs and generates key SaaS metrics:
1. **ARR Calculation** – Estimates Annual Recurring Revenue using MRR.
2. **Churn Rate Calculation** – Determines customer retention trends over time.
3. **CLTV Calculation** – Evaluates customer lifetime value to measure revenue potential per customer.
By consolidating these KPIs, the tool provides a comprehensive performance overview, allowing businesses to identify opportunities for growth and improvement.
## **Frequently Asked Questions (FAQs)**
1. **What is a good churn rate for a SaaS business?**
* A good churn rate for SaaS businesses varies depending on the industry but it typically falls below 10%. Lower churn means better customer retention, which directly impacts revenue stability. If your churn rate is higher, it may indicate issues with product fit or customer satisfaction.
2. **Why is tracking MRR important for SaaS companies?**
* MRR provides a clear, predictable revenue stream that you can count on month over month. It helps with financial forecasting, budgeting, and measuring the success of marketing and sales strategies.
3. **How can I increase my CLTV?**
* You can increase CLTV by improving customer retention, upselling customers to higher pricing tiers, and providing exceptional customer service. Happy customers are likely to stick around longer and spend more.
4. **What’s the difference between MRR and ARR?**
* MRR represents your monthly recurring revenue, while ARR is the annualized version of MRR. ARR provides a longer-term perspective on your recurring revenue, making it easier to assess yearly performance.
5. **Why should I monitor churn rate closely?**
* Churn rate directly affects your bottom line. High churn means that you’re losing customers faster than you’re acquiring new ones, which can lead to negative revenue growth. Monitoring churn helps you identify areas for improvement, like product enhancements or better customer support.
# SaaS Pricing calculator
Source: https://docs.dodopayments.com/features/gtm-tools/saas-pricing-calculator
The SaaS Pricing Calculator is designed to help SaaS businesses determine the ideal pricing strategy for their software products. Setting the right price is critical for remaining competitive, covering operational costs, and maximizing profitability. This tool enables businesses to explore different pricing models, including competitor-based, cost-based, and value-based pricing, to develop a pricing structure that aligns with market trends and customer expectations.
## **Optimize Your SaaS Pricing Strategy Today**
Use the **SaaS Pricing Calculator** to develop a pricing model that maximises profitability, competitiveness, and customer acquisition.
Link: [https://dodopayments.com/tools/saas-pricing-calculator](https://dodopayments.com/tools/saas-pricing-calculator)
**Find the perfect balance between cost, value, and market positioning!**
## **Why Pricing Strategy is Crucial for SaaS Businesses**
Pricing directly impacts customer acquisition, revenue growth, and profitability. A well-defined pricing strategy ensures:
1. **Competitive positioning** – Aligns your product pricing with market expectations
2. **Sustainable profitability** – Covers costs while maintaining profit margins
3. **Value-based pricing** – Ensures customers pay according to the benefits they receive
Choosing the right pricing strategy allows SaaS businesses to balance affordability, perceived value, and business growth.
## **Key Input Metrics**
### **1. Competitor Pricing**
Understanding the price points of similar SaaS solutions in the market helps in positioning your product effectively. Competitor pricing acts as a reference, enabling businesses to decide whether to price above, below, or at market rates.
### **2. Product Value Addition (%)**
Represents the relative value your product provides compared to competitors. If your software offers 30% more features or efficiency, pricing can be adjusted accordingly.
### **3. Cost per User**
Includes operational costs such as cloud hosting, development, maintenance, and support services. This metric helps in setting a profitable baseline price to ensure sustainability.
### **4. Estimated User Base**
Defines the projected number of users subscribing to the SaaS product over a set period. This estimation helps determine revenue potential and optimal pricing.
### **5. Target Revenue**
Businesses must set annual or monthly revenue goals to ensure pricing strategies align with profitability objectives. This metric helps determine minimum pricing thresholds.
### **6. Estimated Value for the Customer**
Assesses the financial impact or time savings the product delivers to users. For example, if the software saves businesses \$10,000 annually, pricing should reflect this value-based approach.
## **How the SaaS Pricing Calculator Works**
This tool enables businesses to compare multiple pricing models and identify the most suitable one based on financial goals, competitive landscape, and customer expectations. It supports:
1. **Competitor-Based Pricing** – Align pricing with industry benchmarks
2. **Cost-Based Pricing** – Ensure pricing covers operational costs and profit margins
3. **Value-Based Pricing** – Charge based on customer-perceived value
By leveraging data-driven pricing strategies, SaaS companies can optimize revenue, enhance customer acquisition, and drive business growth.
## **Key Output Metrics**
### **1. Recommended Price Range**
The tool provides a flexible pricing range, allowing businesses to adjust prices based on market trends and customer feedback. Pricing recommendations typically range between 0.8x and 1.2x the suggested price, ensuring adaptability.
### **2. Tiered Pricing Structure**
A well-defined tiered pricing model maximizes revenue potential by catering to different customer segments. The tool recommends three tiers:
**Basic Tier** – Lower-priced plan for budget-conscious users with essential features.
**Pro Tier** – Standard pricing plan offering a balanced set of features.
**Enterprise Tier** – Premium pricing model with advanced functionalities and personalized support.
## **Frequently Asked Questions (FAQs)**
1. **What is the best pricing strategy for SaaS companies?**
* There is no one-size-fits-all pricing strategy for SaaS companies. The best approach depends on your product, market, and business goals. Competitor-based pricing helps you align with market rates, cost-based pricing ensures you cover your expenses, and value-based pricing lets you charge based on the perceived value your product delivers to customers.
2. **How do I decide whether to use competitor-based, cost-based, or value-based pricing?**
* If your market is saturated with similar products, competitor-based pricing can keep you competitive. If you want to ensure profitability, cost-based pricing guarantees your costs are covered. If your product offers significant value to users, value-based pricing allows you to charge based on the results your product delivers, which can lead to higher pricing.
3. **How can I make my SaaS pricing more competitive?**
* To stay competitive, evaluate your competitors regularly, ensure your pricing reflects the value you provide, and consider offering tiered pricing or freemium models. Adjust your pricing based on user feedback and market trends to ensure you remain competitive.
4. **Why should I offer tiered pricing for my SaaS product?**
* Tiered pricing allows you to cater to different customer segments, offering basic features at lower prices and premium features at higher prices. This flexibility maximizes your revenue by appealing to both budget-conscious users and those willing to pay for advanced features.
5. **How often should I reevaluate my SaaS pricing?**
* It’s a good practice to review your pricing strategy at least once a year, or when significant changes occur in your product offerings, market conditions, or customer needs. This ensures your pricing remains competitive and aligned with your business goals.
# SaaS Revenue & Profit Growth
Source: https://docs.dodopayments.com/features/gtm-tools/saas-revenue-and-profit-growth
The **SaaS Revenue & Profit Growth Tool** is designed to help SaaS businesses accurately forecast their **financial performance** by analyzing revenue, costs, and growth rates. This tool enables businesses to make data-driven decisions about scaling, hiring, and long-term sustainability. By predicting future revenue and profit trends, SaaS companies can optimize growth strategies and maximize profitability.
Start Forecasting Your Business Growth with **SaaS Revenue and Profit Growth Tool**
**Link:** [https://dodopayments.com/tools/saas-revenue-profit-growth-tool](https://dodopayments.com/tools/saas-revenue-profit-growth-tool)
**Optimize revenue, increase profitability, and scale smarter!**
## **Why Revenue & Profit Growth Projections Matter for SaaS Businesses**
Accurate revenue and profit projections are crucial for SaaS companies to:
1. Plan long-term growth strategies
2. Set realistic revenue and expansion goals
3. Make informed decisions about scaling, hiring, and product development
4. Identify potential financial risks and opportunities
5. Ensure sustainable profitability in an evolving market
By leveraging financial forecasting, SaaS businesses can gain a competitive advantage and minimize unexpected financial hurdles.
## **Key Input Metrics**
To generate precise revenue and profit projections, the tool requires the following key metrics:
### **1. Estimated Annual Revenue**
This is the total revenue generated annually from customer subscriptions. Entering an accurate figure allows the tool to forecast revenue growth trends over multiple years.
### **2. Estimated Annual Costs**
All operational expenses, including software development, hosting, salaries, marketing, and customer support, should be included. Tracking these costs ensures an accurate profitability forecast.
### **3. Revenue Growth Rate**
This is the annual percentage increase in revenue based on customer acquisition, expansion, and pricing adjustments. For example, if you expect a 10% revenue increase yearly, enter this value to project long-term growth.
### **4. Cost Growth Rate**
Expenses grow as the business scales. The cost growth rate estimates how annual costs increase over time, accounting for infrastructure, hiring, and marketing investments.
### **5. Forecast Duration (Number of Years)**
Select the time frame for your financial projections (e.g., 3, 5, or 10 years). Longer projections provide a bigger picture of financial health but should be regularly reviewed for accuracy.
## **How the SaaS Revenue & Profit Growth Calculator Works**
This tool uses real-time calculations based on your revenue, costs, and growth rates to generate financial projections. It provides:
1. **Revenue Growth Forecasts** – Year-over-year revenue increase based on your expected growth rate.
2. **Profitability Analysis** – Calculates net profit by subtracting projected costs from revenue.
3. **Break-even Insights** – Identifies when your business becomes sustainably profitable.
4. **Data-driven Decision Support** – Helps refine pricing, reduce churn, and optimize cost management.
## **Key Output Metrics**
After entering your data, the tool provides detailed insights into your SaaS business’s financial future:
### **1. Revenue Projection**
A year-over-year revenue forecast, estimating how your business will grow based on your revenue growth rate. This projection helps track expansion progress and scalability.
### **2. Profit Projection**
A detailed profit analysis displaying how much revenue remains after accounting for growing operational costs. Monitoring profit growth ensures long-term business sustainability.
## **Frequently Asked Questions (FAQs)**
### **1. Why are revenue and profit projections important for SaaS businesses?**
Revenue and profit forecasts allow SaaS businesses to make informed financial decisions, set realistic goals, and plan growth strategies. Predicting financial trends helps **optimize operations, scale efficiently, and mitigate risks**.
### **2. How accurate are long-term SaaS revenue projections?**
Projections are based on current data and estimated growth rates, but factors like customer churn, market shifts, and operational costs can impact actual outcomes. Regularly updating forecasts ensures greater accuracy.
### **3. What is the difference between revenue growth and profit growth?**
* **Revenue Growth**: Measures total income increase from SaaS subscriptions and customer expansion.
* **Profit Growth**: Accounts for both revenue and costs, reflecting the actual net earnings after expenses. A company may experience revenue growth but lower profits if costs rise significantly.
### **4. How can I increase my SaaS revenue growth rate?**
Boost revenue by:
1. Enhancing customer acquisition strategies
2. Reducing churn with better retention efforts
3. Optimizing pricing models and offering upsells
4. Expanding into new markets or launching new features
### **5. How does cost growth affect SaaS profitability?**
As businesses scale, operational costs (e.g., support, hosting, infrastructure, and marketing) also increase. If costs outpace revenue growth, profitability declines. Monitoring expenses ensures financial stability.
# Invoice Generation
Source: https://docs.dodopayments.com/features/invoice-generation
The Invoice Generation feature in Dodo Payments simplifies the billing process by automatically creating and delivering invoices after every successful payment. Whether for one-time purchases or recurring subscription renewals, invoices are generated to document transactions with clear, professional records.
## **Introduction**
At Dodo Payments, keeping your business and customer data safe is a top priority. We provide robust fraud prevention tools and security features designed to protect against fraudulent transactions, data breaches, and unauthorized access. Our security measures ensure that your payment processing is secure and compliant with industry standards, so you can focus on growing your business without worrying about fraud or data security.
## **Key Security Features**
**PCI-DSS Compliance**
Dodo Payments is fully compliant with the **Payment Card Industry Data Security Standard (PCI-DSS)**, which means we meet the highest security standards for handling, processing, and storing card information. This compliance ensures that all card transactions are processed securely and reduces the risk of data breaches.
**Data Encryption**
All sensitive data, such as payment information and personal details, is encrypted using the latest encryption technology. This ensures that your data is protected during transmission and storage, making it unreadable to unauthorized parties.
**Tokenization**
Instead of storing sensitive card information, Dodo Payments uses **tokenization**. This means that sensitive data is replaced with a unique identifier (token), ensuring that no card details are ever stored directly in our systems. This adds an extra layer of protection against fraud.
## **Fraud Prevention Tools**
**Fraud Detection**
Dodo Payments uses real-time fraud detection tools that monitor transactions for suspicious activity. This includes looking for unusual purchasing patterns, multiple failed payment attempts, or signs of account takeover. Any flagged transactions are immediately investigated, and merchants are notified if additional verification is needed.
## **Monitoring and Alerts**
Dodo Payments provides continuous monitoring of all transactions and account activity. If any unusual behavior or potential security threats are detected, we will block the transactions. These include suspicious login attempts, unusual transaction volumes, or possible fraud attempts.
## **Best Practices for Merchants**
To help keep your business secure, we recommend the following best practices
* **Monitor Transactions Regularly**: Keep an eye on your transaction history for any suspicious activity.
* **Use Strong Passwords**: Use unique, complex passwords for your account and change them regularly.
* **Report** any suspicious activity to our support team
# Feature Prioritization Tools
Source: https://docs.dodopayments.com/features/gtm-tools/feature-prioritization-tool
The **Feature Prioritization Tool** helps SaaS product teams prioritize feature development using the **RICE (Reach, Impact, Confidence, Effort) framework**. By assigning a RICE score to each feature, this tool ensures that high-impact, low-effort features are prioritized, maximizing development efficiency and business value.
## **Start Prioritizing Features for Maximum Impact**
Use the **Feature Prioritization Tool** to optimize product development and ensure your SaaS team focuses on features that drive engagement, user satisfaction, and revenue growth.
Link: [https://dodopayments.com/tools/product-prioritization-tool](https://dodopayments.com/tools/product-prioritization-tool)
## **Why Feature Prioritization is Essential for SaaS Businesses**
Prioritizing product features ensures that development teams focus on features with the highest user impact while efficiently managing resources. A structured prioritization process helps:
1. Improve customer satisfaction by delivering high-value features first
2. Maximize ROI on development efforts
3. Reduce time-to-market for essential features
4. Align product development with business objectives
By leveraging data-driven prioritization, SaaS companies can build products that drive engagement, retention, and revenue growth.
## **Key Input Metrics**
### **1. Reach Score (1-10)**
Represents the estimated number of users who will benefit from the feature within a specific period. High-reach features impact a large portion of the user base.
### **2. Impact Score (1-10)**
Measures the feature’s value to affected users. Higher impact scores indicate features that significantly enhance the user experience or solve a critical problem.
### **3. Confidence Level (%)**
Reflects the certainty of reach and impact estimates. A higher confidence percentage ensures that decisions are based on reliable data and user insights.
### **4. Effort Score (1-10)**
Represents the estimated resources required to implement the feature, including development time, personnel, and budget. Features requiring lower effort with high impact should be prioritized.
## **How the Feature Prioritization Tool Works**
Using the **RICE framework**, the tool ranks product features based on their potential value vs. effort. It provides:
1. A structured scoring system to evaluate feature importance
2. Automated ranking to ensure optimal resource allocation
3. Data-driven prioritization for faster decision-making
The tool generates a prioritized feature list, ensuring that the highest-impact features with the lowest resource investment are developed first.
## **Key Output Metrics**
### **1. Prioritized Feature List**
A feature ranking list is generated based on the RICE score, displayed in descending order. This list helps SaaS product teams focus on the most impactful features first, ensuring efficient roadmap planning.
## **Frequently Asked Questions (FAQs)**
### **FAQs:**
1. **What is the RICE framework?**
* The RICE framework is a prioritization method used to rank product features based on four factors: Reach (how many users it will affect), Impact (how much value it provides), Confidence (how sure you are of the estimates), and Effort (how much work it requires).
2. **How do I calculate Reach for a feature?**
* Reach is the estimated number of users who will benefit from the feature. For example, if a feature impacts 1,000 users per month, your reach score would reflect this number.
3. **Why is Confidence important in the RICE framework?**
* Confidence helps ensure that you’re making decisions based on reliable estimates. If you’re unsure about the impact or reach of a feature, a lower confidence score will prevent you from over-prioritizing a feature that may not deliver the expected value.
4. **How do I decide which features to prioritize?**
* Features with the highest RICE scores should be prioritized first because they offer the most value relative to the effort required. This ensures your team focuses on tasks that deliver maximum results quickly.
5. **What should I do if two features have the same RICE score?**
* If two features have the same RICE score, consider qualitative factors such as strategic importance, user feedback, or alignment with long-term business goals. You can also reassess confidence levels or adjust the impact estimate to break the tie.
# Freemium Model
Source: https://docs.dodopayments.com/features/gtm-tools/freemium-model
The Freemium Model ROI Analysis Tool helps SaaS businesses evaluate the effectiveness and financial viability of a freemium strategy. It provides insights into the costs associated with supporting free users and the revenue generated from conversions to paid plans. This tool enables businesses to assess whether their freemium model is sustainable and profitable.
## **Start Optimizing Your Freemium Strategy Today**
Evaluate your freemium model’s profitability with the Freemium Model ROI Calculator.
Link: [https://dodopayments.com/tools/freemium-model-calculator](https://dodopayments.com/tools/freemium-model-calculator)
Make data-driven decisions to maximize conversions and revenue!
## Importance of ROI Analysis for Freemium Models
Freemium models attract a large user base by offering free access to basic features, with the expectation that a percentage of users will convert to paid plans. However, if conversion rates are too low or operational costs are too high, the free tier can become unsustainable. Understanding the ROI of a freemium strategy is critical for:
* Evaluating the financial impact of supporting free users.
* Optimizing conversion strategies to increase paid users.
* Identifying cost inefficiencies and areas for improvement.
* Enhancing pricing models to maximize revenue potential.
## **Key Metrics Analyzed**
This tool provides insights into the following key factors affecting freemium profitability:
### **1. Free User Base**
Understanding the size of the free user base is essential, as these users form the primary pool for potential paid conversions.
### **2. Operational Costs**
The costs associated with supporting free users, including server infrastructure, customer support, and product maintenance, directly impact the financial sustainability of a freemium model.
### **3. Free-to-Paid Conversion Rate**
The percentage of free users upgrading to paid plans is a critical indicator of monetization success. A low conversion rate may suggest issues with feature differentiation, pricing, or user engagement.
### **4. Paid User Revenue & Costs**
Revenue generated from paid subscribers must offset both acquisition costs and the cost of maintaining free users. Understanding the balance between these factors ensures long-term profitability.
## **How This Tool Helps SaaS Businesses**
By analyzing these metrics, the Freemium Model ROI Analysis Tool enables businesses to:
1. Assess the financial impact of free users and determine if the model is sustainable.
2. Optimize the free-to-paid conversion funnel to improve monetization.
3. Identify opportunities to reduce costs while maintaining product quality.
4. Fine-tune pricing and feature differentiation to increase revenue.
## **Strategic Considerations**
* **ROI (Return on Investment)**: The tool provides an ROI percentage, showing the profitability of your freemium model. A positive ROI indicates that your free users are converting into paying customers at a rate that covers your costs and generates profit.
If the analysis indicates a negative ROI, businesses may need to:
* Refine pricing models by adjusting free and premium feature allocations.
* Enhance product value to improve user retention and encourage upgrades.
* Reduce operational costs associated with maintaining free users.
* Optimize conversion tactics, such as targeted promotions and in-app nudges.
### **FAQs:**
1. **What is a good conversion rate for freemium models?**
* A typical conversion rate for freemium models is between 2% and 5%, but it can vary depending on your product and market. Higher conversion rates indicate that your free users are finding enough value to upgrade to a paid plan.
2. **How do I reduce the costs of supporting free users?**
* You can reduce costs by optimizing server resources, automating customer support for free users, and limiting the features available in the free tier to reduce usage costs.
3. **What are the risks of a freemium model?**
* The biggest risk is that too many users stay on the free plan without converting to paid plans. This can lead to high costs without generating sufficient revenue. Balancing the value of the free tier and making the upgrade path attractive is key.
4. **How can I improve my freemium conversion rate?**
* You can improve conversion by offering clear value in the paid tiers, such as premium features, better support, or advanced analytics. Offering timely nudges to ask the user to upgrade may push the conversion
5. **What should I do if my freemium ROI is negative?**
* If your freemium ROI is negative, it’s important to reevaluate the value you’re offering in the free tier. Consider reducing the free features or increasing the incentives to upgrade to a paid plan to make your strategy more profitable.
# SaaS KPI Measurement
Source: https://docs.dodopayments.com/features/gtm-tools/saas-kpi-measurement
The SaaS KPI Measurement Tool enables SaaS businesses to monitor their key performance indicators (KPIs) such as Annual Recurring Revenue (ARR), Churn Rate, and Customer Lifetime Value (CLTV). By consolidating critical financial metrics in a single dashboard, businesses can gain insights into growth trends, customer retention, and long-term profitability.
## **Start Tracking Your SaaS KPIs Today**
Gain valuable business insights with the **SaaS KPI Measurement Tool**.
Link: [https://dodopayments.com/tools/saas-kpi-measurement](https://dodopayments.com/tools/saas-kpi-measurement)
**Optimize revenue, monitor churn, and scale with confidence!**
## **Why KPI Measurement is Essential for SaaS Businesses**
Accurate KPI tracking helps SaaS companies:
1. Understand monthly and annual revenue trends
2. Identify customer retention challenges and reduce churn
3. Forecast long-term financial performance
4. Optimize pricing and revenue models
5. Improve customer lifetime value (CLTV) and ROI
Tracking these KPIs consistently ensures better decision-making and business sustainability.
## **Key Input Metrics**
To generate accurate SaaS KPIs, the tool requires the following inputs:
### 1. Monthly Recurring Revenue (MRR)
The total recurring revenue generated per month from customer subscriptions. This metric is the foundation for calculating ARR and CLTV.
### 2. New Customers Added This Month
The number of new customers acquired during the current month. This input is essential for tracking growth and understanding customer acquisition effectiveness.
### 3. Customers Last Month
The total customer base at the start of the month. This metric is used to assess churn rate and retention trends.
### 4. Current Customer Base This Month
The number of active customers at the end of the month. This figure helps determine if the company is retaining or losing customers.
### 5. Average Customer Retention Period
The average length of time a customer remains subscribed (in months or years). This is crucial for calculating CLTV and evaluating long-term revenue potential.
## **How the SaaS KPI Measurement Tool Works**
The tool performs real-time calculations based on the provided inputs and generates key SaaS metrics:
1. **ARR Calculation** – Estimates Annual Recurring Revenue using MRR.
2. **Churn Rate Calculation** – Determines customer retention trends over time.
3. **CLTV Calculation** – Evaluates customer lifetime value to measure revenue potential per customer.
By consolidating these KPIs, the tool provides a comprehensive performance overview, allowing businesses to identify opportunities for growth and improvement.
## **Frequently Asked Questions (FAQs)**
1. **What is a good churn rate for a SaaS business?**
* A good churn rate for SaaS businesses varies depending on the industry but it typically falls below 10%. Lower churn means better customer retention, which directly impacts revenue stability. If your churn rate is higher, it may indicate issues with product fit or customer satisfaction.
2. **Why is tracking MRR important for SaaS companies?**
* MRR provides a clear, predictable revenue stream that you can count on month over month. It helps with financial forecasting, budgeting, and measuring the success of marketing and sales strategies.
3. **How can I increase my CLTV?**
* You can increase CLTV by improving customer retention, upselling customers to higher pricing tiers, and providing exceptional customer service. Happy customers are likely to stick around longer and spend more.
4. **What’s the difference between MRR and ARR?**
* MRR represents your monthly recurring revenue, while ARR is the annualized version of MRR. ARR provides a longer-term perspective on your recurring revenue, making it easier to assess yearly performance.
5. **Why should I monitor churn rate closely?**
* Churn rate directly affects your bottom line. High churn means that you’re losing customers faster than you’re acquiring new ones, which can lead to negative revenue growth. Monitoring churn helps you identify areas for improvement, like product enhancements or better customer support.
# SaaS Pricing calculator
Source: https://docs.dodopayments.com/features/gtm-tools/saas-pricing-calculator
The SaaS Pricing Calculator is designed to help SaaS businesses determine the ideal pricing strategy for their software products. Setting the right price is critical for remaining competitive, covering operational costs, and maximizing profitability. This tool enables businesses to explore different pricing models, including competitor-based, cost-based, and value-based pricing, to develop a pricing structure that aligns with market trends and customer expectations.
## **Optimize Your SaaS Pricing Strategy Today**
Use the **SaaS Pricing Calculator** to develop a pricing model that maximises profitability, competitiveness, and customer acquisition.
Link: [https://dodopayments.com/tools/saas-pricing-calculator](https://dodopayments.com/tools/saas-pricing-calculator)
**Find the perfect balance between cost, value, and market positioning!**
## **Why Pricing Strategy is Crucial for SaaS Businesses**
Pricing directly impacts customer acquisition, revenue growth, and profitability. A well-defined pricing strategy ensures:
1. **Competitive positioning** – Aligns your product pricing with market expectations
2. **Sustainable profitability** – Covers costs while maintaining profit margins
3. **Value-based pricing** – Ensures customers pay according to the benefits they receive
Choosing the right pricing strategy allows SaaS businesses to balance affordability, perceived value, and business growth.
## **Key Input Metrics**
### **1. Competitor Pricing**
Understanding the price points of similar SaaS solutions in the market helps in positioning your product effectively. Competitor pricing acts as a reference, enabling businesses to decide whether to price above, below, or at market rates.
### **2. Product Value Addition (%)**
Represents the relative value your product provides compared to competitors. If your software offers 30% more features or efficiency, pricing can be adjusted accordingly.
### **3. Cost per User**
Includes operational costs such as cloud hosting, development, maintenance, and support services. This metric helps in setting a profitable baseline price to ensure sustainability.
### **4. Estimated User Base**
Defines the projected number of users subscribing to the SaaS product over a set period. This estimation helps determine revenue potential and optimal pricing.
### **5. Target Revenue**
Businesses must set annual or monthly revenue goals to ensure pricing strategies align with profitability objectives. This metric helps determine minimum pricing thresholds.
### **6. Estimated Value for the Customer**
Assesses the financial impact or time savings the product delivers to users. For example, if the software saves businesses \$10,000 annually, pricing should reflect this value-based approach.
## **How the SaaS Pricing Calculator Works**
This tool enables businesses to compare multiple pricing models and identify the most suitable one based on financial goals, competitive landscape, and customer expectations. It supports:
1. **Competitor-Based Pricing** – Align pricing with industry benchmarks
2. **Cost-Based Pricing** – Ensure pricing covers operational costs and profit margins
3. **Value-Based Pricing** – Charge based on customer-perceived value
By leveraging data-driven pricing strategies, SaaS companies can optimize revenue, enhance customer acquisition, and drive business growth.
## **Key Output Metrics**
### **1. Recommended Price Range**
The tool provides a flexible pricing range, allowing businesses to adjust prices based on market trends and customer feedback. Pricing recommendations typically range between 0.8x and 1.2x the suggested price, ensuring adaptability.
### **2. Tiered Pricing Structure**
A well-defined tiered pricing model maximizes revenue potential by catering to different customer segments. The tool recommends three tiers:
**Basic Tier** – Lower-priced plan for budget-conscious users with essential features.
**Pro Tier** – Standard pricing plan offering a balanced set of features.
**Enterprise Tier** – Premium pricing model with advanced functionalities and personalized support.
## **Frequently Asked Questions (FAQs)**
1. **What is the best pricing strategy for SaaS companies?**
* There is no one-size-fits-all pricing strategy for SaaS companies. The best approach depends on your product, market, and business goals. Competitor-based pricing helps you align with market rates, cost-based pricing ensures you cover your expenses, and value-based pricing lets you charge based on the perceived value your product delivers to customers.
2. **How do I decide whether to use competitor-based, cost-based, or value-based pricing?**
* If your market is saturated with similar products, competitor-based pricing can keep you competitive. If you want to ensure profitability, cost-based pricing guarantees your costs are covered. If your product offers significant value to users, value-based pricing allows you to charge based on the results your product delivers, which can lead to higher pricing.
3. **How can I make my SaaS pricing more competitive?**
* To stay competitive, evaluate your competitors regularly, ensure your pricing reflects the value you provide, and consider offering tiered pricing or freemium models. Adjust your pricing based on user feedback and market trends to ensure you remain competitive.
4. **Why should I offer tiered pricing for my SaaS product?**
* Tiered pricing allows you to cater to different customer segments, offering basic features at lower prices and premium features at higher prices. This flexibility maximizes your revenue by appealing to both budget-conscious users and those willing to pay for advanced features.
5. **How often should I reevaluate my SaaS pricing?**
* It’s a good practice to review your pricing strategy at least once a year, or when significant changes occur in your product offerings, market conditions, or customer needs. This ensures your pricing remains competitive and aligned with your business goals.
# SaaS Revenue & Profit Growth
Source: https://docs.dodopayments.com/features/gtm-tools/saas-revenue-and-profit-growth
The **SaaS Revenue & Profit Growth Tool** is designed to help SaaS businesses accurately forecast their **financial performance** by analyzing revenue, costs, and growth rates. This tool enables businesses to make data-driven decisions about scaling, hiring, and long-term sustainability. By predicting future revenue and profit trends, SaaS companies can optimize growth strategies and maximize profitability.
Start Forecasting Your Business Growth with **SaaS Revenue and Profit Growth Tool**
**Link:** [https://dodopayments.com/tools/saas-revenue-profit-growth-tool](https://dodopayments.com/tools/saas-revenue-profit-growth-tool)
**Optimize revenue, increase profitability, and scale smarter!**
## **Why Revenue & Profit Growth Projections Matter for SaaS Businesses**
Accurate revenue and profit projections are crucial for SaaS companies to:
1. Plan long-term growth strategies
2. Set realistic revenue and expansion goals
3. Make informed decisions about scaling, hiring, and product development
4. Identify potential financial risks and opportunities
5. Ensure sustainable profitability in an evolving market
By leveraging financial forecasting, SaaS businesses can gain a competitive advantage and minimize unexpected financial hurdles.
## **Key Input Metrics**
To generate precise revenue and profit projections, the tool requires the following key metrics:
### **1. Estimated Annual Revenue**
This is the total revenue generated annually from customer subscriptions. Entering an accurate figure allows the tool to forecast revenue growth trends over multiple years.
### **2. Estimated Annual Costs**
All operational expenses, including software development, hosting, salaries, marketing, and customer support, should be included. Tracking these costs ensures an accurate profitability forecast.
### **3. Revenue Growth Rate**
This is the annual percentage increase in revenue based on customer acquisition, expansion, and pricing adjustments. For example, if you expect a 10% revenue increase yearly, enter this value to project long-term growth.
### **4. Cost Growth Rate**
Expenses grow as the business scales. The cost growth rate estimates how annual costs increase over time, accounting for infrastructure, hiring, and marketing investments.
### **5. Forecast Duration (Number of Years)**
Select the time frame for your financial projections (e.g., 3, 5, or 10 years). Longer projections provide a bigger picture of financial health but should be regularly reviewed for accuracy.
## **How the SaaS Revenue & Profit Growth Calculator Works**
This tool uses real-time calculations based on your revenue, costs, and growth rates to generate financial projections. It provides:
1. **Revenue Growth Forecasts** – Year-over-year revenue increase based on your expected growth rate.
2. **Profitability Analysis** – Calculates net profit by subtracting projected costs from revenue.
3. **Break-even Insights** – Identifies when your business becomes sustainably profitable.
4. **Data-driven Decision Support** – Helps refine pricing, reduce churn, and optimize cost management.
## **Key Output Metrics**
After entering your data, the tool provides detailed insights into your SaaS business’s financial future:
### **1. Revenue Projection**
A year-over-year revenue forecast, estimating how your business will grow based on your revenue growth rate. This projection helps track expansion progress and scalability.
### **2. Profit Projection**
A detailed profit analysis displaying how much revenue remains after accounting for growing operational costs. Monitoring profit growth ensures long-term business sustainability.
## **Frequently Asked Questions (FAQs)**
### **1. Why are revenue and profit projections important for SaaS businesses?**
Revenue and profit forecasts allow SaaS businesses to make informed financial decisions, set realistic goals, and plan growth strategies. Predicting financial trends helps **optimize operations, scale efficiently, and mitigate risks**.
### **2. How accurate are long-term SaaS revenue projections?**
Projections are based on current data and estimated growth rates, but factors like customer churn, market shifts, and operational costs can impact actual outcomes. Regularly updating forecasts ensures greater accuracy.
### **3. What is the difference between revenue growth and profit growth?**
* **Revenue Growth**: Measures total income increase from SaaS subscriptions and customer expansion.
* **Profit Growth**: Accounts for both revenue and costs, reflecting the actual net earnings after expenses. A company may experience revenue growth but lower profits if costs rise significantly.
### **4. How can I increase my SaaS revenue growth rate?**
Boost revenue by:
1. Enhancing customer acquisition strategies
2. Reducing churn with better retention efforts
3. Optimizing pricing models and offering upsells
4. Expanding into new markets or launching new features
### **5. How does cost growth affect SaaS profitability?**
As businesses scale, operational costs (e.g., support, hosting, infrastructure, and marketing) also increase. If costs outpace revenue growth, profitability declines. Monitoring expenses ensures financial stability.
# Invoice Generation
Source: https://docs.dodopayments.com/features/invoice-generation
The Invoice Generation feature in Dodo Payments simplifies the billing process by automatically creating and delivering invoices after every successful payment. Whether for one-time purchases or recurring subscription renewals, invoices are generated to document transactions with clear, professional records.
 ## Key Highlights
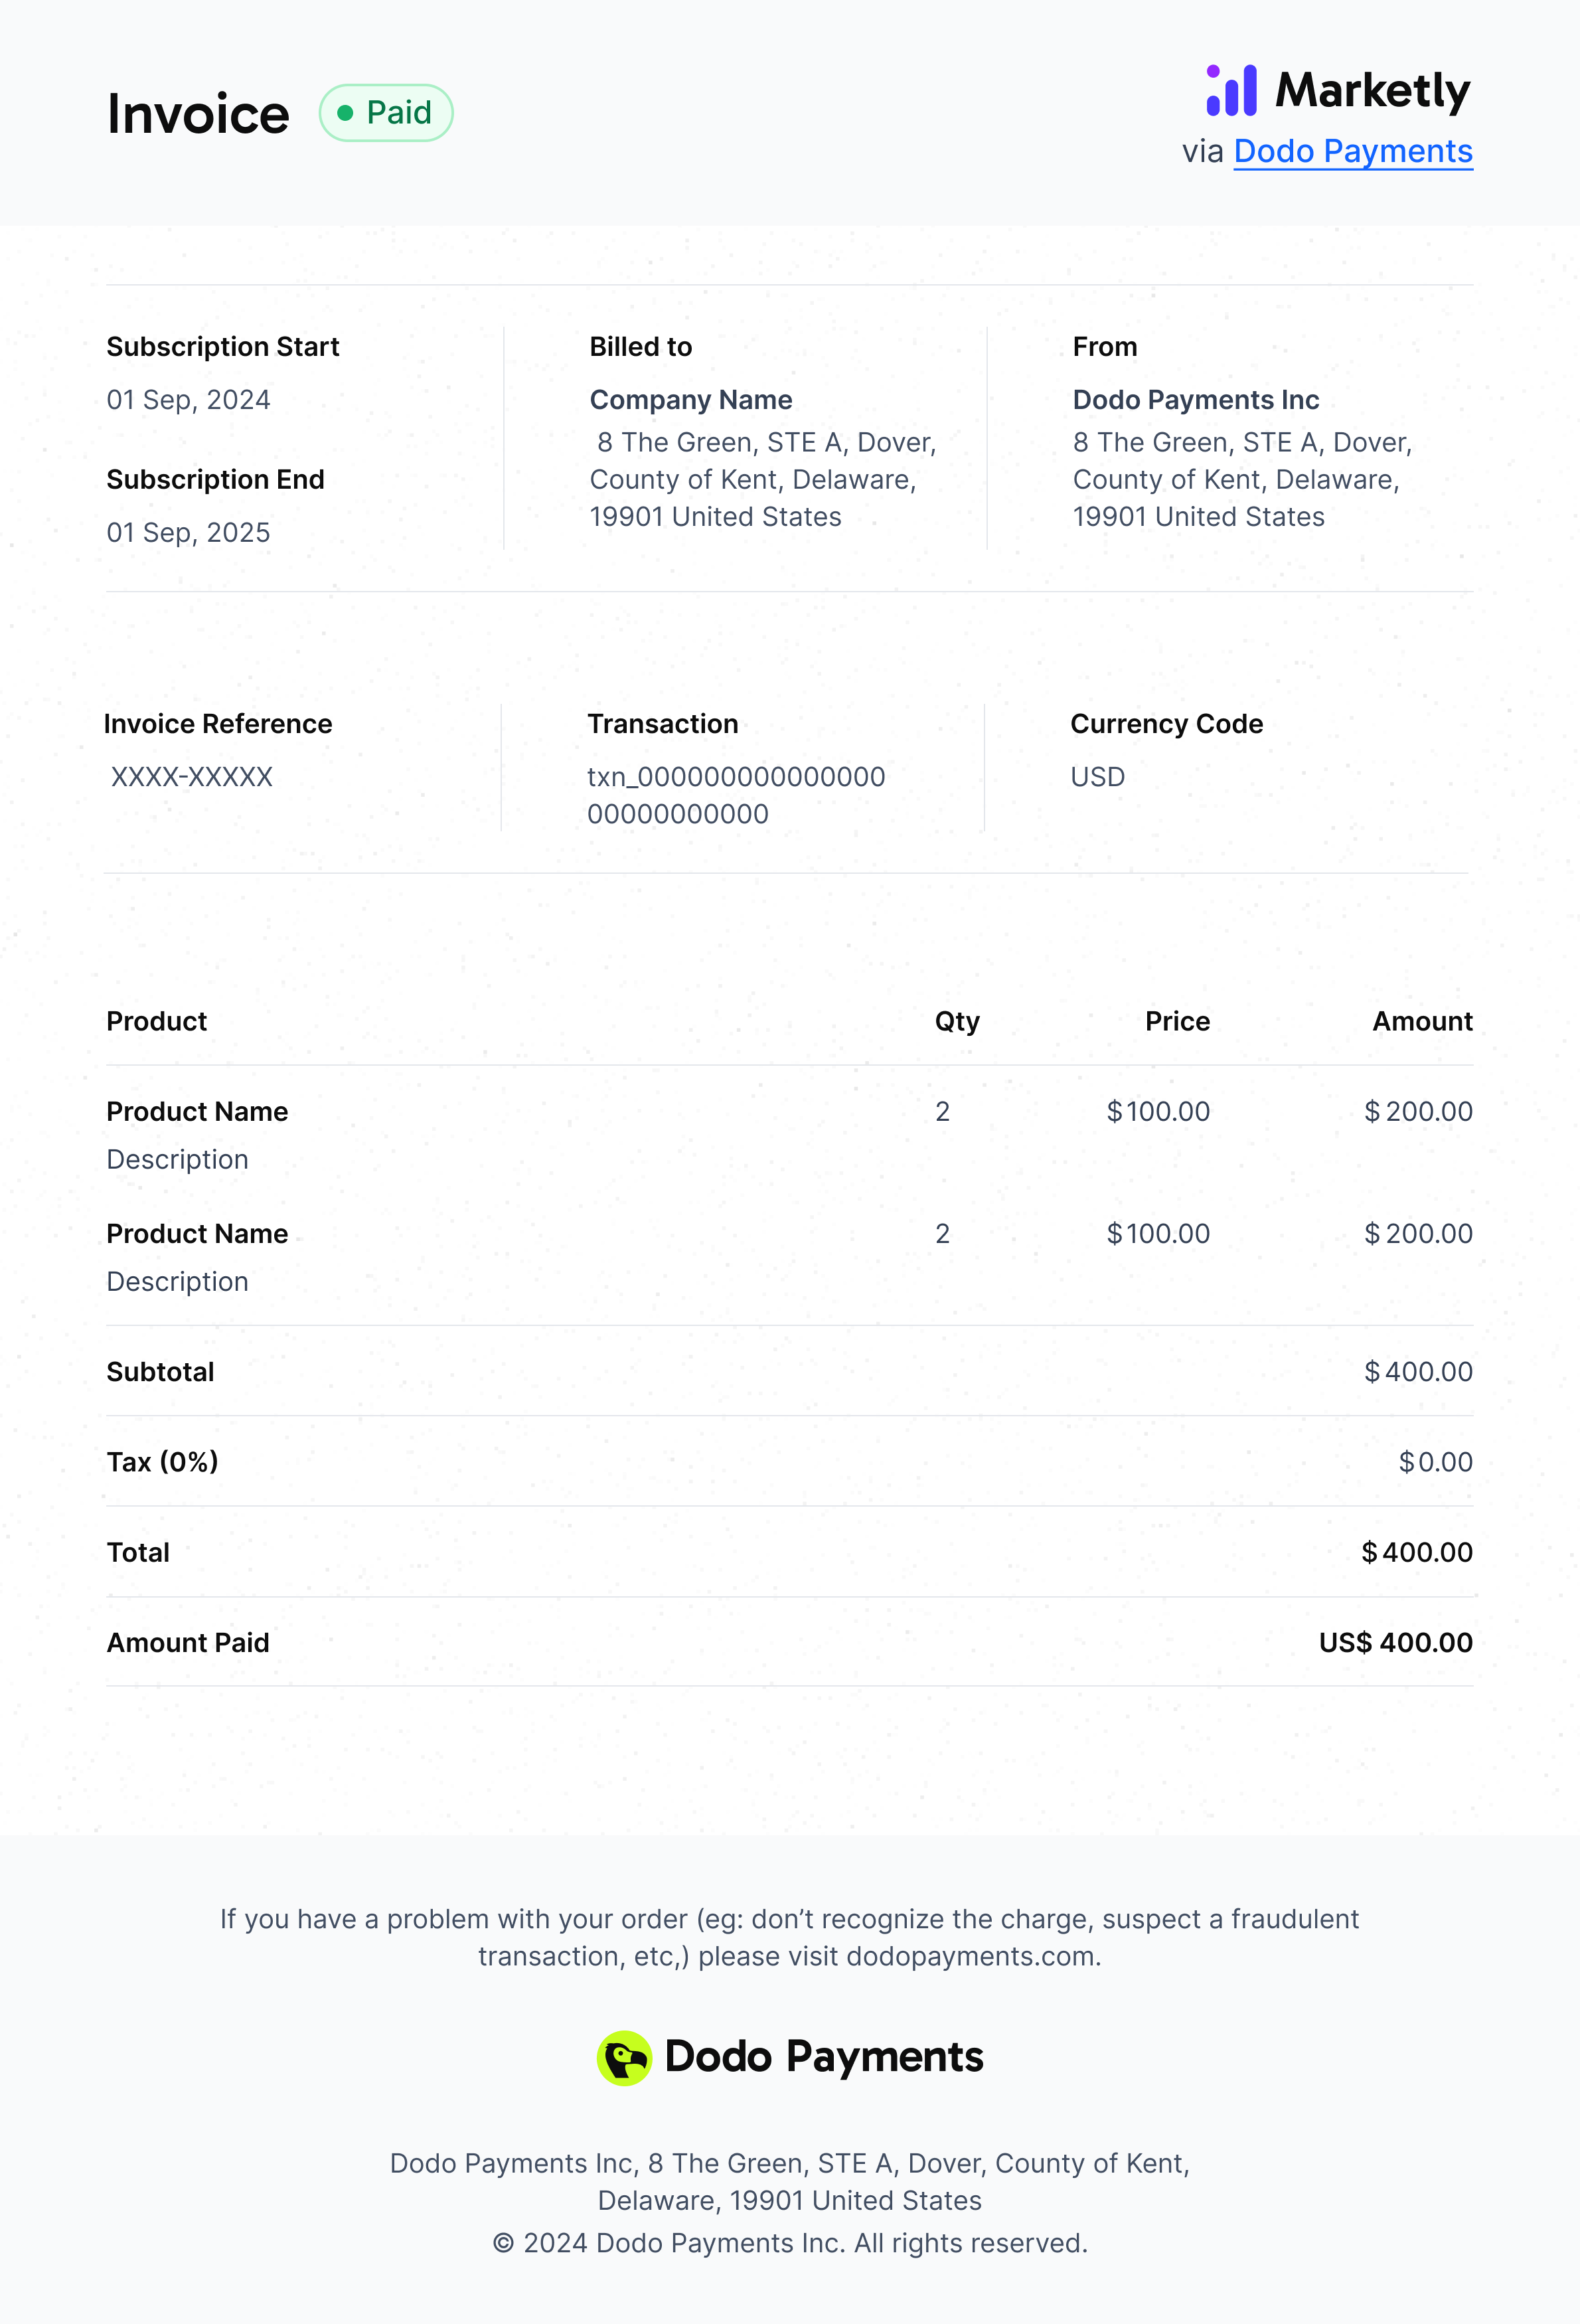 **Invoice Status**
| Status | Description |
| --------- | ---------------------------------------------------------------- |
| In Draft | Invoice which has not been created with all information required |
| Unpaid | Invoice for which payment has not been received |
| Paid | Invoice for which the payment has been received |
| Cancelled | Invoice has been cancelled |
| Past Due | Invoice which is past due |
***
## Invoice is Sent to Customer and Merchant
Once generated, the invoice is immediately sent to the customer and merchant via email.
***
## Invoice Access and Management
Merchants can view, manage, and resend invoices from the **Invoices** section in the Dodo Payments dashboard. This section provides a comprehensive view of all generated invoices, allowing merchants to easily track payments.
### Features of the Invoices Section:
* **View Invoices**: See a list of all generated invoices, each marked with its payment status (e.g., paid, pending, refunded).
* **Download Invoices**: Export individual invoices as PDF files for internal records or customer requests.
* **Filter Invoices**: Use filters to search for invoices by date, customer name, or status for quicker access to specific invoices.
# License Keys
Source: https://docs.dodopayments.com/features/license-keys
The License Key Management feature is designed to help merchants secure their digital products and services by generating, managing, and tracking unique license keys. This feature ensures only authorized users access your products and provides merchants with full control over their license key usage and distribution. Ideal for SaaS businesses and digital product vendors, the tool also includes advanced tracking and revocation capabilities for enhanced security.
## How to Create License Keys?
Creating license keys is a simple process:
1. **Access the License Key Section**:
* Log in to your Dodo Payments dashboard.
* Navigate to the **Products** tab and select a **Product**
2. **Click on `License Key`**:
* Click on License Key section in the selected product
3. **Configure the License Key Settings**:
Provide the following details:
* **License Key Expiry Date**: Define the validity period of the license key. It will be never expire by default which means the license key will always be valid
* **Activation Limit**: Set the total number of activations allowed per key. It will unlimited by default which means unlimited activations will be allowed
* **Activation Instructions**: Add clear instructions to guide customers through the activation process. This will be sent along with the license key email.
**Invoice Status**
| Status | Description |
| --------- | ---------------------------------------------------------------- |
| In Draft | Invoice which has not been created with all information required |
| Unpaid | Invoice for which payment has not been received |
| Paid | Invoice for which the payment has been received |
| Cancelled | Invoice has been cancelled |
| Past Due | Invoice which is past due |
***
## Invoice is Sent to Customer and Merchant
Once generated, the invoice is immediately sent to the customer and merchant via email.
***
## Invoice Access and Management
Merchants can view, manage, and resend invoices from the **Invoices** section in the Dodo Payments dashboard. This section provides a comprehensive view of all generated invoices, allowing merchants to easily track payments.
### Features of the Invoices Section:
* **View Invoices**: See a list of all generated invoices, each marked with its payment status (e.g., paid, pending, refunded).
* **Download Invoices**: Export individual invoices as PDF files for internal records or customer requests.
* **Filter Invoices**: Use filters to search for invoices by date, customer name, or status for quicker access to specific invoices.
# License Keys
Source: https://docs.dodopayments.com/features/license-keys
The License Key Management feature is designed to help merchants secure their digital products and services by generating, managing, and tracking unique license keys. This feature ensures only authorized users access your products and provides merchants with full control over their license key usage and distribution. Ideal for SaaS businesses and digital product vendors, the tool also includes advanced tracking and revocation capabilities for enhanced security.
## How to Create License Keys?
Creating license keys is a simple process:
1. **Access the License Key Section**:
* Log in to your Dodo Payments dashboard.
* Navigate to the **Products** tab and select a **Product**
2. **Click on `License Key`**:
* Click on License Key section in the selected product
3. **Configure the License Key Settings**:
Provide the following details:
* **License Key Expiry Date**: Define the validity period of the license key. It will be never expire by default which means the license key will always be valid
* **Activation Limit**: Set the total number of activations allowed per key. It will unlimited by default which means unlimited activations will be allowed
* **Activation Instructions**: Add clear instructions to guide customers through the activation process. This will be sent along with the license key email.
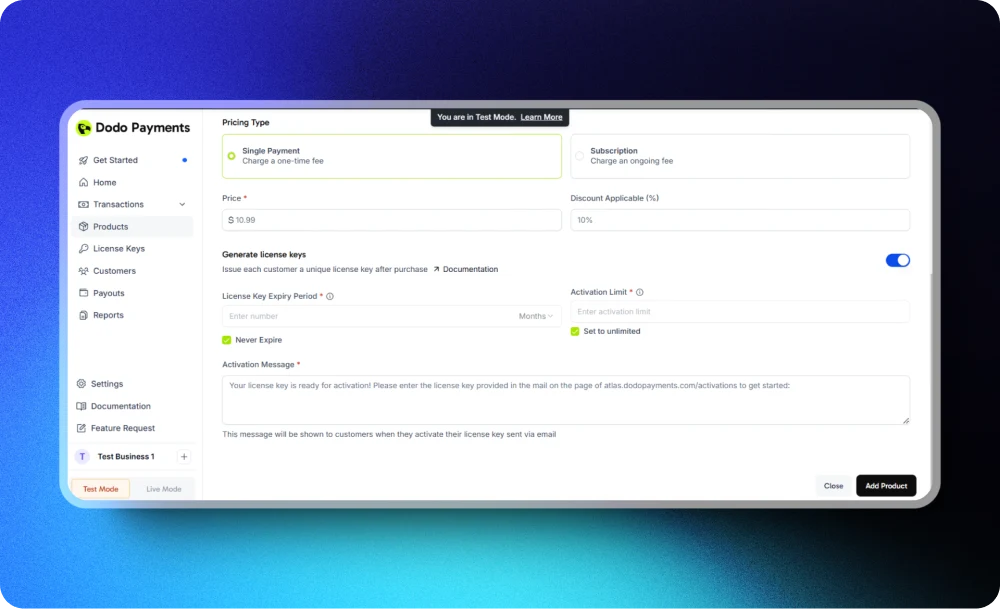 4. **Preview and Save**:
* Review the license key settings to ensure accuracy.
* Click **Save** to create the license key.
5. **Automatic Delivery**:
* The license key is delivered to the customer via email upon successful transaction along with the activation instructions
## **Understanding License Key Configuration**
Here’s a detailed explanation of each configuration field:
### **License Key Expiry Date**
* **What It Does**: Defines the duration for which the license key remains active.
* **Example**: A key can be set to expire after 30 days, 1 year, or no expiry (perpetual).
* **Purpose**: Ideal for subscription services or time-limited products.
### **Activation Limit**
* **What It Does**: Sets the maximum number of times a key can be activated.
* **Example**: A single-user license may allow 1 activation, while a team license may allow 5 activations.
* **Purpose**: Prevents overuse or unauthorized sharing.
### **Activation Instructions**
* **What It Does**: Guides customers on how to activate their license key.
* **Example**:
* “Enter your license key in the software activation field.”
* “Use the key to unlock premium features in your account settings.”
* **Purpose**: Simplifies the activation process and reduces customer queries.
## License Keys Section
The **License Keys Section** provides a comprehensive view of all license key activity and enables merchants to manage and monitor their licenses effectively. This section includes the following features:
### **Information Available**:
4. **Preview and Save**:
* Review the license key settings to ensure accuracy.
* Click **Save** to create the license key.
5. **Automatic Delivery**:
* The license key is delivered to the customer via email upon successful transaction along with the activation instructions
## **Understanding License Key Configuration**
Here’s a detailed explanation of each configuration field:
### **License Key Expiry Date**
* **What It Does**: Defines the duration for which the license key remains active.
* **Example**: A key can be set to expire after 30 days, 1 year, or no expiry (perpetual).
* **Purpose**: Ideal for subscription services or time-limited products.
### **Activation Limit**
* **What It Does**: Sets the maximum number of times a key can be activated.
* **Example**: A single-user license may allow 1 activation, while a team license may allow 5 activations.
* **Purpose**: Prevents overuse or unauthorized sharing.
### **Activation Instructions**
* **What It Does**: Guides customers on how to activate their license key.
* **Example**:
* “Enter your license key in the software activation field.”
* “Use the key to unlock premium features in your account settings.”
* **Purpose**: Simplifies the activation process and reduces customer queries.
## License Keys Section
The **License Keys Section** provides a comprehensive view of all license key activity and enables merchants to manage and monitor their licenses effectively. This section includes the following features:
### **Information Available**:
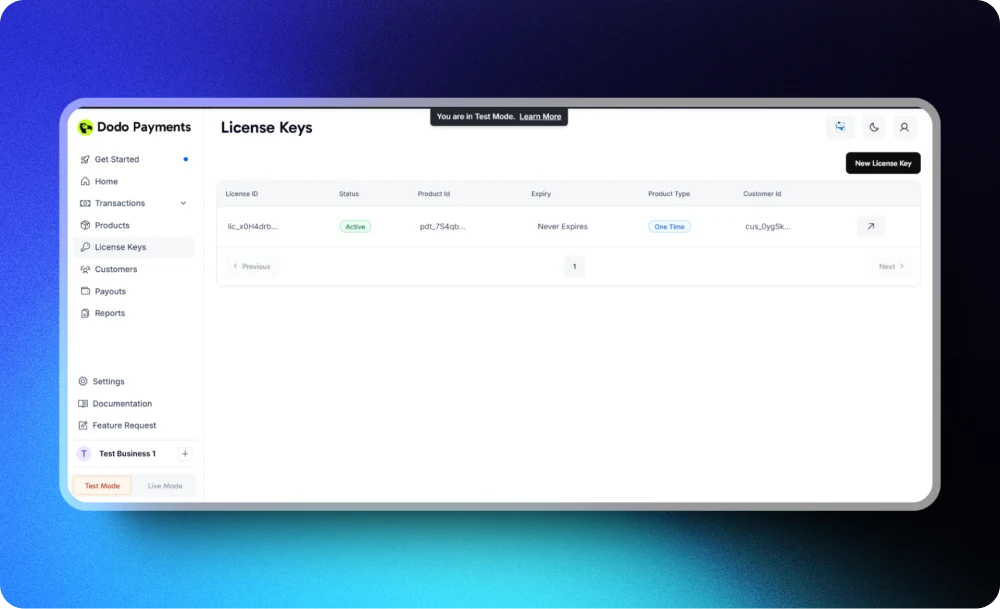 1. **Key Details**:
* License key value.
* Associated product name.
* Customer details (e.g., customer\_id)
* Purchase date.
2. **Usage Activity**:
* Number of activations.
* Activation dates and times.
* Status (active, expired, disabled)
3. **Expiry and Limits**:
* Key expiry date.
* Remaining activation count
* Current activation instances
### **Actions Available**:
1. **Key Details**:
* License key value.
* Associated product name.
* Customer details (e.g., customer\_id)
* Purchase date.
2. **Usage Activity**:
* Number of activations.
* Activation dates and times.
* Status (active, expired, disabled)
3. **Expiry and Limits**:
* Key expiry date.
* Remaining activation count
* Current activation instances
### **Actions Available**:
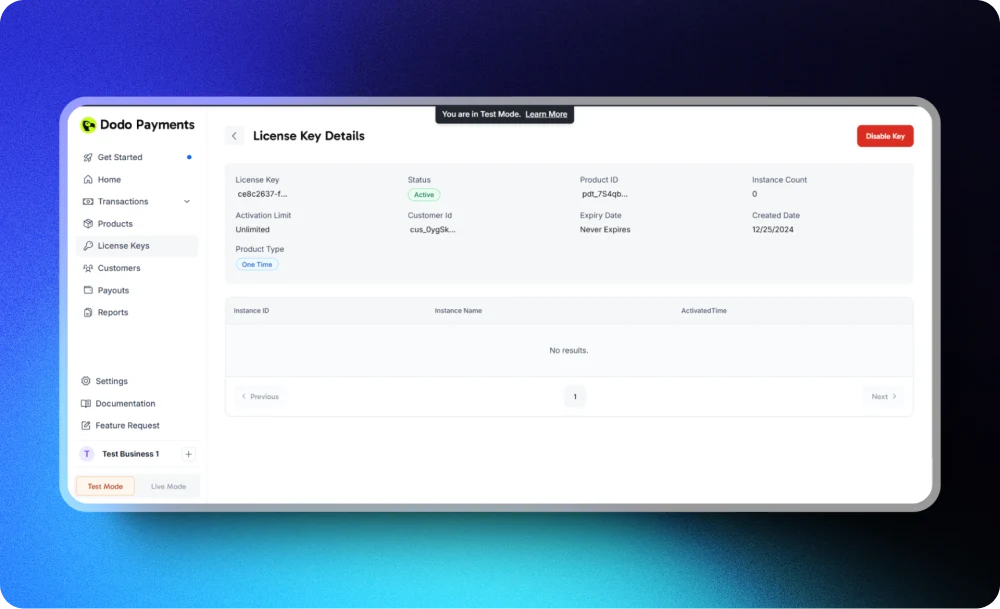 1. **Disable License Key**:
* Immediately disable a key to prevent further usage.
2. **Enable Key**:
* Enable a previously disabled license key.
3. **View Activation Instances**:
* View all associated activation instances for a particular license key
### **Benefits of License Key information** :
* Enables merchants to track license key activity in real-time.
* Identifies potential misuse or unauthorized activations.
* Simplifies customer support by providing detailed usage records in case of discrepancy.
## Technical Integration
This section provides details on how to integrate and utilize the License Key Management feature using the available APIs.
### **1. License Key Action APIs**
1. **Disable License Key**:
* Immediately disable a key to prevent further usage.
2. **Enable Key**:
* Enable a previously disabled license key.
3. **View Activation Instances**:
* View all associated activation instances for a particular license key
### **Benefits of License Key information** :
* Enables merchants to track license key activity in real-time.
* Identifies potential misuse or unauthorized activations.
* Simplifies customer support by providing detailed usage records in case of discrepancy.
## Technical Integration
This section provides details on how to integrate and utilize the License Key Management feature using the available APIs.
### **1. License Key Action APIs**
 3. **Fill the form.** Enter Brand Name, Website URL (or social profile), Description and Submit the form.
 4. Upload Logo, set Statement Descriptor, and Support Email for each brand
5. **Approval.** Once our compliance team marks the website “Verified”, live mode will be enabled for this brand. Products can now be tagged to this brand and live payment links will display its branding.
6. **Brand selector.** A Brand filter is now visible on Product creation.
4. Upload Logo, set Statement Descriptor, and Support Email for each brand
5. **Approval.** Once our compliance team marks the website “Verified”, live mode will be enabled for this brand. Products can now be tagged to this brand and live payment links will display its branding.
6. **Brand selector.** A Brand filter is now visible on Product creation.
 7. Transactions and Subscriptions have a Brand ID to help you identify which brand the transaction belongs to.
 ## Additional Points
* **No payout changes:** All funds, payout cycles and fees still flow to the business-level wallet and merchant bank account.
* **Suspensions:** If a brand is suspended, only its payment links stop—other brands under the same business keep transacting.
* No changes to Storefront, Invoices, License Keys, Discount Codes, Payout Settings and any other business level features.
# One-Time Payment
Source: https://docs.dodopayments.com/features/one-time-payment-products
A One-Time Payment Product in Dodo Payments is a digital item that customers purchase with a single, upfront payment—no recurring charges or subscriptions. This model is ideal for selling e-books, software licenses, downloadable content, or any product or service that requires only a one-time transaction.
## Additional Points
* **No payout changes:** All funds, payout cycles and fees still flow to the business-level wallet and merchant bank account.
* **Suspensions:** If a brand is suspended, only its payment links stop—other brands under the same business keep transacting.
* No changes to Storefront, Invoices, License Keys, Discount Codes, Payout Settings and any other business level features.
# One-Time Payment
Source: https://docs.dodopayments.com/features/one-time-payment-products
A One-Time Payment Product in Dodo Payments is a digital item that customers purchase with a single, upfront payment—no recurring charges or subscriptions. This model is ideal for selling e-books, software licenses, downloadable content, or any product or service that requires only a one-time transaction.
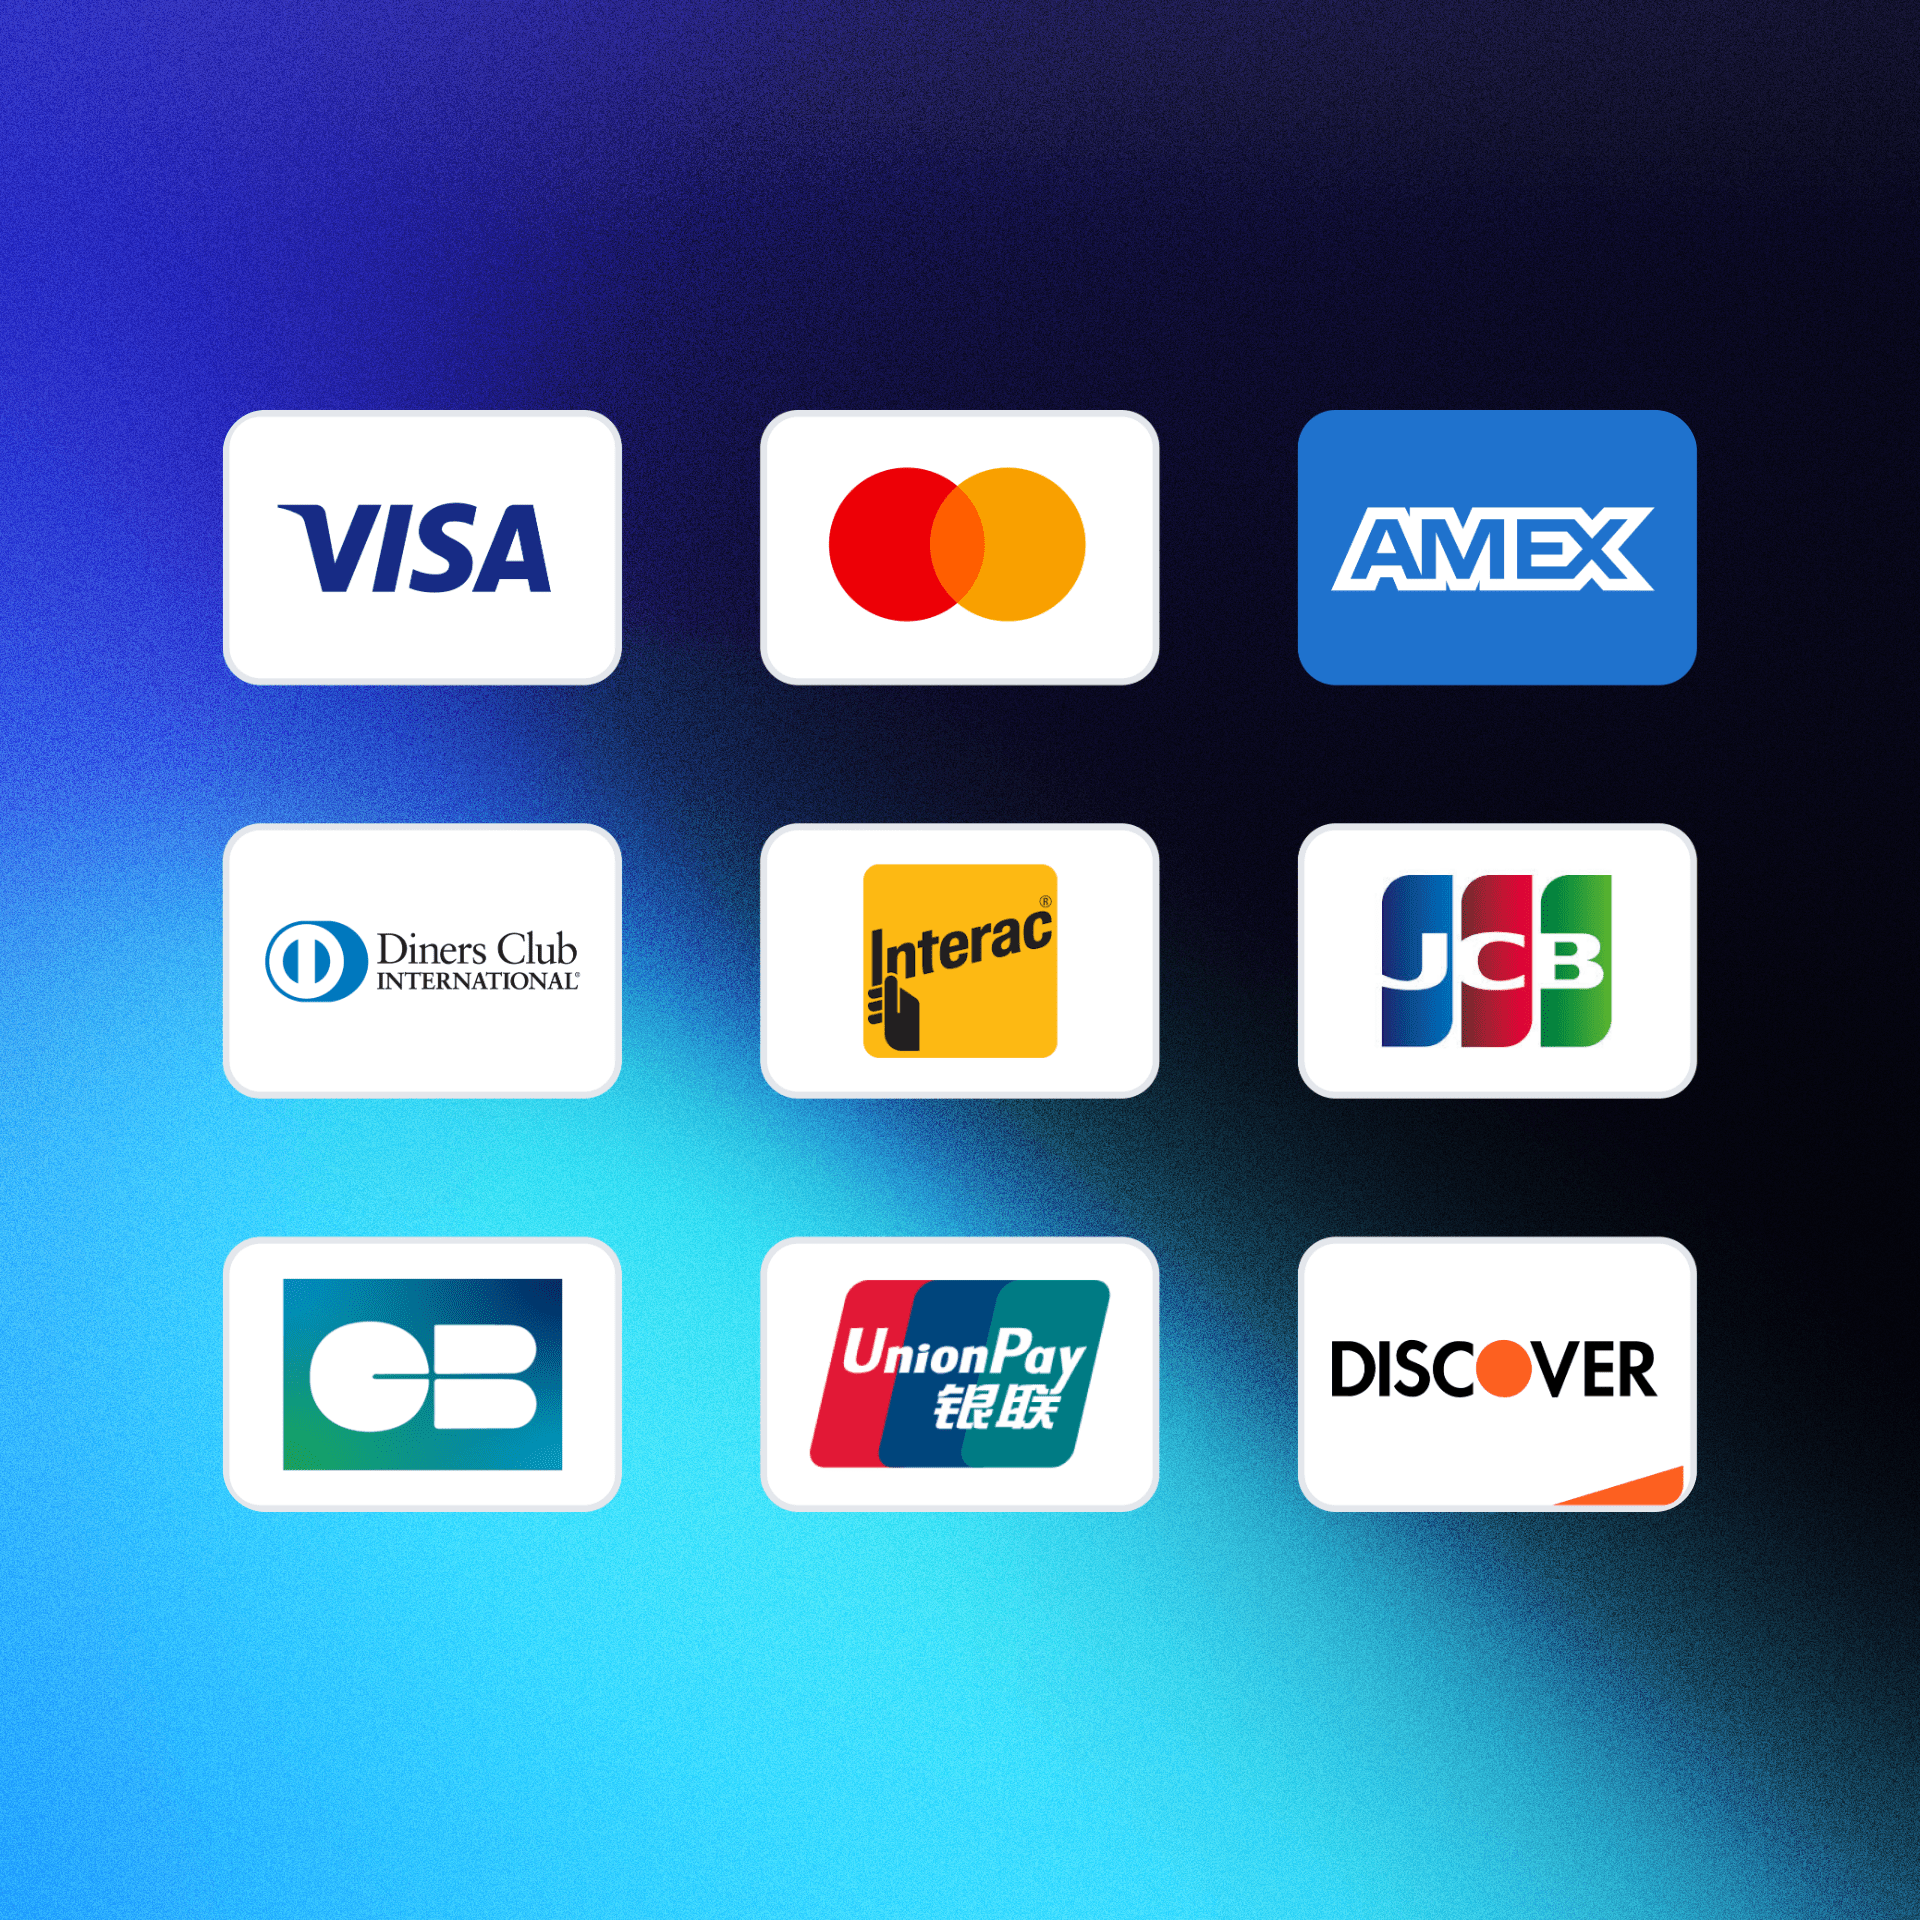 * **Mastercard** - A globally recognized payment network that processes credit and debit card transactions.
* **American Express** - A premium payment network known for its exclusive benefits and rewards programs.
* **Discover** - A major payment network offering cashback rewards and competitive interest rates.
* **Visa** - The world's largest payment network, accepted at millions of merchants worldwide.
* **JCB** - A Japanese payment network with strong presence in Asia and growing global acceptance.
* **UnionPay** - China's primary payment network with extensive acceptance in Asia and expanding global reach.
* **Interac** - Canada's leading debit payment network for secure online and in-person transactions.
* **Cartes Bancaires** - France's national payment network, widely used across French territories.
* **Diners Club** - A premium payment network offering exclusive benefits and international acceptance.
### Debit Cards
* **Mastercard** - A globally recognized payment network that processes credit and debit card transactions, offering extensive acceptance worldwide and robust security features.
* **American Express** - A premium payment network known for its exclusive benefits and rewards programs, catering to high-value customers with exceptional service.
* **Discover** - A major payment network offering cashback rewards and competitive interest rates, with strong presence in the United States.
* **Visa** - The world's largest payment network, accepted at millions of merchants worldwide, providing reliable and secure payment processing.
* **JCB** - A Japanese payment network with strong presence in Asia and growing global acceptance, particularly popular in Japan and surrounding regions.
* **UnionPay** - China's primary payment network with extensive acceptance in Asia and expanding global reach, serving as the dominant payment method in China.
* **Interac** - Canada's leading debit payment network for secure online and in-person transactions, widely used across Canadian financial institutions.
* **Cartes Bancaires** - France's national payment network, widely used across French territories, offering seamless domestic payment processing.
* **Diners Club** - A premium payment network offering exclusive benefits and international acceptance, known for its prestigious membership programs.
### Digital Wallets
* **Mastercard** - A globally recognized payment network that processes credit and debit card transactions.
* **American Express** - A premium payment network known for its exclusive benefits and rewards programs.
* **Discover** - A major payment network offering cashback rewards and competitive interest rates.
* **Visa** - The world's largest payment network, accepted at millions of merchants worldwide.
* **JCB** - A Japanese payment network with strong presence in Asia and growing global acceptance.
* **UnionPay** - China's primary payment network with extensive acceptance in Asia and expanding global reach.
* **Interac** - Canada's leading debit payment network for secure online and in-person transactions.
* **Cartes Bancaires** - France's national payment network, widely used across French territories.
* **Diners Club** - A premium payment network offering exclusive benefits and international acceptance.
### Debit Cards
* **Mastercard** - A globally recognized payment network that processes credit and debit card transactions, offering extensive acceptance worldwide and robust security features.
* **American Express** - A premium payment network known for its exclusive benefits and rewards programs, catering to high-value customers with exceptional service.
* **Discover** - A major payment network offering cashback rewards and competitive interest rates, with strong presence in the United States.
* **Visa** - The world's largest payment network, accepted at millions of merchants worldwide, providing reliable and secure payment processing.
* **JCB** - A Japanese payment network with strong presence in Asia and growing global acceptance, particularly popular in Japan and surrounding regions.
* **UnionPay** - China's primary payment network with extensive acceptance in Asia and expanding global reach, serving as the dominant payment method in China.
* **Interac** - Canada's leading debit payment network for secure online and in-person transactions, widely used across Canadian financial institutions.
* **Cartes Bancaires** - France's national payment network, widely used across French territories, offering seamless domestic payment processing.
* **Diners Club** - A premium payment network offering exclusive benefits and international acceptance, known for its prestigious membership programs.
### Digital Wallets
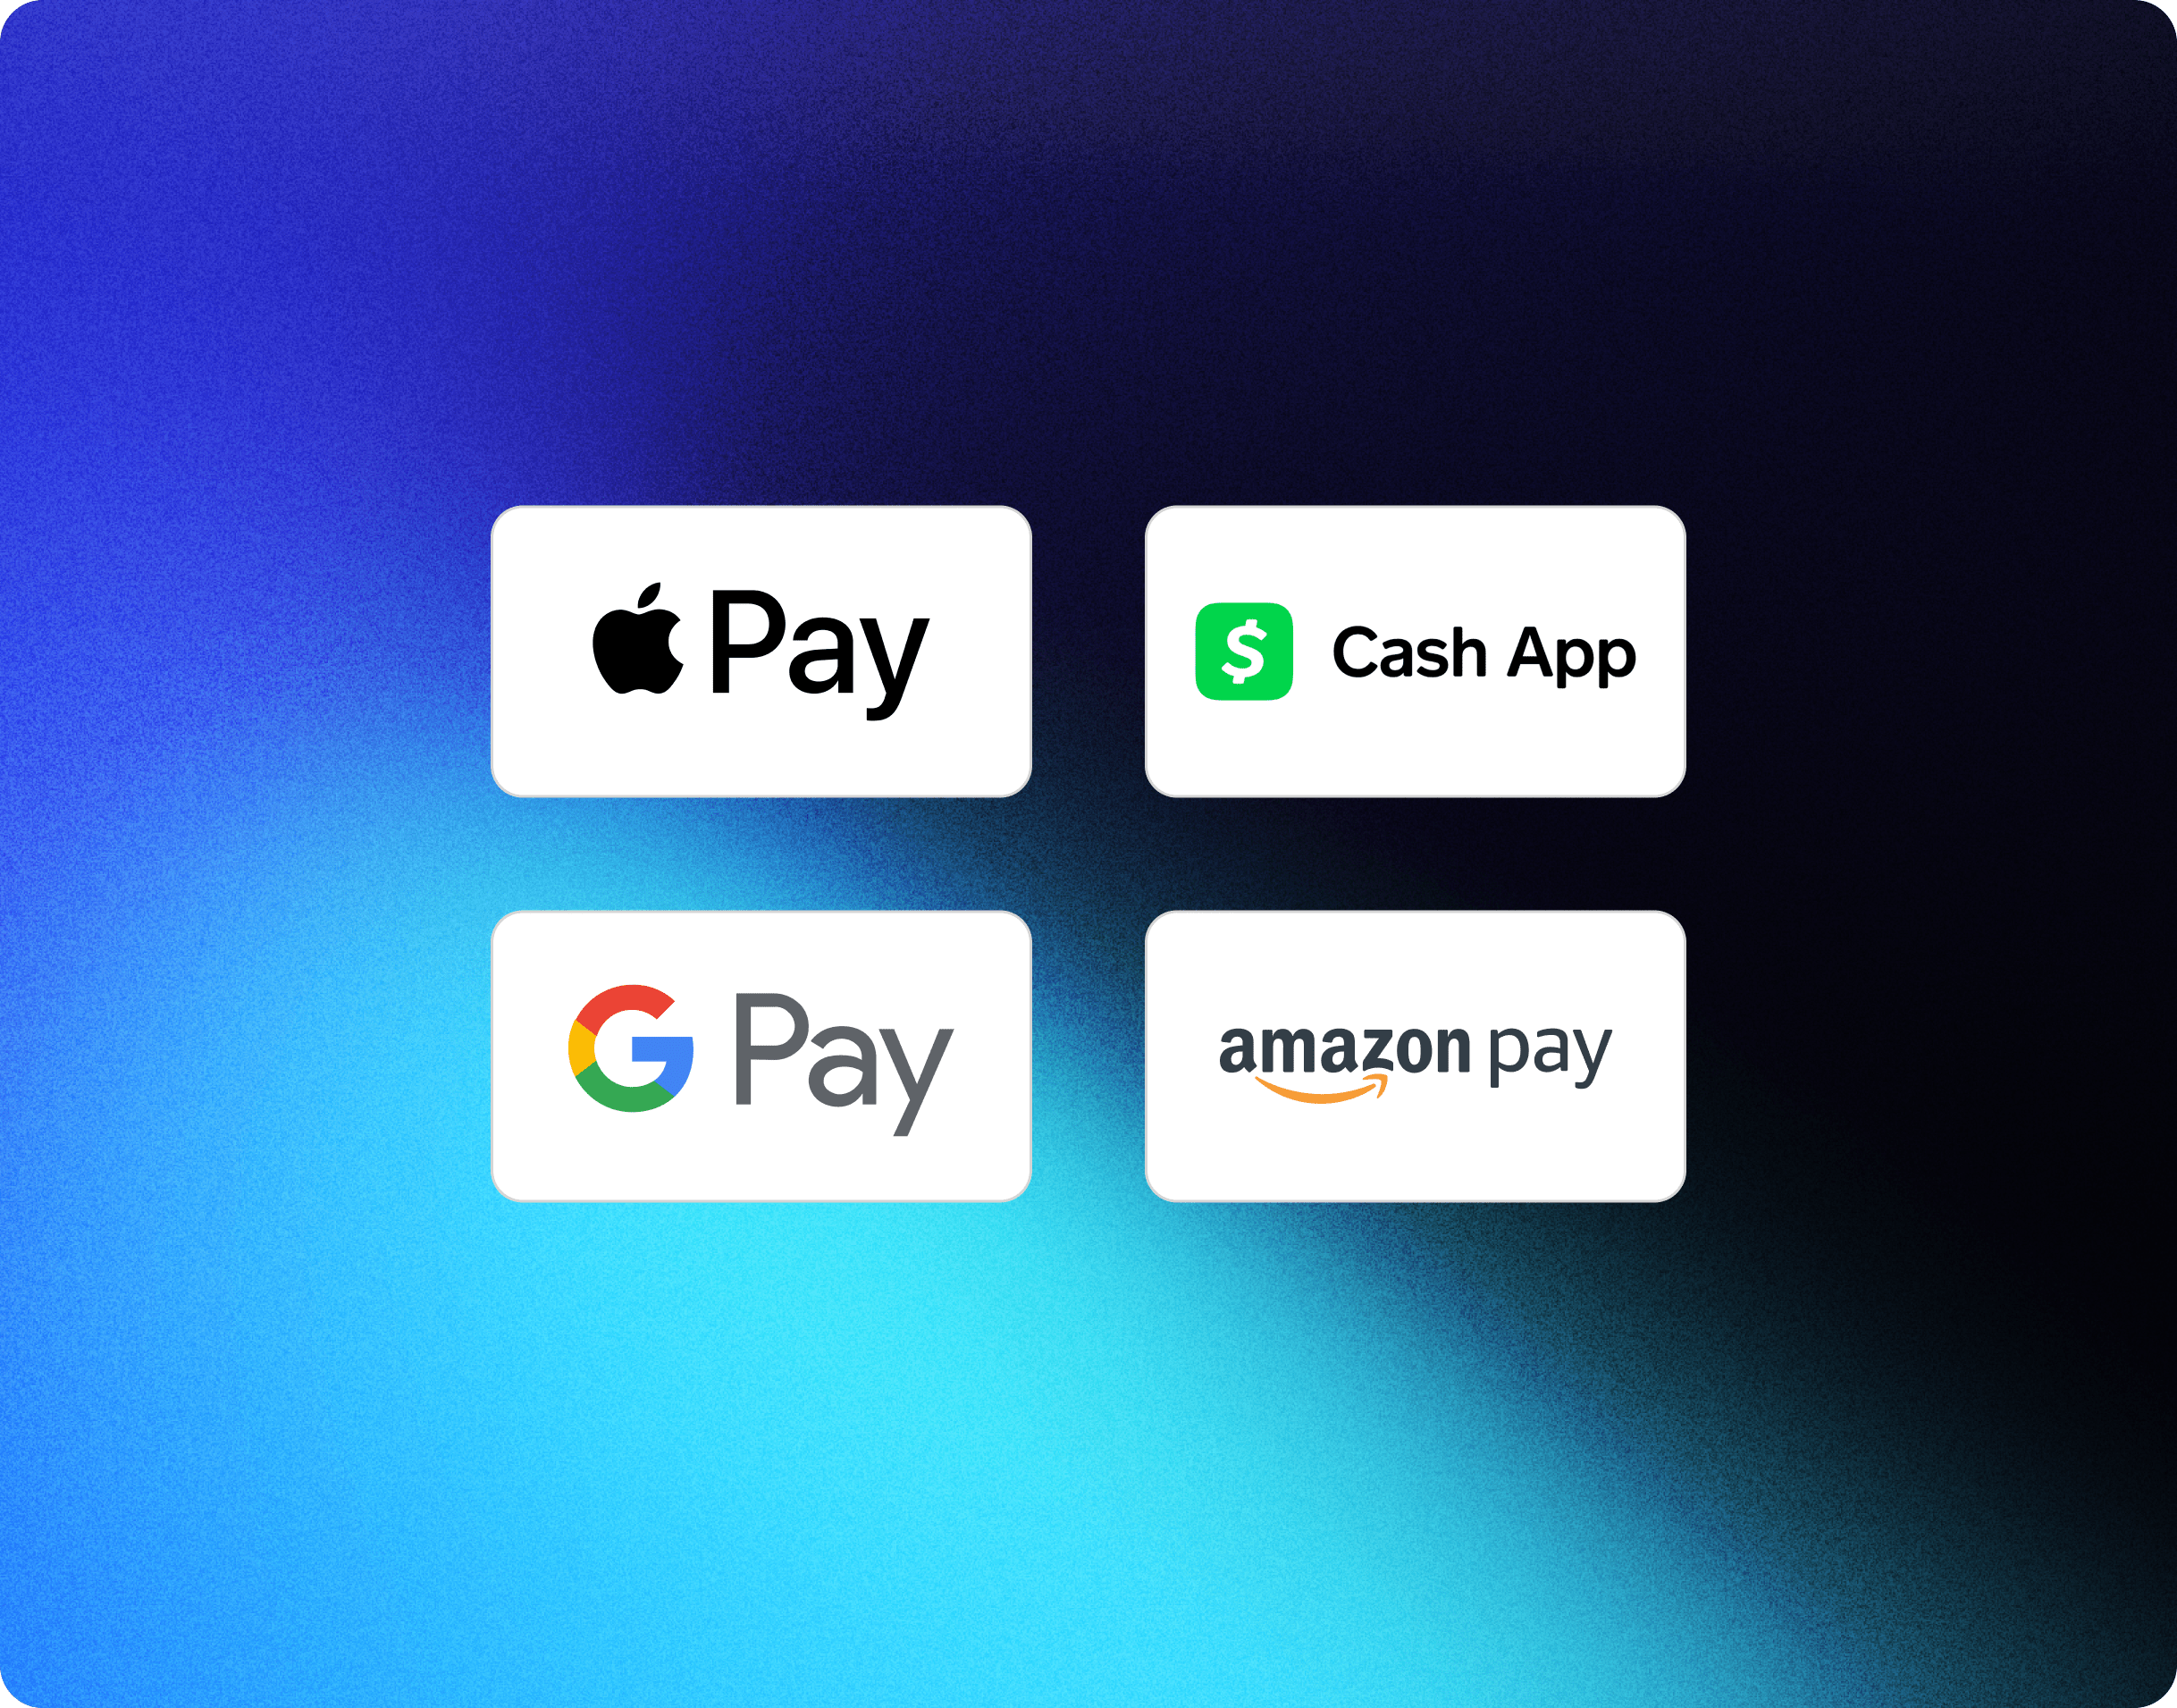 * **Apple Pay** - Apple's secure and convenient digital wallet service that allows users to make payments using their Apple devices, offering seamless integration with iOS, macOS, and watchOS platforms.
* **Google Pay** - Google's comprehensive digital payment platform that enables users to make secure transactions across Android devices, web browsers, and in-store locations.
* **Cash App Pay** - Square's innovative payment solution that provides users with a simple and efficient way to send and receive money, make purchases, and manage their finances through a user-friendly mobile application.
* **Amazon Pay** - Amazon's trusted payment service that allows customers to use their Amazon account credentials to make purchases on third-party websites, offering a familiar and secure checkout experience.
### Buy Now Pay Later (BNPL)
* **Apple Pay** - Apple's secure and convenient digital wallet service that allows users to make payments using their Apple devices, offering seamless integration with iOS, macOS, and watchOS platforms.
* **Google Pay** - Google's comprehensive digital payment platform that enables users to make secure transactions across Android devices, web browsers, and in-store locations.
* **Cash App Pay** - Square's innovative payment solution that provides users with a simple and efficient way to send and receive money, make purchases, and manage their finances through a user-friendly mobile application.
* **Amazon Pay** - Amazon's trusted payment service that allows customers to use their Amazon account credentials to make purchases on third-party websites, offering a familiar and secure checkout experience.
### Buy Now Pay Later (BNPL)
 * **Klarna** - A leading Buy Now, Pay Later (BNPL) service that offers flexible payment options including pay in 4 installments, pay in 30 days, and financing solutions, with a strong presence in Europe and North America.
* **Afterpay** - A popular BNPL service that allows customers to split purchases into four interest-free payments, offering a simple and transparent payment solution with no hidden fees.
### UPI and Rupay (India Only)
* **Klarna** - A leading Buy Now, Pay Later (BNPL) service that offers flexible payment options including pay in 4 installments, pay in 30 days, and financing solutions, with a strong presence in Europe and North America.
* **Afterpay** - A popular BNPL service that allows customers to split purchases into four interest-free payments, offering a simple and transparent payment solution with no hidden fees.
### UPI and Rupay (India Only)
 * **Pay Using UPI QR Code** - A convenient and secure payment method that allows customers to scan a QR code displayed at checkout to initiate instant bank-to-bank transfers through their preferred UPI-enabled mobile banking application, offering a seamless and contactless payment experience.
* **Pay Using UPI ID** - A user-friendly payment option that enables customers to make instant payments by entering their unique UPI ID (Virtual Payment Address) at checkout, facilitating quick and secure bank transfers without sharing sensitive bank account details.
* **Rupay Credit & Debit Card** - India's indigenous card payment network that provides customers with a secure and reliable way to make payments using Rupay-branded credit and debit cards, offering competitive transaction fees and widespread acceptance across Indian merchants.
### European Payment Methods
* **Pay Using UPI QR Code** - A convenient and secure payment method that allows customers to scan a QR code displayed at checkout to initiate instant bank-to-bank transfers through their preferred UPI-enabled mobile banking application, offering a seamless and contactless payment experience.
* **Pay Using UPI ID** - A user-friendly payment option that enables customers to make instant payments by entering their unique UPI ID (Virtual Payment Address) at checkout, facilitating quick and secure bank transfers without sharing sensitive bank account details.
* **Rupay Credit & Debit Card** - India's indigenous card payment network that provides customers with a secure and reliable way to make payments using Rupay-branded credit and debit cards, offering competitive transaction fees and widespread acceptance across Indian merchants.
### European Payment Methods
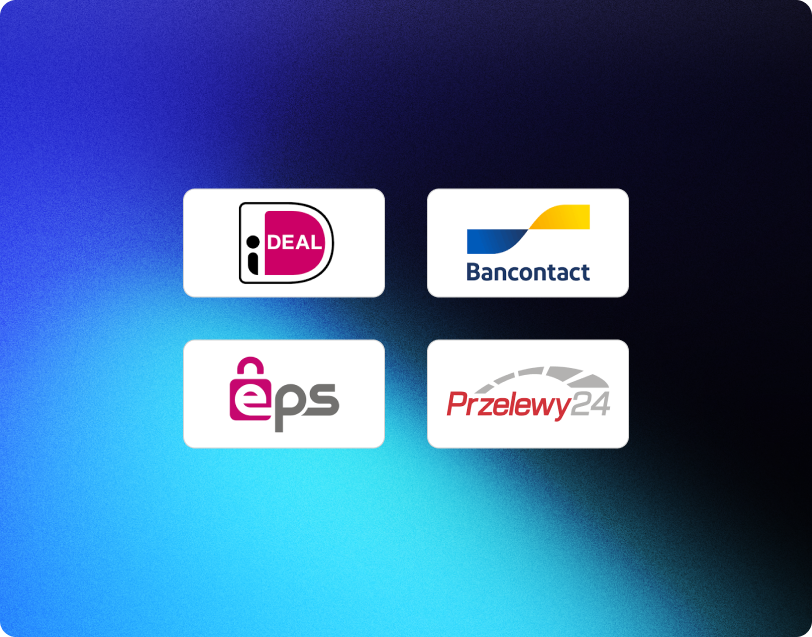 * **iDEAL** - Popular Dutch method for direct online bank payments.
* **Bancontact** - Belgium's leading debit card payment method.
* **Przelewy24 (P24)** - Widely used Polish method offering various options like bank transfers.
* **EPS** - Austria's online banking payment system for direct bank account payments.
### Important Information
* **iDEAL** - Popular Dutch method for direct online bank payments.
* **Bancontact** - Belgium's leading debit card payment method.
* **Przelewy24 (P24)** - Widely used Polish method offering various options like bank transfers.
* **EPS** - Austria's online banking payment system for direct bank account payments.
### Important Information
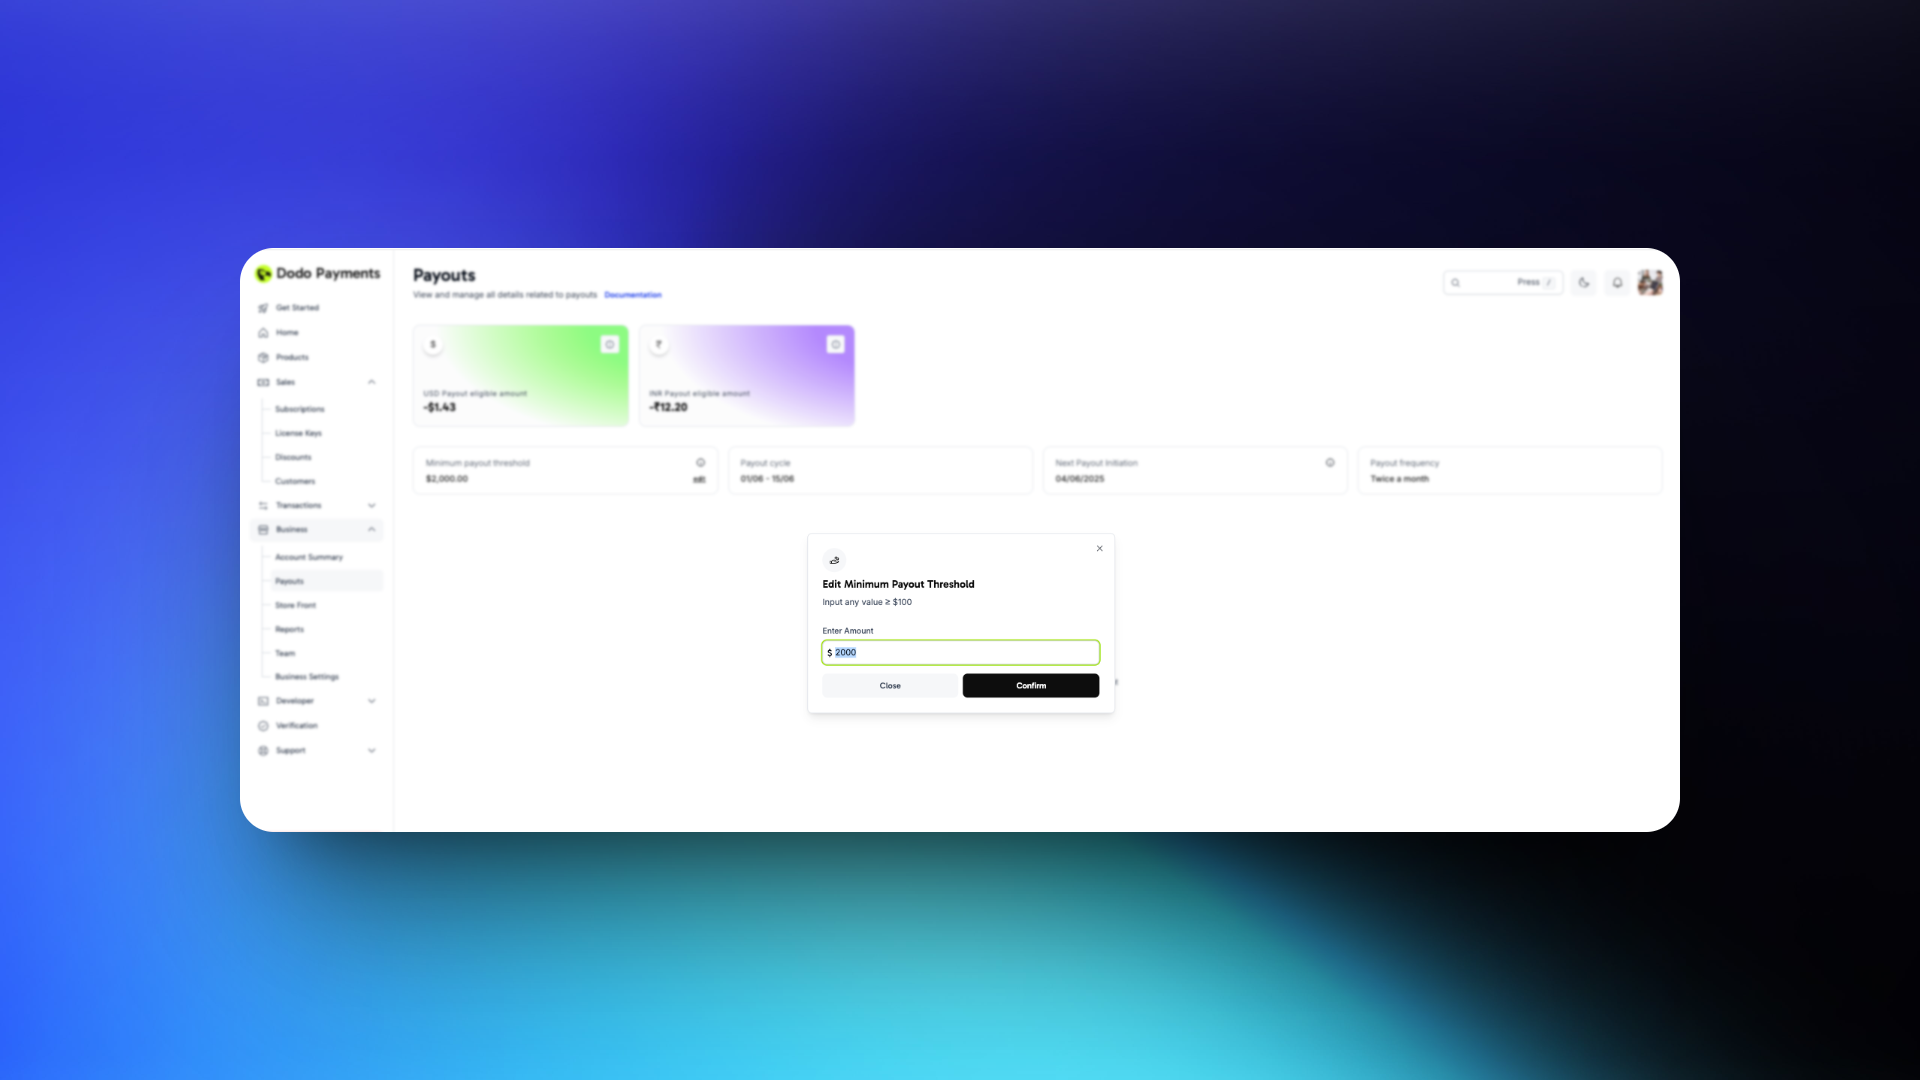 1. **Settings → Payouts → Minimum Threshold**
2. Choose edit threshold and enter a number **≥ 100** (e.g., “250”).
3. Click **Confirm.**
4. You will see the updated amount in the Minimum Payout Threshold field
**Note: This feature is only applicable to the USD Wallet as of now. The INR wallet will have no changes**
## Payout Deductions
1. **Taxes** : All applicable taxes as per the Tax Calculator will be deducted from the sales amount before payout
2. **Dodo Payment Fees and Payout Fees** will be deducted before sending the payout. For details check out our [**Pricing Page**](https://docs.dodopayments.com/miscellaneous/pricing-and-fee-structure)
## **Payout Status**
| Payout Status | Description |
| -------------------- | ---------------------------------------------------------------------------------------- |
| Payout Not Initiated | Payout due date has not yet arrived hence it has not been initiated |
| Payout In Progress | Payout due date has arrived and Payout is in progress |
| Payout On Hold | Payout is put on hold by the Payout Team (By Backend until admin dashboard is available) |
| Payout Successful | Payout to the merchant account is processed successfully |
| Payout Failed | Payout to the merchant account has failed |
## Payout Invoice
A reverse invoice will be generated to indicate the amount paid by Dodo Payments to the Merchant
### Payout Invoice Structure
1. **Settings → Payouts → Minimum Threshold**
2. Choose edit threshold and enter a number **≥ 100** (e.g., “250”).
3. Click **Confirm.**
4. You will see the updated amount in the Minimum Payout Threshold field
**Note: This feature is only applicable to the USD Wallet as of now. The INR wallet will have no changes**
## Payout Deductions
1. **Taxes** : All applicable taxes as per the Tax Calculator will be deducted from the sales amount before payout
2. **Dodo Payment Fees and Payout Fees** will be deducted before sending the payout. For details check out our [**Pricing Page**](https://docs.dodopayments.com/miscellaneous/pricing-and-fee-structure)
## **Payout Status**
| Payout Status | Description |
| -------------------- | ---------------------------------------------------------------------------------------- |
| Payout Not Initiated | Payout due date has not yet arrived hence it has not been initiated |
| Payout In Progress | Payout due date has arrived and Payout is in progress |
| Payout On Hold | Payout is put on hold by the Payout Team (By Backend until admin dashboard is available) |
| Payout Successful | Payout to the merchant account is processed successfully |
| Payout Failed | Payout to the merchant account has failed |
## Payout Invoice
A reverse invoice will be generated to indicate the amount paid by Dodo Payments to the Merchant
### Payout Invoice Structure
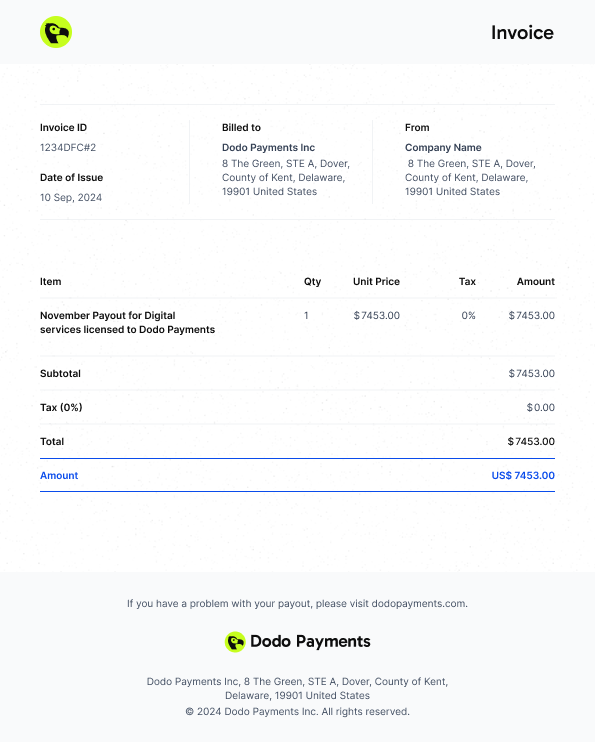 | Information | Description |
| ------------------------------ | --------------------------------------------------------------------------------------------- |
| Invoice ID | A Unique ID of the Invoice generated |
| Date of Issue | Datetime of the Invoice Issued |
| Merchant Business Name | Registered Business Name of the Merchant |
| Merchant Business Address | Registered Business Address of the Merchant |
| Dodo Merchant Name | Registered Business Name of Dodo Payments |
| Dodo Payments Company ID | Registered Company ID of Dodo Payments |
| Dodo Payments Business Address | Registered Business Address of Dodo Payments |
| Payout Name | Name given to the payout (Eg. November Payout for Digital services licensed to Dodo Payments) |
| Payout Qty | Will be 1 |
| Payout Unit Price | Total Amount to be paid |
| Payout Amount | Total Amount to be paid |
# Product Pricing
Source: https://docs.dodopayments.com/features/pricing
The Pricing can be set for every product while creating or editing a product. Sales Tax will be charged above this price based on the customer’s location by default. If you want to show the final price to your customer upfront and bear the cost of the sales tax you can enable Tax Inclusive Pricing toggle while creating or editing a product.
| Information | Description |
| ------------------------------ | --------------------------------------------------------------------------------------------- |
| Invoice ID | A Unique ID of the Invoice generated |
| Date of Issue | Datetime of the Invoice Issued |
| Merchant Business Name | Registered Business Name of the Merchant |
| Merchant Business Address | Registered Business Address of the Merchant |
| Dodo Merchant Name | Registered Business Name of Dodo Payments |
| Dodo Payments Company ID | Registered Company ID of Dodo Payments |
| Dodo Payments Business Address | Registered Business Address of Dodo Payments |
| Payout Name | Name given to the payout (Eg. November Payout for Digital services licensed to Dodo Payments) |
| Payout Qty | Will be 1 |
| Payout Unit Price | Total Amount to be paid |
| Payout Amount | Total Amount to be paid |
# Product Pricing
Source: https://docs.dodopayments.com/features/pricing
The Pricing can be set for every product while creating or editing a product. Sales Tax will be charged above this price based on the customer’s location by default. If you want to show the final price to your customer upfront and bear the cost of the sales tax you can enable Tax Inclusive Pricing toggle while creating or editing a product.
 ## **Tax Inclusive Pricing**
The Tax Inclusive Pricing feature allows merchants to embed applicable taxes directly into the product prices. Customers see one final amount upfront, creating a transparent and seamless shopping experience. The system automatically calculates the tax-exclusive portion and the tax amount during checkout, ensuring compliance and clarity on invoices.
### **Merchant Flow**
**Note: This option and flows are applicable to both One-Time Purchases and Subscription products.**
#### **Create a Product**
1. **Access Products**
* Go to the **Products** section of your merchant dashboard.
* Click **Create Product** to add a new product.
2. **Enter Product Details**
* Fill in the product information (name, description, and price).
* **Enable the “Tax Inclusive Pricing” toggle** below the price field.
* A short note appears when “Tax Inclusive Pricing” is toggled:
> Enable this option to include applicable taxes in the displayed product price. Taxes will vary based on customer location.
3. **Save**
* Click **Save Product**.
* The system will now treat the listed price as **final** (including tax).
#### **Edit Product Pricing**
1. **Select Product**
* In the **Products** section, find and open the product you want to modify.
2. **Toggle Tax-Inclusive**
* Click **Edit** and adjust the “Tax Inclusive Pricing” toggle as needed.
* Update the price if necessary.
3. **Save Changes**
* Click **Save**.
* Only **future purchases** will reflect your updated tax-inclusive settings and past purchases including active subscriptions will not be affected by this change .
### **Checkout and Invoice Flow**
#### **Checkout Flow**
1. **Customer Views Product**
* The **tax-inclusive** price is labeled as such (e.g., “\$100 (Tax Inclusive)”).
2. **Price at Checkout**
* Taxes are **calculated** based on the **customer’s location**.
* The checkout page lists:
* The **tax-inclusive** price of the product.
* A **tax breakdown** for clarity.
3. **Payment**
* The customer is charged exactly the final, tax-inclusive amount they saw from the start.
#### **Invoice**
* After the purchase:
* An **invoice** is generated showing:
* **Product Price** (Tax Inclusive)
* **Tax Amount** extracted from that price
* **Net Amount** (price without tax)
* This structure confirms the total paid and tax details.
With Tax Inclusive Pricing, you provide final, tax-included figures upfront, giving customers full clarity and ensuring invoices display compliant breakdowns.
## **Pay What you Want Pricing**
**Pay What You Want (PWYW)** is a pricing strategy that allows customers to decide how much they will pay for a product—above or at a minimum threshold set by the merchant. This can boost engagement, encourage community support, and allow for greater flexibility in how merchants price their offerings.
### **Key Highlights**
* **Customer-Driven Pricing**: The buyer chooses the price they pay.
* **Minimum Threshold**: Merchants set a required minimum. This should be at least \$0.5 or Rs.5
* **Suggested Price** (Optional): You can display a recommended or typical value to guide customers.
* This option is only available for One-Time Payment products.
### **Merchant Flow**
1. **Enable PWYW**
* From the dashboard, create or edit a product and select Pricing as Single Payment
* Enable Toggle **“ Pay What You Want ”** under the pricing section.
2. **Set Minimum Price**
* Enter the **Minimum** price. This should be at least \$0.5 or Rs.5
* If you wish, enter a **“Suggested Price”** that appears on the product page to guide customers. This should be at least \$0.5 or Rs.5
3. **Confirm & Save**
* Save your settings. The product is now **Pay What You Want** enabled.
4. **Preview & Share**
* Once saved, customers on your storefront or via your checkout link will see the PWYW field.
* Review the checkout preview to ensure everything looks correct (e.g., the minimum price, suggested price)
* Share the link or embed the product as usual.
5. **Monitor Transactions**
* In your dashboard, each sale’s **“paid amount”** might vary so you can monitor the transactions in detail.
### **Customer Flow**
1. **Product Page**
* The shopper lands on the product listing. They see an input field to set their price with a **suggested**(if provided) & **minimum** price.
2. **Input Their Price**
* The customer types any amount that meets or exceeds the **minimum**.
3. **Checkout**
* The checkout summary will display their chosen amount.
* They complete payment as usual (card, wallet, etc.), paying exactly what they entered.
4. **Confirmation**
* They can see how much they paid in their invoice sent via email.
### **Points to Remember**
1. **Suggested Price vs. Minimum Price**
* **Minimum Price**: Ensures you recoup at least a nominal amount
* **Suggested Price**: Helps anchor a “typical” or “recommended” rate, which can influence average payments positively.
2. **Refund & Support**
* Refund logic remains the same as other products. If a user requests a refund, they’d be refunded whatever they initially paid.
# Purchasing Power Parity
Source: https://docs.dodopayments.com/features/purchasing-power-parity
Learn how to implement Purchasing Power Parity pricing with ParityDeals integration to offer location-based discounts for your customers on Dodo Payments
## Introduction
[ParityDeals](https://www.paritydeals.com/) is a platform that enables automatic pricing optimization based on a customer's geographical location, commonly known as "purchasing power parity" pricing.
With ParityDeals, you can also offer [automatic time-based discounts](https://www.paritydeals.com/features/time-based-discounts/) and [holiday-based promotions](https://www.paritydeals.com/features/holiday-based-discounts/) throughout the year.
## **Tax Inclusive Pricing**
The Tax Inclusive Pricing feature allows merchants to embed applicable taxes directly into the product prices. Customers see one final amount upfront, creating a transparent and seamless shopping experience. The system automatically calculates the tax-exclusive portion and the tax amount during checkout, ensuring compliance and clarity on invoices.
### **Merchant Flow**
**Note: This option and flows are applicable to both One-Time Purchases and Subscription products.**
#### **Create a Product**
1. **Access Products**
* Go to the **Products** section of your merchant dashboard.
* Click **Create Product** to add a new product.
2. **Enter Product Details**
* Fill in the product information (name, description, and price).
* **Enable the “Tax Inclusive Pricing” toggle** below the price field.
* A short note appears when “Tax Inclusive Pricing” is toggled:
> Enable this option to include applicable taxes in the displayed product price. Taxes will vary based on customer location.
3. **Save**
* Click **Save Product**.
* The system will now treat the listed price as **final** (including tax).
#### **Edit Product Pricing**
1. **Select Product**
* In the **Products** section, find and open the product you want to modify.
2. **Toggle Tax-Inclusive**
* Click **Edit** and adjust the “Tax Inclusive Pricing” toggle as needed.
* Update the price if necessary.
3. **Save Changes**
* Click **Save**.
* Only **future purchases** will reflect your updated tax-inclusive settings and past purchases including active subscriptions will not be affected by this change .
### **Checkout and Invoice Flow**
#### **Checkout Flow**
1. **Customer Views Product**
* The **tax-inclusive** price is labeled as such (e.g., “\$100 (Tax Inclusive)”).
2. **Price at Checkout**
* Taxes are **calculated** based on the **customer’s location**.
* The checkout page lists:
* The **tax-inclusive** price of the product.
* A **tax breakdown** for clarity.
3. **Payment**
* The customer is charged exactly the final, tax-inclusive amount they saw from the start.
#### **Invoice**
* After the purchase:
* An **invoice** is generated showing:
* **Product Price** (Tax Inclusive)
* **Tax Amount** extracted from that price
* **Net Amount** (price without tax)
* This structure confirms the total paid and tax details.
With Tax Inclusive Pricing, you provide final, tax-included figures upfront, giving customers full clarity and ensuring invoices display compliant breakdowns.
## **Pay What you Want Pricing**
**Pay What You Want (PWYW)** is a pricing strategy that allows customers to decide how much they will pay for a product—above or at a minimum threshold set by the merchant. This can boost engagement, encourage community support, and allow for greater flexibility in how merchants price their offerings.
### **Key Highlights**
* **Customer-Driven Pricing**: The buyer chooses the price they pay.
* **Minimum Threshold**: Merchants set a required minimum. This should be at least \$0.5 or Rs.5
* **Suggested Price** (Optional): You can display a recommended or typical value to guide customers.
* This option is only available for One-Time Payment products.
### **Merchant Flow**
1. **Enable PWYW**
* From the dashboard, create or edit a product and select Pricing as Single Payment
* Enable Toggle **“ Pay What You Want ”** under the pricing section.
2. **Set Minimum Price**
* Enter the **Minimum** price. This should be at least \$0.5 or Rs.5
* If you wish, enter a **“Suggested Price”** that appears on the product page to guide customers. This should be at least \$0.5 or Rs.5
3. **Confirm & Save**
* Save your settings. The product is now **Pay What You Want** enabled.
4. **Preview & Share**
* Once saved, customers on your storefront or via your checkout link will see the PWYW field.
* Review the checkout preview to ensure everything looks correct (e.g., the minimum price, suggested price)
* Share the link or embed the product as usual.
5. **Monitor Transactions**
* In your dashboard, each sale’s **“paid amount”** might vary so you can monitor the transactions in detail.
### **Customer Flow**
1. **Product Page**
* The shopper lands on the product listing. They see an input field to set their price with a **suggested**(if provided) & **minimum** price.
2. **Input Their Price**
* The customer types any amount that meets or exceeds the **minimum**.
3. **Checkout**
* The checkout summary will display their chosen amount.
* They complete payment as usual (card, wallet, etc.), paying exactly what they entered.
4. **Confirmation**
* They can see how much they paid in their invoice sent via email.
### **Points to Remember**
1. **Suggested Price vs. Minimum Price**
* **Minimum Price**: Ensures you recoup at least a nominal amount
* **Suggested Price**: Helps anchor a “typical” or “recommended” rate, which can influence average payments positively.
2. **Refund & Support**
* Refund logic remains the same as other products. If a user requests a refund, they’d be refunded whatever they initially paid.
# Purchasing Power Parity
Source: https://docs.dodopayments.com/features/purchasing-power-parity
Learn how to implement Purchasing Power Parity pricing with ParityDeals integration to offer location-based discounts for your customers on Dodo Payments
## Introduction
[ParityDeals](https://www.paritydeals.com/) is a platform that enables automatic pricing optimization based on a customer's geographical location, commonly known as "purchasing power parity" pricing.
With ParityDeals, you can also offer [automatic time-based discounts](https://www.paritydeals.com/features/time-based-discounts/) and [holiday-based promotions](https://www.paritydeals.com/features/holiday-based-discounts/) throughout the year.
 These discount codes are automatically created and managed by ParityDeals and will appear in your **Dodo Payments Dashboard** under **Sales → Discounts**.
## Step-by-Step Setup Guide
### 1. Sign up on ParityDeals
Visit [app.paritydeals.com](https://app.paritydeals.com/) and create an account.
### 2. Create Deals
After signing in, locate the option to create deals. From the dropdown menu, select:
**→ "Create Deals via Dodo Payments"**
These discount codes are automatically created and managed by ParityDeals and will appear in your **Dodo Payments Dashboard** under **Sales → Discounts**.
## Step-by-Step Setup Guide
### 1. Sign up on ParityDeals
Visit [app.paritydeals.com](https://app.paritydeals.com/) and create an account.
### 2. Create Deals
After signing in, locate the option to create deals. From the dropdown menu, select:
**→ "Create Deals via Dodo Payments"**
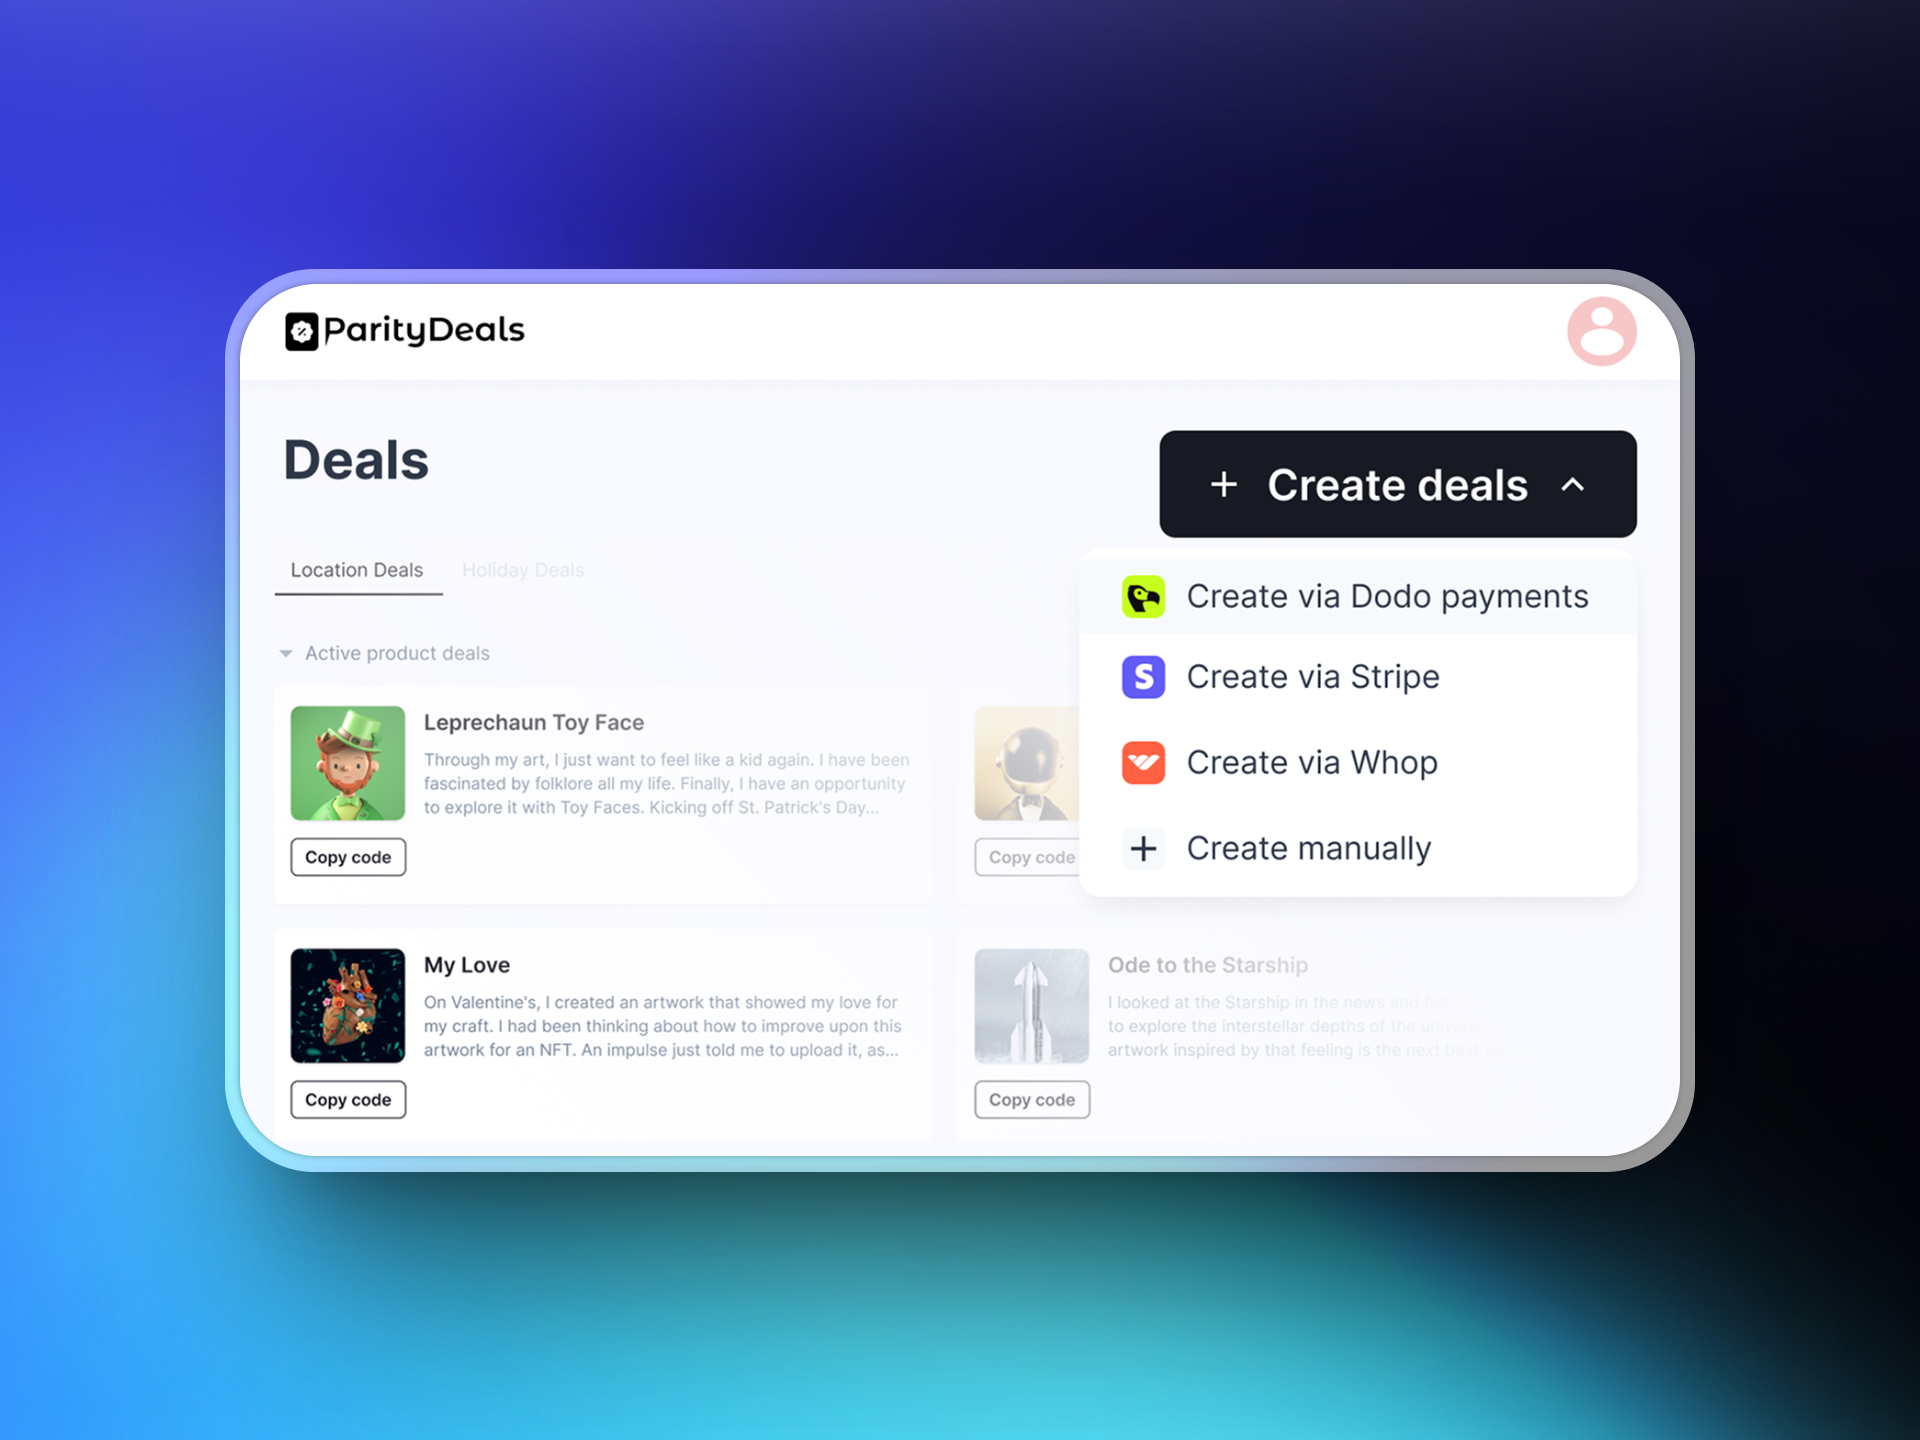 ### 3. Generate a Dodo Payments API Key
Log in to your **Dodo Payments dashboard** and navigate to:
**Developers → API Keys**
Click **"Create New API"** and name it something descriptive like "ParityDeals".
### 3. Generate a Dodo Payments API Key
Log in to your **Dodo Payments dashboard** and navigate to:
**Developers → API Keys**
Click **"Create New API"** and name it something descriptive like "ParityDeals".
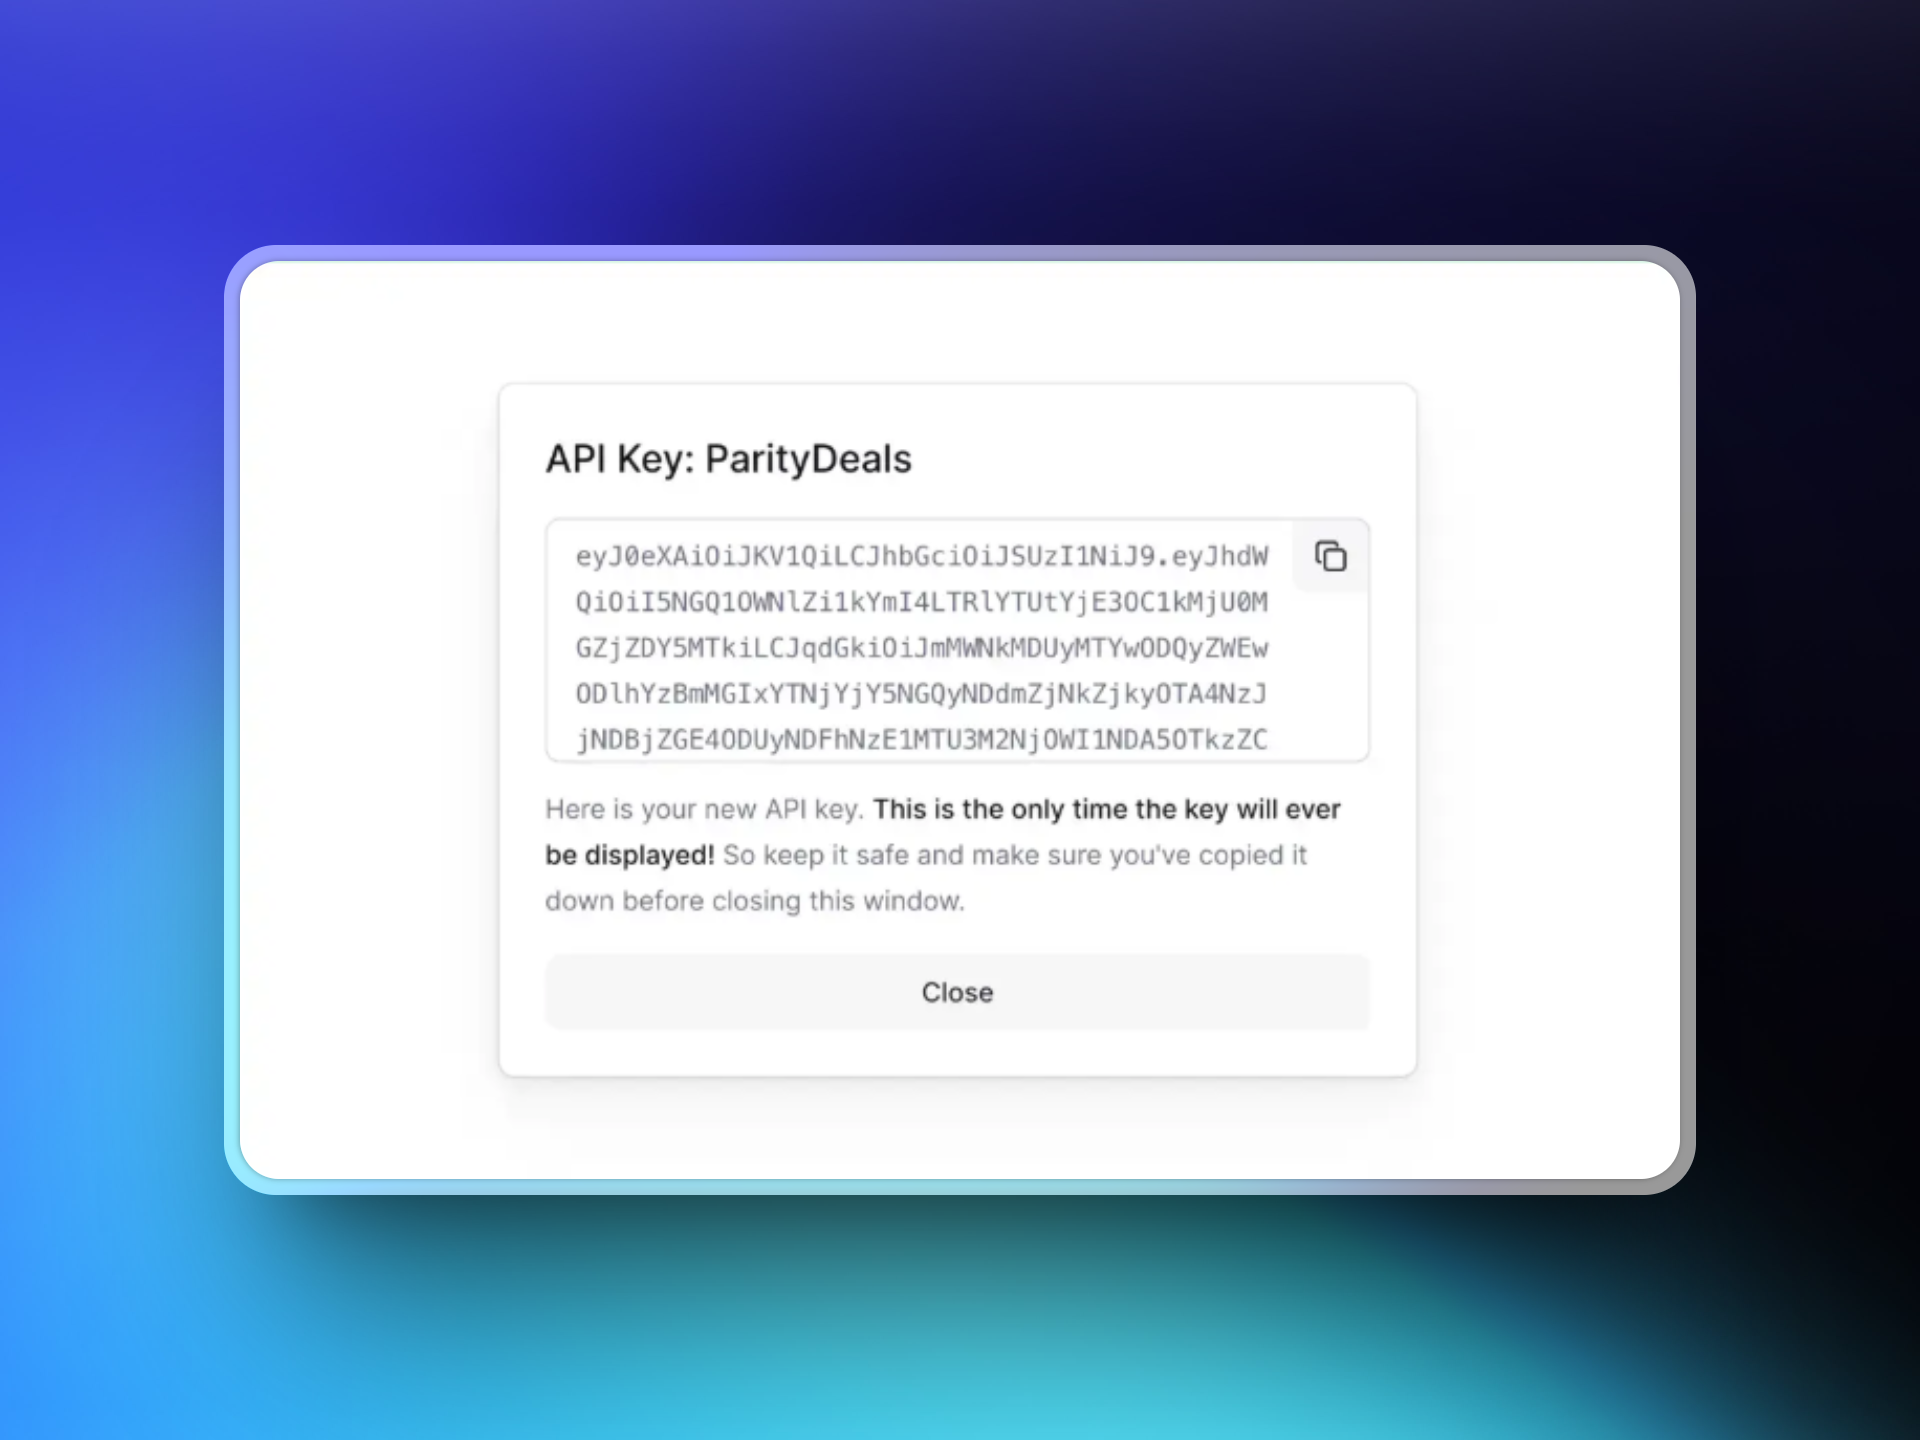 ### 4. Connect Your API Key to ParityDeals
Copy the API key you created and paste it into the ParityDeals interface to establish the connection with your Dodo Payments account.
### 4. Connect Your API Key to ParityDeals
Copy the API key you created and paste it into the ParityDeals interface to establish the connection with your Dodo Payments account.
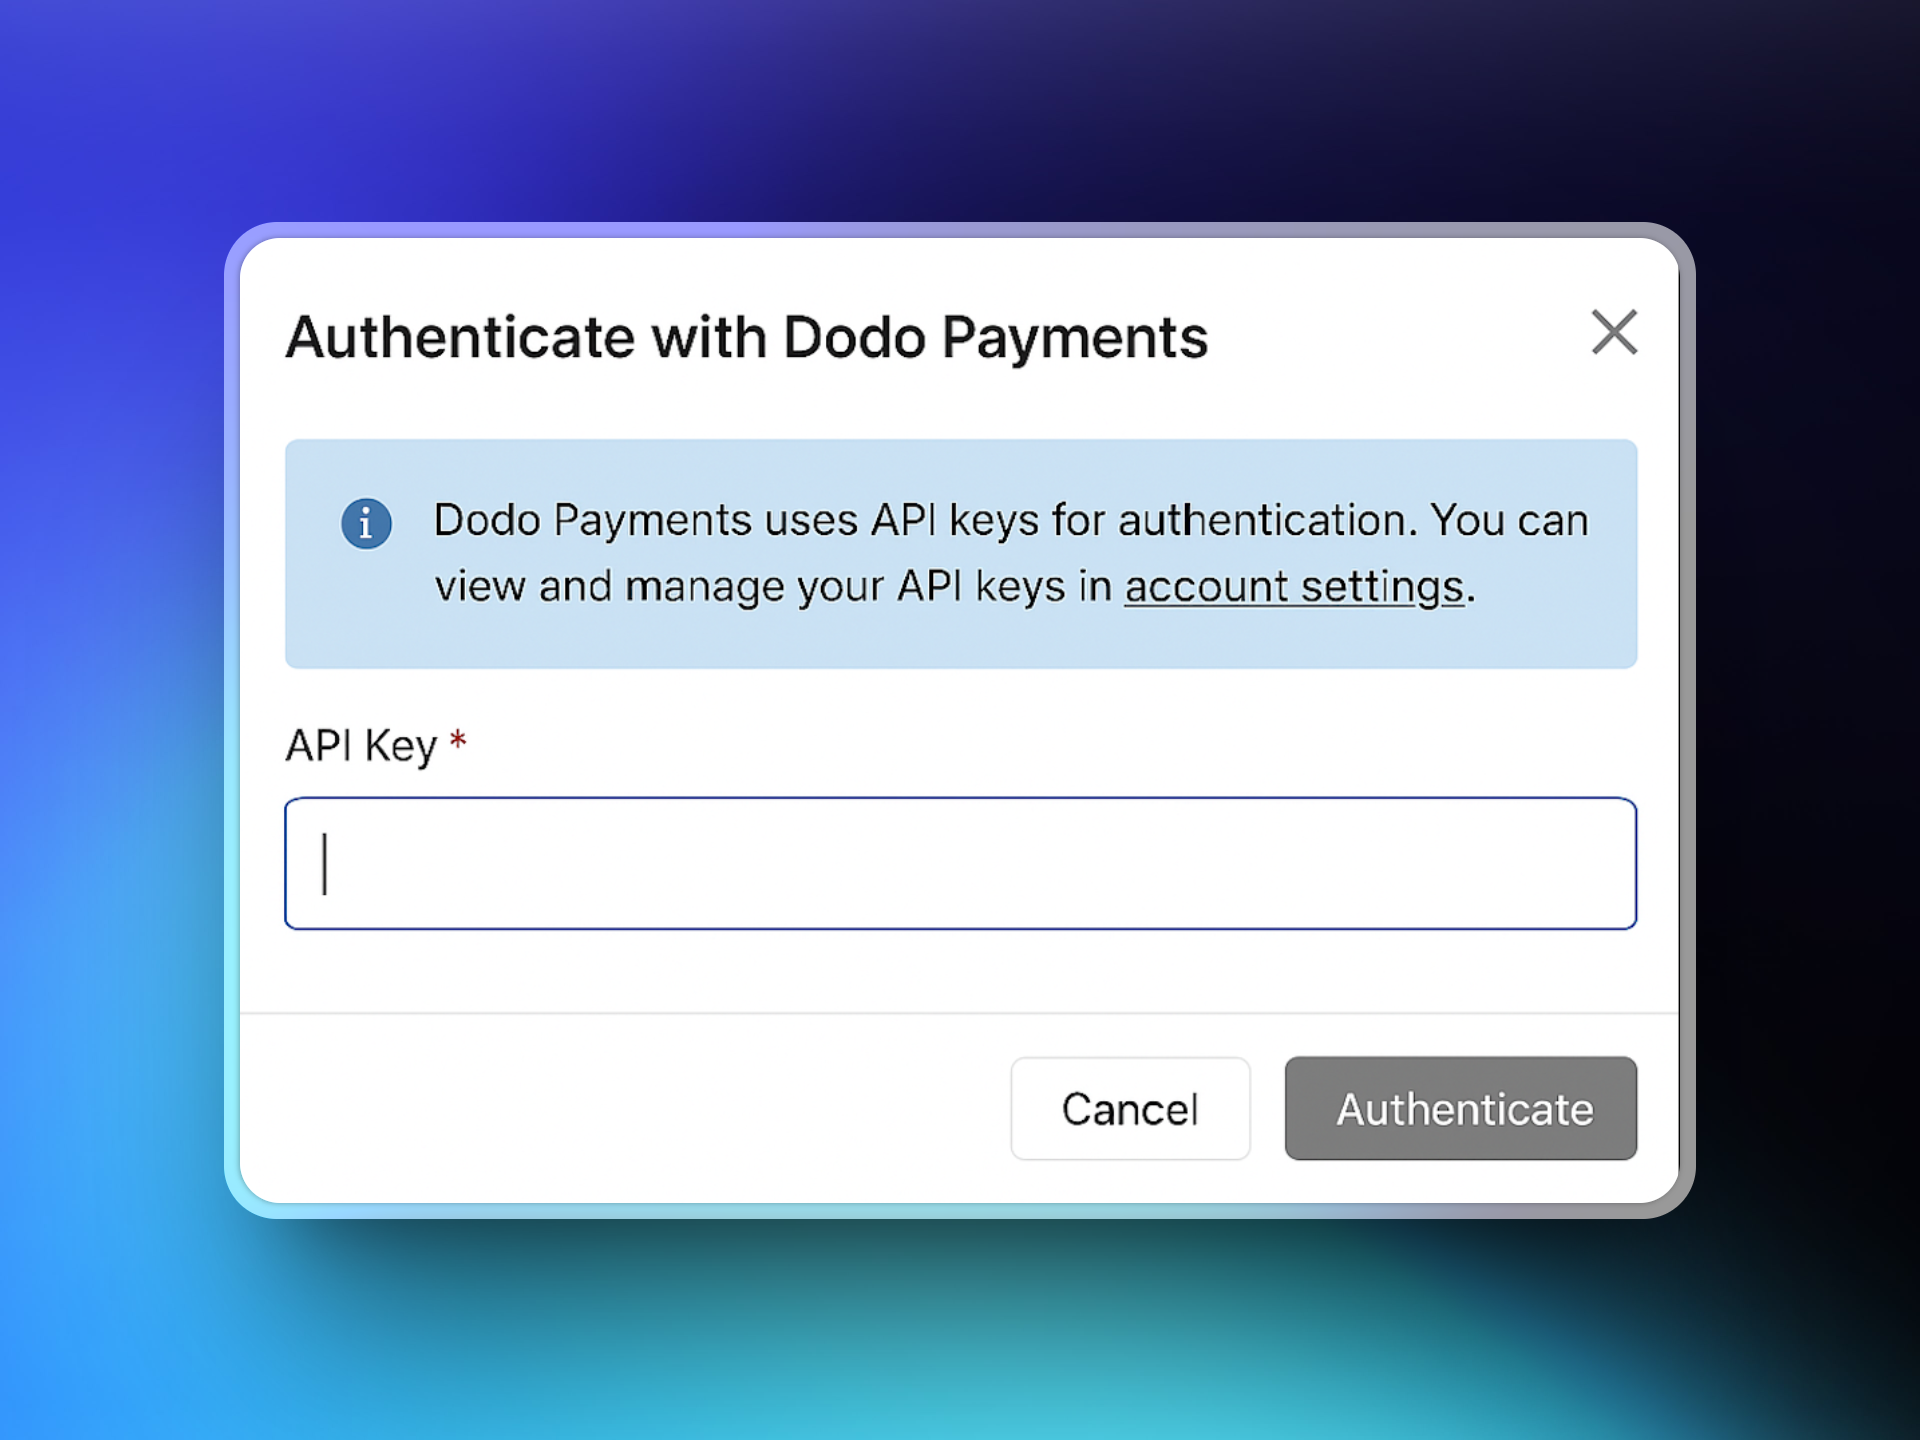 ### 5. Select Products
Once connected, ParityDeals will fetch your Dodo Payments product catalog. Select the products you want to associate with your deals.
### 5. Select Products
Once connected, ParityDeals will fetch your Dodo Payments product catalog. Select the products you want to associate with your deals.
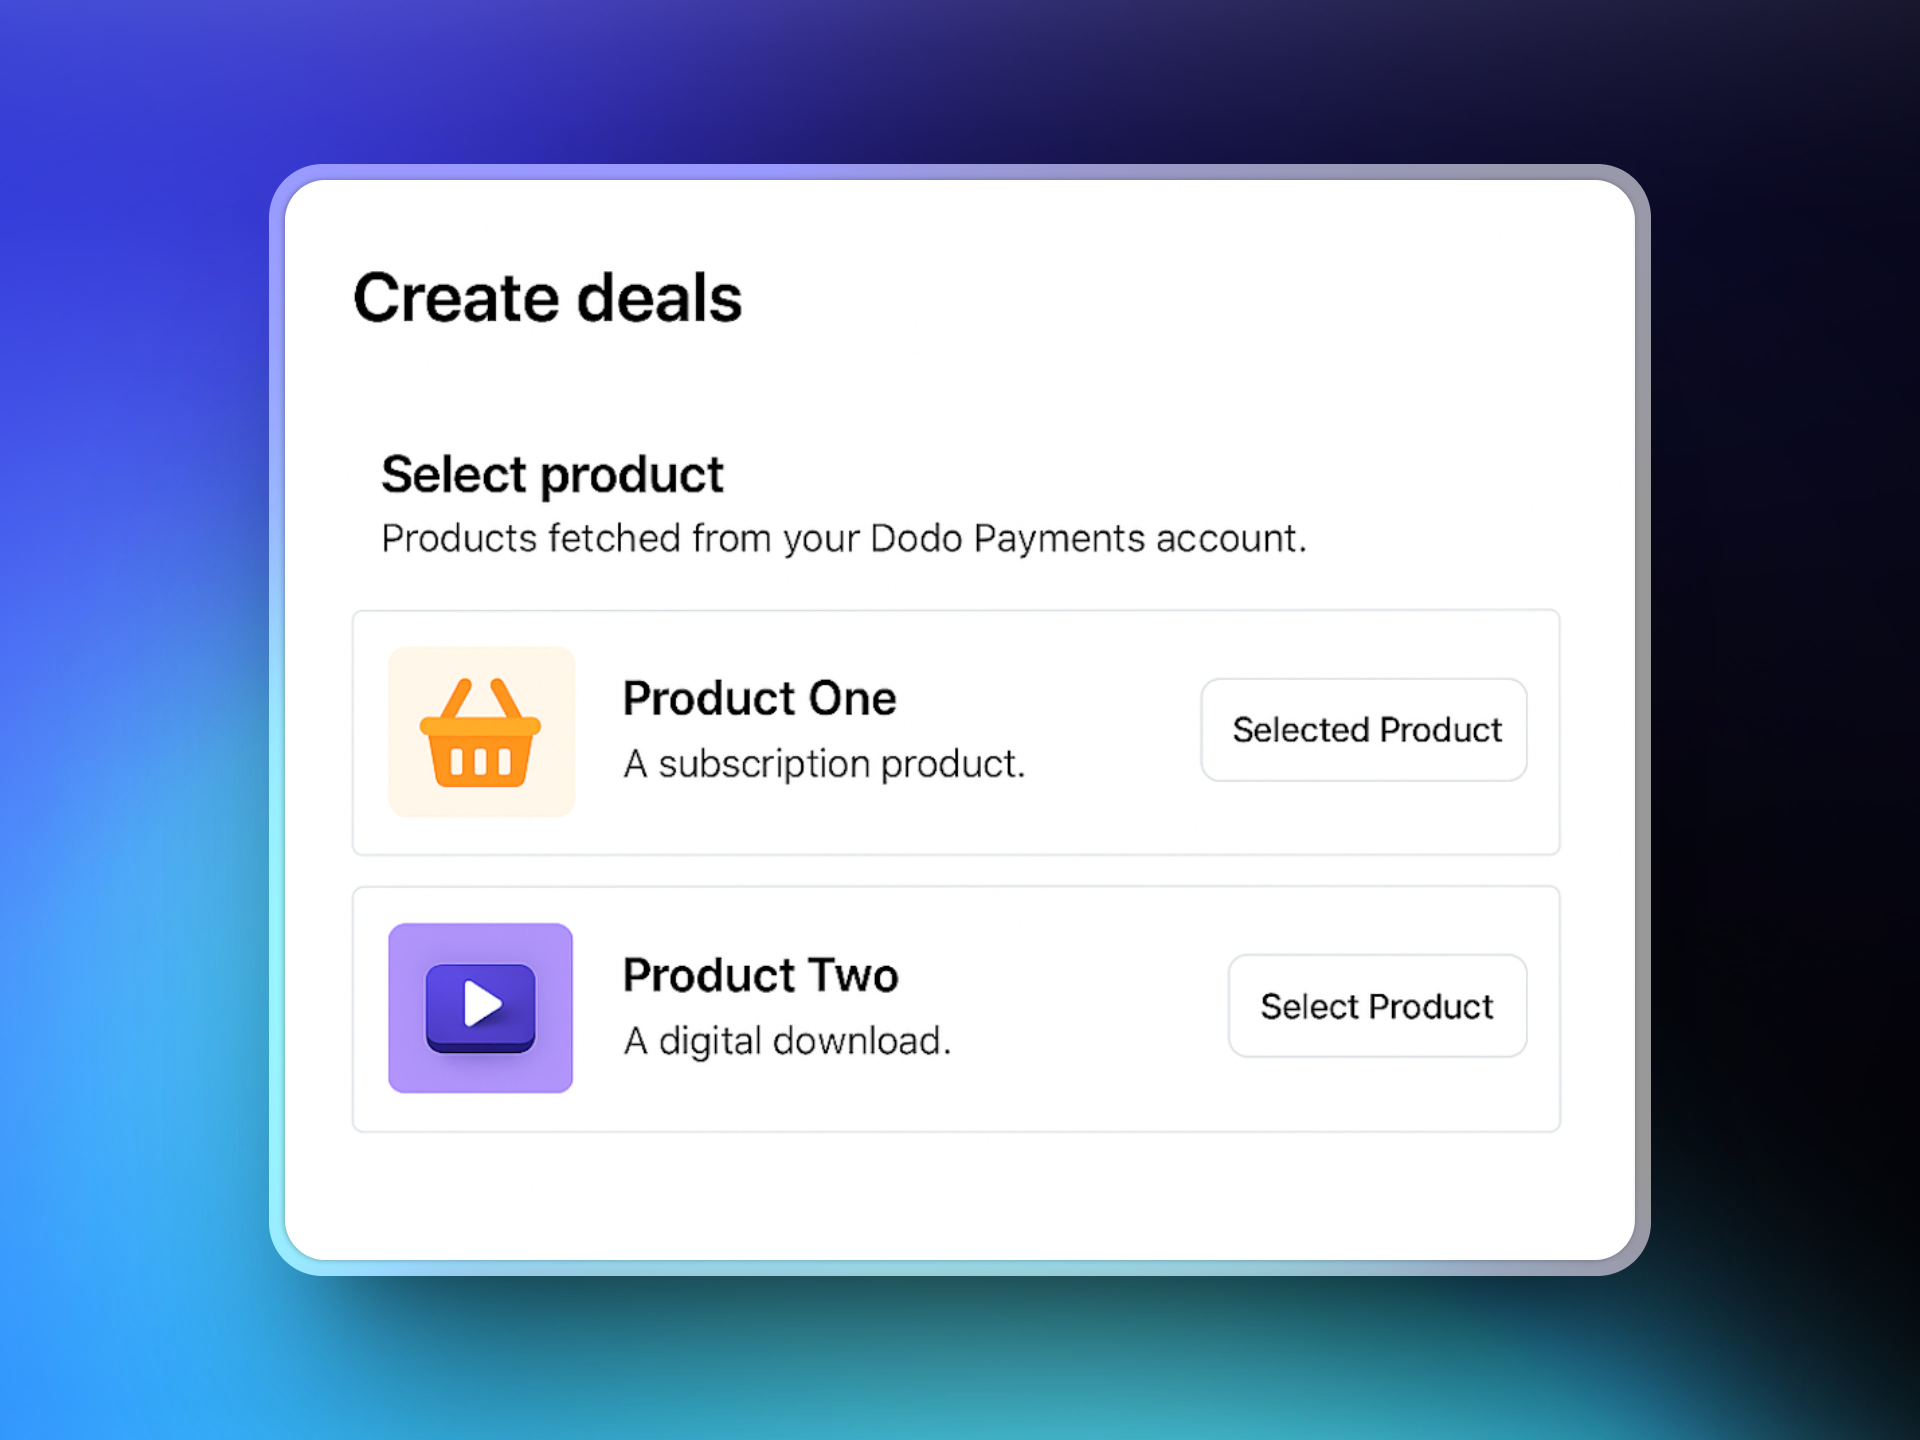 ### 6. Configure Deal Settings
Enter your website URL and optionally select specific target pages where the discount banner should appear.
Then choose your preferred deal type:
* Location-based deals
* Holiday deals
* Time-based flash deals
### 6. Configure Deal Settings
Enter your website URL and optionally select specific target pages where the discount banner should appear.
Then choose your preferred deal type:
* Location-based deals
* Holiday deals
* Time-based flash deals
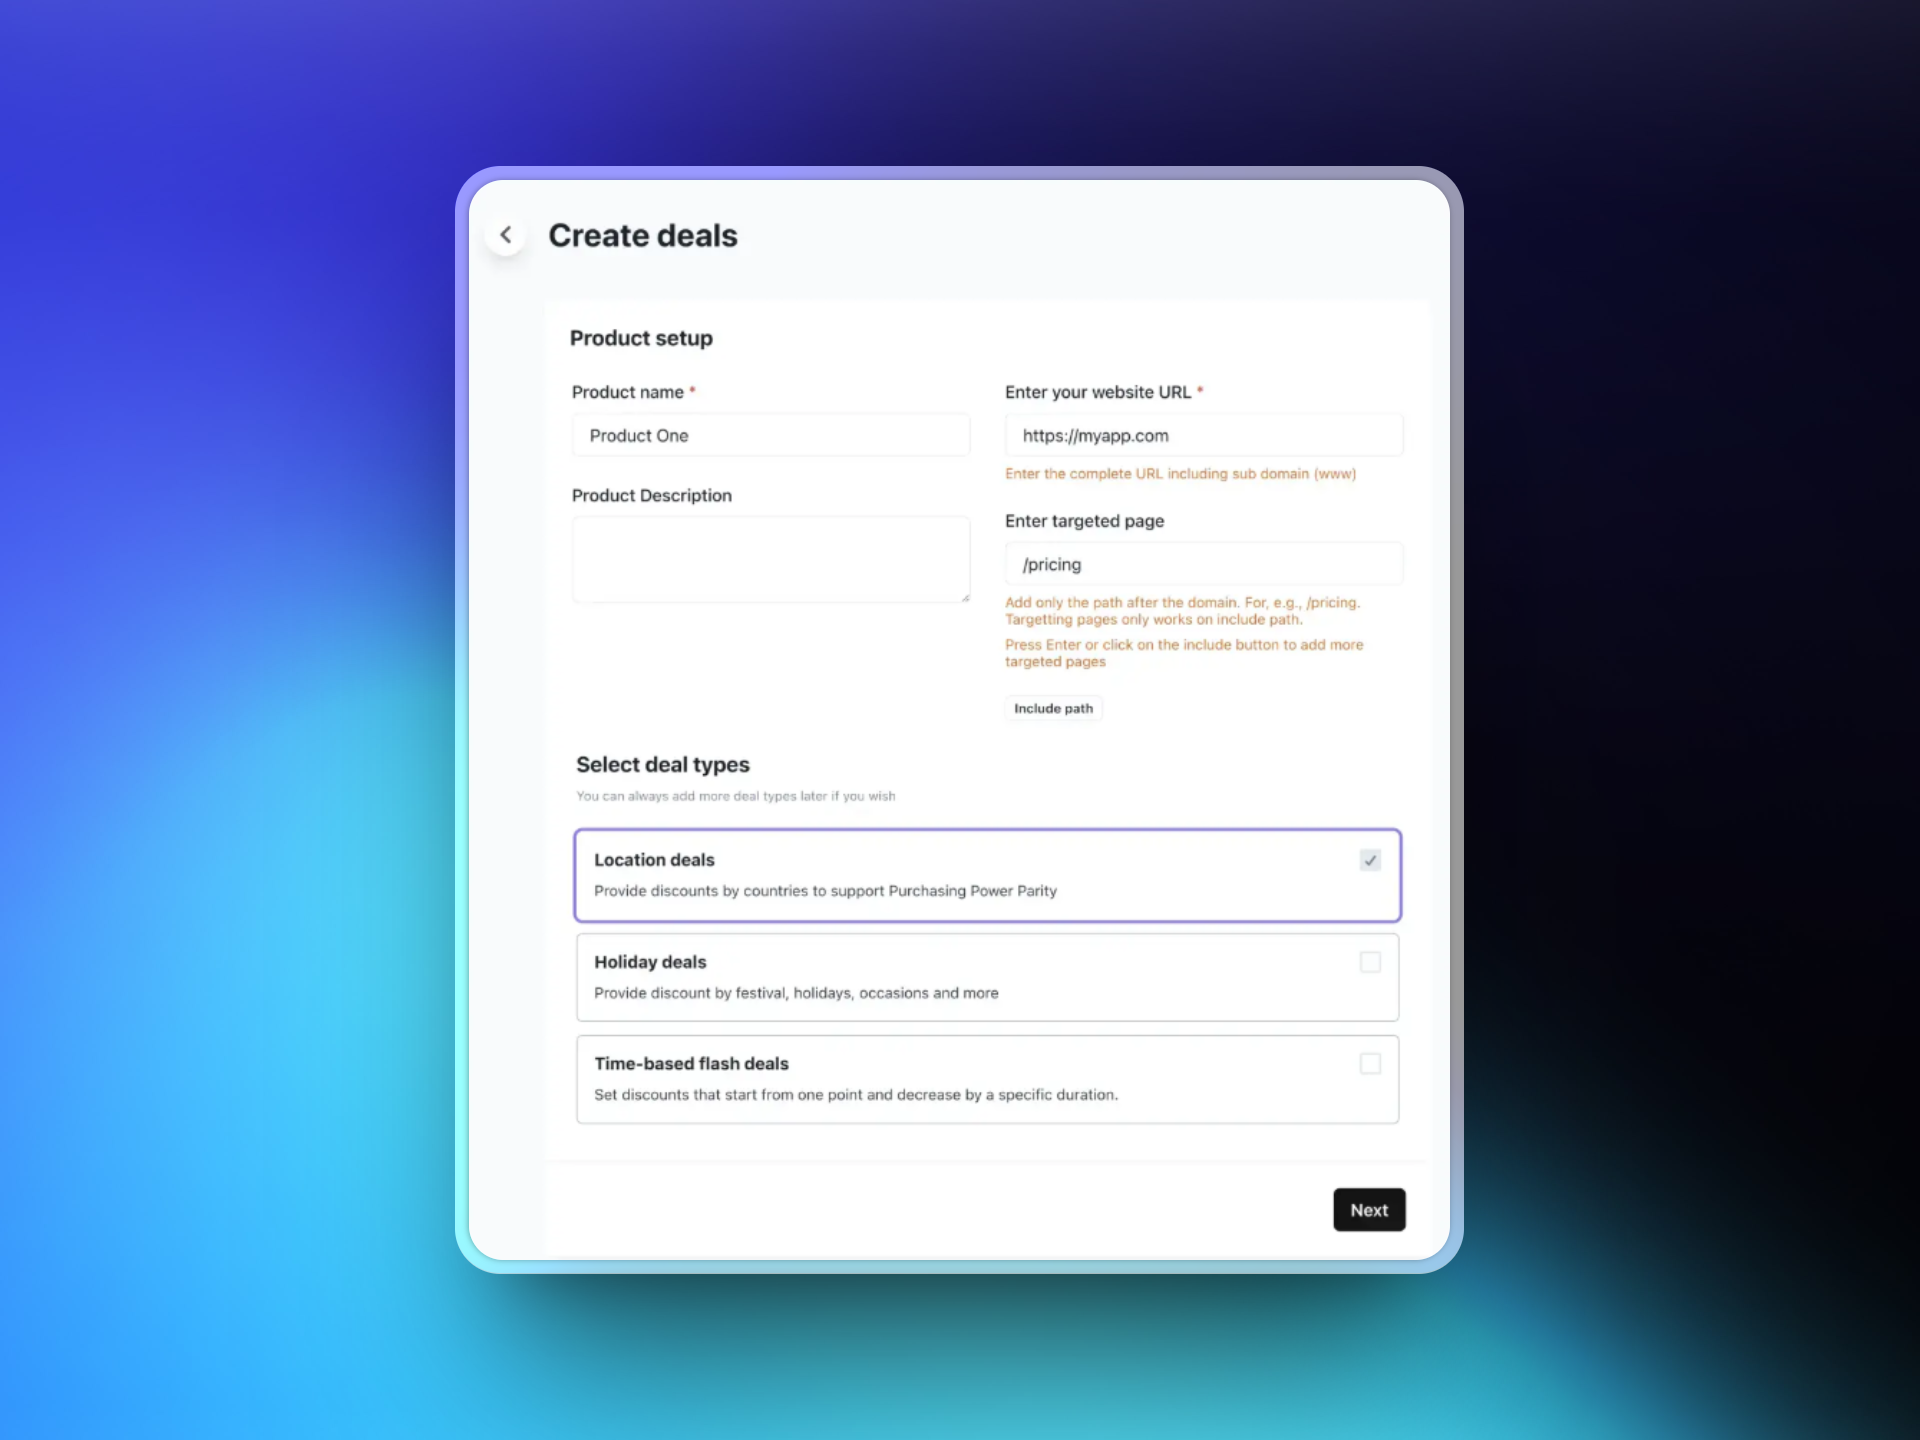 ### 7. Set Country-Based Rules
Select the countries you want to offer localized discounts to and define the discount percentage for each. ParityDeals provides recommended defaults that you can adjust as needed.
### 7. Set Country-Based Rules
Select the countries you want to offer localized discounts to and define the discount percentage for each. ParityDeals provides recommended defaults that you can adjust as needed.
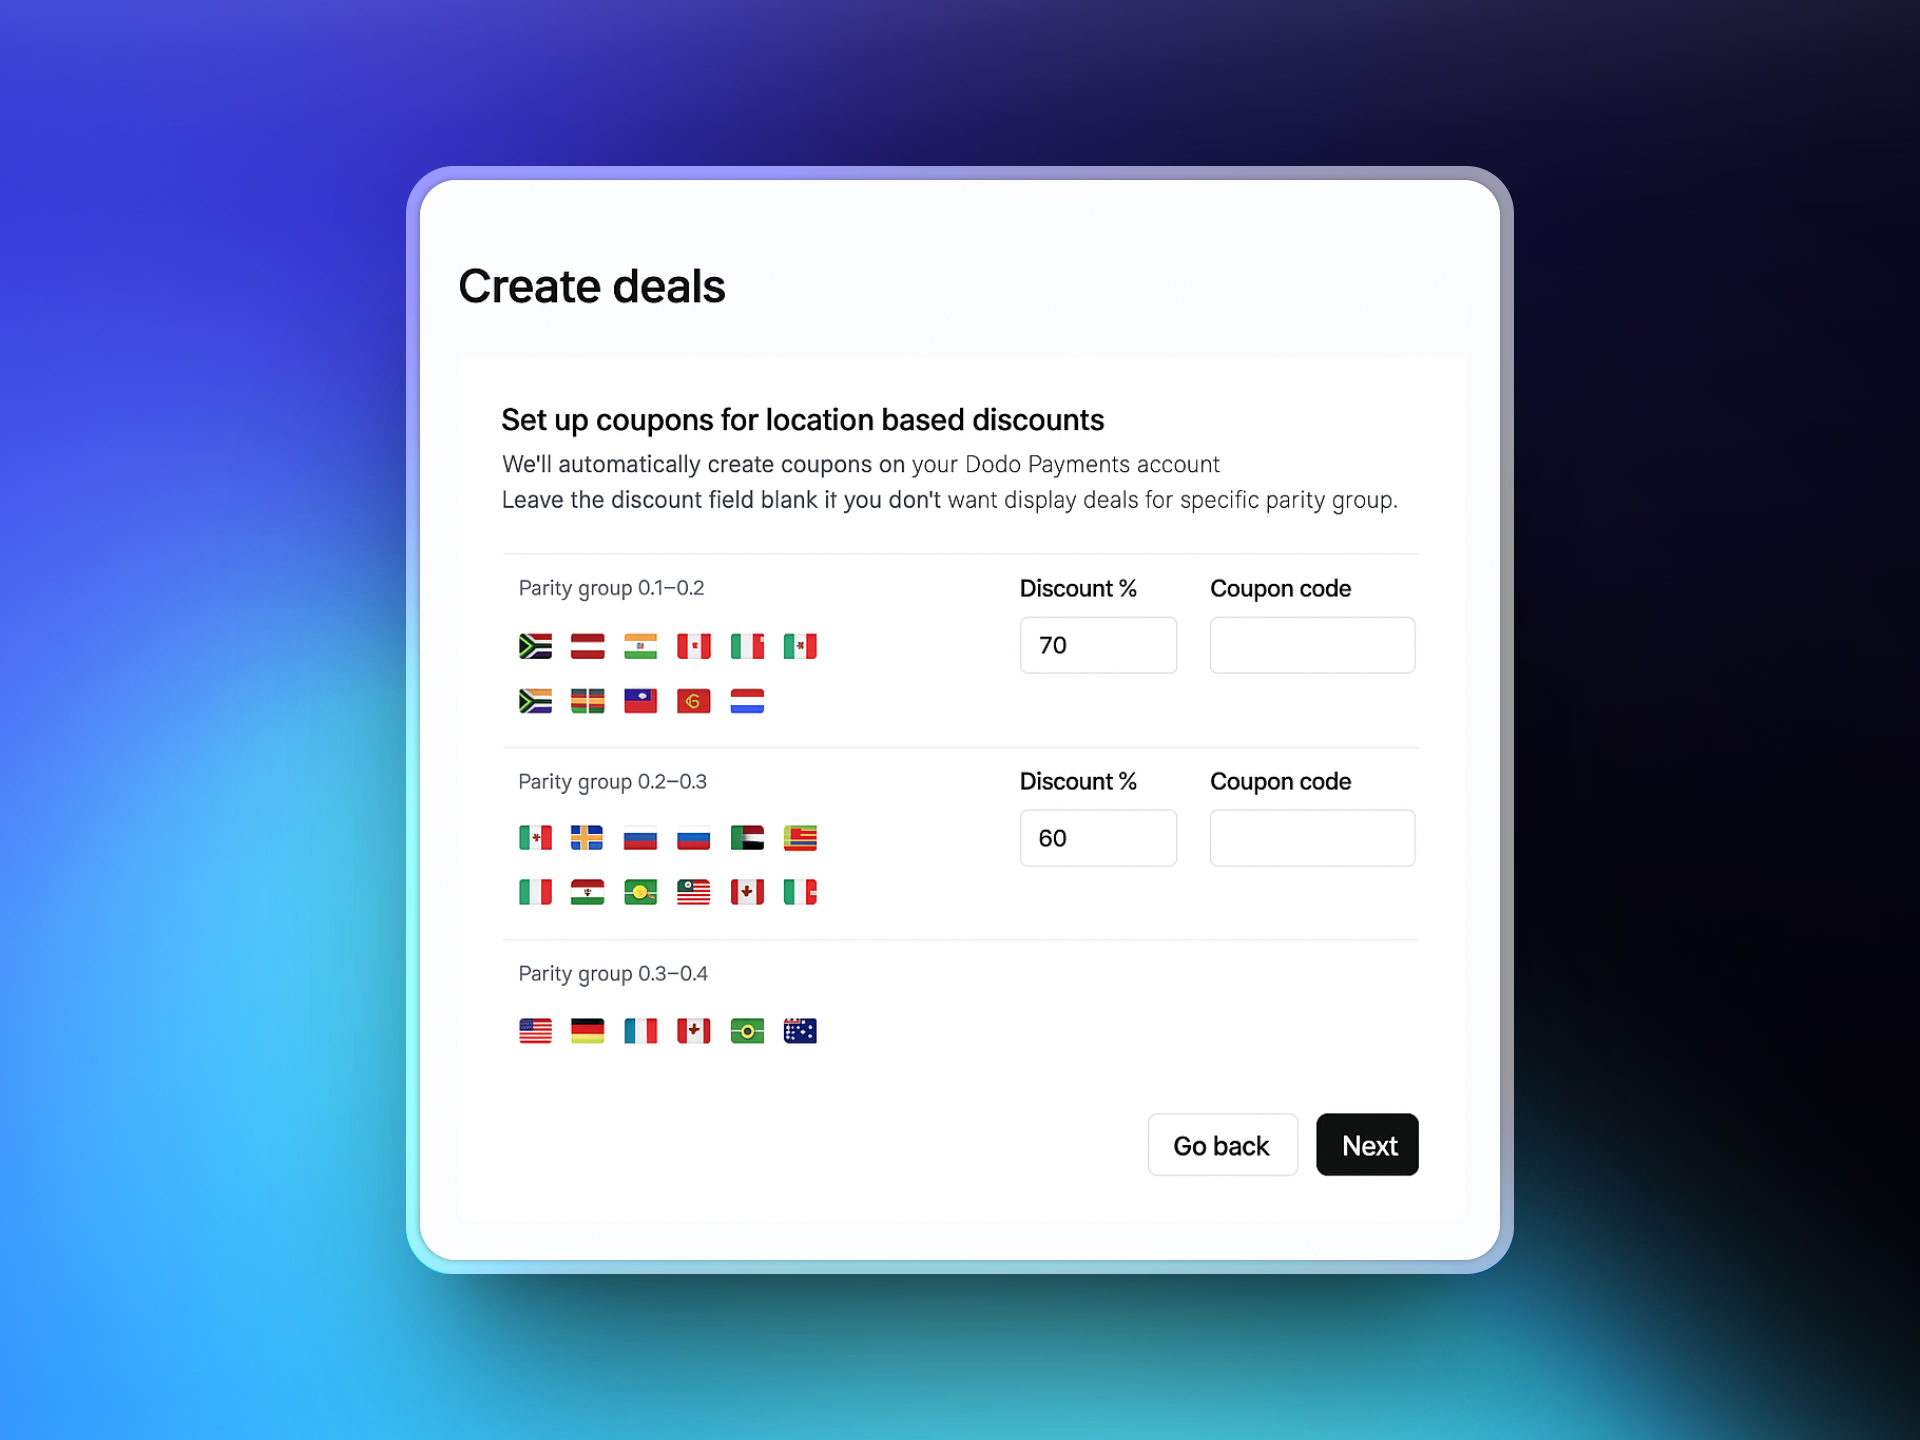 ### 8. Customize the Banner
Design your discount banner by:
* Customizing the text
* Selecting colors and layout
* Choosing the banner position (top or bottom of page)
This banner will be displayed to eligible visitors based on your configured rules.
### 8. Customize the Banner
Design your discount banner by:
* Customizing the text
* Selecting colors and layout
* Choosing the banner position (top or bottom of page)
This banner will be displayed to eligible visitors based on your configured rules.
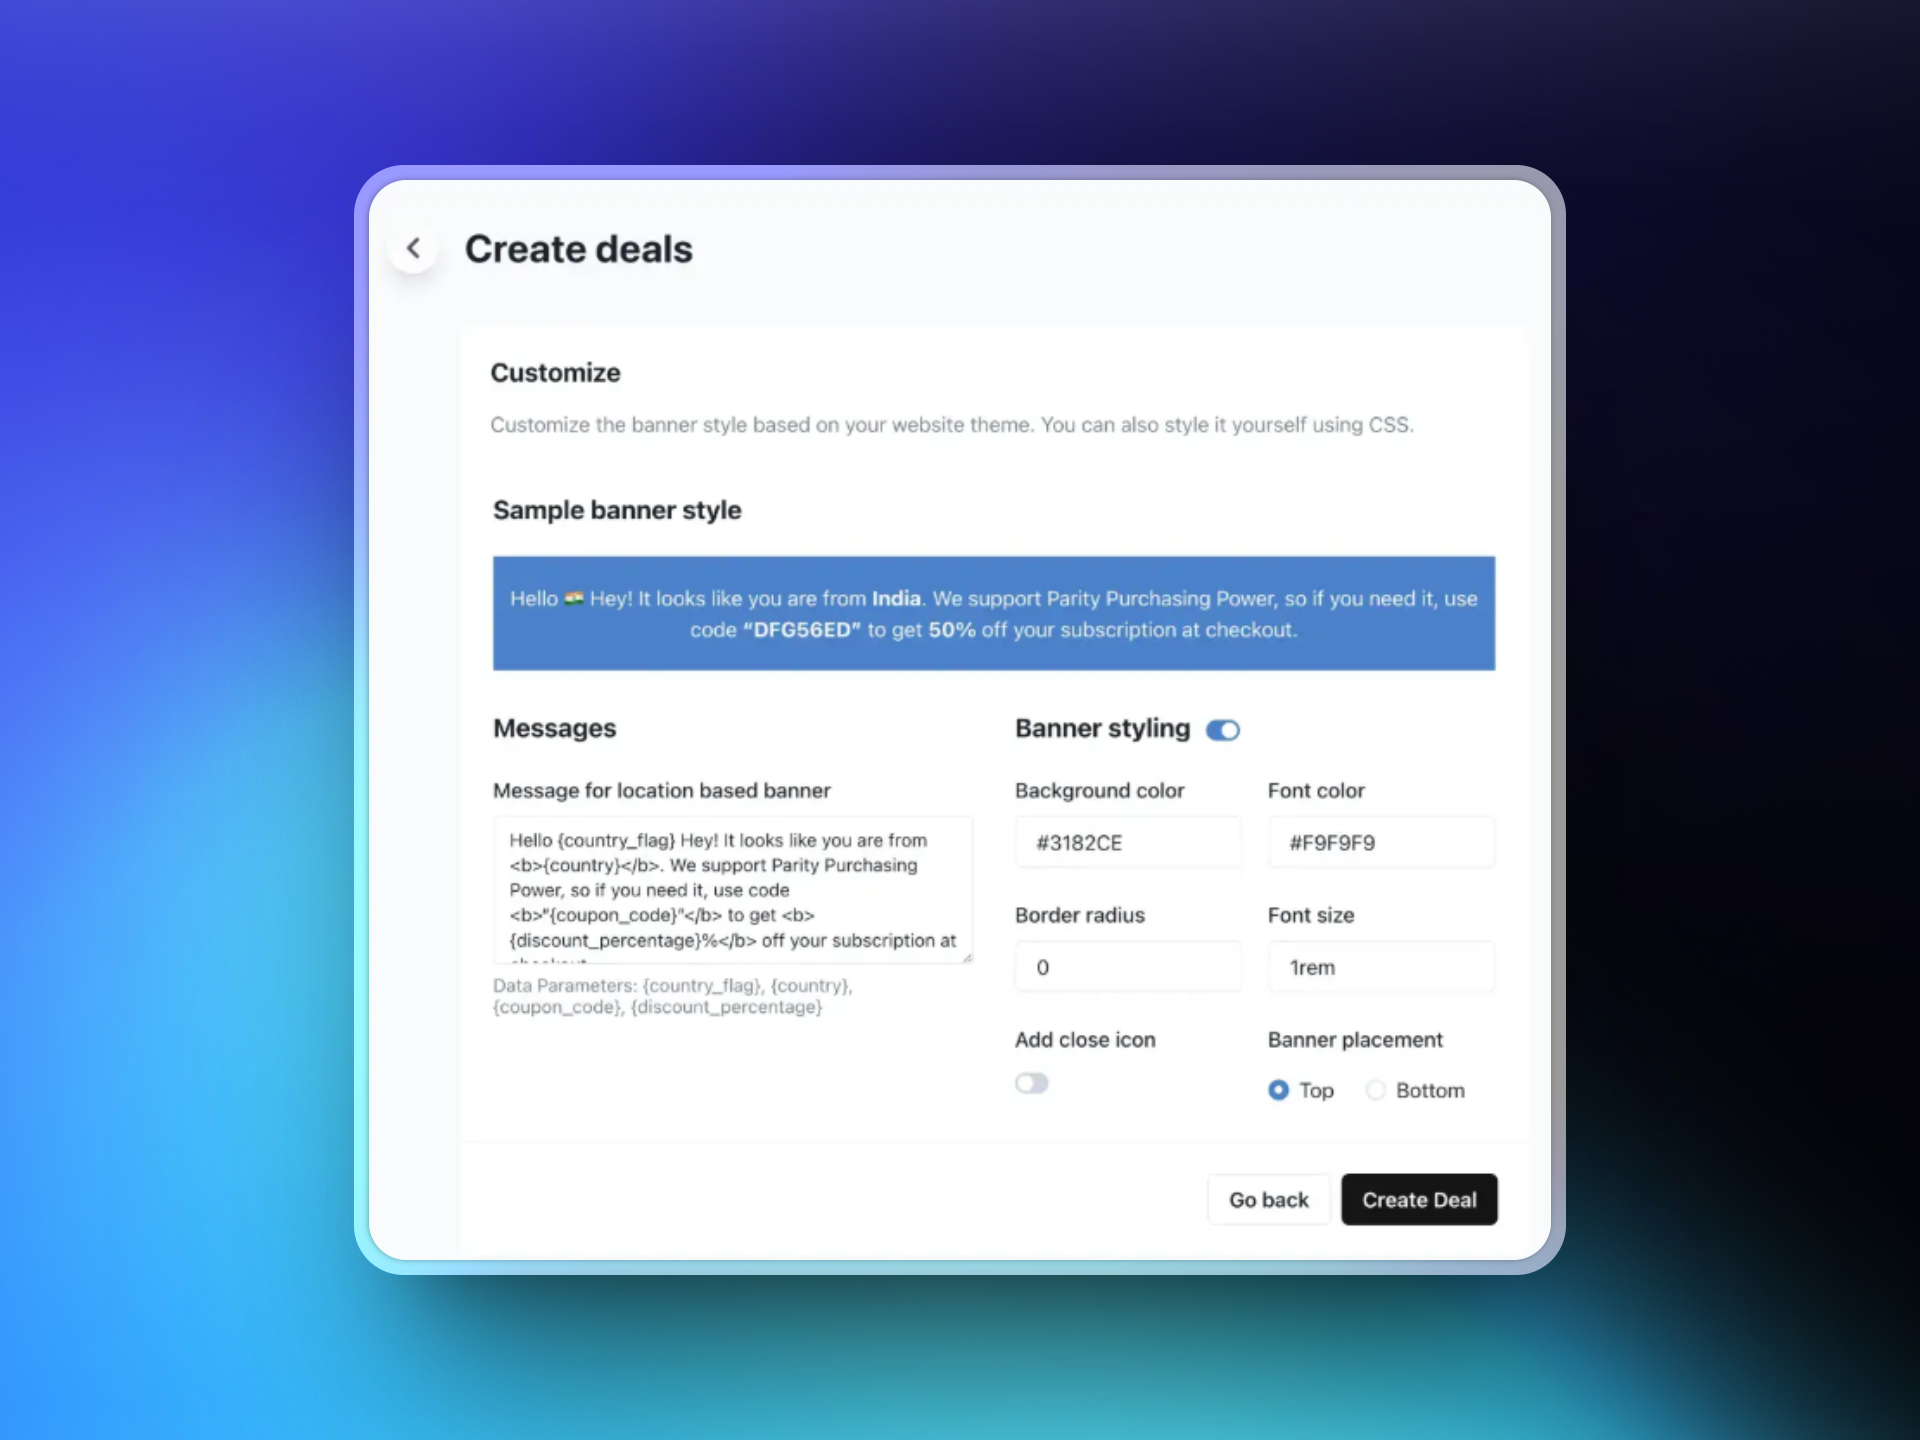 ### 9. Add the ParityDeals Script to Your Website
After saving your deal, ParityDeals will generate a script. Add this script to your website code (typically in the `` section).
This script automatically detects visitor locations and displays the appropriate discount banner.
### 9. Add the ParityDeals Script to Your Website
After saving your deal, ParityDeals will generate a script. Add this script to your website code (typically in the `` section).
This script automatically detects visitor locations and displays the appropriate discount banner.
 ## All Set!
You're now ready to offer:
* **Location-based deals** - Adjust pricing based on purchasing power
* **Countdown/time-sensitive discounts** - Create urgency with limited-time offers
* **Holiday promotions** - Capitalize on seasonal shopping trends
All of these are automated through ParityDeals and work seamlessly with Dodo Payments.
For more detailed information, refer to the [ParityDeals Documentation](https://www.paritydeals.com/docs/) or contact their support team.
# Storefront
Source: https://docs.dodopayments.com/features/storefront
The Storefront Feature allows you to create a simple, branded, and mobile-friendly online store where you can showcase both One-Time Payment products and Subscription products. This feature eliminates the complexity of building an entire website, enabling you to quickly offer your products or services online without additional web development efforts.
## All Set!
You're now ready to offer:
* **Location-based deals** - Adjust pricing based on purchasing power
* **Countdown/time-sensitive discounts** - Create urgency with limited-time offers
* **Holiday promotions** - Capitalize on seasonal shopping trends
All of these are automated through ParityDeals and work seamlessly with Dodo Payments.
For more detailed information, refer to the [ParityDeals Documentation](https://www.paritydeals.com/docs/) or contact their support team.
# Storefront
Source: https://docs.dodopayments.com/features/storefront
The Storefront Feature allows you to create a simple, branded, and mobile-friendly online store where you can showcase both One-Time Payment products and Subscription products. This feature eliminates the complexity of building an entire website, enabling you to quickly offer your products or services online without additional web development efforts.
 ## Key Highlights of the Feature
1. **Branded Storefront**
* Customize your store with a Store Name, Logo, and Cover Image.
* Easily share your store URL (e.g., `store.dodopayments.com/your-store`).
2. **Product Segregation**
* Automatically organizes your products into One-Time Payment and Subscription sections.
3. **Simple Checkout Flow**
* Customers can select a product & quantity and click **“Buy Now”** to be redirected to Dodopayments checkout.
4. **Publish/Unpublish**
* Control which products appear on your store: quickly publish or unpublish within the Merchant Dashboard.
5. **No Extra Setup**
* You don’t need a separate CMS; all product management happens in your Merchant Dashboard, where you already manage pricing, descriptions, and subscription details.
6. **Mobile-Friendly**
* The storefront layout is responsive, ensuring a seamless shopping experience on phones, tablets, and desktops.
## Store Front Setup
Below is the step-by-step process for merchants to set up and manage their storefront:
## Key Highlights of the Feature
1. **Branded Storefront**
* Customize your store with a Store Name, Logo, and Cover Image.
* Easily share your store URL (e.g., `store.dodopayments.com/your-store`).
2. **Product Segregation**
* Automatically organizes your products into One-Time Payment and Subscription sections.
3. **Simple Checkout Flow**
* Customers can select a product & quantity and click **“Buy Now”** to be redirected to Dodopayments checkout.
4. **Publish/Unpublish**
* Control which products appear on your store: quickly publish or unpublish within the Merchant Dashboard.
5. **No Extra Setup**
* You don’t need a separate CMS; all product management happens in your Merchant Dashboard, where you already manage pricing, descriptions, and subscription details.
6. **Mobile-Friendly**
* The storefront layout is responsive, ensuring a seamless shopping experience on phones, tablets, and desktops.
## Store Front Setup
Below is the step-by-step process for merchants to set up and manage their storefront:
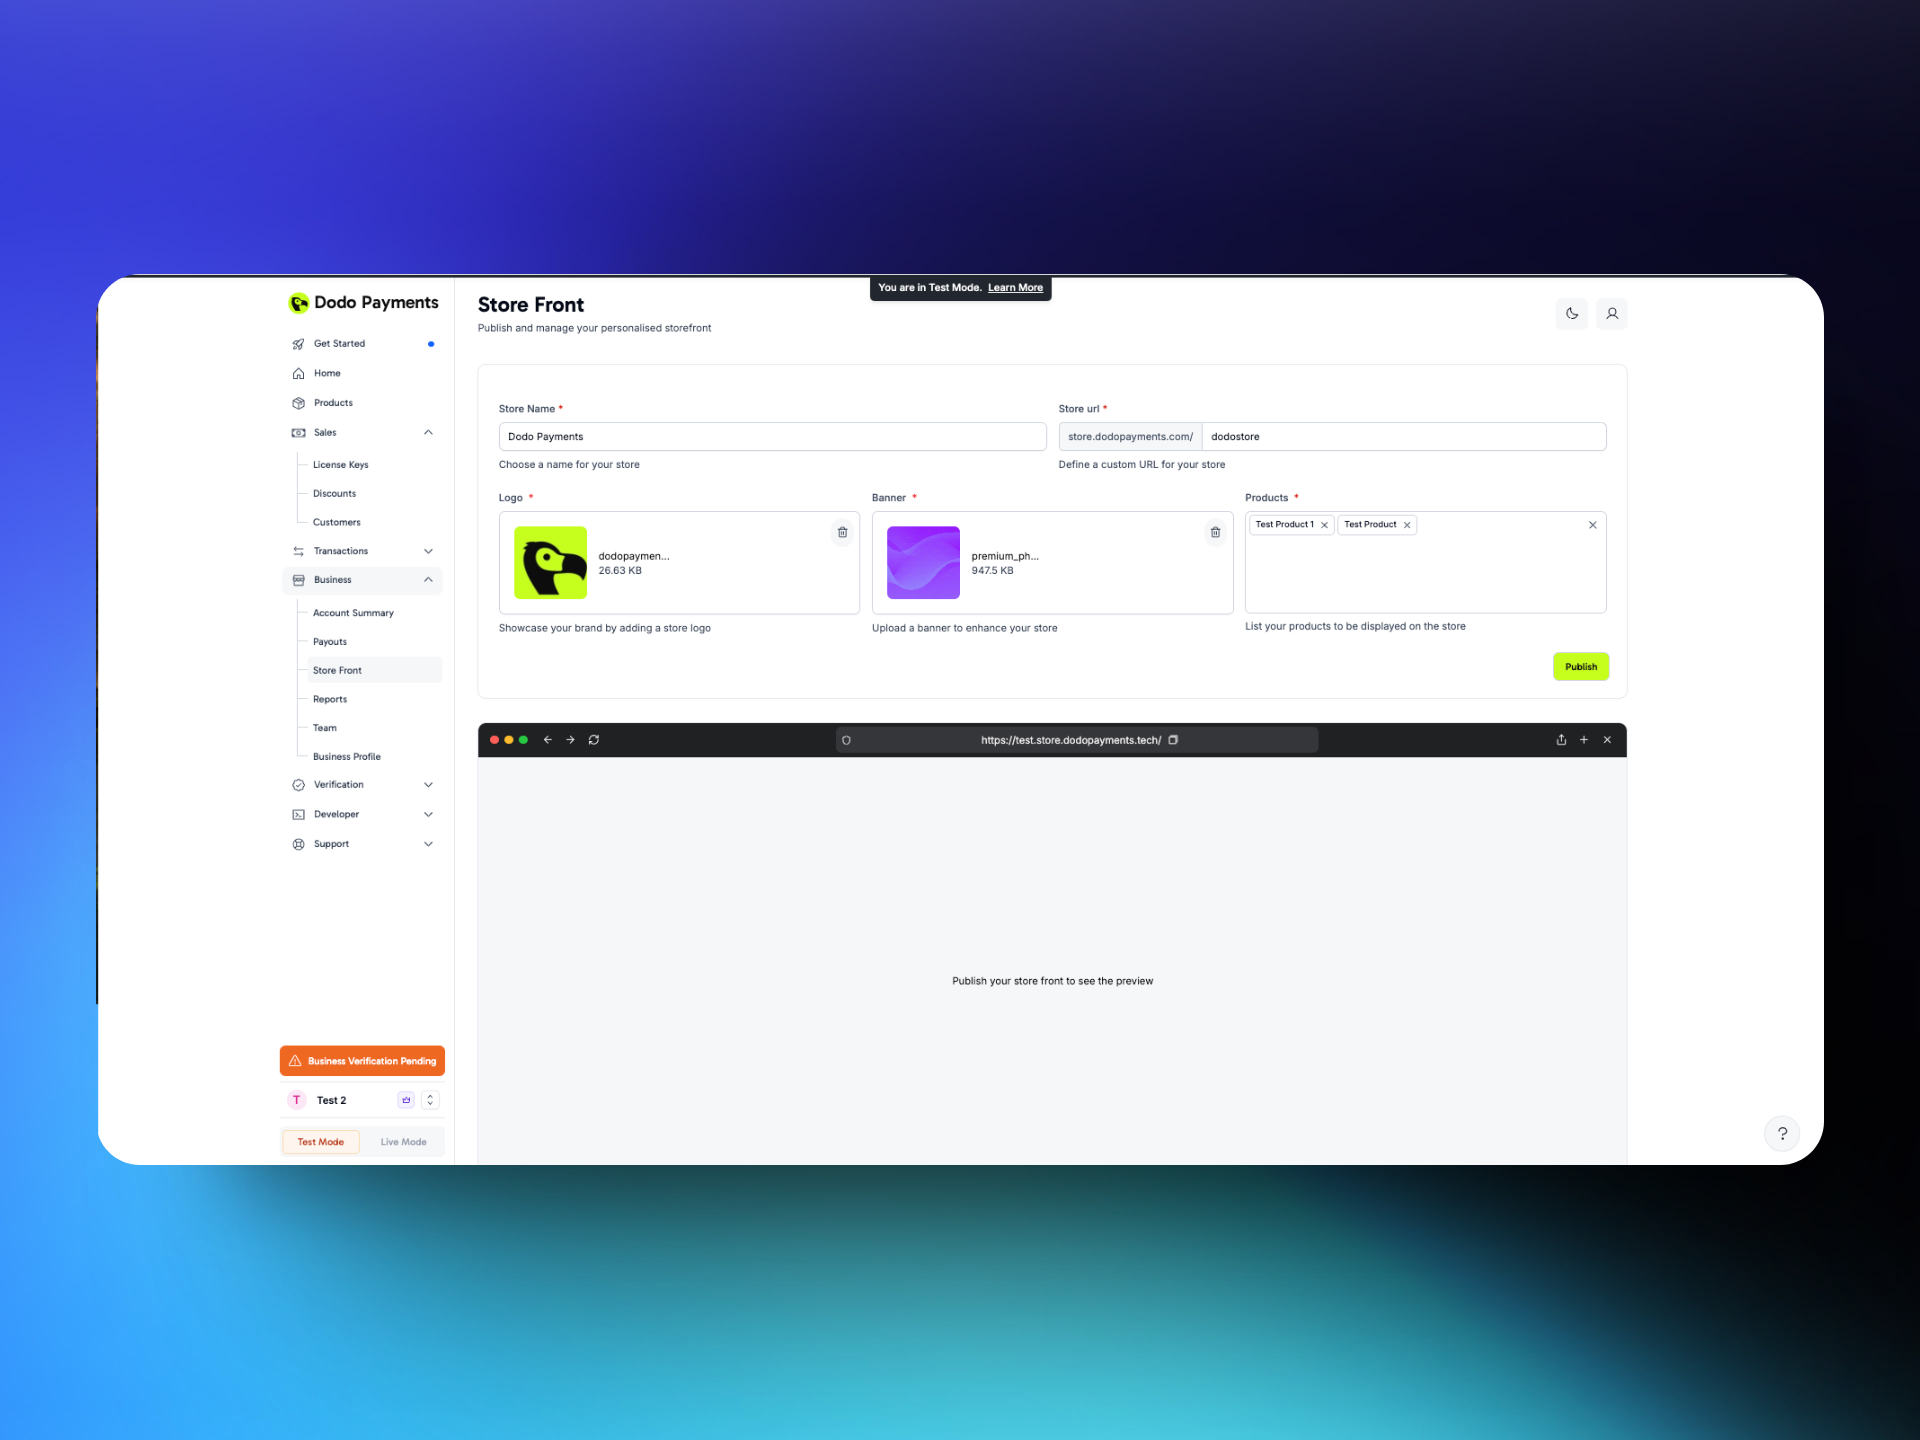 ### Accessing Your Storefront Settings
1. Open Business Section → Select Store Front
### Store Branding
1. **Store Name**: Enter the public-facing name of your store. This appears prominently at the top of your storefront.
2. **Logo**: Upload an image (e.g., PNG or JPG) for your brand logo.
3. **Cover Image**: Select or upload a banner/cover image that appear on the storefront homepage.
4. **Store URL**:
* Typically auto-generated based on your business name (e.g., `business.dodopayments.com/my-store`).
* You can edit this URL if the system supports custom slugs.
5. **Products:** You can select the Products you want to display on your storefront
### Saving & Viewing Your Store
### Accessing Your Storefront Settings
1. Open Business Section → Select Store Front
### Store Branding
1. **Store Name**: Enter the public-facing name of your store. This appears prominently at the top of your storefront.
2. **Logo**: Upload an image (e.g., PNG or JPG) for your brand logo.
3. **Cover Image**: Select or upload a banner/cover image that appear on the storefront homepage.
4. **Store URL**:
* Typically auto-generated based on your business name (e.g., `business.dodopayments.com/my-store`).
* You can edit this URL if the system supports custom slugs.
5. **Products:** You can select the Products you want to display on your storefront
### Saving & Viewing Your Store
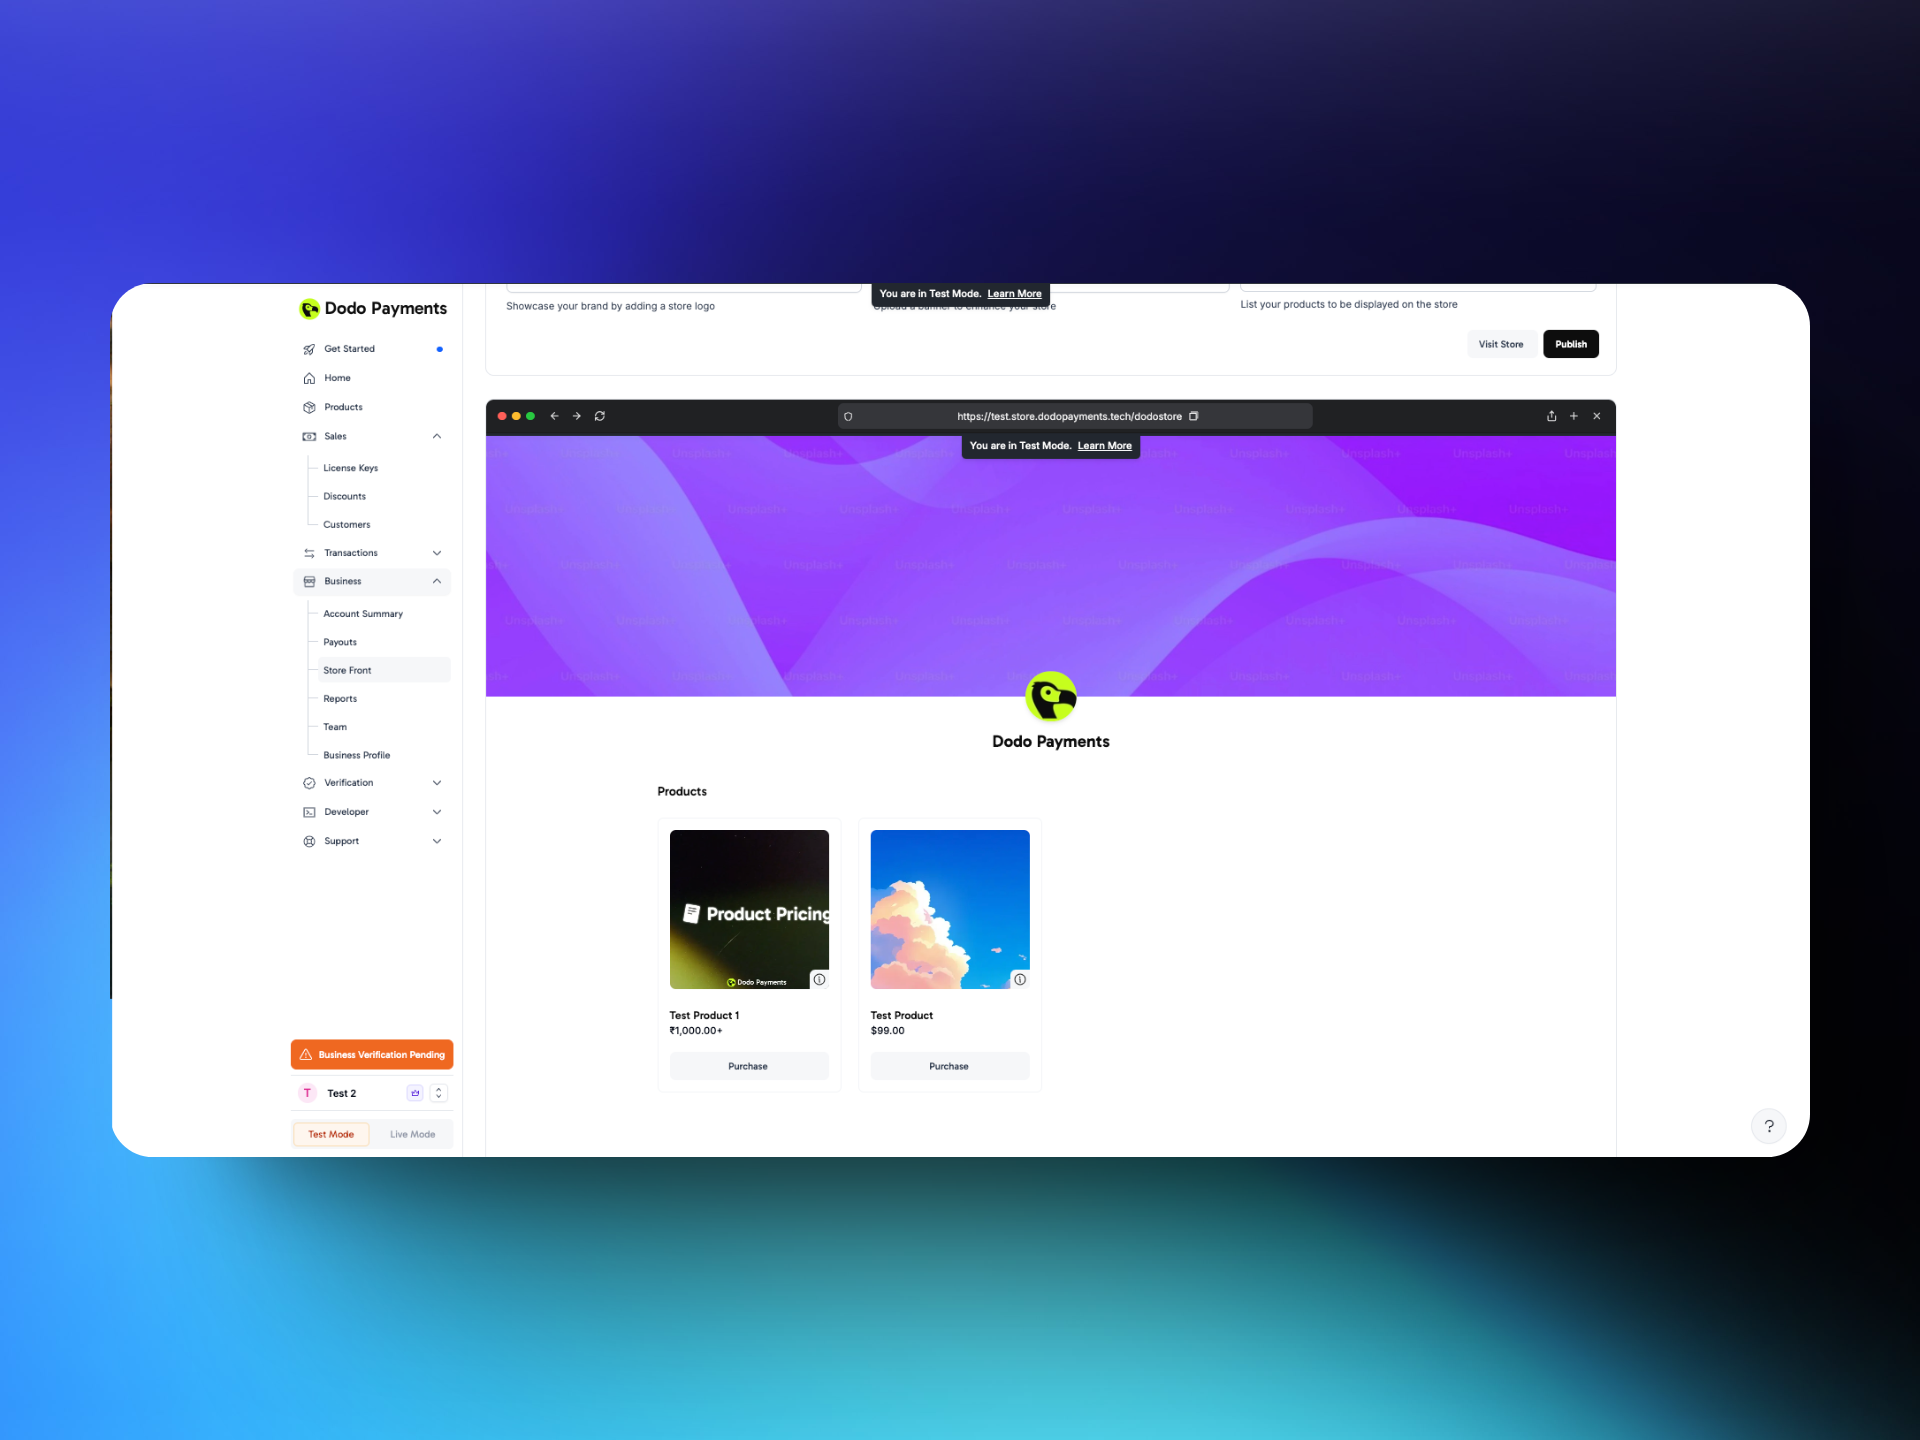 1. **Click Publish**: Click Publish to confirm your storefront setup and product publishing decisions.
2. **Preview Store**: You can preview your storefront at the generated URL.
3. **Share URL**: Once satisfied, share the link with your customers via email, social media, or your website.
### Test Mode
1. **Click Publish**: Click Publish to confirm your storefront setup and product publishing decisions.
2. **Preview Store**: You can preview your storefront at the generated URL.
3. **Share URL**: Once satisfied, share the link with your customers via email, social media, or your website.
### Test Mode
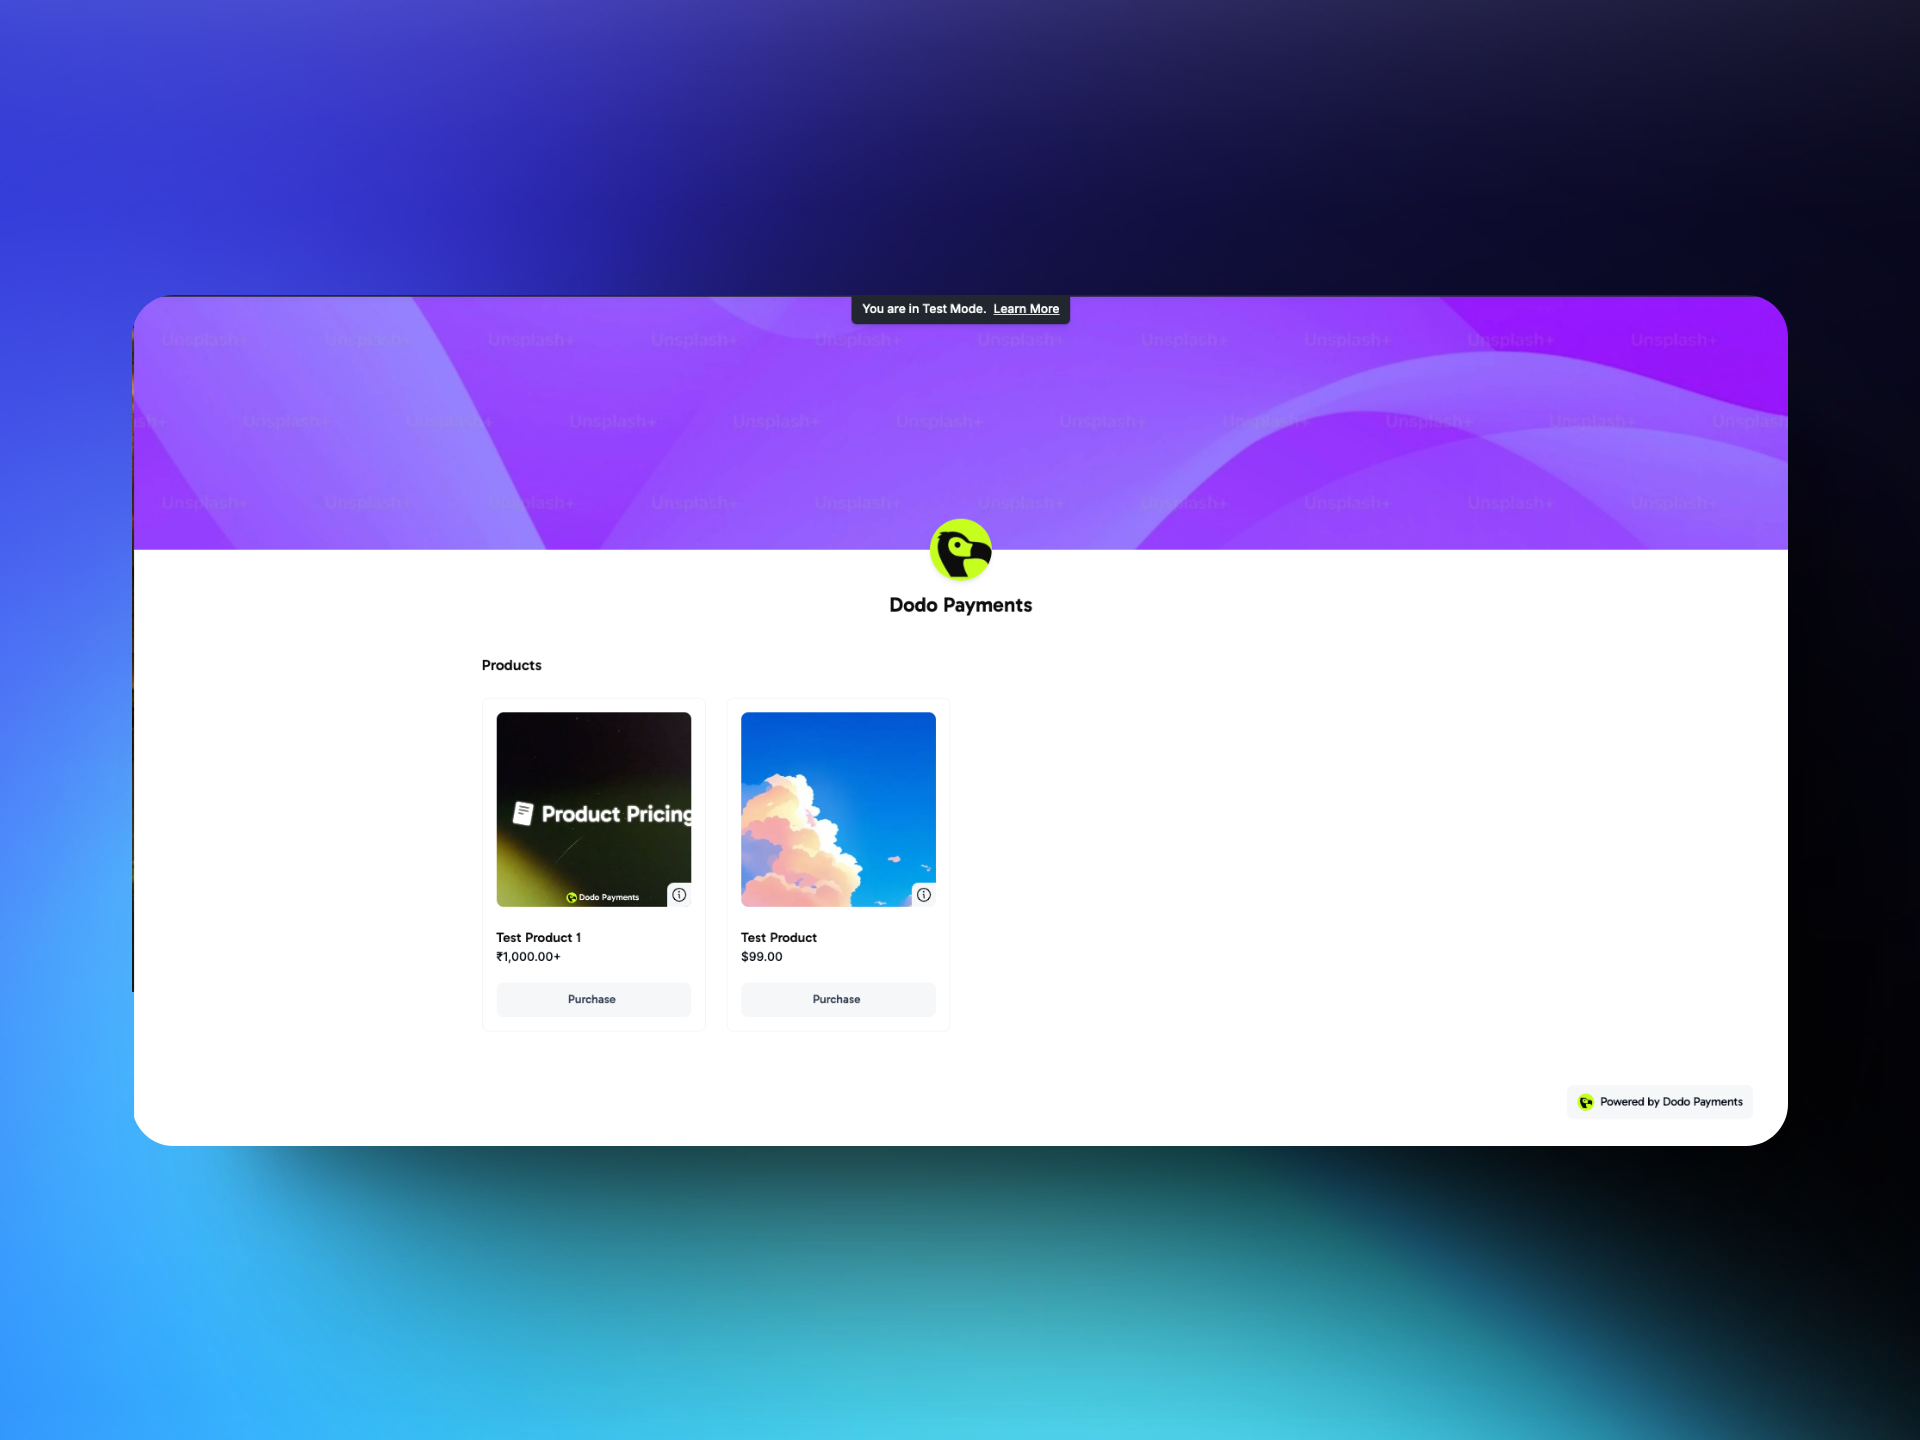 Test Mode and Live Mode have separate storefronts. You can see the test mode indicator on the top of your website and store front generated through test mode as well.
Test Mode is for you try out the user flow and purchase experience on the store. Please share the live mode Store link with your users to facilitate real purchases
## Customer Experience
Test Mode and Live Mode have separate storefronts. You can see the test mode indicator on the top of your website and store front generated through test mode as well.
Test Mode is for you try out the user flow and purchase experience on the store. Please share the live mode Store link with your users to facilitate real purchases
## Customer Experience
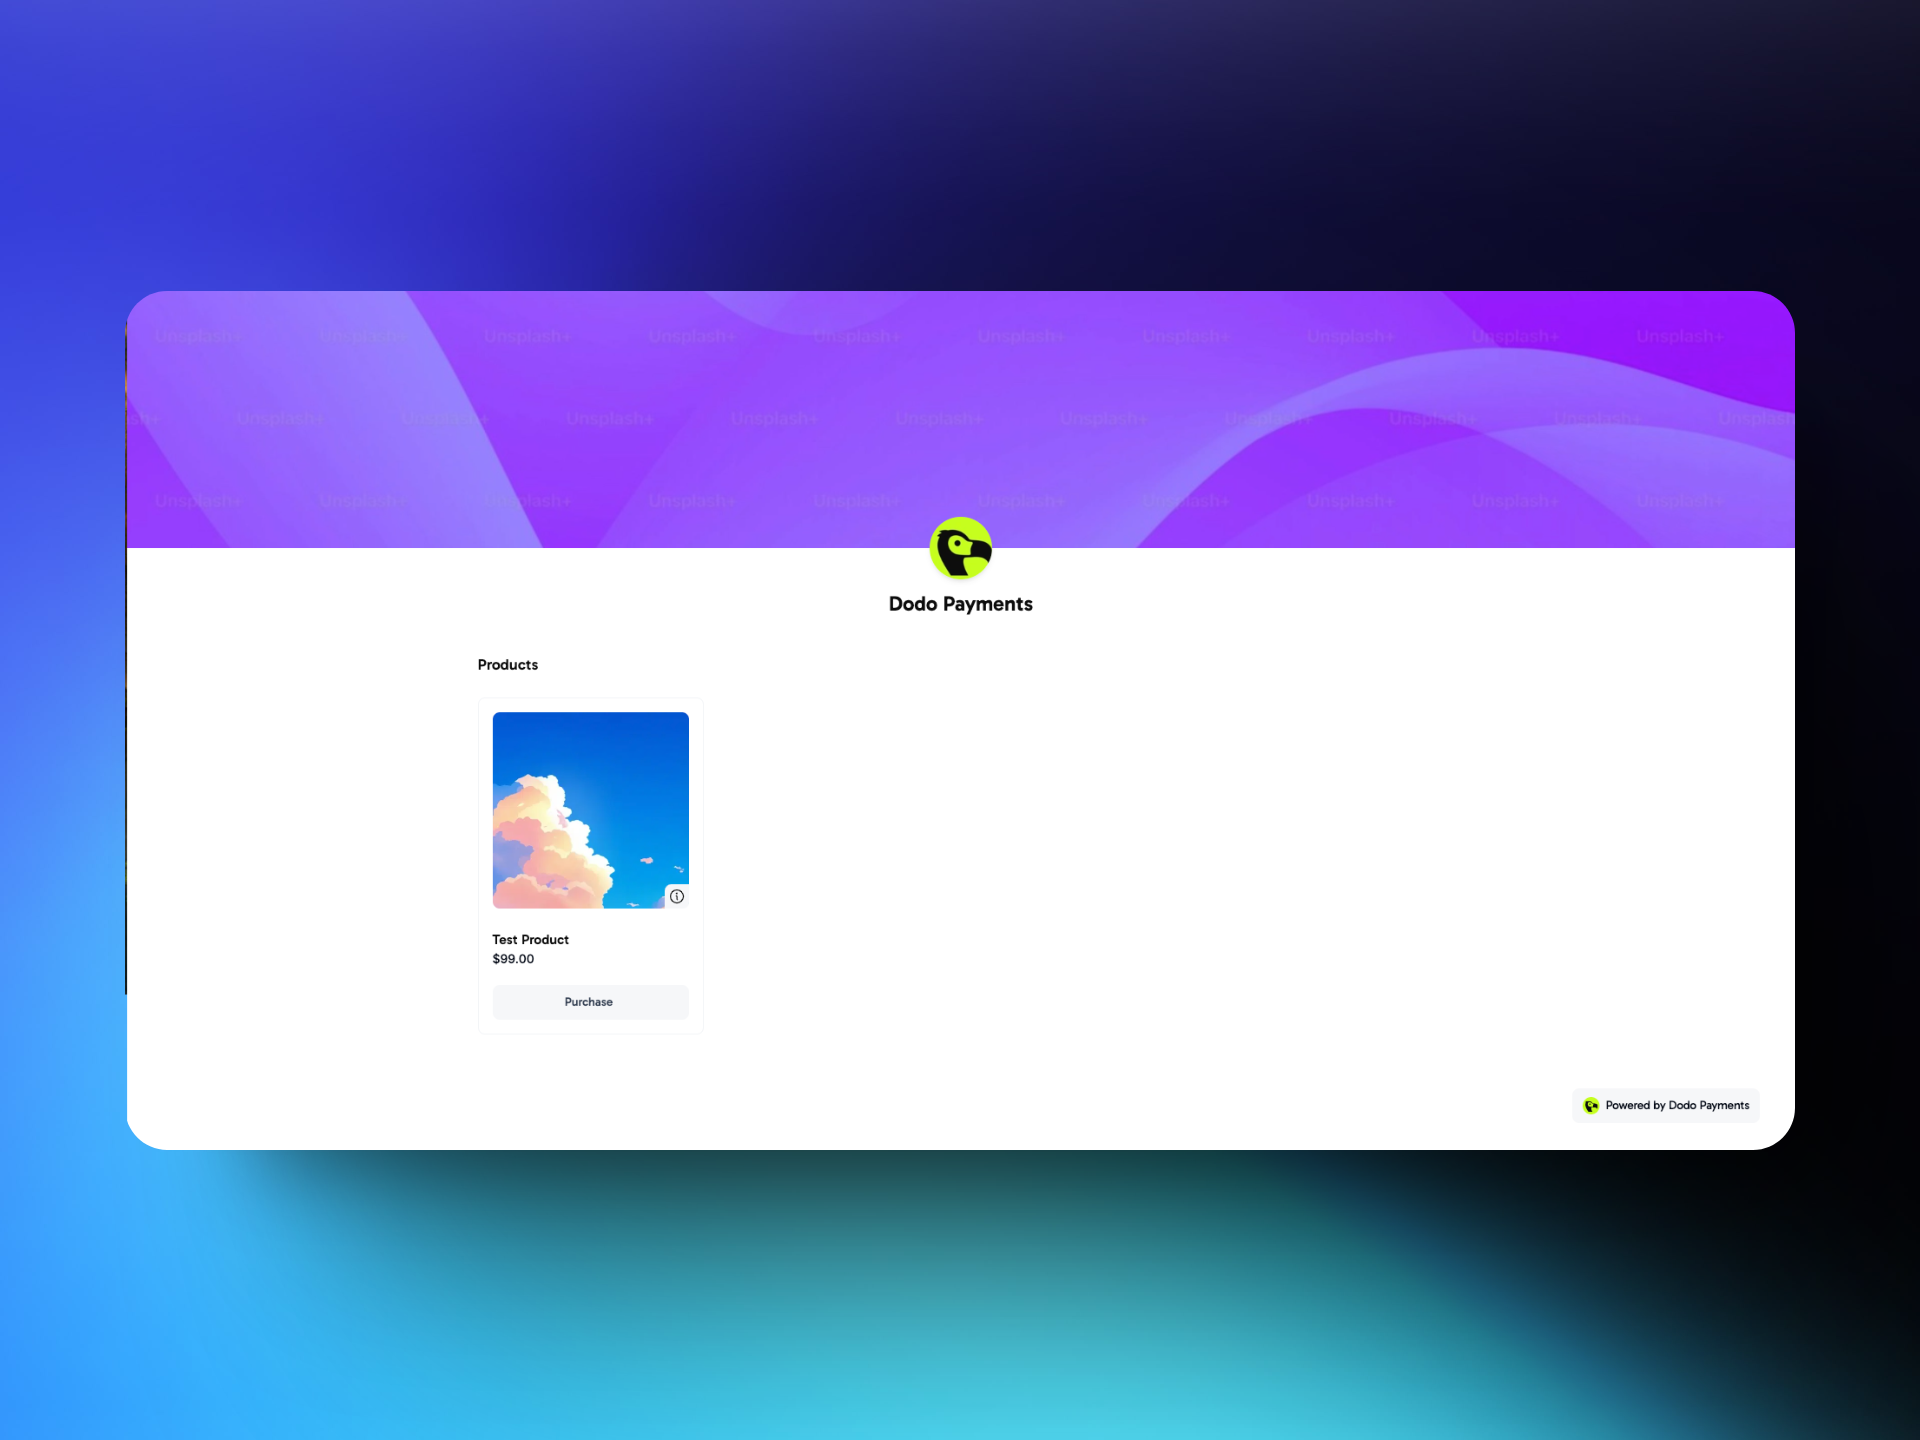 ### Landing on the Storefront
* **Visual Branding**: Customers see your store name, logo, and cover image immediately.
* **Organized Products**: Two categories are displayed: One-Time Payment and Subscription.
### Browsing Products
* **Product Cards**: Each product shows a name, description, and price. Description can be viewed by clicking the i icon on the bottom right of the card.
* **Quantity Selection**: Customers can pick how many items they want to buy.
* **Subscription Frequency & Trial**: Subscription products explicitly state billing frequency (e.g., monthly) and if a trial is available (e.g., 7-day free trial).
### Landing on the Storefront
* **Visual Branding**: Customers see your store name, logo, and cover image immediately.
* **Organized Products**: Two categories are displayed: One-Time Payment and Subscription.
### Browsing Products
* **Product Cards**: Each product shows a name, description, and price. Description can be viewed by clicking the i icon on the bottom right of the card.
* **Quantity Selection**: Customers can pick how many items they want to buy.
* **Subscription Frequency & Trial**: Subscription products explicitly state billing frequency (e.g., monthly) and if a trial is available (e.g., 7-day free trial).
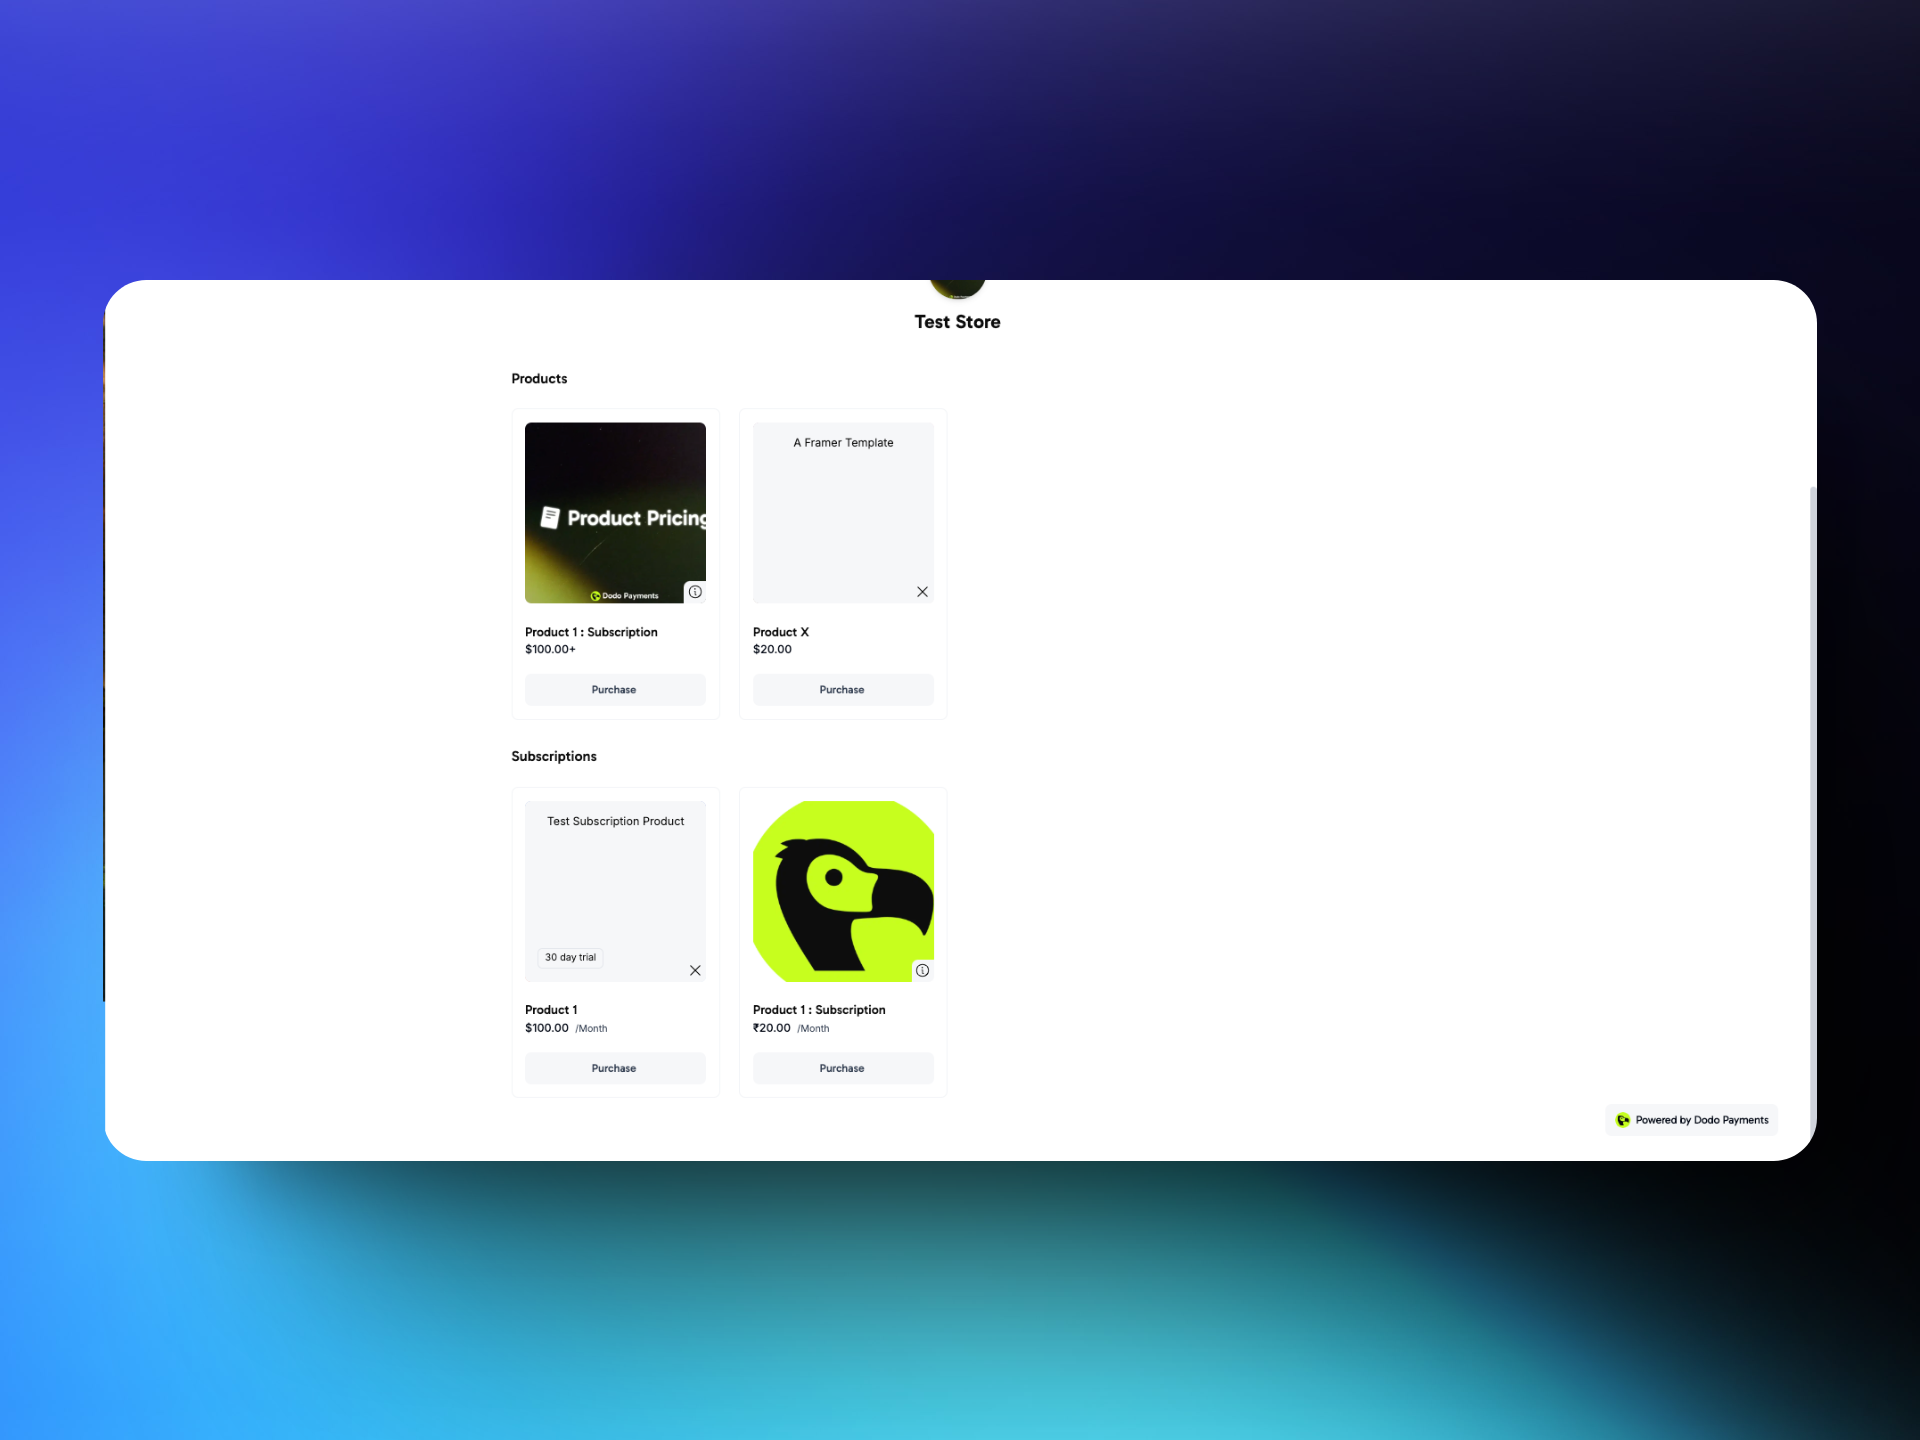 ### Buying Process
1. **Select “Buy Now”**: Once ready, the customer clicks “Purchase” for the desired product, selects quantity and clicks “Buy Now”
2. **Redirect to Dodopayments checkout**:
* The customer will be taken to the dodo payments checkout
* The customer completes the secure checkout flow on Dodopayments.
3. **Confirmation**:
* After successful payment, Dodopayments shows a confirmation.
* Optionally, the customer may be redirected back to a “Thank You” page on your storefront based on the redirect URL entered.
# Subscription
Source: https://docs.dodopayments.com/features/subscription
Subscription products let you offer recurring billing for memberships, SaaS, or ongoing services. Flexible billing cycles, free trials, and add-ons help you maximize revenue and customer value. Know how to create, manage, and integrate recurring subscription products in Dodo Payments, including add-ons and on-demand billing.
### Buying Process
1. **Select “Buy Now”**: Once ready, the customer clicks “Purchase” for the desired product, selects quantity and clicks “Buy Now”
2. **Redirect to Dodopayments checkout**:
* The customer will be taken to the dodo payments checkout
* The customer completes the secure checkout flow on Dodopayments.
3. **Confirmation**:
* After successful payment, Dodopayments shows a confirmation.
* Optionally, the customer may be redirected back to a “Thank You” page on your storefront based on the redirect URL entered.
# Subscription
Source: https://docs.dodopayments.com/features/subscription
Subscription products let you offer recurring billing for memberships, SaaS, or ongoing services. Flexible billing cycles, free trials, and add-ons help you maximize revenue and customer value. Know how to create, manage, and integrate recurring subscription products in Dodo Payments, including add-ons and on-demand billing.

 ## Subscription Cancellation
You or your customers can cancel subscriptions at any time via the dashboard or customer portal. Cancellation takes effect immediately, but access continues until the end of the current billing period. No automatic refunds are issued for cancellations.
## On-Demand Subscriptions
## Subscription Cancellation
You or your customers can cancel subscriptions at any time via the dashboard or customer portal. Cancellation takes effect immediately, but access continues until the end of the current billing period. No automatic refunds are issued for cancellations.
## On-Demand Subscriptions
 ## How to add a teammate?
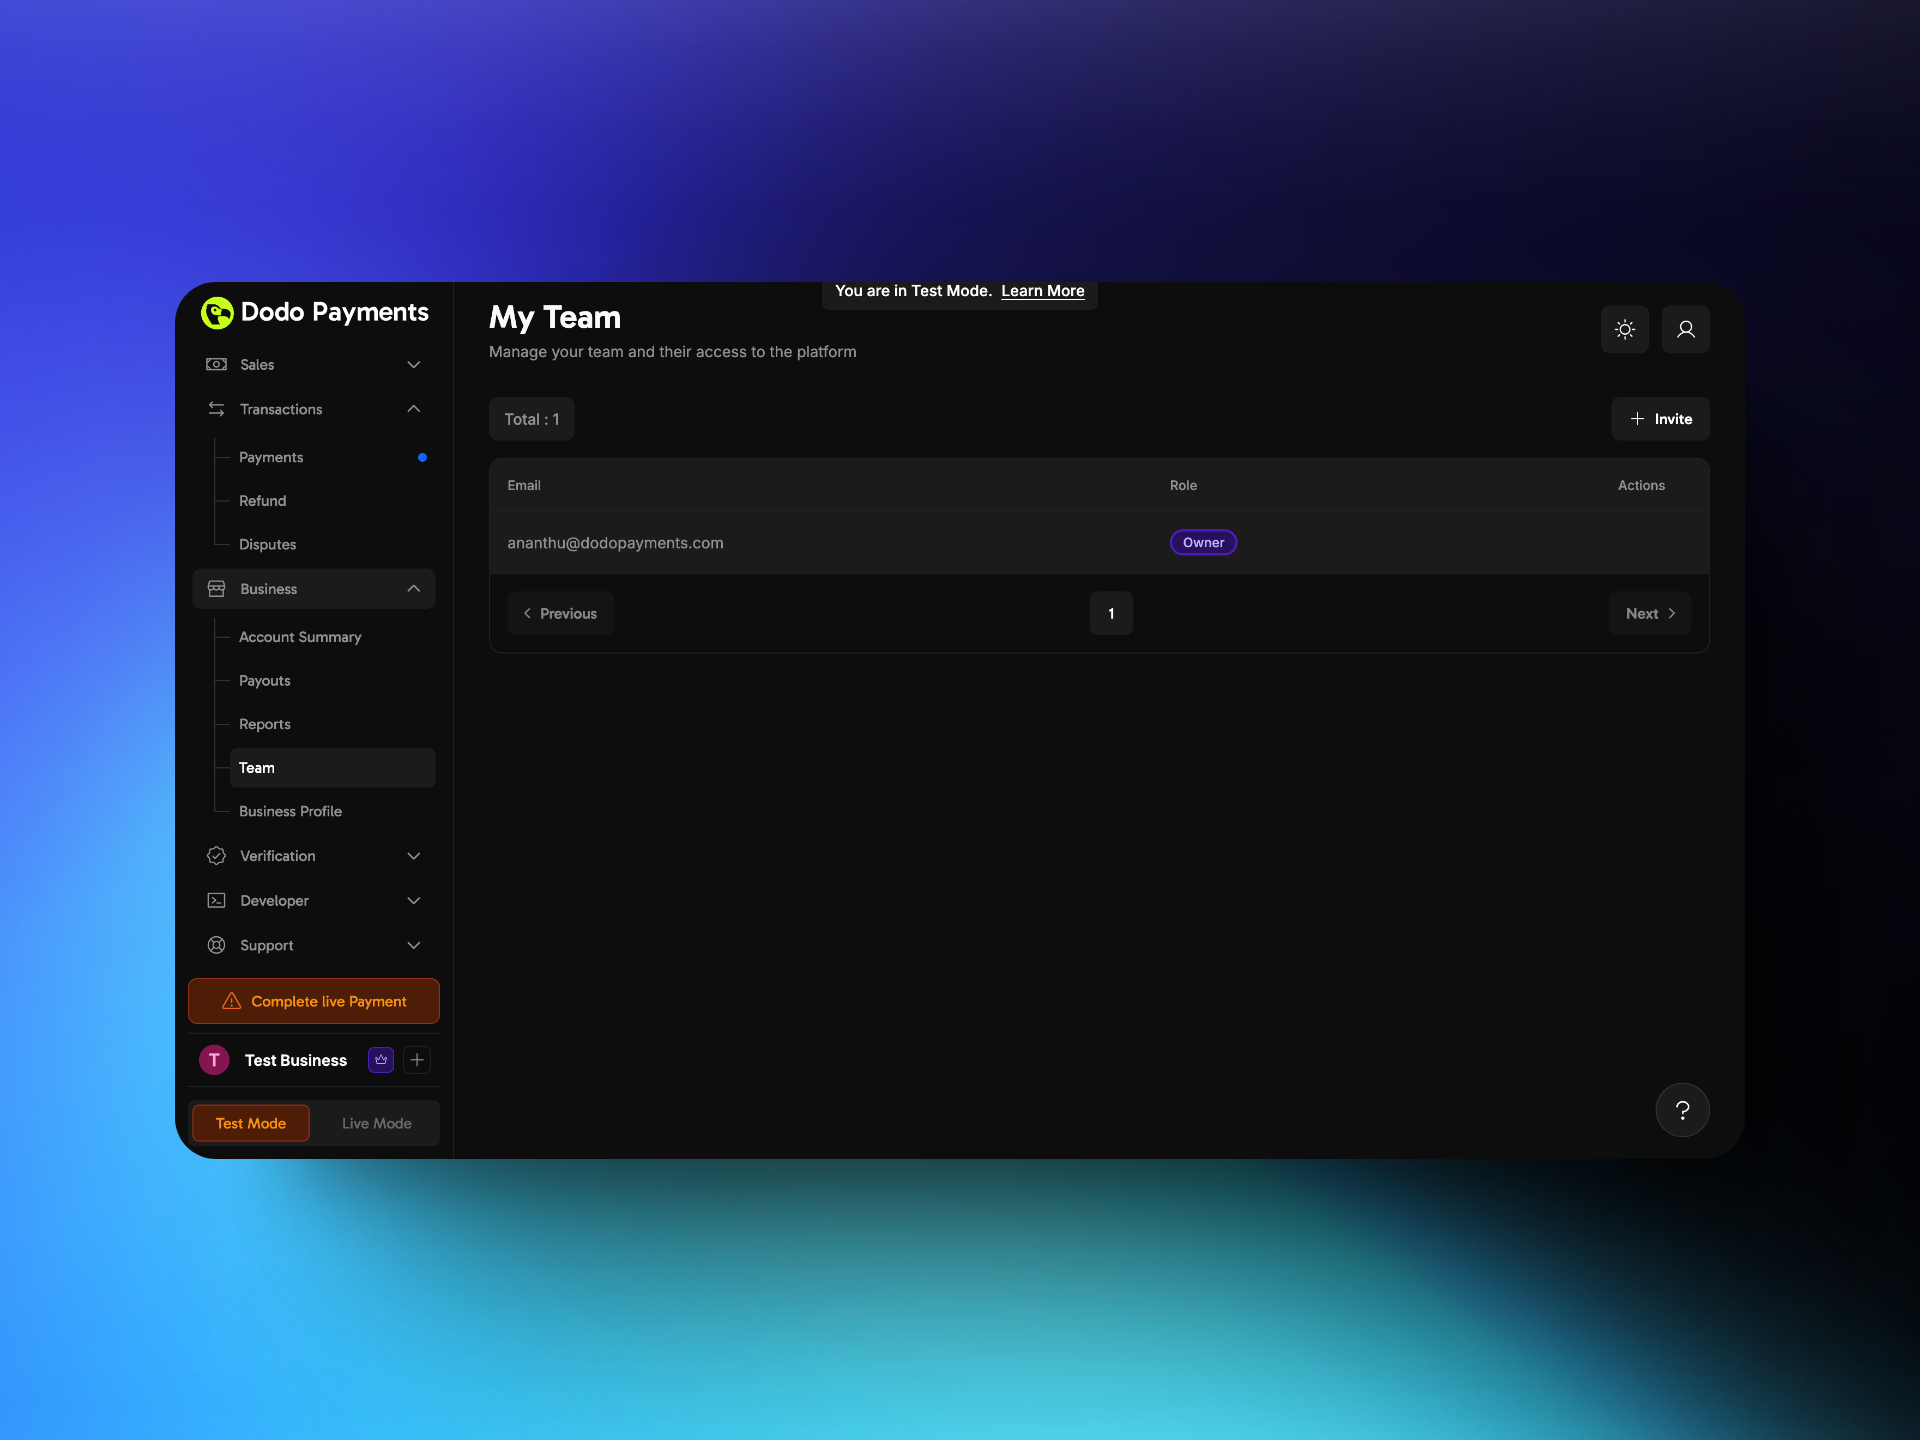 1. Go to Business → Team.
2. Click on +**invite** button on the top right corner.
1. Go to Business → Team.
2. Click on +**invite** button on the top right corner.
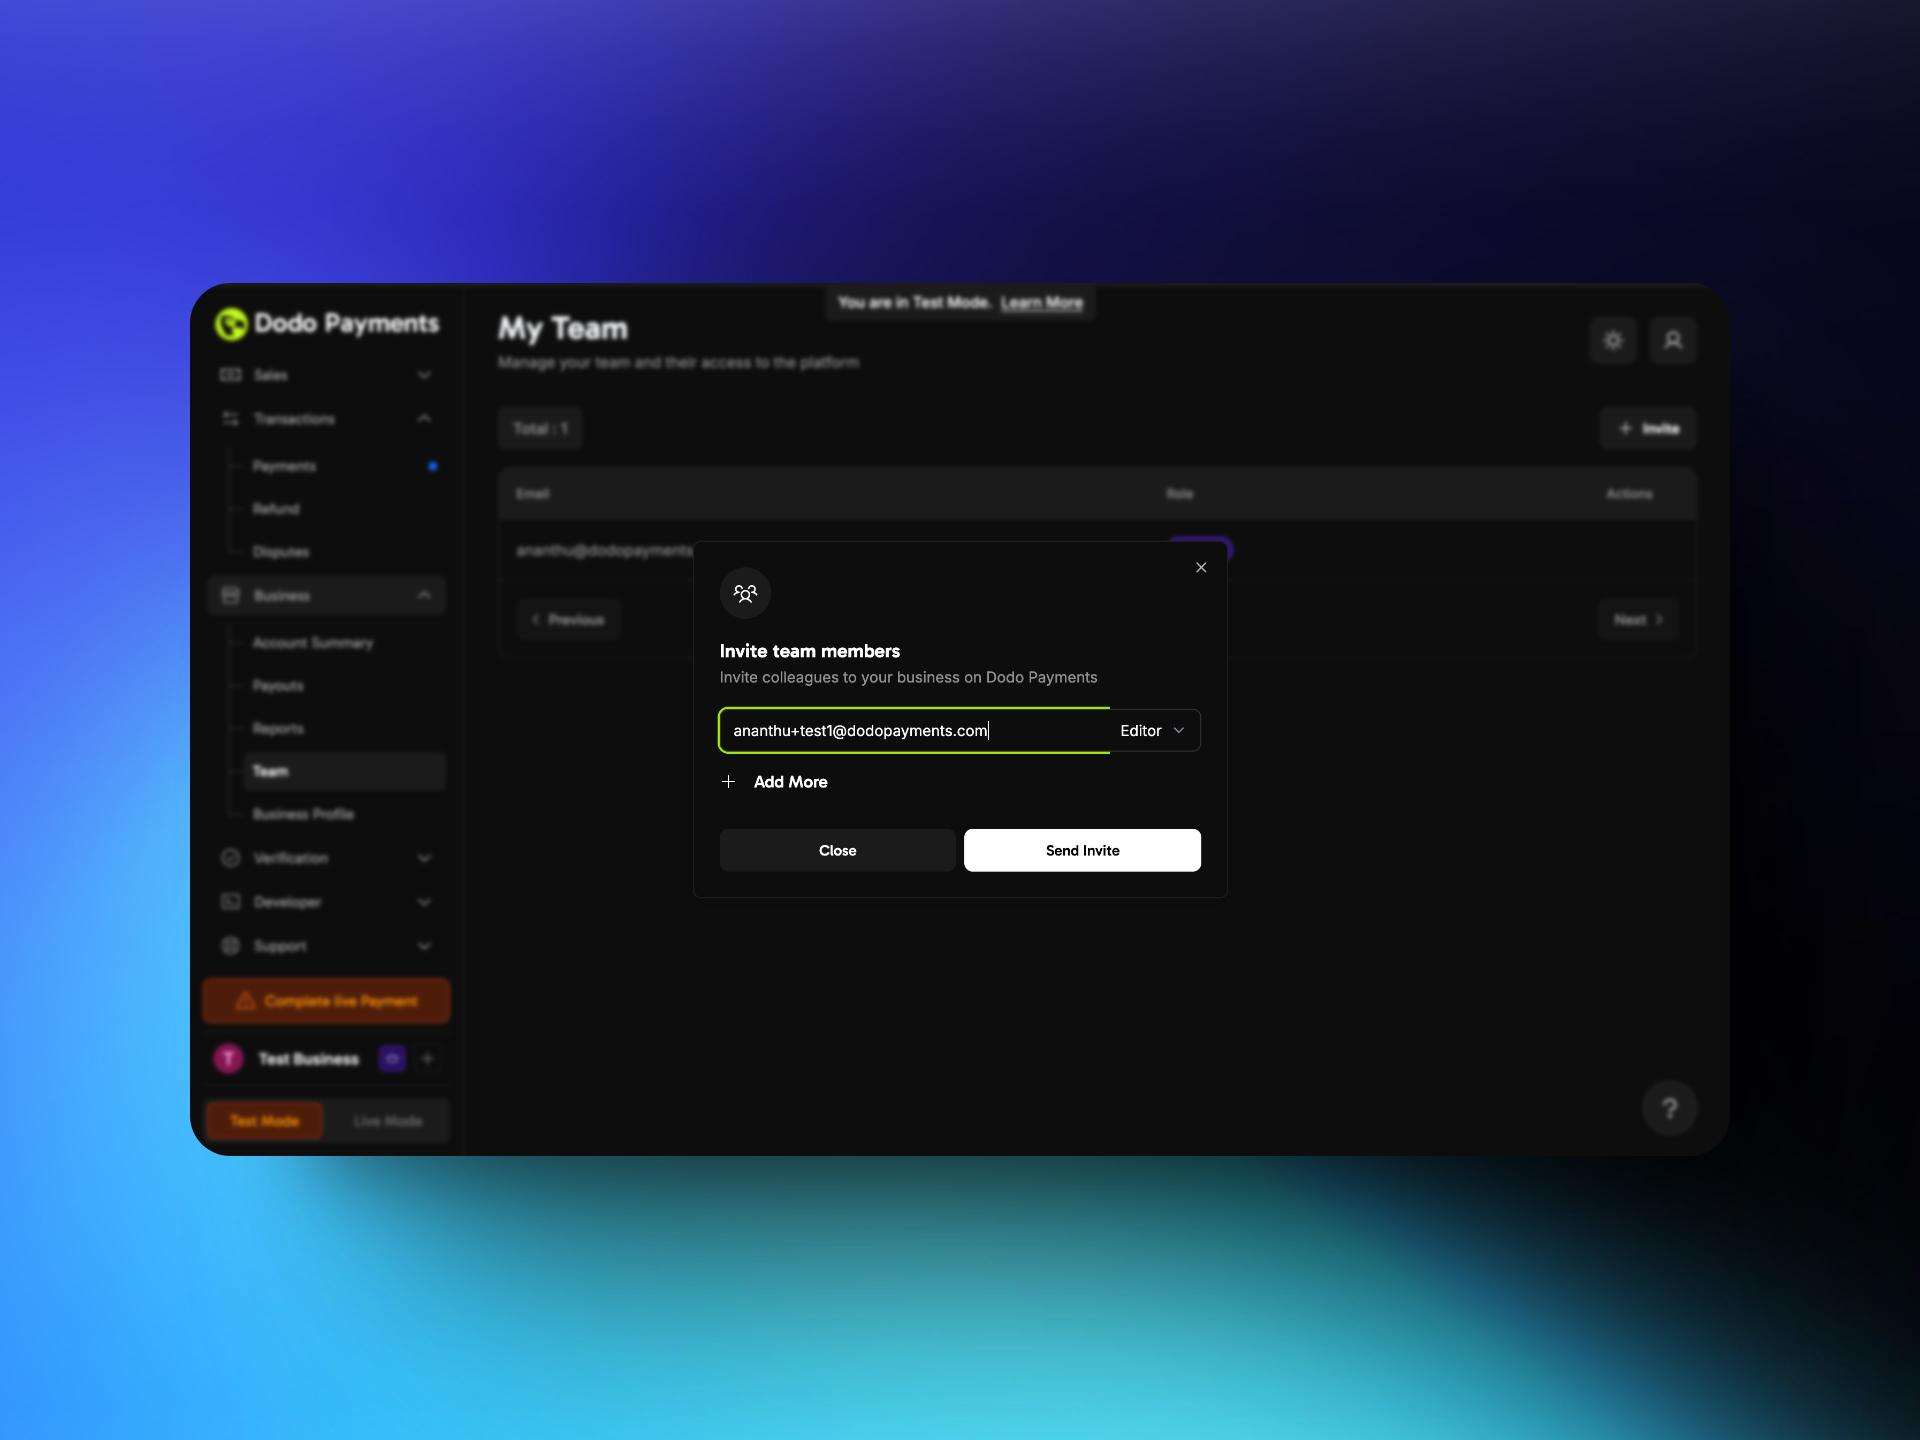 3. Provide the teammates email and assign a role to them.
4. Click on **Send Invite**.
## How can a teammate access the dashboard?
3. Provide the teammates email and assign a role to them.
4. Click on **Send Invite**.
## How can a teammate access the dashboard?
 1. The teammate receives an invitation link via email and clicks on it.
2. If they do not have a Dodo Payments account, they are directed to the signup page where they need to provide the required details. If they already have a Dodo Payments account they can access the business through the business toggle on the bottom left.
3. After completing the signup process, they gain access to the dashboard.
## Roles and Permissions
1. The teammate receives an invitation link via email and clicks on it.
2. If they do not have a Dodo Payments account, they are directed to the signup page where they need to provide the required details. If they already have a Dodo Payments account they can access the business through the business toggle on the bottom left.
3. After completing the signup process, they gain access to the dashboard.
## Roles and Permissions
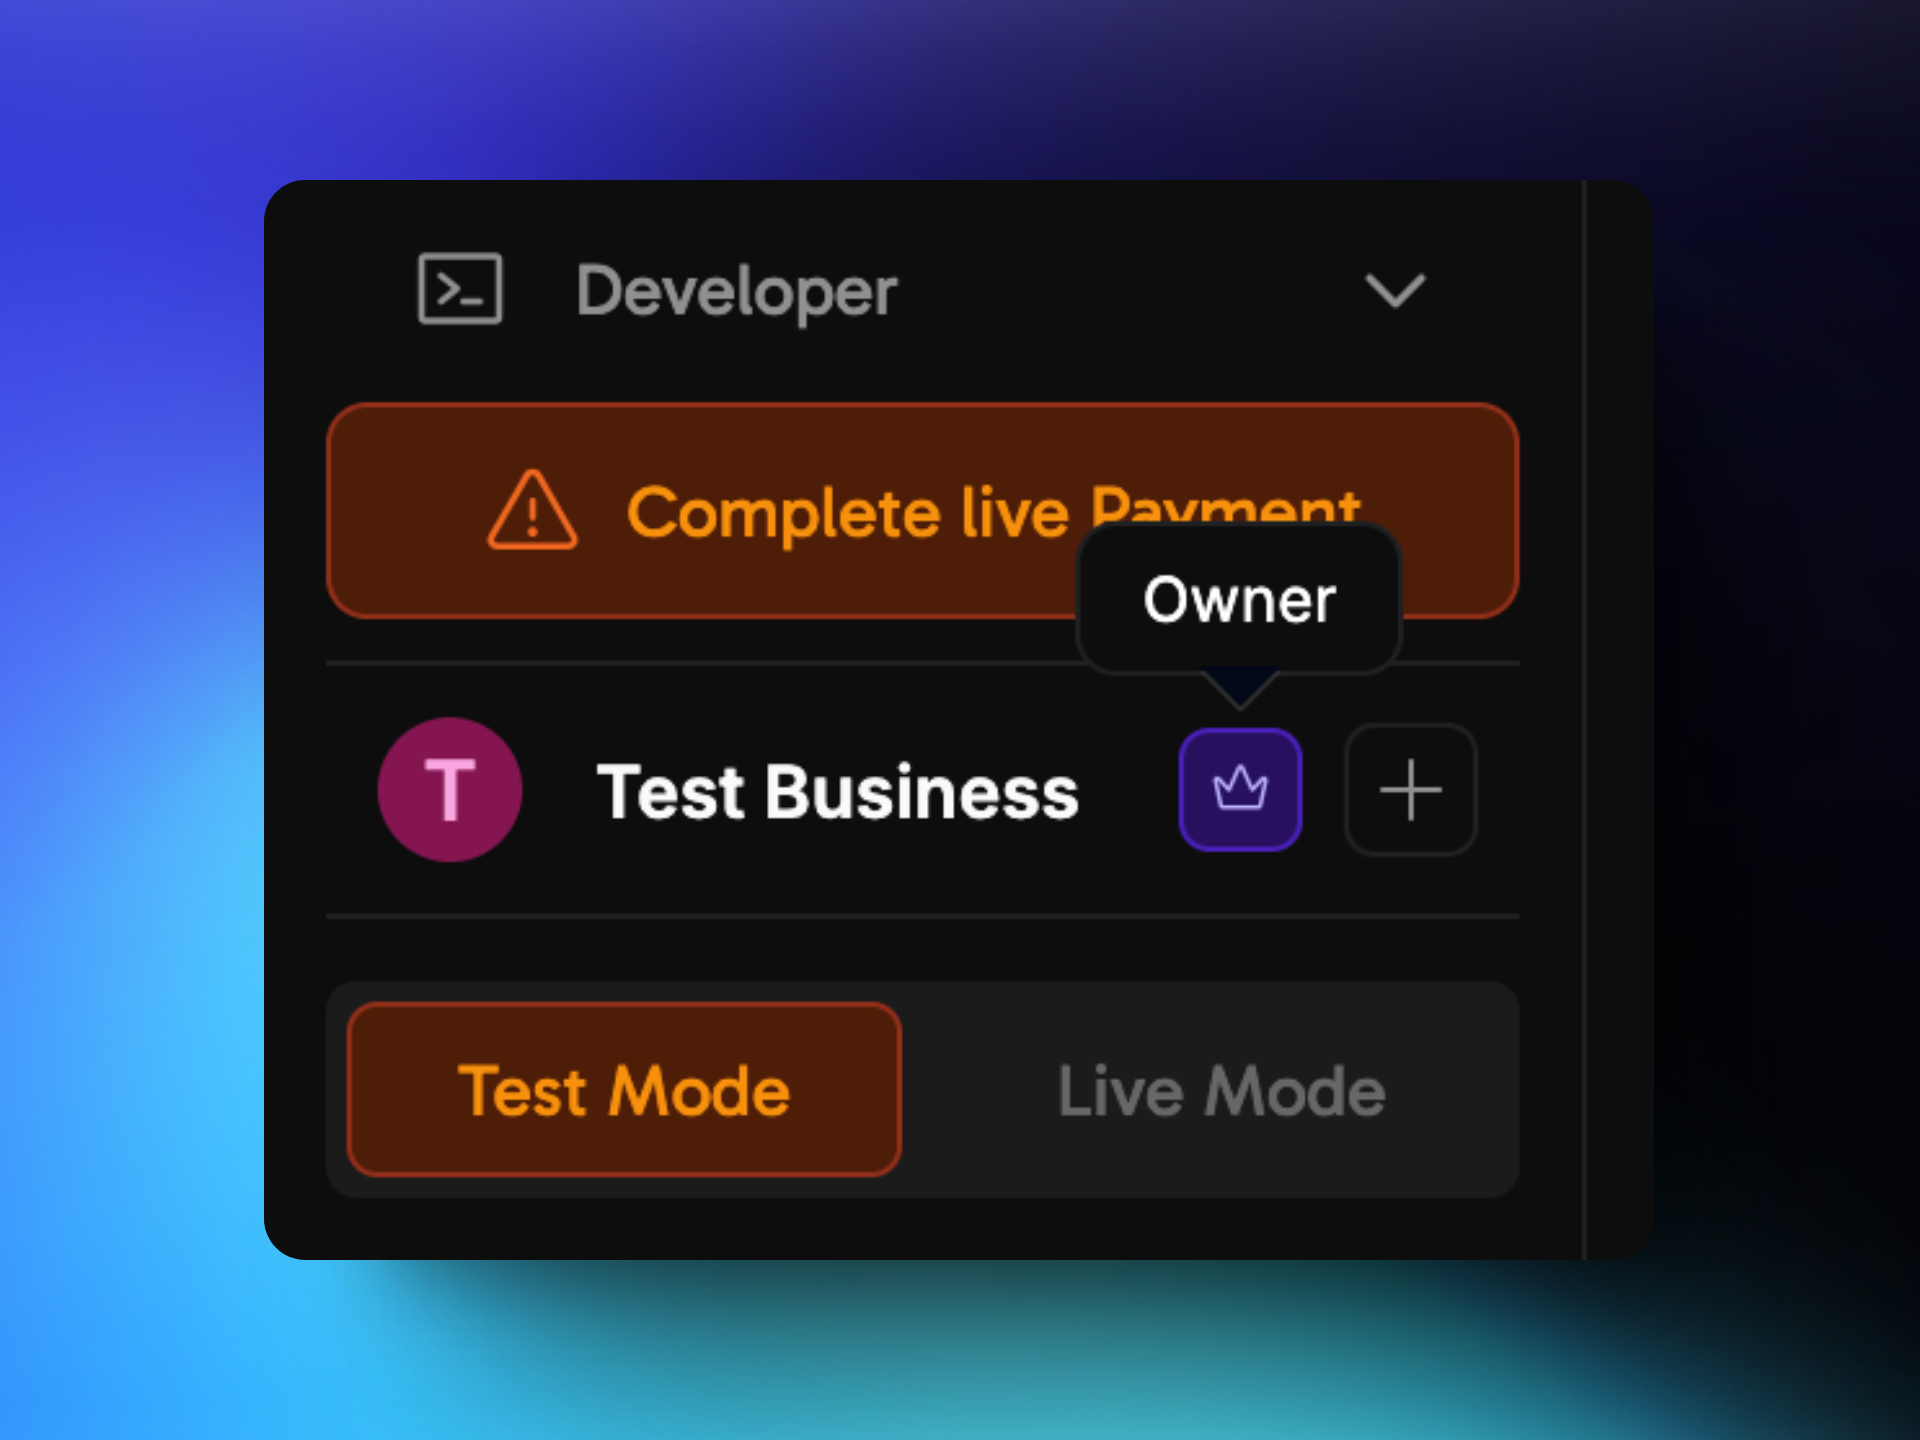 The Dodo Dashboard has three types of user roles, each with different levels of access. The role icon of the user can be seen in the bottom left of the dashboard.
### 1. Owner
The **Owner** has the highest level of access and full control over the account. Only the account owner holds this role and has the exclusive ability to invite new users. The ownership of the account cannot be transferred.
### 2. Editor
Editors have almost the same permissions as the Owner, except they cannot invite new Editors. However, they can invite and remove users with the Viewer role. Additionally, they can create, edit, and delete products and make other modifications within the dashboard.
### 3. Viewer
Viewers have read-only access to the dashboard. They can view all information, including products, transactions, and reports, but cannot add, edit, or delete products or make any modifications.
# Disputes
Source: https://docs.dodopayments.com/features/transactions/disputes
The Disputes section is dedicated to managing customer disputes related to payments. Merchants can view and manage disputes from the Transactions page, including tracking the status of chargebacks and responding to disputes.
## Introduction
The disputes section provides a detailed view of all the disputes raised along with the current status of these disputes. You will have to manage the dispute resolution at your end but the dashboard will provide a visibility into the status, reason for dispute, dispute ID for convenience of access to information.
The Dodo Dashboard has three types of user roles, each with different levels of access. The role icon of the user can be seen in the bottom left of the dashboard.
### 1. Owner
The **Owner** has the highest level of access and full control over the account. Only the account owner holds this role and has the exclusive ability to invite new users. The ownership of the account cannot be transferred.
### 2. Editor
Editors have almost the same permissions as the Owner, except they cannot invite new Editors. However, they can invite and remove users with the Viewer role. Additionally, they can create, edit, and delete products and make other modifications within the dashboard.
### 3. Viewer
Viewers have read-only access to the dashboard. They can view all information, including products, transactions, and reports, but cannot add, edit, or delete products or make any modifications.
# Disputes
Source: https://docs.dodopayments.com/features/transactions/disputes
The Disputes section is dedicated to managing customer disputes related to payments. Merchants can view and manage disputes from the Transactions page, including tracking the status of chargebacks and responding to disputes.
## Introduction
The disputes section provides a detailed view of all the disputes raised along with the current status of these disputes. You will have to manage the dispute resolution at your end but the dashboard will provide a visibility into the status, reason for dispute, dispute ID for convenience of access to information.
 4. **If Accepting**
* No further action required
* You will lose the dispute
5. **If Countering**
* Prepare to submit evidence
* Follow the best practices below
4. **If Accepting**
* No further action required
* You will lose the dispute
5. **If Countering**
* Prepare to submit evidence
* Follow the best practices below
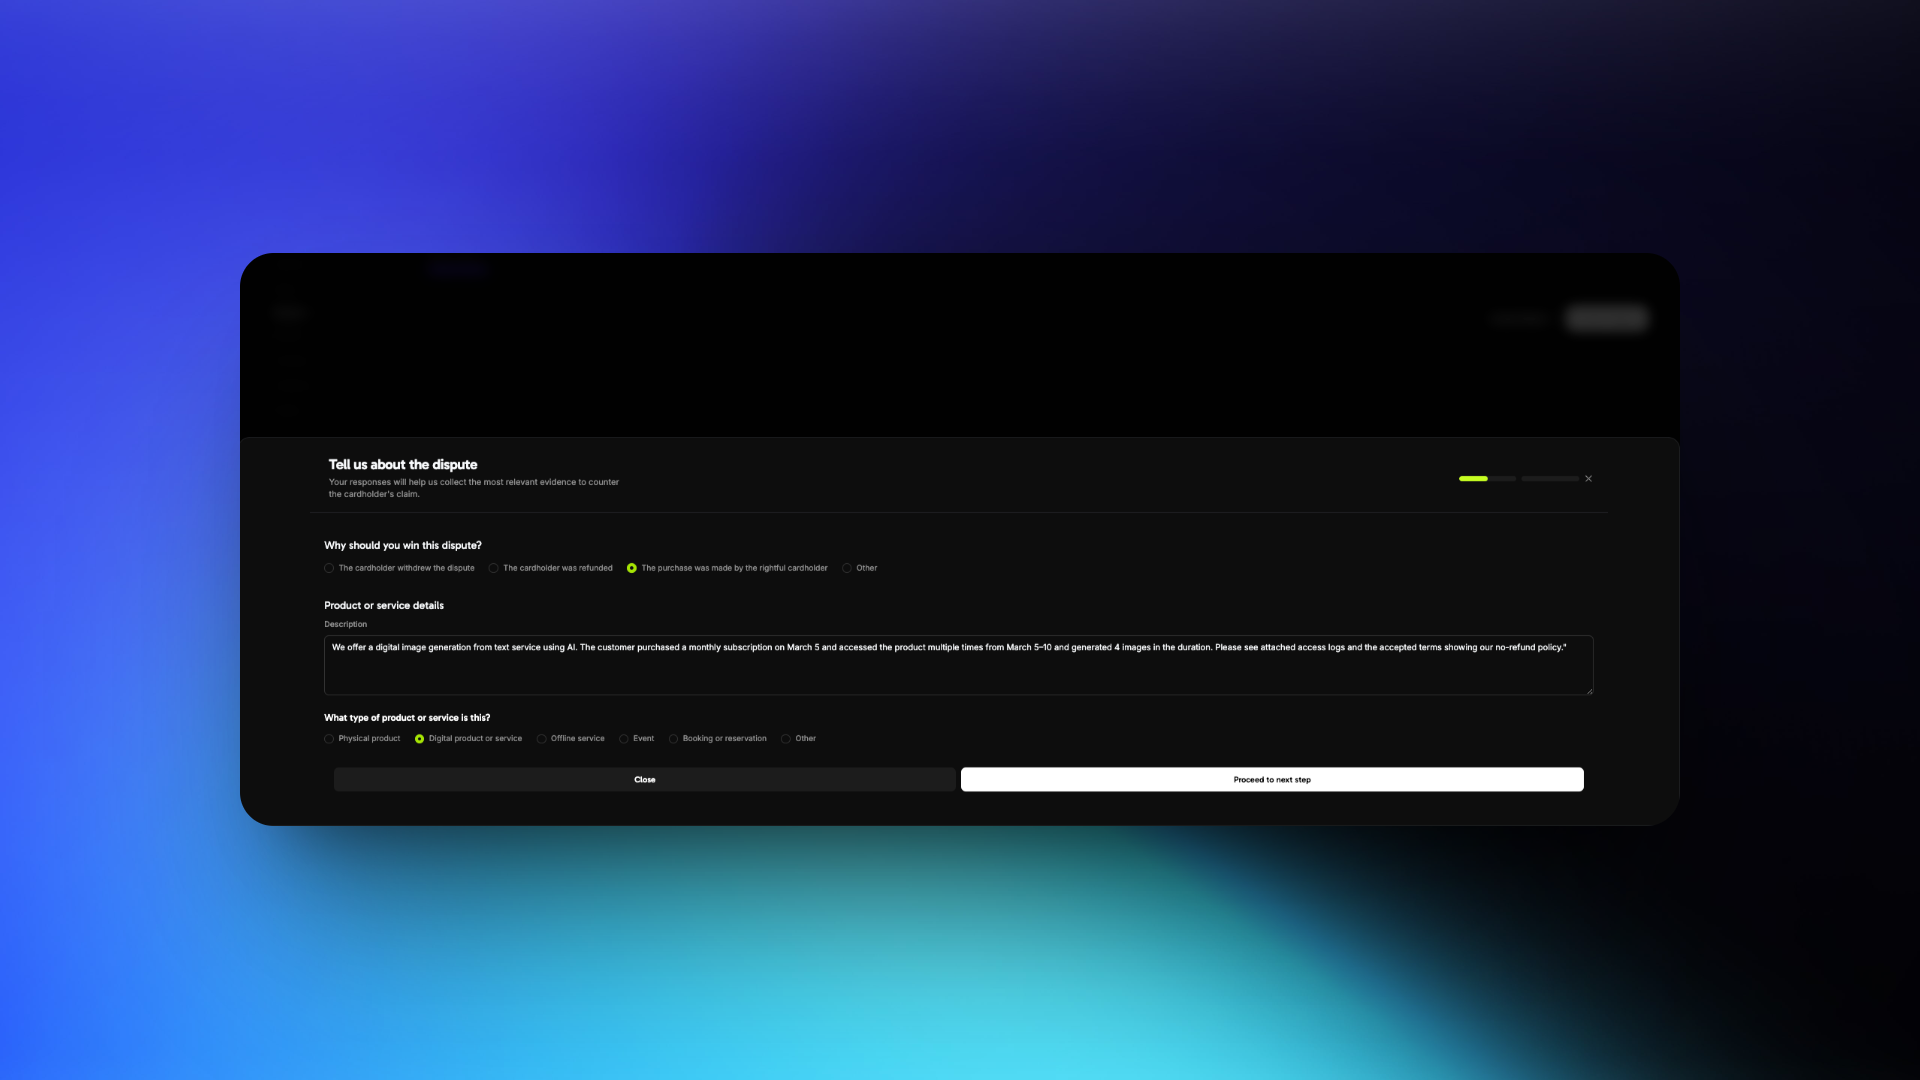
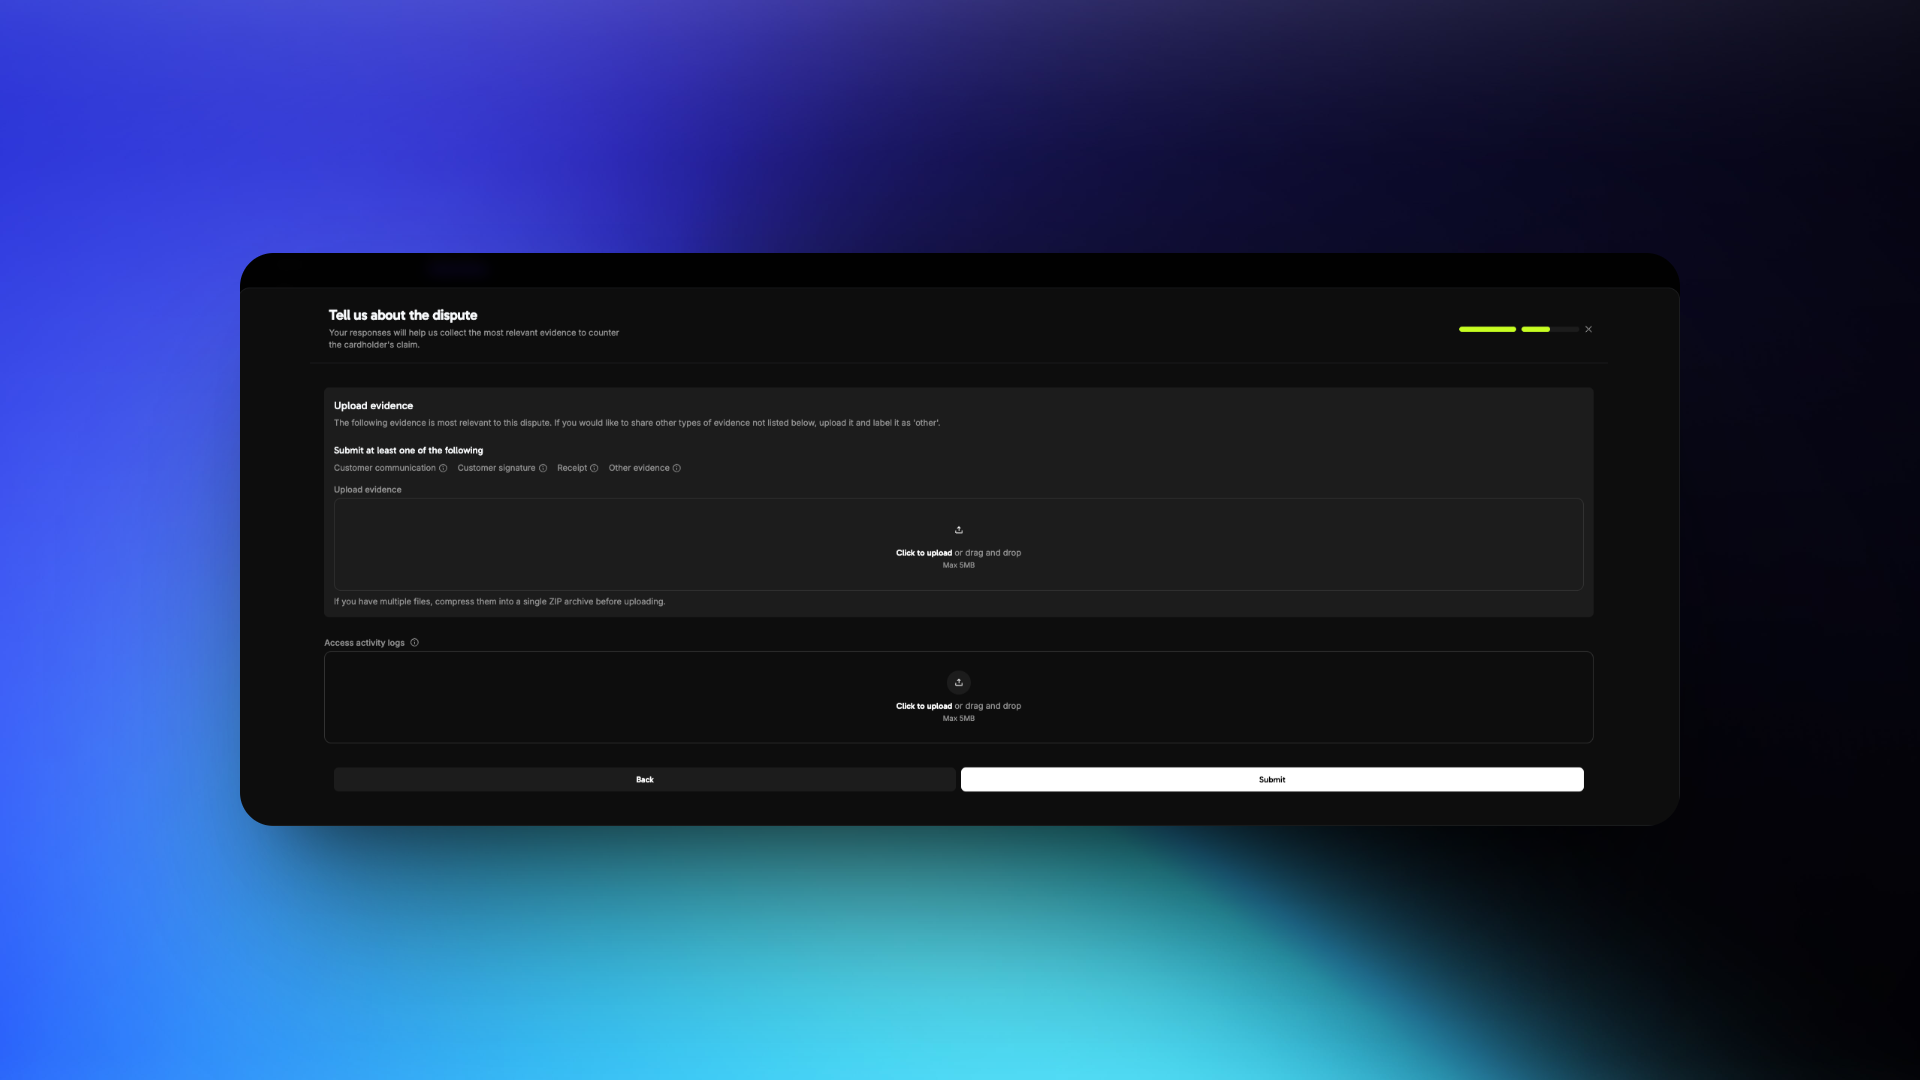
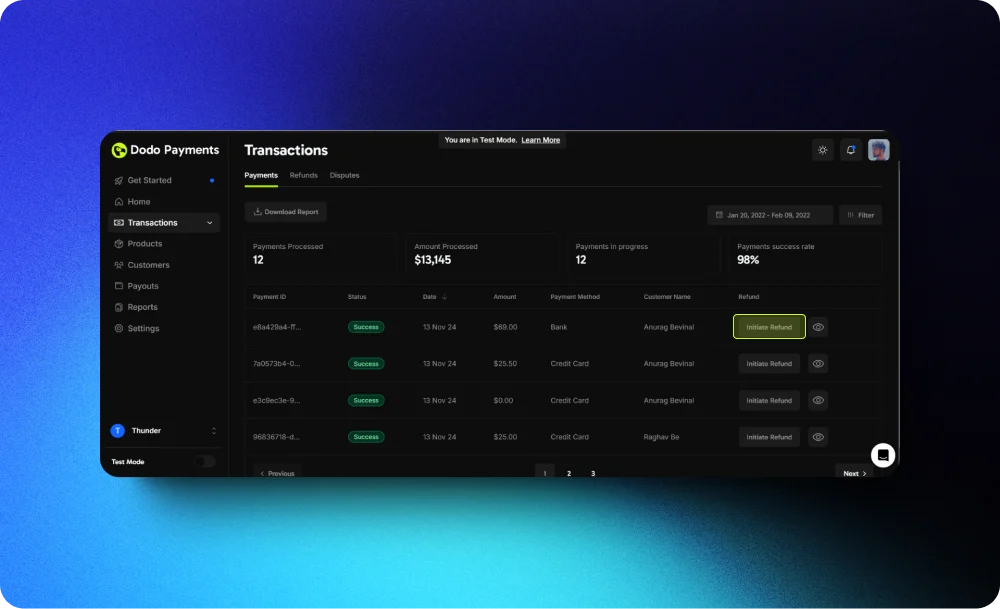
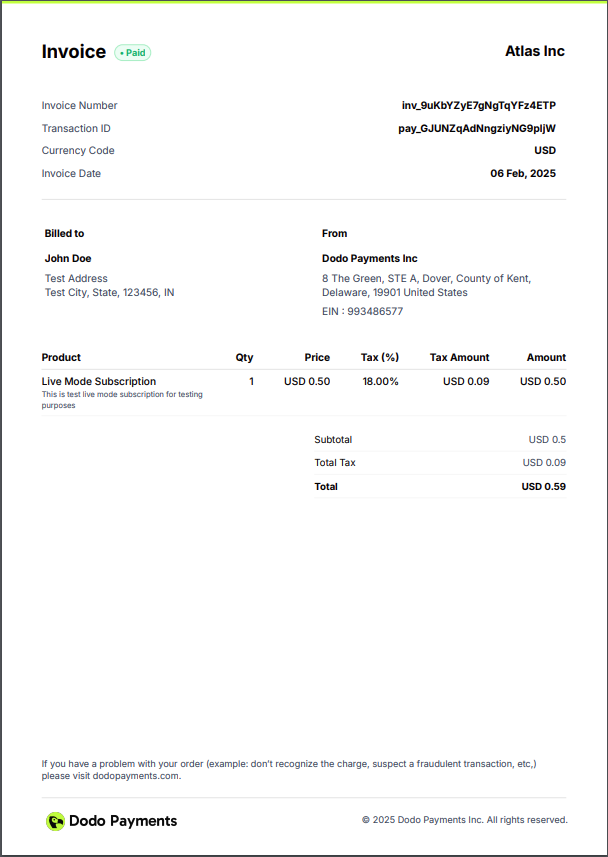 # Quick Start Guide
Source: https://docs.dodopayments.com/introduction
Get up and running with Dodo Payments in under 10 minutes. Follow our step-by-step guide to set up your account and start processing payments.
## What is Dodo Payments?
Welcome to Dodo Payments, your comprehensive solution for managing all aspects of global payment processing. We are a Merchant of Record handling end to end global payments for digital products. Whether you're selling one-time payment products or offering subscription products, Dodo Payments provides a seamless platform to help you handle manage products, handle transactions and ensure compliance—all from one easy-to-use dashboard.
## Quick Start
Want to get started off using Dodo Payments right away ? Our guide below will take you through the most essential steps to get started.
### Follow these steps
# Quick Start Guide
Source: https://docs.dodopayments.com/introduction
Get up and running with Dodo Payments in under 10 minutes. Follow our step-by-step guide to set up your account and start processing payments.
## What is Dodo Payments?
Welcome to Dodo Payments, your comprehensive solution for managing all aspects of global payment processing. We are a Merchant of Record handling end to end global payments for digital products. Whether you're selling one-time payment products or offering subscription products, Dodo Payments provides a seamless platform to help you handle manage products, handle transactions and ensure compliance—all from one easy-to-use dashboard.
## Quick Start
Want to get started off using Dodo Payments right away ? Our guide below will take you through the most essential steps to get started.
### Follow these steps
 1. Albania
2. Andorra
3. Antigua and Barbuda
4. Argentina
5. Armenia
6. Aruba
7. Australia
8. Austria
9. Azerbaijan
10. Bahamas
11. Bahrain
12. Bangladesh
13. Belgium
14. Belize
15. Benin
16. Bermuda
17. Bhutan
18. Bolivia
19. Bosnia and Herzegovina
20. Botswana
21. Brazil
22. Brunei Darussalam
23. Burundi
24. Cambodia
25. Canada
26. Cape Verde
27. Chad
28. Chile
29. China
30. Colombia
31. Comoros
32. Costa Rica
33. Curaçao
34. Cyprus
35. Czech Republic
36. Denmark
37. Djibouti
38. Dominica
39. Dominican Republic
40. Ecuador
41. Egypt
42. El Salvador
43. Equatorial Guinea
44. Eritrea
45. Estonia
46. Eswatini
47. Ethiopia
48. Fiji
49. Finland
50. France
51. French Polynesia
52. Gabon
53. Gambia
54. Georgia
55. Germany
56. Ghana
57. Greece
58. Greenland
59. Grenada
60. Guatemala
61. Guinea
62. Guinea-Bissau
63. Guyana
64. Honduras
65. Hong Kong
66. Hungary
67. Iceland
68. India
69. Indonesia
70. Iraq
71. Ireland
72. Israel
73. Italy
74. Japan
75. Kazakhstan
76. Kiribati
77. Kuwait
78. Laos
79. Latvia
80. Lesotho
81. Liberia
82. Liechtenstein
83. Lithuania
84. Luxembourg
85. Macau
86. Madagascar
87. Malawi
88. Malaysia
89. Maldives
90. Malta
91. Marshall Islands
92. Mauritania
93. Mauritius
94. Mexico
95. Micronesia
96. Mongolia
97. Montenegro
98. Morocco
99. Nauru
100. Nepal
101. Netherlands
102. New Caledonia
103. New Zealand
104. Niger
105. Nigeria
106. North Macedonia
107. Norway
108. Oman
109. Palau
110. Papua New Guinea
111. Paraguay
112. Peru
113. Philippines
114. Poland
115. Portugal
116. Puerto Rico
117. Qatar
118. Romania
119. Rwanda
120. Saint Kitts and Nevis
121. Saint Lucia
122. Saint Vincent and the Grenadines
123. Samoa
124. San Marino
125. Sao Tome and Principe
126. Saudi Arabia
127. Serbia
128. Seychelles
129. Sierra Leone
130. Singapore
131. Sint Maarten
132. Slovakia
133. Slovenia
134. Solomon Islands
135. South Korea
136. Spain
137. Sri Lanka
138. Suriname
139. Sweden
140. Switzerland
141. Taiwan
142. Tajikistan
143. Tanzania
144. Thailand
145. Timor-Leste
146. Togo
147. Tonga
148. Tunisia
149. Turkey
150. Tuvalu
151. Turks and Caicos
152. United Kingdom
153. United States
154. Uruguay
155. Uzbekistan
156. Zambia
Currently we do not accept payments from countries outside the above list. We will keep updating this list as we add more countries to our roster
# Pricing and Fee Structure
Source: https://docs.dodopayments.com/miscellaneous/pricing-and-fee-structure
This document provides detailed information about Dodo Payments' fee structure for processing transactions, issuing payouts, and refunds and chargebacks. All fees outlined here will apply once a merchant's account is live.
1. Albania
2. Andorra
3. Antigua and Barbuda
4. Argentina
5. Armenia
6. Aruba
7. Australia
8. Austria
9. Azerbaijan
10. Bahamas
11. Bahrain
12. Bangladesh
13. Belgium
14. Belize
15. Benin
16. Bermuda
17. Bhutan
18. Bolivia
19. Bosnia and Herzegovina
20. Botswana
21. Brazil
22. Brunei Darussalam
23. Burundi
24. Cambodia
25. Canada
26. Cape Verde
27. Chad
28. Chile
29. China
30. Colombia
31. Comoros
32. Costa Rica
33. Curaçao
34. Cyprus
35. Czech Republic
36. Denmark
37. Djibouti
38. Dominica
39. Dominican Republic
40. Ecuador
41. Egypt
42. El Salvador
43. Equatorial Guinea
44. Eritrea
45. Estonia
46. Eswatini
47. Ethiopia
48. Fiji
49. Finland
50. France
51. French Polynesia
52. Gabon
53. Gambia
54. Georgia
55. Germany
56. Ghana
57. Greece
58. Greenland
59. Grenada
60. Guatemala
61. Guinea
62. Guinea-Bissau
63. Guyana
64. Honduras
65. Hong Kong
66. Hungary
67. Iceland
68. India
69. Indonesia
70. Iraq
71. Ireland
72. Israel
73. Italy
74. Japan
75. Kazakhstan
76. Kiribati
77. Kuwait
78. Laos
79. Latvia
80. Lesotho
81. Liberia
82. Liechtenstein
83. Lithuania
84. Luxembourg
85. Macau
86. Madagascar
87. Malawi
88. Malaysia
89. Maldives
90. Malta
91. Marshall Islands
92. Mauritania
93. Mauritius
94. Mexico
95. Micronesia
96. Mongolia
97. Montenegro
98. Morocco
99. Nauru
100. Nepal
101. Netherlands
102. New Caledonia
103. New Zealand
104. Niger
105. Nigeria
106. North Macedonia
107. Norway
108. Oman
109. Palau
110. Papua New Guinea
111. Paraguay
112. Peru
113. Philippines
114. Poland
115. Portugal
116. Puerto Rico
117. Qatar
118. Romania
119. Rwanda
120. Saint Kitts and Nevis
121. Saint Lucia
122. Saint Vincent and the Grenadines
123. Samoa
124. San Marino
125. Sao Tome and Principe
126. Saudi Arabia
127. Serbia
128. Seychelles
129. Sierra Leone
130. Singapore
131. Sint Maarten
132. Slovakia
133. Slovenia
134. Solomon Islands
135. South Korea
136. Spain
137. Sri Lanka
138. Suriname
139. Sweden
140. Switzerland
141. Taiwan
142. Tajikistan
143. Tanzania
144. Thailand
145. Timor-Leste
146. Togo
147. Tonga
148. Tunisia
149. Turkey
150. Tuvalu
151. Turks and Caicos
152. United Kingdom
153. United States
154. Uruguay
155. Uzbekistan
156. Zambia
Currently we do not accept payments from countries outside the above list. We will keep updating this list as we add more countries to our roster
# Pricing and Fee Structure
Source: https://docs.dodopayments.com/miscellaneous/pricing-and-fee-structure
This document provides detailed information about Dodo Payments' fee structure for processing transactions, issuing payouts, and refunds and chargebacks. All fees outlined here will apply once a merchant's account is live.
 ## **Customer and Merchant**
For the purpose of this document the following is the definition of a merchant and customer:
**Merchant:** This refers to the merchant's who are part of the Dodo Payments platform and selling their products using Dodo Payments as a reseller
**Customer:** This refers to the customers who purchase the products offered by the merchants
## **Pay-In Fees**
**This refers to the fees applied on the transactions made by customers**
1. Transaction Fees (USA customers) : 4% + \$0.40
2. +1.5% for International Customers (Outside USA)
3. +0.5% for Subscription Payments
Eg. For a customer from Spain buying a digital product worth \$50 find the detailed pricing breakdown:
| Description | Amount |
| ------------------------------------------- | ------- |
| **Product Price** | \$50 |
| **Tax** (21%) | \$10.50 |
| **Total** | \$60.50 |
| **Platform Fees** (4%+1.5%+\$0.40) | \$3.73 |
| **Net Profit** (Total - Tax- Platform Fees) | \$46.27 |
**For Indian Merchants**
Pay In Fees for Indian Customers : 4% + Rs.4
***
## **Payout Fees**
**This refers to the fees for payments from Dodo Payments to the Merchant**
### **For US Merchants**
* **Dodo Fees**:
* \$5 per payout for amount \< \$1000
* No Fees per payout for amount >= \$1000
### **For Non-US Merchants (Non-USD Currency)**
* **Dodo Fees**:
* \$5 per payout for amount \< \$1000
* No Fees per payout for amount >= \$1000
* **USD Payout Option**:
* A flat \$25 SWIFT fee will be charged if merchants prefer to receive payouts in USD
## **Customer and Merchant**
For the purpose of this document the following is the definition of a merchant and customer:
**Merchant:** This refers to the merchant's who are part of the Dodo Payments platform and selling their products using Dodo Payments as a reseller
**Customer:** This refers to the customers who purchase the products offered by the merchants
## **Pay-In Fees**
**This refers to the fees applied on the transactions made by customers**
1. Transaction Fees (USA customers) : 4% + \$0.40
2. +1.5% for International Customers (Outside USA)
3. +0.5% for Subscription Payments
Eg. For a customer from Spain buying a digital product worth \$50 find the detailed pricing breakdown:
| Description | Amount |
| ------------------------------------------- | ------- |
| **Product Price** | \$50 |
| **Tax** (21%) | \$10.50 |
| **Total** | \$60.50 |
| **Platform Fees** (4%+1.5%+\$0.40) | \$3.73 |
| **Net Profit** (Total - Tax- Platform Fees) | \$46.27 |
**For Indian Merchants**
Pay In Fees for Indian Customers : 4% + Rs.4
***
## **Payout Fees**
**This refers to the fees for payments from Dodo Payments to the Merchant**
### **For US Merchants**
* **Dodo Fees**:
* \$5 per payout for amount \< \$1000
* No Fees per payout for amount >= \$1000
### **For Non-US Merchants (Non-USD Currency)**
* **Dodo Fees**:
* \$5 per payout for amount \< \$1000
* No Fees per payout for amount >= \$1000
* **USD Payout Option**:
* A flat \$25 SWIFT fee will be charged if merchants prefer to receive payouts in USD
 ## **General Tips for Completing Tax Forms**
1. **Accurate Information**: Ensure all details match official tax records.
2. **Timely Submission**: Submit forms promptly to avoid payment delays.
3. **Authorized Signatures**: Ensure the form is signed by an authorized individual.
4. **Delay in Form Submission**: Failure to provide the necessary forms can result in higher withholding taxes or delays in payment processing.
## **Form W-8 BEN: For Non-U.S. Individuals**
### **What is Form W-8?**
W-8 forms are Internal Revenue Service (IRS) forms that foreign individuals and businesses must file to verify their country of residence for tax purposes, certifying that they qualify for a lower rate of tax withholding.
### **How to Fill Out Form W-8 BEN (only for non-US Individuals)**
**Part I Line 1**
Enter your name as the beneficial owner. Add your full name on this line.
**Part I Line 2**
Enter your country of citizenship.
**Part I Line 3**
Enter your permanent residence/mailing address.
**Part I Line 4**
Enter your mailing address, if different.
**Part I Line 6**
Enter your foreign tax identifying number (Tax identification number issued by your country of residence).
**Part I Line 8**
Enter your date of birth.
**Part II Line 9**
Enter the foreign country under whose tax laws you claim tax benefits.
**Part II Line 10**
Foreign individuals who are students and researchers should enter specific withholding rates.
**Part III**
Here, you'll need to certify with your signature that everything on the form is true and correct and that you aren't a U.S. person. Insert the date of form completion and certification in a mm-dd-yyyy format.
### **Sample W-8 BEN Form (To be Added)**
> **Sample Profile**
>
> Individual: Aditya Singh
>
> Type: SaaS / Digital Products
>
> Country: India
>
> TIN: Pan or equivalent tax ID in your country
Page 1
## **General Tips for Completing Tax Forms**
1. **Accurate Information**: Ensure all details match official tax records.
2. **Timely Submission**: Submit forms promptly to avoid payment delays.
3. **Authorized Signatures**: Ensure the form is signed by an authorized individual.
4. **Delay in Form Submission**: Failure to provide the necessary forms can result in higher withholding taxes or delays in payment processing.
## **Form W-8 BEN: For Non-U.S. Individuals**
### **What is Form W-8?**
W-8 forms are Internal Revenue Service (IRS) forms that foreign individuals and businesses must file to verify their country of residence for tax purposes, certifying that they qualify for a lower rate of tax withholding.
### **How to Fill Out Form W-8 BEN (only for non-US Individuals)**
**Part I Line 1**
Enter your name as the beneficial owner. Add your full name on this line.
**Part I Line 2**
Enter your country of citizenship.
**Part I Line 3**
Enter your permanent residence/mailing address.
**Part I Line 4**
Enter your mailing address, if different.
**Part I Line 6**
Enter your foreign tax identifying number (Tax identification number issued by your country of residence).
**Part I Line 8**
Enter your date of birth.
**Part II Line 9**
Enter the foreign country under whose tax laws you claim tax benefits.
**Part II Line 10**
Foreign individuals who are students and researchers should enter specific withholding rates.
**Part III**
Here, you'll need to certify with your signature that everything on the form is true and correct and that you aren't a U.S. person. Insert the date of form completion and certification in a mm-dd-yyyy format.
### **Sample W-8 BEN Form (To be Added)**
> **Sample Profile**
>
> Individual: Aditya Singh
>
> Type: SaaS / Digital Products
>
> Country: India
>
> TIN: Pan or equivalent tax ID in your country
Page 1
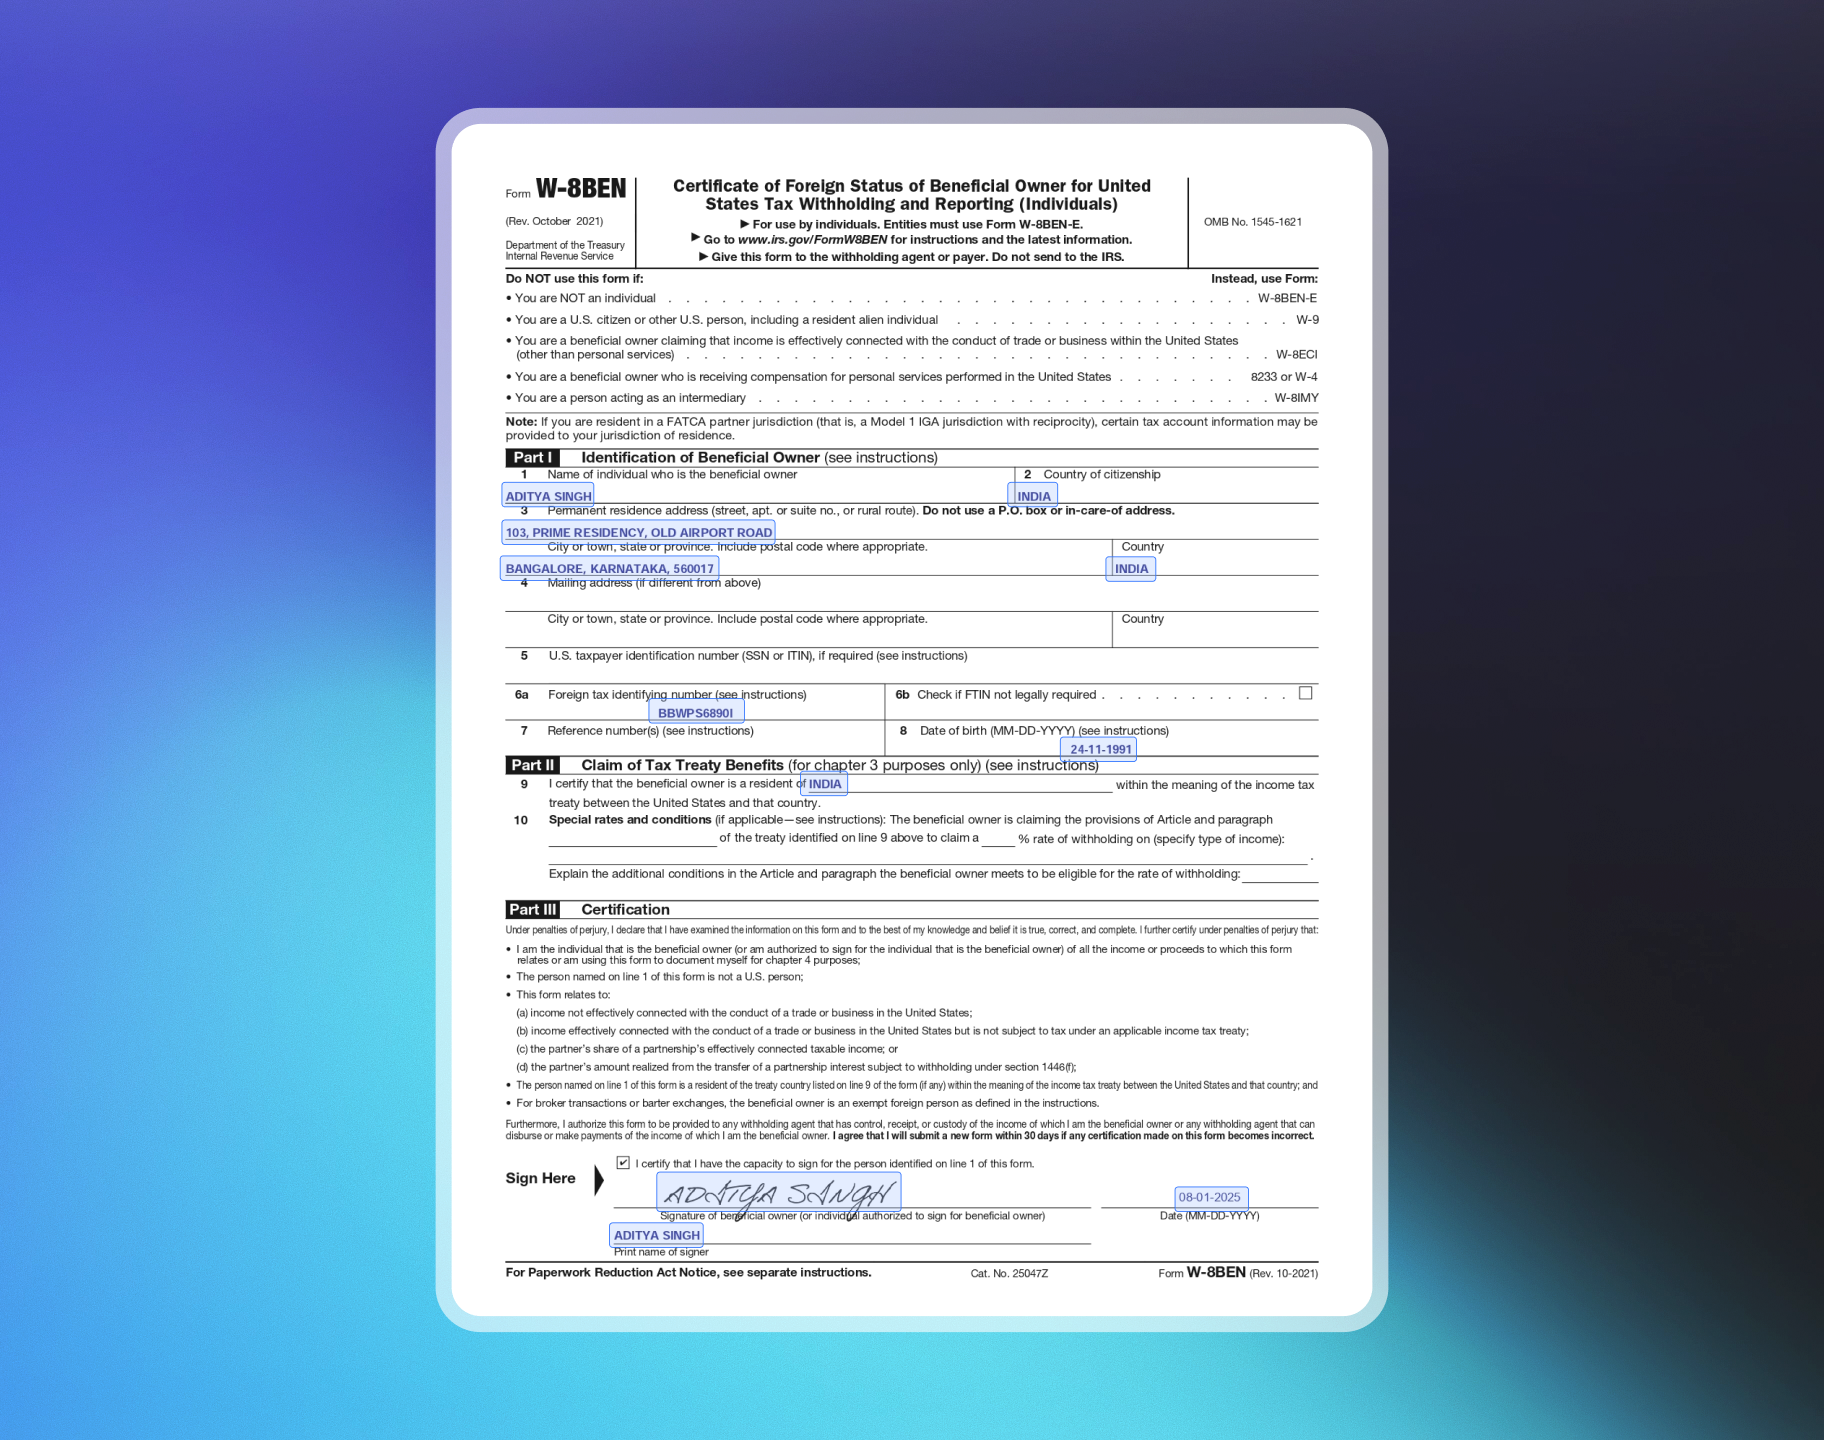 ## **Form W-8 BEN-E: For Non-U.S. Entities**
### **What is Form W-8 BEN E?**
W-8 BEN E forms are Internal Revenue Service (IRS) forms that foreign businesses must file to verify their country of residence for tax purposes, certifying that they qualify for a lower rate of tax withholding.
### **How to Fill Out Form W-8 BEN E (only for non-US entities)**
**Part I**
**1. Name of Organization That is the Beneficial Owner**
This is your entity name.
**2. Country of Incorporation or Organization**
This is the country of residence (where the business is registered). For a corporation, it is the country of incorporation. If you are another type of entity, enter the country under whose laws you are created, organized, or governed.
**3. Chapter 3 Status**
In this section, the most commonly checked box is "Corporation". The majority of foreign entities that are doing business fall under "Corporation" or "Partnership" status. Other options include:
* Foreign government – Controlled Entity
* Foreign government – Integral Part
* Estate
* Simple trust (grantor and complex, too)
* Central Bank of Issue
* Tax-exempt organization
* Private foundation
* International organization
* Disregarded entity
For Private Limited company- check W8-ben-e-form\_PLC sample
For Limited Liability Partnership- check W8-ben-e-form\_LLP sample
**4. Chapter 4 Status (FATCA Status)**
For SaaS/Digital Products, the most common choice here is Active NFFE. This means the business is an Active Non-Financial Foreign Entity. If none of the other categories fit, Active NFFE is the best option.
**5. Permanent Residence Address**
This is your business's permanent resident address. Your permanent residence address is the address in the country where you claim to be a resident for purposes of that country's income tax.
**8-10. Tax Identification Information**
You may provide the FTIN issued to you by your jurisdiction of tax residence on line 9b for purposes of claiming treaty benefits.
**Part XXV – Active NFFE**
In this part of the form, you simply need to check box 39 to certify that:
* The entity in Part I is a foreign entity that is not a bank or financial institution.
* Less than 50% of the gross income for the preceding calendar year is passive income.
* Less than 50% of assets held are assets that produce or are held for the production of passive income (calculated as a weighted average of the % of quarterly passive assets).
**Part XXX – Certification**
The most important part of the document is the certification and signature. Here, in writing, there needs to be a first name, last name, and date (on which the form was signed). The person signing the W-8BEN-E form must be authorized to sign for the beneficial owner.
### **Sample W-8 BEN-E Form**
> **Sample Profile**
>
> Company: ABC Technologies LLP/PVT LTD
>
> Type: SaaS / Digital Products
>
> Country: India
>
> TIN: Pan or equivalent tax ID in your country
#### **Private Limited**
Page 1
## **Form W-8 BEN-E: For Non-U.S. Entities**
### **What is Form W-8 BEN E?**
W-8 BEN E forms are Internal Revenue Service (IRS) forms that foreign businesses must file to verify their country of residence for tax purposes, certifying that they qualify for a lower rate of tax withholding.
### **How to Fill Out Form W-8 BEN E (only for non-US entities)**
**Part I**
**1. Name of Organization That is the Beneficial Owner**
This is your entity name.
**2. Country of Incorporation or Organization**
This is the country of residence (where the business is registered). For a corporation, it is the country of incorporation. If you are another type of entity, enter the country under whose laws you are created, organized, or governed.
**3. Chapter 3 Status**
In this section, the most commonly checked box is "Corporation". The majority of foreign entities that are doing business fall under "Corporation" or "Partnership" status. Other options include:
* Foreign government – Controlled Entity
* Foreign government – Integral Part
* Estate
* Simple trust (grantor and complex, too)
* Central Bank of Issue
* Tax-exempt organization
* Private foundation
* International organization
* Disregarded entity
For Private Limited company- check W8-ben-e-form\_PLC sample
For Limited Liability Partnership- check W8-ben-e-form\_LLP sample
**4. Chapter 4 Status (FATCA Status)**
For SaaS/Digital Products, the most common choice here is Active NFFE. This means the business is an Active Non-Financial Foreign Entity. If none of the other categories fit, Active NFFE is the best option.
**5. Permanent Residence Address**
This is your business's permanent resident address. Your permanent residence address is the address in the country where you claim to be a resident for purposes of that country's income tax.
**8-10. Tax Identification Information**
You may provide the FTIN issued to you by your jurisdiction of tax residence on line 9b for purposes of claiming treaty benefits.
**Part XXV – Active NFFE**
In this part of the form, you simply need to check box 39 to certify that:
* The entity in Part I is a foreign entity that is not a bank or financial institution.
* Less than 50% of the gross income for the preceding calendar year is passive income.
* Less than 50% of assets held are assets that produce or are held for the production of passive income (calculated as a weighted average of the % of quarterly passive assets).
**Part XXX – Certification**
The most important part of the document is the certification and signature. Here, in writing, there needs to be a first name, last name, and date (on which the form was signed). The person signing the W-8BEN-E form must be authorized to sign for the beneficial owner.
### **Sample W-8 BEN-E Form**
> **Sample Profile**
>
> Company: ABC Technologies LLP/PVT LTD
>
> Type: SaaS / Digital Products
>
> Country: India
>
> TIN: Pan or equivalent tax ID in your country
#### **Private Limited**
Page 1
 Page 2
 Page 8
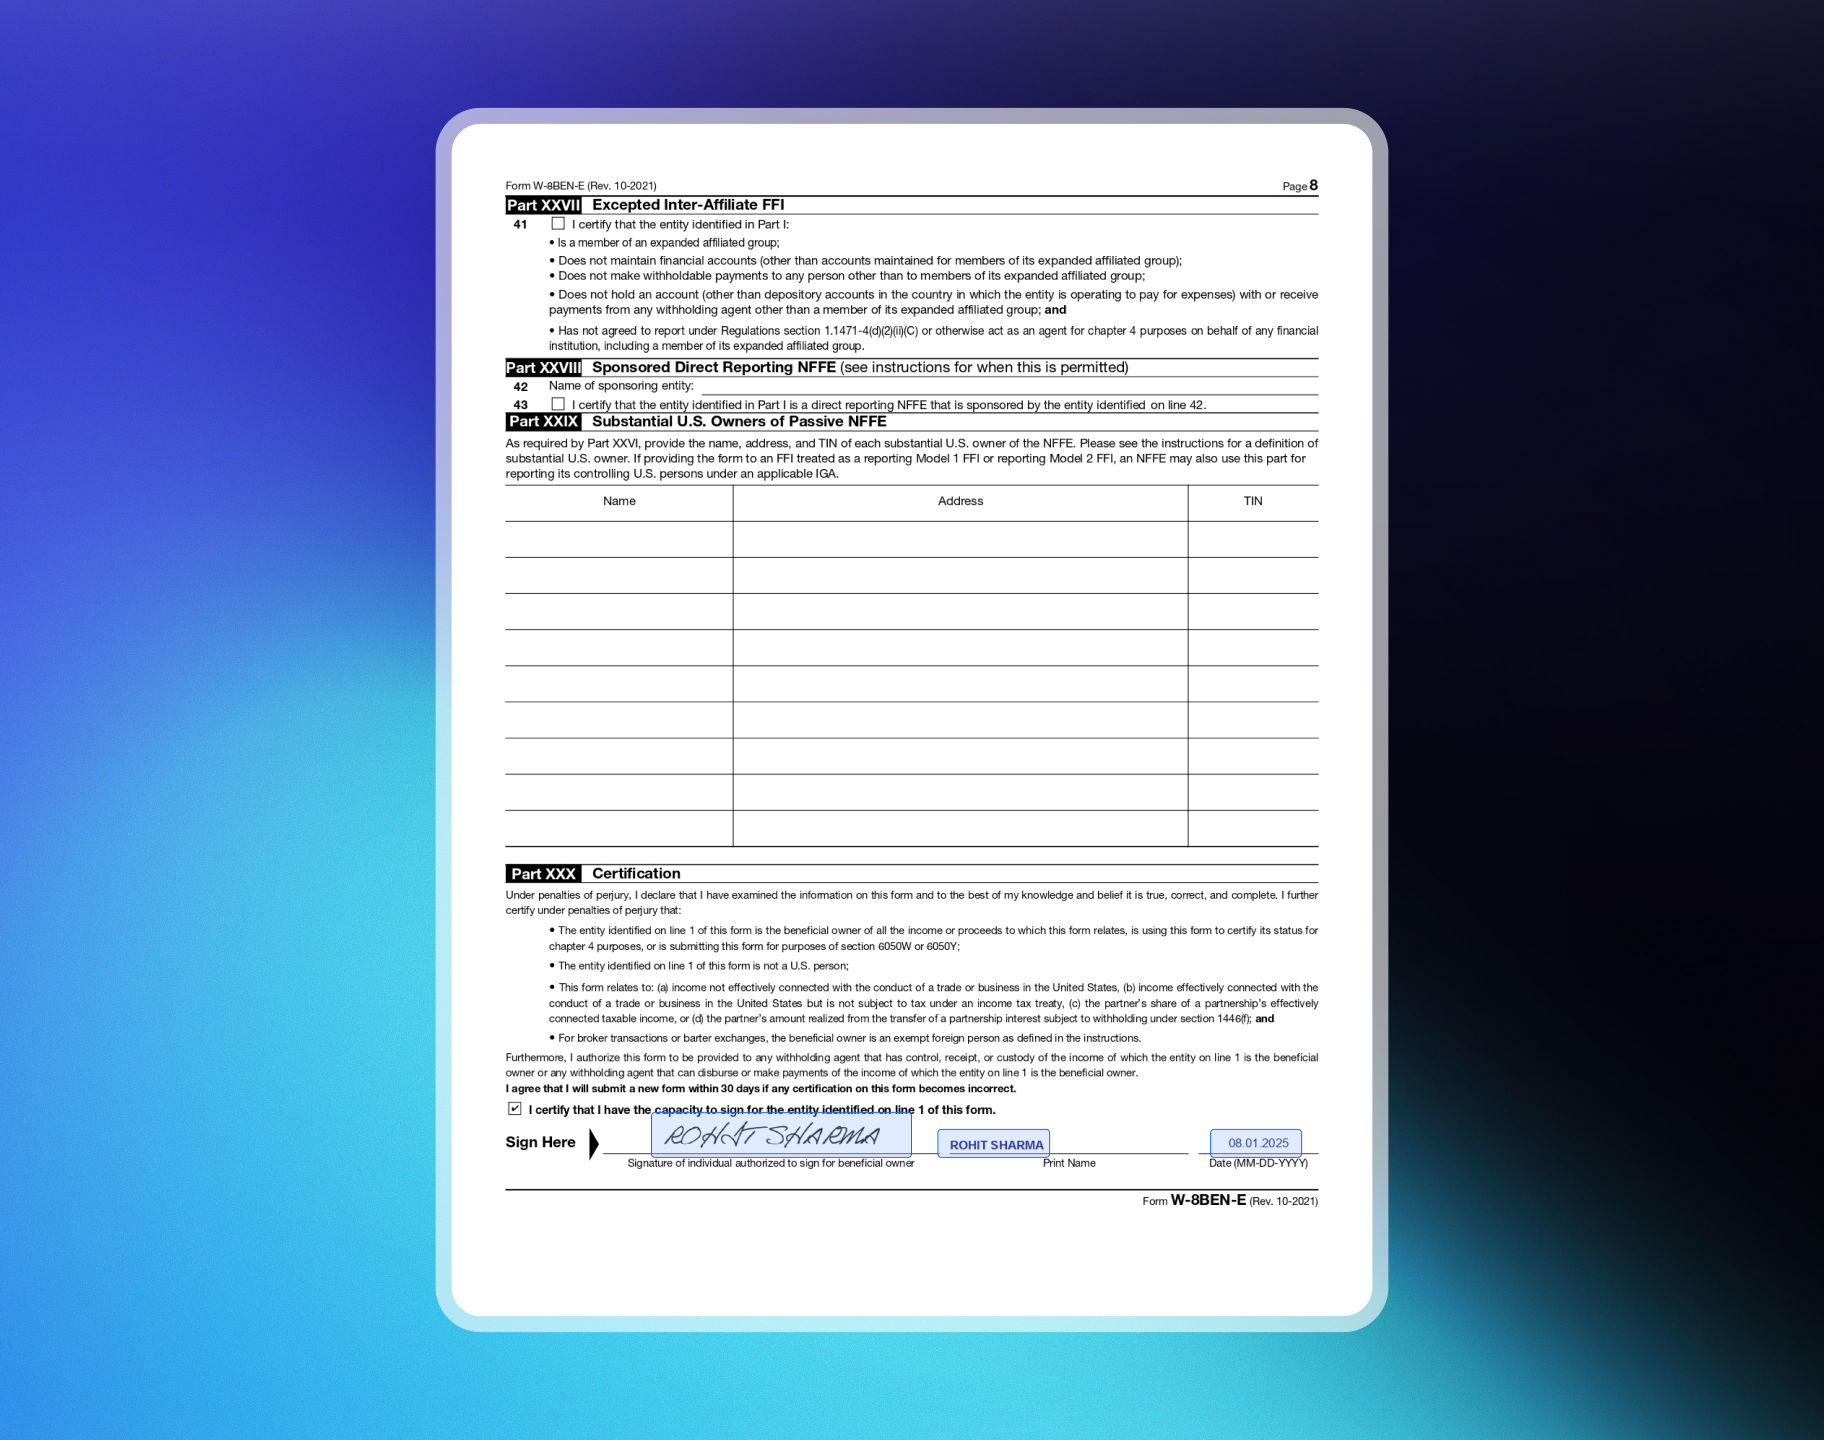 #### **LLP**
Page 1
#### **LLP**
Page 1
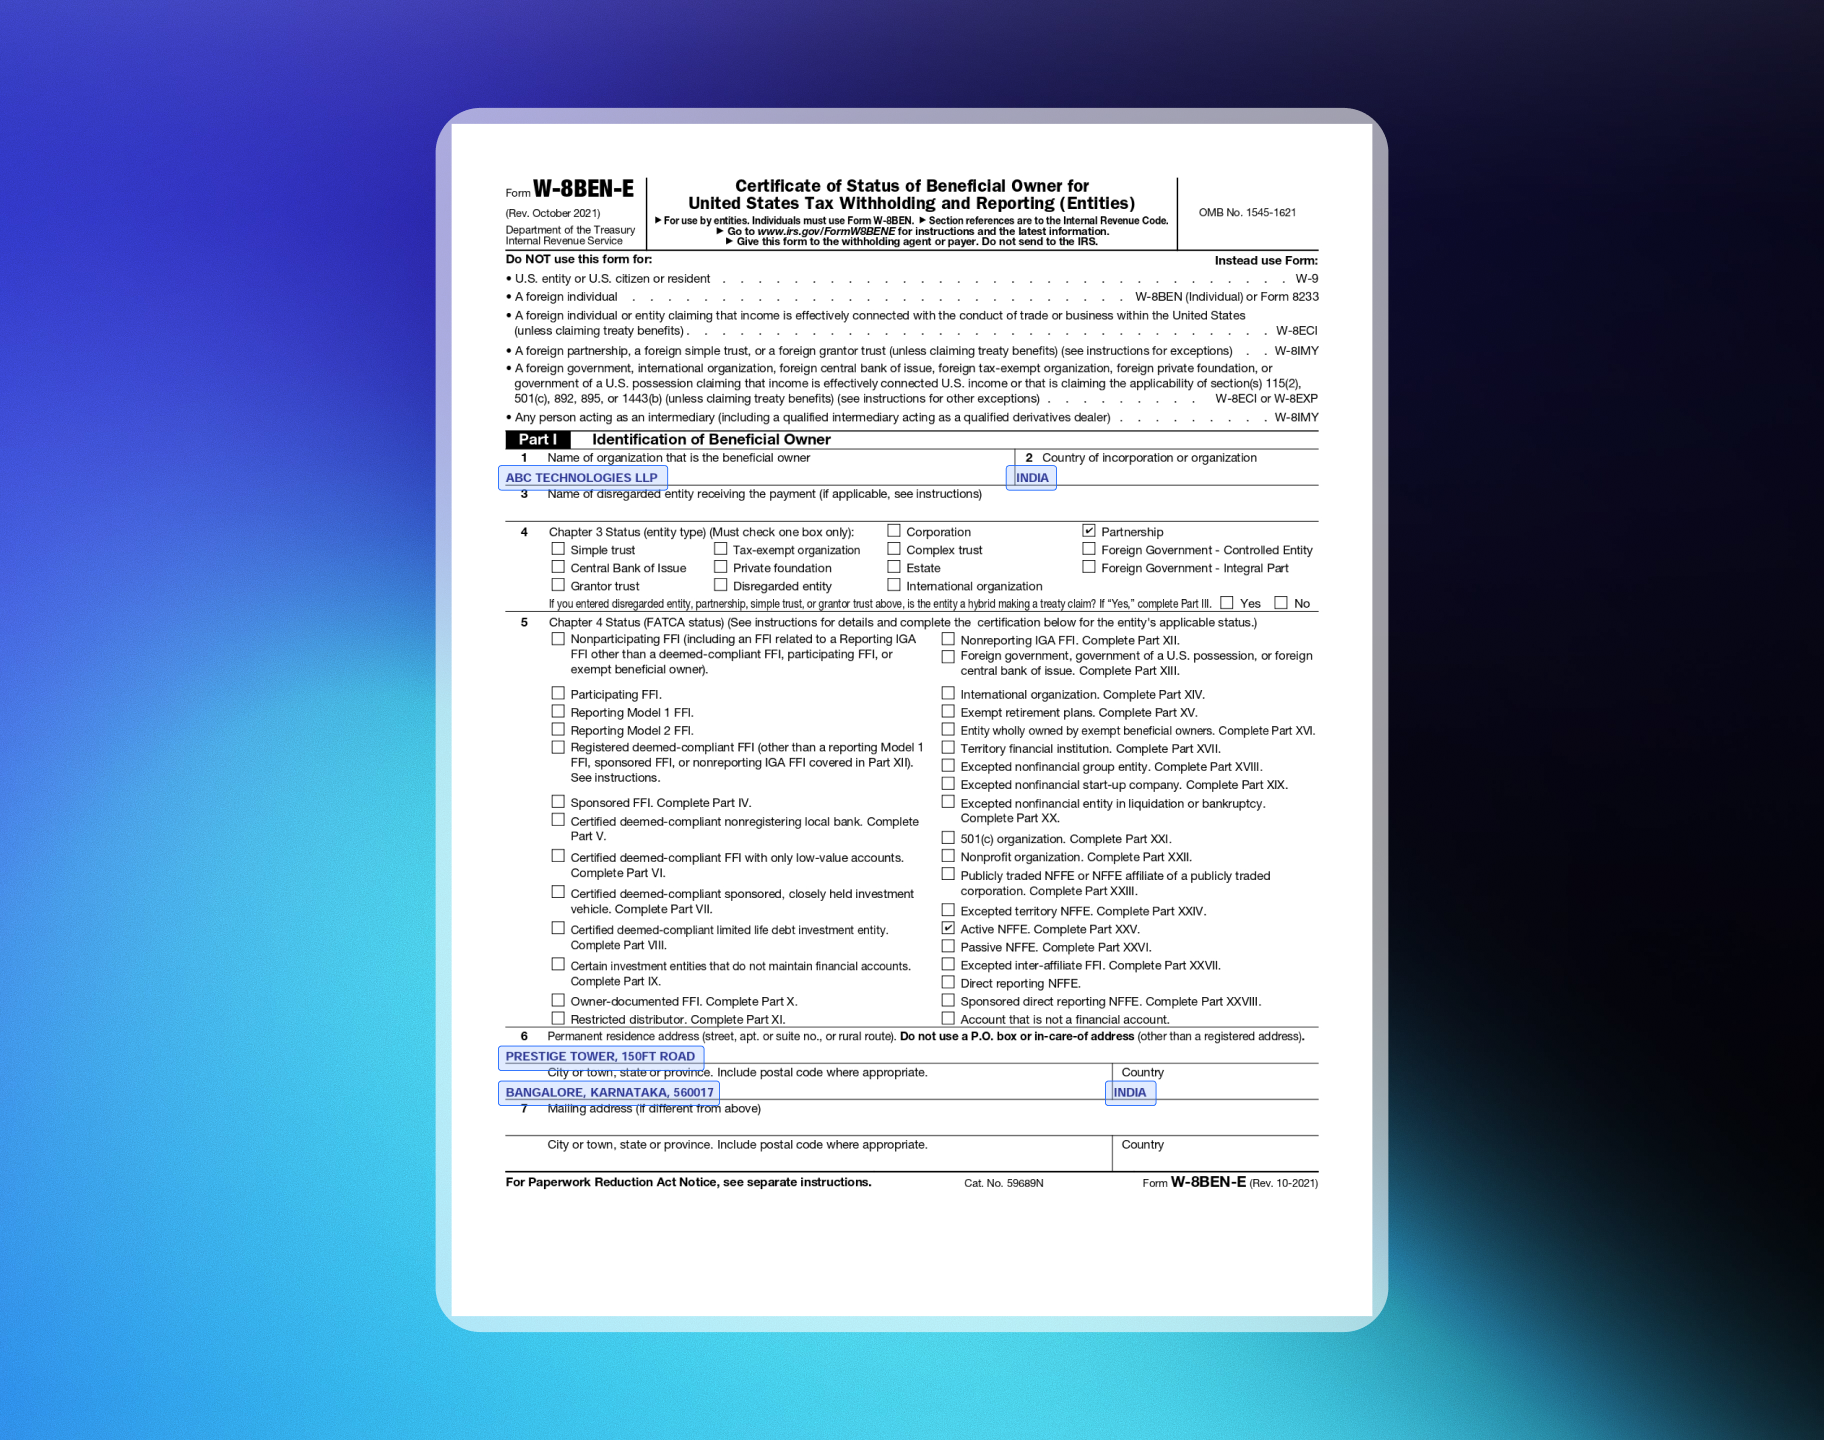 Page 2
 Page 8
## **Form W-9: For U.S. Citizens or Entities**
### **What Is Form W-9?**
Form W-9 is an IRS tax form used to confirm a person's name, address, and Taxpayer Identification Number (TIN) for employment or other income-generating purposes. It applies exclusively to U.S. citizens or entities.
### **How to Fill Out Form W-9?**
**Step 1: W-9, Line 1**
Enter your name as shown on your tax return.
**Step 2: W-9, Line 2**
Enter your business name or "disregarded entity" name, if different from the name you entered for step 1. For example, you might be a sole proprietor, but for marketing purposes, you don't use your personal name as your business name; instead, you are "doing business as" some other name. You would enter that name here.
**Step 3: W-9, Line 3**
Select which type of business entity you are for federal tax classification: sole proprietorship, partnership, C corporation, S corporation, trust/estate, limited liability company, or "other." Check the appropriate box, and only one classification should be selected.
If you're not sure what type of business entity you should select, the IRS has provided a summary table for guidance as part of the Form W-9's instructions.
**Step 4: W-9, Line 4**
With exemptions, chances are you're going to leave these boxes blank. Here are a couple of exceptions:
* Payees that are exempt from backup withholding, such as corporations (in most cases), might need to enter a code in the "Exempt payee code" box. The Form W-9 instructions list the exempt payees and their codes and the types of payments for which these codes should be used. Corporations filling out a W-9 for receipt of interest or dividend payments, for example, would enter code "5."
* Payees that are exempt from reporting under the FATCA might need to enter a code in the "Exemption from FATCA reporting code" box. Neither of these boxes will apply to the typical independent contractor or freelancer.
**Step 5: W-9, Lines 5-6**
Provide your street address, city, state, and ZIP code. Use the address that you will use on your tax return.
**Step 7: W-9, Part I**
The IRS calls the next section Part I. Here, you must provide your business's tax identification number, which will either be your individual Social Security Number if you're a sole proprietor, or your EIN if you're another type of business.
**Step 8: W-9, Part II**
In Part II, you must attest to the truthfulness of all of your information before you can sign Form W-9.
### **Sample W9 Form**
> **Sample Profile**
>
> Company: ABC Technologies INC
>
> Type: SaaS / Digital Products
>
> Country: US
>
> TIN: SSN or EIN
Page 8
## **Form W-9: For U.S. Citizens or Entities**
### **What Is Form W-9?**
Form W-9 is an IRS tax form used to confirm a person's name, address, and Taxpayer Identification Number (TIN) for employment or other income-generating purposes. It applies exclusively to U.S. citizens or entities.
### **How to Fill Out Form W-9?**
**Step 1: W-9, Line 1**
Enter your name as shown on your tax return.
**Step 2: W-9, Line 2**
Enter your business name or "disregarded entity" name, if different from the name you entered for step 1. For example, you might be a sole proprietor, but for marketing purposes, you don't use your personal name as your business name; instead, you are "doing business as" some other name. You would enter that name here.
**Step 3: W-9, Line 3**
Select which type of business entity you are for federal tax classification: sole proprietorship, partnership, C corporation, S corporation, trust/estate, limited liability company, or "other." Check the appropriate box, and only one classification should be selected.
If you're not sure what type of business entity you should select, the IRS has provided a summary table for guidance as part of the Form W-9's instructions.
**Step 4: W-9, Line 4**
With exemptions, chances are you're going to leave these boxes blank. Here are a couple of exceptions:
* Payees that are exempt from backup withholding, such as corporations (in most cases), might need to enter a code in the "Exempt payee code" box. The Form W-9 instructions list the exempt payees and their codes and the types of payments for which these codes should be used. Corporations filling out a W-9 for receipt of interest or dividend payments, for example, would enter code "5."
* Payees that are exempt from reporting under the FATCA might need to enter a code in the "Exemption from FATCA reporting code" box. Neither of these boxes will apply to the typical independent contractor or freelancer.
**Step 5: W-9, Lines 5-6**
Provide your street address, city, state, and ZIP code. Use the address that you will use on your tax return.
**Step 7: W-9, Part I**
The IRS calls the next section Part I. Here, you must provide your business's tax identification number, which will either be your individual Social Security Number if you're a sole proprietor, or your EIN if you're another type of business.
**Step 8: W-9, Part II**
In Part II, you must attest to the truthfulness of all of your information before you can sign Form W-9.
### **Sample W9 Form**
> **Sample Profile**
>
> Company: ABC Technologies INC
>
> Type: SaaS / Digital Products
>
> Country: US
>
> TIN: SSN or EIN
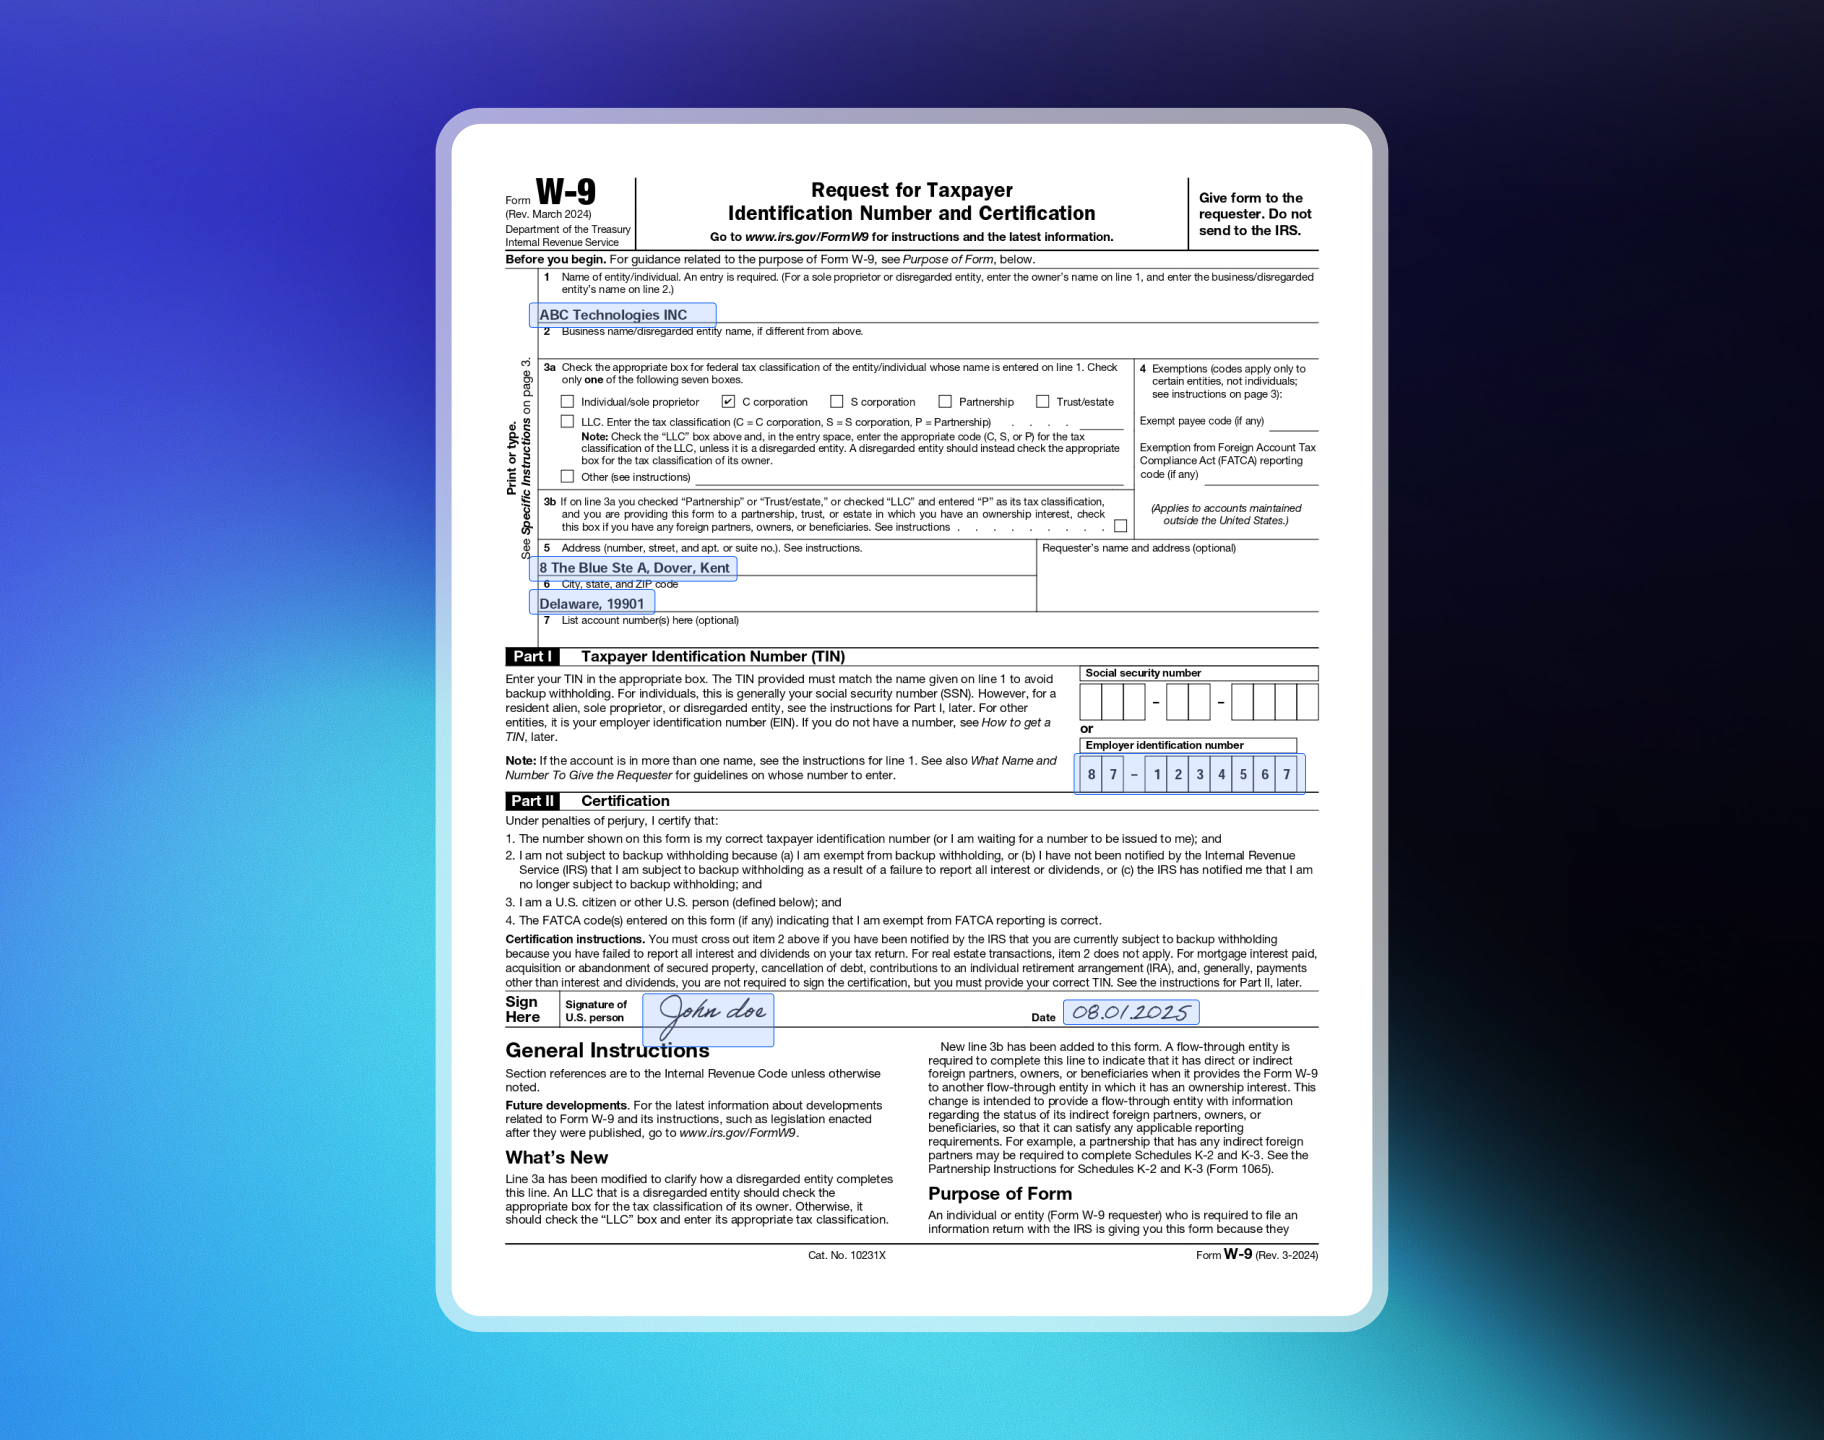 # Test Mode vs Live Mode
Source: https://docs.dodopayments.com/miscellaneous/test-mode-vs-live-mode
Learn the difference between Test Mode and Live Mode and how to switch between them.
Find the detailed breakdown of the features which will be available in test mode vs live mode
## Feature Comparison
| **Feature** | **Test Mode** | **Live Mode** | **Is Environment Dependent?** |
| ------------------------------------------- | ------------- | ------------- | ----------------------------- |
| **Create Products (One-Time/Subscription)** | ✓ | ✓ | YES |
| **Generate Payment Links** | ✓ | ✓ | YES |
| **Simulate Payments (Card, Wallet, etc.)** | ✓ | x | YES |
| **Process Real Payments** | x | ✓ | YES |
| **Issue Refunds** | ✓ (Simulated) | ✓ (Real) | YES |
| **Access Transaction History** | ✓ (Simulated) | ✓ (Real) | YES |
| **Download Invoices** | ✓ (Simulated) | ✓ (Real) | YES |
| **Link Bank Account** | ✓ | ✓ | Environment Independent |
| **Payouts to Bank Account** | x | ✓ | YES |
| **Simulate Failed Transactions** | ✓ | x | YES |
| **Analytics Section** | ✓ (Simulated) | ✓ (Real) | YES |
| **View Detailed Reports** | ✓ (Simulated) | ✓ (Real) | YES |
| **Customize Invoice Templates** | ✓ | ✓ | Environment Independent |
| **API Keys generation** | ✓ | ✓ | YES |
| **Real-time Fraud Detection** | x | ✓ | YES |
| **Access Live Customer Support** | ✓ | ✓ | Environment Independent |
| **Webhook Creation** | ✓ | ✓ | YES |
| **Business Profile section** | ✓ | ✓ | Environment Independent |
| **My Account section** | ✓ | ✓ | Environment Independent |
| **Create multiple businesses** | ✓ | ✓ | Environment Independent |
| **Payout Compliance** | ✓ | ✓ | Environment Independent |
| **Transaction Emails** | x | ✓ | YES |
### Environment Dependency
**Environment Dependent:** All Environment Dependent features will have independent data in Test Mode and Live Mode. Any changes made in one environment will not affect the other. Eg. API Keys generated in Test Mode will be independent of API keys generated in Live Mode and vice versa
**Environment Independent:** All Environment Independent features will have the same data in both live mode and test mode. Eg. My Account section will have the same data in test mode and live mode. Changes made in one environment will affect the other environment
Live Mode will be available only post successful completion of Identity verification and Business Verification. You can accept real payments only in \`live mode\`.
API Hostnames for Test Mode and Live Mode are below:
* Test Mode: [`https://test.dodopayments.com`](https://test.dodopayments.com/)
* Live Mode: [`https://live.dodopayments.com`](https://live.dodopayments.com/)
## Key Highlights
1. All products created in test mode or live mode will only be available in the respective environment. There is an option of copy to live mode in the test mode environment. This will copy the product with all relevant details and create the same in live mode
2. API keys and Webhooks created in test mode will only be limited to test mode environment and will not affect live mode deployment and vice versa
3. All documents submitted for verification and Bank account details submitted will be the same in test mode and live mode. A change in this information in any environment will also change it in the other environment
## Test Cards and UPI IDs
For detailed information about test cards, UPI IDs, and other testing methods, please refer to our comprehensive [Testing Process](/miscellaneous/testing-process) guide.
This guide includes:
* Test card numbers for different scenarios
* Test UPI IDs for simulating payments
* Instructions for testing various payment outcomes
* Best practices for testing your integration
# Test Mode vs Live Mode
Source: https://docs.dodopayments.com/miscellaneous/test-mode-vs-live-mode
Learn the difference between Test Mode and Live Mode and how to switch between them.
Find the detailed breakdown of the features which will be available in test mode vs live mode
## Feature Comparison
| **Feature** | **Test Mode** | **Live Mode** | **Is Environment Dependent?** |
| ------------------------------------------- | ------------- | ------------- | ----------------------------- |
| **Create Products (One-Time/Subscription)** | ✓ | ✓ | YES |
| **Generate Payment Links** | ✓ | ✓ | YES |
| **Simulate Payments (Card, Wallet, etc.)** | ✓ | x | YES |
| **Process Real Payments** | x | ✓ | YES |
| **Issue Refunds** | ✓ (Simulated) | ✓ (Real) | YES |
| **Access Transaction History** | ✓ (Simulated) | ✓ (Real) | YES |
| **Download Invoices** | ✓ (Simulated) | ✓ (Real) | YES |
| **Link Bank Account** | ✓ | ✓ | Environment Independent |
| **Payouts to Bank Account** | x | ✓ | YES |
| **Simulate Failed Transactions** | ✓ | x | YES |
| **Analytics Section** | ✓ (Simulated) | ✓ (Real) | YES |
| **View Detailed Reports** | ✓ (Simulated) | ✓ (Real) | YES |
| **Customize Invoice Templates** | ✓ | ✓ | Environment Independent |
| **API Keys generation** | ✓ | ✓ | YES |
| **Real-time Fraud Detection** | x | ✓ | YES |
| **Access Live Customer Support** | ✓ | ✓ | Environment Independent |
| **Webhook Creation** | ✓ | ✓ | YES |
| **Business Profile section** | ✓ | ✓ | Environment Independent |
| **My Account section** | ✓ | ✓ | Environment Independent |
| **Create multiple businesses** | ✓ | ✓ | Environment Independent |
| **Payout Compliance** | ✓ | ✓ | Environment Independent |
| **Transaction Emails** | x | ✓ | YES |
### Environment Dependency
**Environment Dependent:** All Environment Dependent features will have independent data in Test Mode and Live Mode. Any changes made in one environment will not affect the other. Eg. API Keys generated in Test Mode will be independent of API keys generated in Live Mode and vice versa
**Environment Independent:** All Environment Independent features will have the same data in both live mode and test mode. Eg. My Account section will have the same data in test mode and live mode. Changes made in one environment will affect the other environment
Live Mode will be available only post successful completion of Identity verification and Business Verification. You can accept real payments only in \`live mode\`.
API Hostnames for Test Mode and Live Mode are below:
* Test Mode: [`https://test.dodopayments.com`](https://test.dodopayments.com/)
* Live Mode: [`https://live.dodopayments.com`](https://live.dodopayments.com/)
## Key Highlights
1. All products created in test mode or live mode will only be available in the respective environment. There is an option of copy to live mode in the test mode environment. This will copy the product with all relevant details and create the same in live mode
2. API keys and Webhooks created in test mode will only be limited to test mode environment and will not affect live mode deployment and vice versa
3. All documents submitted for verification and Bank account details submitted will be the same in test mode and live mode. A change in this information in any environment will also change it in the other environment
## Test Cards and UPI IDs
For detailed information about test cards, UPI IDs, and other testing methods, please refer to our comprehensive [Testing Process](/miscellaneous/testing-process) guide.
This guide includes:
* Test card numbers for different scenarios
* Test UPI IDs for simulating payments
* Instructions for testing various payment outcomes
* Best practices for testing your integration
 At Dodo Payments, we take verification seriously to ensure that all merchants using our platform meet regulatory standards and compliance requirements. Our verification process includes **Identity Verification** and **Business Verification**, with a strong emphasis on **AML (Anti-Money Laundering) and Product Categories**. This guide will help you understand which product categories are not supported, documents required for verification and how to re-submit documents if needed.
***
### **1. Unsupported Product Categories**
Dodo Payments supports only digital product sales. As part of our commitment to maintaining a secure and compliant platform, we do not support certain product categories due to legal, compliance, and risk considerations.
**Prohibited Product Categories:**
1. **Illegal Products**: Any product or service that violates local or international laws.
2. **Physical Goods**: Dodo Payments only supports digital products, so the sale of any physical goods (including weapons, tobacco, and counterfeit items) is not allowed.
3. **Adult Content**: This includes pornography, escort services, or other adult-related products.
4. **Gambling Services**: Online casinos, sports betting, or any game of chance requiring payment are not supported.
5. **Pyramid and Ponzi Schemes**: Any illegal financial schemes designed to generate returns for older investors through the contributions of newer investors.
6. **Hate Speech**: Products or services that promote hate speech, violence, or discrimination against any individual or group.
7. **Unlicensed Financial Services**: Cryptocurrency exchanges, unlicensed money transmission services, or other financial services without proper authorization.
At Dodo Payments, we take verification seriously to ensure that all merchants using our platform meet regulatory standards and compliance requirements. Our verification process includes **Identity Verification** and **Business Verification**, with a strong emphasis on **AML (Anti-Money Laundering) and Product Categories**. This guide will help you understand which product categories are not supported, documents required for verification and how to re-submit documents if needed.
***
### **1. Unsupported Product Categories**
Dodo Payments supports only digital product sales. As part of our commitment to maintaining a secure and compliant platform, we do not support certain product categories due to legal, compliance, and risk considerations.
**Prohibited Product Categories:**
1. **Illegal Products**: Any product or service that violates local or international laws.
2. **Physical Goods**: Dodo Payments only supports digital products, so the sale of any physical goods (including weapons, tobacco, and counterfeit items) is not allowed.
3. **Adult Content**: This includes pornography, escort services, or other adult-related products.
4. **Gambling Services**: Online casinos, sports betting, or any game of chance requiring payment are not supported.
5. **Pyramid and Ponzi Schemes**: Any illegal financial schemes designed to generate returns for older investors through the contributions of newer investors.
6. **Hate Speech**: Products or services that promote hate speech, violence, or discrimination against any individual or group.
7. **Unlicensed Financial Services**: Cryptocurrency exchanges, unlicensed money transmission services, or other financial services without proper authorization.
Global Payments Made Effortless
Dodo Payments handles global payment collection, compliance, tax, and risk management so you can focus on building your business.