Inline checkout lets you create fully integrated checkout experiences that blend seamlessly with your website or application. Unlike the overlay checkout, which opens as a modal on top of your page, inline checkout embeds the payment form directly into your page layout.Using inline checkout, you can:
Create checkout experiences that are fully integrated with your app or website
Let Dodo Payments securely capture customer and payment information in an optimized checkout frame
Display items, totals, and other information from Dodo Payments on your page
Use SDK methods and events to build advanced checkout experiences
Inline checkout works by embedding a secure Dodo Payments frame into your website or app.The checkout frame handles collecting customer information and capturing payment details. Your page displays the items list, totals, and options for changing what’s on the checkout. The SDK lets your page and the checkout frame interact with each other.Dodo Payments automatically creates a subscription when a checkout completes, ready for you to provision.
The inline checkout frame securely handles all sensitive payment information, ensuring PCI compliance without additional certification on your end.
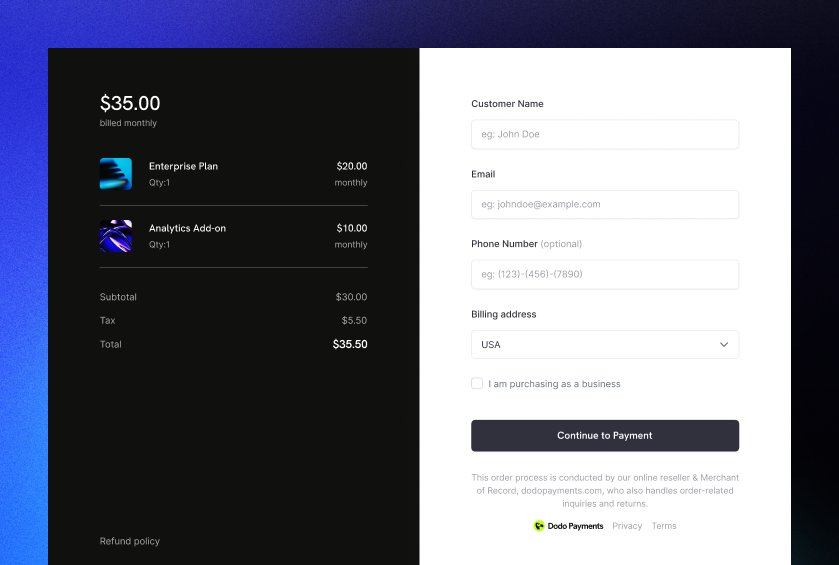
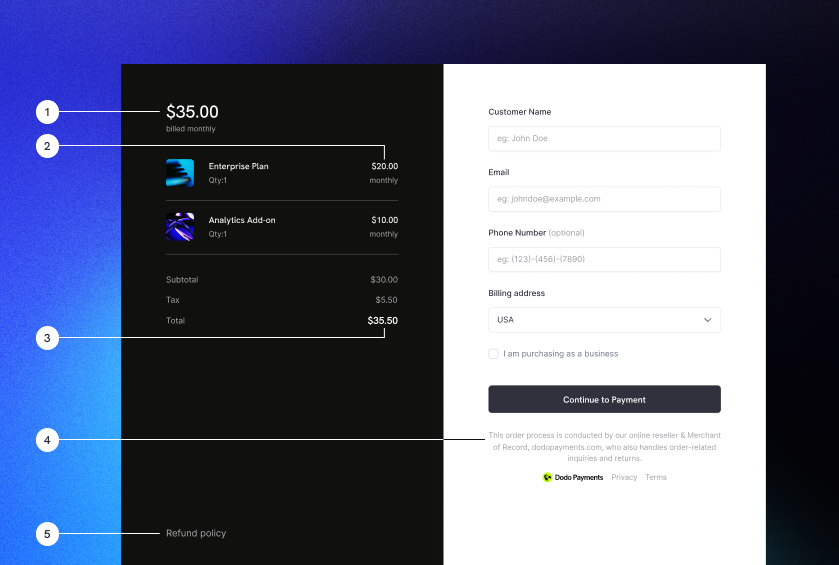
It’s important that customers know who they’re buying from, what they’re buying, and how much they’re paying.To build an inline checkout that’s compliant and optimized for conversion, your implementation must include:
Example inline checkout layout showing required elements
Recurring information: If recurring, how often it recurs and the total to pay on renewal. If a trial, how long the trial lasts.
Item descriptions: A description of what’s being purchased.
Transaction totals: Transaction totals, including subtotal, total tax, and grand total. Be sure to include the currency too.
Dodo Payments footer: The full inline checkout frame, including the checkout footer that has information about Dodo Payments, our terms of sale, and our privacy policy.
Refund policy: A link to your refund policy, if it differs from the Dodo Payments standard refund policy.
Always display the complete inline checkout frame, including the footer. Removing or hiding legal information violates compliance requirements.
The checkout flow is determined by your checkout session configuration. Depending on how you configure the checkout session, customers will experience a checkout that may present all information on a single page or across multiple steps.
1
Customer opens checkout
Sie können den Inline-Checkout öffnen, indem Sie Artikel oder eine bestehende Transaktion übergeben. Verwenden Sie das SDK, um Informationen auf der Seite anzuzeigen und zu aktualisieren, und SDK-Methoden, um Artikel basierend auf der Kundeninteraktion zu aktualisieren.
2
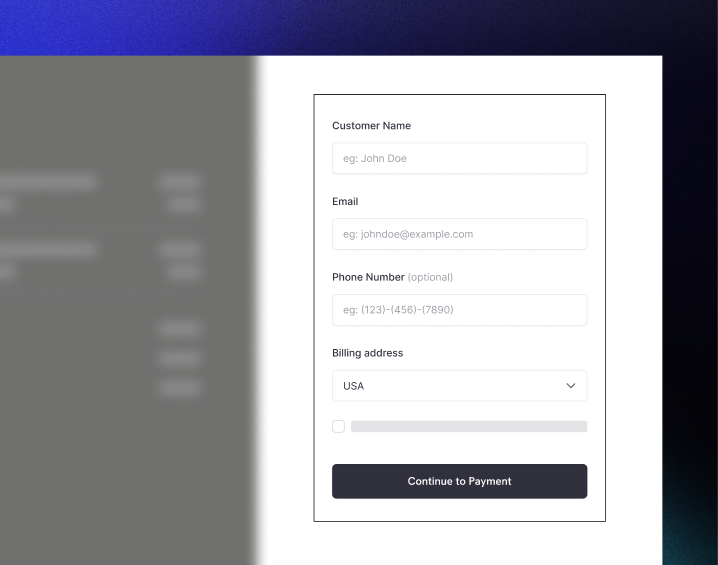
Customer enters their details
Inline checkout first asks customers to enter their email address, select their country, and (where required) enter their ZIP or postal code. This step gathers all necessary information to determine taxes and available payment options.You can prefill customer details and present saved addresses to streamline the experience.
3
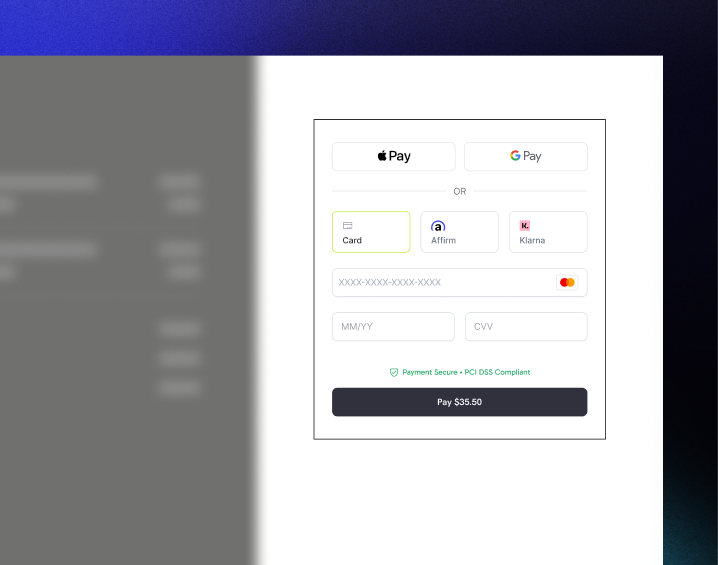
Customer selects payment method
After entering their details, customers are presented with available payment methods and the payment form. Options may include credit or debit card, PayPal, Apple Pay, Google Pay, and other local payment methods based on their location.Display saved payment methods if available to speed up checkout.
4
Checkout completed
Dodo Payments routes every payment to the best acquirer for that sale to get the best possible chance of success. Customers enter a success workflow that you can build.
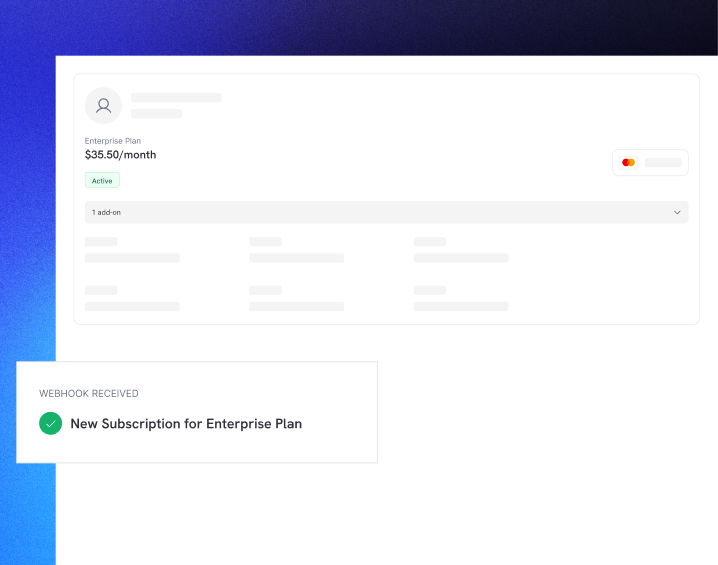
5
Dodo Payments creates subscription
Dodo Payments automatically creates a subscription for the customer, ready for you to provision. The payment method the customer used is held on file for renewals or subscription changes.
Get started with the Dodo Payments Inline Checkout in just a few lines of code:
import { DodoPayments } from "dodopayments-checkout";// Initialize the SDK for inline modeDodoPayments.Initialize({ mode: "test", displayType: "inline", onEvent: (event) => { console.log("Checkout event:", event); },});// Open checkout in a specific containerDodoPayments.Checkout.open({ checkoutUrl: "https://test.dodopayments.com/session/cks_123", elementId: "dodo-inline-checkout" // ID of the container element});
Ensure you have a container element with the corresponding id on your page: <div id="dodo-inline-checkout"></div>.
Initialize the SDK and specify displayType: 'inline'. You should also listen for the checkout.breakdown event to update your UI with real-time tax and total calculations.
import { DodoPayments } from "dodopayments-checkout";DodoPayments.Initialize({ mode: "test", displayType: "inline", onEvent: (event) => { if (event.event_type === "checkout.breakdown") { const breakdown = event.data?.message; // Update your UI with breakdown.subTotal, breakdown.tax, breakdown.total, etc. } },});
3
Create a Container Element
Add an element to your HTML where the checkout frame will be injected:
<div id="dodo-inline-checkout"></div>
4
Open the Checkout
Call DodoPayments.Checkout.open() with the checkoutUrl and the elementId of your container:
This example demonstrates how to implement a custom order summary alongside the inline checkout, keeping them in sync using the checkout.breakdown event.
Das id des DOM-Elements, in dem der Checkout gerendert werden soll.
options.showTimer
boolean
Nein
Den Checkout-Timer anzeigen oder ausblenden. Standard ist true. Wenn deaktiviert, erhalten Sie das checkout.link_expired-Ereignis, wenn die Sitzung abläuft.
options.showSecurityBadge
boolean
Nein
Das Sicherheitsabzeichen anzeigen oder ausblenden. Standard ist true.
options.payButtonText
string
Nein
Benutzerdefinierter Text, der auf der Bezahltaste angezeigt wird.
Das SDK bietet Echtzeit-Ereignisse über den onEvent-Rückruf. Für den Inline-Checkout ist checkout.breakdown besonders nützlich für die Synchronisierung Ihrer Benutzeroberfläche.
Ereignistyp
Beschreibung
checkout.opened
Checkout-Frame wurde geladen.
checkout.form_ready
Checkout-Formular ist bereit, Benutzereingaben zu empfangen. Nützlich zum Verbergen von Ladezuständen und Anzeigen der Checkout-Benutzeroberfläche.
checkout.breakdown
Ausgelöst, wenn Preise, Steuern oder Rabatte aktualisiert werden.
checkout.customer_details_submitted
Kundendetails wurden übermittelt.
checkout.pay_button_clicked
Ausgelöst, wenn der Kunde auf die Bezahltaste klickt. Nützlich für Analysen und das Tracking von Conversion-Trichtern.
checkout.redirect
Der Checkout wird eine Weiterleitung durchführen (z.B. zu einer Bankseite).
checkout.error
Ein Fehler ist während des Checkouts aufgetreten.
checkout.link_expired
Ausgelöst, wenn die Checkout-Sitzung abläuft. Nur empfangen, wenn showTimer auf false eingestellt ist.
Das checkout.breakdown-Ereignis ist der Hauptweg, um die Benutzeroberfläche Ihrer Anwendung mit dem Dodo Payments Checkout-Status zu synchronisieren.Wann es ausgelöst wird:
Bei der Initialisierung: Unmittelbar nachdem das Checkout-Frame geladen und bereit ist.
Bei Adressänderung: Jedes Mal, wenn der Kunde ein Land auswählt oder eine Postleitzahl eingibt, die eine Steuerneuberechnung zur Folge hat.
Felddetails:
Feld
Beschreibung
subTotal
Die Summe aller Posten in der Sitzung, bevor Rabatte oder Steuern angewendet werden.
discount
Der Gesamtwert aller angewendeten Rabatte.
tax
Der berechnete Steuerbetrag. Im inline-Modus aktualisiert sich dies dynamisch, wenn der Benutzer mit den Adressfeldern interagiert.
total
Das mathematische Ergebnis von subTotal - discount + tax in der Basissitzungswährung.
currency
Der ISO-Währungscode (z.B. "USD") für die standardmäßigen Zwischensummen-, Rabatt- und Steuerwerte.
finalTotal
Der tatsächliche Betrag, den der Kunde zahlen muss. Dies kann zusätzliche Anpassungen an Devisenkursen oder Gebühren für lokale Zahlungsmethoden enthalten, die nicht Teil der grundlegenden Preisaufschlüsselung sind.
finalTotalCurrency
Die Währung, in der der Kunde tatsächlich bezahlt. Dies kann von currency abweichen, wenn Kaufkraftparität oder lokale Währungsumrechnung aktiv ist.
Wichtige Integrationstipps:
Währungsformatierung: Preise werden immer als ganze Zahlen in der kleinsten Währungseinheit zurückgegeben (z.B. Cent für USD, Yen für JPY). Um sie anzuzeigen, dividieren Sie durch 100 (oder die entsprechende Zehnerpotenz) oder verwenden Sie eine Formatbibliothek wie Intl.NumberFormat.
Umgang mit Anfangszuständen: Wenn der Checkout zum ersten Mal geladen wird, können tax und discount0 oder null sein, bis der Benutzer seine Rechnungsinformationen bereitstellt oder einen Code anwendet. Ihre Benutzeroberfläche sollte diese Zustände elegant behandeln (z.B. ein Strich — zeigen oder die Zeile ausblenden).
Der “endgültige Gesamtbetrag” vs. “Gesamtbetrag”: Während total Ihnen die Standardpreiskalkulation gibt, ist finalTotal die Quelle der Wahrheit für die Transaktion. Wenn finalTotal vorhanden ist, spiegelt es genau wider, was der Karte des Kunden belastet wird, einschließlich aller dynamischen Anpassungen.
Echtzeitrückmeldung: Verwenden Sie das Feld tax, um den Benutzern anzuzeigen, dass Steuern in Echtzeit berechnet werden. Dies vermittelt ein “Live”-Gefühl zu Ihrer Checkout-Seite und reduziert Reibungen während des Adresseingabeschritts.
Inline-Checkout unterstützt Updates der Zahlungsmethode für Abonnements. Wenn ein Kunde seine Zahlungsmethode aktualisieren muss - sei es für ein aktives Abonnement oder um ein pausiertes Abonnement zu reaktivieren - können Sie den Aktualisierungsablauf direkt in Ihrem Seitenlayout rendern.
Der Inline-Frame rendert nur das Erfassungsformular für die Zahlungsmethode. Kunden können neue Kartendetails eingeben oder eine gespeicherte Zahlungsmethode auswählen, ohne Ihre Seite zu verlassen.
Wenn Sie die Zahlungsmethode für ein Abonnement im on_hold-Status aktualisieren, erstellt Dodo Payments automatisch eine Belastung für alle ausstehenden Beträge. Überwachen Sie die payment.succeeded und subscription.active Webhooks, um die Reaktivierung zu bestätigen.
const response = await client.subscriptions.updatePaymentMethod('sub_123', { type: 'new', return_url: 'https://example.com/return'});if (response.payment_id) { // Charge created for remaining dues // Open inline checkout for payment collection DodoPayments.Checkout.open({ checkoutUrl: response.payment_link, elementId: "dodo-inline-checkout" });}
Sie können auch eine vorhandene gespeicherte Zahlungsmethode verwenden, anstatt neue Details zu erfassen, indem Sie type: 'existing' mit einer payment_method_id an die Update Payment Method API übergeben.
Das SDK bietet detaillierte Fehlerinformationen über das Ereignissystem. Implementieren Sie immer eine ordnungsgemäße Fehlerbehandlung in Ihrem onEvent-Rückruf:
Responsives Design: Stellen Sie sicher, dass Ihr Containerelement genügend Breite und Höhe hat. Das iFrame wird typischerweise seine Containergröße ausfüllen.
Synchronisation: Verwenden Sie das checkout.breakdown-Ereignis, um Ihre benutzerdefinierte Bestellübersicht oder Preistabellen mit dem, was der Benutzer im Checkout-Frame sieht, synchron zu halten.
Zustände des Skeletts: Zeigen Sie einen Ladeindikator in Ihrem Container, bis das checkout.opened-Ereignis ausgelöst wird.
Bereinigung: Rufen Sie DodoPayments.Checkout.close() auf, wenn Ihre Komponente demontiert wird, um das iFrame und die Ereignislistener zu bereinigen.
Für Implementierungen im Dunkelmodus wird empfohlen, #0d0d0d als Hintergrundfarbe zu verwenden, um eine optimale visuelle Integration mit dem Inline-Checkout-Frame zu gewährleisten.
Verlassen Sie sich nicht ausschließlich auf Inline-Checkout-Ereignisse, um Zahlungserfolg oder -fehler zu bestimmen. Implementieren Sie immer serverseitige Validierung mit Webhooks und/oder Polling.
Obwohl Inline-Checkout-Ereignisse Echtzeit-Feedback bieten, sollten sie nicht Ihre einzige Wahrheitsquelle für den Zahlungsstatus sein. Netzwerkprobleme, Browserabstürze oder das Schließen der Seite durch Benutzer können dazu führen, dass Ereignisse verpasst werden. Um eine zuverlässige Zahlungsvalidierung sicherzustellen:
Ihr Server sollte Webhook-Ereignisse abhören - Dodo Payments sendet Webhooks für Zahlungsstatusänderungen
Implementieren Sie einen Polling-Mechanismus - Ihr Frontend sollte Ihren Server auf Statusaktualisierungen abfragen
Kombinieren Sie beide Ansätze - Verwenden Sie Webhooks als primäre Quelle und Polling als Fallback
1. Zuhören nach Checkout-Ereignissen - Wenn der Benutzer auf Bezahlen klickt, beginnen Sie mit der Vorbereitung zur Statusüberprüfung:
onEvent: (event) => { if (event.event_type === 'checkout.pay_button_clicked') { // Start polling your server for confirmed status startPolling(); }}
2. Ihren Server abfragen - Erstellen Sie einen Endpunkt, der Ihre Datenbank auf den Zahlungsstatus überprüft (aktualisiert durch Webhooks):
// Poll every 2 seconds until status is confirmedconst interval = setInterval(async () => { const { status } = await fetch(`/api/payments/${paymentId}/status`).then(r => r.json()); if (status === 'succeeded' || status === 'failed') { clearInterval(interval); handlePaymentResult(status); }}, 2000);
3. Webhooks serverseitig behandeln - Aktualisieren Sie Ihre Datenbank, wenn Dodo payment.succeeded oder payment.failed Webhooks sendet. Siehe unsere Webhooks-Dokumentation für Details.
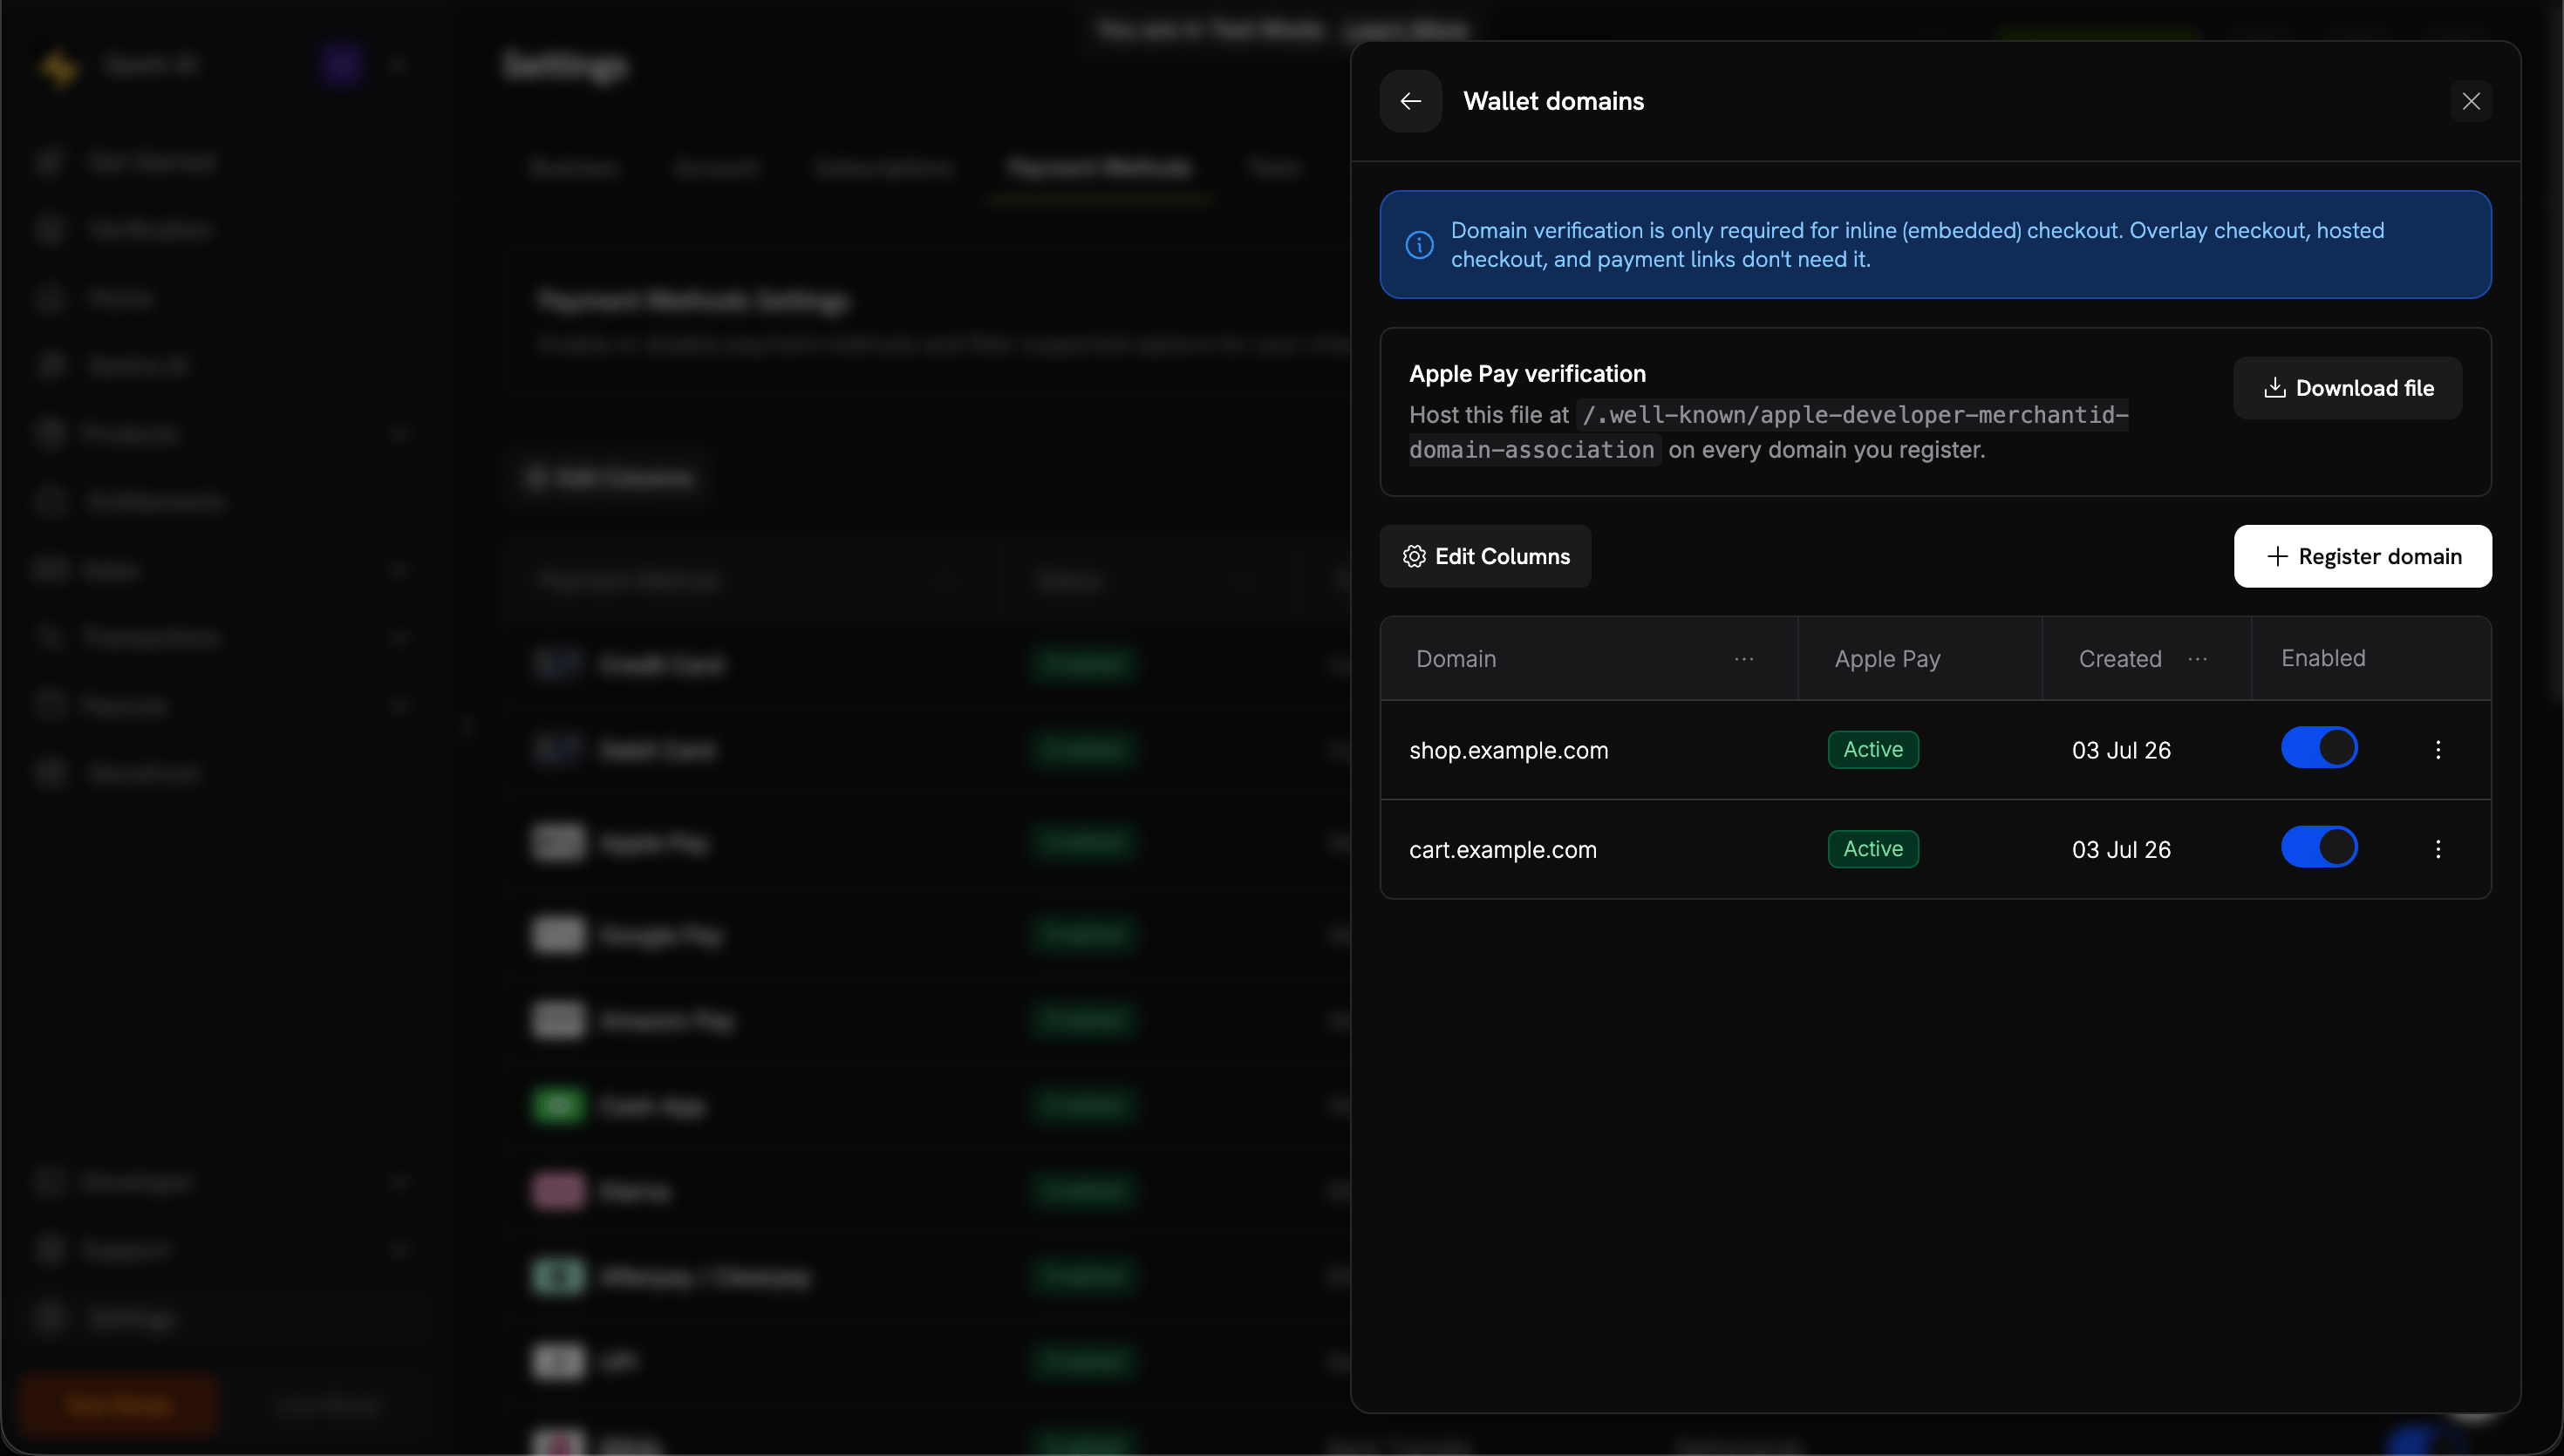
Die Domänenüberprüfung ist nur für Inline-Checkout (eingebettet) erforderlich. Overlay-Checkout, gehosteter Checkout und Zahlungslinks benötigen dies nicht.
Apple Pay wird pro Domäne über das Dashboard verifiziert.
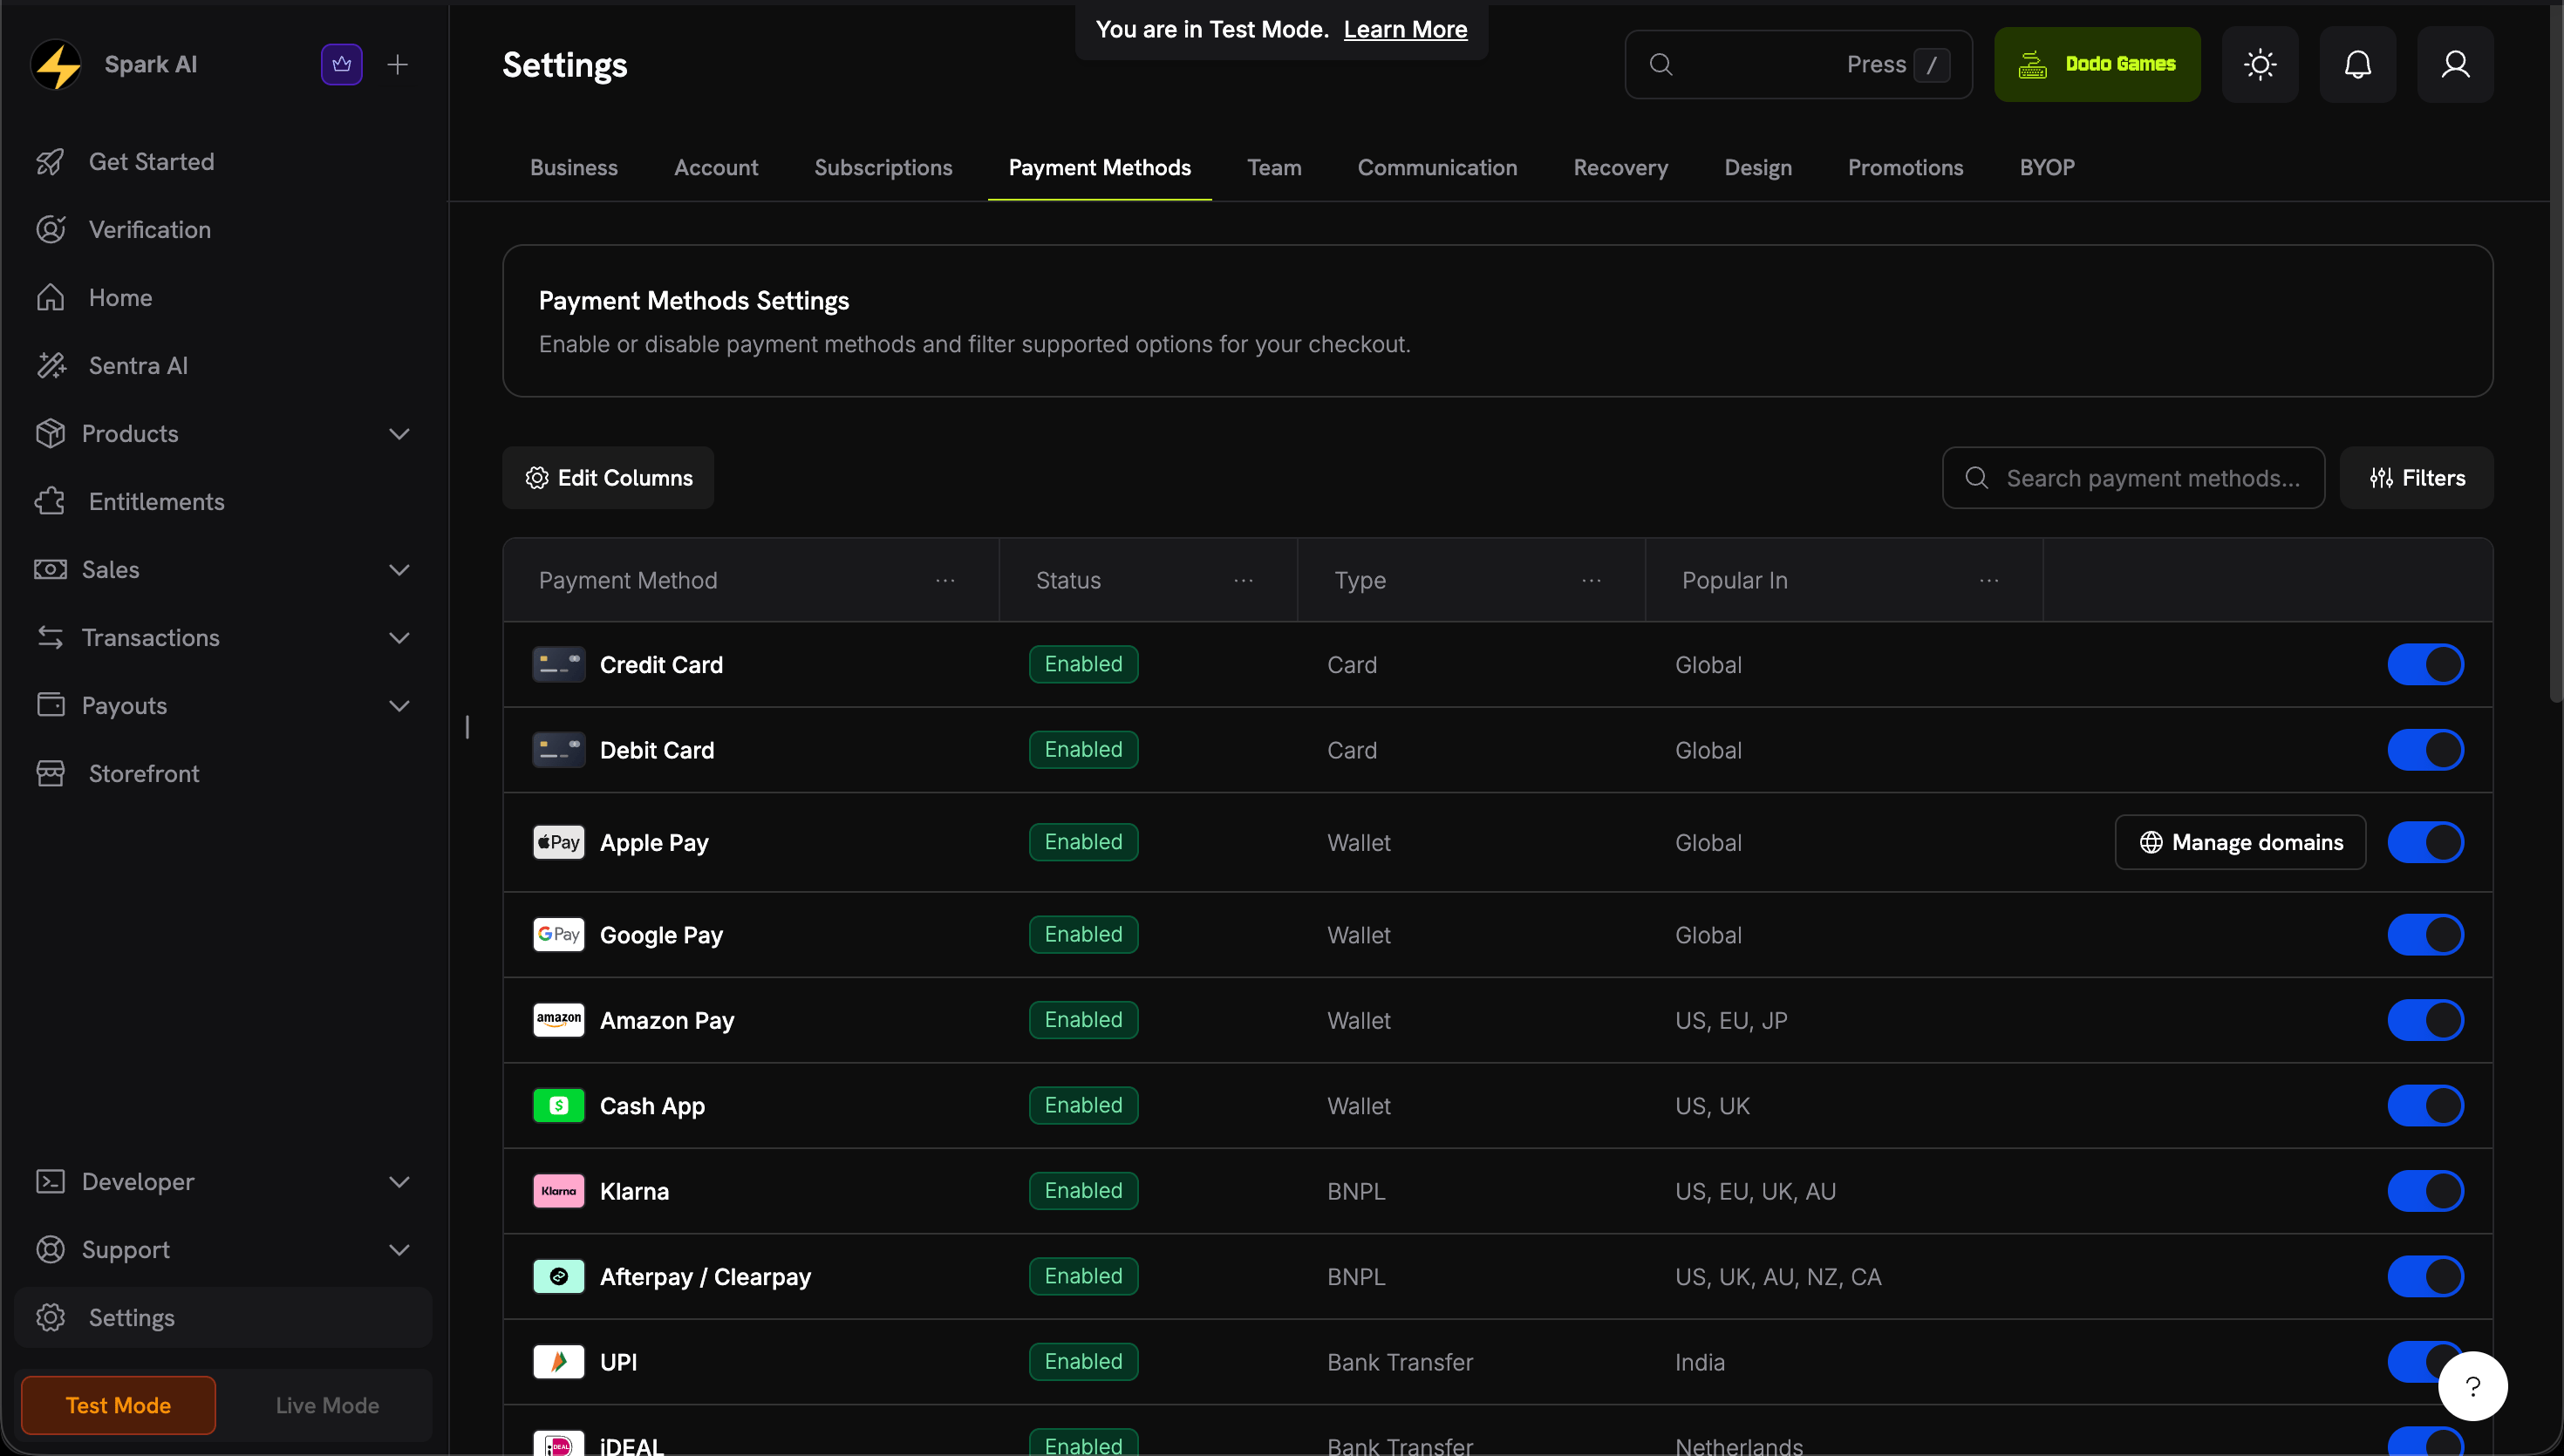
1
Open Wallet domains
Gehen Sie zu Einstellungen → Zahlungsmethoden und klicken Sie in der Zeile Apple Pay auf Domänen verwalten.
Open Wallet domains from the Apple Pay row
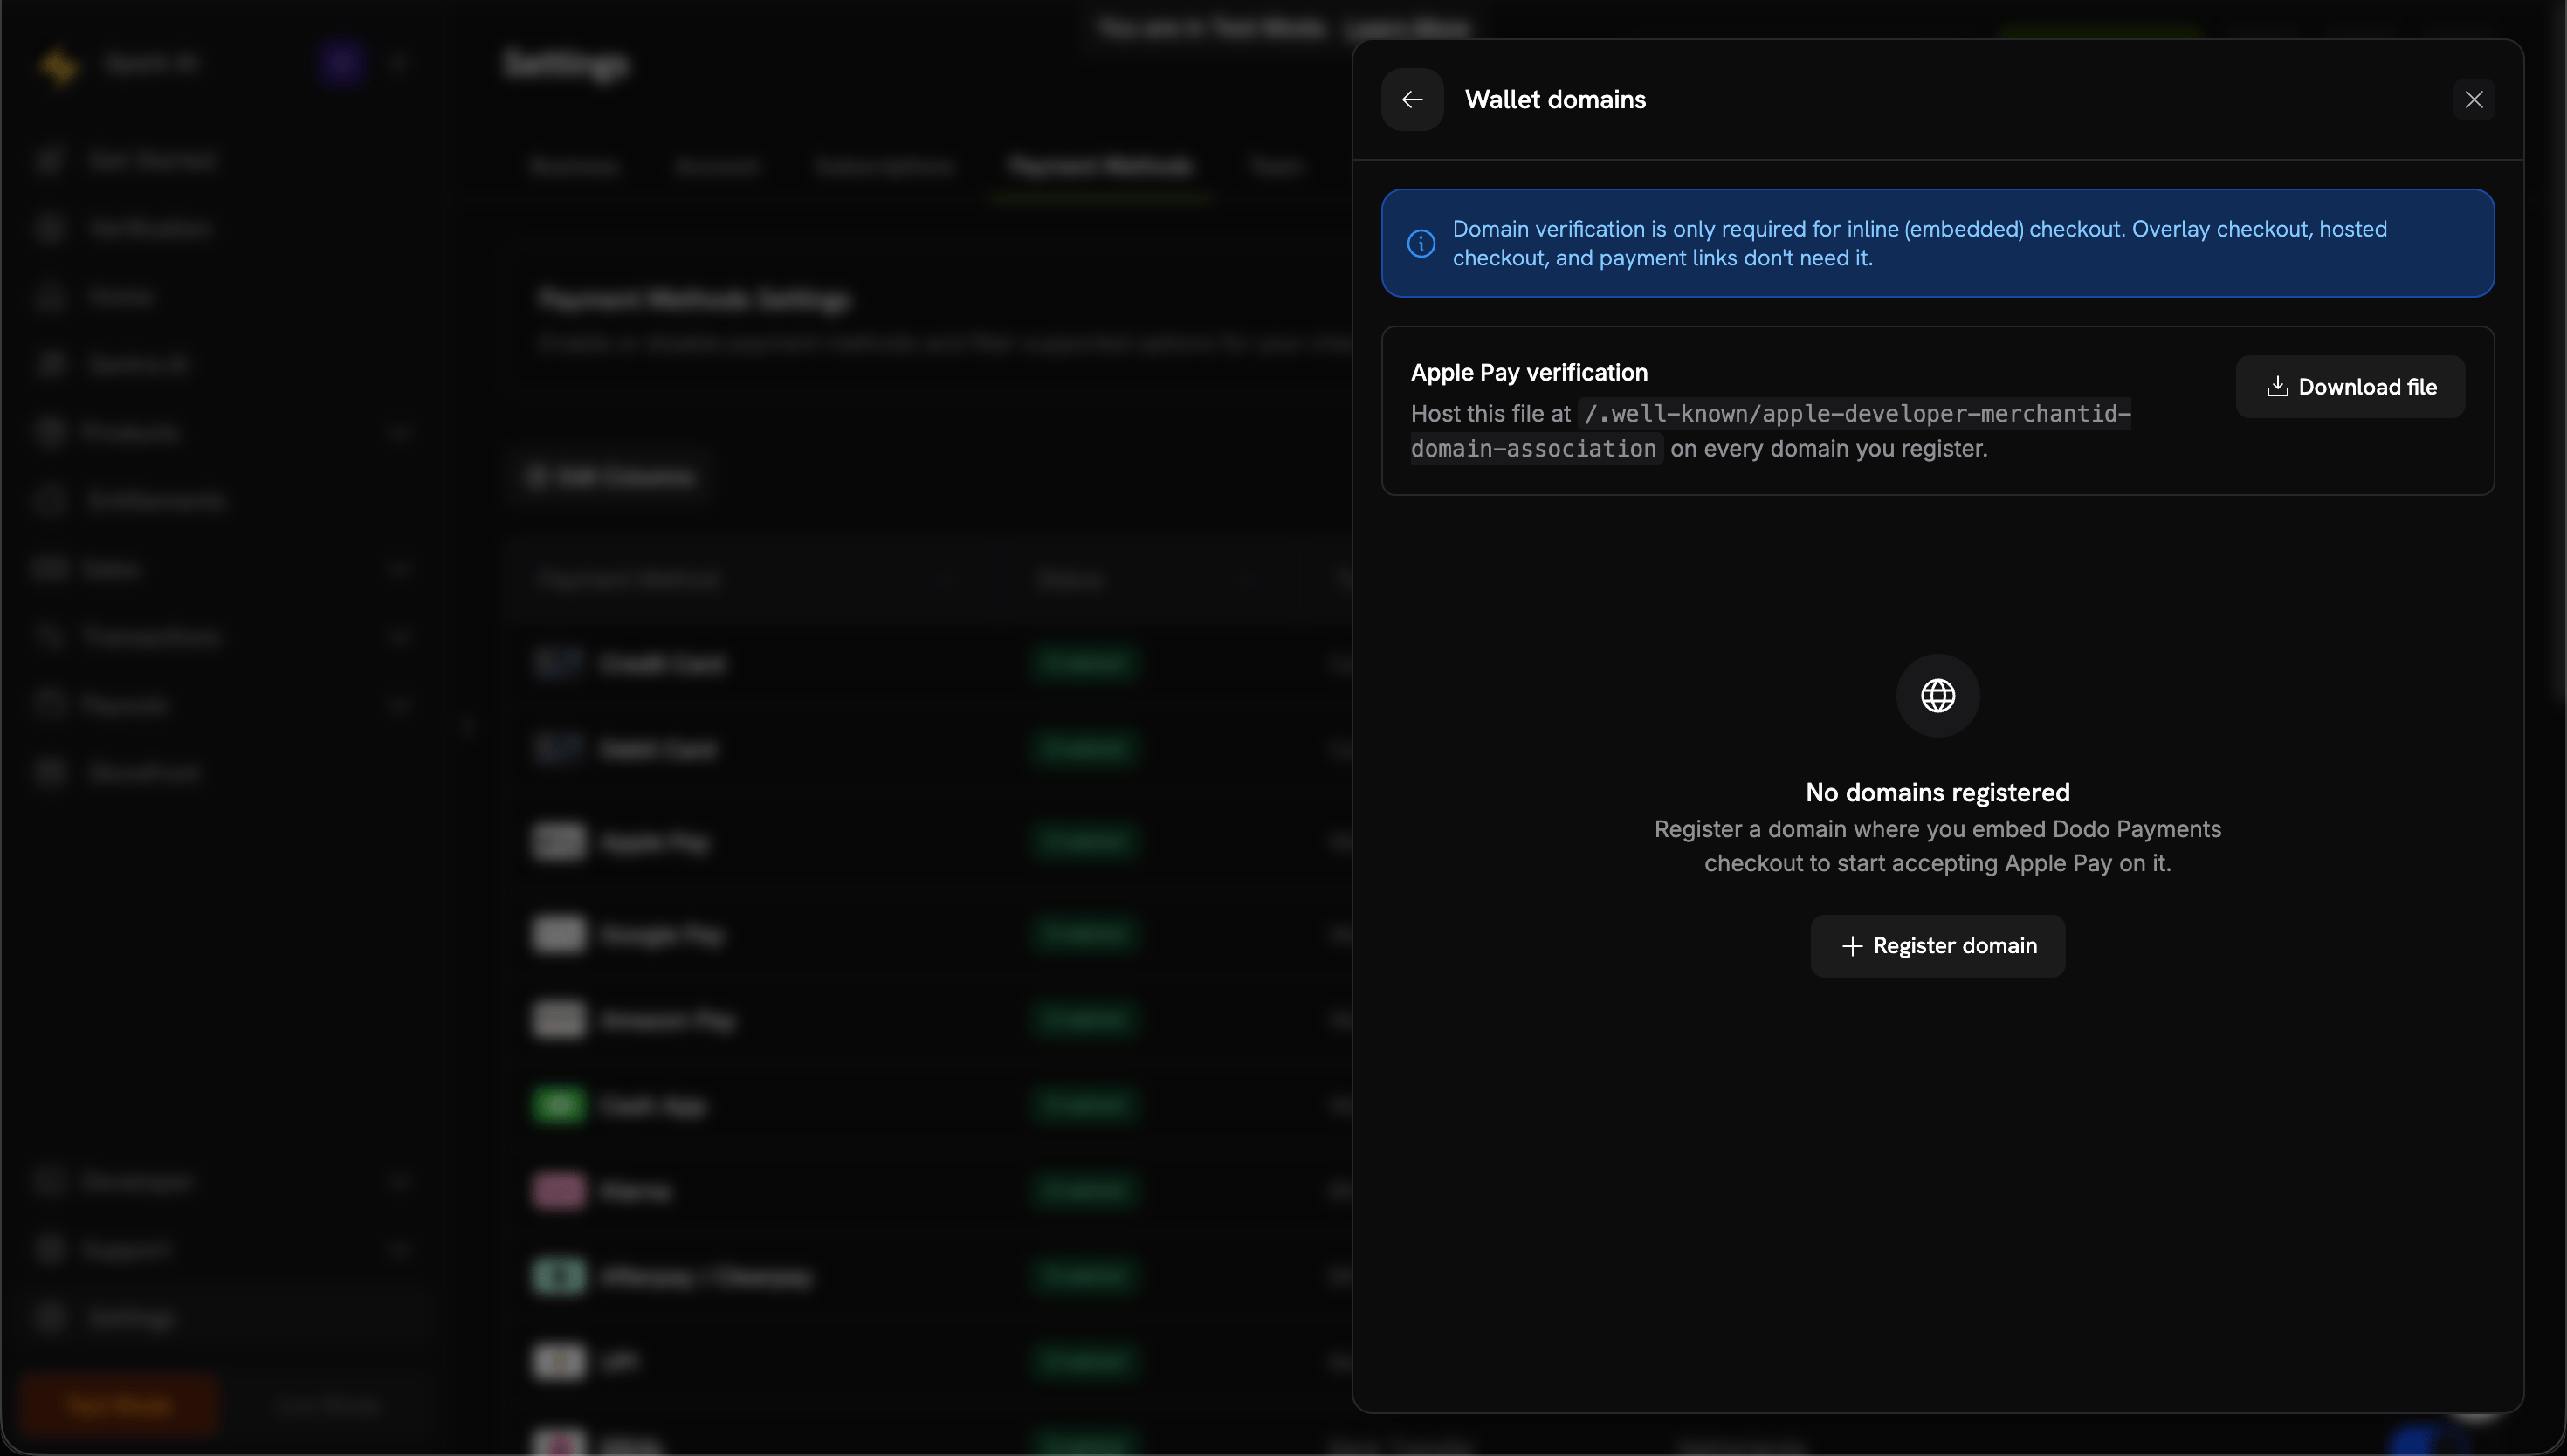
2
Download the domain association file
Laden Sie die Zuordnungsdatei aus dem Wallet-Domänen-Panel herunter.
Download the Apple Pay domain association file
3
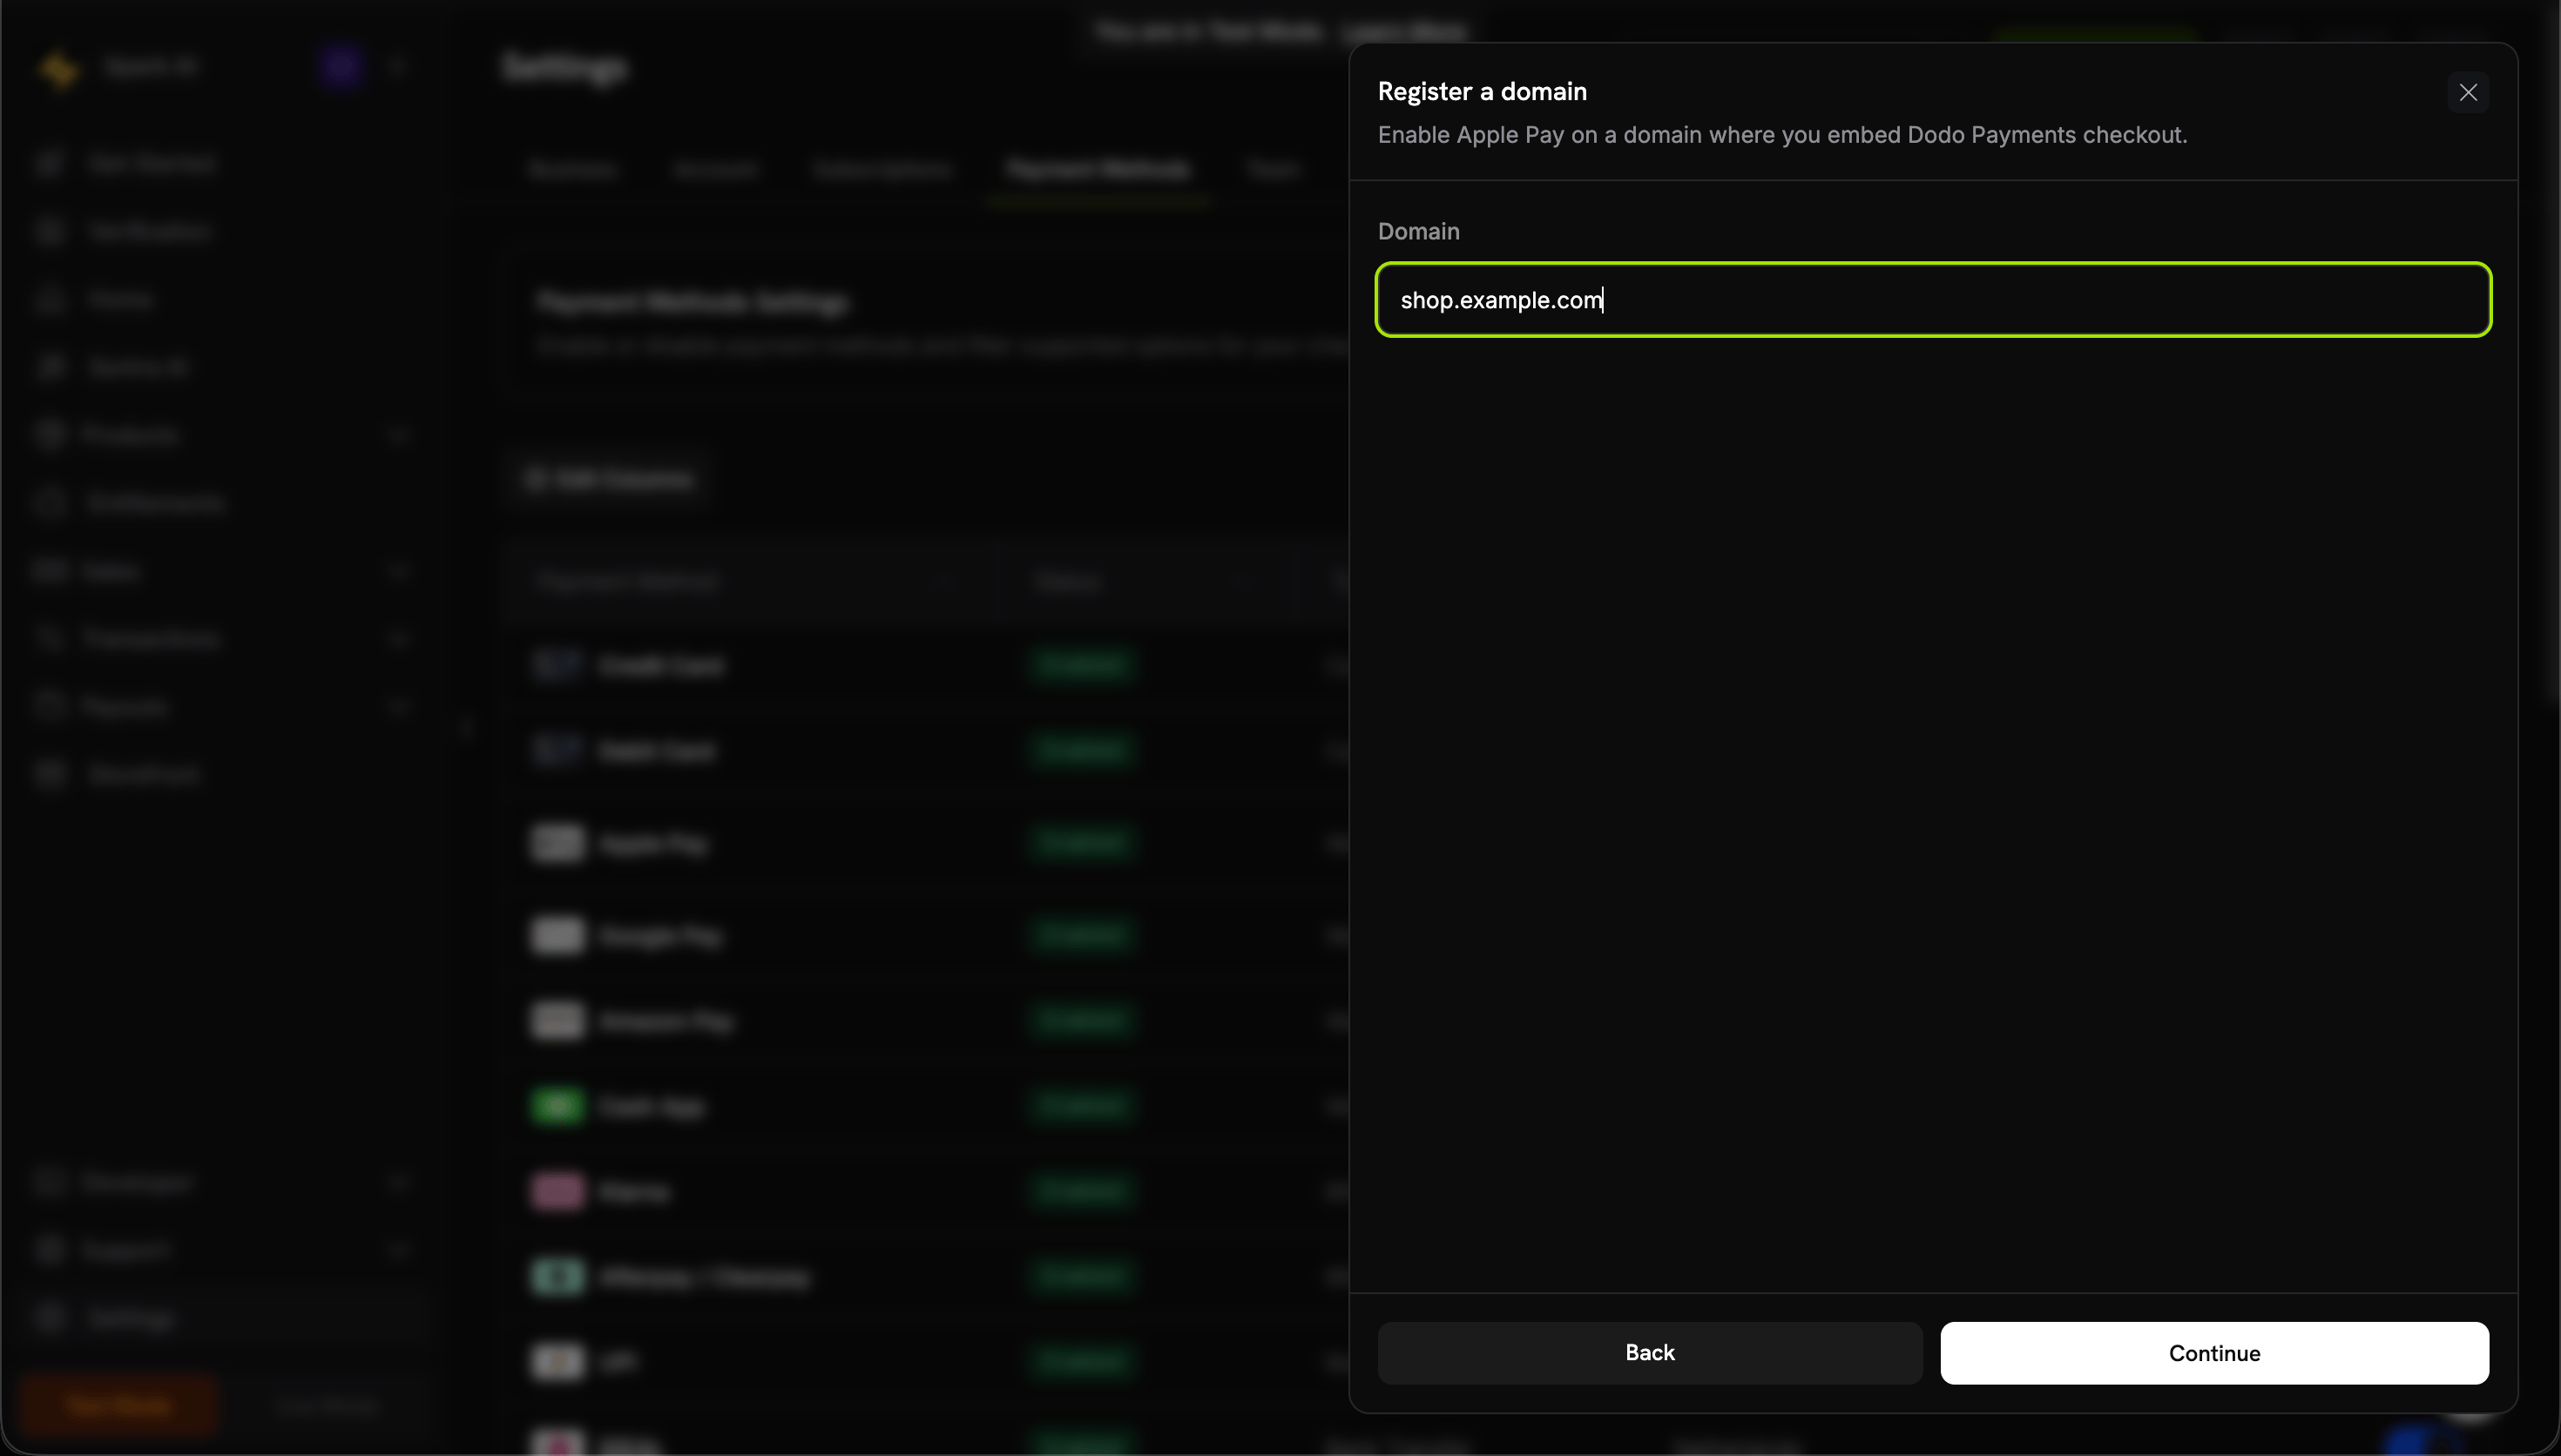
Register your domain
Klicken Sie auf Domäne registrieren und geben Sie die Domäne ein, in die Sie den Inline-Checkout einbetten (z.B. shop.example.com), dann Weiter.
Register the domain where you embed inline checkout
Es muss über HTTPS bereitgestellt werden, ohne Umleitungen erreichbar sein und mit Content-Type: application/octet-stream oder text/plain bedient werden.
5
Verify the domain
Klicken Sie auf Domäne verifizieren. Dodo Payments bestätigt, dass die Datei aktiv ist, und übermittelt Ihre Domäne an Apple.
Verify the hosted association file
6
Confirm it's active
Wenn der Status Aktiv anzeigt, ist Apple Pay für diese Domäne aktiviert. Verwenden Sie den Aktiviert-Schalter, um es pro Domäne ein- oder auszuschalten.
Verified domains show an Active status
7
Test the integration
Öffnen Sie den Checkout auf einem Apple-Gerät
Verifizieren Sie, dass die Apple Pay-Taste erscheint
Verwenden Sie Inline-Checkout, wenn Sie maximale Kontrolle über das Checkout-Erlebnis und nahtloses Branding wünschen. Verwenden Sie Overlay-Checkout für schnellere Integration mit minimalen Änderungen an Ihren bestehenden Seiten.