

Introduction
The AutoSend integration sends an email through AutoSend’s email API each time a Dodo Payments event occurs, from successful payments to failed payment attempts and refund confirmations. A transformation on the webhook endpoint turns each event into an AutoSend send request. To set it up, you need an AutoSend API key and a sender domain verified in AutoSend. You can find your API key in the AutoSend dashboard under Settings → API Keys.Getting Started
Follow these steps to connect AutoSend to Dodo Payments:1
Open Webhook Section
In the Dodo Payments dashboard, go to Developer → Webhooks and click Add endpoint.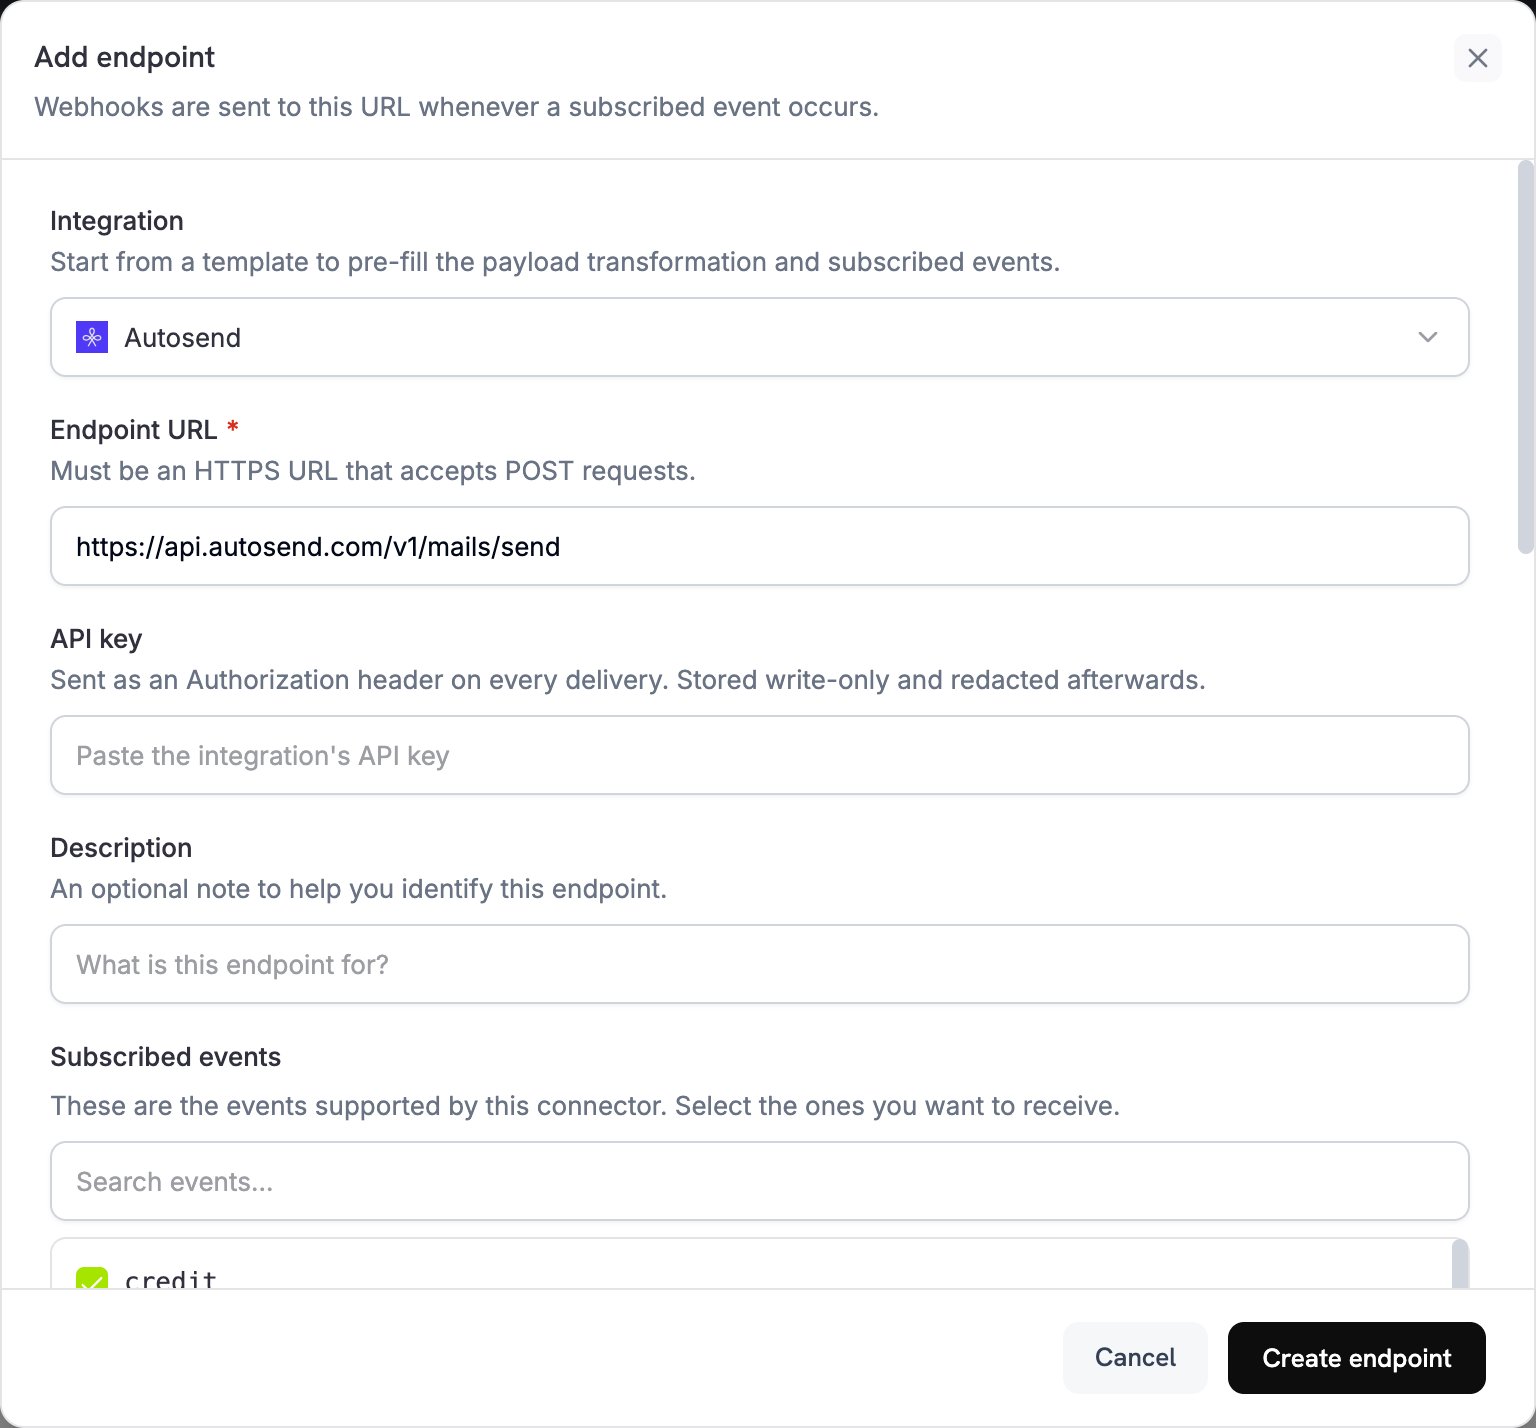
2
Select AutoSend Integration
In Integration, select Autosend.
3
Enter API Key
In API key, paste your AutoSend API key. Dodo Payments sends it in the
Authorization header of every delivery.Learn how to create and manage API keys
4
Select Events
In Subscribed events, select the events your transformation handles, such as
payment.succeeded, subscription.active, and payment.failed. An endpoint with no events selected receives every event type.5
Configure Transformation
Under Transformation code, write the JavaScript handler that builds the email for each event. Start from the code examples.
6
Test & Create
Under Test this code, click Simulate to run the handler against a sample payload and check the result. Then click Create endpoint.
7
Activation Complete
The endpoint sends an email through AutoSend each time a subscribed event occurs.
Code Examples
Each handler checks the event type inwebhook.eventType and reads the event data from webhook.payload.data. It sets webhook.url to AutoSend’s send endpoint and replaces webhook.payload with the email request. Dodo Payments amounts, such as total_amount, are in the smallest currency unit, for example cents for USD.
Payment Confirmation Email
Send a confirmation email when a payment succeeds (payment.succeeded):
payment_confirmation.js
Subscription Welcome Email
Send a welcome email when a subscription becomes active (subscription.active). The example passes product_id as planName. If your template shows the plan name, map the ID to a display name first.
subscription_welcome.js
Payment Failure Notification
Send a notification email when a payment fails (payment.failed). The payment’s error_message field holds the reason for the failure.
payment_failure.js
Best Practices
-
Verify your sender domain: AutoSend sends only from a verified domain, so verify the domain of your
fromaddress in AutoSend before you create the endpoint. A verified domain also improves deliverability and helps keep your emails out of spam folders. -
Use dynamic data for personalization: Pass customer-specific values, such as names, payment amounts, and subscription details, in the
dynamicDatafield, and reference them as variables in your AutoSend template. - Write clear subject lines: Write subject lines that state the email’s purpose. Avoid words that trigger spam filters, and keep subjects under 50 characters.
-
Test before production: Run each handler with Test this code, then send a test email before you go live. Check that the content renders correctly and that every
dynamicDatavalue is mapped.
API Reference
For every parameter and error code of the send endpoint, see the AutoSend API documentation.Troubleshooting
Emails Not Being Sent
Emails Not Being Sent
- Verify that the API key is correct and active.
- Check that the sender domain is verified in AutoSend.
- Check that the recipient email addresses are valid.
- Review your AutoSend sending limits and quotas.
- Verify that the transformation sets the send endpoint URL:
https://api.autosend.com/v1/mails/send. - Check that the payload includes every required parameter.
- Open the endpoint’s delivery attempts in the Logs tab of Developer → Webhooks to see AutoSend’s response code.
Transformation Errors
Transformation Errors
- Check that the payload matches the AutoSend API format.
- Check that all required fields are present:
to,from, and eithertemplateIdorhtml/text. WithouttemplateId,subjectis also required. - Check that email addresses are formatted correctly.
- If you use a template, verify that
templateIdis valid. - Check that the
dynamicDatakeys match your template variables.
Template Issues
Template Issues
- Verify that your template ID is correct and the template is active in AutoSend.
- Check that the
dynamicDatakeys match the variables in your template. - Check that every required template variable has a value.
- Test the template on its own in the AutoSend dashboard.