

Introduction
The SendGrid integration sends a transactional email through SendGrid’s Mail Send API when a Dodo Payments event occurs. Each email uses one of your SendGrid dynamic templates, filled with data from the event, so you can confirm payments, welcome new subscribers, and follow up on failed payments.This integration requires a SendGrid API key with the Mail Send permission, a verified sender in SendGrid, and a dynamic template for each email you send. You also need access to Developer → Webhooks in the Dodo Payments dashboard.
Getting Started
1
Open the Webhook Section
In the Dodo Payments dashboard, go to Developer → Webhooks and click Add endpoint.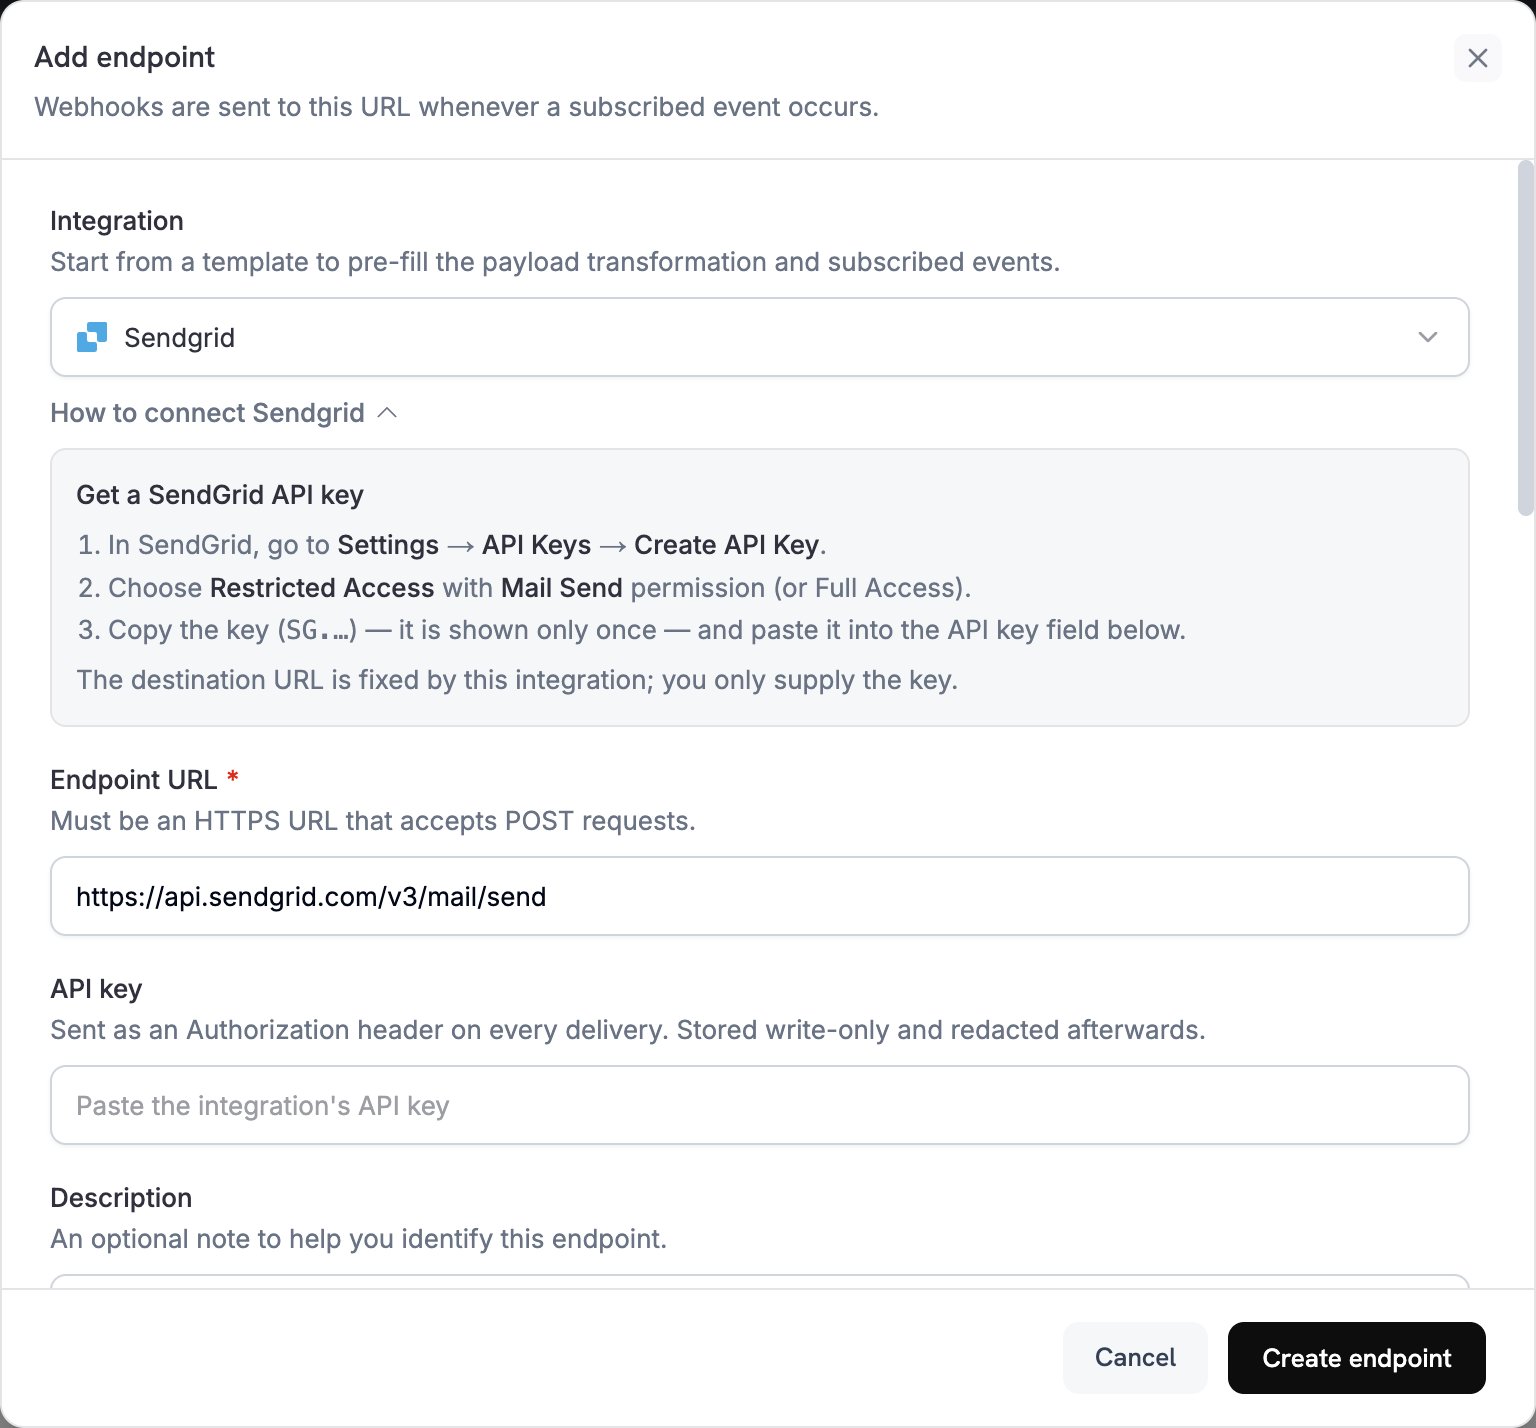
2
Select SendGrid
In Integration, select SendGrid. The dashboard fills in the Endpoint URL and the transformation code for SendGrid, and the How to connect SendGrid panel shows the setup steps.
3
Enter API Key
In SendGrid, go to Settings → API Keys and click Create API Key. Choose Restricted Access with the Mail Send permission, or Full Access. SendGrid shows the key, which starts with
SG., only once. Paste it into API key. Dodo Payments sends it as a bearer token in the Authorization header of every request to SendGrid.4
Select Events
In Subscribed events, select only the events your transformation handles. An event that the transformation leaves unchanged reaches SendGrid in the Dodo Payments format, and SendGrid rejects it.
5
Configure Transformation
Under Transformation code, edit the handler to format emails for SendGrid’s Mail Send API. Start from the examples, and replace each
template_id with the ID of your own dynamic template, which starts with d-.6
Test & Create
Under Test this code, select an event type and click Simulate to preview the request to SendGrid. Then click Create endpoint.
7
Done
Dodo Payments now sends an email through SendGrid for each subscribed event. To see each delivery and SendGrid’s response, open the Logs tab in Developer → Webhooks.
Transformation Code Examples
Each handler setswebhook.url to the Mail Send endpoint and passes event data to a dynamic template through dynamic_template_data. Dodo Payments amounts are in the smallest currency unit, so the examples divide by 100. For zero-decimal currencies such as JPY and KRW, use the amount as is.
Payment Confirmation Email
Send a receipt when a payment succeeds (payment.succeeded):
payment_confirmation.js
Subscription Welcome Email
Welcome a customer when a subscription becomes active (subscription.active):
subscription_welcome.js
Payment Failure Notification
Ask the customer to retry when a payment fails (payment.failed):
payment_failure.js
Tips
- Use SendGrid dynamic templates to personalize content.
- Pass the payment data your template needs in
dynamic_template_data. - Set a
fromaddress that matches a verified sender, and a sendername. - Reuse template IDs so emails of the same type keep the same format.
- Include an unsubscribe link in any email that contains marketing content.
- To skip an event in code, set
webhook.cancel = truebefore you return the webhook. The logs record a skipped delivery as successful.
Troubleshooting
Emails Not Being Sent
Emails Not Being Sent
- Check that the API key has the Mail Send permission. To replace it, edit the endpoint and paste a new key in API key.
- Check that each
template_idbelongs to an active dynamic template. - Check that the recipient email addresses are valid.
- Check SendGrid’s sending limits and quotas for your plan.
- Open the Logs tab in Developer → Webhooks and read SendGrid’s response to the failed delivery.
Transformation Errors
Transformation Errors
- Check that the payload matches SendGrid’s Mail Send format.
- Check that all required fields are present:
personalizationswith at least onetoaddress, andfrom. - Check that the keys in
dynamic_template_datamatch the variables in your template, such as{{customer_name}}. - Check that each
fromaddress is verified in SendGrid.