The Dodo Payments WooCommerce plugin provides a seamless integration with your store, enabling you to accept payments through multiple methods including UPI, cards, net banking, and digital wallets. This comprehensive guide will walk you through the installation and configuration process.
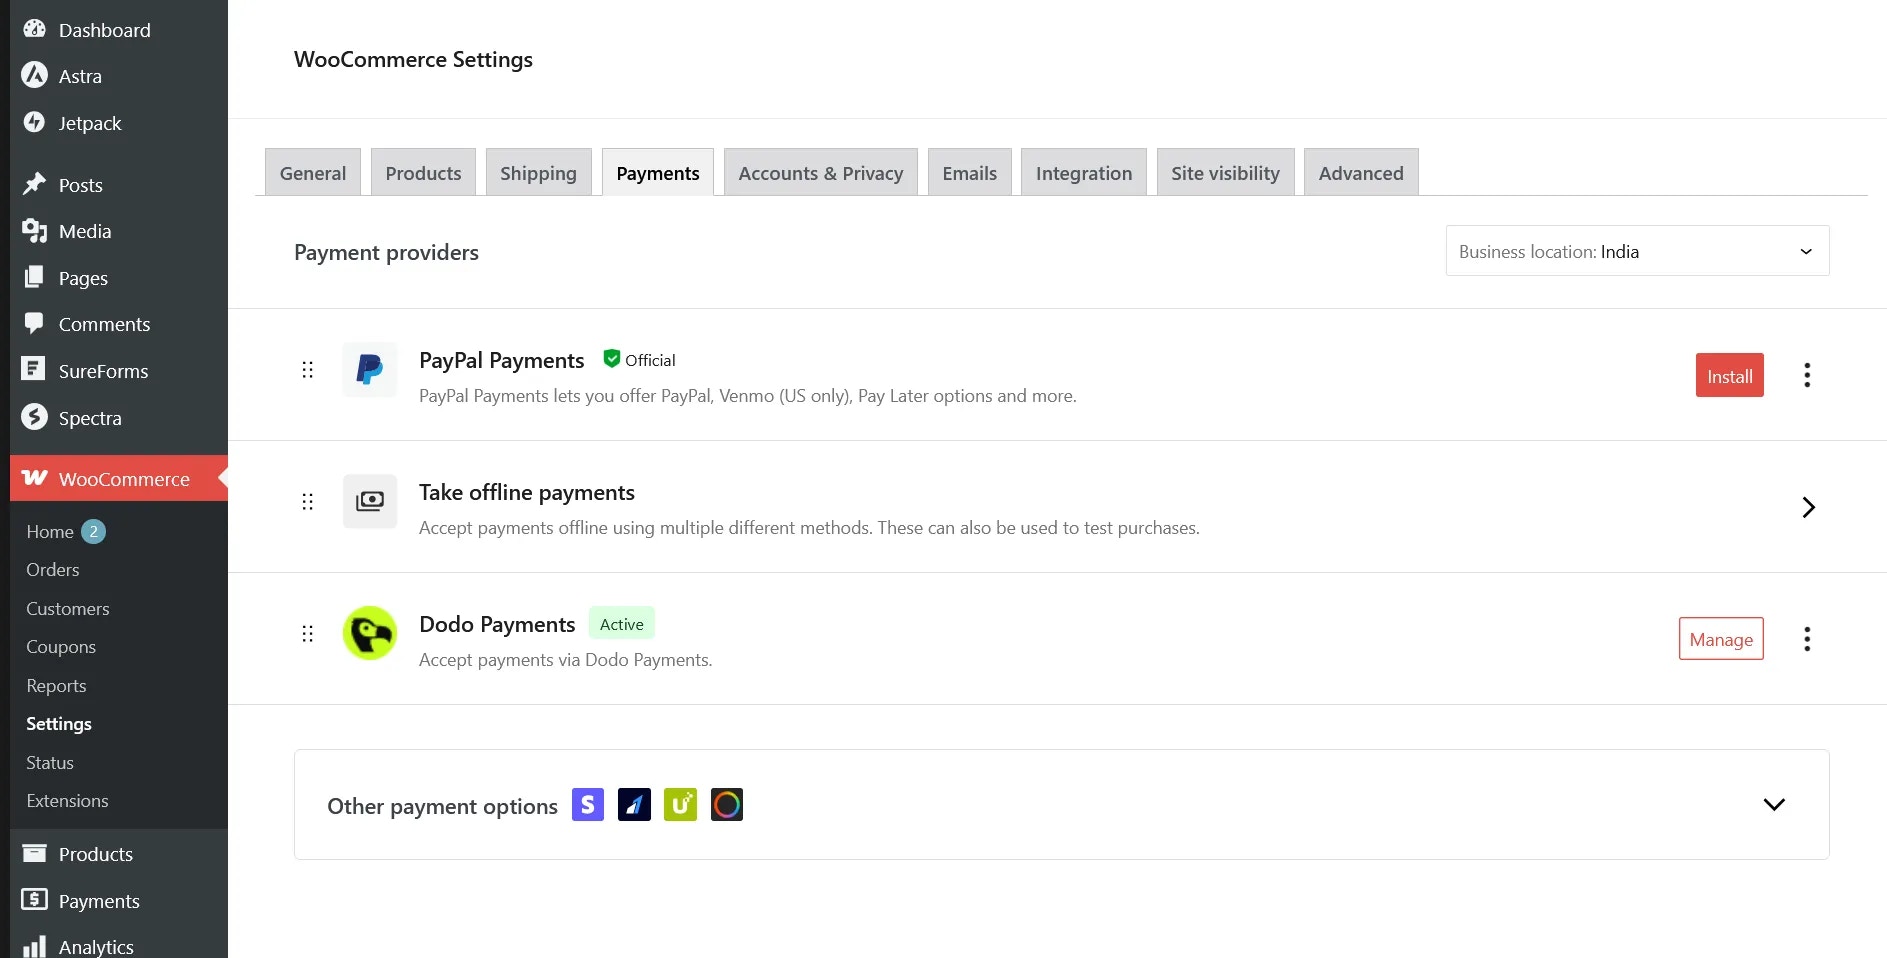
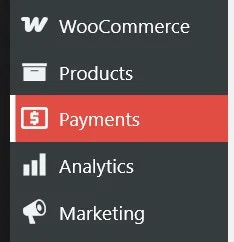
Navigate to WooCommerce → Settings → Payments or click the Payments button in the left sidebar below the WooCommerce menu item
Enable the Dodo Payments payment provider if not already enabled, then click Manage to configure the plugin
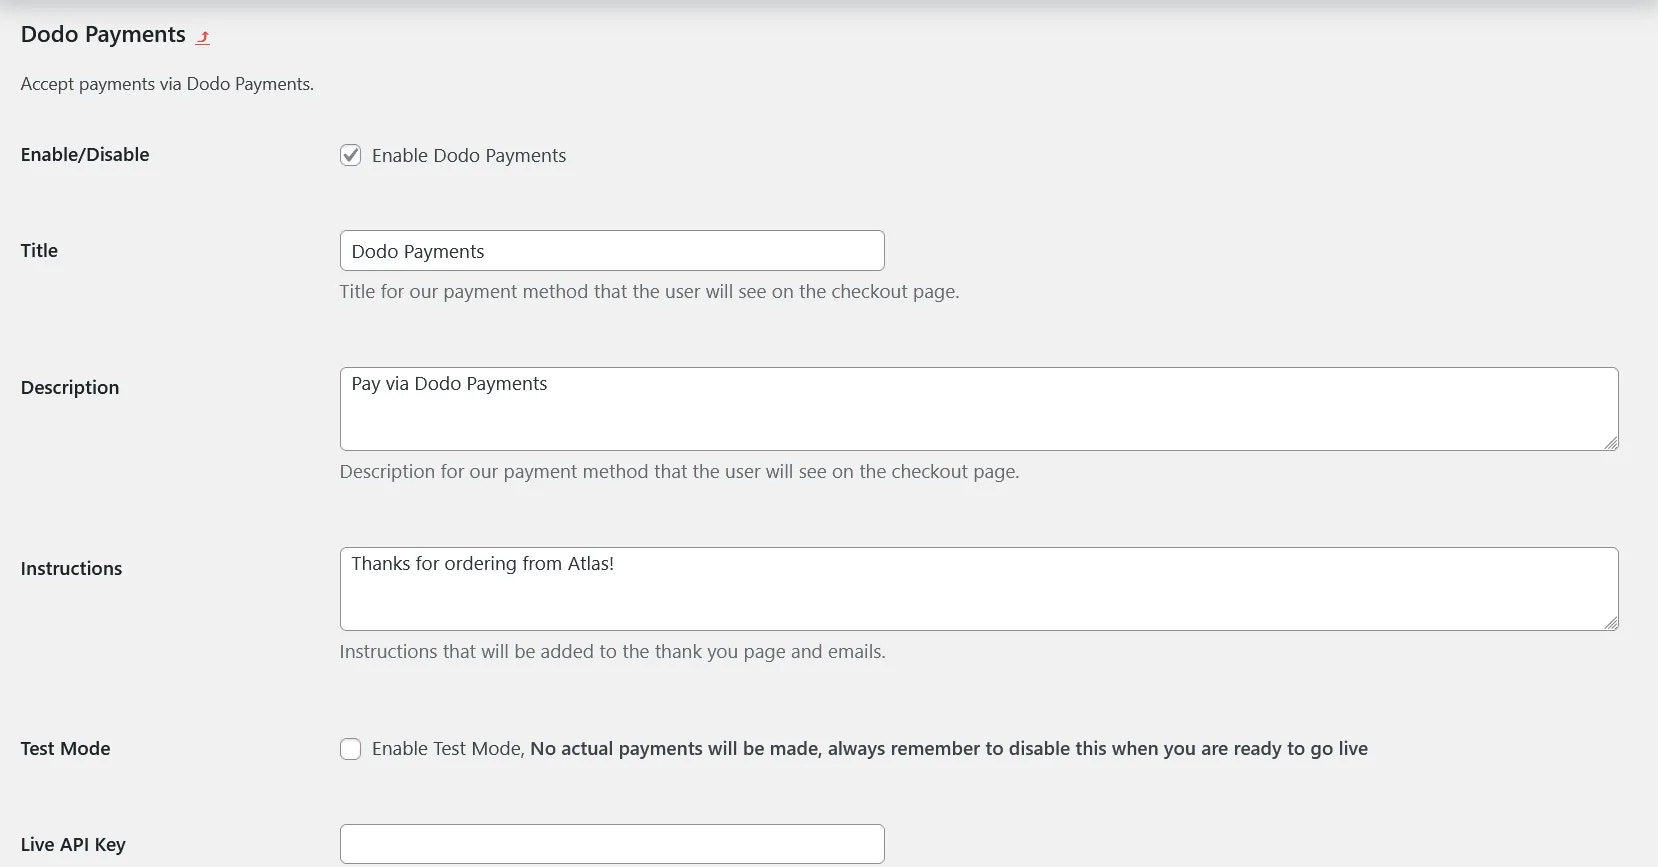
You’ll see various configuration options, each with helpful explanatory text. Begin by setting up your Live API Key
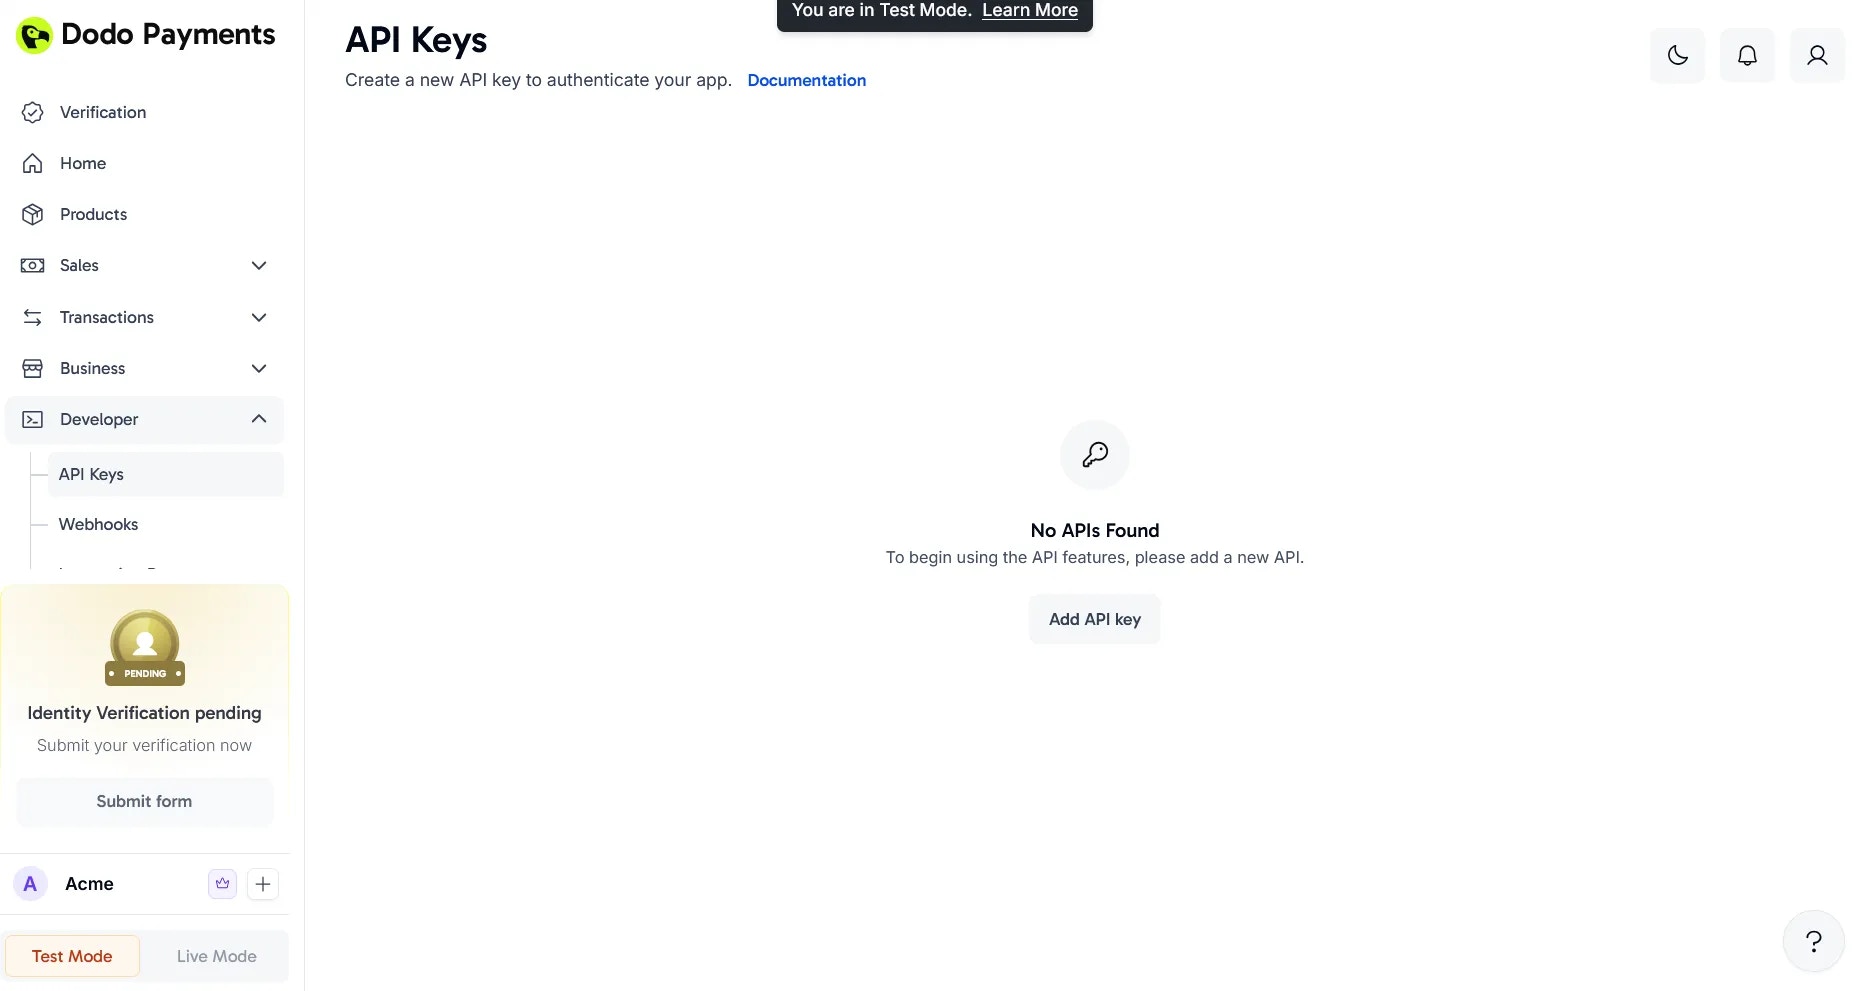
Log in to your Dodo Payments dashboard in Live Mode, then navigate to Dodo Payments (Live Mode) > Developer > API Keys or visit this direct link and click Add API Key
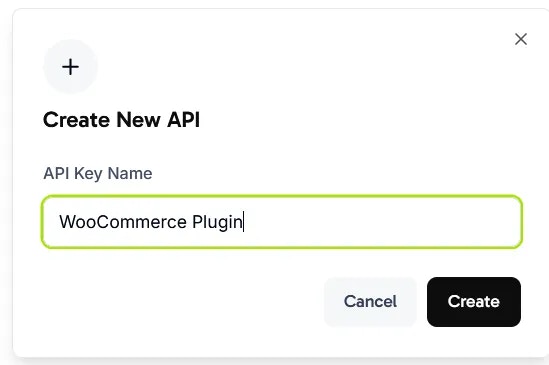
Give your API Key a descriptive name and click Create
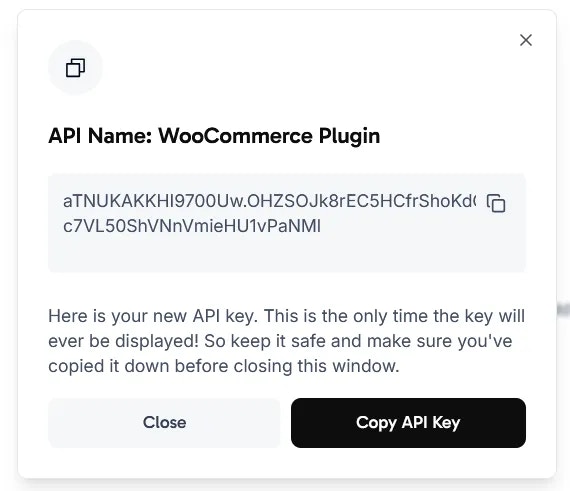
Copy the generated API Key and paste it into the Live API Key field in your WooCommerce plugin settings
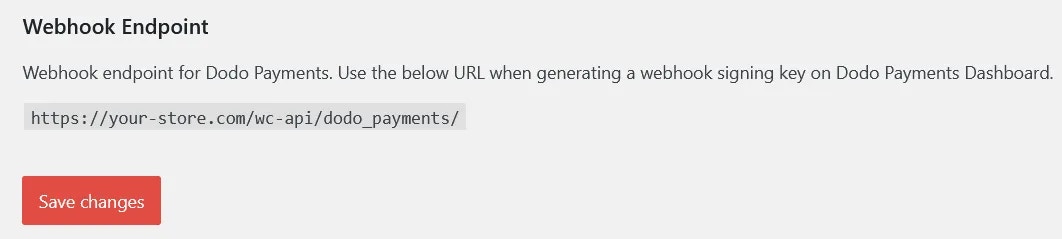
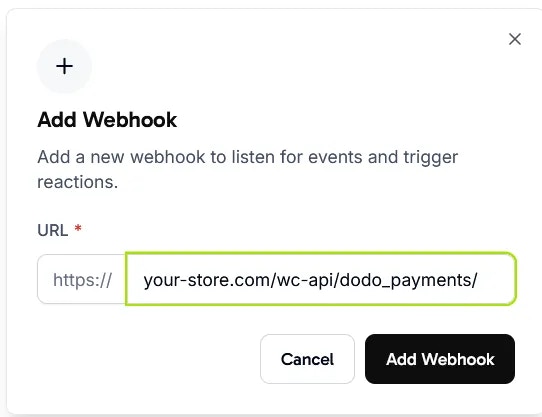
Next, set up the Webhook Signing Key to enable payment status synchronization between Dodo Payments and WooCommerce
Scroll to the bottom of the plugin settings page and copy the webhook URL displayed there
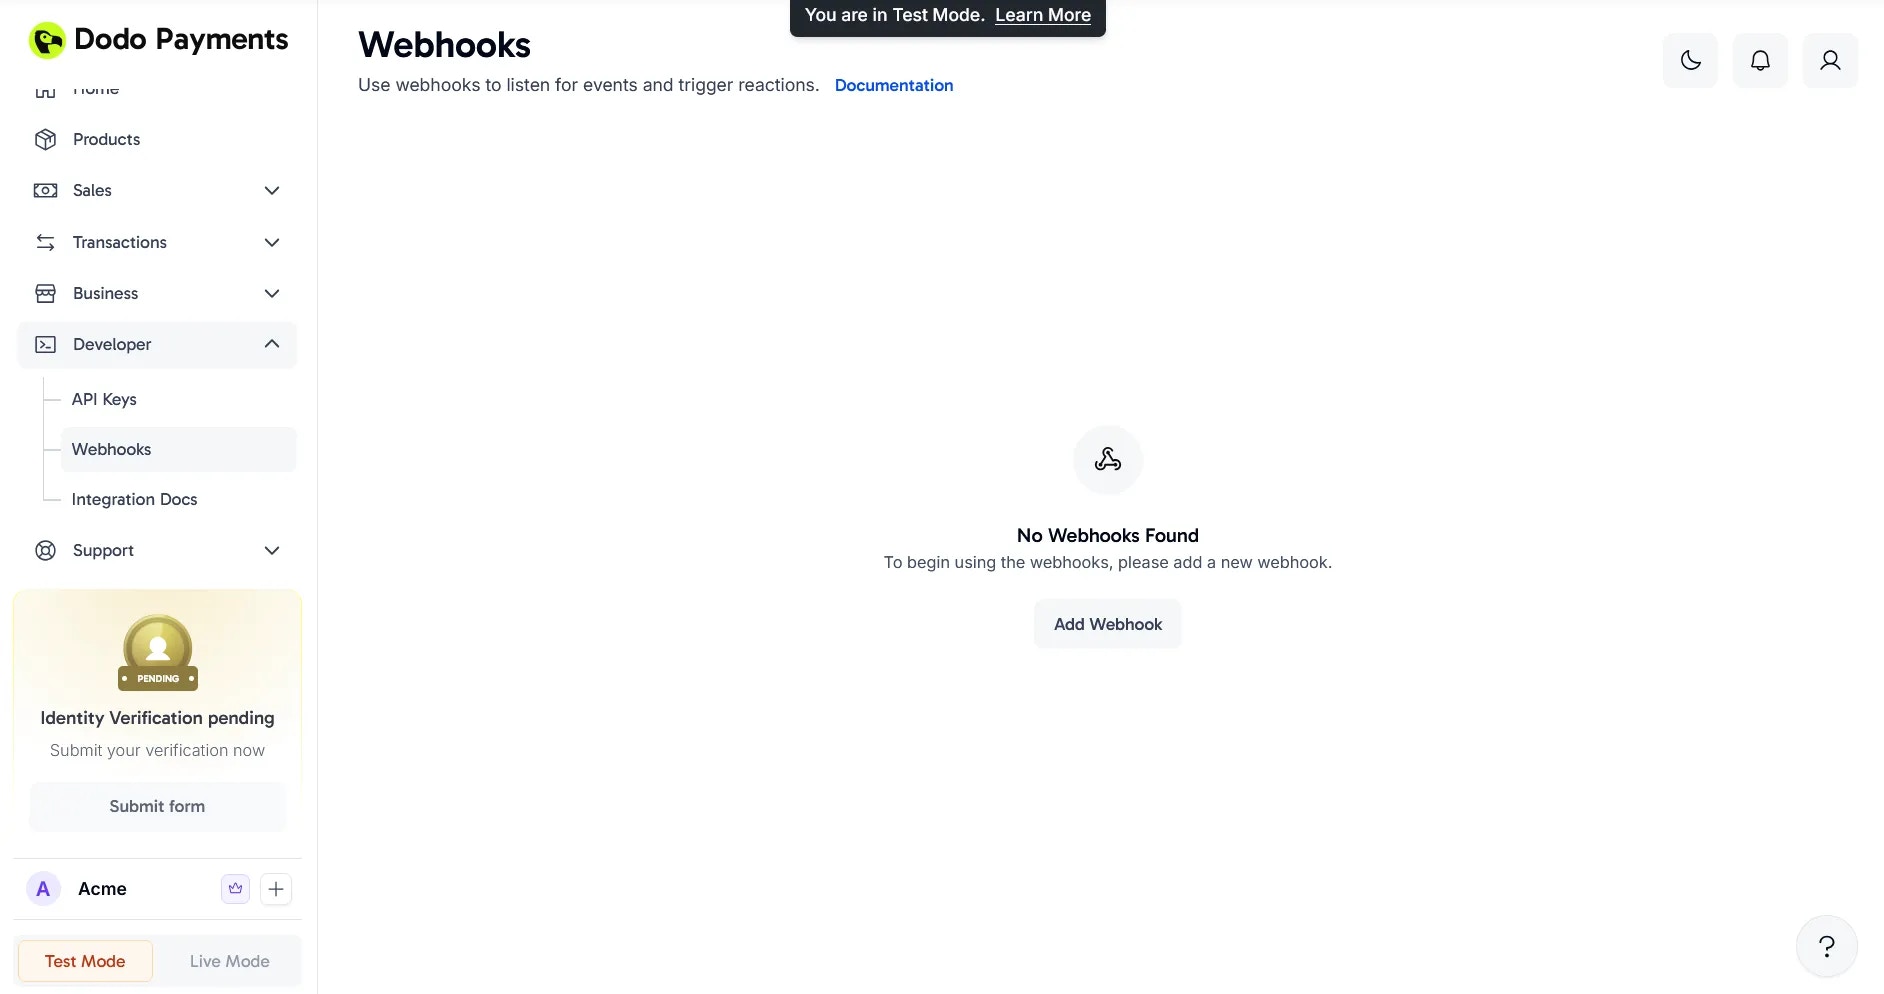
Return to your Dodo Payments dashboard and navigate to Dodo Payments (Live Mode) > Developer > Webhooks and click Add Webhook
Paste the URL you copied in step 8 into the dialog and click Add Webhook
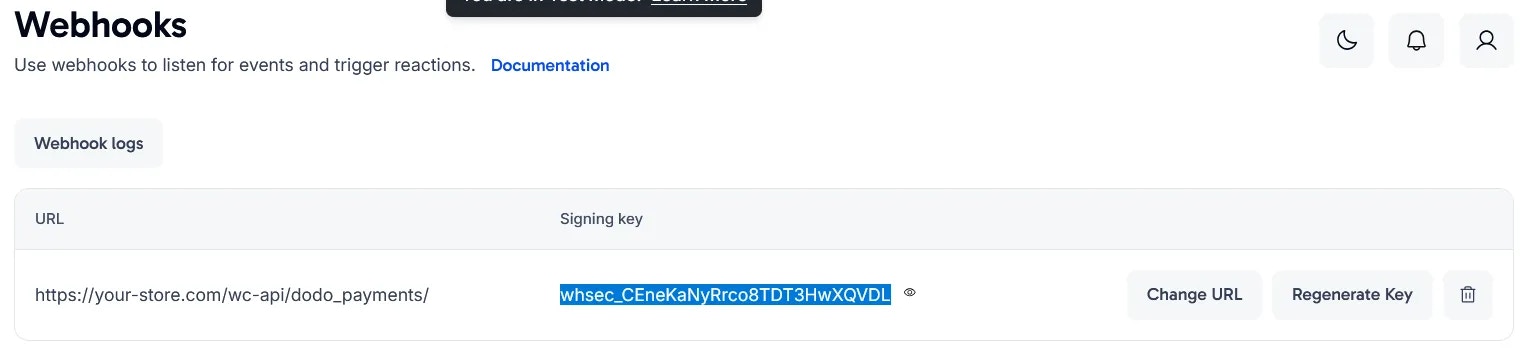
After creating the webhook, click the eye icon next to the redacted Signing Key to reveal and copy it
Paste the Signing Key into the Live Webhook Signing Key field in your plugin settings and save the changes
Review the remaining settings such as Global Tax Category and All Prices are Tax Inclusive, as these options determine how products sync from WooCommerce to Dodo Payments. Note that Test API Key and Test Webhook Signing Key are only needed if you plan to use Test Mode