

परिचय
Zapier के ज़रिए Dodo Payments को हज़ारों ऐप्स से कनेक्ट करें। प्रत्येक Dodo Payments इवेंट एक ऐसा Zap शुरू कर सकता है जो ईमेल भेजता है, spreadsheet में row जोड़ता है, task बनाता है या CRM record अपडेट करता है।Zapier connector प्रत्येक इवेंट को उस Zap के webhook URL पर भेजता है जो Webhooks by Zapier से शुरू होता है। Webhooks by Zapier, Zapier Free plan पर उपलब्ध नहीं है, इसलिए आपको paid Zapier plan की आवश्यकता है। आपको Dodo Payments dashboard में Developer → Webhooks का access भी चाहिए।
प्रारंभ करना
1
Open the Webhook Section
Dodo Payments डैशबोर्ड में, डेवलपर → वेबहुक पर जाएँ और एंडपॉइंट जोड़ें पर क्लिक करें।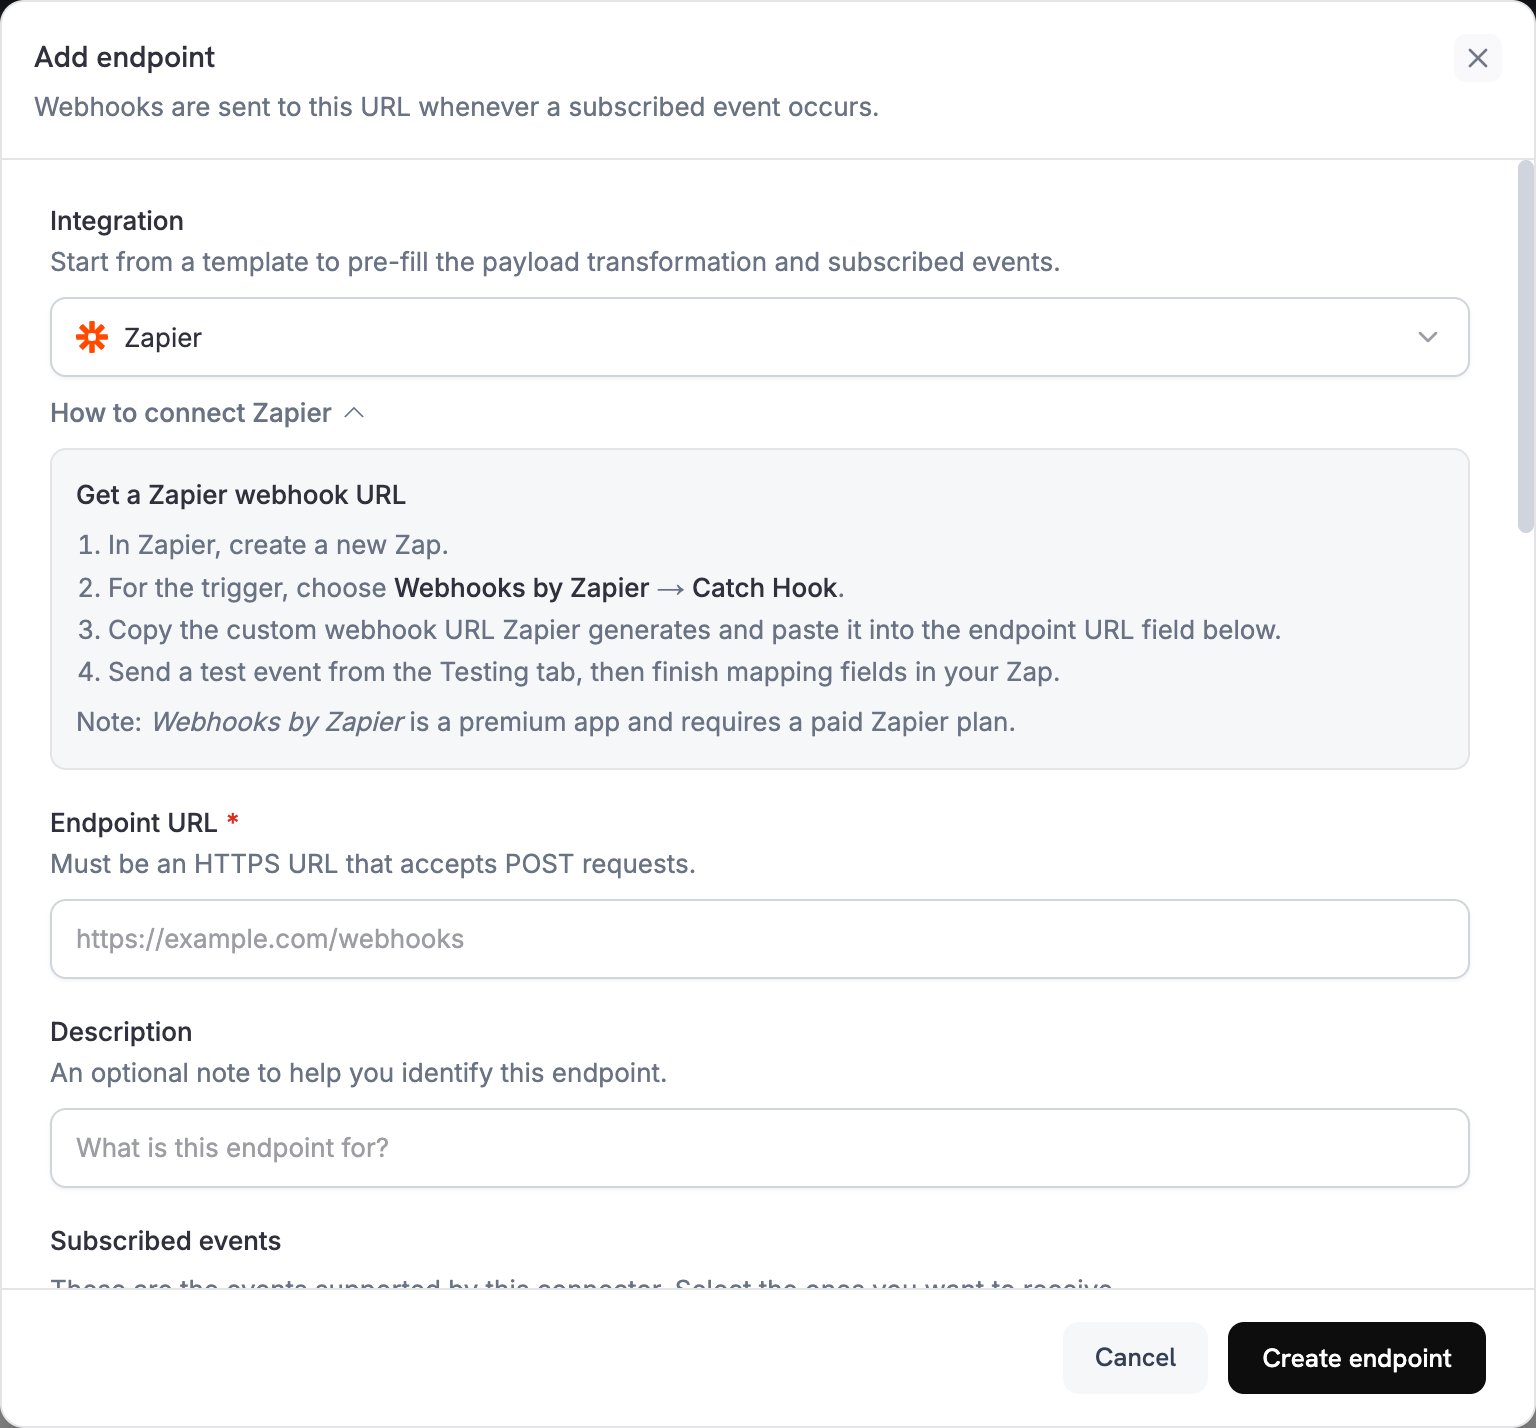
2
Select Zapier
Integration में Zapier चुनें। Dashboard Zapier transformation code लोड करता है और How to connect Zapier panel में setup steps दिखाता है।
3
Create Zap in Zapier
Zapier में एक Zap बनाएँ। Trigger के लिए Webhooks by Zapier चुनें, Catch Hook event चुनें और Continue पर क्लिक करें। Trigger के Test tab में webhook URL कॉपी करें।
4
Paste Webhook URL
Zapier webhook URL को Endpoint URL में paste करें। Zapier connector में API key field नहीं है।
5
Select Events
Subscribed events में वे events सूचीबद्ध होते हैं जिन्हें Zapier connector support करता है। केवल वही events रखें जिन्हें आपका transformation handle करता है। Zapier किसी भी JSON को स्वीकार करता है, इसलिए transformation द्वारा बिना बदलाव छोड़ा गया event भी आपका Zap शुरू करता है और उसमें मूल Dodo Payments payload होता है।
6
Configure Transformation
Transformation code के अंतर्गत handler को edit करके वे fields भेजें जिनका आपका Zap उपयोग करता है। उदाहरणों से शुरुआत करें।
7
Test & Create
Test this code के अंतर्गत एक event type चुनें और payload का preview देखने के लिए Simulate पर क्लिक करें। इसके बाद Create endpoint पर क्लिक करें।
8
Done
Subscribed events अब आपके Zap तक पहुँचते हैं। Zapier में sample fields लोड करने के लिए endpoint का Testing tab खोलें, एक event type चुनें और Send example पर क्लिक करें। Zapier में Test trigger पर क्लिक करें, अपने action steps में fields map करें और Zap publish करें।
Transformation Code के उदाहरण
प्रत्येक handlerwebhook.payload को एक flat object से replace करता है और आपके Zapier webhook URL webhook.url को बनाए रखता है। Dodo Payments की amounts currency की सबसे छोटी unit में होती हैं, इसलिए उदाहरण उन्हें 100 से divide करके result को string के रूप में भेजते हैं, जैसे "25.00"। JPY और KRW जैसी zero-decimal currencies के लिए amount को ऐसे ही उपयोग करें।
Basic Webhook Payload
सफल payment का विवरण भेजें:basic_webhook.js
Subscription Event Handler
जब कोई subscription active हो जाए या cancel हो जाए, तब एकsubscription_started या subscription_cancelled event भेजें:
subscription_webhook.js
Dispute Alert Handler
हर dispute event भेजें और dispute शुरू होने परurgent को true पर सेट करें:
dispute_webhook.js
लोकप्रिय Zapier Use Cases
Email Notifications
Email Notifications
- payment की पुष्टि करने के लिए Gmail या Outlook emails भेजें
- Mailchimp या ConvertKit में customers को email sequences में जोड़ें
- Slack या Discord notifications भेजें
- Google Sheets में rows जोड़ें
CRM Updates
CRM Updates
- HubSpot या Salesforce में contacts जोड़ें
- Pipedrive या Close में deals बनाएँ
- Airtable में customer records अपडेट करें
- Monday.com में activities log करें
Task Management
Task Management
- Asana या Trello में tasks बनाएँ
- Notion में to-do items जोड़ें
- calendar events बनाएँ
- Twilio के ज़रिए SMS messages भेजें
सुझाव
- Payload को flat रखें, ताकि Zapier में map करते समय प्रत्येक field आसानी से मिल सके।
- सभी events में समान field names का उपयोग करें, ताकि एक Zap कई event types को handle कर सके।
timestampशामिल करें, ताकि आपका Zap यह record कर सके कि प्रत्येक event कब हुआ।- Transformation बदलने के बाद नया example भेजें और Zapier में trigger को फिर से test करें, ताकि उसमें नए fields लोड हो जाएँ।
- बाद के steps को केवल कुछ events के लिए चलाने हेतु, एक Filter by Zapier step जोड़ें जो
event_typeकी जाँच करे। - किसी event को code में skip करने के लिए webhook return करने से पहले
webhook.cancel = trueसेट करें। Logs में skipped delivery को successful के रूप में record किया जाता है।
समस्या निवारण
Zap Not Triggering
Zap Not Triggering
- जाँचें कि Endpoint URL, trigger के Test tab में मौजूद webhook URL से match करता है। Zap को किसी अन्य Zapier user को transfer करने पर URL बदल जाता है।
- जाँचें कि Zap publish और turned on है। बंद या deleted Zap के लिए Zapier
404लौटाता है, लेकिन बदलाव के बाद URL कई घंटों तक200लौटाता रह सकता है। - प्रत्येक delivery पर Zapier की response देखने के लिए Developer → Webhooks में Logs tab खोलें।
- जाँचें कि event Subscribed events में selected है। Selection बदलने के लिए endpoint खोलें और Edit पर क्लिक करें।
Data Not Mapping Correctly
Data Not Mapping Correctly
- जाँचें कि आपके action steps में field names, transformation द्वारा भेजी गई keys से match करते हैं।
- जाँचें कि प्रत्येक value का type वही है जिसकी आपका action अपेक्षा करता है। उदाहरण amounts को strings के रूप में भेजते हैं।
- जाँचें कि handler
webhookreturn करता है औरwebhook.payloadएक JSON object है। यदि payload एक array है, तो Zapier प्रत्येक item के लिए Zap को एक बार चलाता है। - नवीनतम event के fields देखने के लिए Zapier में Test trigger का उपयोग करें।