

परिचय
Dub शॉर्ट लिंक, रूपांतरण ट्रैकिंग और affiliate programs के लिए एक लिंक attribution platform है। इस integration के साथ, जब भी कोई ग्राहक Dodo Payments के माध्यम से भुगतान करता है, Dub एक sale conversion event रिकॉर्ड करता है, ताकि आप अपने marketing campaigns और referral programs पर मिलने वाले return को माप सकें। Dub बिक्री तब रिकॉर्ड करता है जब कोई ग्राहक:- एक बार का भुगतान पूरा करता है
- किसी paid plan की सदस्यता लेता है
- recurring subscription payment करता है
इस integration के लिए आपके links पर conversion tracking enabled वाला Dub account आवश्यक है। Dub की conversion tracking के लिए Business plan या उससे ऊपर का plan आवश्यक है।
यह कैसे काम करता है
जब कोई visitor आपके Dub short links में से किसी पर click करता है, तो Dubdub_id cookie में एक unique click ID store करता है। अपनी links को बिक्री का attribution देने के लिए:
- Checkout बनाते समय
dub_idcookie से Dub का click ID capture करें। - Payment के
metadataमें click ID store करें, साथ ही अपने system में customer की ID (external ID) भी रखें। - Payment सफल होने पर उसके Track API के माध्यम से बिक्री Dub को भेजें।
आवश्यकताएँ
इस integration को सेट अप करने से पहले आपके पास यह होना चाहिए:- Workspace वाला एक Dub account।
- आपकी links के लिए enabled conversion tracking।
- एक Dub API key, जिसे आप अपने Dub dashboard में Settings → API Keys के अंतर्गत बनाते हैं।
शुरुआत करना
1
Enable Conversion Tracking in Dub
अपने Dub dashboard में उन links के लिए conversion tracking enable करें जिनकी बिक्री आप track करना चाहते हैं। इसके बाद Dub उन customers के sale events रिकॉर्ड करता है जो उन links के माध्यम से आते हैं।
Conversion tracking enable करने के लिए Dub documentation देखें।
2
Get Your Dub API Key
अपने Dub dashboard में Settings → API Keys पर जाएं और
conversions.write scope वाली API key बनाएं।3
Capture Click ID in Checkout
Checkout बनाते समय cookie से Dub click ID पढ़ें और उसे payment के
metadata में जोड़ें। Step 1 देखें।4
Send Sale Data via Webhook
ऐसा webhook endpoint बनाएं जो payment सफल होने पर प्रत्येक बिक्री को Dub के Track API पर भेजे। Step 2 देखें।
5
Done
Sale conversion events आपके Dub analytics dashboard में आपकी links को attribution के साथ दिखाई देते हैं।
Implementation Guide
चरण 1: Checkout Metadata में Click ID और Customer ID जोड़ें
Checkout बनाते समय cookie से Dub click ID पढ़ें और उसे customer के external ID के साथ payment केmetadata में शामिल करें।
नीचे दिए गए examples
POST /payments का उपयोग करते हैं, जो deprecated है। यह मौजूदा integrations के लिए अभी भी काम करता है, लेकिन नए integrations में Checkout Sessions (POST /checkouts) का उपयोग करना चाहिए, जो metadata को उसी तरह स्वीकार करते हैं।चरण 2: Dub को Sale Data भेजें
ऐसा webhook endpoint बनाएं जो payment सफल होने पर sale data को Dub के Track API पर भेजे।1
Open the Webhook Section
Dodo Payments dashboard में, Developer → Webhooks पर जाएँ और Add endpoint पर क्लिक करें।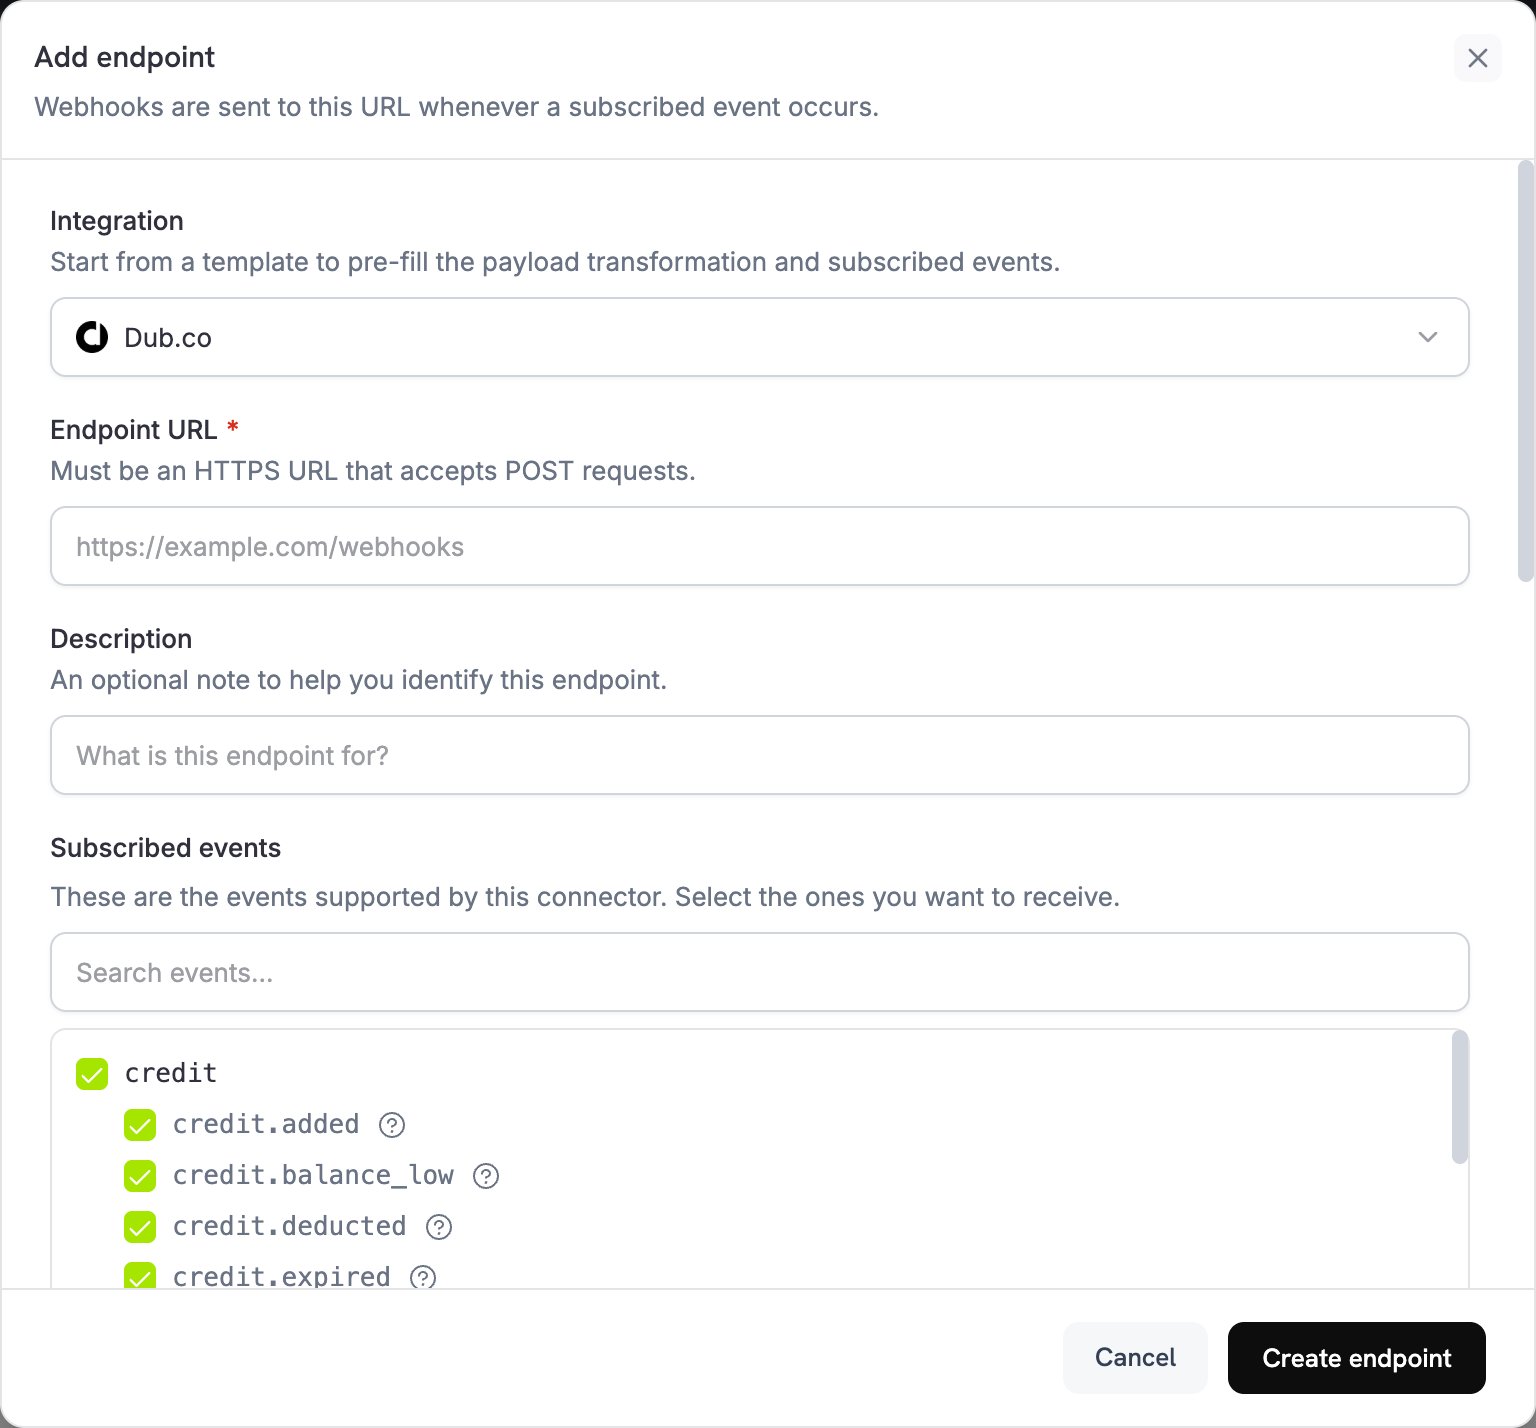
2
Select Dub
Integration में, Dub.co चुनें।
3
Enter API Key
API key में अपनी Dub API key पेस्ट करें। Dodo Payments इसे हर delivery के 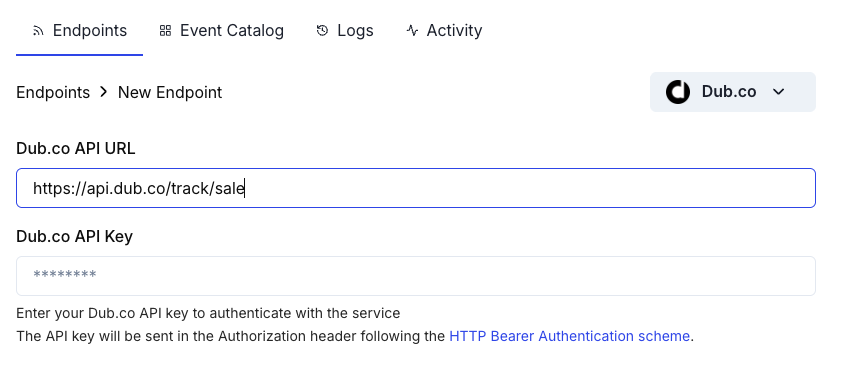
Authorization header में भेजता है।4
Check the URL and Events
यदि Endpoint URL खाली है, तो
https://api.dub.co/track/sale दर्ज करें। Subscribed events में, वे events चुनें जिन्हें आपका transformation handle करता है, जैसे payment.succeeded।5
Configure Transformation
Transformation code के अंतर्गत, payment data को Dub के Track Sale API के लिए format करने हेतु handler को edit करें। examples से शुरुआत करें।
6
Test & Create
Test this code के अंतर्गत, sample payload के विरुद्ध handler चलाने के लिए Simulate पर क्लिक करें। फिर Create endpoint पर क्लिक करें।
Transformation Code के उदाहरण
हर handler Dub को sale तभी भेजता है जबmetadata में click ID हो। organic traffic के लिए, जब click ID न हो, यह webhook.cancel = true set करता है, इसलिए Dub को कोई request नहीं जाती; canceled delivery फिर भी webhook logs में successful दिखाई देती है।
Request body Dub के Track Sale API का अनुसरण करती है: customerExternalId और amount आवश्यक हैं, और paymentProcessor का मान custom है, क्योंकि Dub की payment processors की सूची में Dodo Payments का मान नहीं है। Dub, amount को Dodo Payments amounts वाली उसी unit में लेता है: two-decimal currencies के लिए cents और JPY जैसी zero-decimal currencies के लिए पूरा integer। Examples amount को बिना बदले pass करते हैं।
Basic Sale Tracking
जब payment सफल हो जाए, तब sale track करें:basic_sale.js
Subscription Sales track करना
Initial subscriptions और recurring payments दोनों को track करें। Subscriptions के लिए इस handler का उपयोगpayment.succeeded handlers के बजाय करें, उनके साथ नहीं: हर subscription payment payment.succeeded भी fire करता है, इसलिए दोनों events को handle करने पर हर sale दो बार record होगी। Subscription Integration Guide देखें।
Handler subscription के metadata से click ID पढ़ता है, इसलिए subscription create करते समय वही metadata pass करें। Renewals के लिए, invoiceId subscription ID को previous_billing_date, यानी current billing period की शुरुआत, के साथ combine करता है, इसलिए retried delivery उसी invoiceId का पुनः उपयोग करती है।
subscription_sale.js
Tax Exclusion के साथ Sales track करना
Dub को केवल pre-tax amount भेजें, ताकि Dub में revenue में tax शामिल न हो:sale_without_tax.js
Custom Event Names के साथ Sales track करना
विभिन्न प्रकार की sales को categorize करने के लिए custom event names का उपयोग करें। Example payment केmetadata में set किए गए is_upgrade flag को पढ़ता है:
custom_events.js
Alternative: Client-Side Implementation
Webhook transformation के बजाय अपने server से sales track करने के लिए, successful payment के बाद सीधे Dub के Track API को call करें, उदाहरण के लिए अपनेpayment.succeeded webhook handler से। Code आपकी Dub API key का उपयोग करता है, इसलिए इसे अपने server पर चलाएँ, browser में कभी नहीं।
Best Practices
- Click ID को metadata में शामिल करें: Click ID के बिना, Dub आपके links से revenue attribute नहीं कर सकता।
- External IDs का लगातार उपयोग करें: सटीक customer-level analytics के लिए, अपने system से वही customer ID हर बार
customerExternalIdके रूप में pass करें। - Organic traffic handle करें: जब click ID न हो, तो अनावश्यक API calls से बचने के लिए
webhook.cancel = trueset करें। - Sample payments के साथ test करें: Test this code का उपयोग करके handler चलाएँ और live होने से पहले confirm करें कि integration काम करता है।
- अपने Dub dashboard को monitor करें: जाँचें कि sales अपेक्षित attribution के साथ दिखाई दे रही हैं।
Important Notes
- Amount format: Dub two-decimal currencies के लिए amounts को cents में (उदाहरण के लिए, $10.00 का मान
1000है) और JPY जैसी zero-decimal currencies के लिए पूरे integer में अपेक्षित करता है। - Currency: USD, EUR और GBP जैसे ISO 4217 currency codes का उपयोग करें। Dub हर sale को latest exchange rate पर USD में convert करता है।
- Free trials: Dub का Track Sale API
amountको0स्वीकार करता है, और examples $0 payments को skip नहीं करते, इसलिए हर $0 payment Dub तक sale के रूप में पहुँचती है। $0 payments को skip करने के लिए, जबtotal_amount0हो, तबwebhook.cancel = trueset करें। - Refunds: यदि आपको सटीक revenue reporting चाहिए, तो refunds को अलग से track करें।
Troubleshooting
Sales Not Appearing in Dub
Sales Not Appearing in Dub
- पुष्टि करें कि आपकी Dub API key सही है और उसमें
conversions.writescope है। - जाँचें कि
dub_click_idcapture होकर payment metadata में store है। - जाँचें कि webhook transformation payload को सही ढंग से format करता है।
- पुष्टि करें कि endpoint
payment.succeededके लिए subscribed है। - Confirm करें कि आपके Dub links के लिए conversion tracking enabled है।
- Dub की response देखने के लिए Developer → Webhooks के Logs tab में endpoint के delivery attempts खोलें। Click ID के बिना payment canceled होती है और successful दिखाई देती है।
Revenue Attribution Not Working
Revenue Attribution Not Working
- Confirm करें कि customers checkout से पहले आपके Dub short links पर क्लिक करते हैं।
- पुष्टि करें कि
dub_idcookie आपके domain पर set है। - जाँचें कि payment metadata में click ID customer द्वारा किए गए click से match करती है।
- Checkout create करने से पहले click ID capture करें।
Transformation Errors
Transformation Errors
- जाँचें कि payload Dub के Track Sale API format से match करता है।
- जाँचें कि required fields,
customerExternalIdऔरamount, मौजूद हैं और attribution के लिएclickIdset है। - जाँचें कि amount decimal के बजाय smallest currency unit में integer है।
- पुष्टि करें कि endpoint URL
https://api.dub.co/track/saleहै। - Sample webhook payloads के साथ transformation test करें।
Duplicate Sales Being Tracked
Duplicate Sales Being Tracked
- Sales को केवल
payment.succeededevents पर track करें,payment.processingपर नहीं। - हर sale के लिए unique
invoiceIdका उपयोग करें। Dub प्रत्येकinvoiceIdके लिए केवल एक sale record करता है। - Renewals के लिए, subscription ID और billing period से
invoiceIdबनाएँ, जैसा Track Subscription Sales में बताया गया है। हर delivery पर बदलने वाला value, जैसे current time, delivery retry होने पर duplicate sale record करता है।
Additional Resources
Dub Conversions Documentation
Dub Track Sale API
Dub Dashboard
Webhook Events Guide
इस integration में सहायता के लिए, support@dodopayments.com पर Dodo Payments support से संपर्क करें।