

परिचय
Slack integration Dodo Payments events, जैसे successful payments, subscription changes और disputes, को आपके चुने हुए Slack channel पर पोस्ट करता है। आपकी team Slack से payments को follow कर सकती है और disputes पर कार्रवाई कर सकती है, dashboard जाँचे बिना।Slack connector प्रत्येक Dodo Payments event को transformation के साथ Slack message में बदलता है: यह JavaScript code होता है जो delivery से पहले event पर चलता है। Connector में transformation code शामिल होता है, इसलिए शुरुआत करने के लिए coding की आवश्यकता नहीं है। आपको Dodo Payments dashboard में Developer → Webhooks का access और अपने Slack workspace में apps जोड़ने की permission चाहिए।
प्रारंभ करना
1
Open the Webhook Section
Dodo Payments dashboard में Developer → Webhooks पर जाएँ और Add endpoint पर क्लिक करें।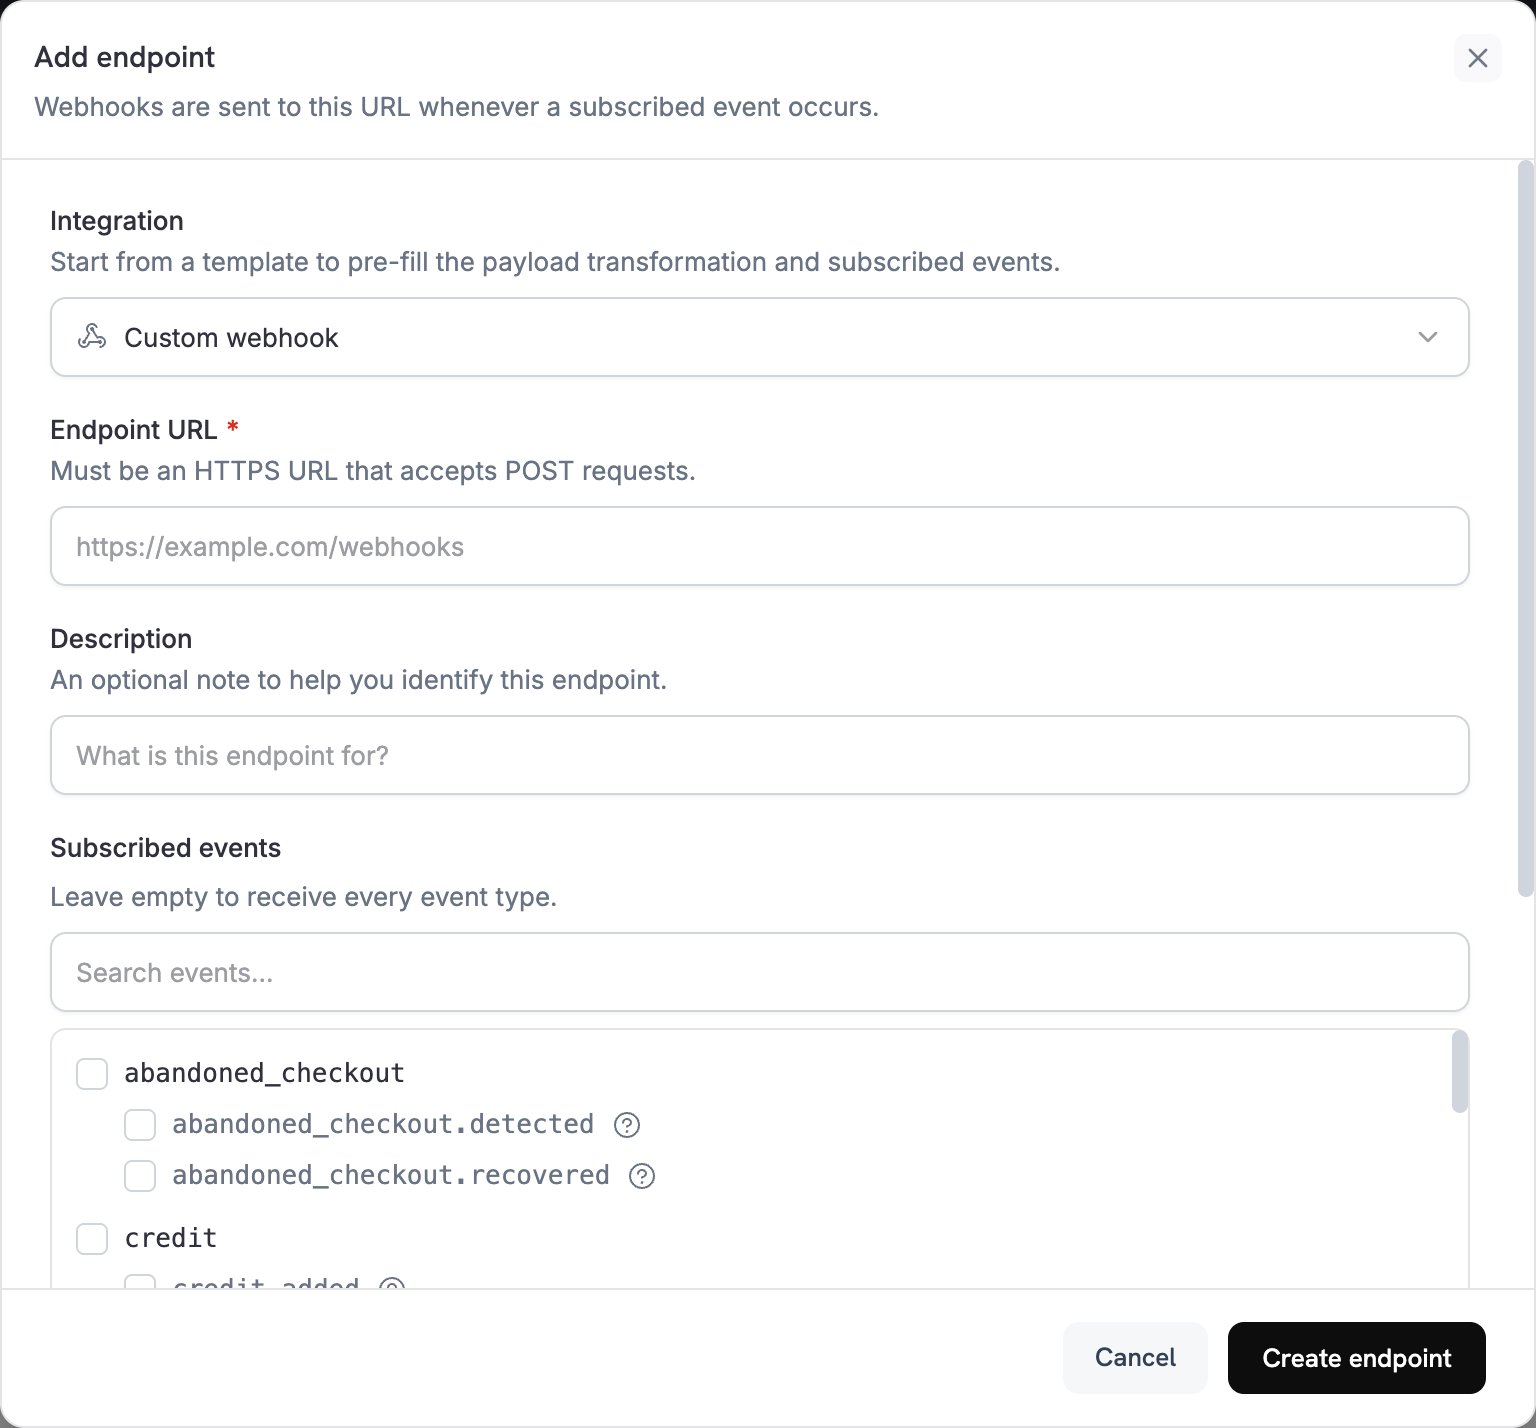
2
Select Slack Integration
Integration में Slack चुनें। dashboard Slack transformation code लोड करता है और How to connect Slack panel में setup steps दिखाता है।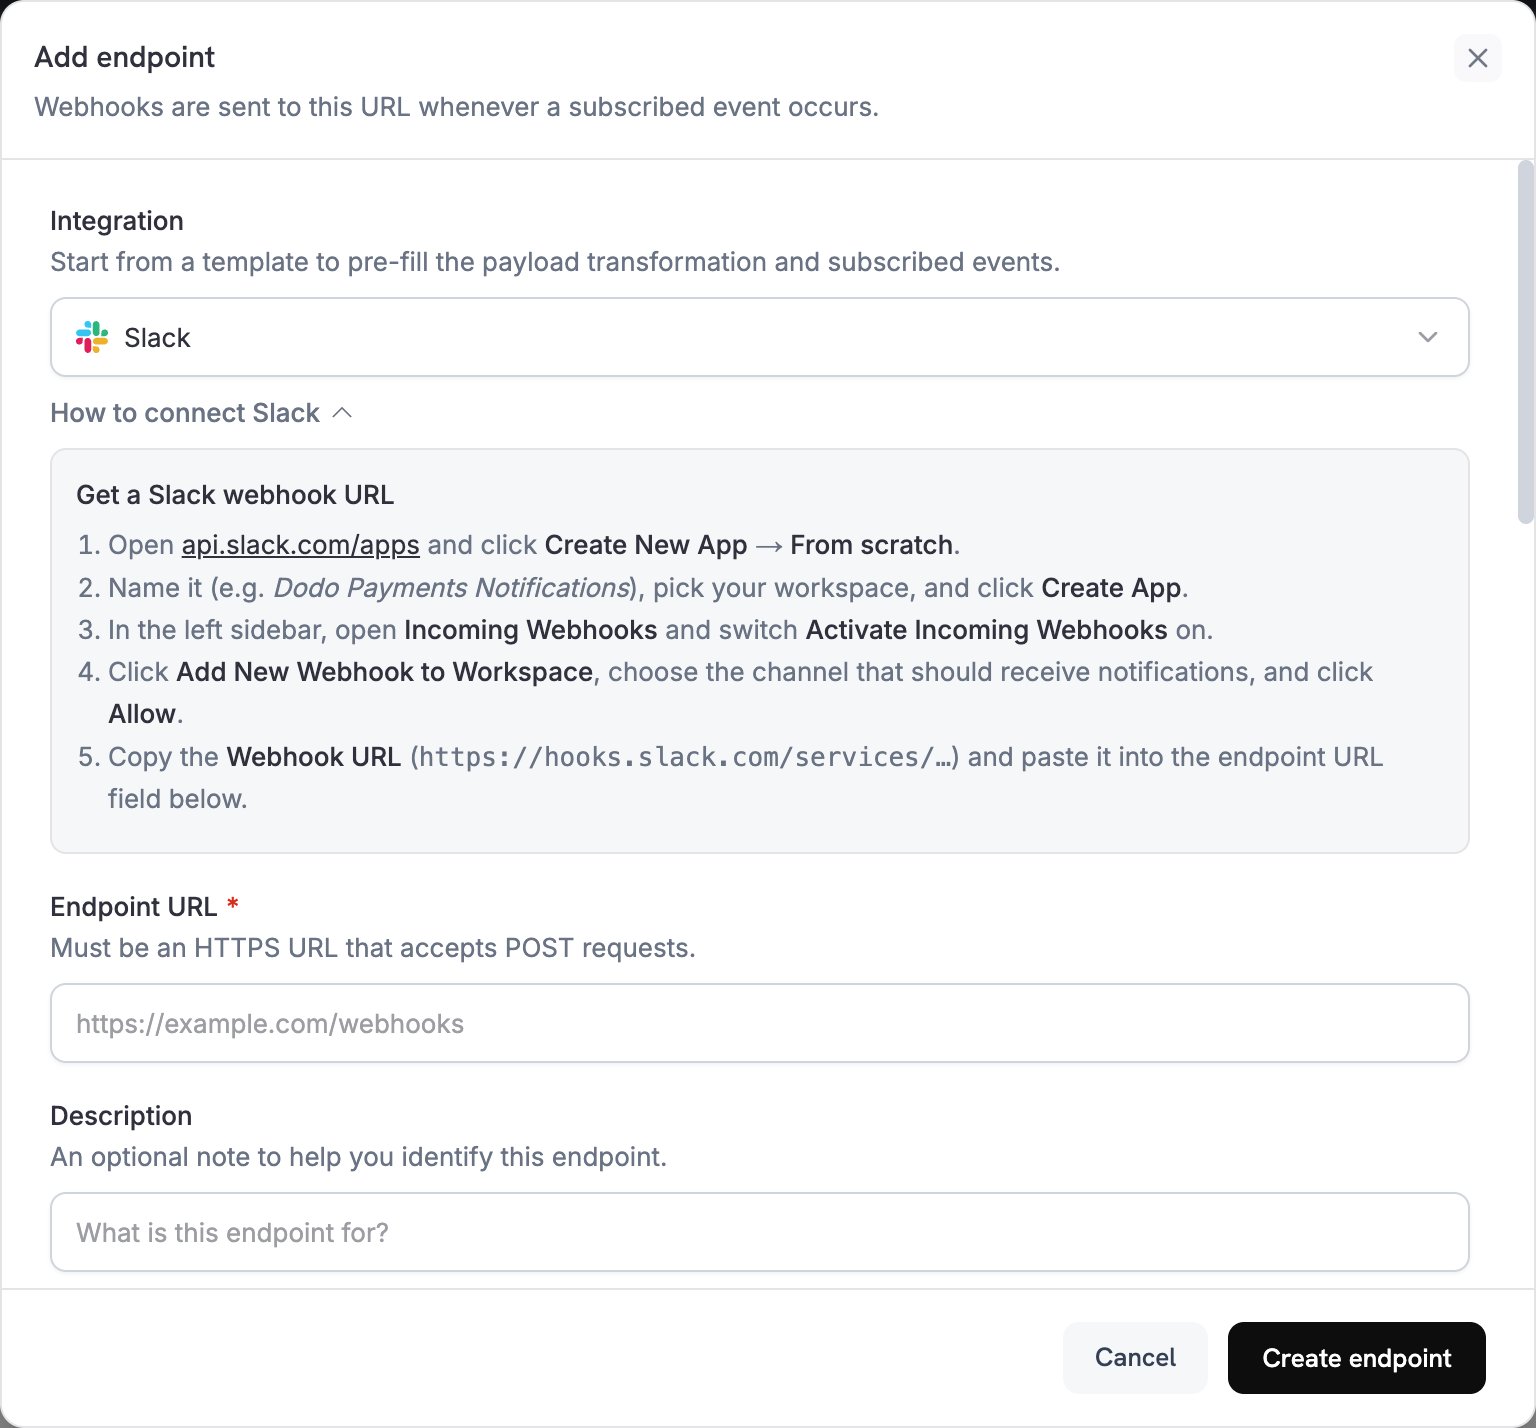
3
Create a Slack Webhook URL
Slack में उस channel के लिए incoming webhook वाला app बनाएँ जिसे notifications प्राप्त करनी हैं: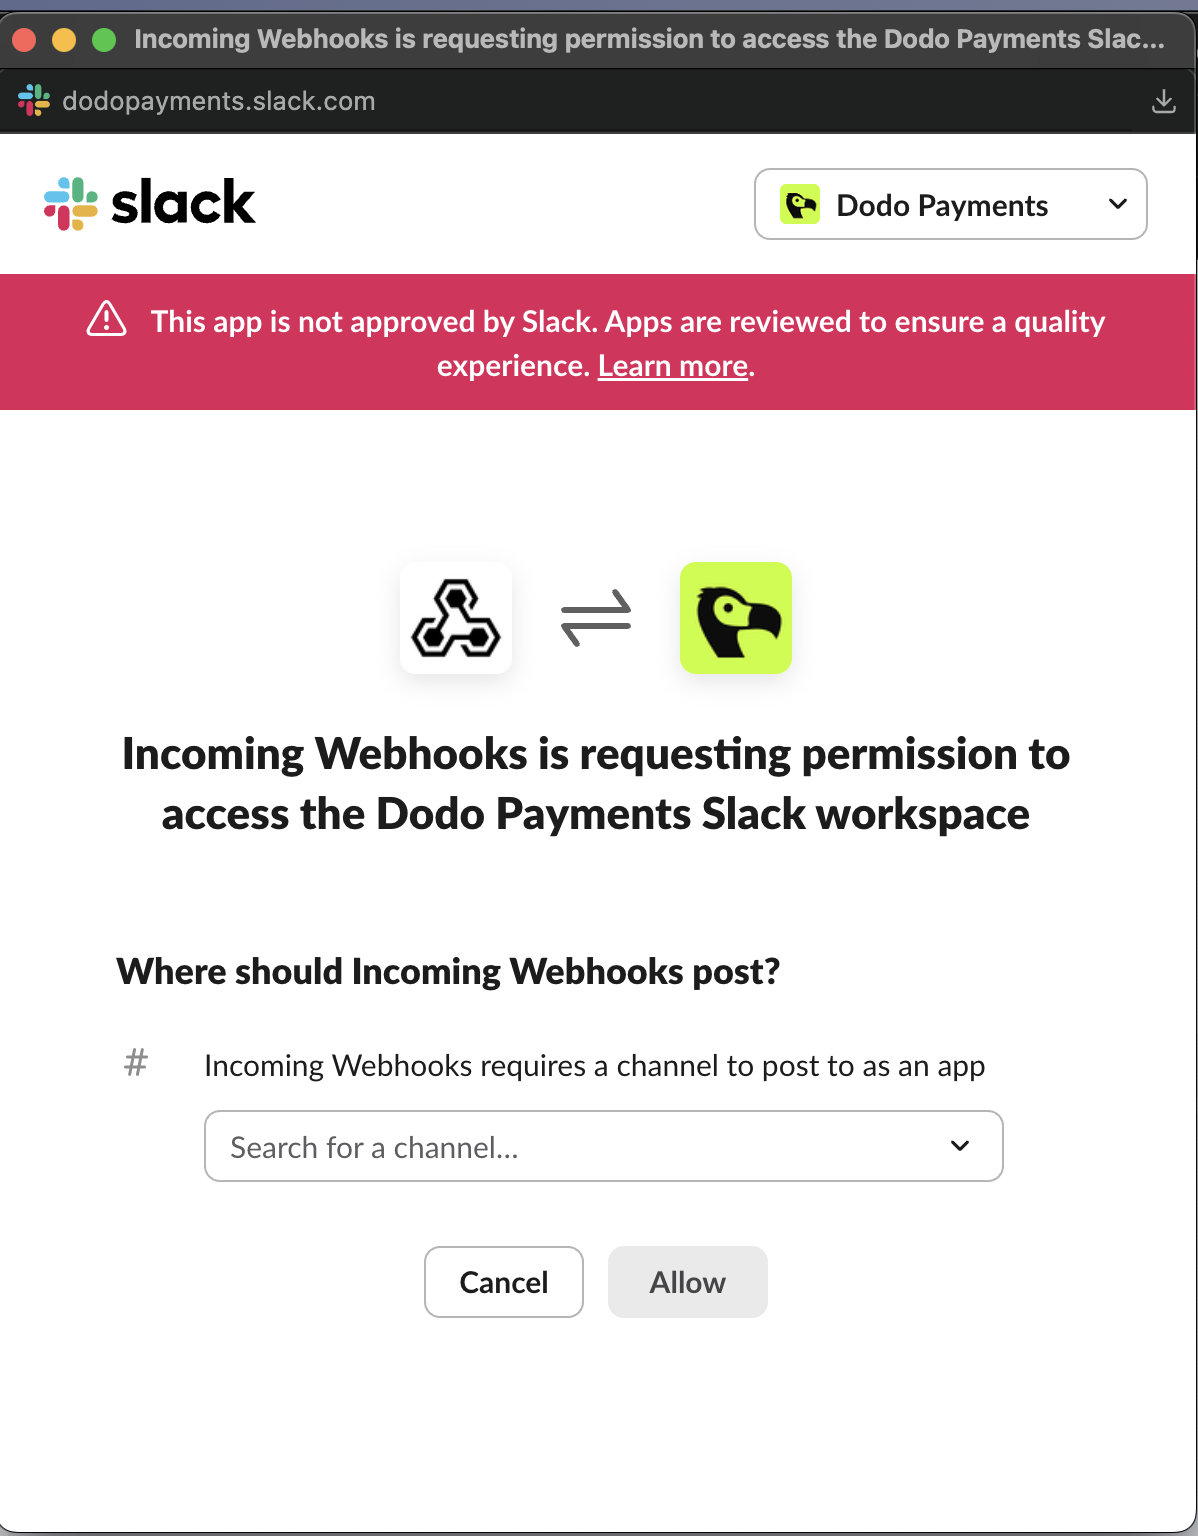
- api.slack.com/apps खोलें, Create New App पर click करें और From scratch चुनें।
- App का नाम रखें, उदाहरण के लिए
Dodo Payments Notifications, अपना workspace चुनें और Create App पर click करें। - Sidebar में Incoming Webhooks खोलें और Activate Incoming Webhooks चालू करें।
- Add New Webhook to Workspace पर click करें, channel चुनें और Allow पर click करें।
- Webhook URL copy करें, जो
https://hooks.slack.com/services/से शुरू होता है।
4
Paste the Webhook URL
Slack webhook URL को Endpoint URL में paste करें। Slack को API key की आवश्यकता नहीं है।
5
Select Events
Subscribed events उन events की सूची देता है जिन्हें Slack connector support करता है। यदि आप transformation बदलते हैं, तो केवल वही events रखें जिन्हें यह handle करता है। Slack ऐसी request को reject करता है जो Slack message नहीं होती, इसलिए transformation द्वारा अपरिवर्तित छोड़ा गया event deliver होने में विफल रहता है।
6
Customize Transformation Code
Transformation code के अंतर्गत handler को edit करके चुनें कि कौन से events message पोस्ट करें और प्रत्येक message कैसा दिखे। Connector का code रखें या examples से शुरुआत करें।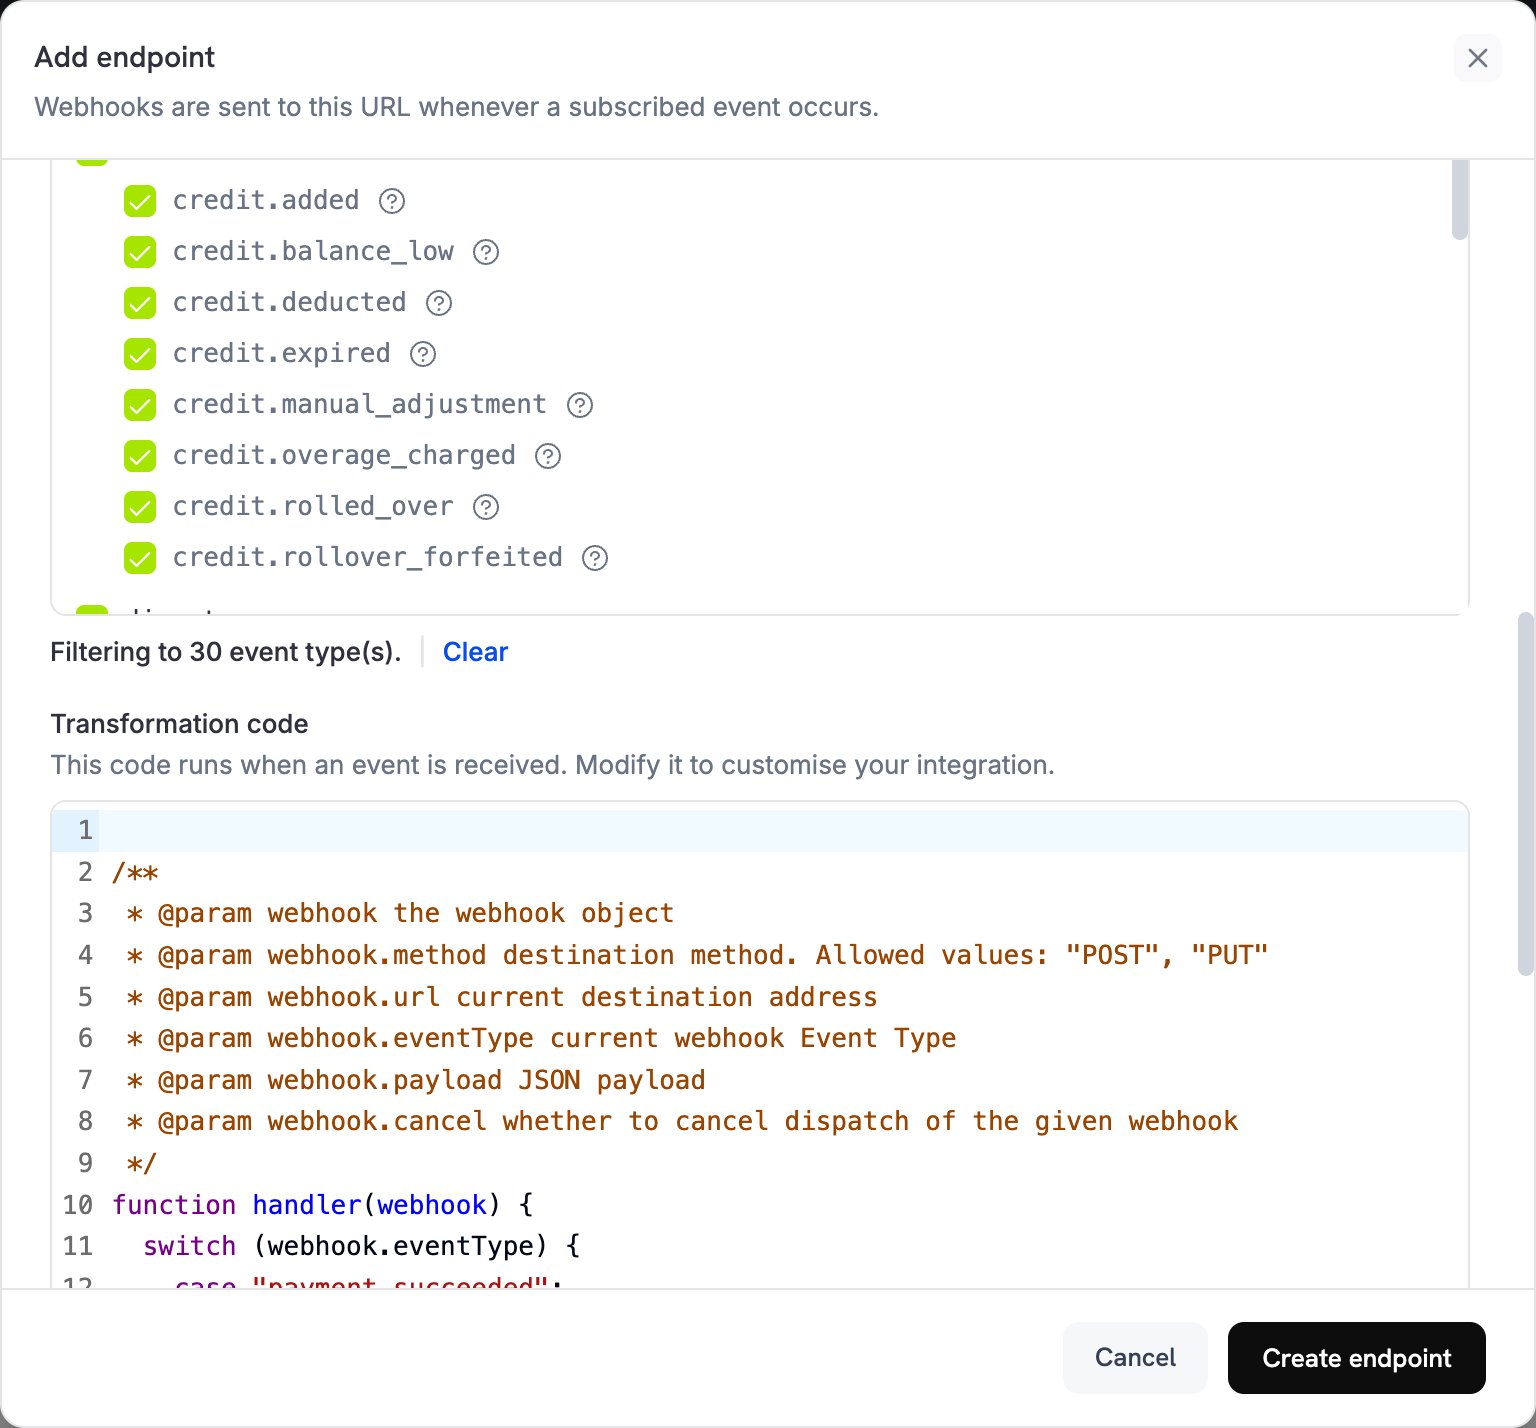
7
Test and Create
Test this code के अंतर्गत, कोई event type चुनें और Simulate पर क्लिक करें। Result में वह message दिखता है जो Slack को प्राप्त होगा। फिर Create endpoint पर क्लिक करें।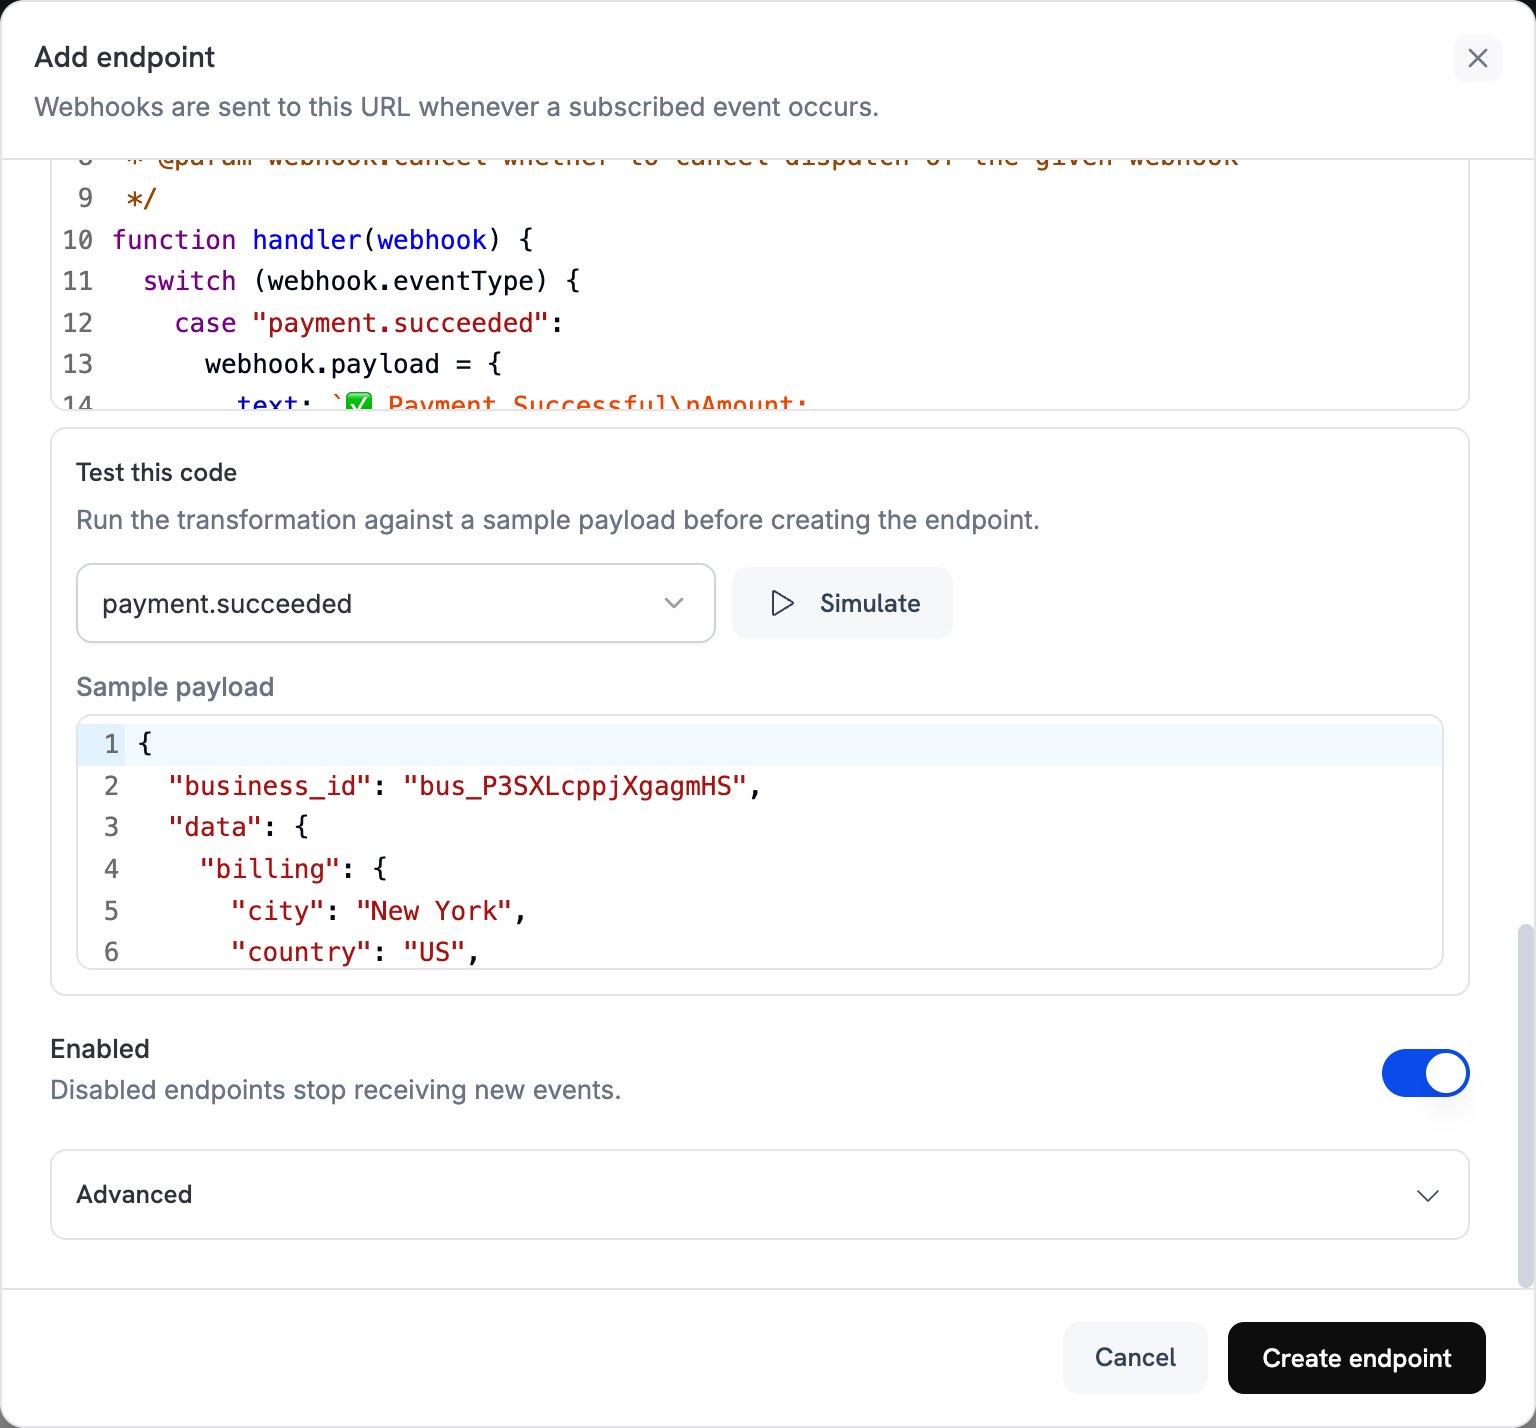
8
Integration Complete!
Dodo Payments अब प्रत्येक subscribed event को आपके Slack channel पर पोस्ट करता है। Test message पोस्ट करने के लिए endpoint का Testing tab खोलें, event type चुनें और Send example पर click करें।
Transformation Code Examples
हर handlerwebhook.payload को Slack message से बदलता है और webhook.url, आपके incoming webhook URL को बनाए रखता है। Dodo Payments की राशियाँ currency की सबसे छोटी इकाई में होती हैं, इसलिए examples 100 से भाग देकर currency code दिखाते हैं। JPY और KRW जैसी zero-decimal currencies के लिए राशि को यथावत उपयोग करें।
Basic Payment Notifications
किसी payment के सफल होने, विफल होने या processing में होने पर plain-text message post करें:payment_notifs.js
Rich Subscription Notifications
जब कोई subscription active हो, cancel हो या renew हो, तब attachment fields के साथ color-coded message post करें:subscription_notifs.js
Dispute Management Notifications
जब कोई dispute open हो या lost हो, तब red message post करें और जब वह won हो, तब green message post करें:dispute_notifs.js
Comprehensive All-Events Handler
हर event type के लिए समान format में message post करें। जिन events का अपनाcase नहीं है, उन्हें event type और time वाला generic message मिलता है:
all_events_notifs.js
Best Practices
Slack notifications को उपयोगी बनाए रखने के लिए इन practices का पालन करें:- colors और fields वाले message attachments का उपयोग करें, ताकि प्रत्येक event स्पष्ट हो और उस पर आसानी से कार्रवाई की जा सके।
- amount, customer email और IDs जैसे महत्वपूर्ण data शामिल करें, ताकि आपकी team record तुरंत ढूँढ सके।
- color को event type से मिलाएँ: success के लिए green (
good), disputes या failures के लिए red (danger), cancellations के लिए yellow (warning), और informational events के लिए blue (#3aa3e3)। - timestamp (
ts) जोड़ें, ताकि प्रत्येक message में event का समय दिखे।
Troubleshooting
Notifications Not Appearing in Slack
Notifications Not Appearing in Slack
- जाँचें कि Slack webhook URL सही है और उसका Slack app अभी भी installed है।
- जाँचें कि transformation code valid JavaScript है।
- जाँचें कि subscribed events घटित हो रहे हैं। किसी event को भेजने के लिए endpoint के Testing tab में Send example का उपयोग करें।
- जाँचें कि आपके Slack app में Incoming Webhooks turned on है और वह channel पर post कर सकता है।
Transformation Errors
Transformation Errors
- Developer → Webhooks में Logs tab खोलें और failed delivery की response जाँचें।
- जाँचें कि आपका code जिन payload fields को पढ़ता है, वे उस event type के event payload से मेल खाते हैं।
- Simulate और sample payload के साथ अपने code का परीक्षण करें।
- जाँचें कि आपका code जिन fields को पढ़ता है, वे सभी मौजूद हैं।
error_messageजैसे optional fieldsnullहो सकते हैं।
Missing Event Types
Missing Event Types
- जाँचें कि event Subscribed events में selected है। selection बदलने के लिए endpoint खोलें और Edit पर क्लिक करें।
- जाँचें कि Slack connector उस event को support करता है। Subscribed events में केवल connector द्वारा supported events सूचीबद्ध होते हैं।
- जाँचें कि आपके transformation में उस event के लिए
caseहै। examples अन्य events को unchanged छोड़ते हैं और Slack उन्हें reject करता है।