

परिचय
AutoSend integration, Dodo Payments की प्रत्येक घटना पर AutoSend के email API के माध्यम से एक email भेजता है—सफल payments से लेकर विफल payment attempts और refund confirmations तक। webhook endpoint पर किया गया transformation प्रत्येक घटना को AutoSend send request में बदल देता है। इसे सेट अप करने के लिए, आपको AutoSend API key और AutoSend में verified sender domain की आवश्यकता होगी। अपनी API key AutoSend dashboard में Settings → API Keys के अंतर्गत मिल सकती है।शुरुआत करना
AutoSend को Dodo Payments से connect करने के लिए इन steps का पालन करें:1
Open Webhook Section
Dodo Payments dashboard में Developer → Webhooks पर जाएँ और Add endpoint पर click करें।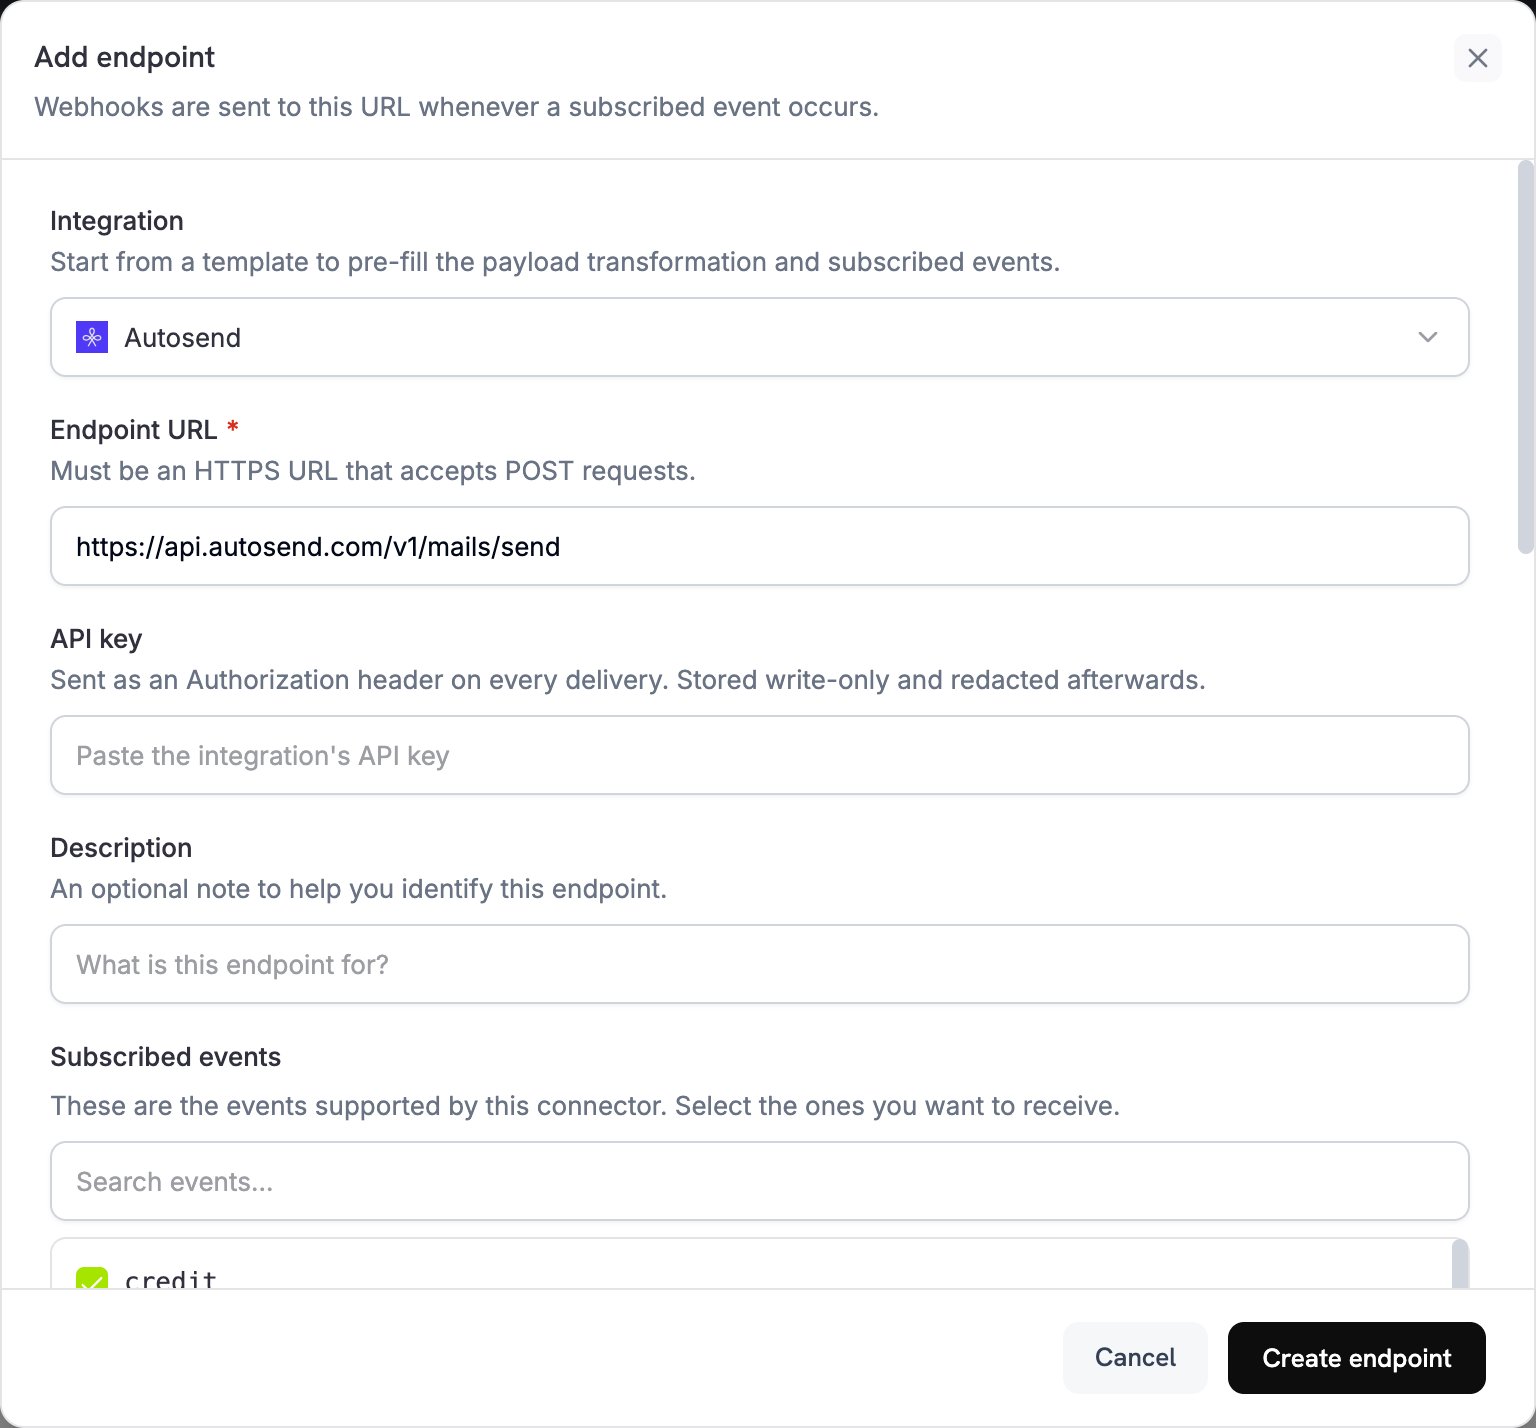
2
Select AutoSend Integration
Integration में, Autosend चुनें।
3
Enter API Key
API key में अपनी AutoSend API key पेस्ट करें। Dodo Payments इसे हर delivery के
Authorization header में भेजता है।Learn how to create and manage API keys
4
Select Events
Subscribed events में, वे events चुनें जिन्हें आपका transformation handle करता है, जैसे
payment.succeeded, subscription.active और payment.failed। जिन endpoints के लिए कोई event चयनित नहीं है, उन्हें हर event type प्राप्त होता है।5
Configure Transformation
Transformation code के अंतर्गत, ऐसा JavaScript handler लिखें जो हर event के लिए email तैयार करे। code examples से शुरुआत करें।
6
Test & Create
Test this code के अंतर्गत, sample payload के विरुद्ध handler चलाने और परिणाम जाँचने के लिए Simulate पर क्लिक करें। फिर Create endpoint पर क्लिक करें।
7
Activation Complete
जब भी कोई subscribed event होता है, endpoint AutoSend के माध्यम से email भेजता है।
Code Examples
हर handlerwebhook.eventType में event type की जाँच करता है और event data को webhook.payload.data से पढ़ता है। यह webhook.url को AutoSend के send endpoint पर सेट करता है और webhook.payload को email request से बदल देता है। Dodo Payments की राशियाँ, जैसे total_amount, currency की सबसे छोटी इकाई में होती हैं; उदाहरण के लिए, USD के लिए cents।
Payment Confirmation Email
जब payment सफल हो जाए (payment.succeeded), तब confirmation email भेजें:
payment_confirmation.js
Subscription Welcome Email
जब subscription active हो जाए (subscription.active), तब welcome email भेजें। उदाहरण में product_id को planName के रूप में भेजा गया है। यदि आपके template में plan name दिखता है, तो पहले ID को display name से map करें।
subscription_welcome.js
Payment Failure Notification
जब payment विफल हो जाए (payment.failed), तब notification email भेजें। Payment का error_message field विफलता का कारण रखता है।
payment_failure.js
Best Practices
-
अपने sender domain को verify करें: AutoSend केवल verified domain से भेजता है, इसलिए endpoint बनाने से पहले AutoSend में अपने
fromaddress के domain को verify करें। Verified domain deliverability को भी बेहतर बनाता है और आपके emails को spam folders में जाने से रोकने में मदद करता है। -
Personalization के लिए dynamic data का उपयोग करें: customer-specific values, जैसे names, payment amounts और subscription details,
dynamicDatafield में भेजें और उन्हें अपने AutoSend template में variables के रूप में reference करें। - स्पष्ट subject lines लिखें: ऐसी subject lines लिखें जो email का उद्देश्य स्पष्ट करें। Spam filters को trigger करने वाले शब्दों से बचें और subjects को 50 characters से कम रखें।
-
Production से पहले test करें: हर handler को Test this code से चलाएँ, फिर live होने से पहले एक test email भेजें। जाँचें कि content सही तरीके से render हो रहा है और हर
dynamicDatavalue mapped है।
API Reference
Send endpoint के हर parameter और error code के लिए AutoSend API documentation देखें।Troubleshooting
Emails Not Being Sent
Emails Not Being Sent
- जाँचें कि API key सही और active है।
- जाँचें कि sender domain AutoSend में verified है।
- जाँचें कि recipient email addresses मान्य हैं।
- अपनी AutoSend sending limits और quotas की समीक्षा करें।
- जाँचें कि transformation send endpoint URL सेट करता है:
https://api.autosend.com/v1/mails/send। - जाँचें कि payload में हर required parameter शामिल है।
- AutoSend के response code को देखने के लिए Developer → Webhooks के Logs tab में endpoint के delivery attempts खोलें।
Transformation Errors
Transformation Errors
- जाँचें कि payload AutoSend API format से मेल खाता है।
- जाँचें कि सभी required fields मौजूद हैं:
to,fromऔर या तोtemplateIdयाhtml/text।templateIdके बिना,subjectभी required है। - जाँचें कि email addresses सही format में हैं।
- यदि आप template का उपयोग करते हैं, तो जाँचें कि
templateIdमान्य है। - जाँचें कि
dynamicDatakeys आपके template variables से मेल खाती हैं।
Template Issues
Template Issues
- जाँचें कि आपका template ID सही है और template AutoSend में active है।
- जाँचें कि
dynamicDatakeys आपके template के variables से मेल खाती हैं। - जाँचें कि हर required template variable का कोई value है।
- AutoSend dashboard में template को अलग से test करें।