

परिचय
DataFast एक revenue-first analytics tool है, जो दिखाता है कि कौन से marketing channels paying customers ला रहे हैं। जब आप अपने Dodo Payments transactions को DataFast में भेजते हैं, तो यह revenue को प्रत्येक customer के original traffic source से जोड़ता है, जिससे आप देख सकते हैं कि कौन से channels और customer segments सबसे अधिक revenue generate करते हैं।इस integration के लिए आपकी DataFast API key आवश्यक है, जिसे आप अपने DataFast dashboard में बनाते हैं।
यह कैसे काम करता है
DataFast प्रत्येक visitor की पहचानdatafast_visitor_id cookie में stored ID से करता है। Revenue को marketing channels से जोड़ने के लिए:
- DataFast की visitor ID capture करें: checkout बनाते समय
datafast_visitor_idcookie से visitor ID प्राप्त करें। - Visitor ID store करें: visitor ID को payment के
metadataमें store करें। - Payment DataFast को भेजें: payment सफल होने पर उसके Payment API के माध्यम से payment भेजें।
प्रारंभ करना
1
Install DataFast Script
अपनी website पर DataFast tracking script install करें। यह script
datafast_visitor_id cookie set करती है, जो प्रत्येक visitor की पहचान करती है।अपने platform के installation instructions के लिए DataFast documentation देखें।2
Get Your API Key
अपने DataFast dashboard में अपनी website की settings खोलें, API पर जाएँ और Create API Key पर click करें।
3
Capture Visitor ID in Checkout
Checkout बनाते समय cookie से DataFast visitor ID पढ़ें और इसे payment के
metadata में add करें। Step 1 देखें।4
Send Payment Data via Webhook
एक webhook endpoint बनाएँ, जो प्रत्येक successful payment को DataFast के Payment API पर भेजे। Step 2 देखें।
5
Done
Revenue आपके DataFast dashboard में दिखाई देता है और उस marketing channel से attributed होता है, जो प्रत्येक customer को लेकर आया।
Implementation Guide
Step 1: Checkout Metadata में Visitor ID जोड़ें
Checkout बनाते समय cookie से DataFast visitor ID पढ़ें और इसे payment केmetadata में शामिल करें।
नीचे दिए गए examples में
POST /payments का उपयोग किया गया है, जो deprecated है। यह existing integrations के लिए अभी भी काम करता है, लेकिन नई integrations में Checkout Sessions (POST /checkouts) का उपयोग करना चाहिए, जो metadata को उसी तरह accept करते हैं।Step 2: Payment Data DataFast को भेजें
एक webhook endpoint बनाएँ, जो successful payments को DataFast के Payment API पर भेजे।1
Open the Webhook Section
Dodo Payments dashboard में Developer → Webhooks पर जाएँ और Add endpoint पर क्लिक करें।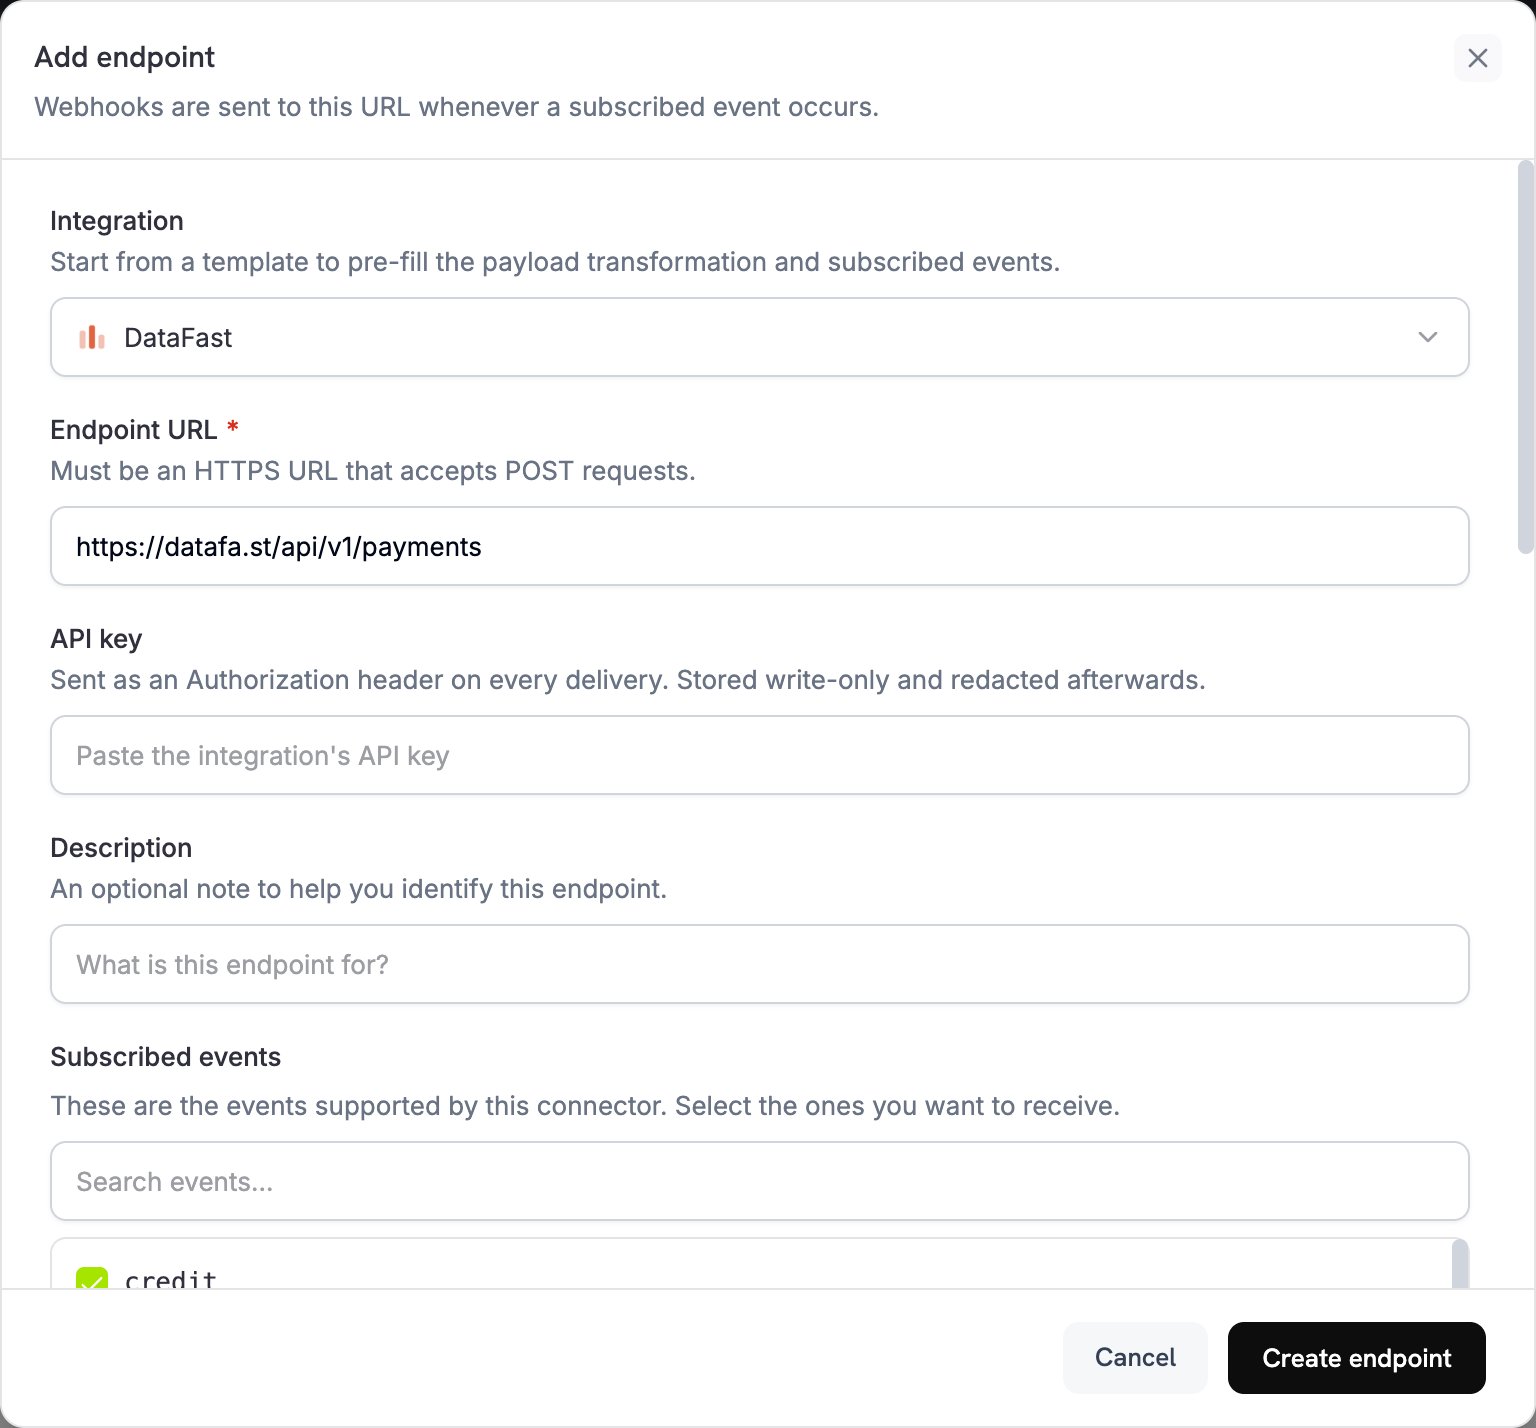
2
Select DataFast
Integration में DataFast चुनें।
3
Enter API Key
API key में अपनी DataFast API key पेस्ट करें। Dodo Payments इसे हर delivery के 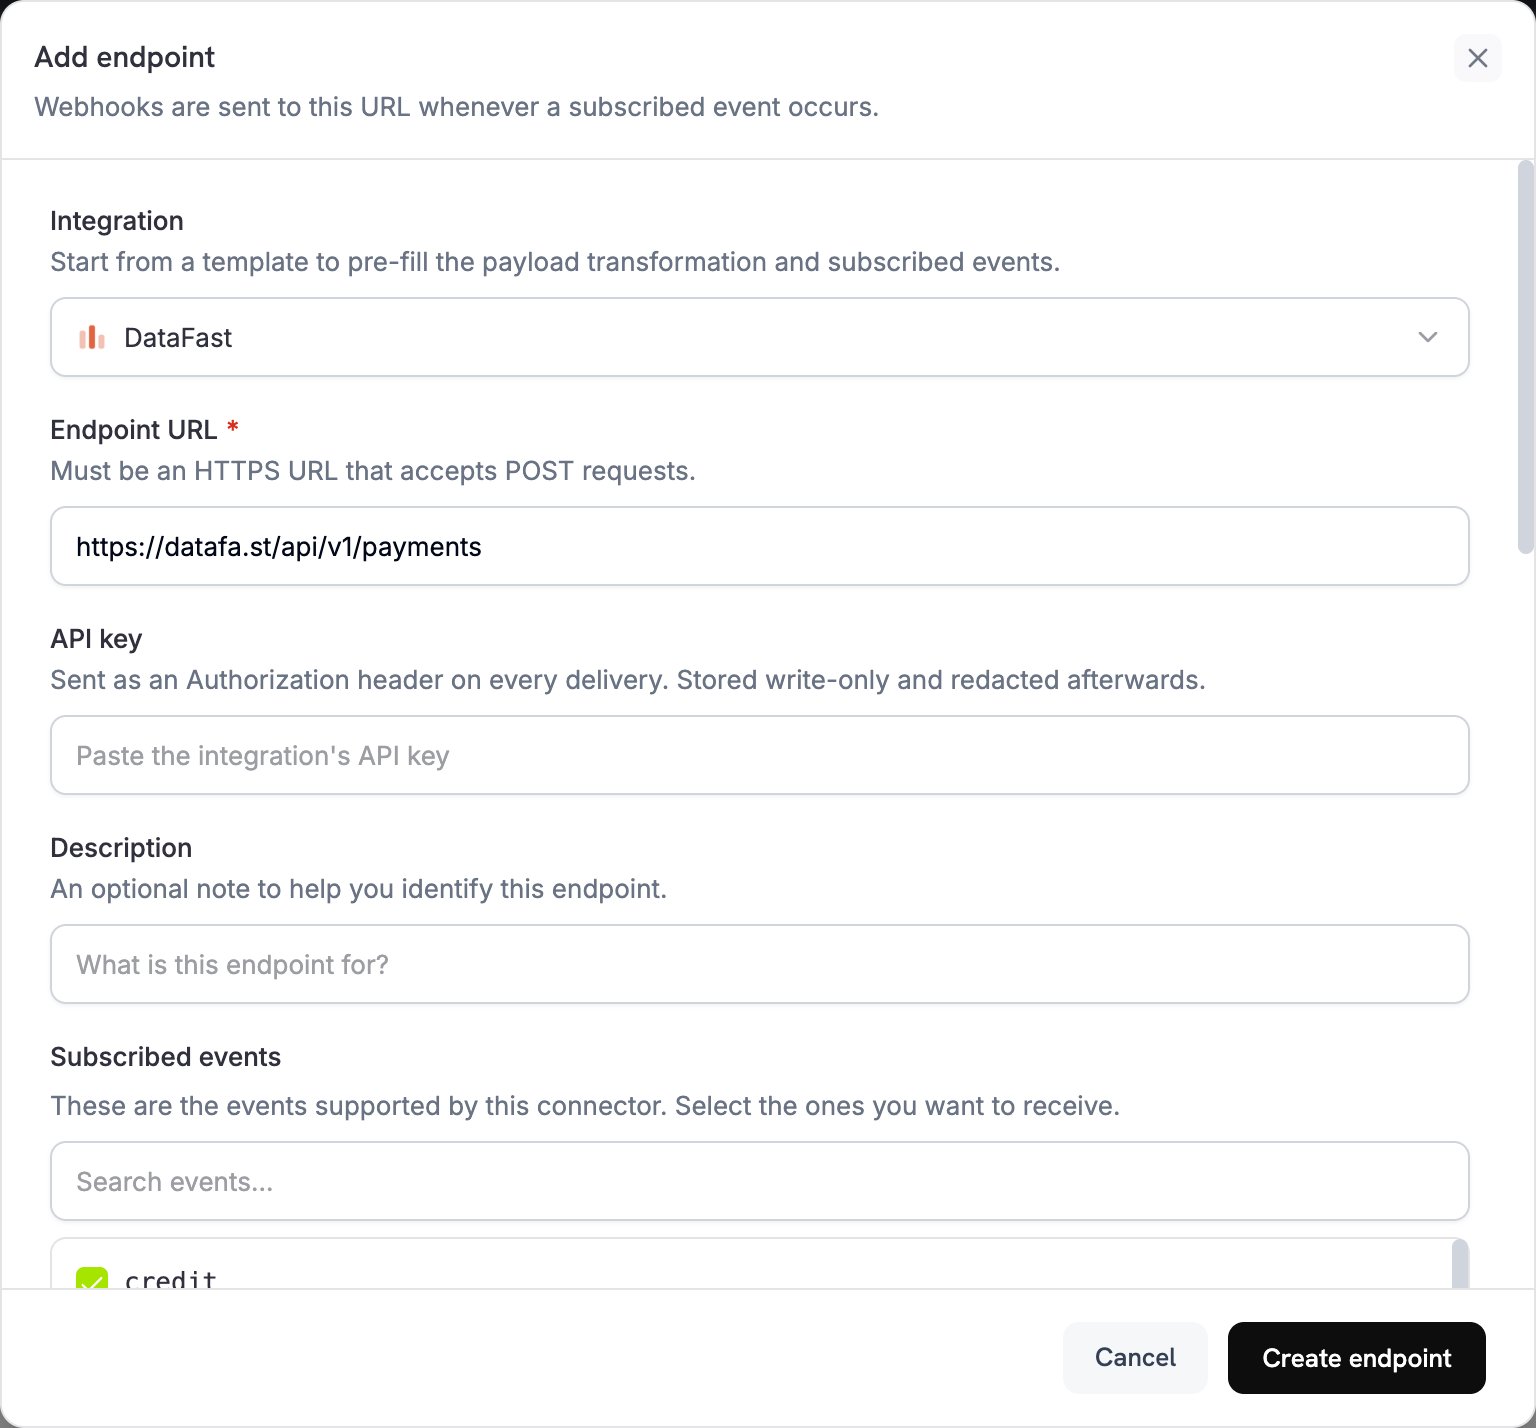
Authorization header में भेजता है।4
Check the URL and Events
यदि Endpoint URL खाली है, तो
https://datafa.st/api/v1/payments दर्ज करें। Subscribed events में payment.succeeded चुनें।5
Configure Transformation
Transformation code के अंतर्गत, DataFast के Payment API के लिए payment data को format करने हेतु handler को संपादित करें। examples से शुरुआत करें।
6
Test & Create
Test this code के अंतर्गत, sample payload के विरुद्ध handler चलाने के लिए Simulate पर क्लिक करें। फिर Create endpoint पर क्लिक करें।
Transformation Code के उदाहरण
हर handlerpayment.succeeded पर चलता है। जब payment का metadata visitor ID के बिना होता है, तो यह webhook.cancel = true सेट करता है, इसलिए DataFast को कोई request नहीं भेजी जाती। रद्द की गई delivery webhook logs में फिर भी successful दिखाई देती है।
DataFast का Payment API amount को major currency units में लेता है, उदाहरण के लिए 29.99। Dodo Payments total_amount को smallest currency unit में भेजता है, जैसे USD के लिए cents, इसलिए examples इसे convert करते हैं।
Basic Payment Attribution
basic_payment.js
Zero Decimal Currencies को संभालना
JPY जैसी zero-decimal currencies में कोई minor unit नहीं होता, इसलिएtotal_amount पहले से ही major units में होता है। KWD जैसी three-decimal currencies में प्रत्येक major unit के 1,000 minor units होते हैं। यह example प्रत्येक स्थिति के लिए amount को convert करता है और उन currencies का उपयोग करता है जिन्हें Dodo Payments zero-decimal और three-decimal मानता है:
zero_decimal.js
Subscription Payments
Subscription payments भीpayment.succeeded trigger करते हैं, जिसमें subscription_id सेट होता है। यह handler हर subscription payment को DataFast को भेजता है और renewals पर renewal: true सेट करता है, ताकि DataFast renewal और first payment के बीच अंतर कर सके।
Renewal को off-session charge किया जाता है, इसलिए उसके payload में subscription_id सेट होता है और checkout_session_id को null पर सेट किया जाता है। Checkout Session के माध्यम से बनाए गए subscription का first payment में checkout_session_id सेट होता है। Renewal payments में subscription का metadata होता है, इसलिए renewals को attribute करने के लिए subscription के metadata में datafast_visitor_id रखें।
subscription_payment.js
Best Practices
- Visitor ID को metadata में शामिल करें: Visitor ID के बिना DataFast revenue को marketing channels से attribute नहीं कर सकता।
- Zero-decimal currencies को संभालें: JPY और KRW जैसी कुछ currencies में decimal places नहीं होते। उनके लिए और KWD जैसी three-decimal currencies के लिए amount conversion समायोजित करें।
- Sample payments के साथ test करें: handler को Test this code के साथ चलाएँ और live होने से पहले पुष्टि करें कि integration काम करता है।
- अपने DataFast dashboard की निगरानी करें: जाँचें कि payments अपेक्षित attribution के साथ दिखाई दे रहे हैं।
- Webhook retries पर निर्भर रहें: DataFast ऐसे payment को skip करता है जिसका
transaction_idवह पहले ही record कर चुका है, इसलिए retried delivery duplicate नहीं बनाती।
Troubleshooting
Payments Not Appearing in DataFast
Payments Not Appearing in DataFast
- पुष्टि करें कि आपकी DataFast API key सही और active है।
- जाँचें कि
datafast_visitor_idcapture करके payment metadata में store किया गया है। - जाँचें कि webhook transformation payload को सही तरह format करता है।
- पुष्टि करें कि endpoint
payment.succeededके लिए subscribed है। - Error messages या API logs के लिए DataFast dashboard देखें।
- DataFast की response देखने के लिए Developer → Webhooks के Logs tab में endpoint के delivery attempts खोलें। बिना visitor ID वाला payment canceled हो जाता है और successful दिखाई देता है।
Revenue Attribution Not Working
Revenue Attribution Not Working
- पुष्टि करें कि DataFast tracking script आपकी website पर installed और running है।
- सत्यापित करें कि
datafast_visitor_idcookie set है। - जाँचें कि payment metadata में visitor ID, DataFast द्वारा visit के लिए record की गई ID से match करता है।
- Checkout बनाने से पहले visitor ID capture करें।
- अधिक guidance के लिए DataFast की Payment API documentation देखें।
Transformation Errors
Transformation Errors
- जाँचें कि payload DataFast के Payment API format से match करता है।
- जाँचें कि सभी required fields मौजूद हैं:
amount,currency, औरtransaction_id। Attribution के लिएdatafast_visitor_idशामिल करें। - Amount conversion जाँचें: अधिकांश currencies के लिए 100 से, three-decimal currencies के लिए 1,000 से divide करें और zero-decimal currencies के लिए divide न करें।
- सत्यापित करें कि endpoint URL
https://datafa.st/api/v1/paymentsहै। - Sample webhook payloads के साथ transformation का test करें।
Currency Conversion Issues
Currency Conversion Issues
- Zero-decimal currencies (BIF, CLP, DJF, GNF, JPY, KMF, KRW, MGA, PYG, RWF, UGX, VND, VUV, XAF, XOF, और XPF) के लिए amount को जैसा है वैसा ही भेजें।
- Three-decimal currencies (BHD, IQD, JOD, KWD, LYD, OMR, और TND) के लिए amount को 1,000 से divide करें।
- अन्य सभी currencies के लिए smallest unit से major unit में convert करने हेतु amount को 100 से divide करें।
- जाँचें कि currency code ISO 4217 format का उपयोग करता है, उदाहरण के लिए
USD,EUR, याJPY।
Additional Resources
DataFast Documentation
DataFast Dashboard
इस integration में सहायता के लिए Dodo Payments support से support@dodopayments.com पर संपर्क करें।