はじめに
支払いイベントが発生したときに、支払い顧客をMailerLiteの購読者リストに自動的に同期します。顧客を特定のグループに追加し、自動化ワークフローをトリガーし、実際の支払いデータでメールマーケティングリストを最新の状態に保ちます。 MailerLiteは、ニュースレター、キャンペーン、および自動化のための強力なメールマーケティングプラットフォームです。この統合により、支払い活動に基づいて購読者を自動的に管理できます。これは、オンボーディングシーケンス、顧客セグメンテーション、およびターゲットマーケティングキャンペーンに最適です。この統合では認証のためにMailerLite APIキーが必要です。MailerLiteのIntegrationsページ から生成できます。
始め方
1
Open the Webhook Section
Dodo Paymentsダッシュボードで、Webhooks + Add Endpointに移動し、統合ドロップダウンを展開します。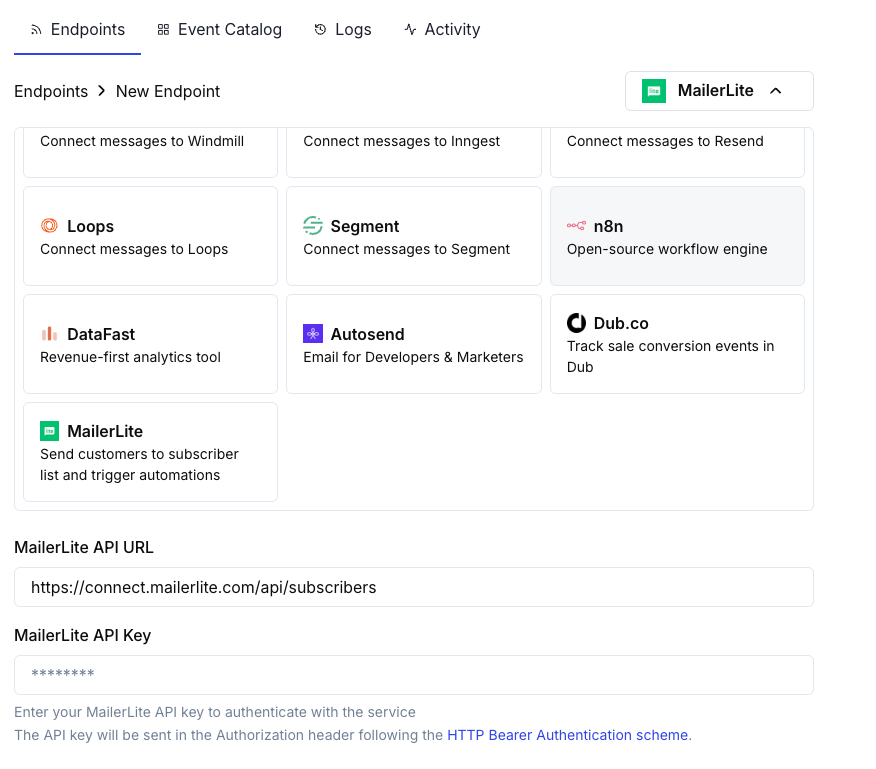
2
Select MailerLite
MailerLite インテグレーションカードを選択します。
3
Enter API Key
設定でMailerLite APIキーを入力します。
4
Configure Transformation
変換コードを編集して、MailerLiteのAPI用に購読者データを整形します。
5
Test & Create
サンプルペイロードでテストし、Create をクリックして購読者同期を有効化します。
6
Done!
支払いイベントが自動的に顧客をMailerLiteリストに同期します。
変換コードの例
成功した支払い時に顧客を追加
add_customer.js
製品に基づいて複数のグループに購読者を追加
product_segmentation.js
サブスクリプションのアクティベーション時に新しい購読者を追加
subscription_subscriber.js
サブスクリプションのキャンセル時に購読者を更新
subscription_cancelled.js
カスタムフィールドを持つ顧客を追加
custom_fields.js
イベントを介して自動化をトリガー
trigger_automation.js
ヒント
- 変換で使用する前にMailerLiteでカスタムフィールドを作成してください
- グループを使用して、製品、プランのティア、または購入行動によって顧客をセグメント化します
- フィールドの更新時にトリガーされるMailerLiteの自動化ワークフローを設定します
- 重複する購読者エラーを避けるために、upsert動作(/subscribersにPOST)を使用します
- より良い顧客インサイトのために、カスタムフィールドに支払いメタデータを保存します
- すべての支払いを有効にする前に、小さなグループでテストします
カスタムフィールドの設定
カスタムフィールドを使用する前に、MailerLiteで作成する必要があります:- MailerLiteダッシュボードにアクセスします。
- Subscribers Fields に移動します。
- Create field をクリックし、次のようなフィールドを追加します:
total_spent(Number)customer_since(Date)subscription_plan(Text)payment_method(Text)last_payment_amount(Number)
トラブルシューティング
Subscribers not being added
Subscribers not being added
- APIキーが正しく有効であることを確認します。
- メールアドレスが有効であること(RFC 2821準拠)を確認します。
- グループIDが正しいこと、かつアカウントに存在することを確認します。
- 注意: 退会済み、バウンス、またはジャンクに分類された購読者はAPI経由で再アクティベートできません。
Custom fields not updating
Custom fields not updating
- カスタムフィールドを使用する前にMailerLiteに存在することを確認します。
- フィールド名が完全に一致していること(大文字小文字を区別)を確認します。
- フィールド値が期待される型(テキスト、数値、日付)に一致していることを確認します。
Rate limit errors
Rate limit errors
- MailerLite APIには1分あたり120件のレートリミットがあります。
- 多数の購読者を処理する場合はバッチエンドポイントを使用します。
- 高負荷シナリオではバックオフ戦略を実装します。
Group assignment not working
Group assignment not working
- グループIDが数値文字列であることを確認します。
- グループがMailerLiteアカウントに存在することを確認します。
- 注意: グループを指定してPUTを使用すると、リストにないグループから購読者が削除されます。
APIリファレンス
MailerLite購読者APIは、次の主要なパラメータを受け入れます:
完全なAPIドキュメントについては、MailerLite Developersを訪問してください。