New Features
1. Credit-Based Billing
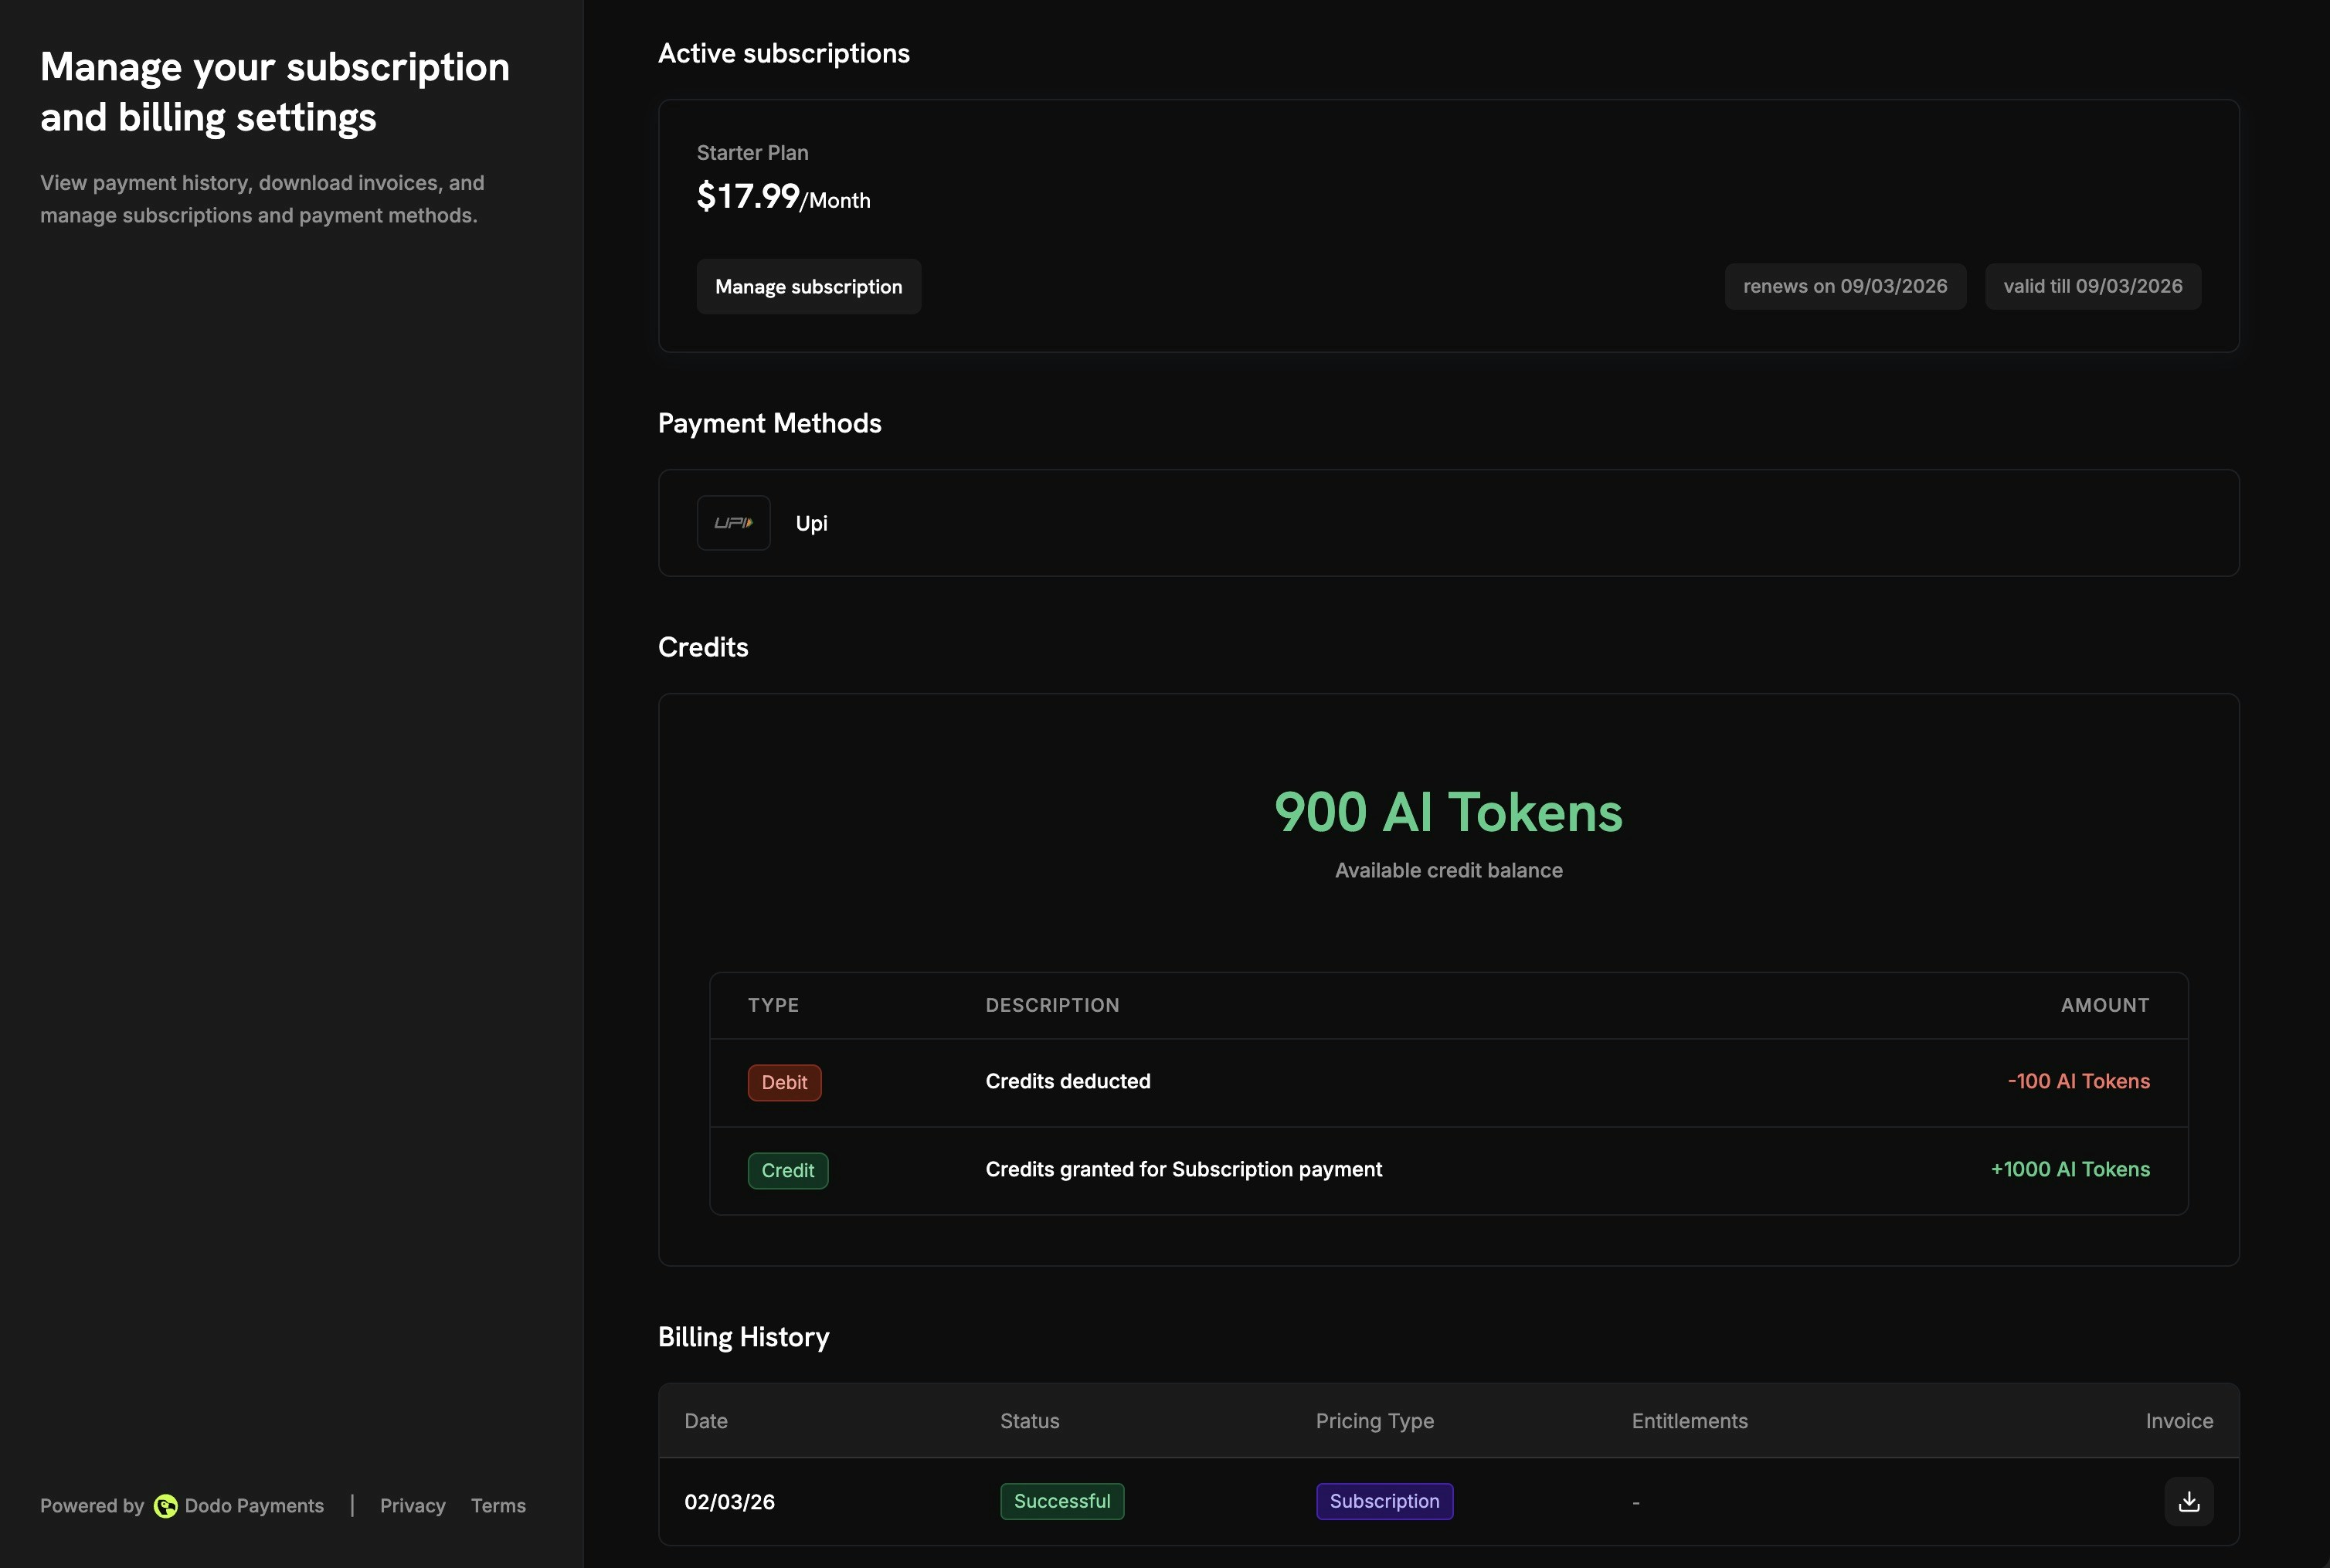
Dodo Payments now supports Credit-Based Billing, a flexible system to issue, manage, and track credit entitlements across subscriptions, one-time products, and usage-based billing. Instead of charging per-use or limiting access through feature flags, you allocate a pool of credits that customers draw from as they consume your service.
What You Can Do
| Capability | Description |
|---|
| Custom Units or Fiat Credits | Define credits in your own unit (API calls, tokens, compute hours) or as actual currency value (USD, EUR) |
| Subscription Credits | Issue credits per billing cycle with automatic re-issuance on renewal |
| One-Time Credits | Grant a fixed credit balance on purchase, ideal for top-up packs or promotional bundles |
| Usage-Based Deduction | Link credits to meters for automatic deduction based on real-time consumption events |
| Rollover | Allow unused credits to carry forward with configurable max percentage, timeframe, and rollover count |
| Overage Controls | Let customers continue using your service beyond their balance, with options to forgive, bill, or carry over the deficit |
| Expiration | Set credit validity from 7 days to never, with custom day counts |
- Credits Issued - Granted when a customer purchases a product with attached credit entitlements. For subscriptions, credits are re-issued each billing cycle.
- Credits Consumed - Deducted as customers use your service. Meters automatically deduct credits based on real-time events, or you can deduct manually via the dashboard or API.
- Credits Expire or Roll Over - At the end of the billing cycle (or after the configured expiry period), unused credits either expire or roll over based on your settings.
- Overage Handling - If credits run out mid-cycle, you can allow continued usage and choose how overage is handled at the end of the cycle.
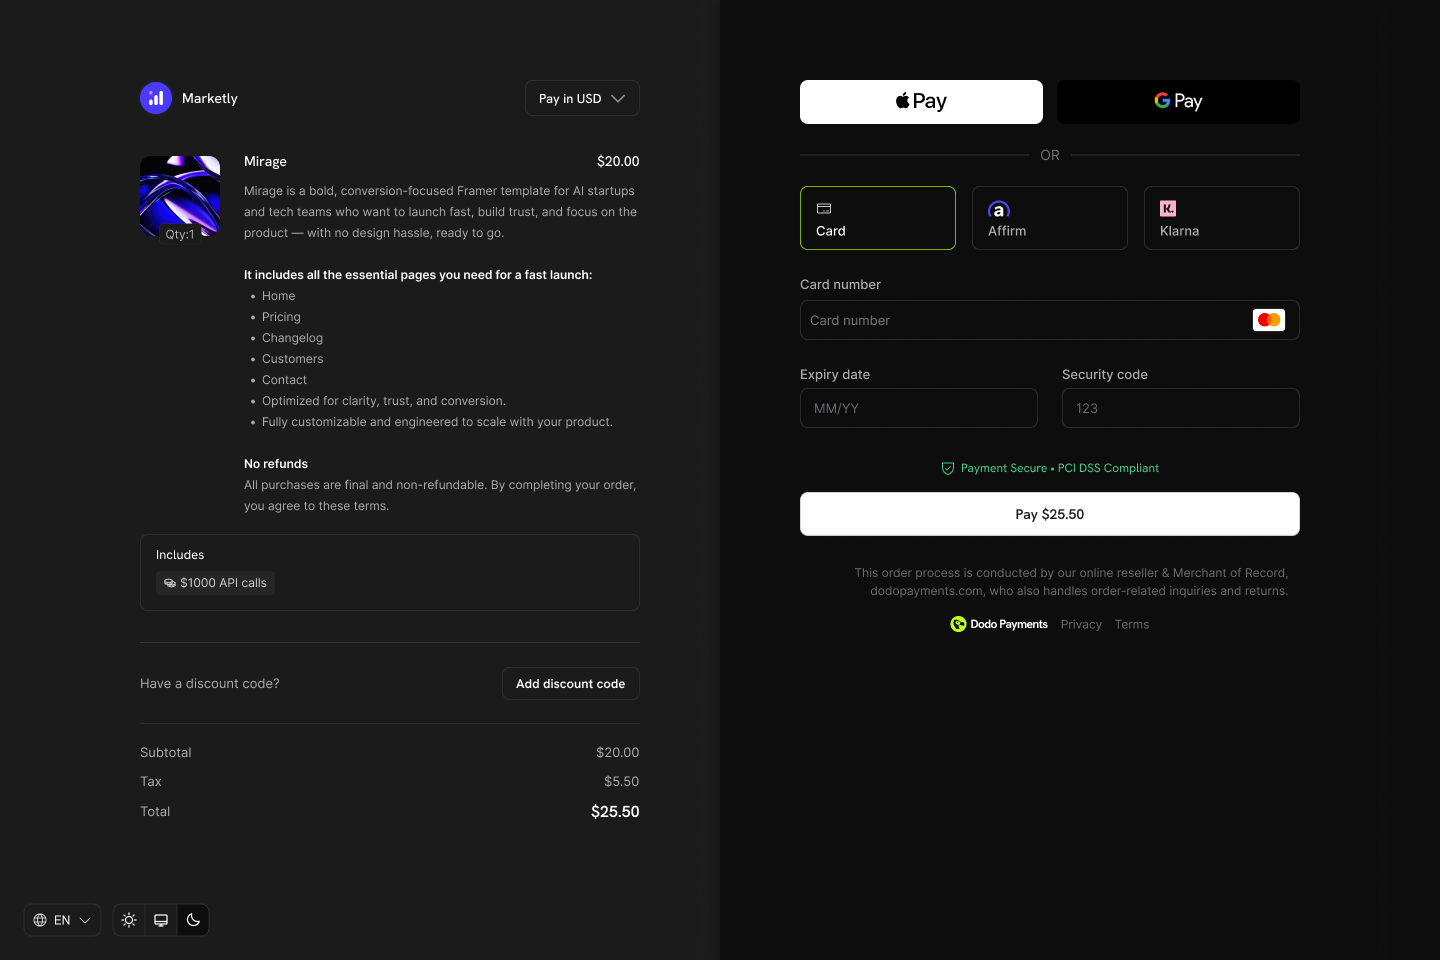
Attaching Credits to Products
Credits are attached as entitlements in the product creation flow. You can attach up to 3 credits per product, and credits work with all three pricing types: subscriptions, one-time payments, and usage-based billing.
// Create a checkout session for a product with attached credits
const session = await client.checkoutSessions.create({
  product_cart: [
    {
      product_id: 'prod_ai_pro_plan',
      quantity: 1,
    }
  ],
  customer: { email: 'customer@example.com' },
  return_url: 'https://yourapp.com/success'
});
// Send usage events that deduct credits automatically
await fetch('https://api.dodopayments.com/events/ingest', {
  method: 'POST',
  headers: {
    'Authorization': `Bearer ${process.env.DODO_API_KEY}`,
    'Content-Type': 'application/json'
  },
  body: JSON.stringify({
    events: [{
      event_id: `gen_${Date.now()}`,
      customer_id: 'cus_abc123',
      event_name: 'ai.generation',
      timestamp: new Date().toISOString(),
      metadata: { model: 'gpt-4', tokens: 1500 }
    }]
  })
});
| Event | Description |
|---|
credit.added | Credits granted to a customer |
credit.deducted | Credits consumed through usage or manual debit |
credit.expired | Unused credits expired |
credit.rolled_over | Credits carried forward to a new grant |
credit.rollover_forfeited | Credits forfeited at max rollover count |
credit.overage_charged | Overage charges applied |
credit.manual_adjustment | Manual credit/debit adjustment made |
credit.balance_low | Balance dropped below configured threshold |
Start with simple settings, no rollover, no overage, and add complexity as you learn how customers use credits. Most settings can be updated at any time without affecting existing grants.
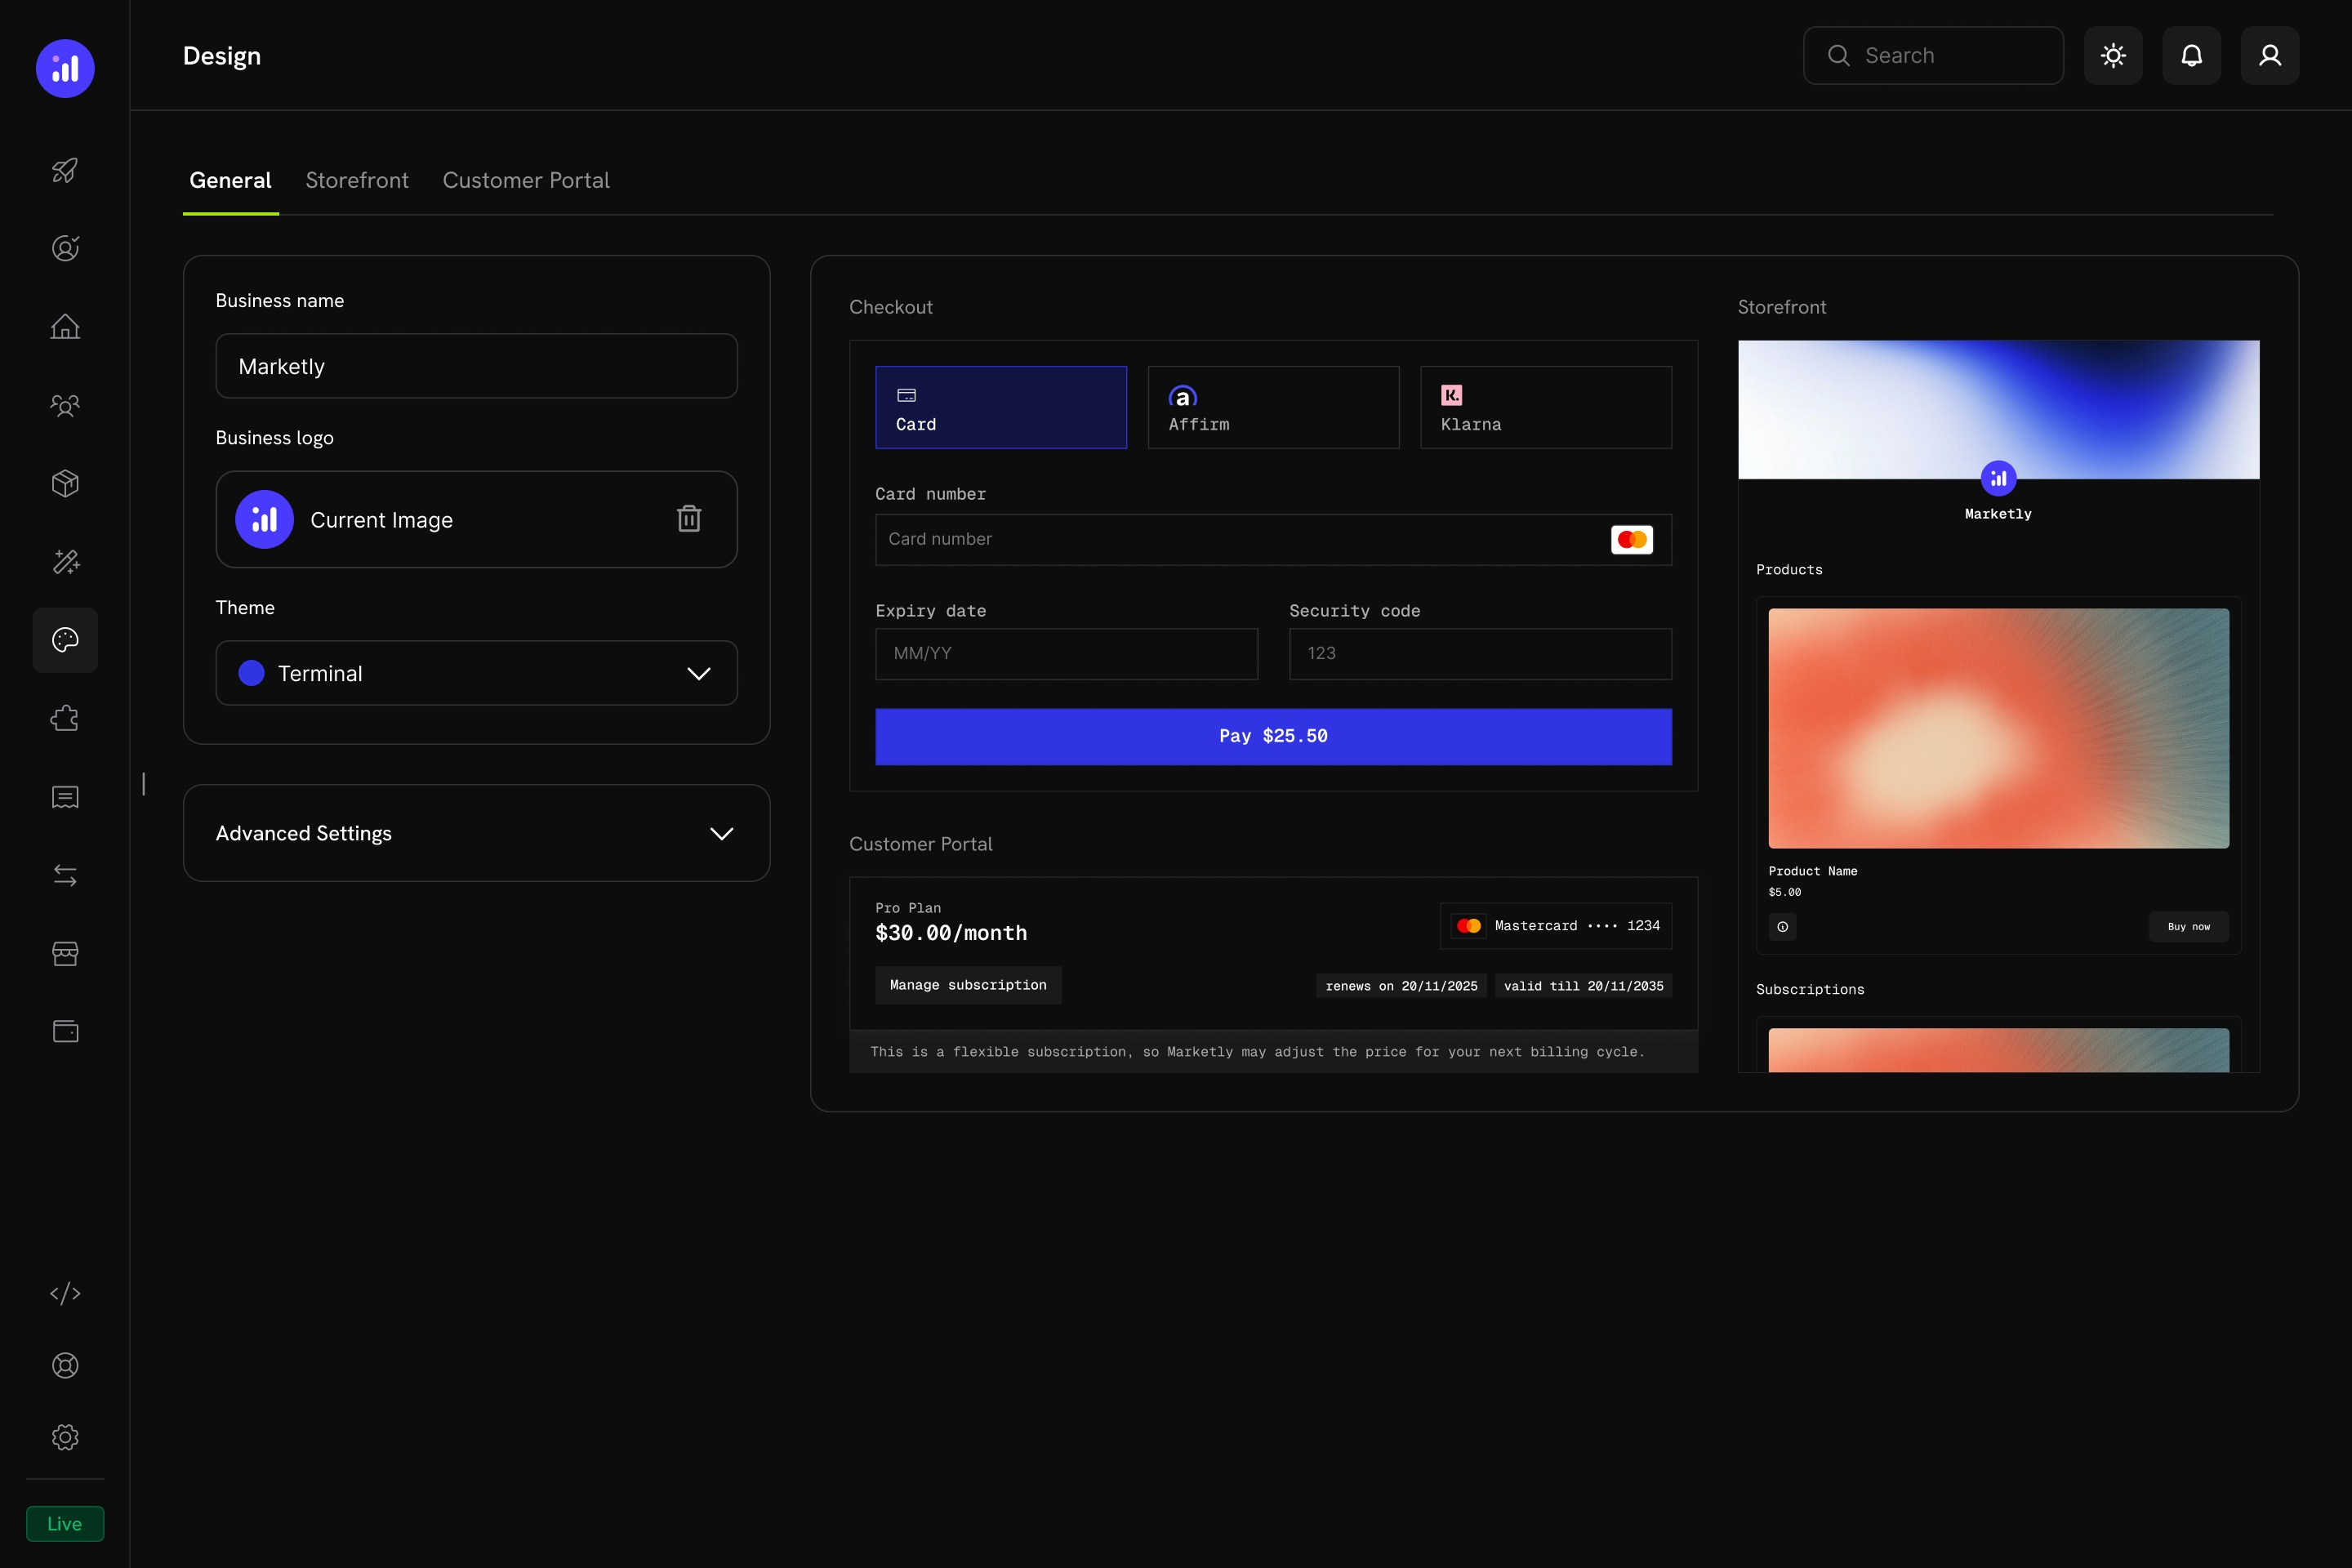
2. Design & Theme Customization
Introducing the new Design page, a unified hub for customizing the look and feel of your checkout, storefront, and customer portal from a single place. Choose pre-built themes, configure typography and colors, and apply per-section overrides, all with a live preview before you save.
Key Highlights
| Feature | Description |
|---|
| Unified Design Hub | Configure checkout, storefront, and customer portal appearance from a single page |
| Pre-Built Themes | Start with a curated theme (Dodo Pulses, Terminal, Bumblebee, or Bubblegum) and customize from there |
| Light & Dark Mode | Define separate color palettes for each mode |
| Live Preview | See how your changes look across checkout, customer portal, and storefront before saving |
| Per-Section Overrides | Fine-tune individual sections without affecting the others |
| Programmatic Control | Override themes at checkout time via the API or Checkout SDK |
| Tab | Purpose |
|---|
| General | Business name, logo, theme selection, and global advanced settings |
| Checkout | Override theme settings specifically for the checkout page |
| Storefront | Override theme settings and configure storefront layout |
| Customer Portal | Override theme settings for the customer portal |
- Dodo Pulses - The default theme with lime green accents and clean sans-serif typography
- Terminal - Developer-oriented with monospaced typography and royal blue accents
- Bumblebee - Warm amber and gold accents with bold, premium styling
- Bubblegum - Playful pink and magenta accents with fully rounded corners
After selecting a pre-built theme, you can further customize individual properties in the Advanced Settings. Any unspecified properties fall back to the theme defaults.
3. Refund Status and Dispute Status in List Payments API
The GET /payments list endpoint now includes refund_status and dispute_status fields in each payment item, so you can see refund and dispute state at a glance without fetching individual payment details.
| Field | Type | Description |
|---|
refund_status | partial | full | null | Summary of the refund status for this payment. null if no succeeded refunds exist |
dispute_status | string | null | The most recent dispute status for this payment. null if no disputes exist |
dispute_status values: dispute_opened, dispute_expired, dispute_accepted, dispute_cancelled, dispute_challenged, dispute_won, dispute_lost
You can also filter payments by dispute status using the dispute_status query parameter:
# List all payments with open disputes
curl -X GET 'https://api.dodopayments.com/payments?dispute_status=dispute_opened' \
  -H 'Authorization: Bearer YOUR_API_KEY'
Use these fields to build dispute and refund dashboards, trigger alerts on dispute status changes, or filter your payment list to surface payments that need attention.
4. Refunds Table in Customer Portal
The Customer Portal now includes a dedicated Refunds section where customers can view all refunds associated with their payments. Each refund entry shows the refund amount, status, date, and the original payment it was issued against, giving customers full transparency into their refund history without needing to contact support.
The refunds table is available automatically in the customer portal for all businesses. No configuration is needed.
5. Copy to Live Mode for Meters
You can now copy meters from test mode to live mode directly from the dashboard. When you’ve finished testing a meter configuration in test mode, use the copy action to replicate it to live mode with all settings preserved: aggregation type, event name, filters, and credit associations. This eliminates the need to manually recreate meters when moving from development to production.
Build and validate your meter configurations in test mode first, then copy them to live mode when you’re ready to go to production. This ensures your billing setup is tested before it handles real customer usage.