pending grant and waits for you to supply the key value from your own system, a third-party vendor, or a finite pool of codes.
By the end you will have:
- A product with a License Key entitlement set to
manualfulfillment. - A webhook listener that detects when a customer is waiting for a key.
- A fulfillment call that delivers the key and notifies the customer automatically.
License Keys overview
The full license key lifecycle and the
fulfillment_mode setting.Fulfill License Key Grant API
API reference for the endpoint you call to deliver a key.
How It Works
Manual fulfillment changes only the issuance step. Activation, validation, deactivation, expiry, and revocation behave exactly like an auto-generated key once delivered.Prerequisites
To follow this guide you’ll need:- A Dodo Payments merchant account.
- Your API key (
DODO_PAYMENTS_API_KEY) and webhook secret key from the dashboard. See the API key generation guide. - A backend endpoint that can receive webhooks.
Use
https://test.dodopayments.com and test-mode credentials while building. Switch to https://live.dodopayments.com and live keys when you go to production.Step 1 — Create a License Key Entitlement in Manual Mode
An entitlement is a reusable definition of what you deliver. Create a License Key entitlement and set itsfulfillment_mode to manual.
- Dashboard
- API
1
Open Entitlements
Go to Entitlements in your dashboard and click + to create a new entitlement.
2
Choose License Key
Select License Key as the integration and give it a Name. The form exposes these fields: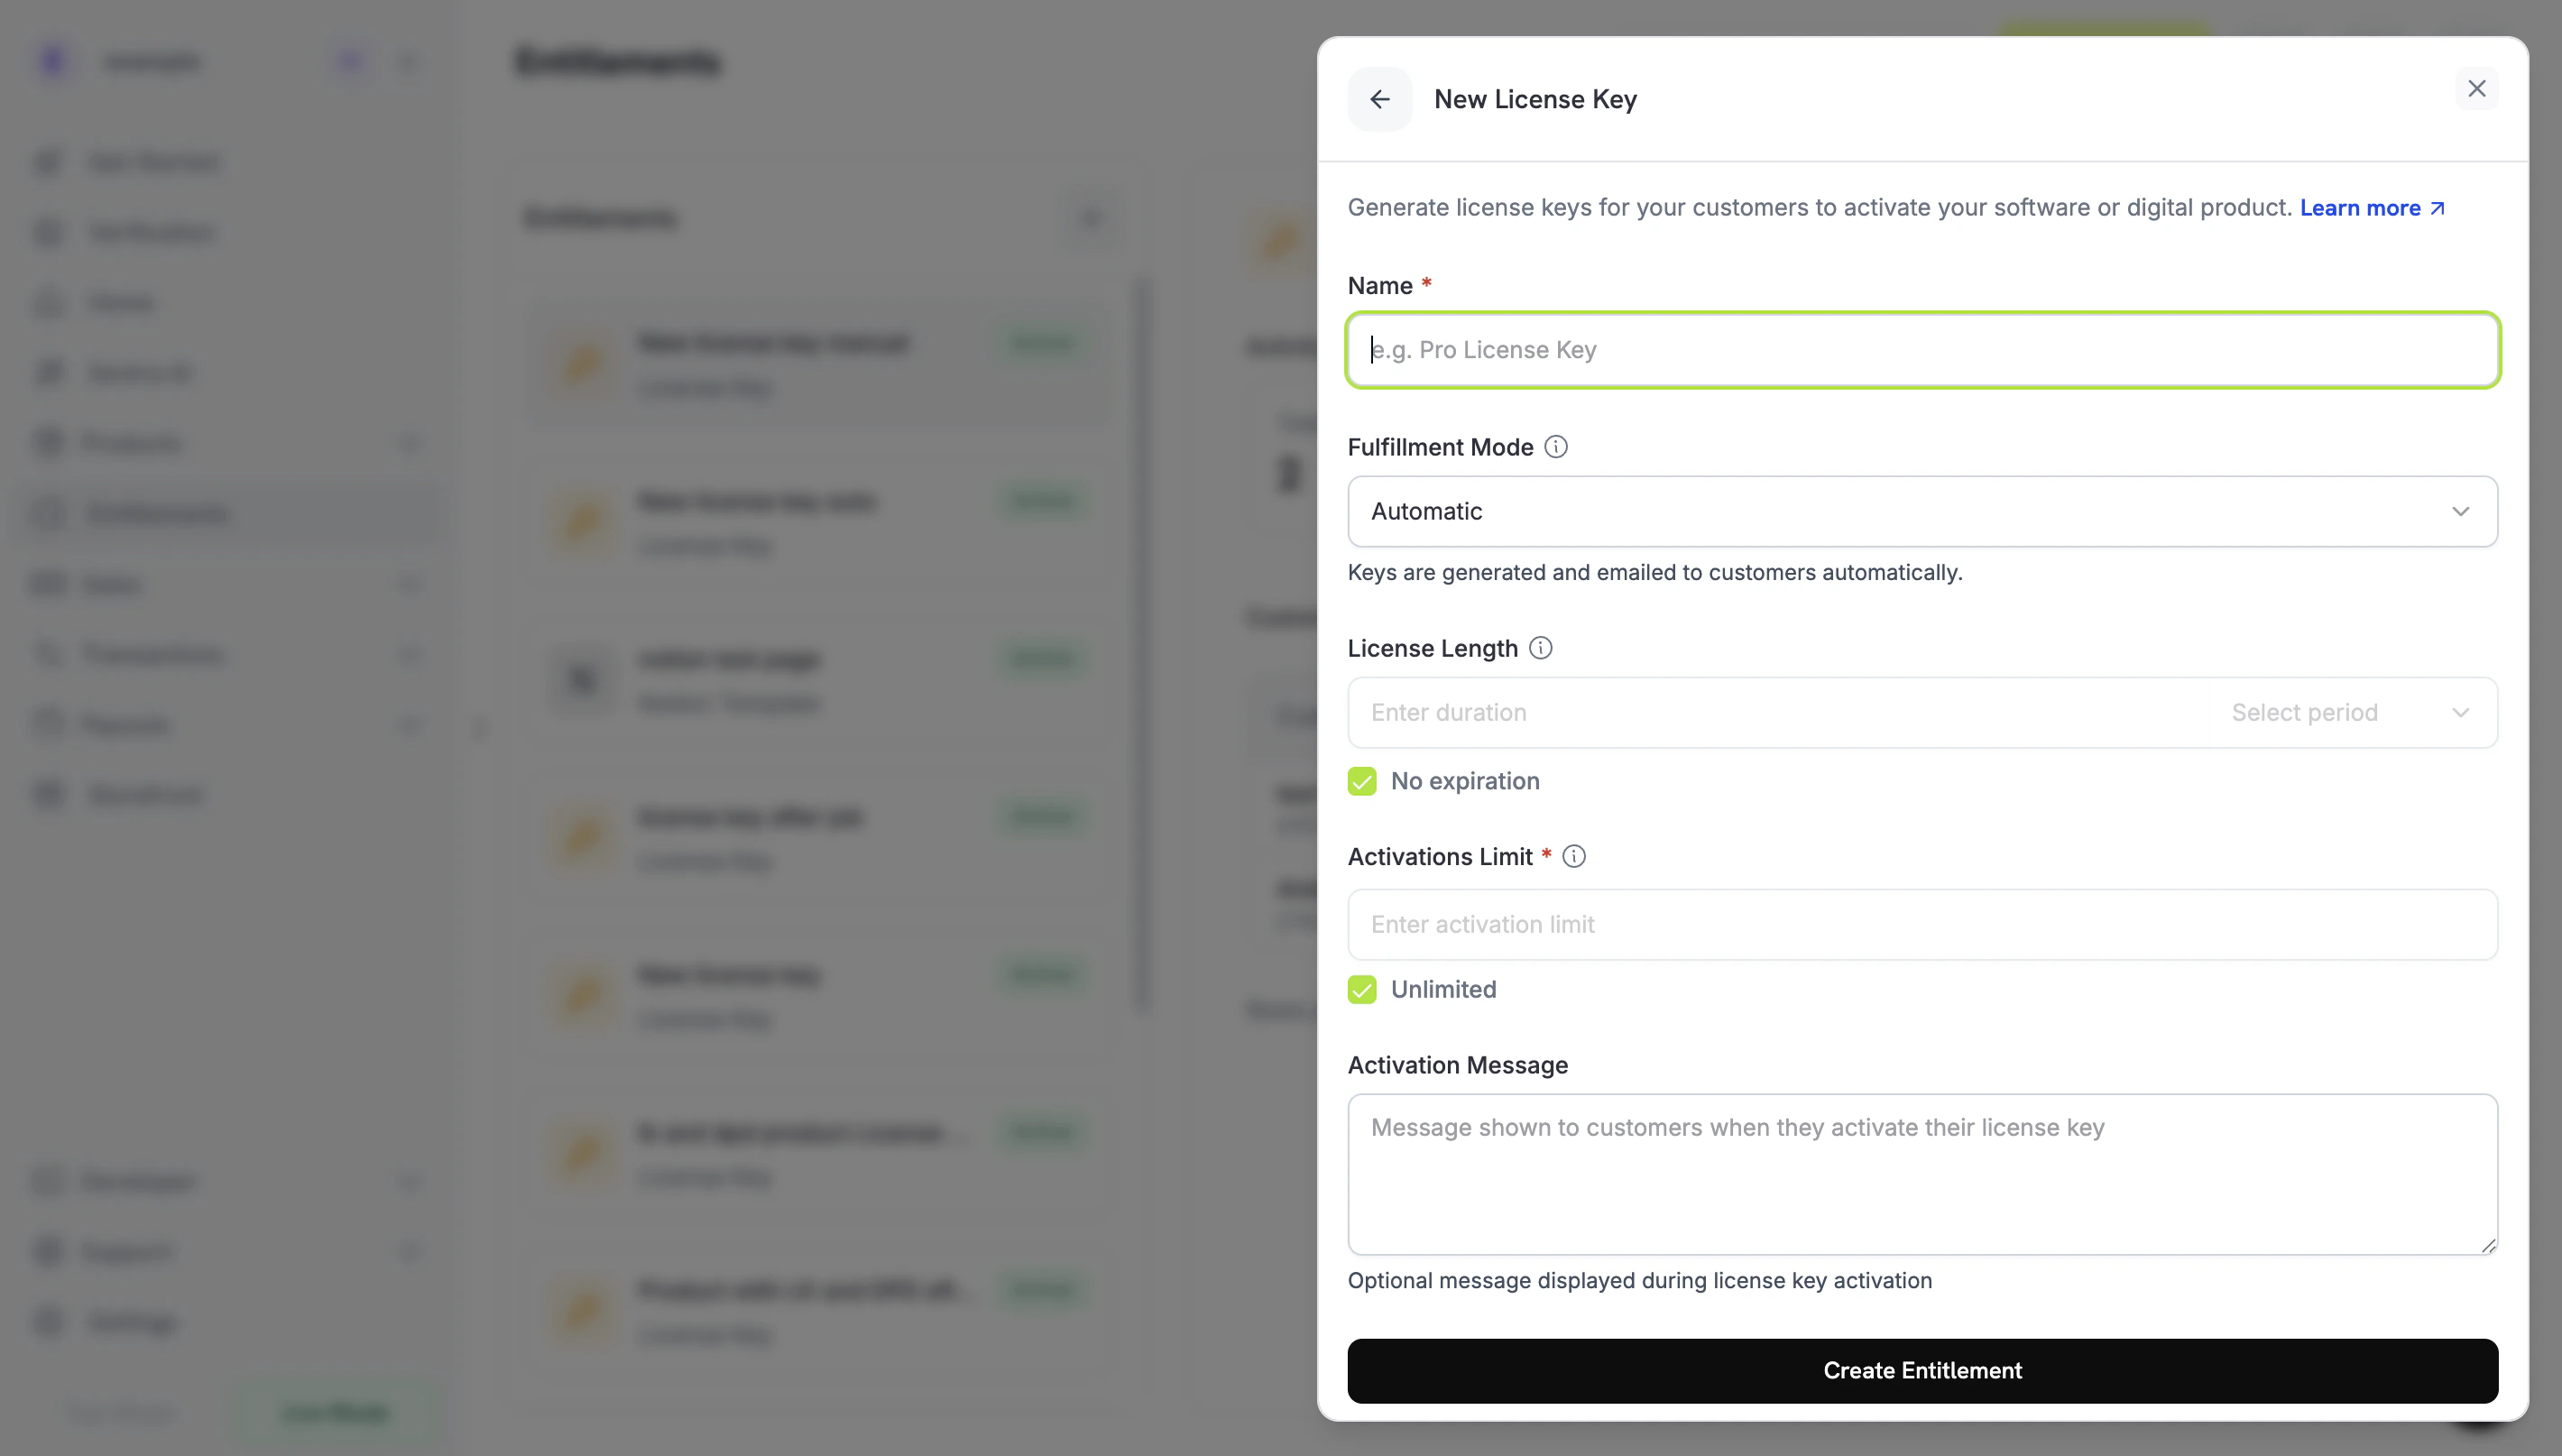
- Fulfillment Mode —
Automaticby default. This is the setting that enables manual fulfillment; you change it in the next step. - License Length — how long each issued key stays valid, or No expiration.
- Activations Limit — maximum activations per key, or Unlimited.
- Activation Message — optional customer-facing message shown when they activate the key.
3
Set Fulfillment Mode to Manual
Open the Fulfillment Mode dropdown and change it from Automatic to Manual. This is the setting that drives this entire guide — without it, keys are generated and emailed automatically and no pending grant is created. With Manual selected, each purchase creates a
pending grant for you to fulfill. Click Create Entitlement to save.fulfillment_mode defaults to auto. Omitting it, or leaving an existing entitlement unchanged, keeps the automatic behavior. Only entitlements explicitly set to manual create pending grants.Step 2 — Attach the Entitlement to a Product
Open the product you want to sell, expand Advanced Settings → Entitlements & Credits, and select the License Key entitlement you set to Manual in Step 1. A single product can deliver this license key alongside other entitlements on the same purchase.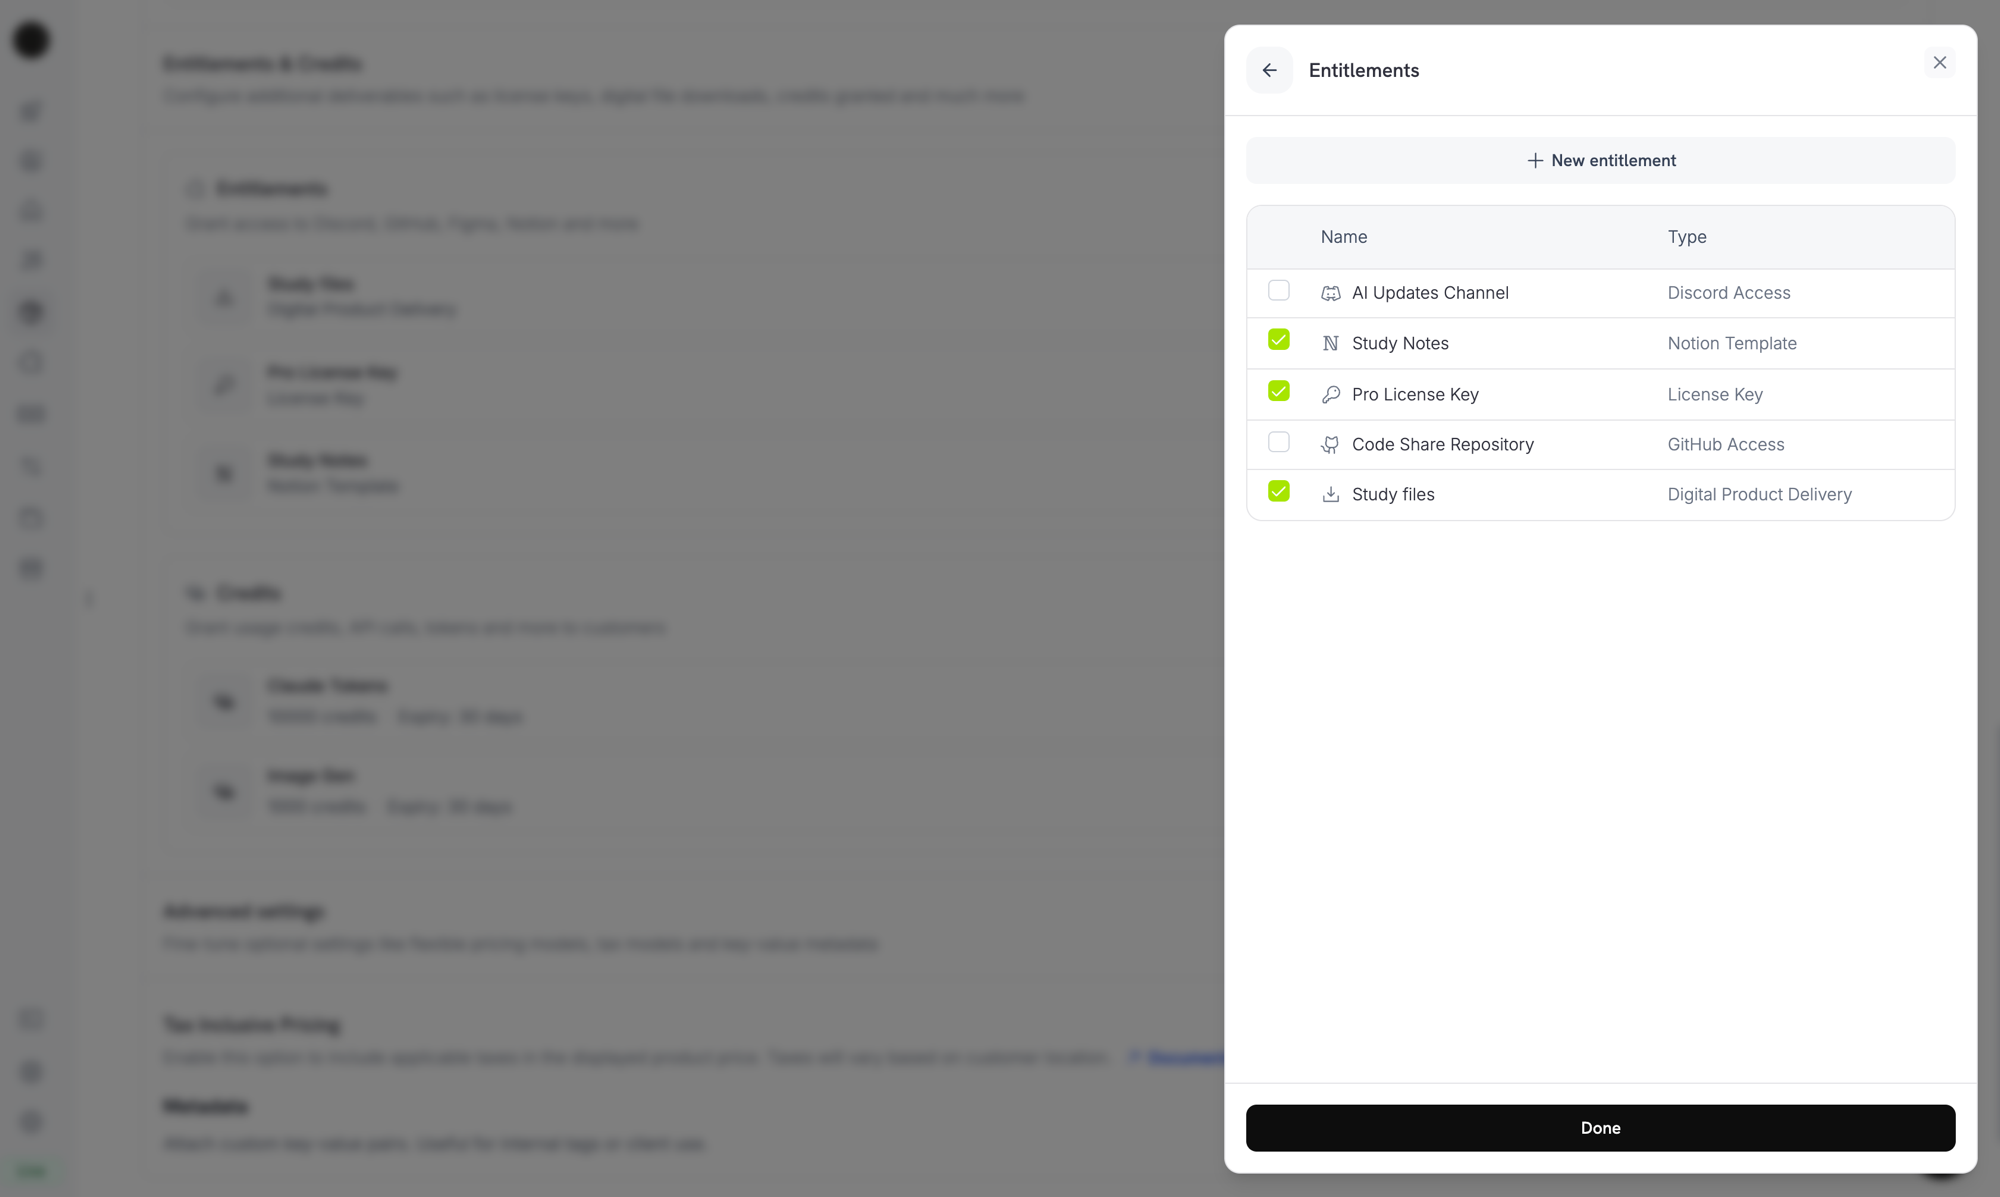
Selecting the License Key entitlement in the product entitlements panel.
Fulfillment mode is a property of the entitlement, not the product. Because you set it to Manual in Step 1, every product this entitlement is attached to creates
pending license-key grants on purchase — there is nothing extra to configure here.Step 3 — Detect Pending Grants
When a customer buys the product, Dodo Payments creates a grant inpending status with no key attached and fires an entitlement_grant.created webhook. This is your signal that a customer is waiting for a key.
Listen for the webhook
Set up a webhook endpoint (Developer → Webhooks in the dashboard) and act on pending license-key grants. The implementation follows the Standard Webhooks specification.integration_type: "license_key", so you can recognize a license-key grant without an extra lookup. See the Entitlement Grant webhook reference for the full payload.
Or poll the List Grants API
If you’d rather not rely on webhooks, list the grants for your License Key entitlement and filter bystatus. Every grant on a License Key entitlement is already a license-key grant, so no integration_type filter is needed:
Step 4 — Deliver the Key
Obtain the key value from your own system, then submit it with the Fulfill License Key Grant endpoint. This requires your secret API key (Editor permission); it is not one of the public license endpoints.Request fields
The license key string to deliver to the customer. Whitespace is trimmed; an empty or whitespace-only value is rejected.
Per-key activation limit. Falls back to the entitlement config when omitted.
Per-key expiry (ISO 8601). Falls back to the entitlement config’s duration when omitted. For subscription-issued grants, validity remains tied to the subscription regardless.
delivered, the customer is sent the key automatically (the same email they’d receive under auto fulfillment), and entitlement_grant.delivered fires.
The customer receives an email with the license key, the product, activation limit, expiry, and your activation instructions:
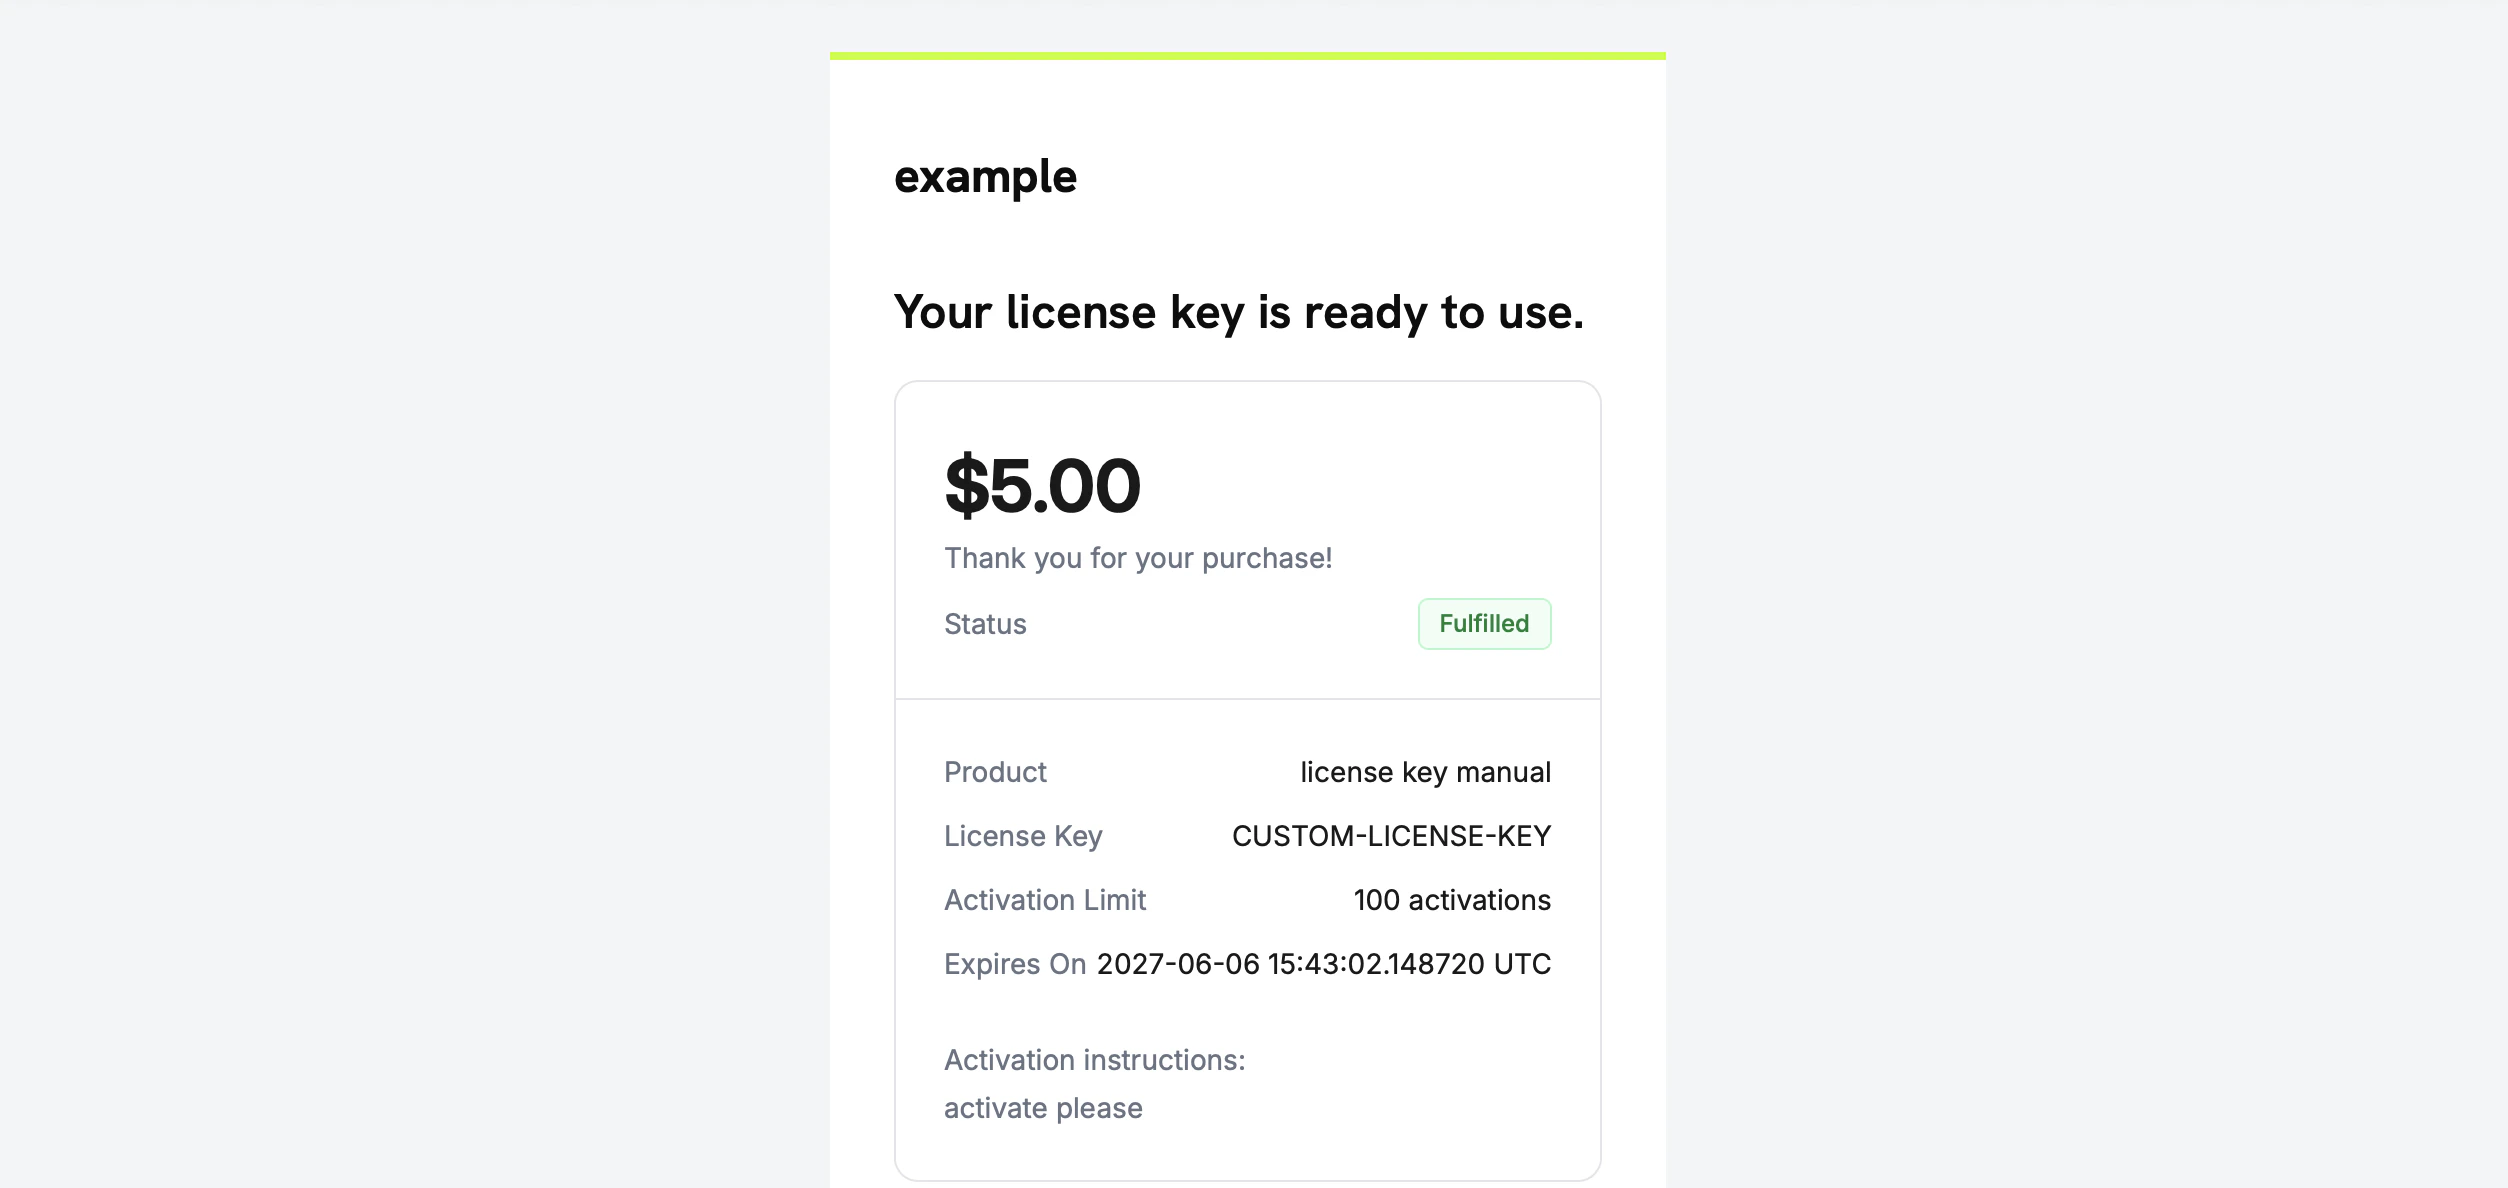
The license key email the customer receives once you fulfill the grant.
You do not need to email the key yourself — delivery happens automatically when the grant is fulfilled.
Step 5 — Handle Errors and Retries
The endpoint validates the grant before delivering anything. Handle these responses:Verify the Flow
- Buy the product in test mode (see the checkout guides).
- Confirm your webhook received
entitlement_grant.createdwithstatus: "pending"andintegration_type: "license_key", or that the grant appears in the List Grants response with those filters. - Call the fulfill endpoint with a test key.
- Confirm the response shows
status: "delivered"with a populatedlicense_key, the customer receives the key email, andentitlement_grant.deliveredfires.
Once delivered, the customer can activate and validate the key against the public license endpoints exactly like an auto-generated key.
Related API Reference
Create Entitlement
Create the License Key entitlement with
fulfillment_mode: manual.List Grants
Filter by
integration_type and status to find pending grants.Fulfill License Key Grant
Deliver the key value and transition the grant to delivered.
Entitlement Grant Webhooks
The
entitlement_grant.* events that signal pending and delivered grants.