

- Create a custom credit entitlement for tokens, and a meter that deducts from it.
- Attach credits to subscription plans, with and without overage, and to a one-time top-up product.
- Call OpenAI from an endpoint that bills tokens through Dodo Payments.
- Read a customer’s live credit balance with the SDK.
- Verify webhook signatures and route Dodo Payments credit events.
What We’re Building
NeuralAPI sells three products:- A Dodo Payments account. Build everything in test mode.
- An OpenAI API key.
- Node.js 22 or later, and working knowledge of TypeScript and Node.js.
Step 1: Create Your Token Credit Entitlement
Create the credit entitlement that both plans and the top-up pack share. It defines the token unit NeuralAPI sells.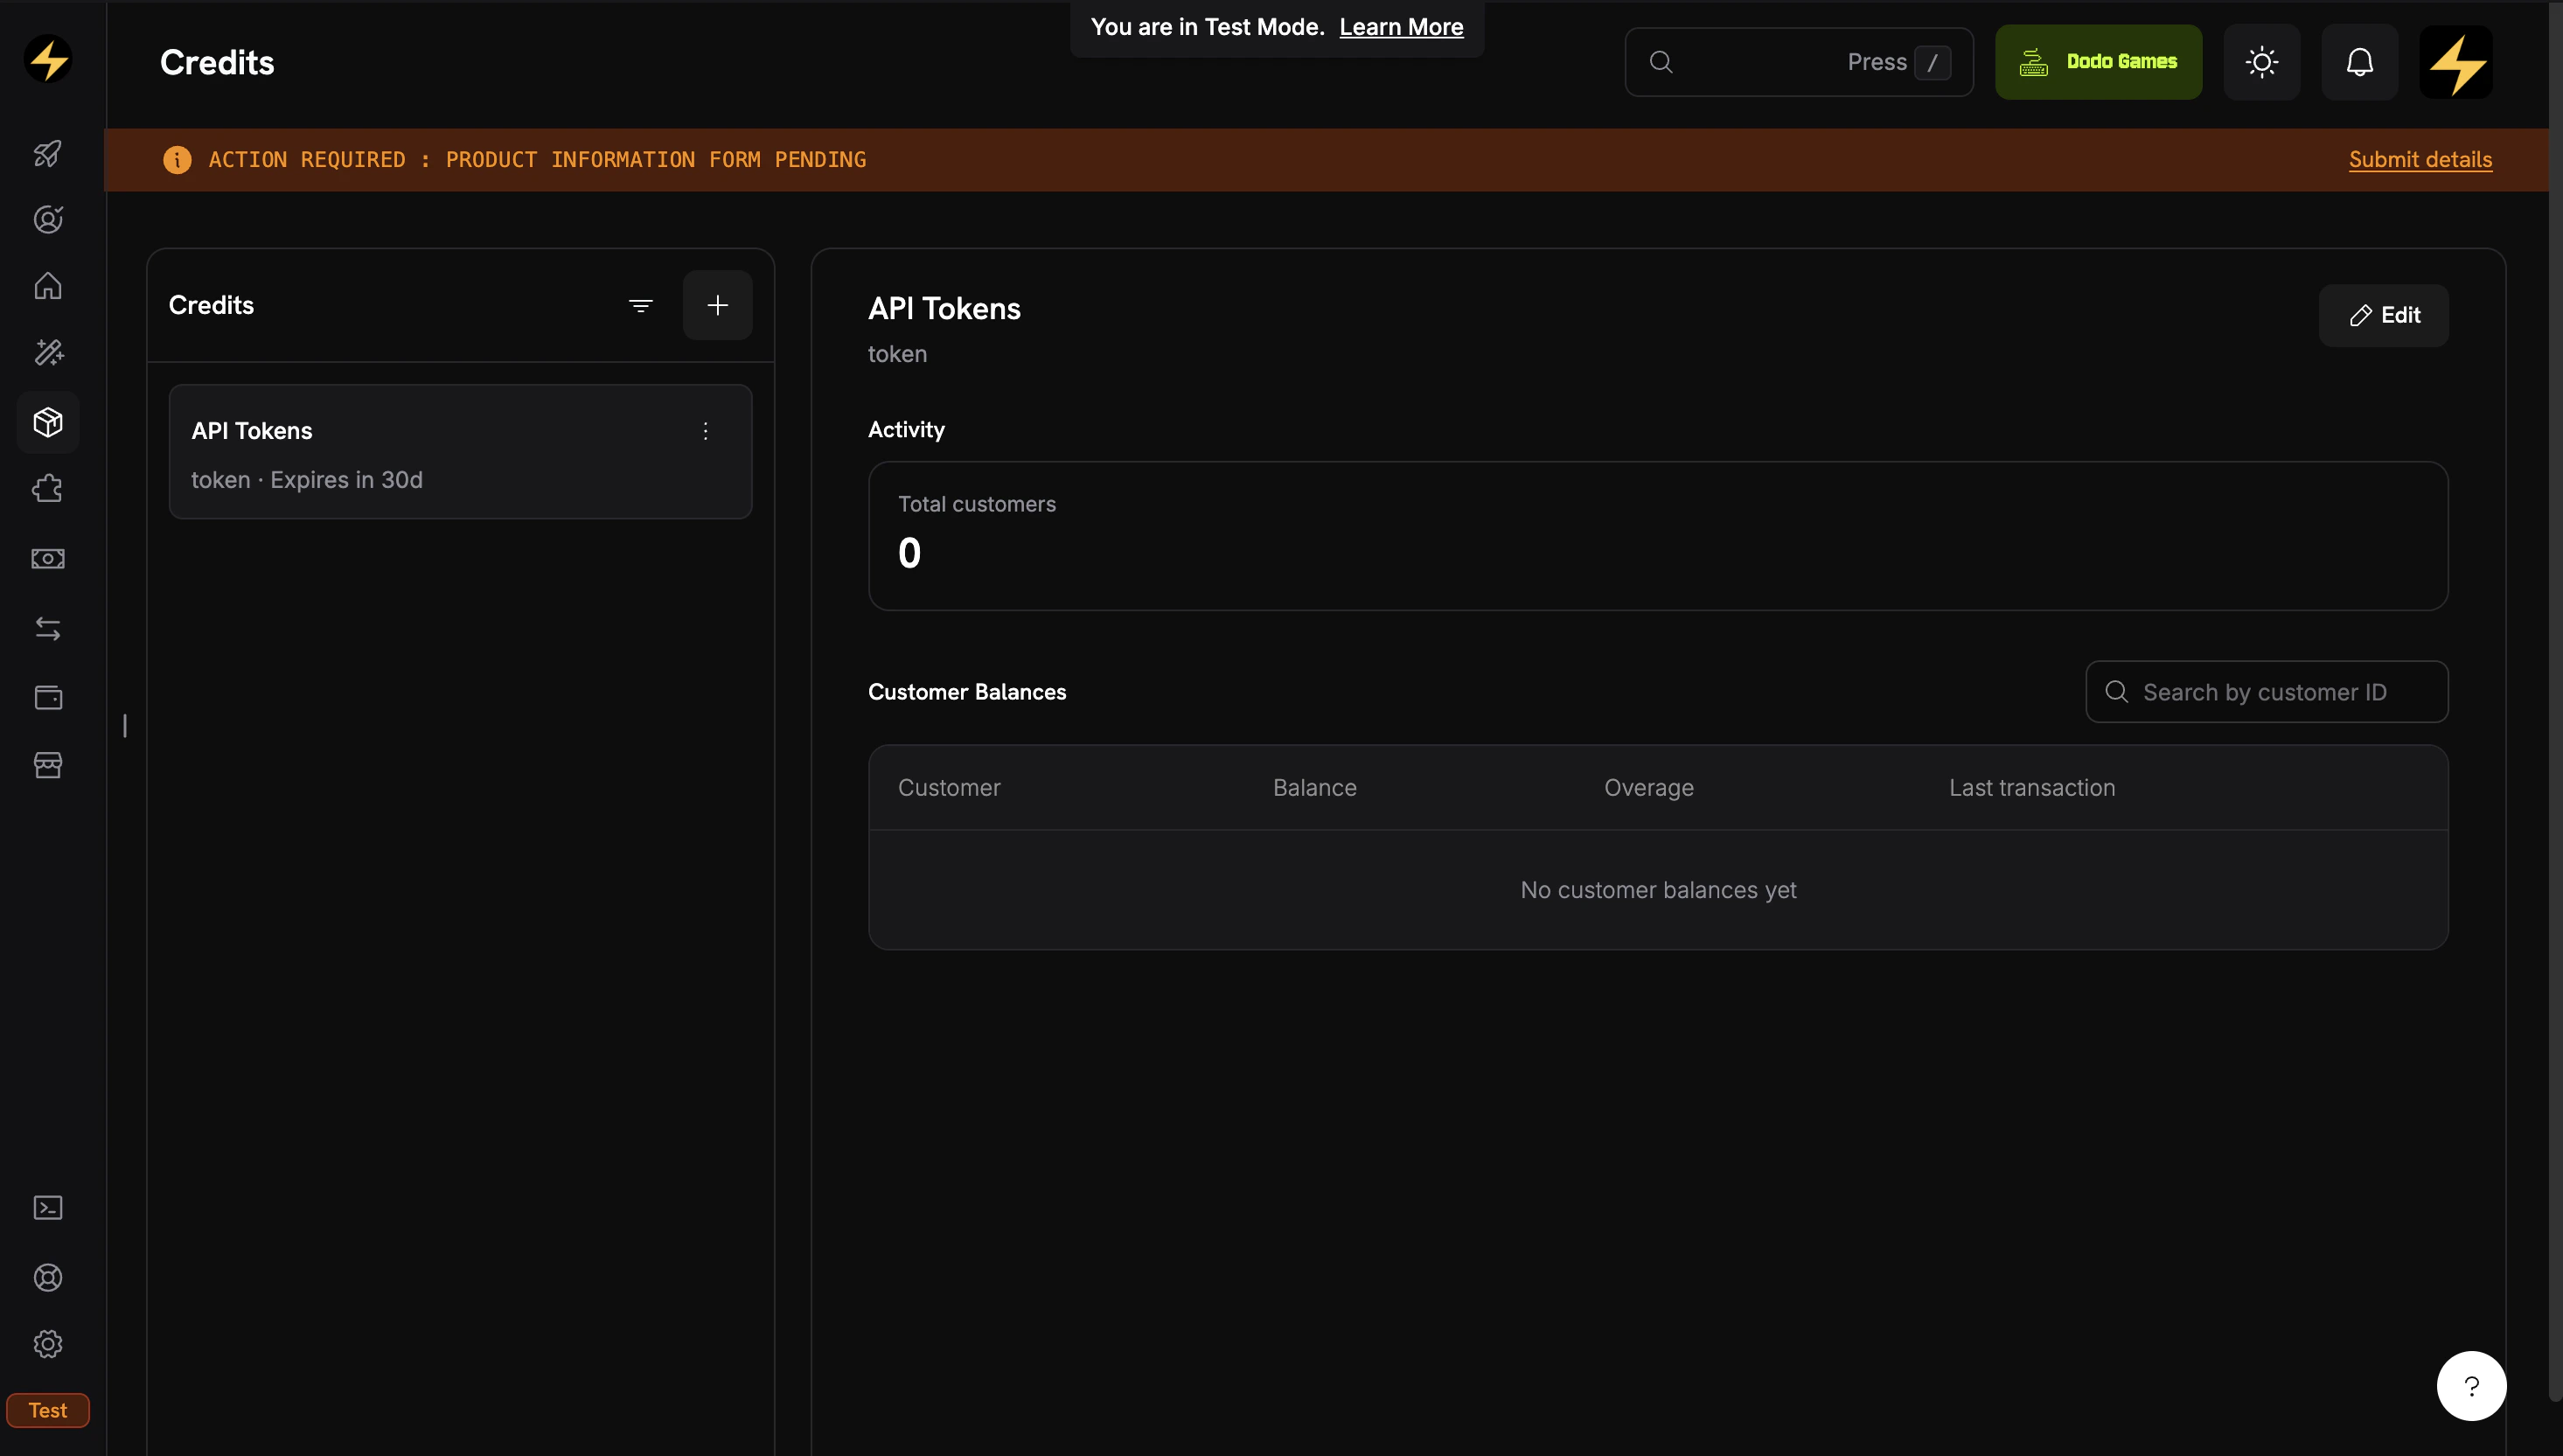
The Credits tab under Products shows all your credit entitlements.
Navigate to Credits
- Log in to the Dodo Payments dashboard.
- Click Products in the sidebar.
- Select the Credits tab.
- Click Create Credit.
Configure the Credit Unit
API TokensCredit Type: Custom UnitUnit Name: tokenDefine Precision: 0. Token counts are whole numbers.Credit Expiry: 30 days. Credits expire 30 days after they’re issued, which matches the monthly billing cycle.Skip Overage at the Credit Level
Save and Copy the Credit ID
cde_.API Tokens credit entitlement is ready. Next, create a meter so that usage events deduct credits.Step 2: Create a Meter for Token Usage
A meter aggregates incoming usage events. When you link it to a credit, the aggregated usage is deducted from the customer’s credit balance. Create the meter before the plan products, because you attach it while you create them in Step 3.Open the Meters Section
- In the dashboard sidebar, go to Products → Meters.
- Click Create Meter.
Configure the Meter
Token Usage MeterEvent Name: api.tokens_used. This must match the event_name your app sends.Aggregation Type: Sum, to add up the token count from each event.Over Property: tokens, the metadata key whose value is summed.Measurement Unit: tokensCreate the meter. You select it by name when you attach it to products.Step 3: Create the Plan Products
Create both plans with the Usage Based Billing pricing type, not plain Subscription. Meters attach to Usage Based Billing products, and the meter is what deducts credits as customers call your API. A Usage Based Billing product still charges a recurring base fee ($29 or $99), and usage on top of it is billed in credits.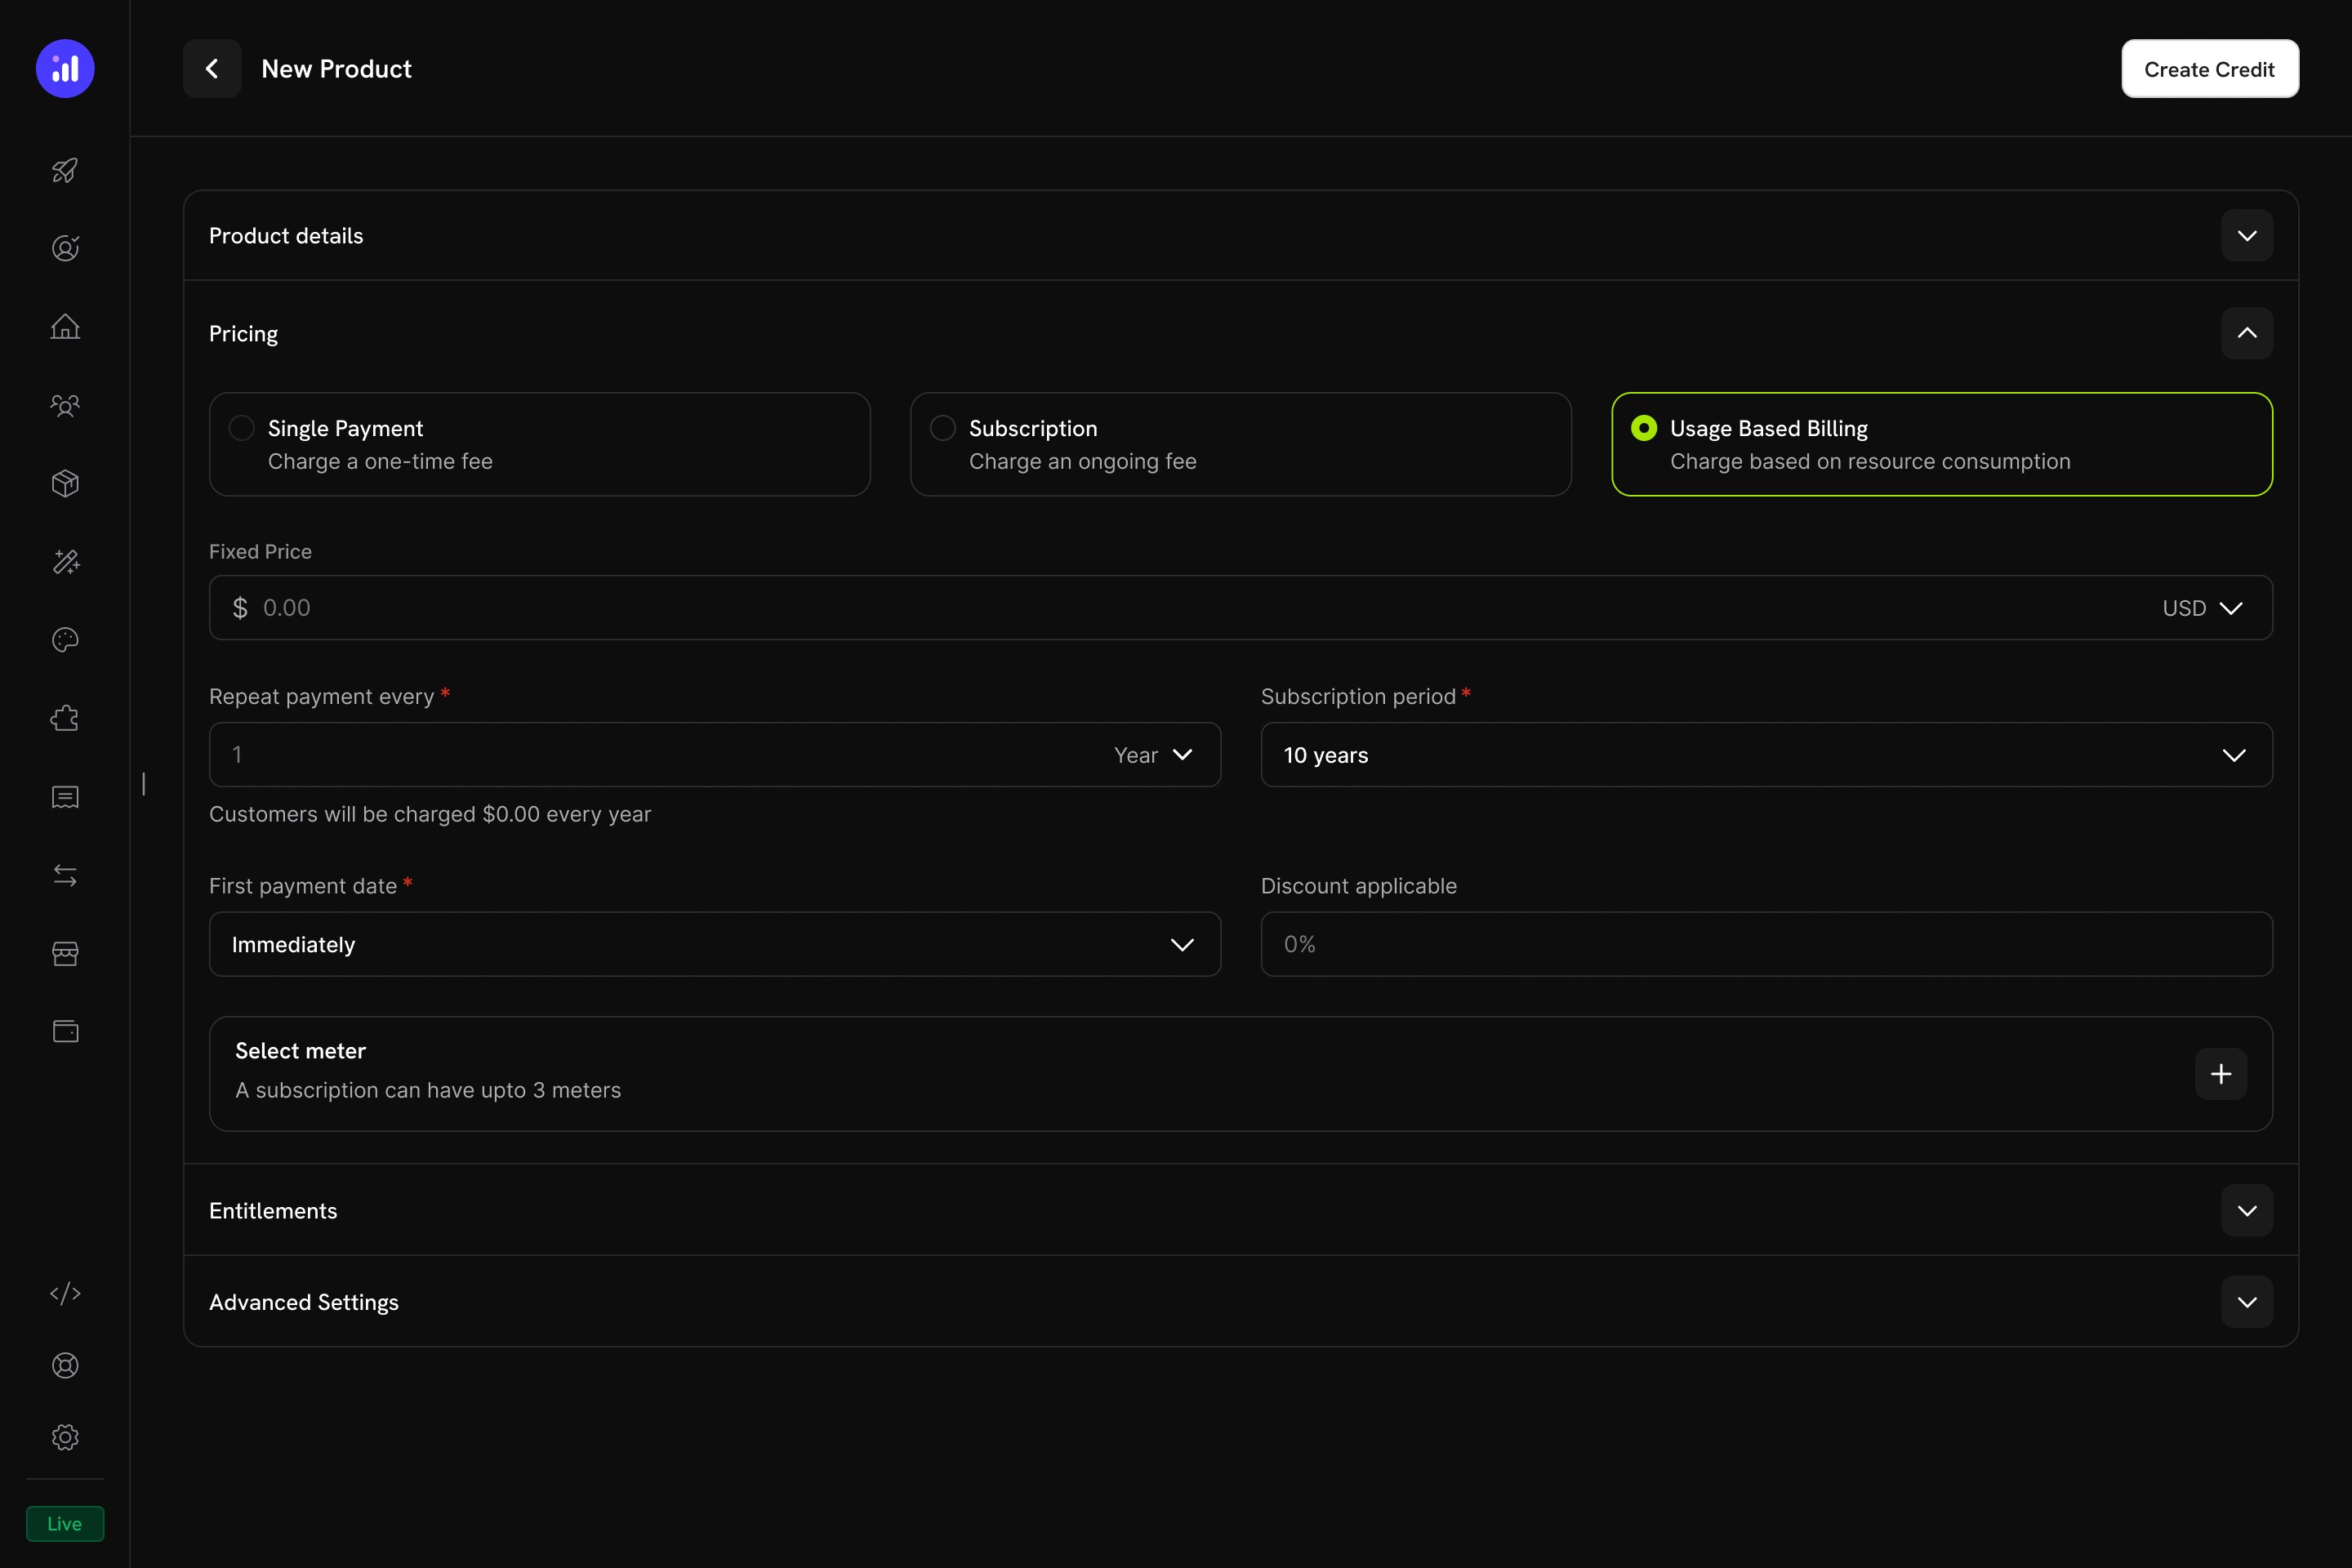
Usage Based Billing pricing type with meter configuration.
Starter Plan ($29/month — 10M Tokens, No Overage)
Create the Starter Product
- Go to Products and click Add Product.
- Under Pricing Type, select Usage Based Billing.
- Enter these values:
NeuralAPI StarterDescription: 10 million API tokens per month. Perfect for individual developers and small projects.Price: 29.00. This is the recurring base fee, charged every month even before any usage.Repeat payment every: 1 monthCurrency: USDAttach the Meter
Token Usage Meter. Then configure the meter:- Turn on Bill usage in credits.
- Select credit:
API Tokens - Meter units per credit:
1. Each token in an event deducts one credit. - Free Threshold:
0. The free threshold applies only when a meter bills in money. When it bills in credits, every unit is deducted from the balance.
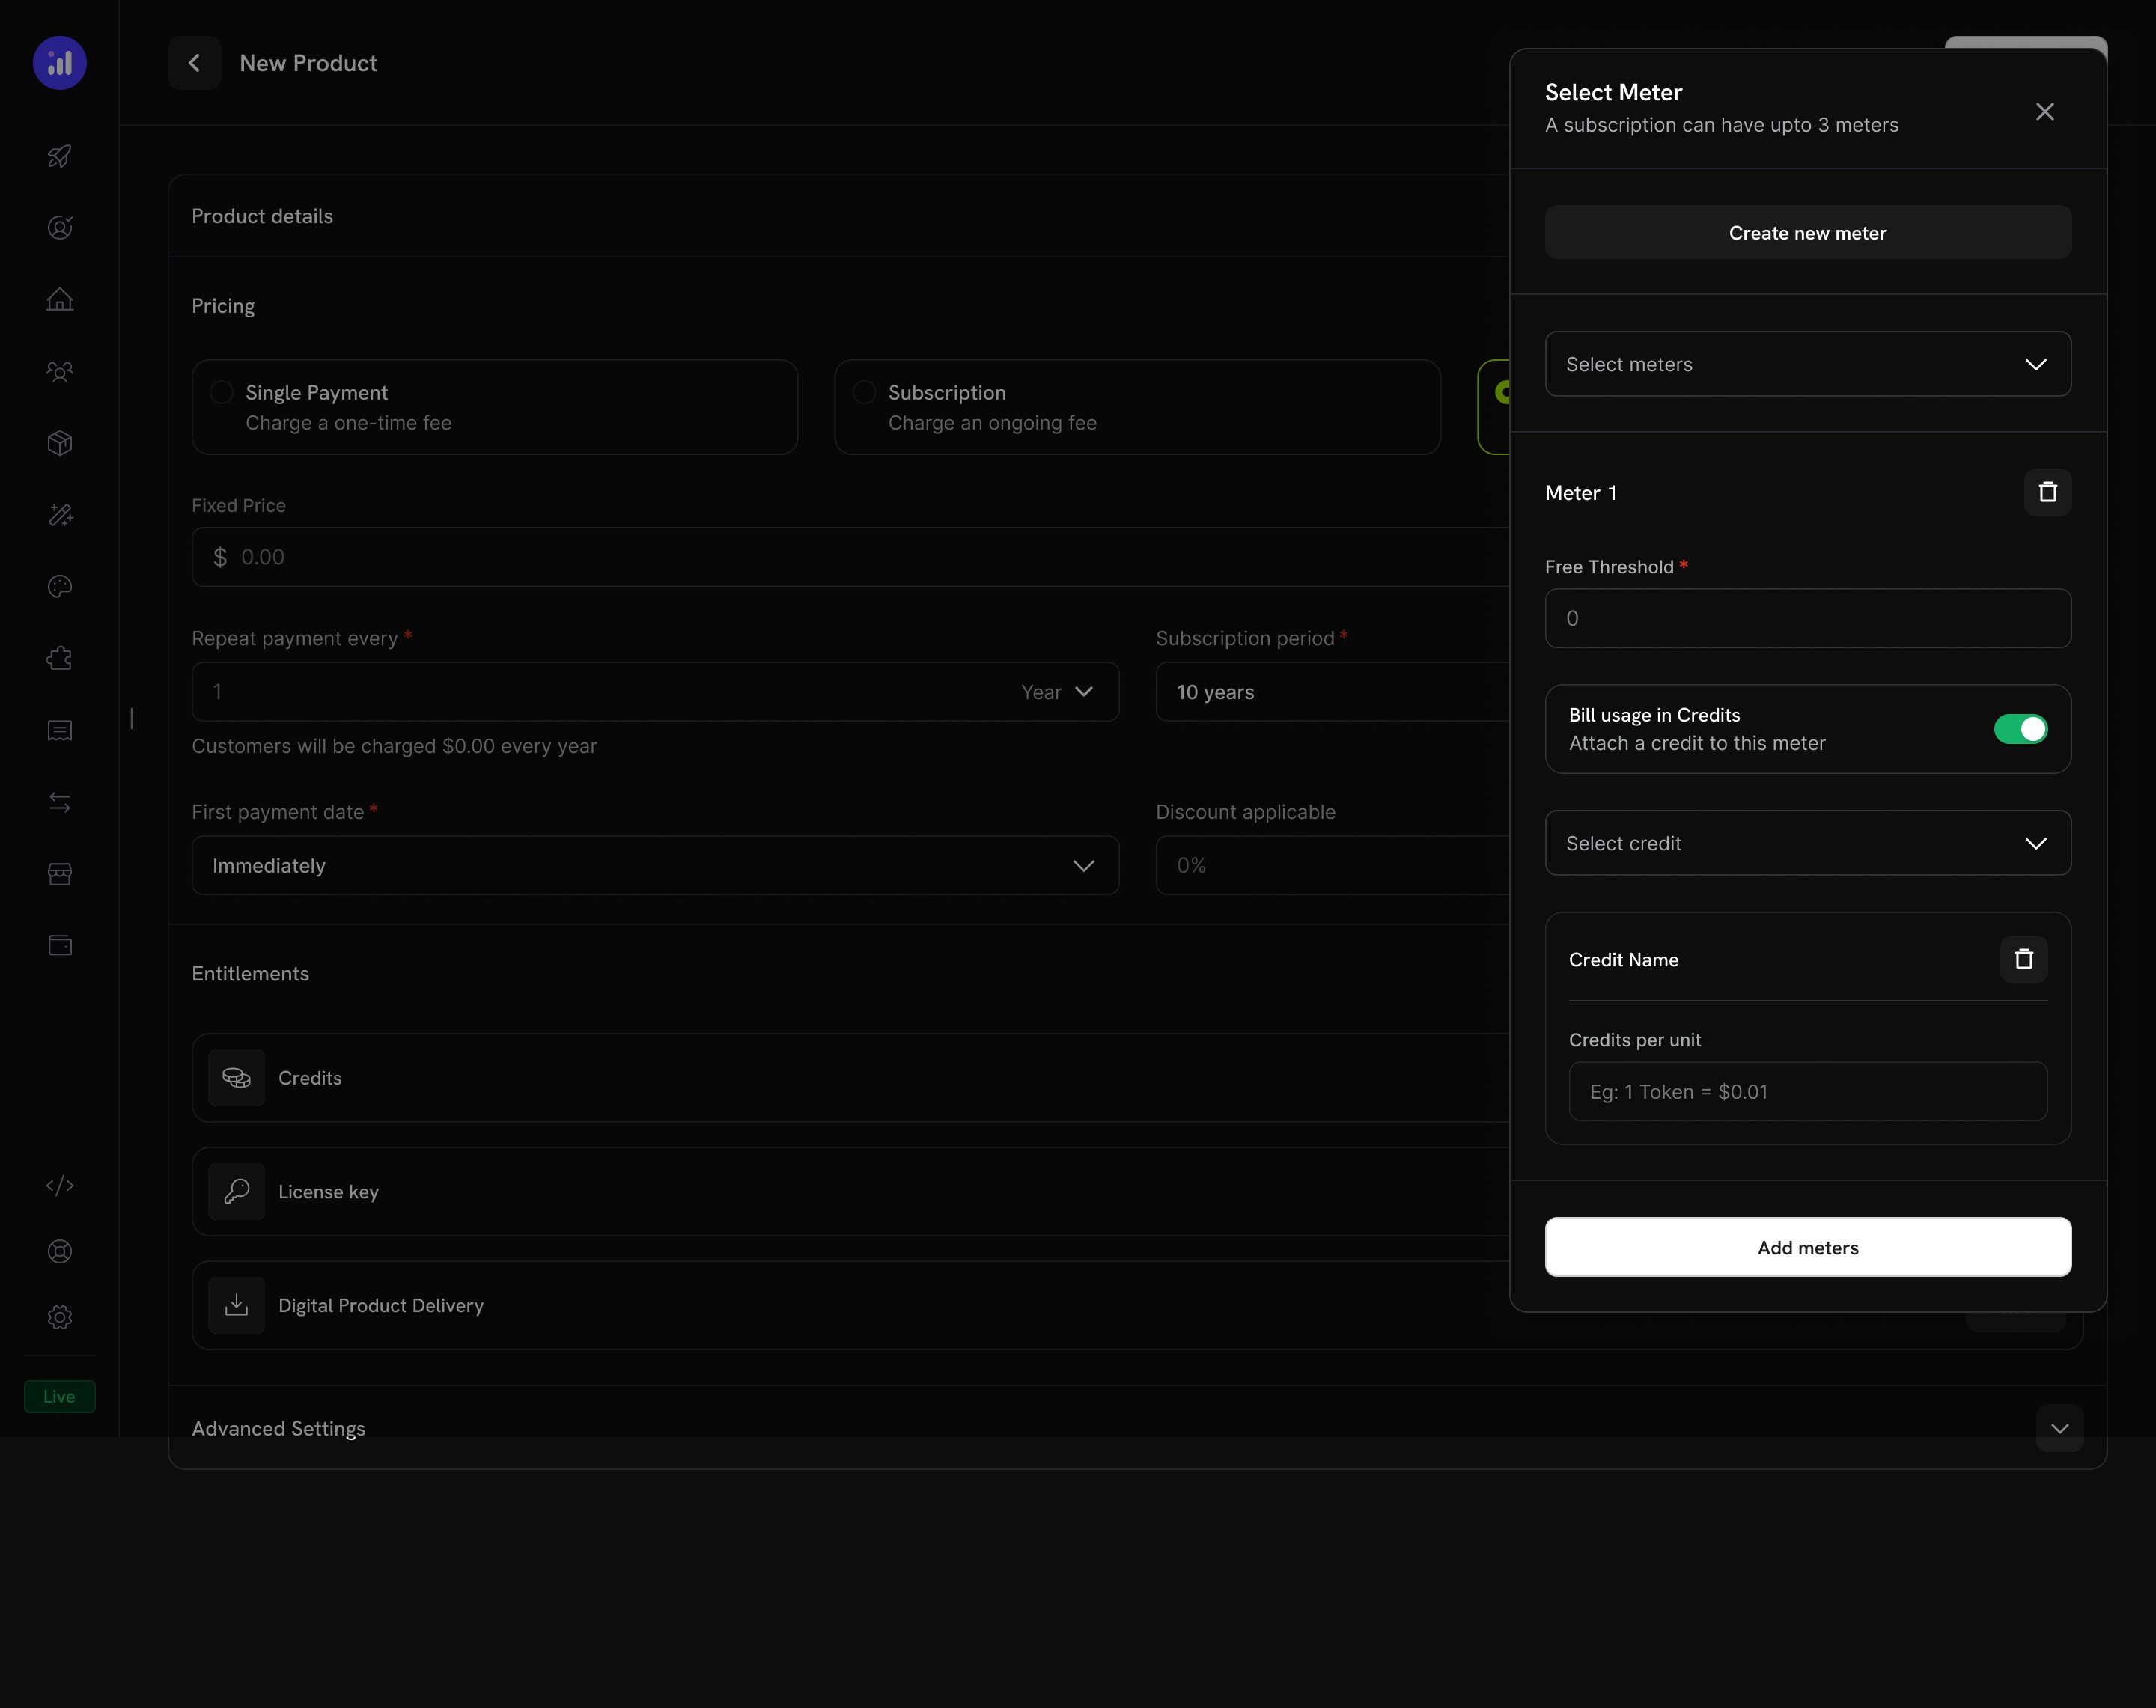
Toggle 'Bill usage in Credits' on the meter and pick the credit entitlement.
api.tokens_used events deduct from the customer’s balance.Configure Credit Issuance for Starter
10000000Import Default Credit Settings: on, so the product uses the 30-day expiry from the credit entitlement.Allow Overage: off. The default from Step 1 keeps overage disabled, so Starter customers stop at zero.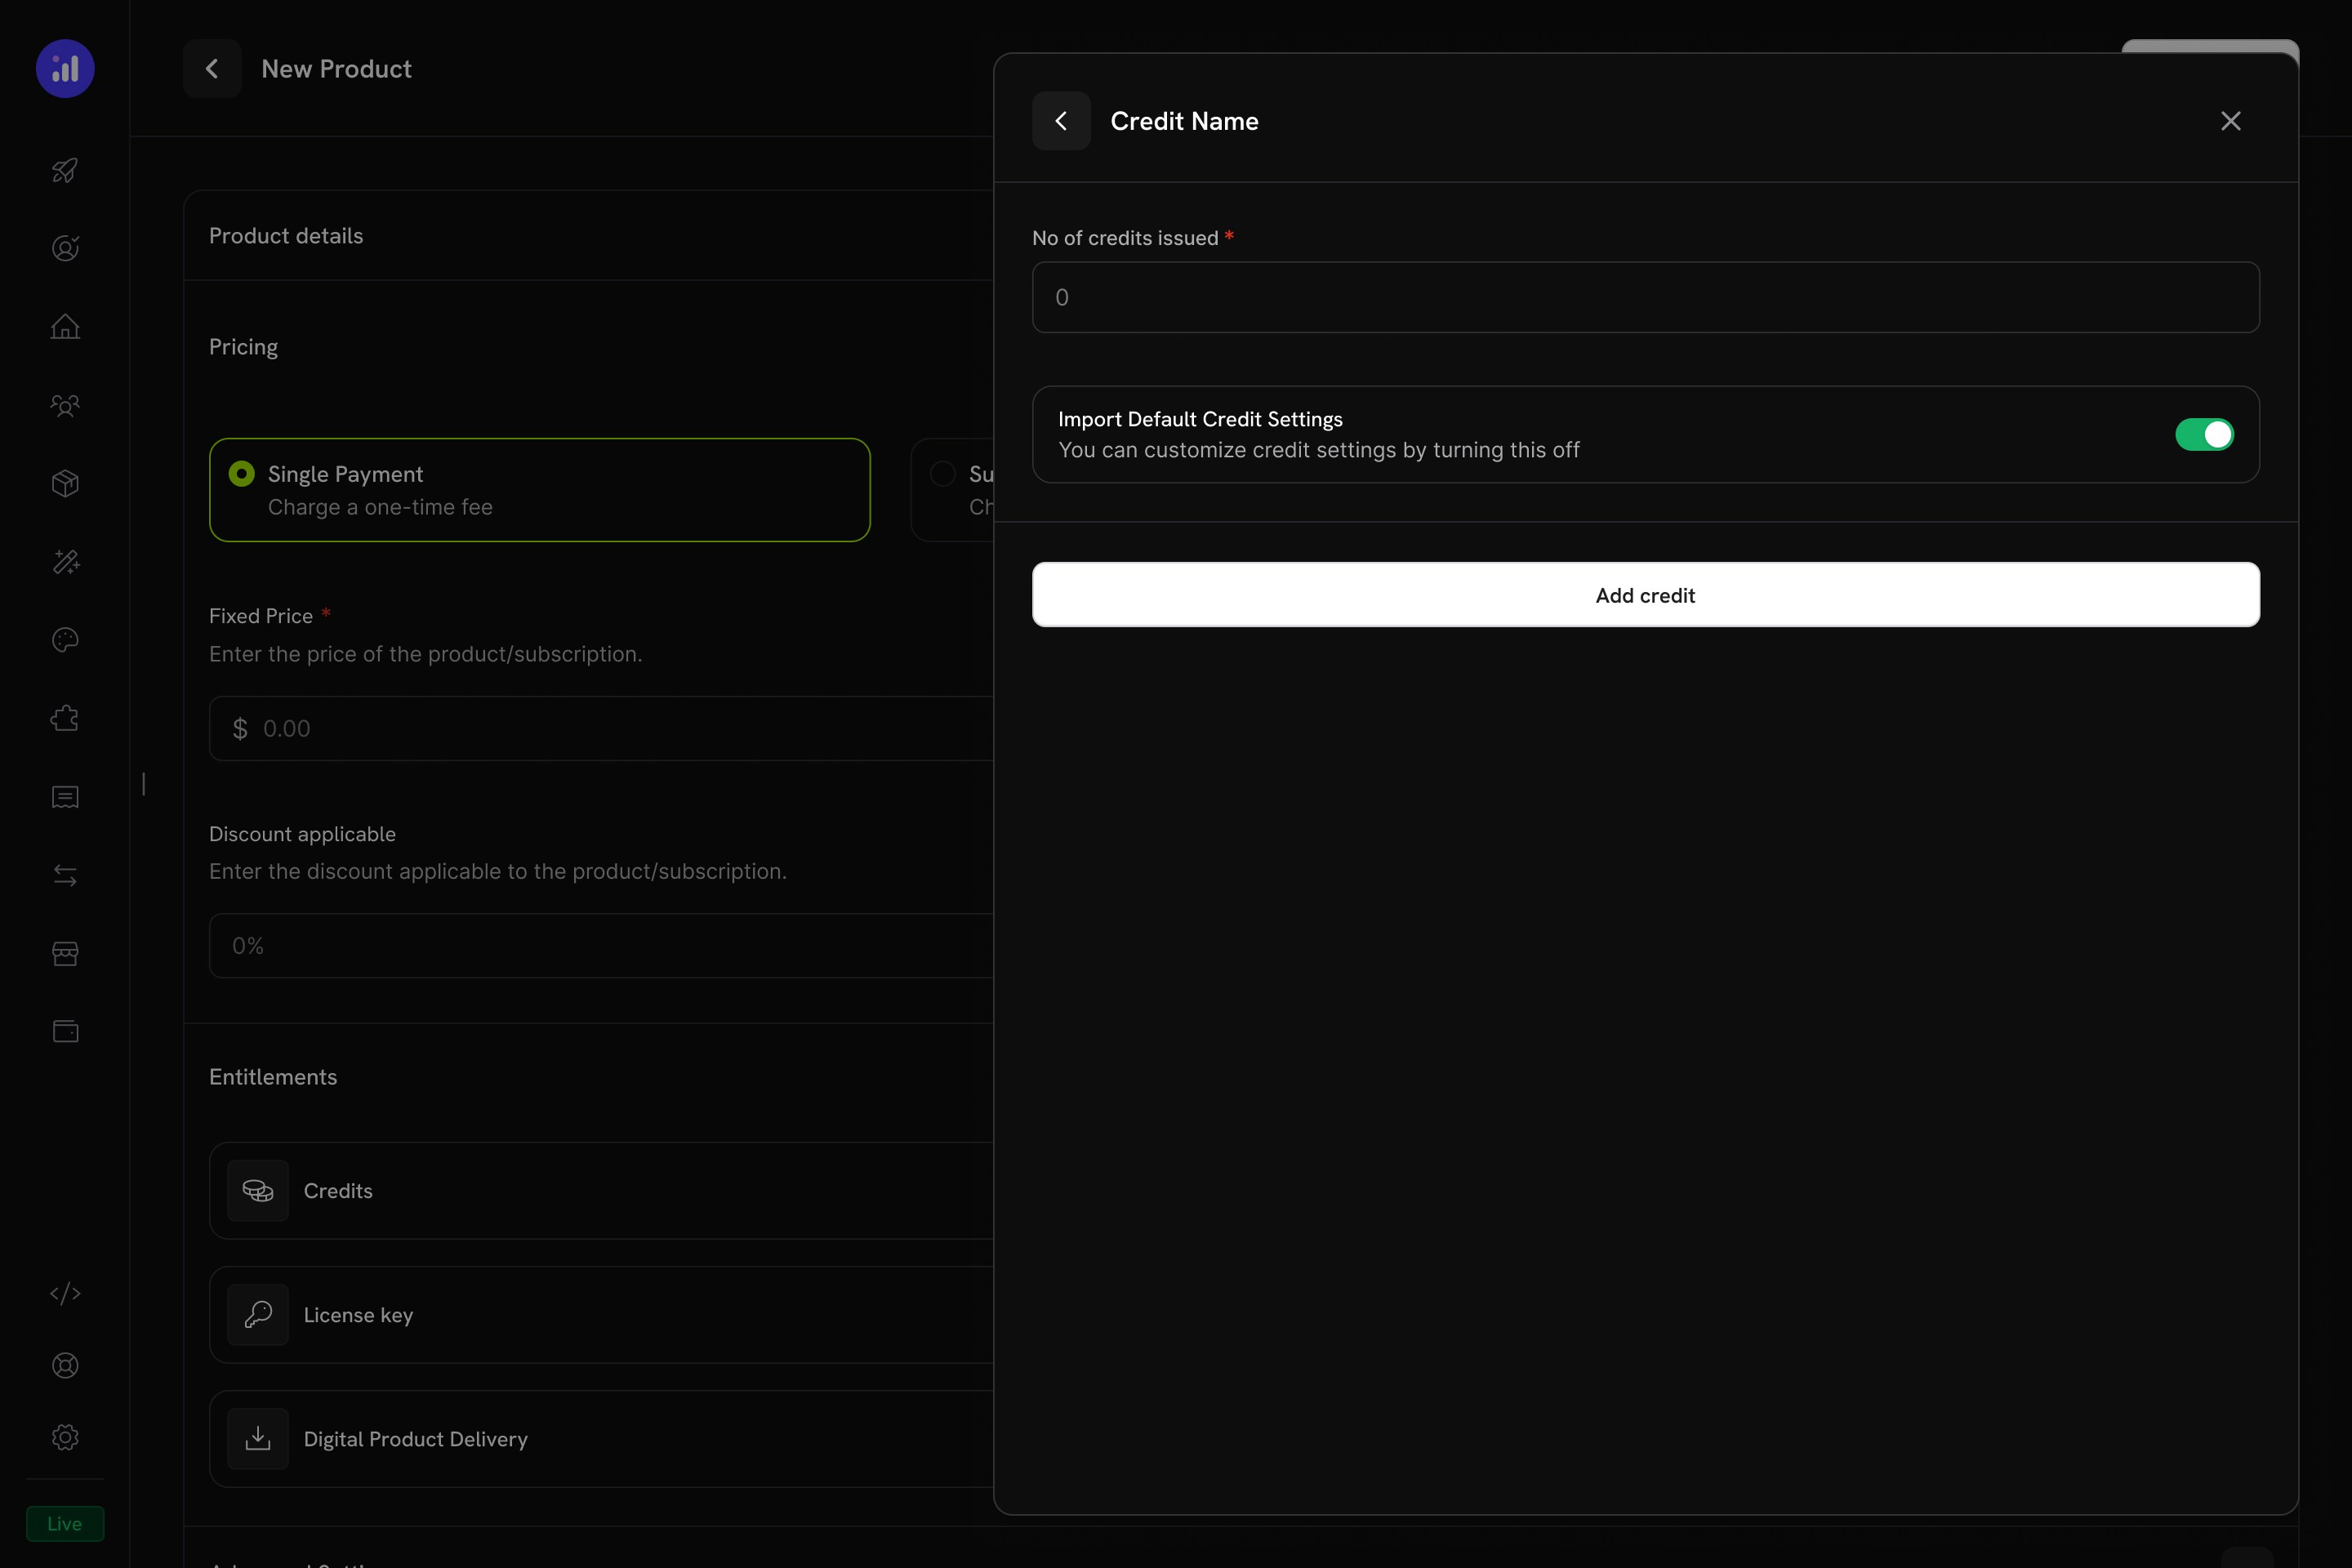
Configure credit issuance per cycle on the UBB product.
pdt_.Pro Plan ($99/month — 40M Tokens, Overage Enabled)
Create the Pro Product
NeuralAPI ProDescription: 40 million API tokens per month with overage. Built for production applications.Price: 99.00Repeat payment every: 1 monthCurrency: USDAttach the Meter
Token Usage Meter, turn on Bill usage in credits, select API Tokens, and set Meter units per credit to 1 and Free Threshold to 0.Configure Credit Issuance with Overage
40000000Import Default Credit Settings: off, so you can set overage for this product.Allow Overage: onPrice Per Unit: 0.000005 USD per token. That is $0.005 per 1K tokens, or $5 per 1M tokens, which is above the plan’s effective per-token rate and discourages overage.Overage Behavior: Bill overage at billing. Overage is charged on the next invoice, and then the balance resets.Save the product and copy its ID.Step 4: Create the Token Top-Up Pack
The top-up pack is a one-time purchase that adds 5,000,000 tokens to an existing customer’s balance.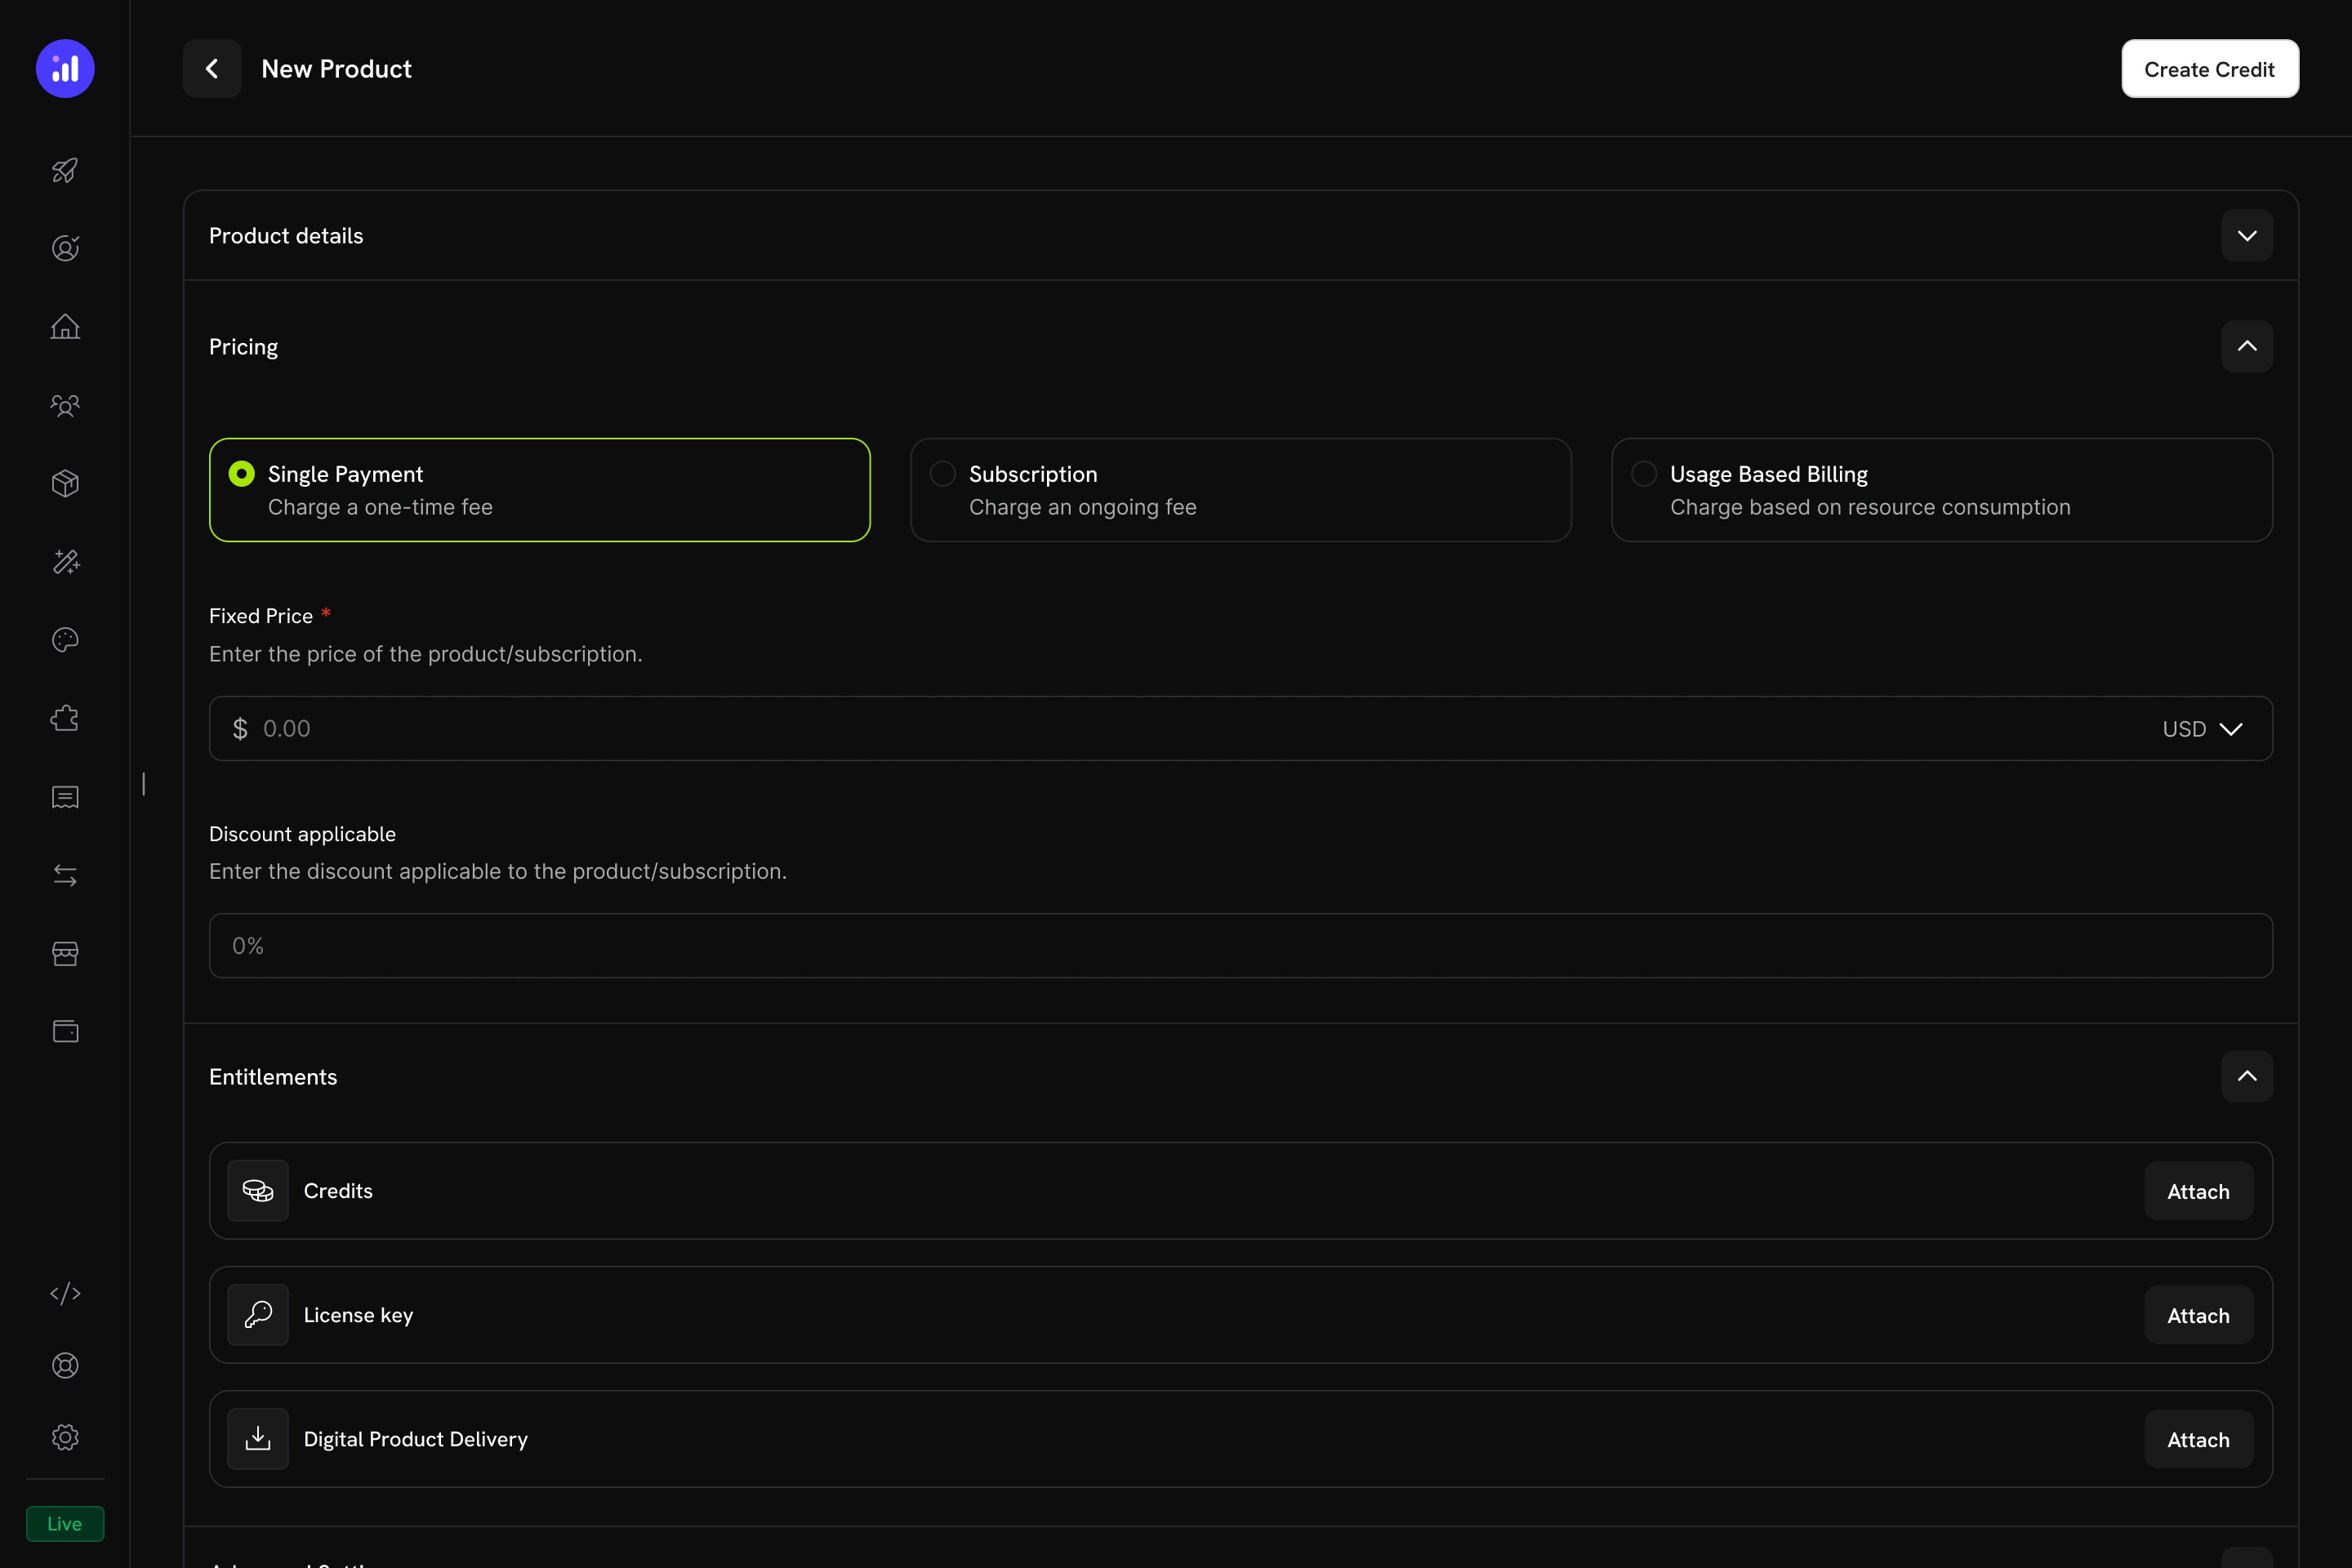
One-time pricing selected for a credit product.
Create a One-Time Product
- Go to Products and click Add Product.
- Under Pricing Type, select One Time.
- Enter these values:
Token Top-Up PackDescription: Add 5 million tokens to your NeuralAPI balance.Price: 19.00Currency: USDAttach the Token Credit
- In the Entitlements section, click Attach next to Credits.
- Select
API Tokens. - Set No of credits issued to
5000000. - Turn off Import Default Credit Settings to override the default 30-day expiry.
- Set Credit Expiry to Custom and enter
365days. - Save the product.
Step 5: Build the Backend
Build the Express server. It creates subscription and top-up checkouts, calls OpenAI and bills the tokens, reads balances, and receives credit webhook events.Set Up Your Project
tsconfig.json:package.json scripts:Set Up Environment Variables
.env with a test mode API key from Developer → API Keys and the IDs from the previous steps:DODO_PAYMENTS_WEBHOOK_KEY in Step 7, after you register the webhook endpoint.Implement the Server
src/server.ts. The completion endpoint calls OpenAI’s gpt-6-luna model, which suits high-volume requests. The package.json tab shows the full dependency list:How Deductions Happen
- Your handler calls OpenAI and reads
usage.total_tokens, for example 1532. - You ingest one usage event with
event_name: api.tokens_usedandmetadata: { tokens: 1532 }. - The
Token Usage Meteraggregates events per customer. A background worker processes new events every minute. - Because the meter bills the
API Tokenscredit through Bill usage in credits, Dodo Payments deducts 1532 credits, starting with the customer’s grant that expires first (FIFO). - If overage is enabled and the balance runs out, the deficit is tracked and billed on the next invoice.
Step 6: Add a Demo Frontend
Createpublic/index.html to test every flow in your browser. The page saves the customer ID in localStorage, so subscribe, generate, and top-up share one identity, as they would in a logged-in app:
Step 7: Wire Up the Webhook
Webhooks let your server react to balance changes, for example to email a customer whose balance is running low.Expose Your Local Server
ngrok-free.app.Register the Webhook in Dodo Payments
- In the dashboard, go to Developer → Webhooks and click Add endpoint.
- Enter the URL
https://your-tunnel.ngrok-free.app/webhooks/dodo, using your own tunnel host. - Select at least these events:
credit.addedcredit.deductedcredit.overage_charged
- Click Create endpoint, then copy the signing secret from the endpoint’s Overview tab.
- Paste it into
.envasDODO_PAYMENTS_WEBHOOK_KEY, then restartnpm run dev.
Step 8: Test the Full Flow
Subscribe a Test Customer
- Run
npm run dev. - Open
http://localhost:3000. - Pick Pro, enter a test email address and name, and click Get Checkout Link. Complete checkout with test card details.
- In the dashboard, go to Customers, open the newest customer, and copy its ID, which starts with
cus_. - Paste the ID into the Logged-in customer ID field on the demo and click Save.
Generate an AI Response
total_tokens, ingests a usage event, and returns the response.Test the Top-Up Flow
credit.added event.Troubleshooting
Credits not deducting after usage events
Credits not deducting after usage events
- The meter’s event name doesn’t match the
event_nameyou send.api.tokens_usedis case-sensitive. - The meter isn’t linked to the
API Tokenscredit on the product. Open the product’s meter configuration and confirm Bill usage in credits is on. - The
metadata.tokenskey doesn’t match the meter’s Over Property. - The customer’s grant has expired. Check the customer’s credit history.
- In Products → Meters, open the meter and confirm the product attachment shows the linked credit name.
- Open the meter’s Events tab. Ingested events appear there even before any deduction.
- Open the customer in Customers and select the Credits tab. Ledger entries appear within a minute or two.
Balance always shows 0 or 'customer not found'
Balance always shows 0 or 'customer not found'
- The customer hasn’t completed checkout. Credits are issued only after a successful payment.
- You’re querying with the wrong
customer_id. Use the ID that starts withcus_from the dashboard, not an ID from your own database. CREDIT_ENTITLEMENT_IDin.envdoesn’t match the credit attached to the product.
Overage not working for Pro plan customers
Overage not working for Pro plan customers
- Overage isn’t enabled on the Pro product’s credit attachment. The setting on the credit is only a default.
- The customer is on Starter, not Pro.
- Overage Limit is set to 0.
0.000005 ($5 per million tokens). Check the leading zeros: the field takes a price per token, not per 1K tokens.Webhook verification failed in logs
Webhook verification failed in logs
- Body parsing order:
express.json()ran on/webhooks/dodobeforeexpress.raw(). The SDK needs the raw bytes of the request, not parsed JSON. DODO_PAYMENTS_WEBHOOK_KEYholds the wrong signing secret.- A reverse proxy rewrites the request headers.
app.use('/webhooks/dodo', express.raw(...)) line comes before app.use(express.json()) in server.ts.Need Help?
Congratulations! You’ve Built Credit-Based Billing for NeuralAPI
NeuralAPI now bills in credits from checkout to deduction:Token Credit Entitlement
Tiered Plans, One Credit
One-Time Top-Up Pack
Deduction Through a Meter
Live Balance API
Verified Webhook Pipeline
- Add authentication to
/credits/:customerIdand/api/generate. As written, anyone can call them with any customer ID. Authenticate users and look up their customer ID on the server. - Use stable
event_idvalues. The example usesDate.now()plus a random string. In production, use your request ID so that retries are idempotent: Dodo Payments ignores an event whoseevent_idit has already ingested. - Store the customer-to-user mapping. Save
customer_idin your database after the first checkout, so users don’t paste it manually. - Decide what happens when a subscription ends. Plan credits stay in the customer’s ledger until they expire 30 days after issuance, and top-up credits stay valid for 365 days. The tutorial’s
/api/generatechecks only the balance, not the subscription status, so a cancelled customer can still use their remaining tokens. That’s the customer-friendly default. For stricter access, either (a) listen for thesubscription.cancelledwebhook and gate/api/generateon subscription status, or (b) on cancellation, debit the unused plan credits with the ledger API. Ledger debits draw from existing grants in FIFO order, oldest grant first. - Monitor the Usage Billing dashboard to catch metering anomalies early.