This tutorial provides sample implementation code for a terminal-based application. You can modify this code for your specific framework (React, Vue, Angular, etc.) and customize the user input method according to your application’s needs.
- Generates images using OpenAI’s DALL-E API
- Tracks every image generation for billing
- Charges customers automatically based on usage
- Handles different quality tiers (standard vs HD)
What We’re Building
Let’s start by understanding our PixelGen AI service:- Service: AI image generation using OpenAI’s DALL-E API
- Pricing Model: Pay-per-image ($0.05 per image)
- Free Tier: 10 free images per customer per month
- Quality Options: Standard and HD images (same price for simplicity)
Before we start, make sure you have:
- A Dodo Payments account
- Access to OpenAI’s API
- Basic familiarity with TypeScript/Node.js
Step 1: Create Your Usage Meter
We’ll start by creating a meter in your Dodo Payments dashboard that will track every image our service generates. Think of this as the “counter” that tracks billable events.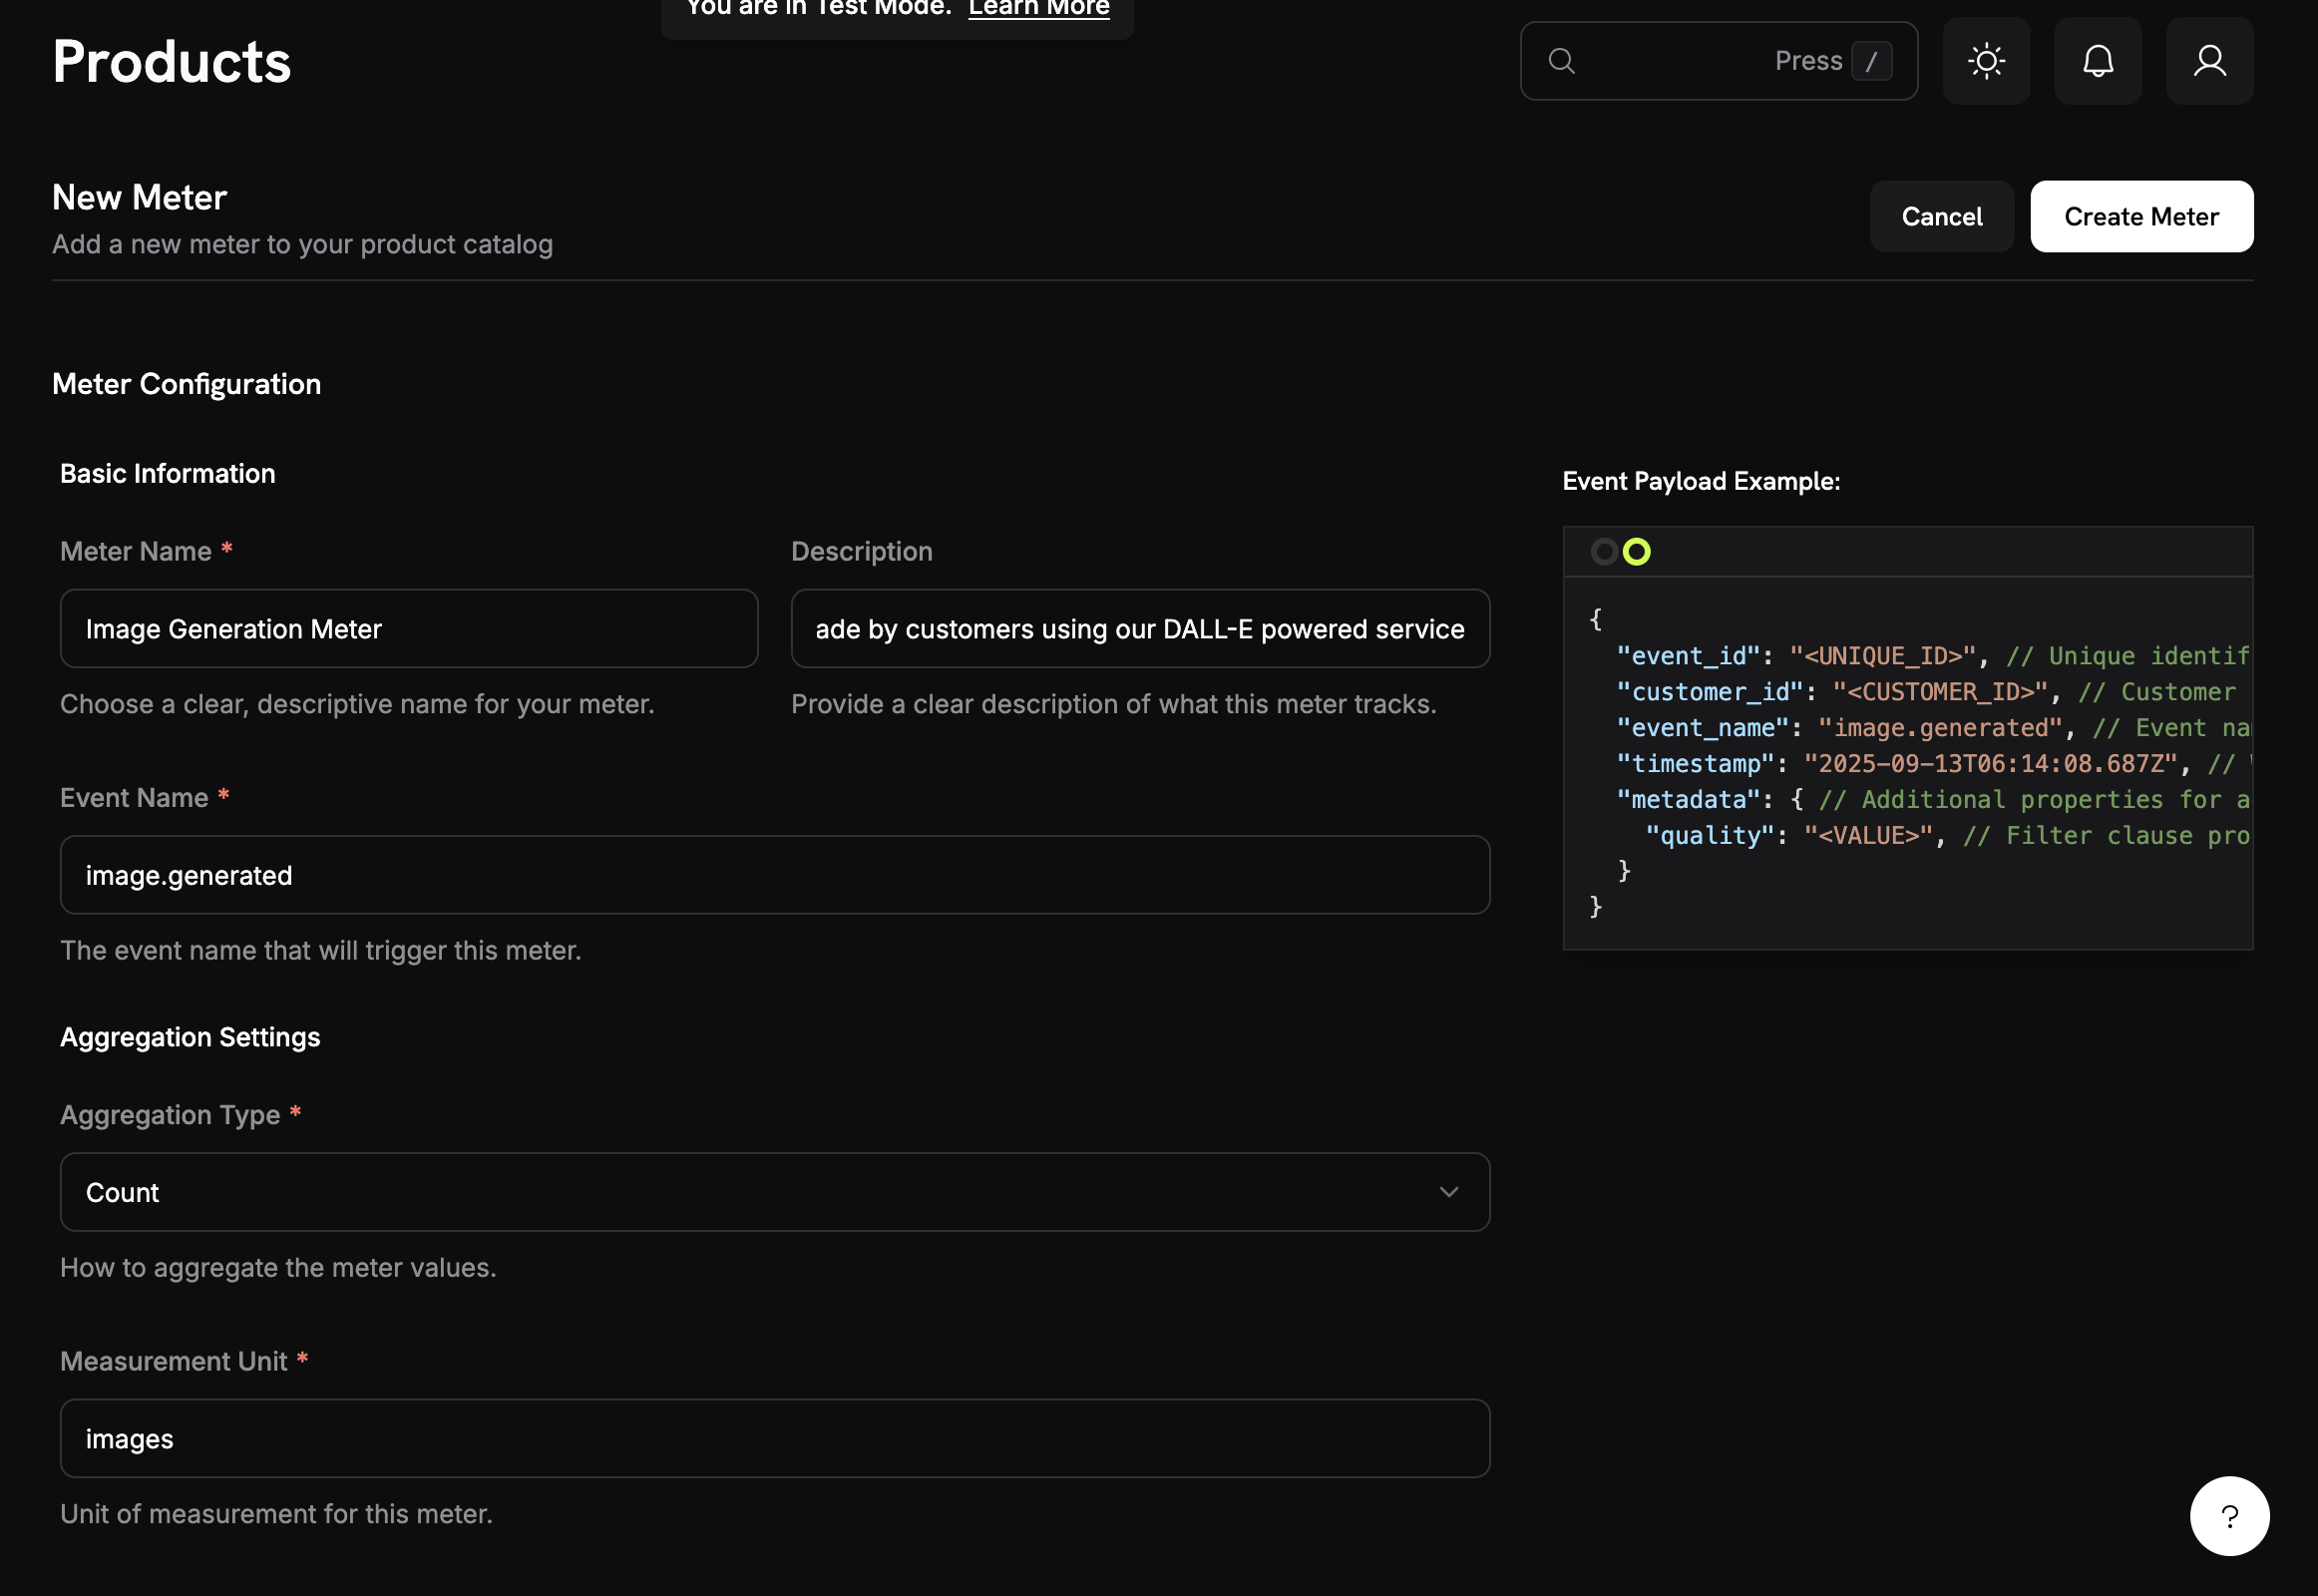
1
Open the Meters section
- Log into your Dodo Payments dashboard
- Click on Meters in the left sidebar
- Click the Create Meter button
2
Fill in the basic meter information
Now we’ll enter the specific details for our PixelGen AI service:Meter Name: Copy and paste this exactly →
Image Generation MeterDescription: Copy this → Tracks each AI image generation request made by customers using our DALL-E powered serviceEvent Name: This is crucial - copy exactly → image.generated3
Configure how we count images
Set up the aggregation (how the meter counts our events):Aggregation Type: Select Count from the dropdownMeasurement Unit: Type →
imagesWe’re using “Count” because we want to bill per image generated, not by size or generation time. Each successful image = 1 billable unit.
4
Add quality filtering
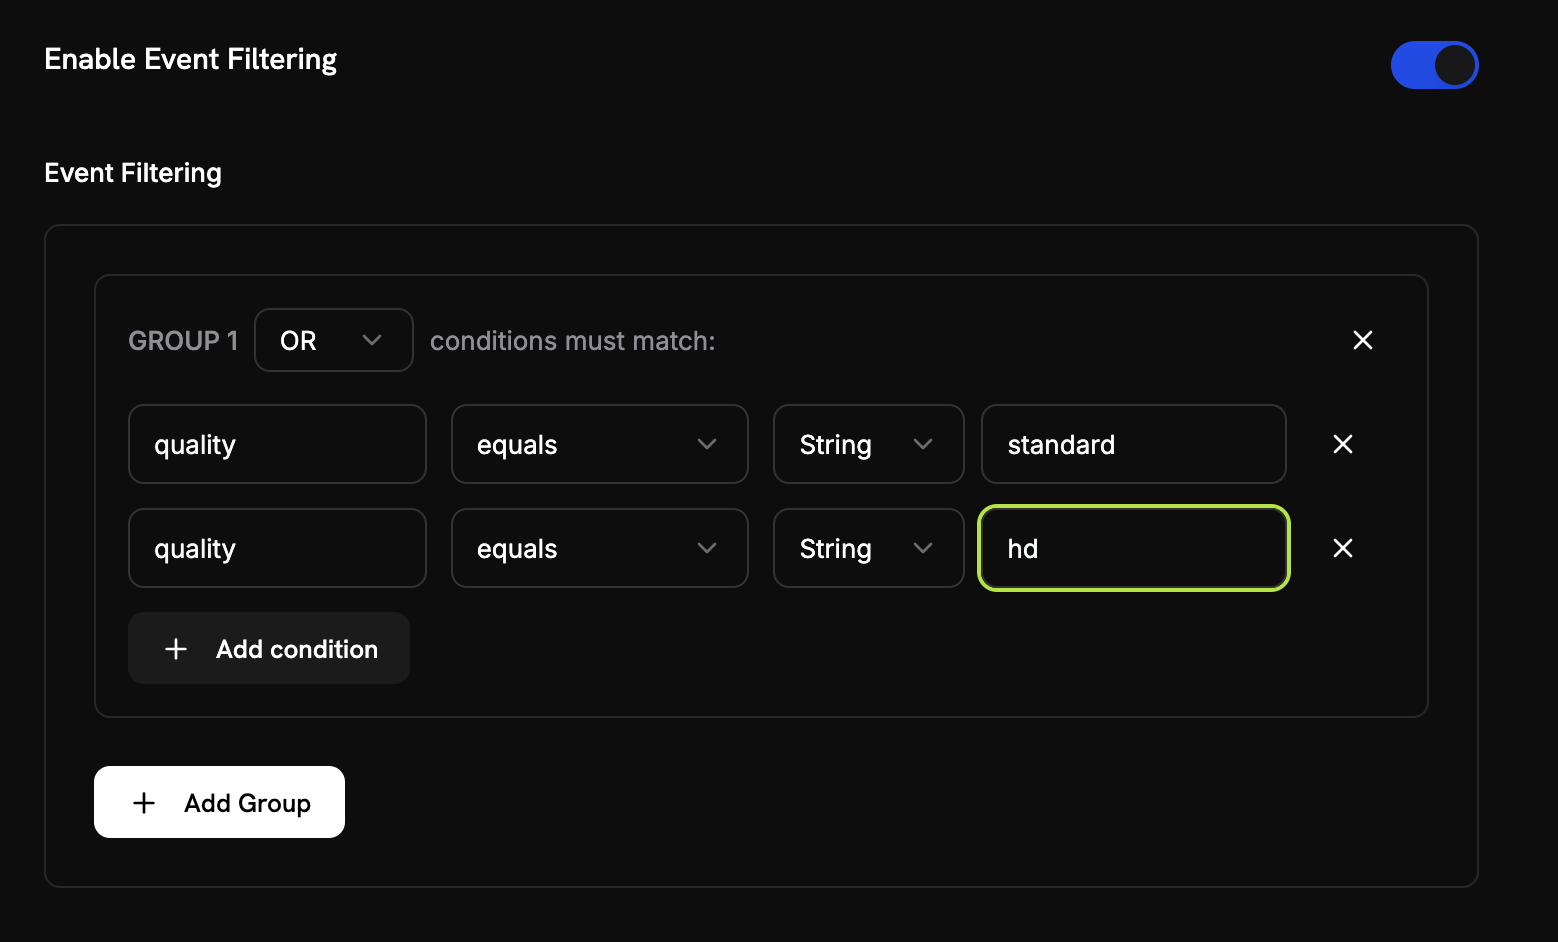
- Enable Event Filtering: Toggle this ON
- Filter Logic: Select OR (this means “count if ANY of these conditions are true”)
- Add the first condition:
- Property Key:
quality - Comparator:
equals - Value:
standard
- Property Key:
- Click “Add Condition” for the second one:
- Property Key:
quality - Comparator:
equals - Value:
hd
- Property Key:
5
Create your meter
- Double-check all your settings match the values above
- Click Create Meter
Meter created! Your “Image Generation Meter” is now ready to start counting image generations. Next, we’ll connect it to a billing product.
Step 2: Create Your Billing Product
Now we need to create a product that defines our pricing ($0.05 per image with 10 free images). This connects our meter to actual billing.1
Navigate to Products
- In your Dodo Payments dashboard, click Products in the left sidebar
- Click Create Product
- Select Usage-Based as the product type
2
Enter product details
Fill in these exact values for our PixelGen AI service:Product Name: Copy this →
PixelGen AI - Image GenerationDescription: Copy this → AI-powered image generation service with pay-per-use billingProduct Image: Upload a clear, relevant image.These will appear on customer invoices, so make them clear and professional.
3
Connect your meter
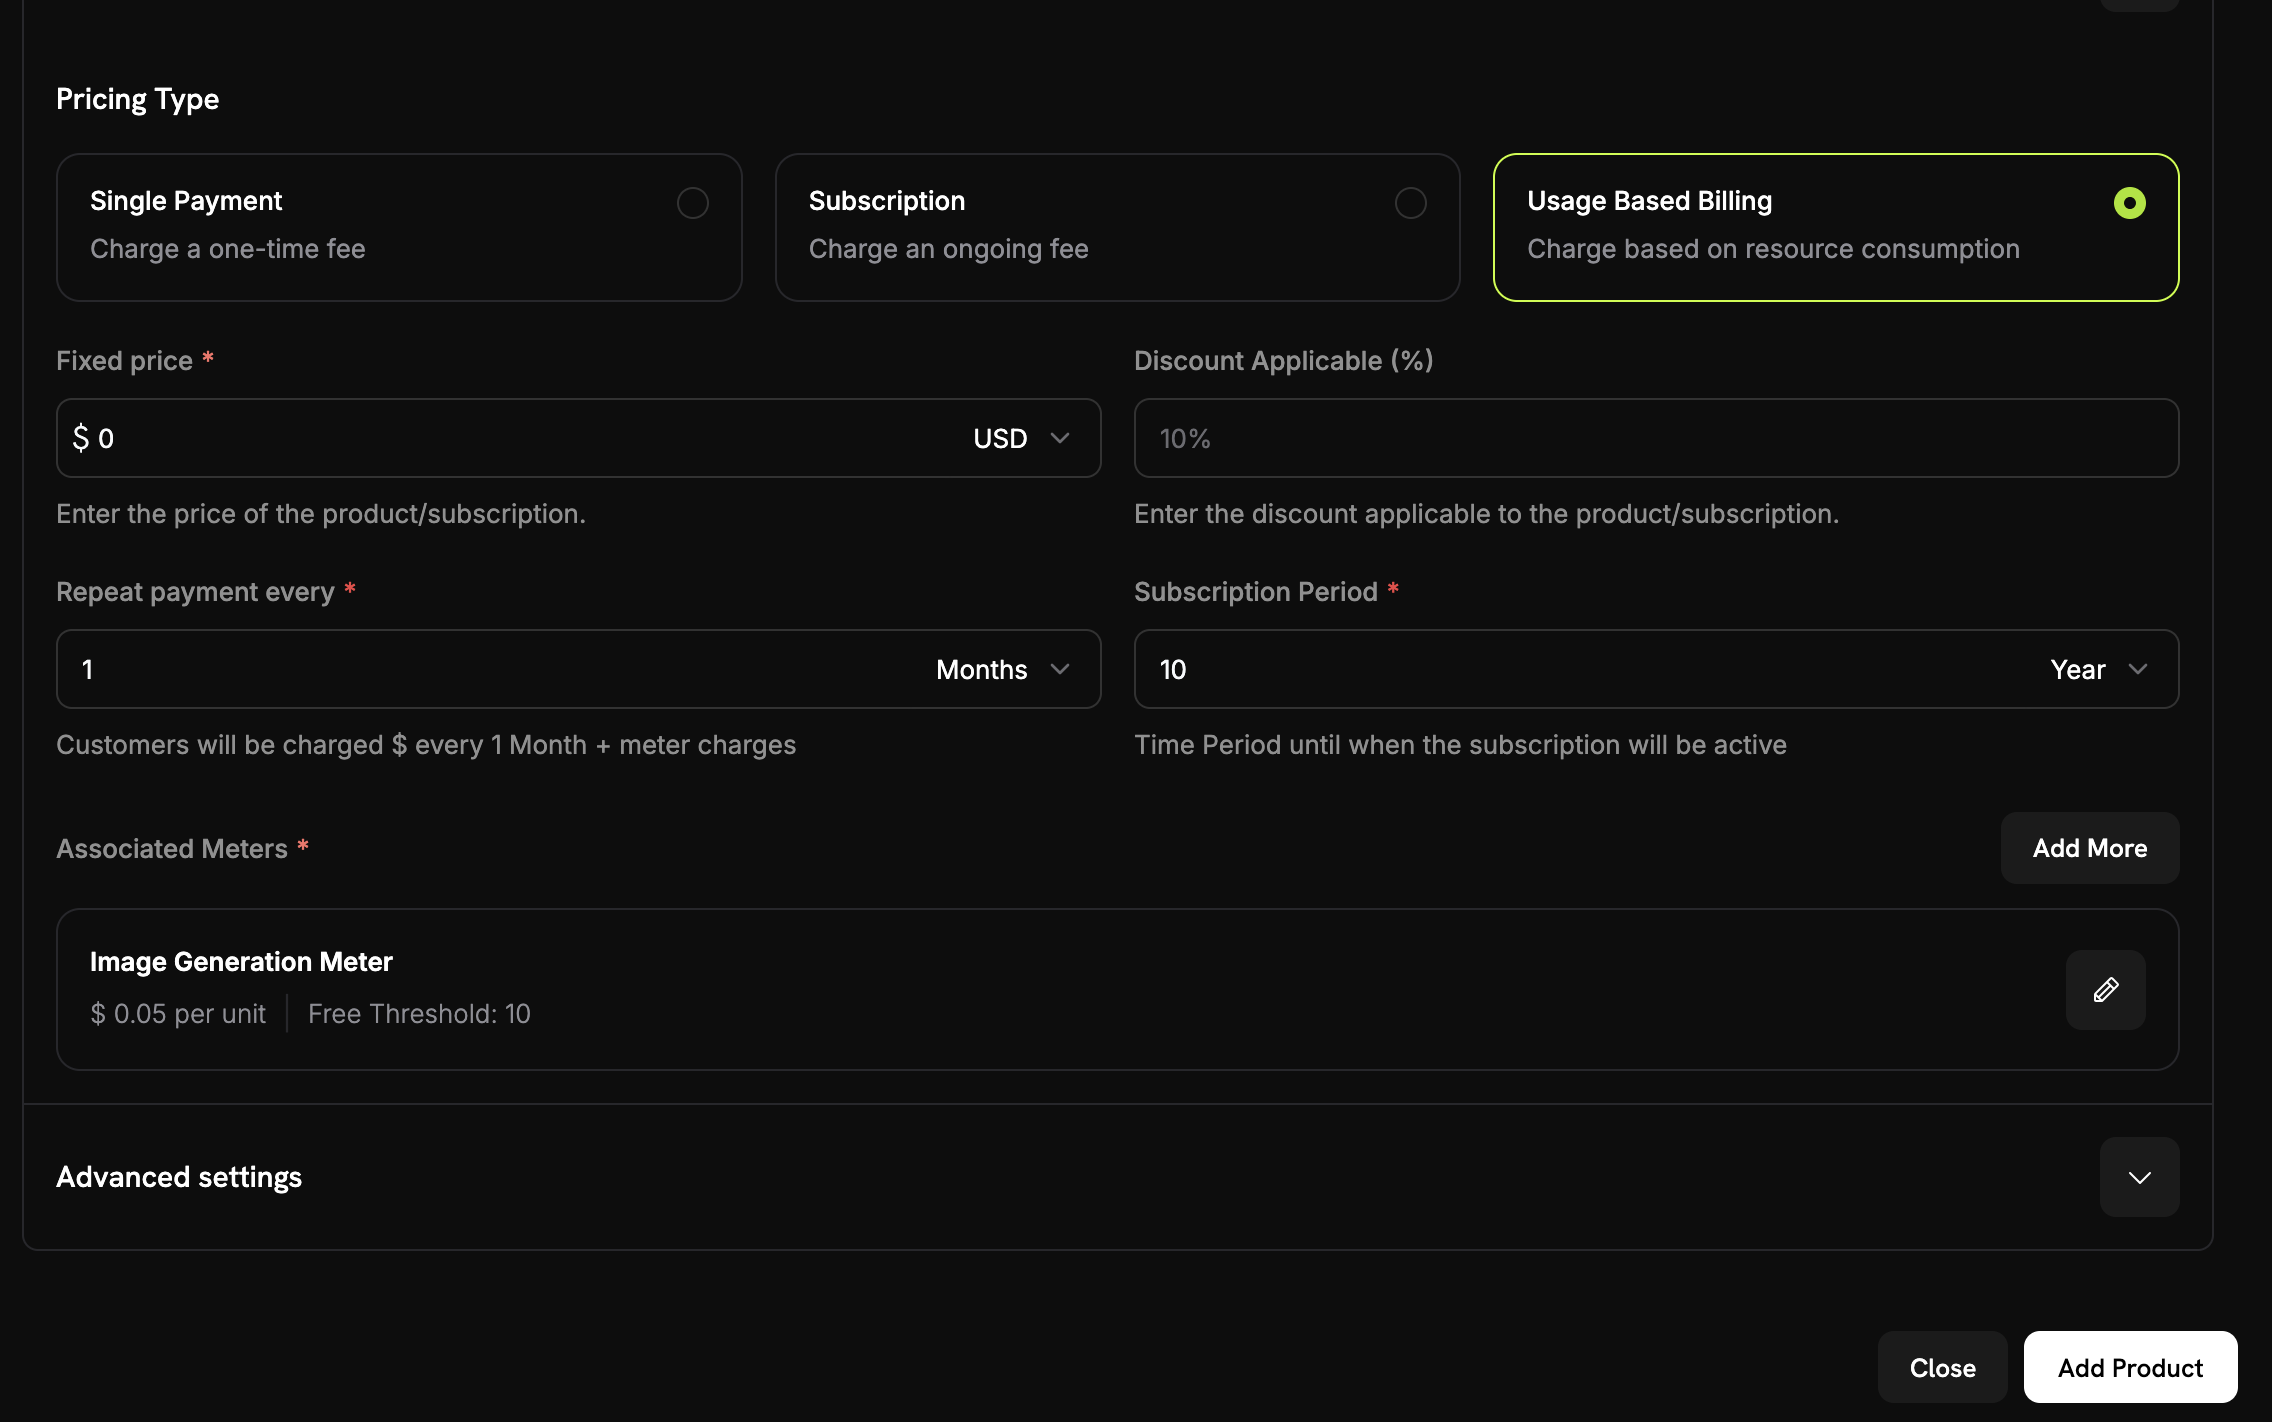
0 to ensure customers are only charged based on their usage, with no base fee.Now, link the meter you just created:- Scroll down to the Associated Meter section
- Click Add Meters
- From the dropdown, select “Image Generation Meter” (the one you created earlier)
- Confirm that it appears in your product configuration
Your meter is now successfully connected to this product.
4
Set your pricing
Here’s where we define our business model: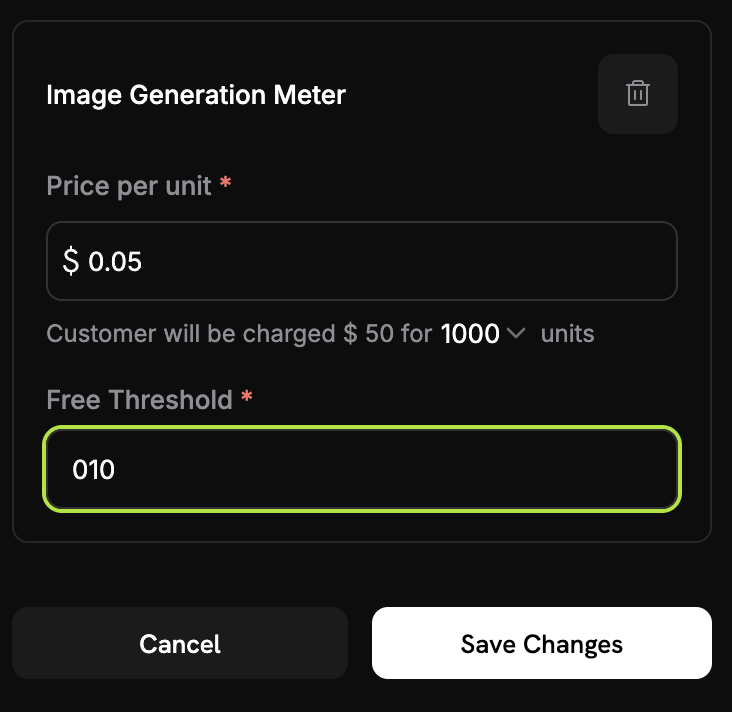
0.05 (this is $0.05 per image)Free Threshold: Enter → 10 (customers get 10 free images per month)5
Save your product
- Review all your settings:
- Name: PixelGen AI - Image Generation
- Meter: Image Generation Meter
- Price: $0.05 per image
- Free tier: 10 images
- Click Save Changes
Product created! Your billing is now configured. Customers will automatically be charged based on their image generation usage.
Step 3: Make a Test Purchase
Before we start ingesting usage events, we need to make a test purchase.1
Get your payment link
- In your Dodo Payments dashboard, go to Products
- Find your “PixelGen AI - Image Generation” product
- Click the Share button next to your product
- Copy the payment link that appears
https://test.checkout.dodopayments.com/buy/pdt_IgPWlRsfpbPd5jQKezzW1?quantity=12
Complete a test purchase
- Open the payment link in a new browser tab
- Enter test payment details and complete purchase.
After successful payment, you’ll have a customer ID that we’ll use in our application code.
3
Find your customer ID
- Go back to your Dodo Payments dashboard
- Navigate to Sales → Customers in the sidebar
- Find the customer you just created (with the test email)
- Copy the customer ID - it will look like
cus_abc123def456
Save this customer ID - we’ll hardcode it in our sample application code to ensure events are properly tracked.
Step 4: Build the Sample Application
Now we have our billing setup complete and a test customer created. Let’s build the sample PixelGen AI application that generates images and automatically tracks usage for billing.1
Set up your project
Create a new directory and initialize the project:
2
Install dependencies
Install the packages we need:
3
Create the main application
Create a file called
index.ts and copy this complete application code:Step 5: Test Your Sample Application
Time to test our sample PixelGen AI service and see the billing in action! Let’s make sure everything works end-to-end.1
Set up your environment
First, make sure you have everything configured:
- Create a
.envfile in yourpixelgen-aidirectory - Add your actual API keys:
- Install dependencies and run the app:
2
Generate your first test image
When the app starts, you’ll see:Try this prompt: “A cute robot painting a landscape”You should see output like this:
If you see “Usage event sent successfully”, your billing integration is working!
3
Generate a few more images
Let’s generate 2-3 more images to test multiple events. Try these prompts:
- “A sunset over mountains with purple clouds”
- “A steampunk coffee machine in a Victorian kitchen”
- “A friendly dragon reading a book in a library”
4
Check your Dodo Payments dashboard
Now let’s verify the events are being received:
- Open your Dodo Payments dashboard
- Go to Usage Billing → *Meters → Image Generation Meter
- Click on the Events tab
- You should see your image generation events listed
- Event names:
image.generated - Customer ID: Your test customer ID
You should see one event for each image you generated!
5
Verify billing calculations
Let’s check if the usage counting is working: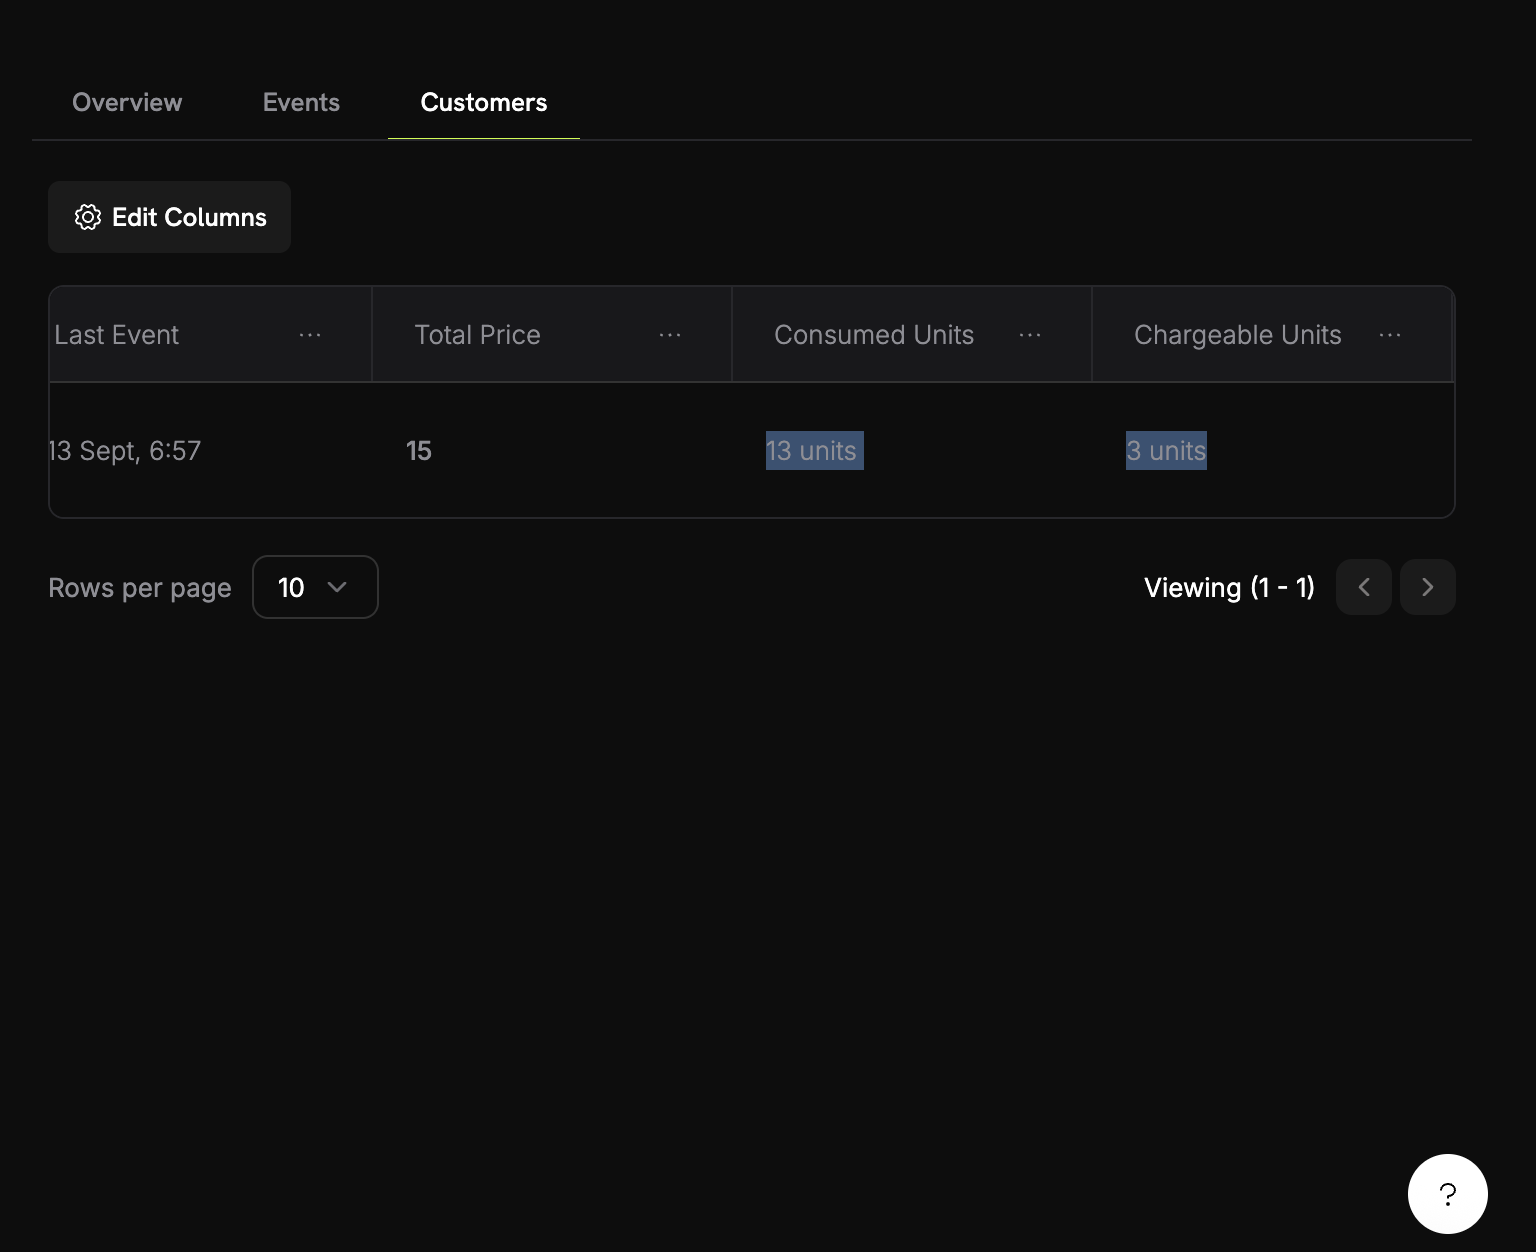
- In your meter, go to the Customers tab
- Find your test customer
- Check the “Consumed Units” column
6
Test the billing threshold
Let’s exceed the free tier to see billing in action:
- Generate 8 more images (to reach 12 total)
- Check your meter dashboard again
- You should now see:
- Consumed units: 12
- Billable units: 2 (12 - 10 free)
- Billing amount: $0.10
Success! Your usage-based billing is working perfectly. Customers will be automatically charged based on their actual image generation usage.
Troubleshooting
Common issues and their solutions:Events not appearing in dashboard
Events not appearing in dashboard
Possible causes:
- Event name doesn’t match meter configuration exactly
- Customer ID doesn’t exist in your account
- API key is invalid or expired
- Network connectivity issues
- Verify event name matches meter configuration exactly (case-sensitive)
- Check that customer ID exists in Dodo Payments
- Test API key with a simple API call
- Check network connectivity and firewall settings
Congratulations! You Built PixelGen AI
You’ve successfully created a snippet for AI image generation with usage-based billing! Here’s what you accomplished:Usage Meter
Created “Image Generation Meter” that tracks every image generation event
Billing Product
Configured pricing at $0.05 per image with 10 free images per month
AI Application
Built a working TypeScript app that generates images using OpenAI’s DALL-E
Automated Billing
Integrated real-time event tracking that automatically bills customers