跳转到主要内容

介绍

根据支付事件触发个性化电子邮件活动和客户旅程。自动通过 Customer.io 发送新客户的欢迎邮件、订阅更新和支付失败通知。
此集成需要您的 Customer.io 网站 ID 和 API 密钥。

开始使用

1

打开 Webhook 部分

在您的 Dodo Payments 仪表板中,导航到 Webhooks → + 添加端点 并展开集成下拉菜单。
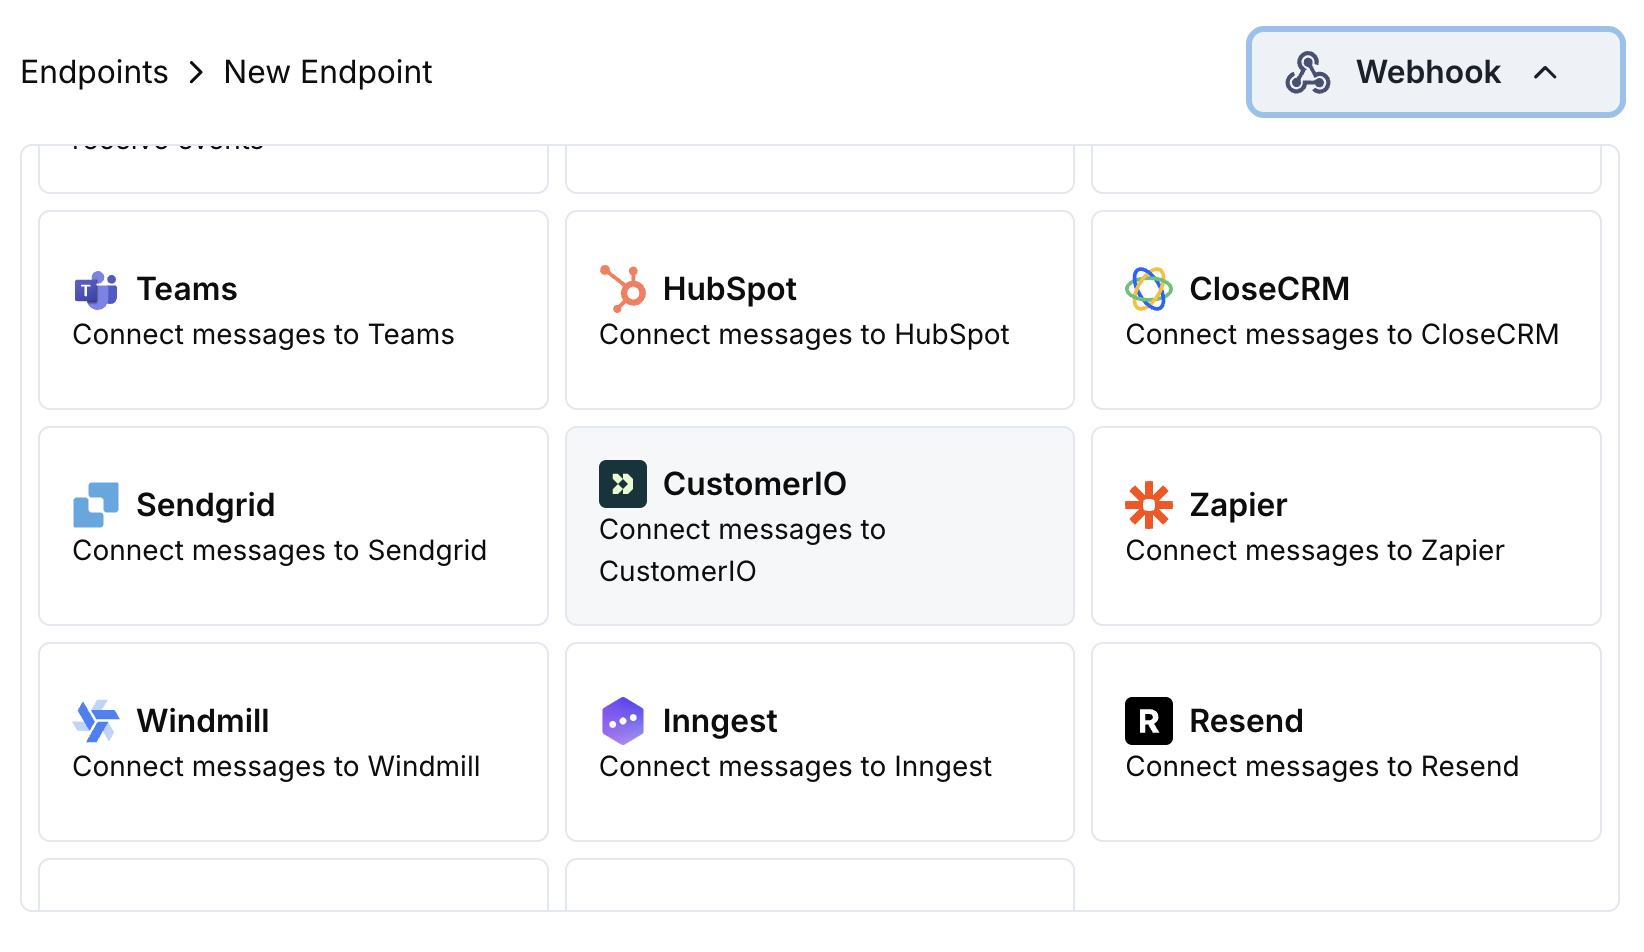
添加端点和集成下拉菜单
2

选择 Customer.io

选择 Customer.io 集成卡片。
3

输入凭据

在配置中提供您的 Customer.io 网站 ID 和 API 密钥。
4

配置转换

编辑转换代码以格式化事件以适应 Customer.io 的 Track API。
5

测试并创建

使用示例有效负载进行测试,然后单击 创建 以激活同步。
6

完成!

🎉 现在,支付事件将触发 Customer.io 的电子邮件自动化。

转换代码示例

跟踪支付事件

track_payments.js
function handler(webhook) {
  if (webhook.eventType === "payment.succeeded") {
    const p = webhook.payload.data;
    webhook.url = "https://track.customer.io/api/v2/entity";
    webhook.payload = {
      type: "person",
      identifiers: {
        id: p.customer.customer_id
      },
      action: "payment_completed",
      name: "Payment Completed",
      attributes: {
        email: p.customer.email,
        name: p.customer.name,
        payment_amount: (p.total_amount / 100).toFixed(2),
        payment_method: p.payment_method || "unknown",
        payment_id: p.payment_id,
        currency: p.currency || "USD"
      }
    };
  }
  return webhook;
}

跟踪订阅生命周期

track_subscriptions.js
function handler(webhook) {
  const s = webhook.payload.data;
  switch (webhook.eventType) {
    case "subscription.active":
      webhook.url = "https://track.customer.io/api/v2/entity";
      webhook.payload = {
        type: "person",
        identifiers: {
          id: s.customer.customer_id
        },
        action: "subscription_started",
        name: "Subscription Started",
        attributes: {
          email: s.customer.email,
          subscription_id: s.subscription_id,
          product_id: s.product_id,
          amount: (s.recurring_pre_tax_amount / 100).toFixed(2),
          frequency: s.payment_frequency_interval,
          next_billing: s.next_billing_date
        }
      };
      break;
    case "subscription.cancelled":
      webhook.url = "https://track.customer.io/api/v2/entity";
      webhook.payload = {
        type: "person",
        identifiers: {
          id: s.customer.customer_id
        },
        action: "subscription_cancelled",
        name: "Subscription Cancelled",
        attributes: {
          email: s.customer.email,
          subscription_id: s.subscription_id,
          cancelled_at: s.cancelled_at,
          cancel_at_next_billing: s.cancel_at_next_billing_date
        }
      };
      break;
  }
  return webhook;
}

跟踪客户属性

track_attributes.js
function handler(webhook) {
  if (webhook.eventType === "payment.succeeded") {
    const p = webhook.payload.data;
    webhook.url = "https://track.customer.io/api/v2/entity";
    webhook.payload = {
      type: "person",
      identifiers: {
        id: p.customer.customer_id
      },
      action: "identify",
      name: "Customer Identified",
      attributes: {
        email: p.customer.email,
        name: p.customer.name,
        total_spent: (p.total_amount / 100).toFixed(2),
        payment_method: p.payment_method || "unknown",
        last_payment_date: webhook.payload.timestamp,
        customer_since: webhook.payload.timestamp
      }
    };
  }
  return webhook;
}

提示

  • 使用与您的 Customer.io 活动匹配的一致事件名称
  • 包含个性化所需的相关属性
  • 设置正确的客户标识符以确保准确跟踪
  • 使用有意义的事件名称作为活动触发器

故障排除

  • 验证网站 ID 和 API 密钥是否正确
  • 检查事件名称是否与您的 Customer.io 活动匹配
  • 确保客户标识符设置正确
  • 查看 Customer.io API 速率限制
  • 验证 JSON 结构是否符合 Customer.io API 格式
  • 检查所有必需字段是否存在
  • 确保事件名称和属性格式正确