

यह tutorial backend और frontend के साथ एक complete application बनाता है। चैट ऐप Google Gemini का उपयोग करता है, और LLM Blueprint प्रत्येक response के लिए token usage रिपोर्ट करता है, इसलिए आपको स्वयं tokens गिनने की आवश्यकता नहीं है।
- AI SDK के माध्यम से Google Gemini के साथ AI conversations चलाती है।
- बिना किसी counting code के token usage को automatically track करती है।
- ग्राहकों द्वारा वास्तव में उपयोग किए गए tokens के लिए charge करती है।
- ऐसी chat interface शामिल करती है जो conversation history बनाए रखती है।
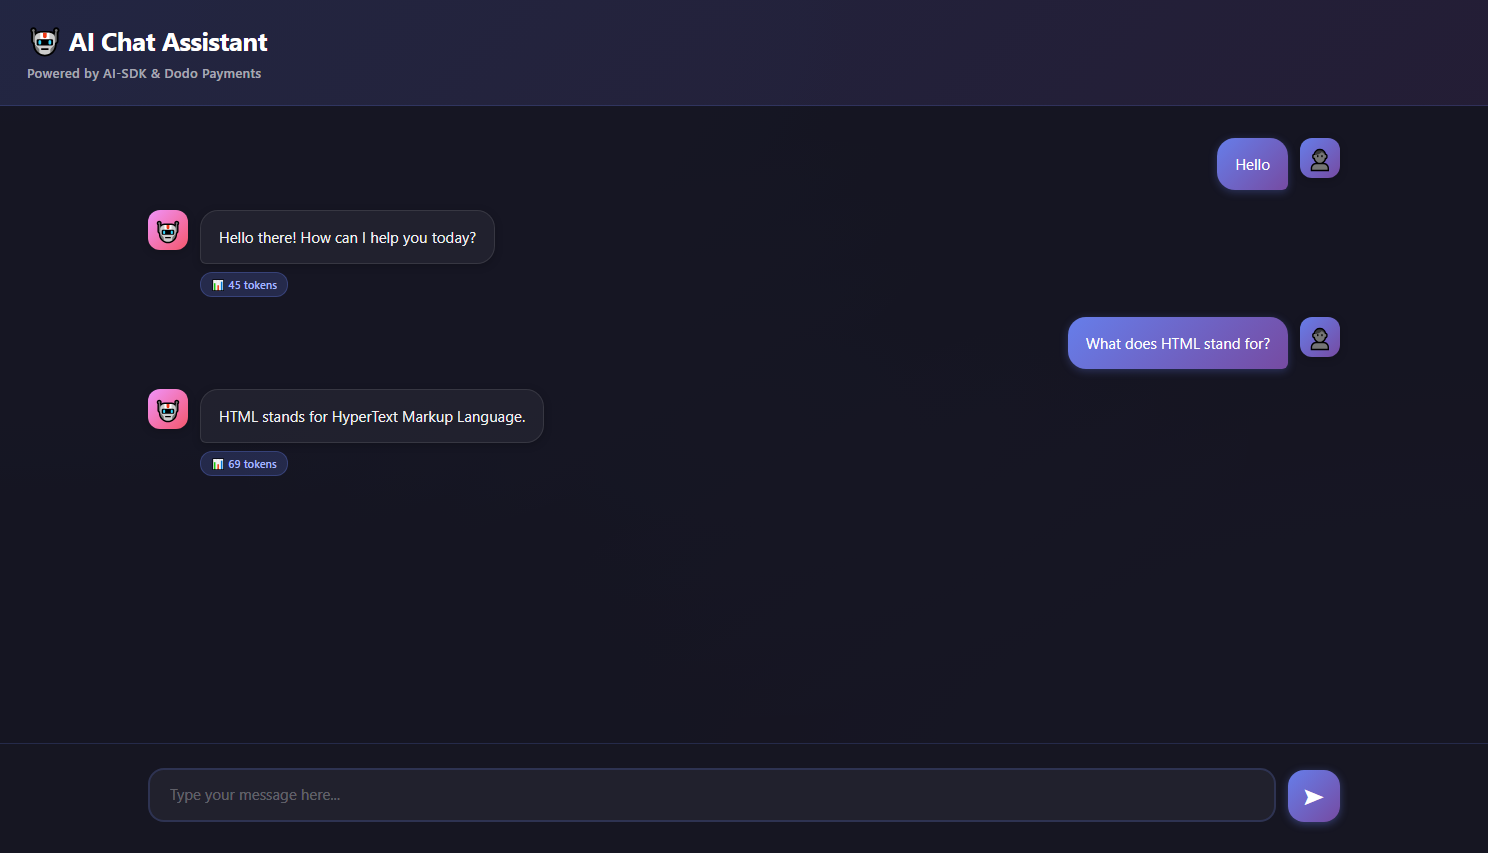
हम क्या बनाएँगे
Chat service इस तरह काम करती है:- Service: AI SDK के माध्यम से Google Gemini के साथ AI chat
- Pricing Model: प्रति token भुगतान ($0.01 प्रति 1,000 tokens)
- Free Tier: प्रत्येक customer के लिए प्रति माह 10,000 free tokens
- Features: Conversation history और automatic token tracking
- Dodo Payments account।
- Google AI API key। Google AI Studio से एक प्राप्त करें।
- Node.js 22 या बाद का संस्करण।
Step 1: अपना Usage Meter बनाएँ
AI token usage को track करने के लिए Dodo Payments dashboard में meter बनाएँ।1
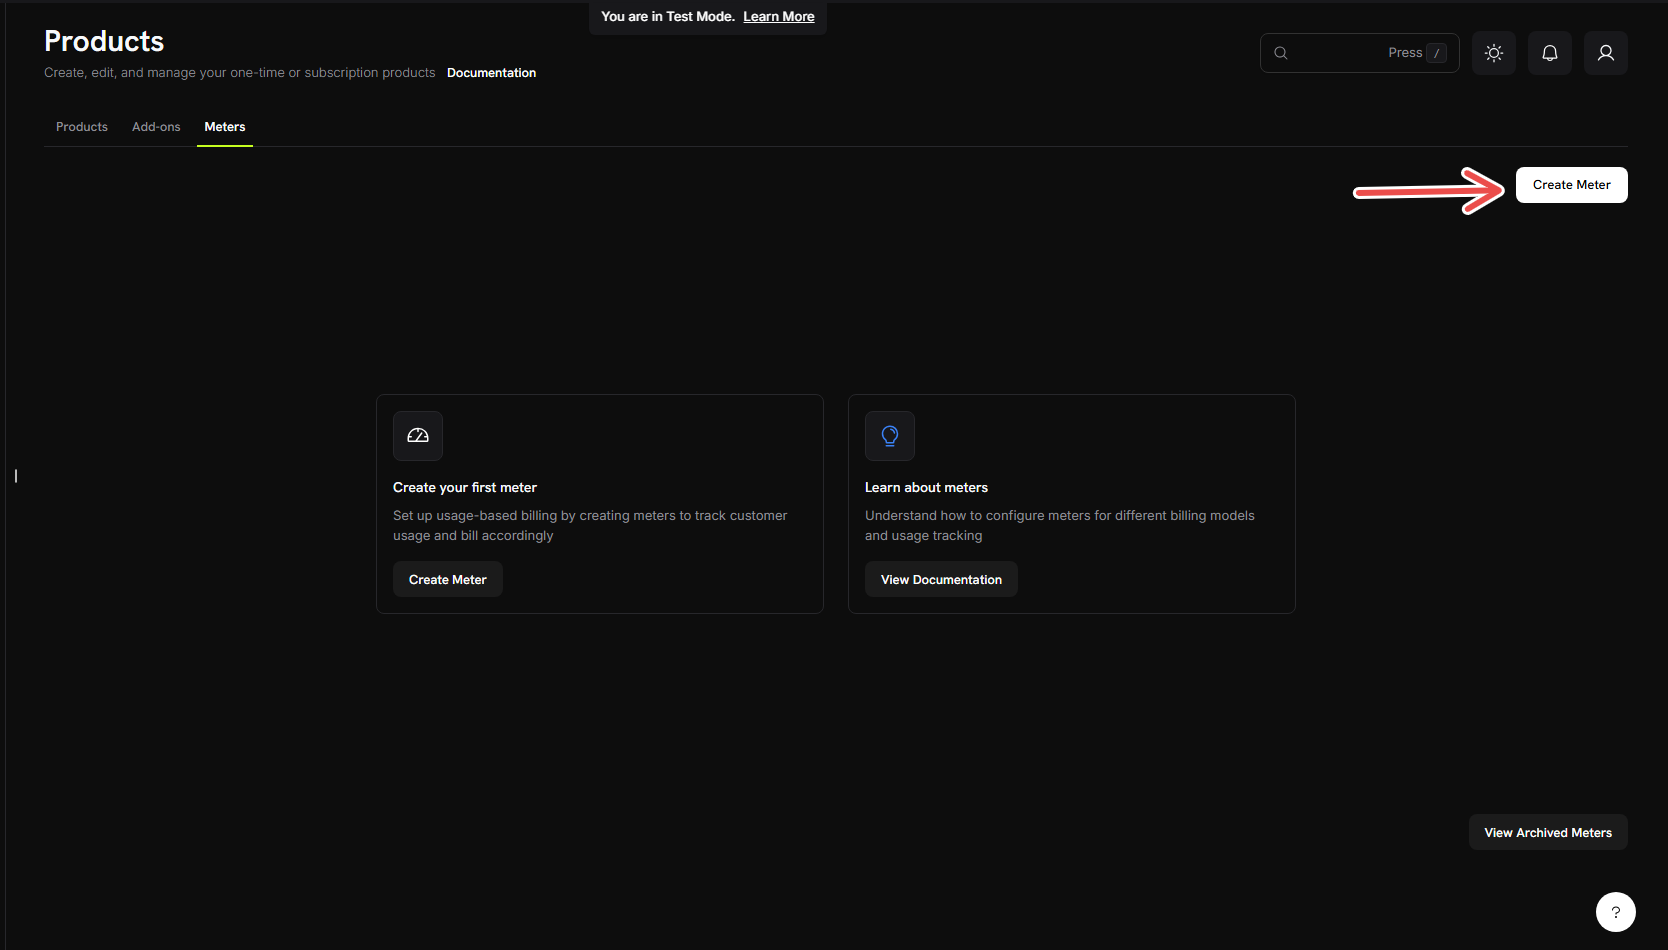
Open the Meters Section
- Dodo Payments dashboard में लॉग इन करें।
- Sidebar में Products पर क्लिक करें।
- Meters पर क्लिक करें।
- Create Meter पर क्लिक करें।
2
Enter the Meter Details
Chat service के विवरण दर्ज करें:Meter Name →
AI Token Usage MeterDescription → Tracks token consumption from AI chat conversations using AI SDKEvent Name → ai_chat_usage3
Configure How Tokens Are Counted
Aggregation सेट करें, जो यह नियंत्रित करता है कि meter events को किस तरह combine करता है:Aggregation Type: SumOver Property:
totalTokensMeasurement Unit: tokensSum प्रत्येक chat message से tokens को जोड़ता है। LLM Blueprint प्रत्येक event के metadata में
inputTokens, outputTokens और totalTokens भेजता है, और यह meter totalTokens का sum करता है।4
Create the Meter
- जाँचें कि प्रत्येक setting ऊपर दिए गए values से match करती है। Meter बनाने के बाद आप उसे edit नहीं कर सकते।
- Create Meter पर क्लिक करें।
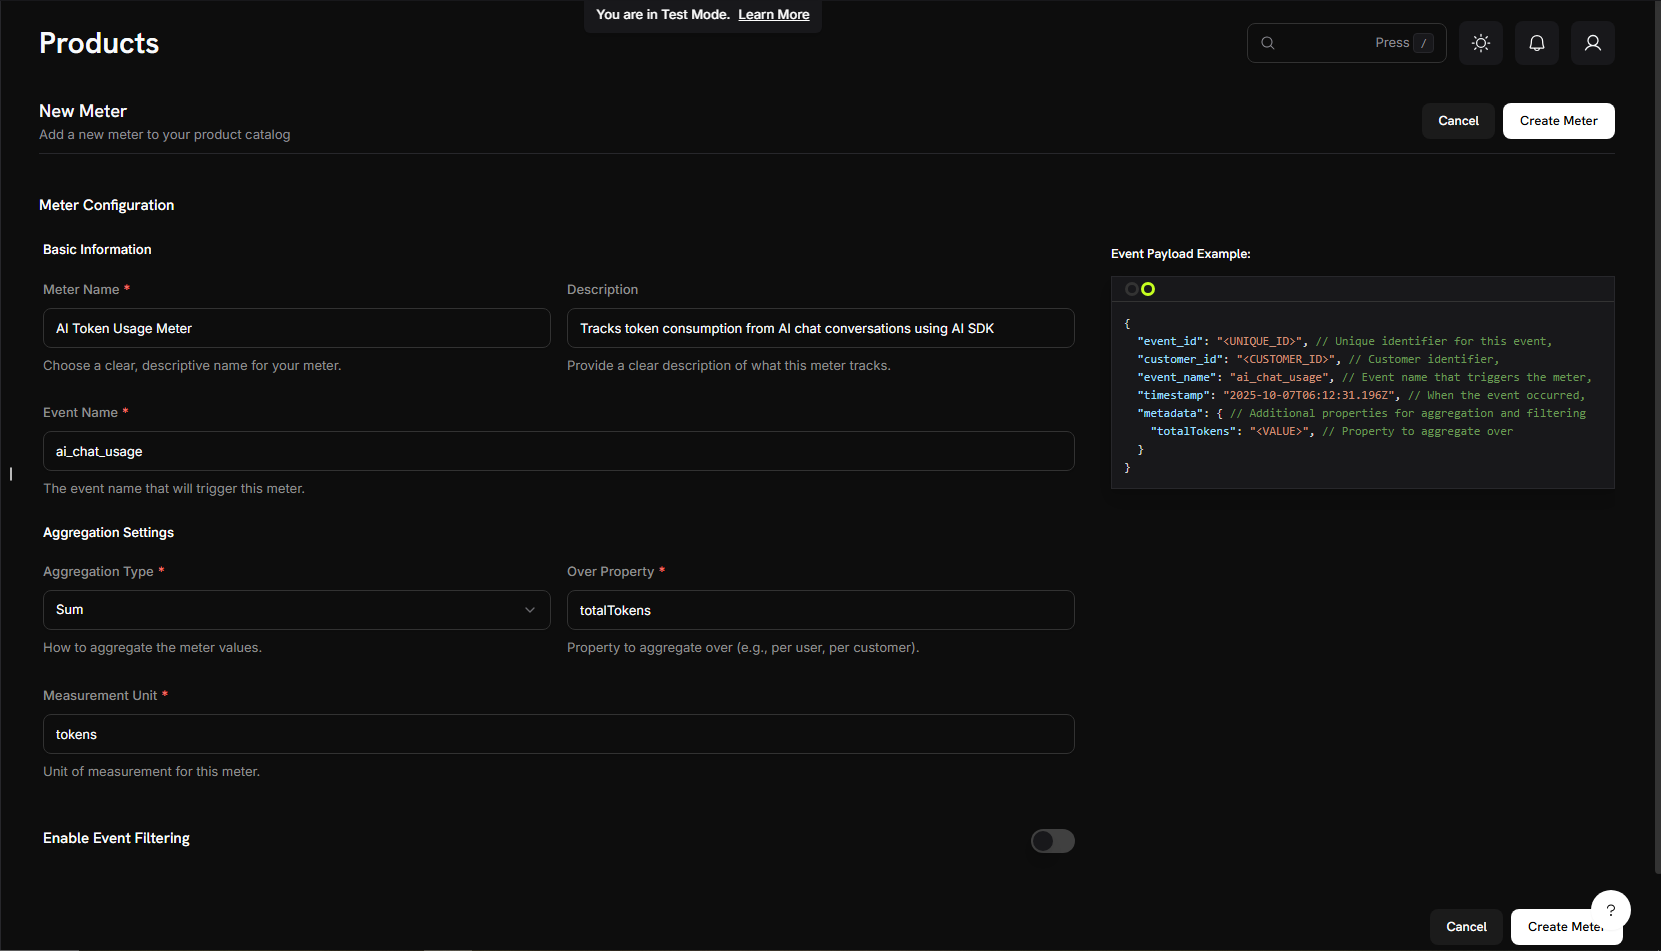
Meter बन गया। “AI Token Usage Meter” अब tokens count करने के लिए तैयार है। अब इसे billing product से connect करें।
Step 2: अपनी API Keys प्राप्त करें
ऐप के लिए आवश्यक दो API keys प्राप्त करें।1
Get a Dodo Payments API Key
- Dodo Payments dashboard में Developer → API Keys पर जाएँ।
- Add API Key पर क्लिक करें।
- API key कॉपी करें।
Key को test mode में बनाएँ: test mode key केवल test mode के साथ काम करती है। आप Step 5 में key को
.env file में जोड़ेंगे।2
Get a Google AI API Key
- aistudio.google.com पर जाएँ।
- Get API Key पर क्लिक करें।
- API key बनाएँ या मौजूदा key का उपयोग करें।
- Key कॉपी करें।
इस key को private रखें। आप इसे Step 5 में
.env file में जोड़ेंगे।Step 3: अपना Billing Product बनाएँ
Pricing निर्धारित करने वाला product बनाएँ: प्रति 1,000 tokens $0.01, जिसमें 10,000 free tokens हों। Product meter को billing से connect करता है।1
Navigate to Products
- Dodo Payments dashboard में sidebar के Products पर क्लिक करें।
- Add Product पर क्लिक करें।
- Pricing Type के अंतर्गत Usage Based Billing चुनें।
2
Enter Product Details
आवश्यक विवरण भरें:Product Name: →
AI Chat ServiceDescription: → AI-powered chat service with automatic token-based billingProduct Image: संबंधित image upload करें।Name और description customer invoices पर दिखाई देते हैं।
3
Connect Your Meter
जाँचें कि product का pricing type Usage Based Billing है।Price को
0 पर सेट करें, ताकि customers केवल usage के लिए भुगतान करें और कोई base fee न हो।इसके बाद आपके बनाए हुए meter को link करें:- Associated Meters section तक scroll करें।
- Add meters पर क्लिक करें।
- Dropdown से “AI Token Usage Meter” चुनें।
- Confirm करें कि meter product configuration में दिखाई दे रहा है।
Meter product से connect हो गया है।
4
Set Your Pricing
Per-token price और free tier निर्धारित करें:Price per unit: → 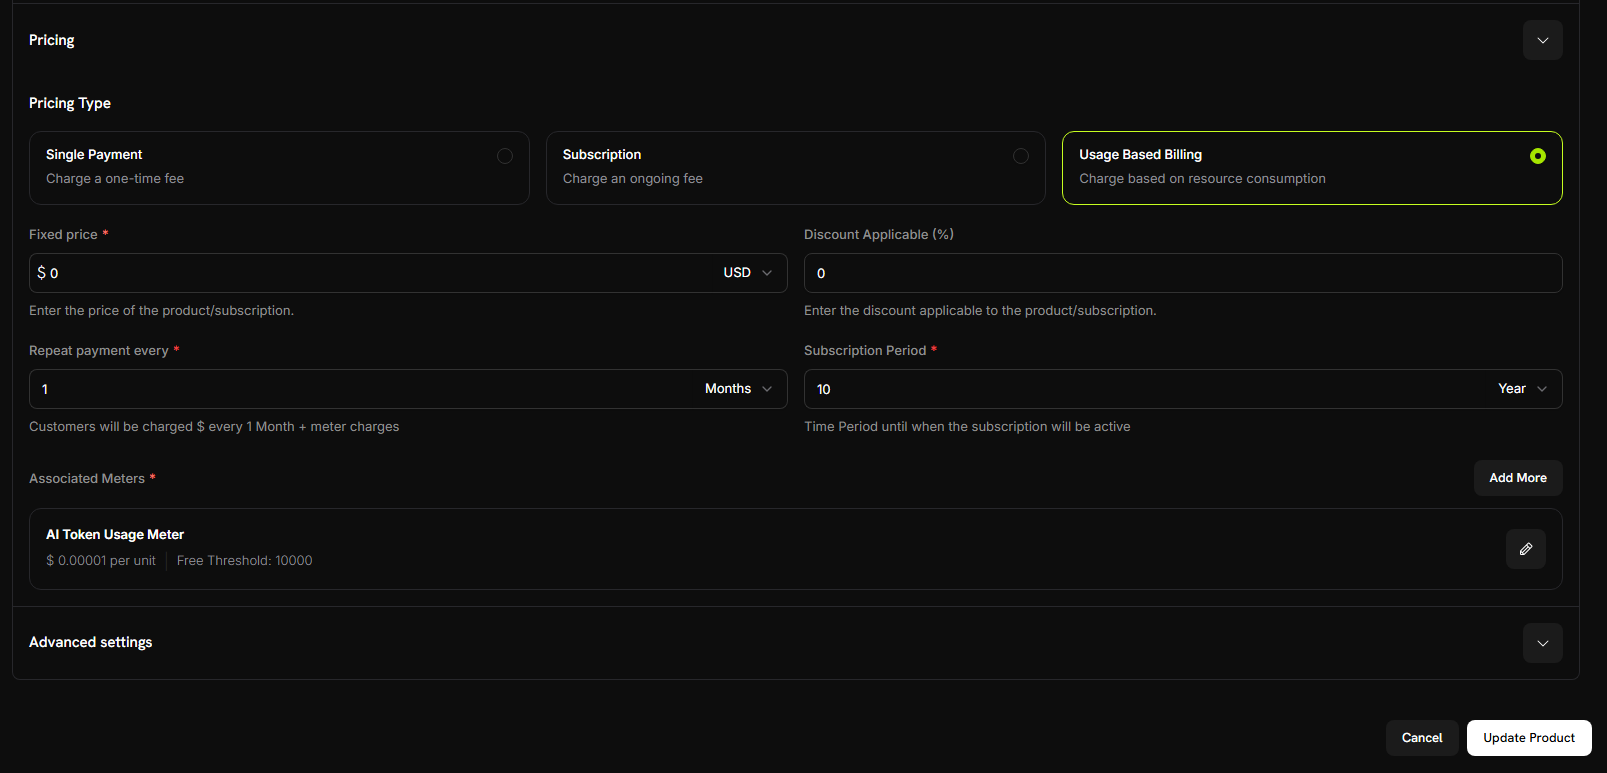
0.00001। यह प्रति token $0.00001, या प्रति 1,000 tokens $0.01 है।Free Threshold: → 10000। प्रत्येक customer को प्रति माह 10,000 free tokens मिलते हैं।5
Save Your Product
- Settings की समीक्षा करें:
- Name: AI Chat Service
- Meter: AI Token Usage Meter
- Price: प्रति 1,000 tokens $0.01
- Free tier: 10,000 tokens
- Save Changes पर क्लिक करें।
Product बन गया। Billing configure हो गई है और customers द्वारा उपयोग किए गए tokens के लिए उन्हें charge किया जाता है।
Step 4: Test Purchase करें
Product खरीदकर एक test customer बनाएँ। ऐप इस customer के लिए usage events भेजता है।1
Get Your Payment Link
- Dodo Payments dashboard में Products पर जाएँ।
- “AI Chat Service” product खोजें।
- Product के पास Share पर क्लिक करें।
- Payment link कॉपी करें।
2
Complete a Test Purchase
- Payment link को नए browser tab में खोलें।
- test payment details दर्ज करें और purchase पूरा करें।
Payment सफल होने के बाद purchase एक customer बनाता है। Application code उस customer की ID का उपयोग करता है।
3
Find Your Customer ID
- Dodo Payments dashboard पर वापस जाएँ।
- Sidebar में Sales → Customers पर जाएँ।
- बनाए गए customer को उसके test email address से खोजें।
- Customer ID कॉपी करें। यह
cus_से शुरू होती है।
इस customer ID को save करें। Chat application को test करते समय आप इसका उपयोग करेंगे।
Step 5: Chat Application बनाएँ
Billing setup और test customer बनाने के बाद chat application बनाएँ।1
Set Up Your Project
एक directory बनाएँ और project initialize करें:
2
Install Dependencies
Packages install करें:
3
Configure TypeScript
tsconfig.json बनाएँ:tsconfig.json
package.json update करें:package.json
4
Create the Project Structure
Source और static-file folders बनाएँ:
5
Set Up Environment Variables
Project root में एक Placeholder values को Step 2 की API keys से replace करें। AI SDK का Google provider default रूप से
.env file बनाएँ:.env
GOOGLE_GENERATIVE_AI_API_KEY पढ़ता है।6
Create the Backend Server
src/server.ts बनाएँ और नीचे दिया गया server code paste करें।.env और package.json:
Step 6: Chat Interface जोड़ें
ऐसा chat interface जोड़ें जो पूरी conversation history बनाए रखे।public/index.html बनाएँ:
public/index.html
Step 7: अपनी Chat Application Test करें
Chat app को end to end test करें और usage को Dodo Payments तक पहुँचते हुए देखें।1
Start the Server
- जाँचें कि
.envfile में Step 2 की दोनों API keys हैं। - Development server शुरू करें:
Server चल रहा है।
2
Open the Chat Interface
- अपना browser खोलें।
http://localhost:3000पर जाएँ। Chat interface load होती है।
Chat करने से पहले, Step 4 की test customer ID को
server.ts में CUSTOMER_ID पर set करें, फिर server restart करें।3
Have Your First Conversation
ये messages भेजें:
- “Artificial intelligence क्या है?”
- “Machine learning कैसे काम करती है?”
- “क्या आप neural networks समझा सकते हैं?”
यदि AI response देती है और token counts दिखाई देते हैं, तो ऐप काम कर रहा है।
4
Check Your Dodo Payments Dashboard
Confirm करें कि Dodo Payments को events प्राप्त हो रहे हैं: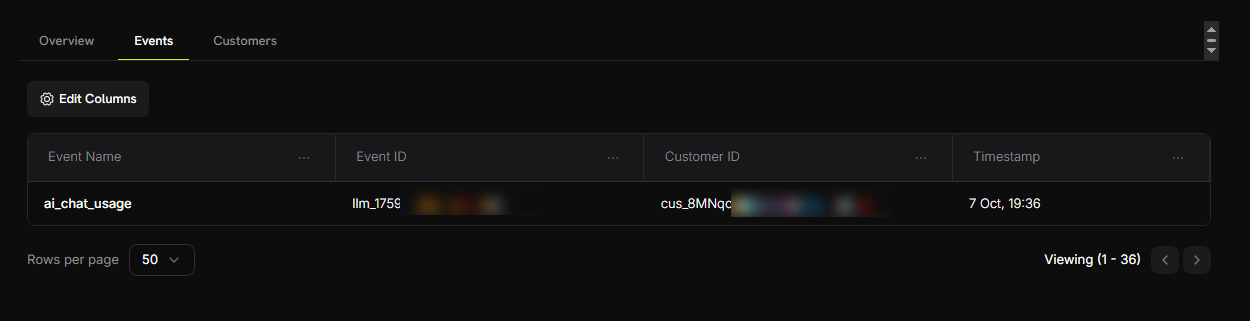
- Dodo Payments dashboard खोलें।
- Products → Meters पर जाएँ और AI Token Usage Meter खोलें।
- Events tab चुनें।
- List में अपने chat events खोजें।
- Event name:
ai_chat_usage - Customer ID: आपकी test customer ID
आपके द्वारा भेजे गए प्रत्येक message के लिए list में एक event है।
5
Verify Token Counting
कुछ और messages भेजें, फिर aggregation जाँचें: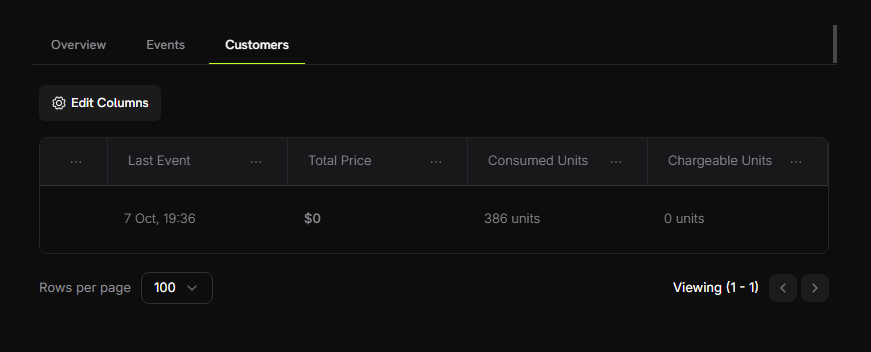
- Meter में Customers tab चुनें।
- अपना test customer खोजें।
- Consumed Units column जाँचें। इसमें उपयोग किए गए कुल tokens दिखाई देते हैं।
Meter प्रत्येक event से
totalTokens value का sum करता है।6
Test the Free Tier
Free tier पार करने के लिए पर्याप्त tokens का उपयोग करें: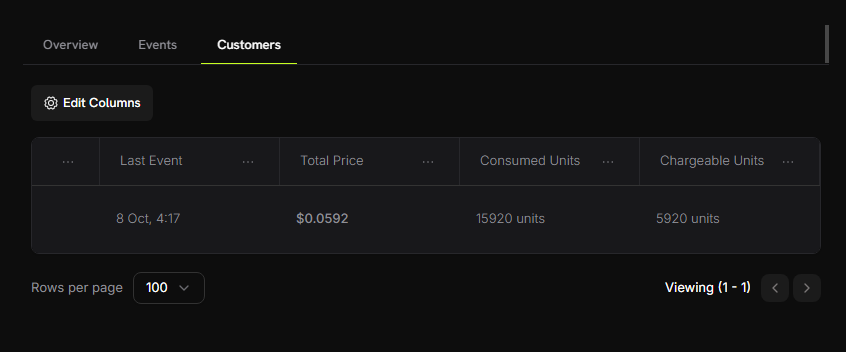
- कई और conversations करें, जब तक total लगभग 15,000 tokens से अधिक न हो जाए।
- Meter का Customers tab फिर से खोलें।
- Values जाँचें:
- Consumed Units: 15,000+ tokens
- Chargeable Units: 5,000 (10,000 free tokens लागू)
- Total Price: ~$0.05
Usage-based billing काम करती है। Customers द्वारा उपयोग किए गए tokens के लिए उन्हें charge किया जाता है।
Troubleshooting
सामान्य समस्याएँ और उनके समाधान:Events not appearing in dashboard
Events not appearing in dashboard
संभावित कारण:
- Event name meter configuration से बिल्कुल match नहीं करता
- Customer ID आपके account में मौजूद नहीं है
- API key invalid या expired है
- Network connectivity issues
- जाँचें कि event name meter से बिल्कुल match करता है। यह case-sensitive है:
ai_chat_usage। - जाँचें कि customer ID Dodo Payments dashboard में मौजूद है।
- Simple API call के साथ API key test करें।
- Errors के लिए server logs जाँचें।
Token counts showing zero
Token counts showing zero
संभावित कारण:
- Model usage information return नहीं कर रहा है
- SDK version गलत है
- जाँचें कि model usage return करता है या नहीं:
- Blueprints package update करें:
npm install @dodopayments/ingestion-blueprints@latest
API key invalid error
API key invalid error
संभावित कारण:
- API key दूसरे mode की है।
.envfile में extra spaces या quotes हैं।
- Key केवल उसी mode में काम करती है जिसमें उसे बनाया गया था।
DODO_PAYMENTS_ENVIRONMENT=test_modeके साथ test mode key औरlive_modeके साथ live mode key का उपयोग करें। .envfile में keys के चारों ओर मौजूद quotes हटाएँ।- आवश्यकता होने पर नई key generate करें।