

Quick Start
Platform Examples
Checkout Customization
Mobile Recipes
Dodo Payments ships an official checkout SDK for Android, iOS, React Native, and Flutter. Each SDK opens the checkout URL, captures the return, and parses the result behind one typed
start(...) call, and each one includes abandoned-session recovery. Build the flow by hand only if none of the SDKs fits your stack.Prerequisites
Before you start, you need:- A Dodo Payments account.
- An API key from Developer → API Keys and a webhook signing secret from Developer → Webhooks.
- An Android, iOS, React Native, or Flutter app.
- A backend server that creates checkout sessions. The API key stays on this server.
Integration Workflow
Your backend makes every Dodo Payments API call. Your app only asks your backend for a checkout URL, opens it, and shows the result.The
status in the deep link tells your app what to show the customer. It is not proof of payment. Grant access from the payment.succeeded or subscription.active webhook on your backend, not from the mobile result.1
Backend: Create Checkout Session
Your backend creates a checkout session with your API key and returns its
checkout_url to the app. Set the session’s return_url to the deep link your app registers, for example myapp://checkout/return.Checkout Session API Docs
Security: Create checkout sessions on your backend server, never in the mobile app. Anyone can extract an API key from an app binary.
2
Mobile: Get Checkout URL
Your app calls your backend to get the checkout URL. Authenticate this request with the signed-in user’s own session token. In each example,
userSessionToken is that token and CheckoutResponse is your own response type.- iOS (Swift)
- Android (Kotlin)
- React Native (JavaScript)
- Flutter (Dart)
Security: The app talks only to your backend, never directly to the Dodo Payments API.
3
Mobile: Open Checkout in Browser
Open the checkout URL in the platform’s system browser surface. The official checkout SDK for your platform does this for you and returns a typed result.
Pick your mobile SDK
4
Backend: Handle Payment Completion
Grant access when your backend receives the
payment.succeeded or subscription.active webhook. Use the result from the return URL only to update the app’s screen.Choose Your SDK
Every mobile SDK has the same contract. Onestart(...) call opens Dodo Payments hosted checkout in the platform’s system browser surface and returns a typed CheckoutResult whose status is succeeded, failed, cancelled, pending, or expired. No SDK holds an API key or calls the Dodo Payments API, and all four support abandoned-session recovery.
Android
iOS
React Native
Flutter
Registering a Callback URL Scheme
All four SDKs return control to your app through a custom URL scheme that you choose, for examplemyapp://checkout/return. Register it once per platform:
- Android
- iOS
- Expo
android/app/build.gradle
returnUrl.To build the flow yourself, open the
checkout_url in the platform’s system browser surface (a Custom Tab on Android, SFSafariViewController on iOS), intercept the navigation to your return_url, and read the status and payment_id query parameters. The SDKs do this for you.Appearance Customization
Every SDK accepts an optionalcustomization parameter on start(...) or CheckoutParams. It controls the system browser surface: the toolbar, the buttons, and how the browser is presented. The checkout page’s own theme is separate. You set it on your server with customization.theme_config when you create the checkout session.
The options are grouped by platform, because a Custom Tab on Android and SFSafariViewController on iOS expose different native controls. Every field is optional. An unset field leaves the platform’s own default in place.
Android - Custom Tab
Android - Custom Tab
Color
Toolbar background color.
Navigation bar color.
Divider color above the navigation bar.
'default' | 'back'
default shows the system “X” icon; back draws a back arrow instead.'start' | 'end'
Which side of the toolbar the close button appears on.
Shows the toolbar’s share icon.
boolean
Shows the page title under the URL in the toolbar.
boolean
Lets the toolbar auto-hide as the page scrolls.
boolean
Shows “Bookmark this page” in the overflow menu.
boolean
Shows “Download page” in the overflow menu.
'system' | 'light' | 'dark'
Forces light or dark appearance regardless of the device’s system setting.
iOS - SFSafariViewController
iOS - SFSafariViewController
'done' | 'close' | 'cancel'
Label or icon for the dismiss button.
'pageSheet' | 'fullScreen'
默认值:"pageSheet"
pageSheet presents checkout as a card that the customer can swipe to dismiss. fullScreen covers the whole screen.boolean
Lets the toolbar collapse on scroll. It has a visible effect only when
presentationStyle is fullScreen. With pageSheet, the bars stay pinned.'system' | 'light' | 'dark'
Forces light or dark appearance regardless of the device’s system setting.
android and ios option groups. The native SDKs take only their own platform’s options.
- React Native
- Flutter
- Android (Kotlin)
- iOS (Swift)
Checkout Page Customization
The checkout page itself (which fields appear, the theme, and which payment methods show) is set on your server when you create the checkout session. Appearance Customization covers only the browser surface around it. The parameters below have the most effect on mobile conversion. 这些参数位于 checkout session 请求中的三个位置:顶层、customization 中,或 feature_flags 中。Where it goes 列会列出每个参数所属的对象。请将每个参数放入所示对象中,因为将参数放在错误的对象中不会产生任何效果。
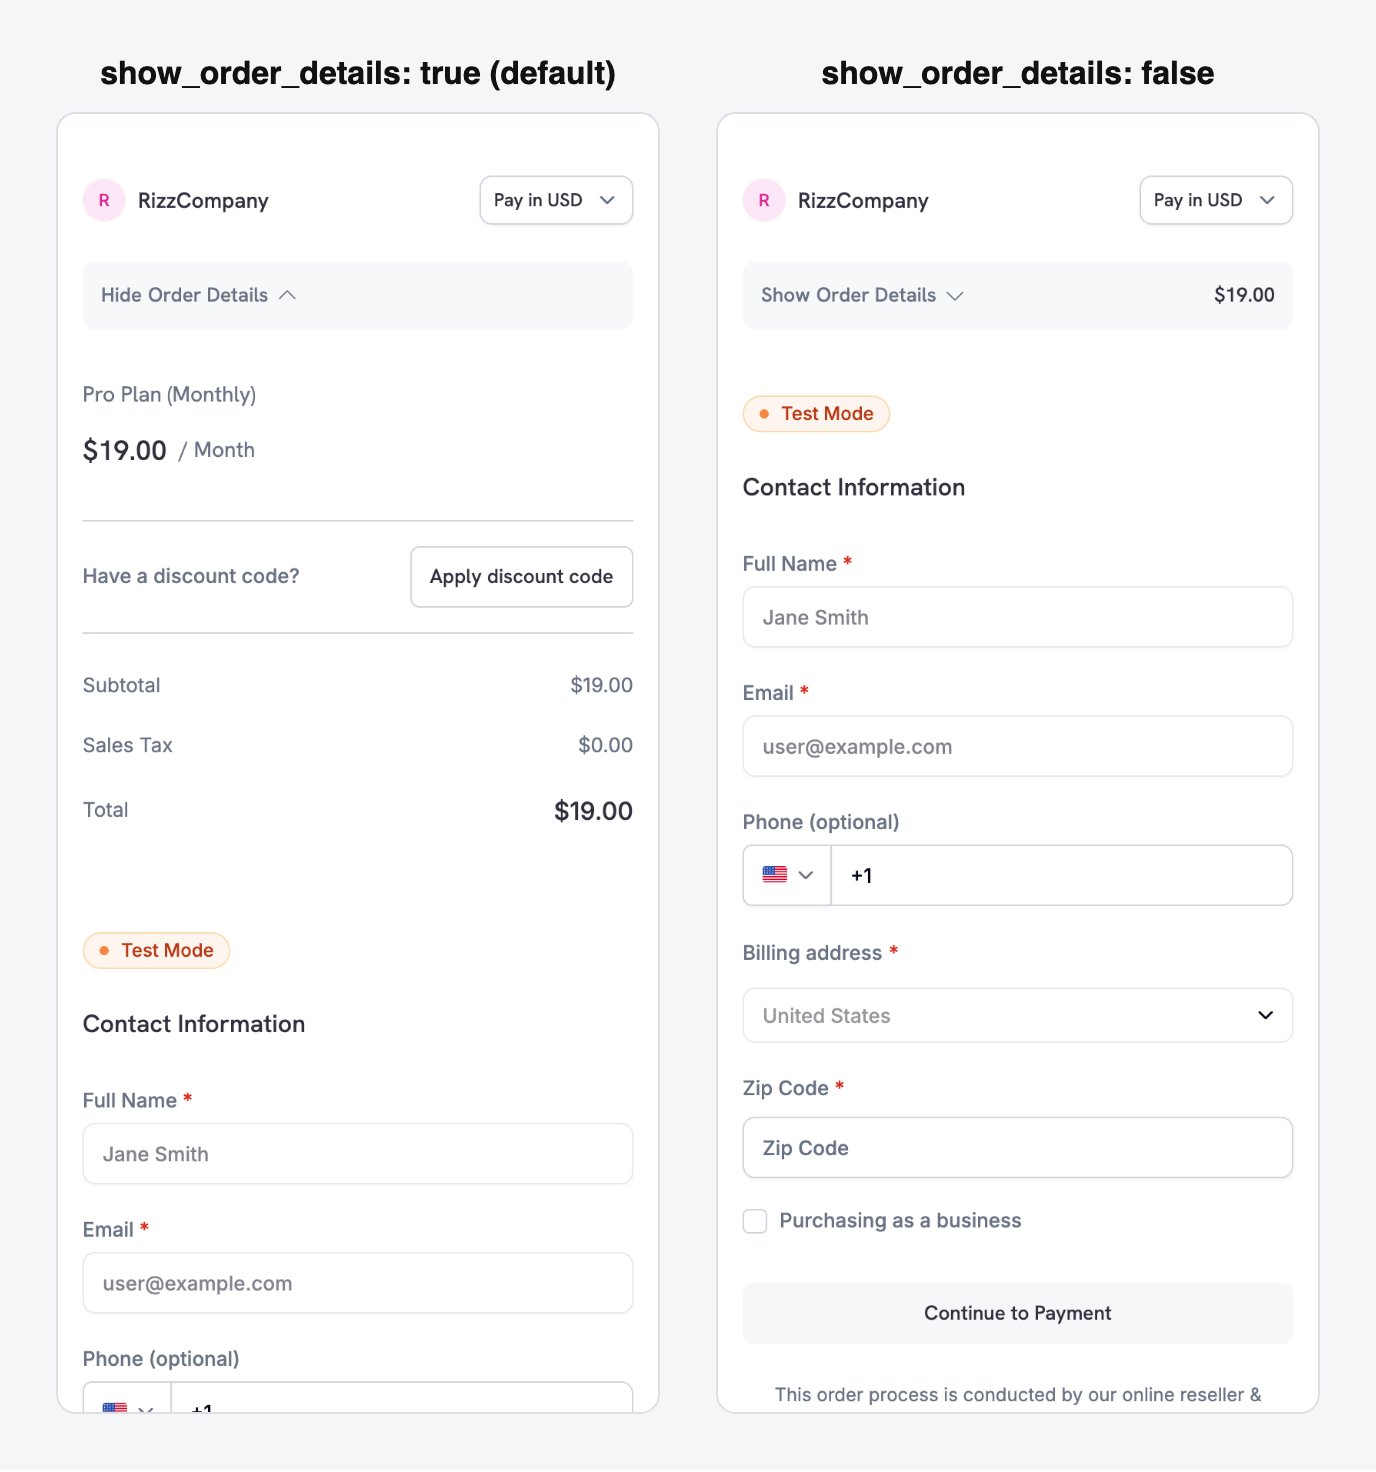
show_order_details: false moves the contact and payment fields above the fold, instead of behind the order summary.
minimal_address: true to collect only a postcode instead of the full street, city, and state fields:
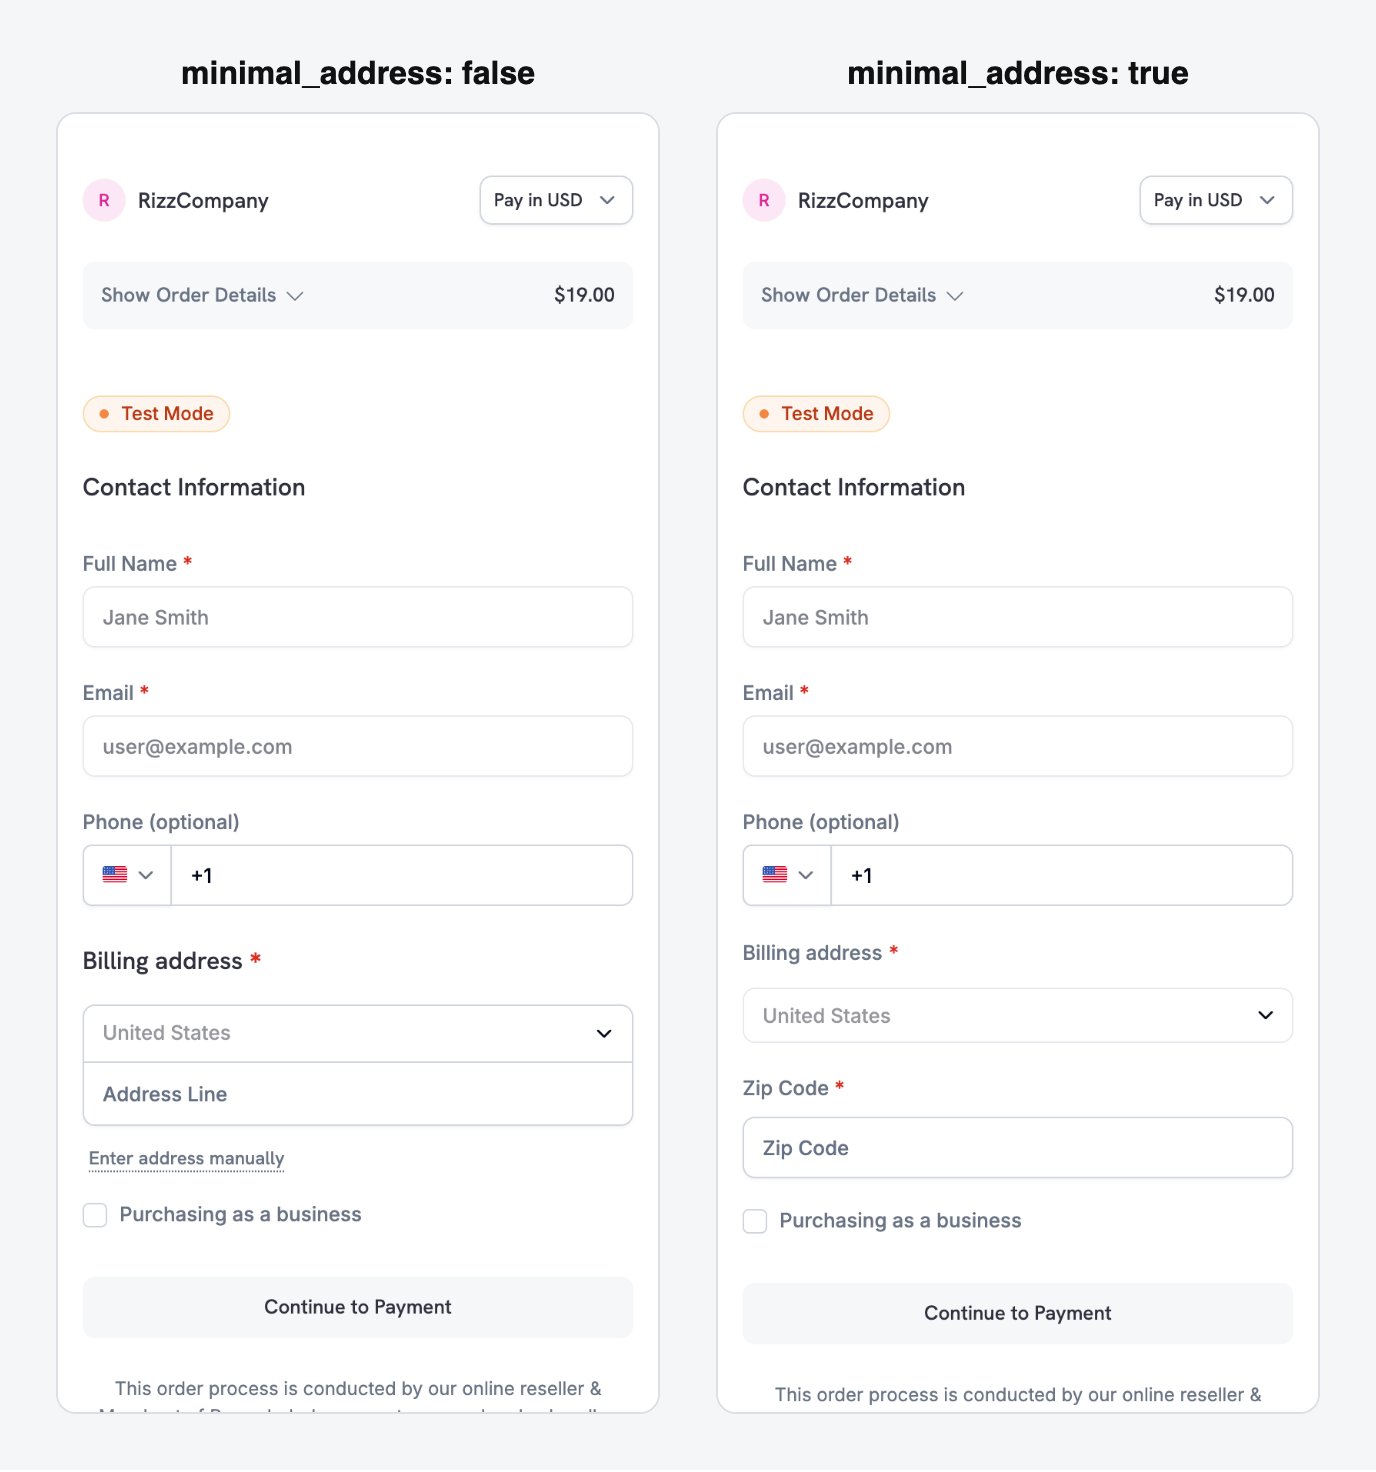
minimal_address: true reduces the billing address to a single postcode field.
theme: "system" so the checkout follows the device’s light or dark mode preference:
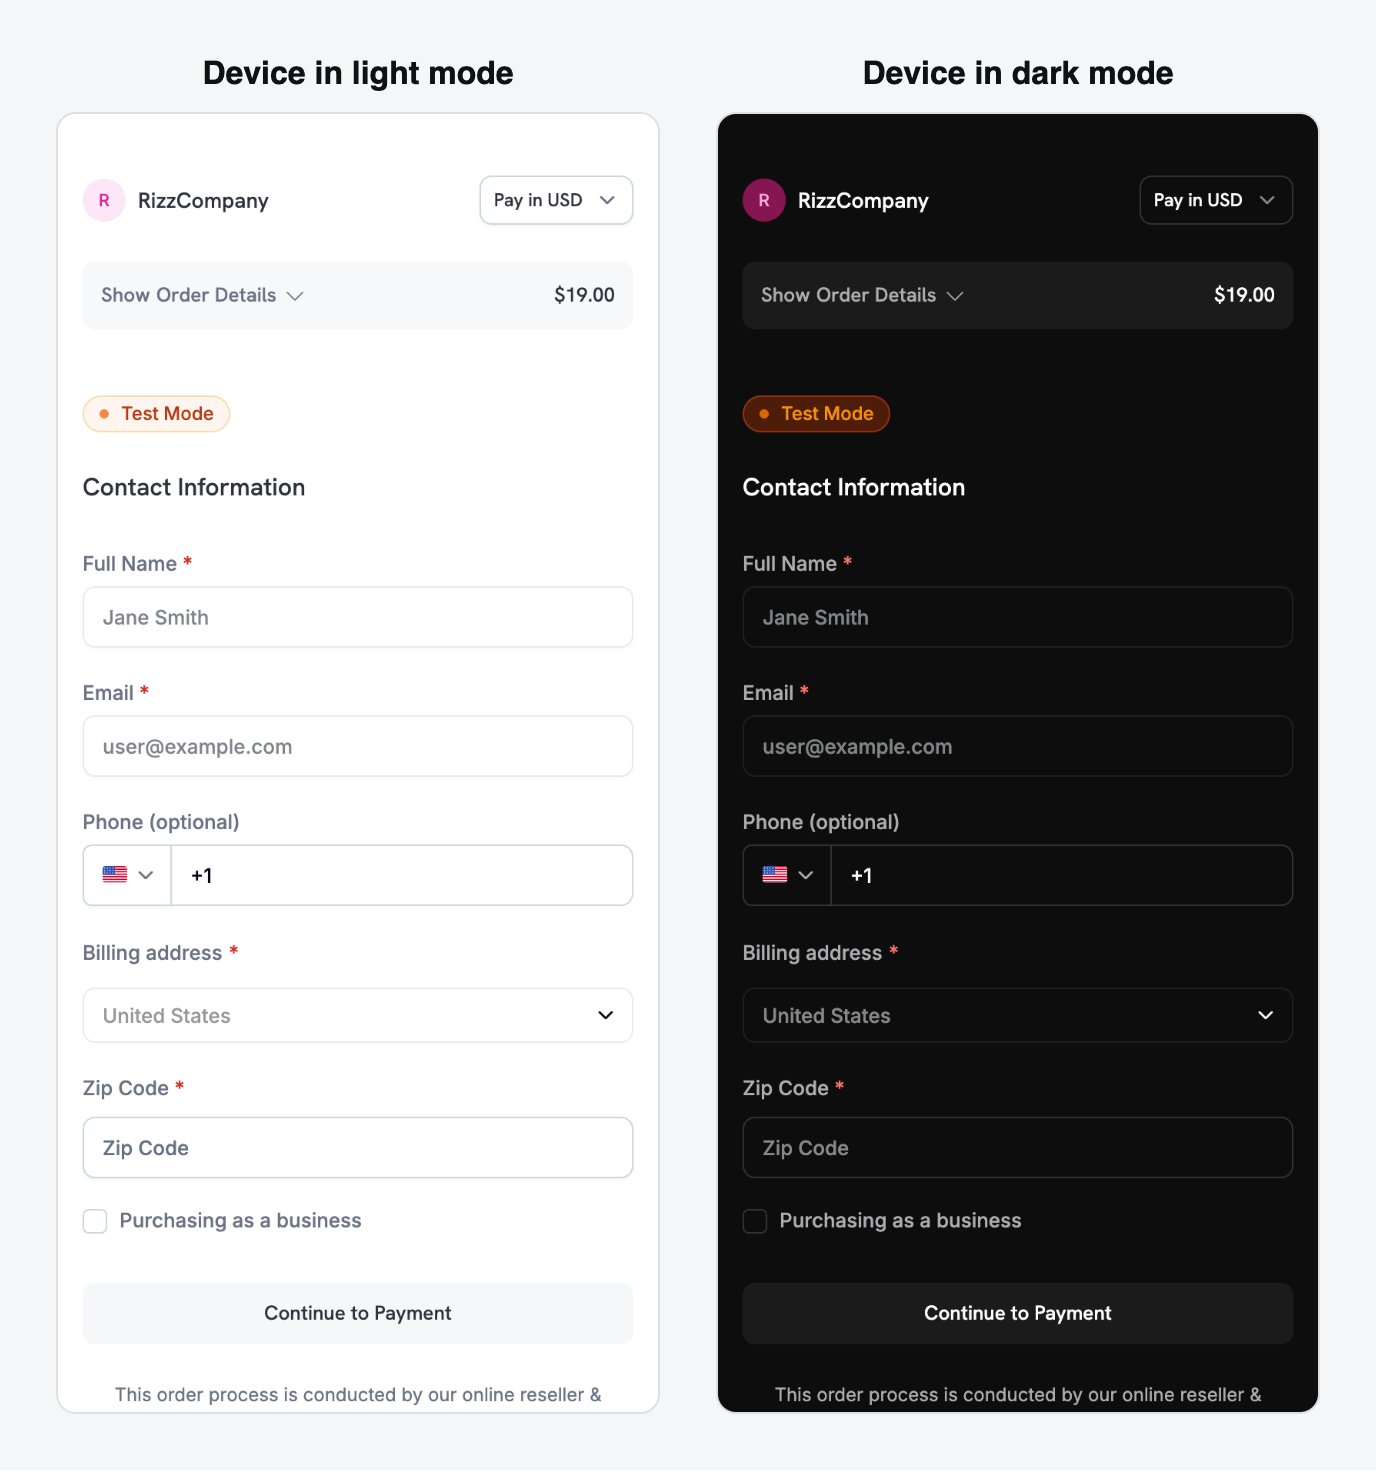
With theme: system, the checkout follows the device's light or dark appearance automatically.
Payment methods depend on the product type. Apple Pay and Cash App Pay support non-zero recurring subscriptions. One-time payments can use every payment method enabled for your business. See Payment Methods.
Full checkout session parameter reference
Mobile-Optimized Recipes
Each recipe is a complete checkout session request that your backend sends. Pick the one that matches your scenario and replace the product ID with your own. The Node.js and Python clients are set up in the first recipe, and the other recipes reuse them.Minimal Mobile Checkout - fastest path to payment
Minimal Mobile Checkout - fastest path to payment
Use this recipe for the shortest form: payment methods at the top, only a postcode for the address, no discount field, and a theme that follows the device.
- Node.js SDK
- Python SDK
See Checkout Sessions for all available parameters and their defaults.
Use this recipe when the checkout page must look like part of your app. It sets your brand colors, a border radius, and a custom pay button label.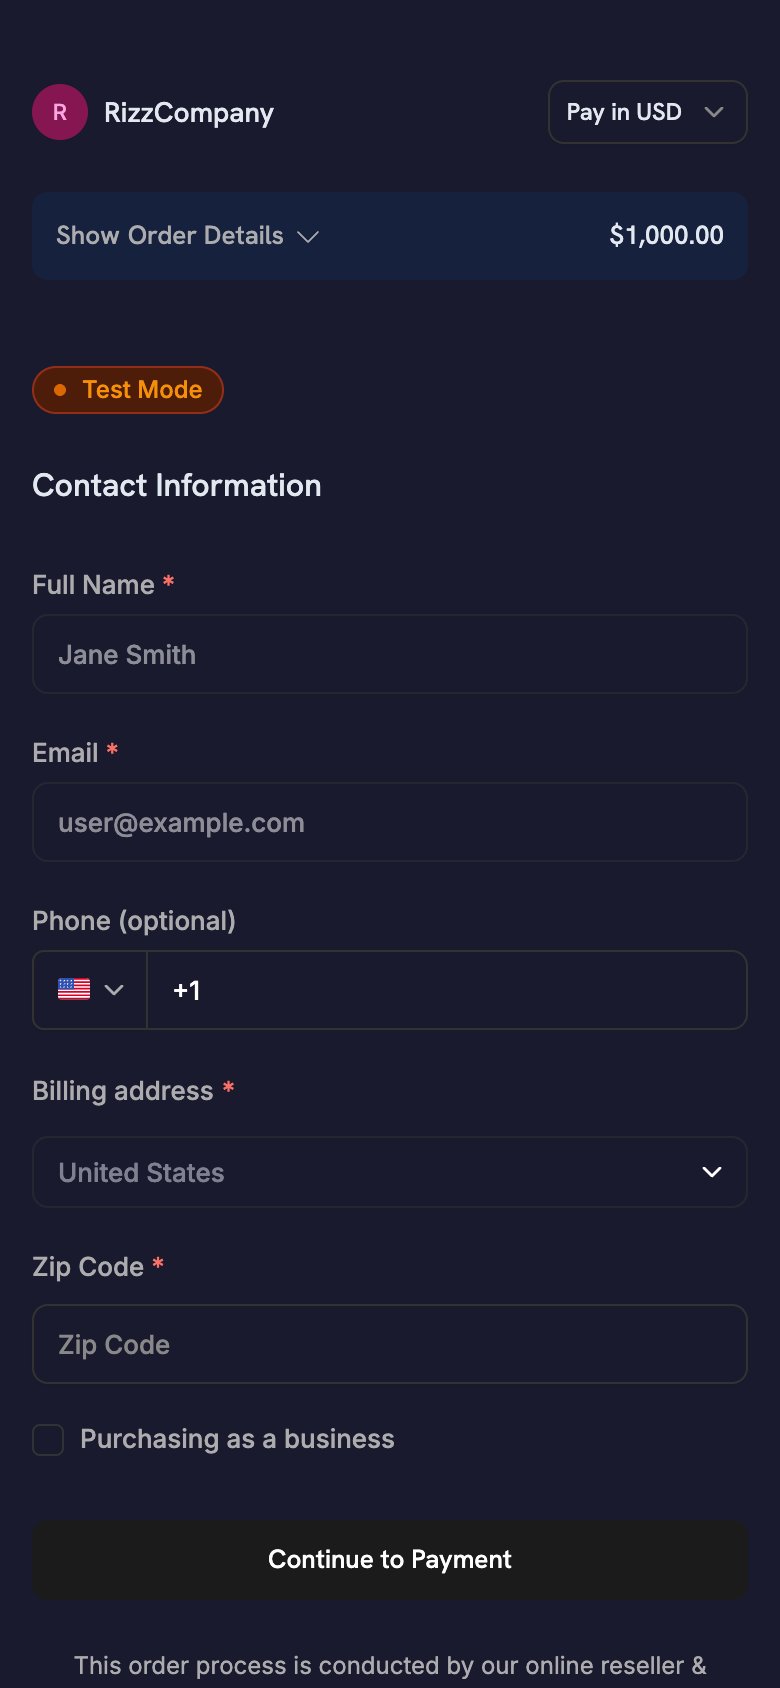
- Node.js SDK
- Python SDK
theme_config accepts separate dark and light objects, so the palette follows the device’s appearance. For every color key and the font option, see Checkout Sessions.One-Click Returning Customer - saved card, instant confirmation
One-Click Returning Customer - saved card, instant confirmation
Use this recipe for signed-in customers who have paid before. Pass the customer’s
customer_id, their saved payment_method_id, and confirm: true to skip the checkout form. With a payment_method_id, the session charges the saved method directly and returns no checkout_url, so your app has nothing to open. Learn the outcome from webhooks.- Node.js SDK
- Python SDK
Grant access when your backend receives the
payment.succeeded webhook. Any status your app shows is a UI hint only.Subscription with Free Trial - trial before first charge
Subscription with Free Trial - trial before first charge
Use this recipe for a subscription product with a free trial before the first charge.
trial_period_days sets the trial length for this session.- Node.js SDK
- Python SDK
Grant access when your backend receives the
subscription.active webhook, not when the mobile SDK returns. For the full webhook flow, see the Subscription Integration Guide.On-Demand Mandate - save a card for future variable charges
On-Demand Mandate - save a card for future variable charges
Use this recipe to save a customer’s payment method for later charges, such as wallet top-ups, pay-as-you-go, or BNPL, without showing a subscription label. The customer authorizes the payment method once, and you charge variable amounts later.
Apps that charge by usage follow this pattern. For example, an astrology app charges a pre-authorized card for each session instead of on a fixed schedule.
- Node.js SDK
- Python SDK
For the full charge flow, webhook events, and retry policies, see On-Demand Subscriptions.
Subscription Flows from Mobile
A mobile app starts a subscription with the same checkout session flow as a one-time payment. The SDK opens hosted checkout, the customer subscribes, and your app handles the deep-link return. Your backend manages the rest of the subscription lifecycle.Regular Recurring Subscriptions
For billing at a fixed interval, such as monthly or yearly, create a checkout session with a subscription product and a deep-linkreturn_url. Your backend receives subscription.active when the subscription starts.
Apple Pay and Cash App Pay support non-zero recurring subscriptions.
On-Demand Subscriptions
An on-demand subscription authorizes a customer’s payment method once, so you can charge variable amounts later. Use it for wallet top-ups, pay-as-you-go, and any charge whose amount you don’t know in advance. For the full request body, see the On-Demand Mandate recipe. On mobile, keep these points in mind:- Set
show_on_demand_tag: falseso the checkout page doesn’t show subscription or on-demand wording. Customers who save a card for top-ups don’t expect subscription terms. - After the customer authorizes the mandate, your backend receives
subscription.active. Store thesubscription_id, because every later charge uses it.
Subscription with Free Trial
To offer a trial before the first charge, passsubscription_data.trial_period_days in the checkout session. The customer authorizes a payment method at signup, and Dodo Payments charges it when the trial ends. For the full request body, see the Subscription with Free Trial recipe.
Upgrades and Downgrades
Your backend changes plans through the API, not through a new checkout session. Dodo Payments calculates proration with the proration mode you choose. To let customers change plans themselves, link to the Customer Portal.Subscription Integration Guide
On-Demand Subscriptions
Upgrade / Downgrade
Customer Portal
Reducing Checkout Drop-Offs
在小屏幕上,填写每个表单字段都需要付出更多努力。以下 checkout session 设置可以缩短表单并减少用户中途放弃。Optimize the Form
These settings shorten the checkout form on mobile:Pre-Fill Customer Data
Each field you pre-fill is one the customer doesn’t have to type:- New customers: set
customer.emailandcustomer.namefrom your auth session. - Returning customers: set
customer.customer_idto use the customer’s stored details. - Currency: pass
billing_currencyandbilling_address.countrytogether.
Recovery Tools
Recovery tools bring back customers whose checkout or renewal didn’t complete:Abandoned Cart Recovery
Payment Retries
Subscription Dunning
Recovery Overview
最佳实践
- 安全性:切勿将 API key 放入你的应用中。请在后端创建 checkout session,并仅将
checkout_url传递给应用。 - 权限控制:将
CheckoutResult.status视为 UI 提示。只有在后端确认支付成功后,才授予访问权限。 - 用户体验:后端创建 session 时显示加载状态。不要将
cancelled视为失败,因为支付可能已经成功。 - 测试:使用测试模式和测试卡,并在真实设备和模拟器上检查 return URL 的往返流程。
- 转化率:设置
show_order_details: false和minimal_address: true。两者结合使用可将支付方式移到首屏上方,并移除大部分地址字段。 - 货币:同时传递
billing_currency和billing_address.country。如果省略其中任意一个,Adaptive Currency 可能会根据客户的 IP 地址选择结算货币。 - 按需计费:仅在使用按需订阅来保存卡片时设置
show_on_demand_tag: false。为钱包充值的客户不会期待订阅相关措辞。 - 恢复:在控制面板中开启 Abandoned Cart Recovery,以便向未完成 checkout 的客户发送电子邮件。
故障排除
常见问题
- 始终收不到回调:
returnUrl中的 scheme 必须与注册的 scheme 匹配。在 Android 上,这是dodoCallbackSchememanifest placeholder。在 iOS 上,这是Info.plistURL type。React Native 和 Flutter 应用需要同时配置两者,在 Expo 中,config plugin 会同时设置两者。 - checkout 在 iOS 上返回浏览器而不是你的应用:你的应用没有转发传入的 URL。请从
.onOpenURL、scene(_:openURLContexts:)或 React NativeLinkinglistener 中调用DodoCheckout.handleOpenURL(url)。 - Android 上出现
PLATFORM_ERROR:最常见的原因是 scheme 不匹配。如果你的MainActivity设置了android:taskAffinity=""(即flutter create默认值),也会出现此问题,因为部分 Android OEM 构建版本可能会丢失进行中的 checkout。 ALREADY_IN_PROGRESS:仍有一个 checkout 处于打开状态。请等待之前的 checkout 完成,或将其关闭,然后再开始新的 checkout。- 构建失败并显示未解析的 placeholder:你已添加 Android SDK,但未设置
manifestPlaceholders["dodoCallbackScheme"]。 - 支付成功但未授予访问权限:你的应用根据移动端结果授予了访问权限。请改为根据
payment.succeeded或subscription.activewebhook 授予访问权限。 - 移动端未显示 Apple Pay 或 Google Pay:检查 checkout 是否在嵌入式 WebView(
WKWebView或 AndroidWebView)中加载。请使用 SDK 打开,或在系统浏览器界面中打开:Android 使用 Custom Tab,iOS 使用SFSafariViewController或ASWebAuthenticationSession。
其他资源
- 支付集成指南
- Webhook 文档
- 测试流程
- 技术常见问题
- Checkout Session 自定义
- 按需订阅
- 订阅升级/降级
- Abandoned Cart Recovery
- Customer Portal