

Quick Start
Platform Examples
Checkout Customization
Mobile Recipes
Dodo Payments ships an official checkout SDK for Android, iOS, React Native, and Flutter. Each SDK opens the checkout URL, captures the return, and parses the result behind one typed
start(...) call, and each one includes abandoned-session recovery. Build the flow by hand only if none of the SDKs fits your stack.Prerequisites
Before you start, you need:- A Dodo Payments account.
- An API key from Developer → API Keys and a webhook signing secret from Developer → Webhooks.
- An Android, iOS, React Native, or Flutter app.
- A backend server that creates checkout sessions. The API key stays on this server.
Integration Workflow
Your backend makes every Dodo Payments API call. Your app only asks your backend for a checkout URL, opens it, and shows the result.The
status in the deep link tells your app what to show the customer. It is not proof of payment. Grant access from the payment.succeeded or subscription.active webhook on your backend, not from the mobile result.1
Backend: Create Checkout Session
Your backend creates a checkout session with your API key and returns its
checkout_url to the app. Set the session’s return_url to the deep link your app registers, for example myapp://checkout/return.Checkout Session API Docs
Security: Create checkout sessions on your backend server, never in the mobile app. Anyone can extract an API key from an app binary.
2
Mobile: Get Checkout URL
Your app calls your backend to get the checkout URL. Authenticate this request with the signed-in user’s own session token. In each example,
userSessionToken is that token and CheckoutResponse is your own response type.- iOS (Swift)
- Android (Kotlin)
- React Native (JavaScript)
- Flutter (Dart)
Security: The app talks only to your backend, never directly to the Dodo Payments API.
3
Mobile: Open Checkout in Browser
Open the checkout URL in the platform’s system browser surface. The official checkout SDK for your platform does this for you and returns a typed result.
Pick your mobile SDK
4
Backend: Handle Payment Completion
Grant access when your backend receives the
payment.succeeded or subscription.active webhook. Use the result from the return URL only to update the app’s screen.Choose Your SDK
Every mobile SDK has the same contract. Onestart(...) call opens Dodo Payments hosted checkout in the platform’s system browser surface and returns a typed CheckoutResult whose status is succeeded, failed, cancelled, pending, or expired. No SDK holds an API key or calls the Dodo Payments API, and all four support abandoned-session recovery.
Android
iOS
React Native
Flutter
Registering a Callback URL Scheme
All four SDKs return control to your app through a custom URL scheme that you choose, for examplemyapp://checkout/return. Register it once per platform:
- Android
- iOS
- Expo
android/app/build.gradle
returnUrl.To build the flow yourself, open the
checkout_url in the platform’s system browser surface (a Custom Tab on Android, SFSafariViewController on iOS), intercept the navigation to your return_url, and read the status and payment_id query parameters. The SDKs do this for you.Appearance Customization
Every SDK accepts an optionalcustomization parameter on start(...) or CheckoutParams. It controls the system browser surface: the toolbar, the buttons, and how the browser is presented. The checkout page’s own theme is separate. You set it on your server with customization.theme_config when you create the checkout session.
The options are grouped by platform, because a Custom Tab on Android and SFSafariViewController on iOS expose different native controls. Every field is optional. An unset field leaves the platform’s own default in place.
Android - Custom Tab
Android - Custom Tab
Color
Toolbar background color.
Navigation bar color.
Divider color above the navigation bar.
'default' | 'back'
default shows the system “X” icon; back draws a back arrow instead.'start' | 'end'
Which side of the toolbar the close button appears on.
Shows the toolbar’s share icon.
boolean
Shows the page title under the URL in the toolbar.
boolean
Lets the toolbar auto-hide as the page scrolls.
boolean
Shows “Bookmark this page” in the overflow menu.
boolean
Shows “Download page” in the overflow menu.
'system' | 'light' | 'dark'
Forces light or dark appearance regardless of the device’s system setting.
iOS - SFSafariViewController
iOS - SFSafariViewController
'done' | 'close' | 'cancel'
Label or icon for the dismiss button.
'pageSheet' | 'fullScreen'
기본값:"pageSheet"
pageSheet presents checkout as a card that the customer can swipe to dismiss. fullScreen covers the whole screen.boolean
Lets the toolbar collapse on scroll. It has a visible effect only when
presentationStyle is fullScreen. With pageSheet, the bars stay pinned.'system' | 'light' | 'dark'
Forces light or dark appearance regardless of the device’s system setting.
android and ios option groups. The native SDKs take only their own platform’s options.
- React Native
- Flutter
- Android (Kotlin)
- iOS (Swift)
Checkout Page Customization
The checkout page itself (which fields appear, the theme, and which payment methods show) is set on your server when you create the checkout session. Appearance Customization covers only the browser surface around it. The parameters below have the most effect on mobile conversion. 이 매개변수는 checkout session request의 세 위치에 들어갑니다. 최상위 레벨,customization 또는 feature_flags입니다. Where it goes 열에는 각 매개변수가 들어갈 객체가 표시됩니다. 각 매개변수는 표시된 객체에 배치하세요. 잘못된 객체에 매개변수를 넣으면 아무런 효과가 없습니다.
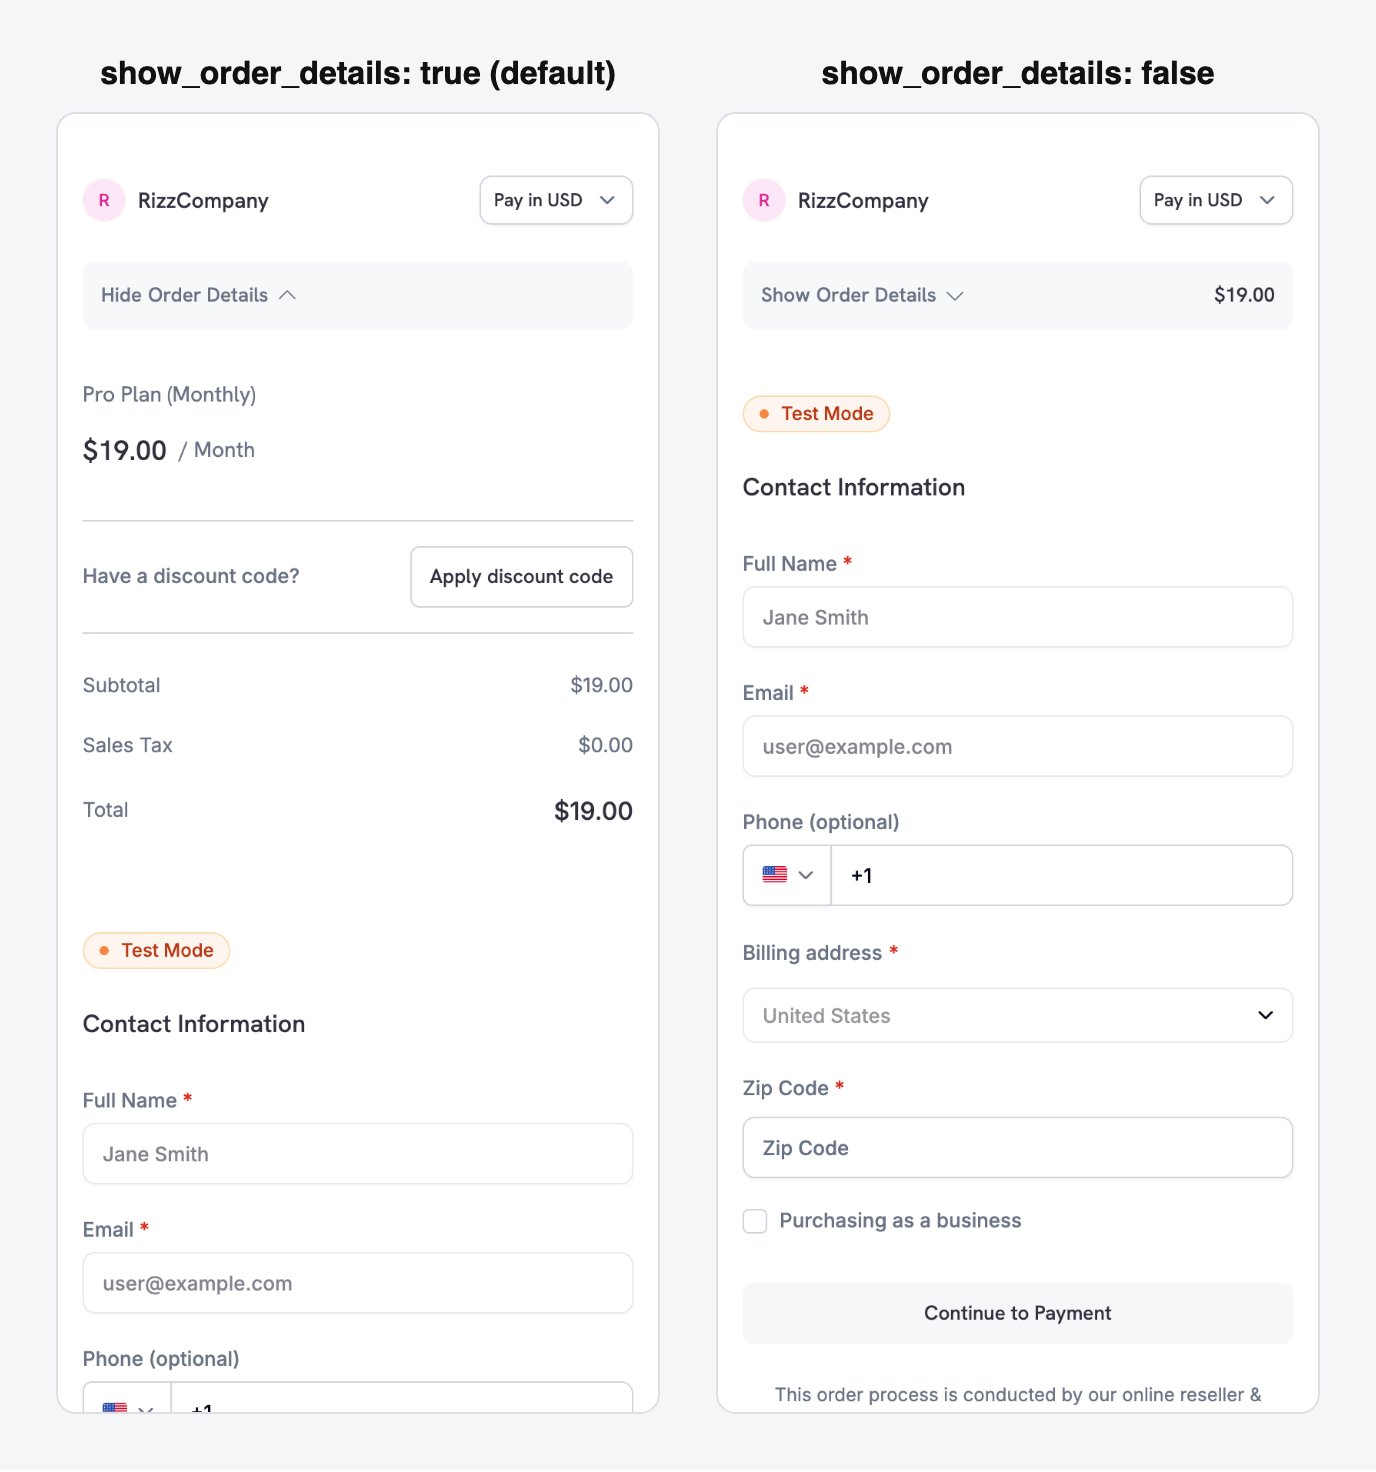
show_order_details: false moves the contact and payment fields above the fold, instead of behind the order summary.
minimal_address: true to collect only a postcode instead of the full street, city, and state fields:
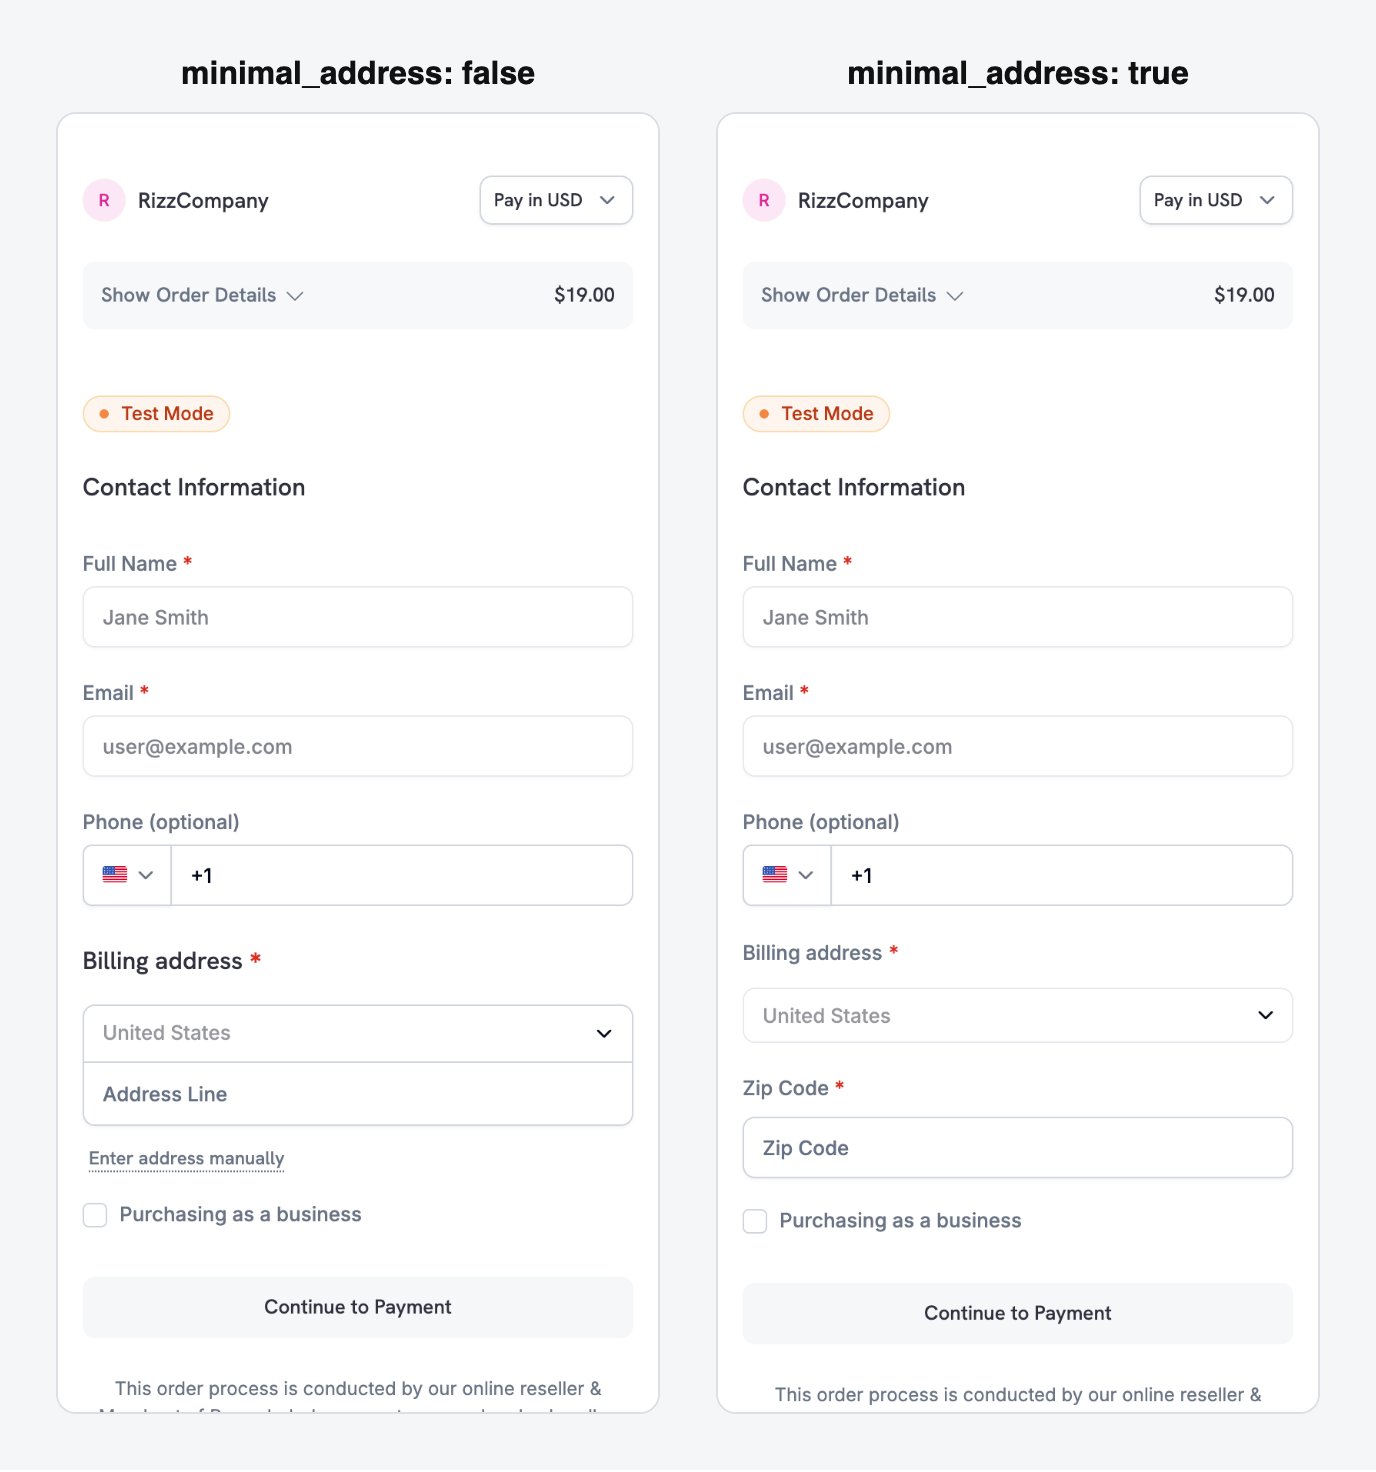
minimal_address: true reduces the billing address to a single postcode field.
theme: "system" so the checkout follows the device’s light or dark mode preference:
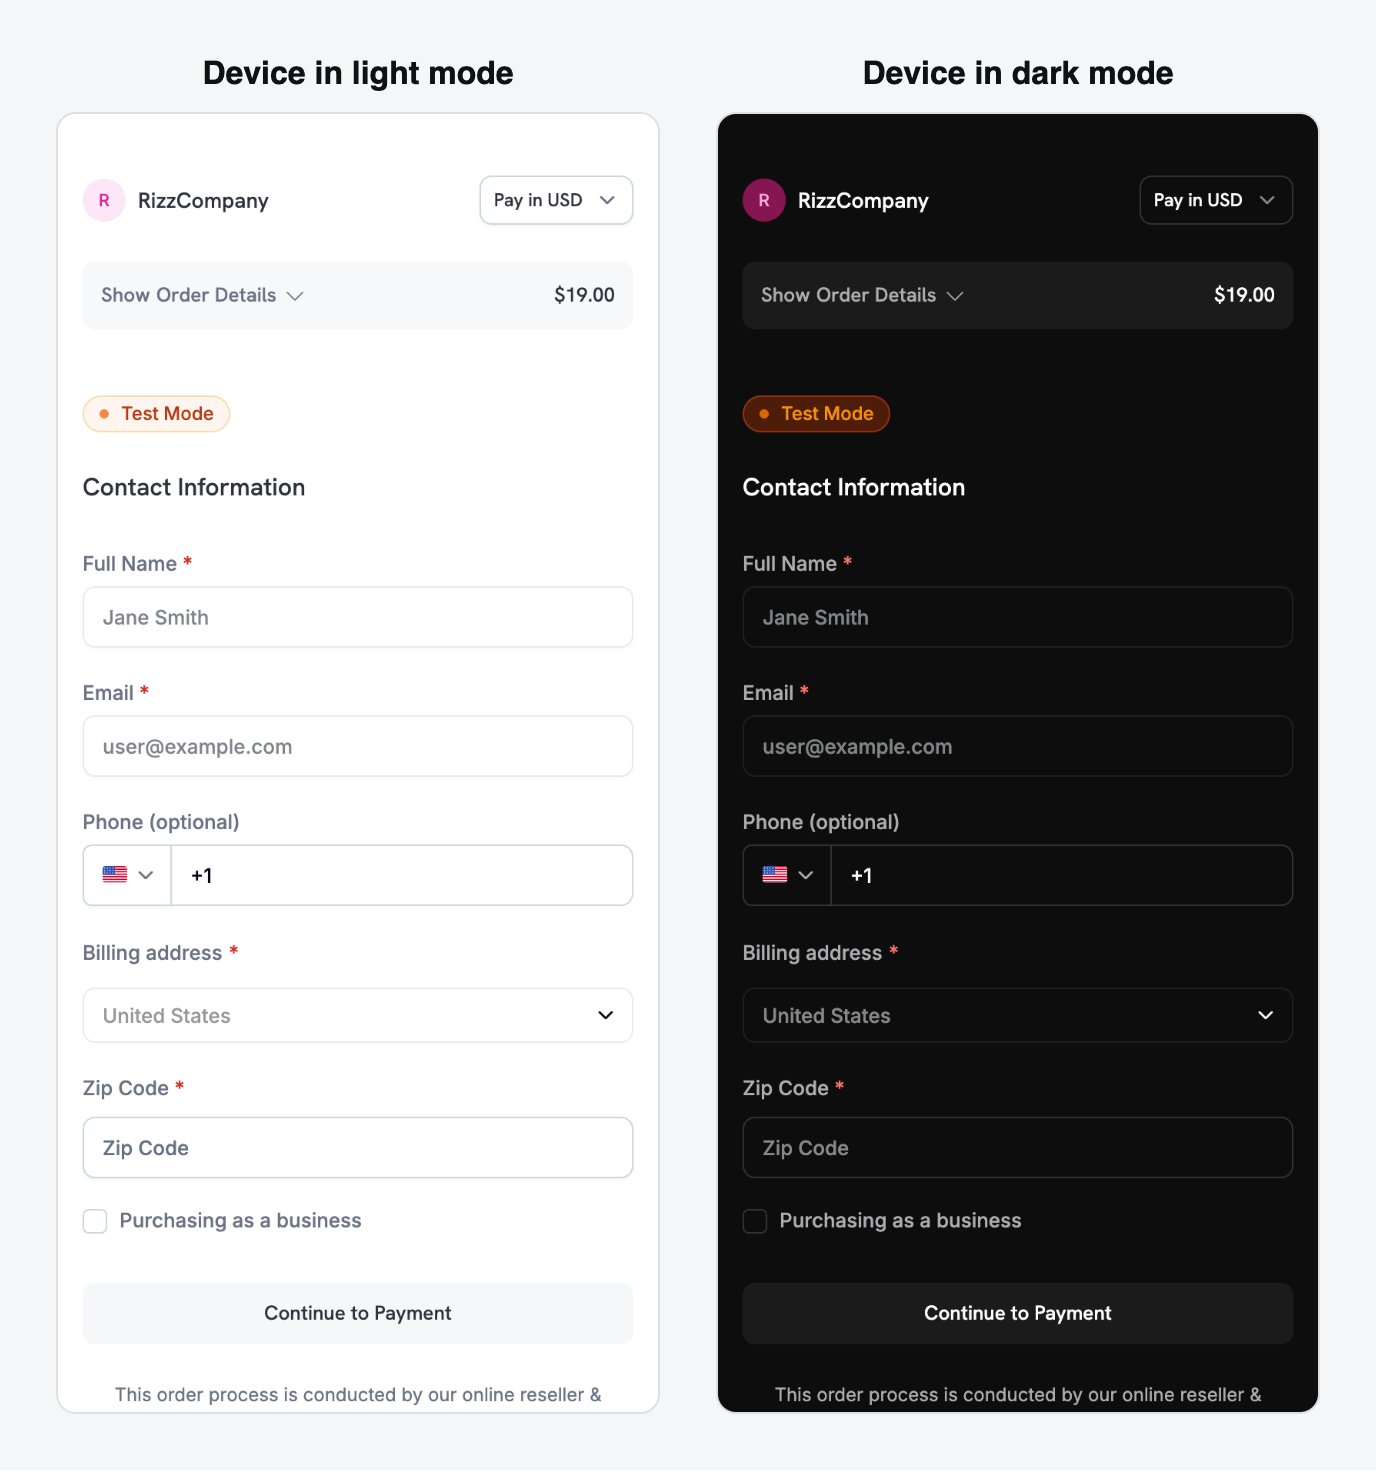
With theme: system, the checkout follows the device's light or dark appearance automatically.
Payment methods depend on the product type. Apple Pay and Cash App Pay support non-zero recurring subscriptions. One-time payments can use every payment method enabled for your business. See Payment Methods.
Full checkout session parameter reference
Mobile-Optimized Recipes
Each recipe is a complete checkout session request that your backend sends. Pick the one that matches your scenario and replace the product ID with your own. The Node.js and Python clients are set up in the first recipe, and the other recipes reuse them.Minimal Mobile Checkout - fastest path to payment
Minimal Mobile Checkout - fastest path to payment
Use this recipe for the shortest form: payment methods at the top, only a postcode for the address, no discount field, and a theme that follows the device.
- Node.js SDK
- Python SDK
See Checkout Sessions for all available parameters and their defaults.
Use this recipe when the checkout page must look like part of your app. It sets your brand colors, a border radius, and a custom pay button label.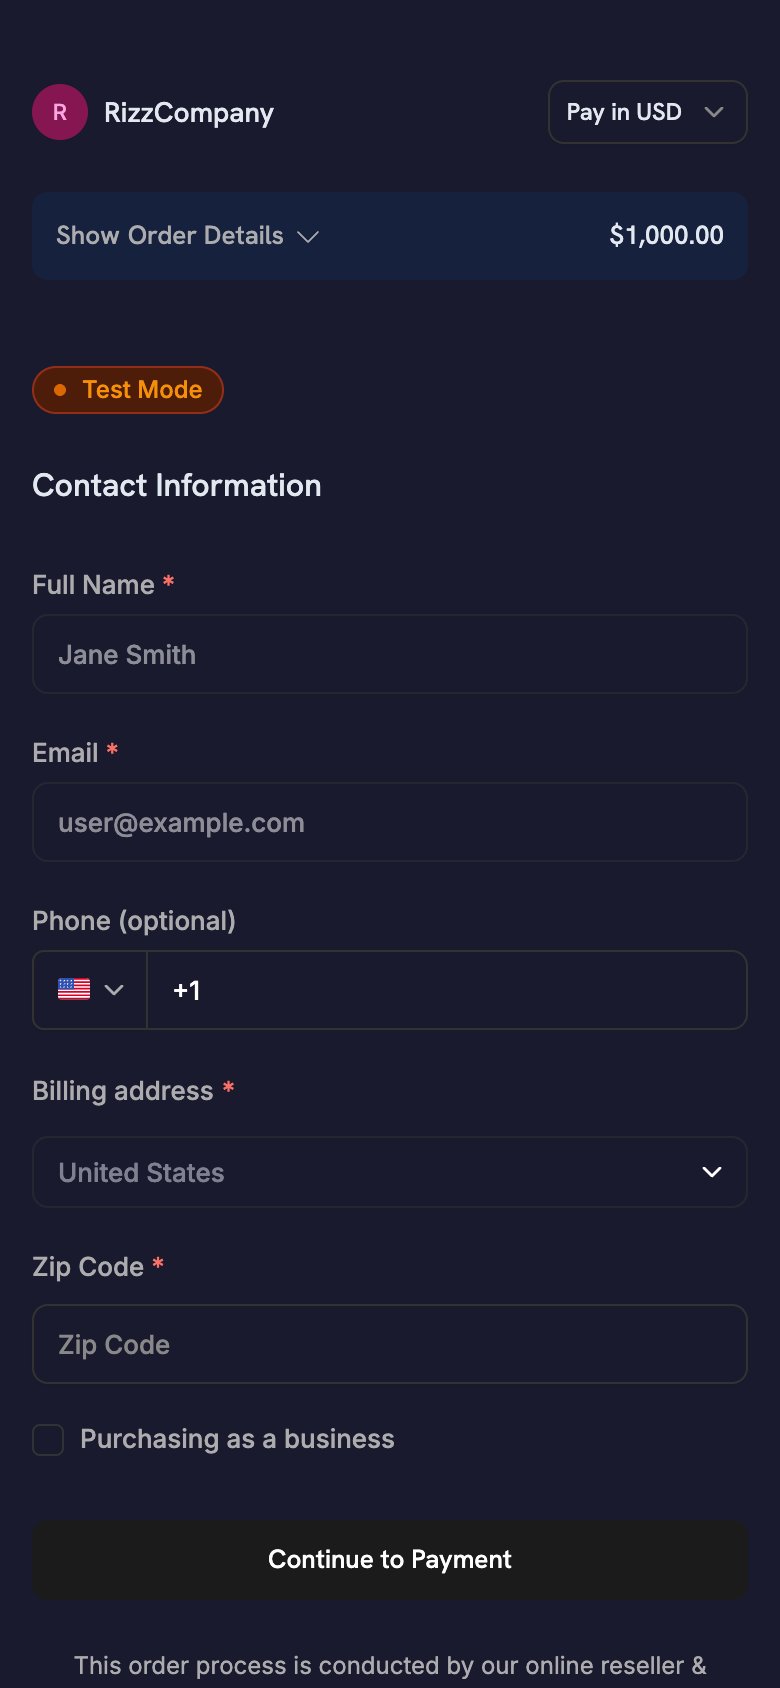
- Node.js SDK
- Python SDK
theme_config accepts separate dark and light objects, so the palette follows the device’s appearance. For every color key and the font option, see Checkout Sessions.One-Click Returning Customer - saved card, instant confirmation
One-Click Returning Customer - saved card, instant confirmation
Use this recipe for signed-in customers who have paid before. Pass the customer’s
customer_id, their saved payment_method_id, and confirm: true to skip the checkout form. With a payment_method_id, the session charges the saved method directly and returns no checkout_url, so your app has nothing to open. Learn the outcome from webhooks.- Node.js SDK
- Python SDK
Grant access when your backend receives the
payment.succeeded webhook. Any status your app shows is a UI hint only.Subscription with Free Trial - trial before first charge
Subscription with Free Trial - trial before first charge
Use this recipe for a subscription product with a free trial before the first charge.
trial_period_days sets the trial length for this session.- Node.js SDK
- Python SDK
Grant access when your backend receives the
subscription.active webhook, not when the mobile SDK returns. For the full webhook flow, see the Subscription Integration Guide.On-Demand Mandate - save a card for future variable charges
On-Demand Mandate - save a card for future variable charges
Use this recipe to save a customer’s payment method for later charges, such as wallet top-ups, pay-as-you-go, or BNPL, without showing a subscription label. The customer authorizes the payment method once, and you charge variable amounts later.
Apps that charge by usage follow this pattern. For example, an astrology app charges a pre-authorized card for each session instead of on a fixed schedule.
- Node.js SDK
- Python SDK
For the full charge flow, webhook events, and retry policies, see On-Demand Subscriptions.
Subscription Flows from Mobile
A mobile app starts a subscription with the same checkout session flow as a one-time payment. The SDK opens hosted checkout, the customer subscribes, and your app handles the deep-link return. Your backend manages the rest of the subscription lifecycle.Regular Recurring Subscriptions
For billing at a fixed interval, such as monthly or yearly, create a checkout session with a subscription product and a deep-linkreturn_url. Your backend receives subscription.active when the subscription starts.
Apple Pay and Cash App Pay support non-zero recurring subscriptions.
On-Demand Subscriptions
An on-demand subscription authorizes a customer’s payment method once, so you can charge variable amounts later. Use it for wallet top-ups, pay-as-you-go, and any charge whose amount you don’t know in advance. For the full request body, see the On-Demand Mandate recipe. On mobile, keep these points in mind:- Set
show_on_demand_tag: falseso the checkout page doesn’t show subscription or on-demand wording. Customers who save a card for top-ups don’t expect subscription terms. - After the customer authorizes the mandate, your backend receives
subscription.active. Store thesubscription_id, because every later charge uses it.
Subscription with Free Trial
To offer a trial before the first charge, passsubscription_data.trial_period_days in the checkout session. The customer authorizes a payment method at signup, and Dodo Payments charges it when the trial ends. For the full request body, see the Subscription with Free Trial recipe.
Upgrades and Downgrades
Your backend changes plans through the API, not through a new checkout session. Dodo Payments calculates proration with the proration mode you choose. To let customers change plans themselves, link to the Customer Portal.Subscription Integration Guide
On-Demand Subscriptions
Upgrade / Downgrade
Customer Portal
Reducing Checkout Drop-Offs
작은 화면에서는 모든 form field를 작성하는 데 더 많은 노력이 필요합니다. 아래의 checkout session 설정은 form을 간소화하고 이탈을 줄여 줍니다.Optimize the Form
These settings shorten the checkout form on mobile:Pre-Fill Customer Data
Each field you pre-fill is one the customer doesn’t have to type:- New customers: set
customer.emailandcustomer.namefrom your auth session. - Returning customers: set
customer.customer_idto use the customer’s stored details. - Currency: pass
billing_currencyandbilling_address.countrytogether.
Recovery Tools
Recovery tools bring back customers whose checkout or renewal didn’t complete:Abandoned Cart Recovery
Payment Retries
Subscription Dunning
Recovery Overview
모범 사례
- 보안: 앱에 API key를 절대 포함하지 마세요. backend에서 checkout session을 생성하고
checkout_url만 앱에 전달하세요. - 권한:
CheckoutResult.status을(를) UI 힌트로 취급하세요. backend에서 결제를 확인한 후에만 액세스 권한을 부여하세요. - 사용자 경험: backend에서 session을 생성하는 동안 loading state를 표시하세요.
cancelled을(를) 실패로 처리하지 마세요. 결제가 여전히 성공했을 수 있습니다. - 테스트: test mode와 test card를 사용하고, simulator뿐 아니라 실제 device에서도 return URL round trip을 확인하세요.
- 전환율:
show_order_details: false및minimal_address: true을(를) 설정하세요. 두 설정을 함께 사용하면 결제 수단이 fold 위에 표시되고 대부분의 주소 필드가 제거됩니다. - 통화:
billing_currency및billing_address.country을(를) 모두 전달하세요. 둘 중 하나라도 생략하면 Adaptive Currency가 고객의 IP 주소에서 결제 통화를 선택할 수 있습니다. - 온디맨드 결제: 온디맨드 subscription을 카드 저장 용도로만 사용하는 경우
show_on_demand_tag: false을(를) 설정하세요. wallet을 충전하는 고객은 subscription 관련 문구를 기대하지 않습니다. - 복구: dashboard에서 Abandoned Cart Recovery를 켜면 checkout을 완료하지 않은 고객에게 이메일을 보낼 수 있습니다.
문제 해결
일반적인 문제
- Callback이 도착하지 않음:
returnUrl의 scheme은 등록한 scheme과 일치해야 합니다. Android에서는dodoCallbackSchememanifest placeholder입니다. iOS에서는Info.plistURL type입니다. React Native 및 Flutter 앱에는 두 항목이 모두 필요하며, Expo에서는 config plugin이 두 항목을 모두 설정합니다. - checkout이 앱 대신 브라우저로 돌아감(iOS): 앱이 수신 URL을 전달하지 않습니다.
.onOpenURL,scene(_:openURLContexts:)또는 React NativeLinkinglistener에서DodoCheckout.handleOpenURL(url)을(를) 호출하세요. - Android에서
PLATFORM_ERROR: 가장 일반적인 원인은 scheme 불일치입니다.MainActivity에서android:taskAffinity=""(flutter create기본값)을 설정한 경우에도 발생합니다. 이 설정으로 인해 일부 Android OEM build에서 진행 중인 checkout을 잃을 수 있습니다. ALREADY_IN_PROGRESS: checkout이 아직 열려 있습니다. 다른 checkout을 시작하기 전에 이전 checkout이 완료될 때까지 기다리거나 닫으세요.- 해결되지 않은 placeholder로 인해 build 실패: Android SDK를 추가했지만
manifestPlaceholders["dodoCallbackScheme"]을(를) 설정하지 않았습니다. - 결제는 성공했지만 액세스 권한이 부여되지 않음: 앱이 mobile result를 기반으로 액세스 권한을 부여하고 있습니다. 대신
payment.succeeded또는subscription.activewebhook에서 액세스 권한을 부여하세요. - mobile에서 Apple Pay 또는 Google Pay가 표시되지 않음: checkout이 임베디드 WebView(대문자
WKWebView또는 AndroidWebView) 내부에서 로드되는지 확인하세요. SDK를 사용하거나 시스템 브라우저 화면에서 여세요. Android에서는 Custom Tab을, iOS에서는SFSafariViewController또는ASWebAuthenticationSession을 사용하세요.
추가 리소스
- 결제 통합 가이드
- Webhook 문서
- 테스트 프로세스
- 기술 FAQ
- Checkout Session 맞춤 설정
- 온디맨드 Subscription
- Subscription 업그레이드/다운그레이드
- Abandoned Cart Recovery
- Customer Portal