

- Create a custom credit entitlement for tokens, and a meter that deducts from it.
- Attach credits to subscription plans, with and without overage, and to a one-time top-up product.
- Call OpenAI from an endpoint that bills tokens through Dodo Payments.
- Read a customer’s live credit balance with the SDK.
- Verify webhook signatures and route Dodo Payments credit events.
What We’re Building
NeuralAPI sells three products:- A Dodo Payments account. Build everything in test mode.
- An OpenAI API key.
- Node.js 22 or later, and working knowledge of TypeScript and Node.js.
Step 1: Create Your Token Credit Entitlement
Create the credit entitlement that both plans and the top-up pack share. It defines the token unit NeuralAPI sells.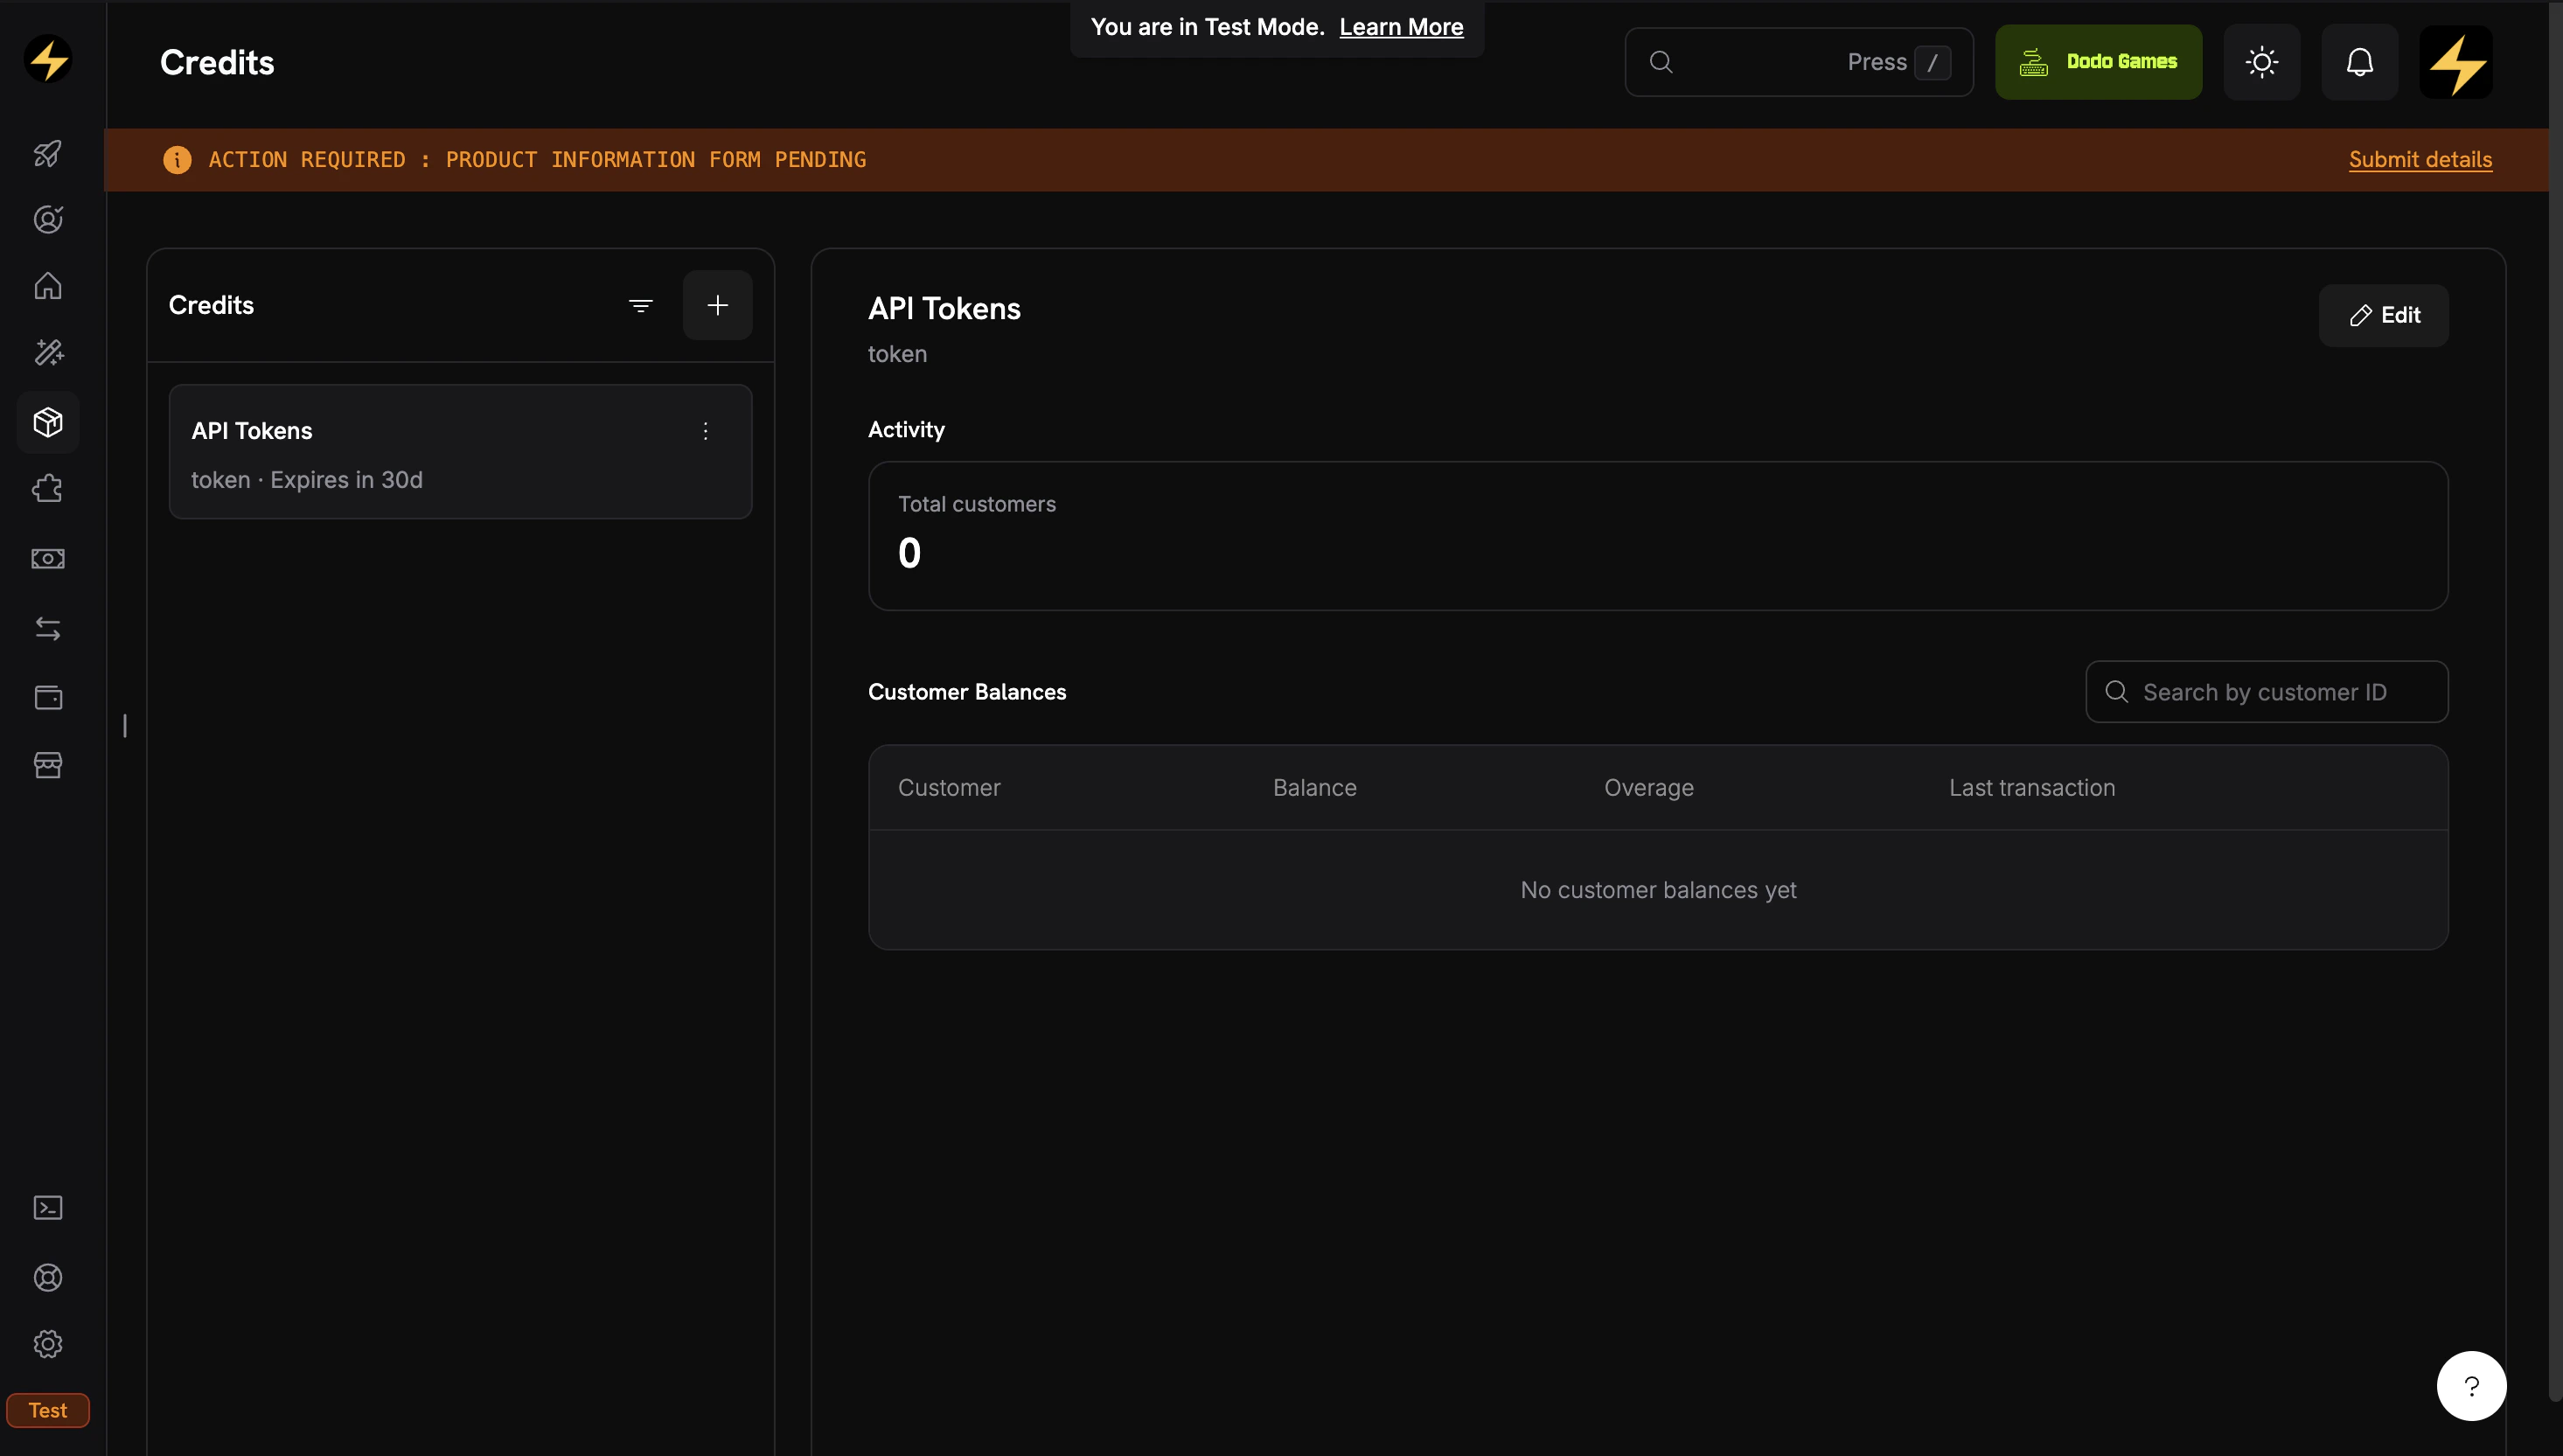
The Credits tab under Products shows all your credit entitlements.
Navigate to Credits
- Log in to the Dodo Payments dashboard.
- Click Products in the sidebar.
- Select the Credits tab.
- Click Create Credit.
Configure the Credit Unit
API TokensCredit Type: Custom UnitUnit Name: tokenDefine Precision: 0. Token counts are whole numbers.Credit Expiry: 30 days. Credits expire 30 days after they’re issued, which matches the monthly billing cycle.Skip Overage at the Credit Level
Save and Copy the Credit ID
cde_.API Tokens credit entitlement is ready. Next, create a meter so that usage events deduct credits.Step 2: Create a Meter for Token Usage
A meter aggregates incoming usage events. When you link it to a credit, the aggregated usage is deducted from the customer’s credit balance. Create the meter before the plan products, because you attach it while you create them in Step 3.Open the Meters Section
- In the dashboard sidebar, go to Products → Meters.
- Click Create Meter.
Configure the Meter
Token Usage MeterEvent Name: api.tokens_used. This must match the event_name your app sends.Aggregation Type: Sum, to add up the token count from each event.Over Property: tokens, the metadata key whose value is summed.Measurement Unit: tokensCreate the meter. You select it by name when you attach it to products.Step 3: Create the Plan Products
Create both plans with the Usage Based Billing pricing type, not plain Subscription. Meters attach to Usage Based Billing products, and the meter is what deducts credits as customers call your API. A Usage Based Billing product still charges a recurring base fee ($29 or $99), and usage on top of it is billed in credits.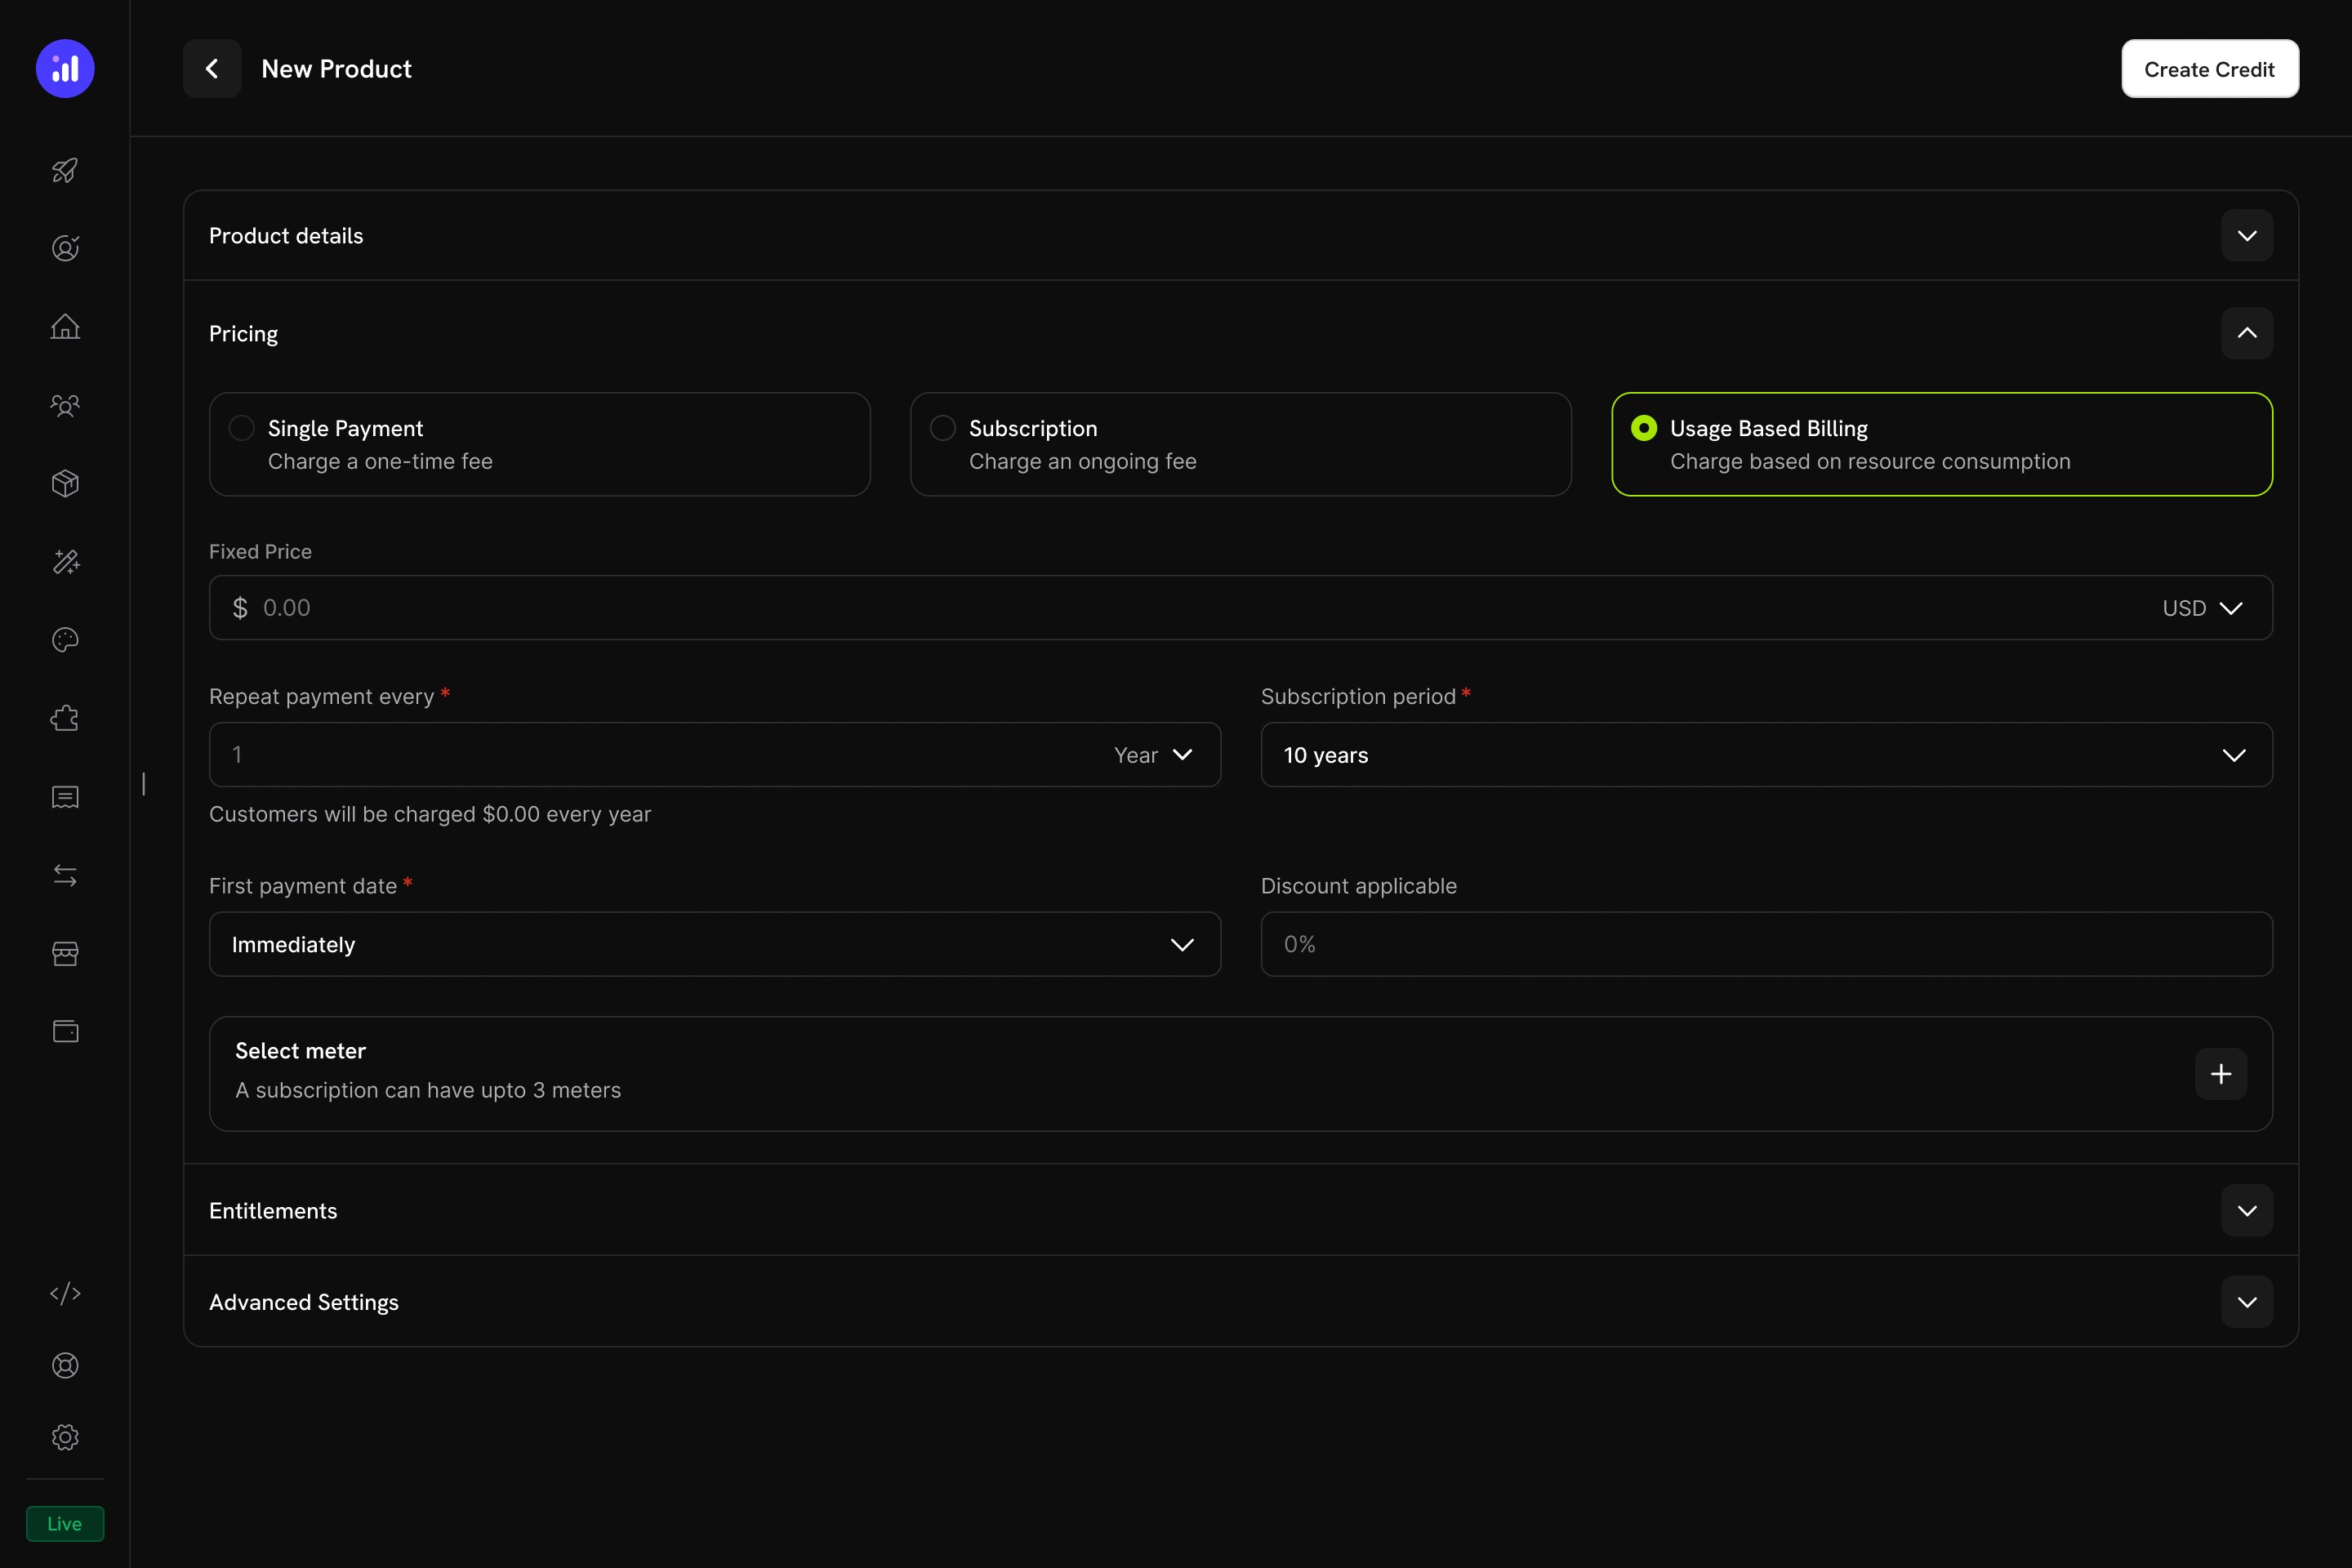
Usage Based Billing pricing type with meter configuration.
Starter Plan ($29/month — 10M Tokens, No Overage)
Create the Starter Product
- Go to Products and click Add Product.
- Under Pricing Type, select Usage Based Billing.
- Enter these values:
NeuralAPI StarterDescription: 10 million API tokens per month. Perfect for individual developers and small projects.Price: 29.00. This is the recurring base fee, charged every month even before any usage.Repeat payment every: 1 monthCurrency: USDAttach the Meter
Token Usage Meter. Then configure the meter:- Turn on Bill usage in credits.
- Select credit:
API Tokens - Meter units per credit:
1. Each token in an event deducts one credit. - Free Threshold:
0. The free threshold applies only when a meter bills in money. When it bills in credits, every unit is deducted from the balance.
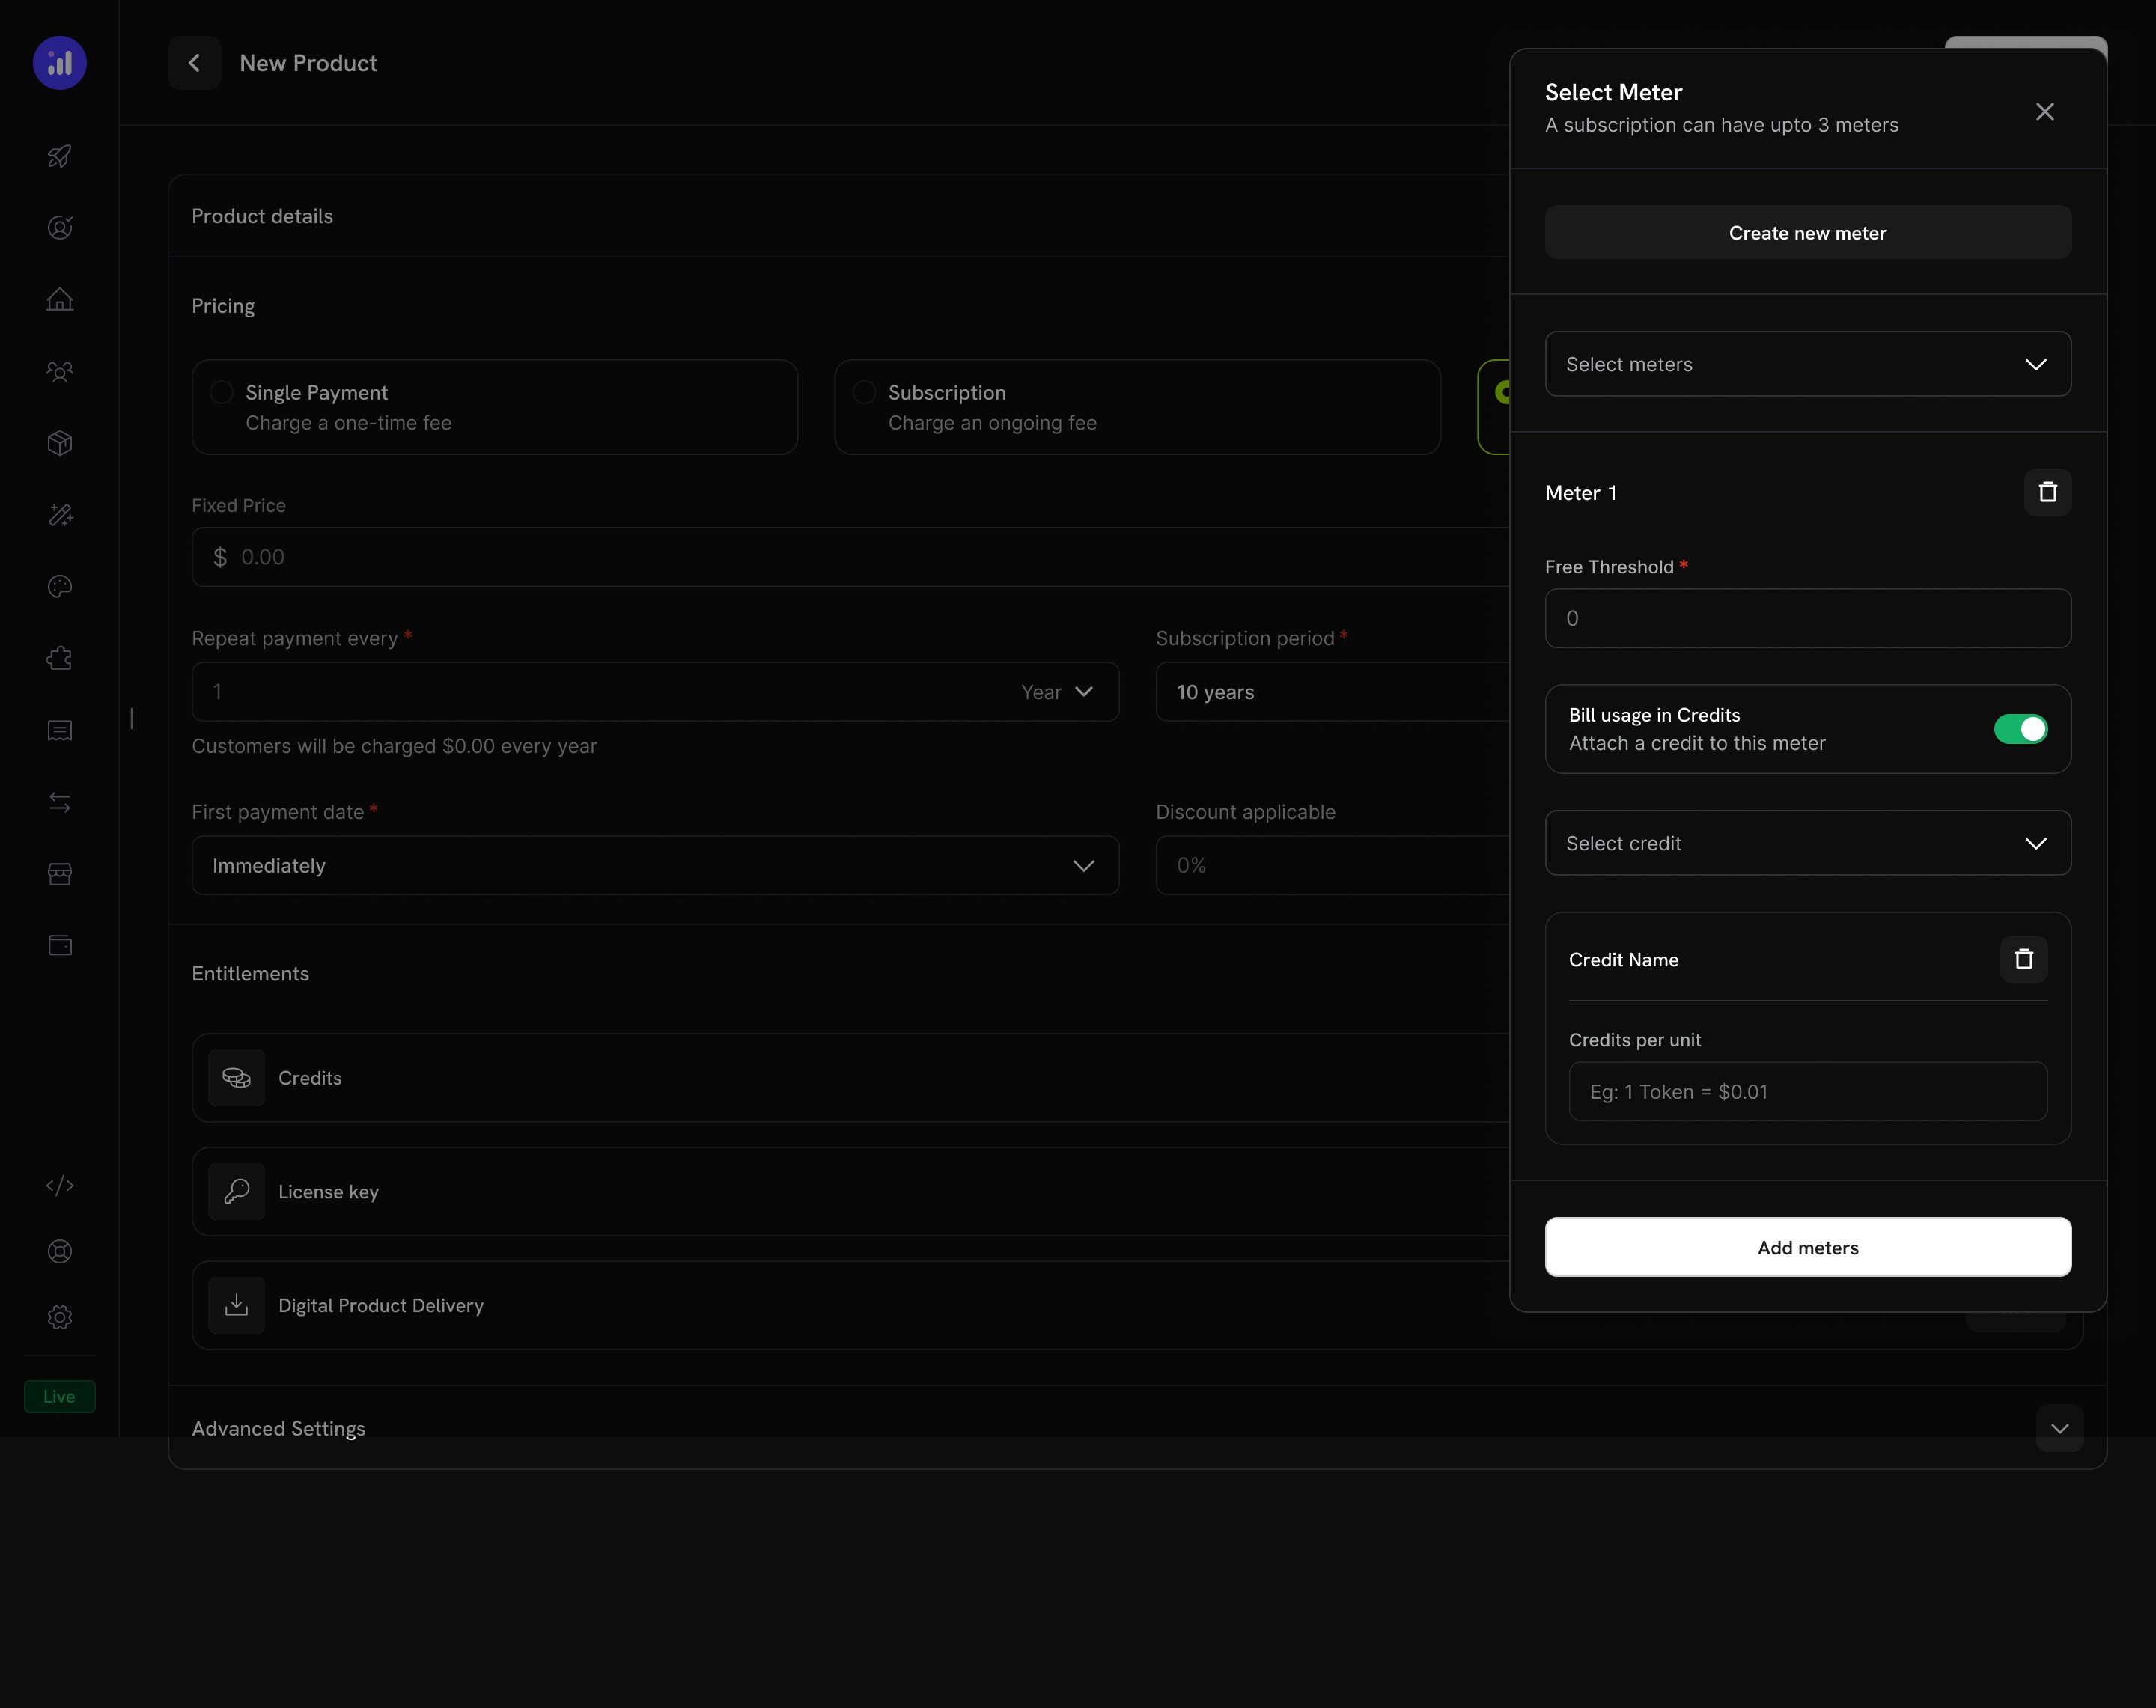
Toggle 'Bill usage in Credits' on the meter and pick the credit entitlement.
api.tokens_used events deduct from the customer’s balance.Configure Credit Issuance for Starter
10000000Import Default Credit Settings: on, so the product uses the 30-day expiry from the credit entitlement.Allow Overage: off. The default from Step 1 keeps overage disabled, so Starter customers stop at zero.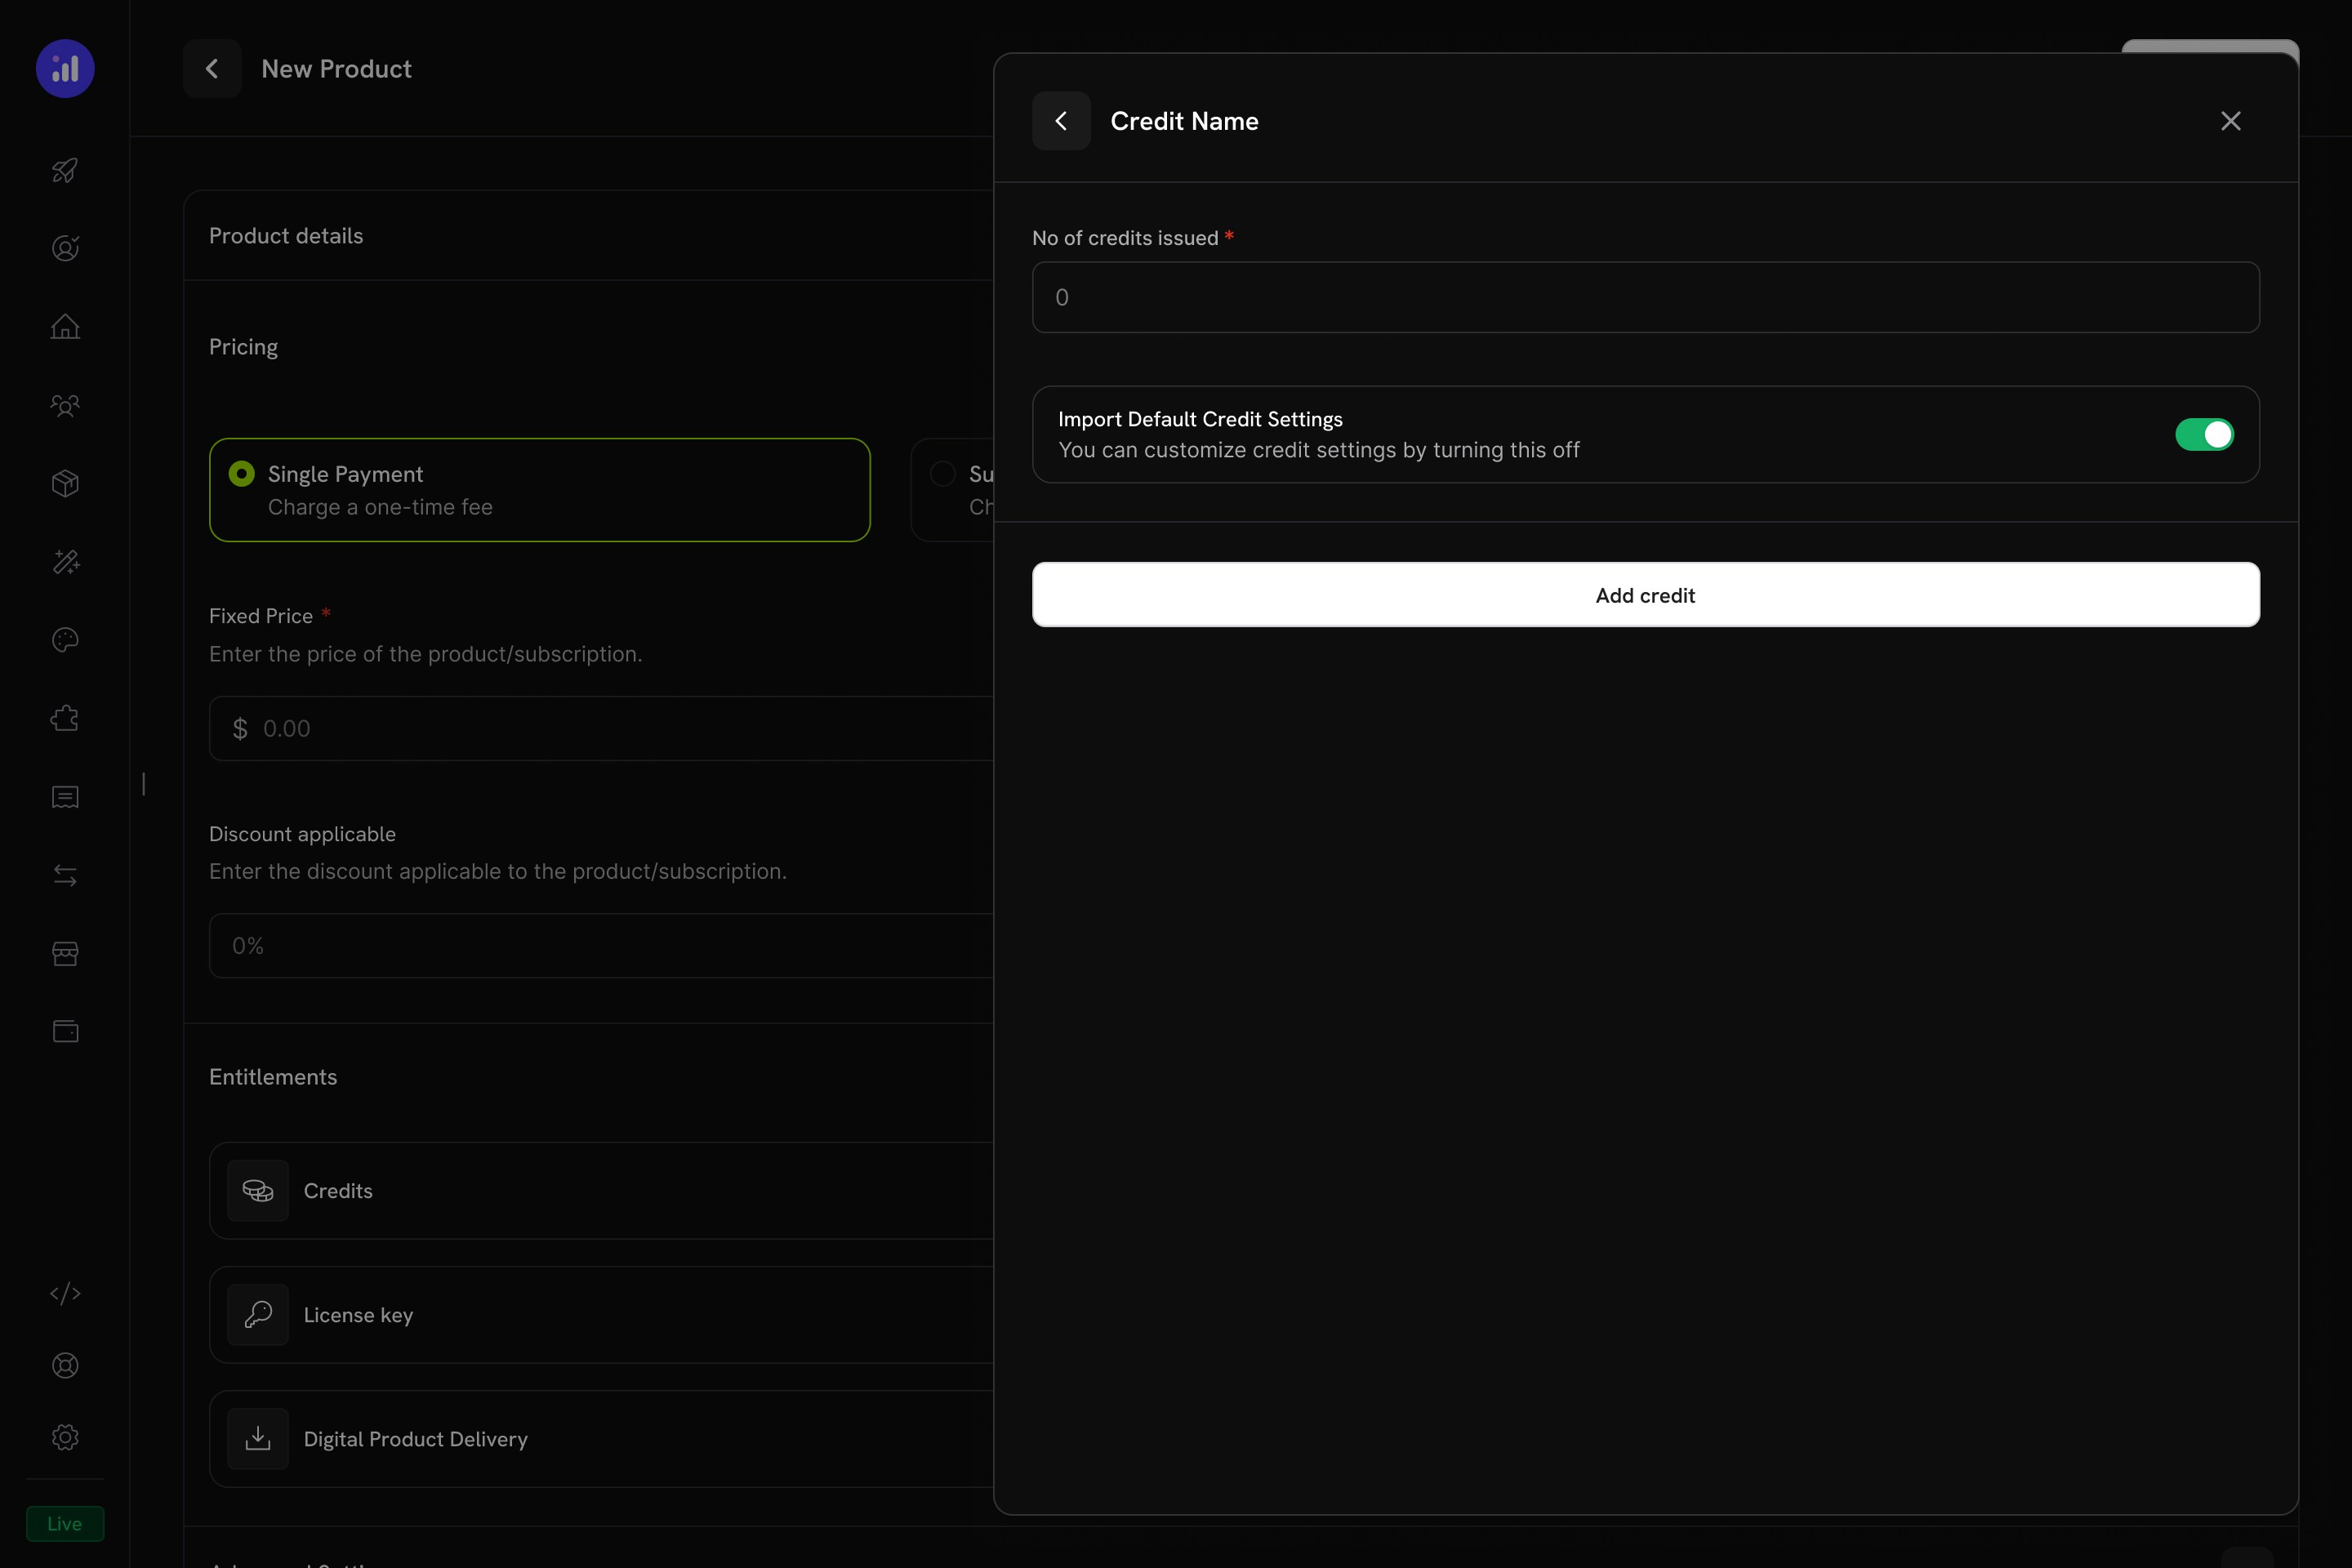
Configure credit issuance per cycle on the UBB product.
pdt_.Pro Plan ($99/month — 40M Tokens, Overage Enabled)
Create the Pro Product
NeuralAPI ProDescription: 40 million API tokens per month with overage. Built for production applications.Price: 99.00Repeat payment every: 1 monthCurrency: USDAttach the Meter
Token Usage Meter, turn on Bill usage in credits, select API Tokens, and set Meter units per credit to 1 and Free Threshold to 0.Configure Credit Issuance with Overage
40000000Import Default Credit Settings: off, so you can set overage for this product.Allow Overage: onPrice Per Unit: 0.000005 USD per token. That is $0.005 per 1K tokens, or $5 per 1M tokens, which is above the plan’s effective per-token rate and discourages overage.Overage Behavior: Bill overage at billing. Overage is charged on the next invoice, and then the balance resets.Save the product and copy its ID.Step 4: Create the Token Top-Up Pack
The top-up pack is a one-time purchase that adds 5,000,000 tokens to an existing customer’s balance.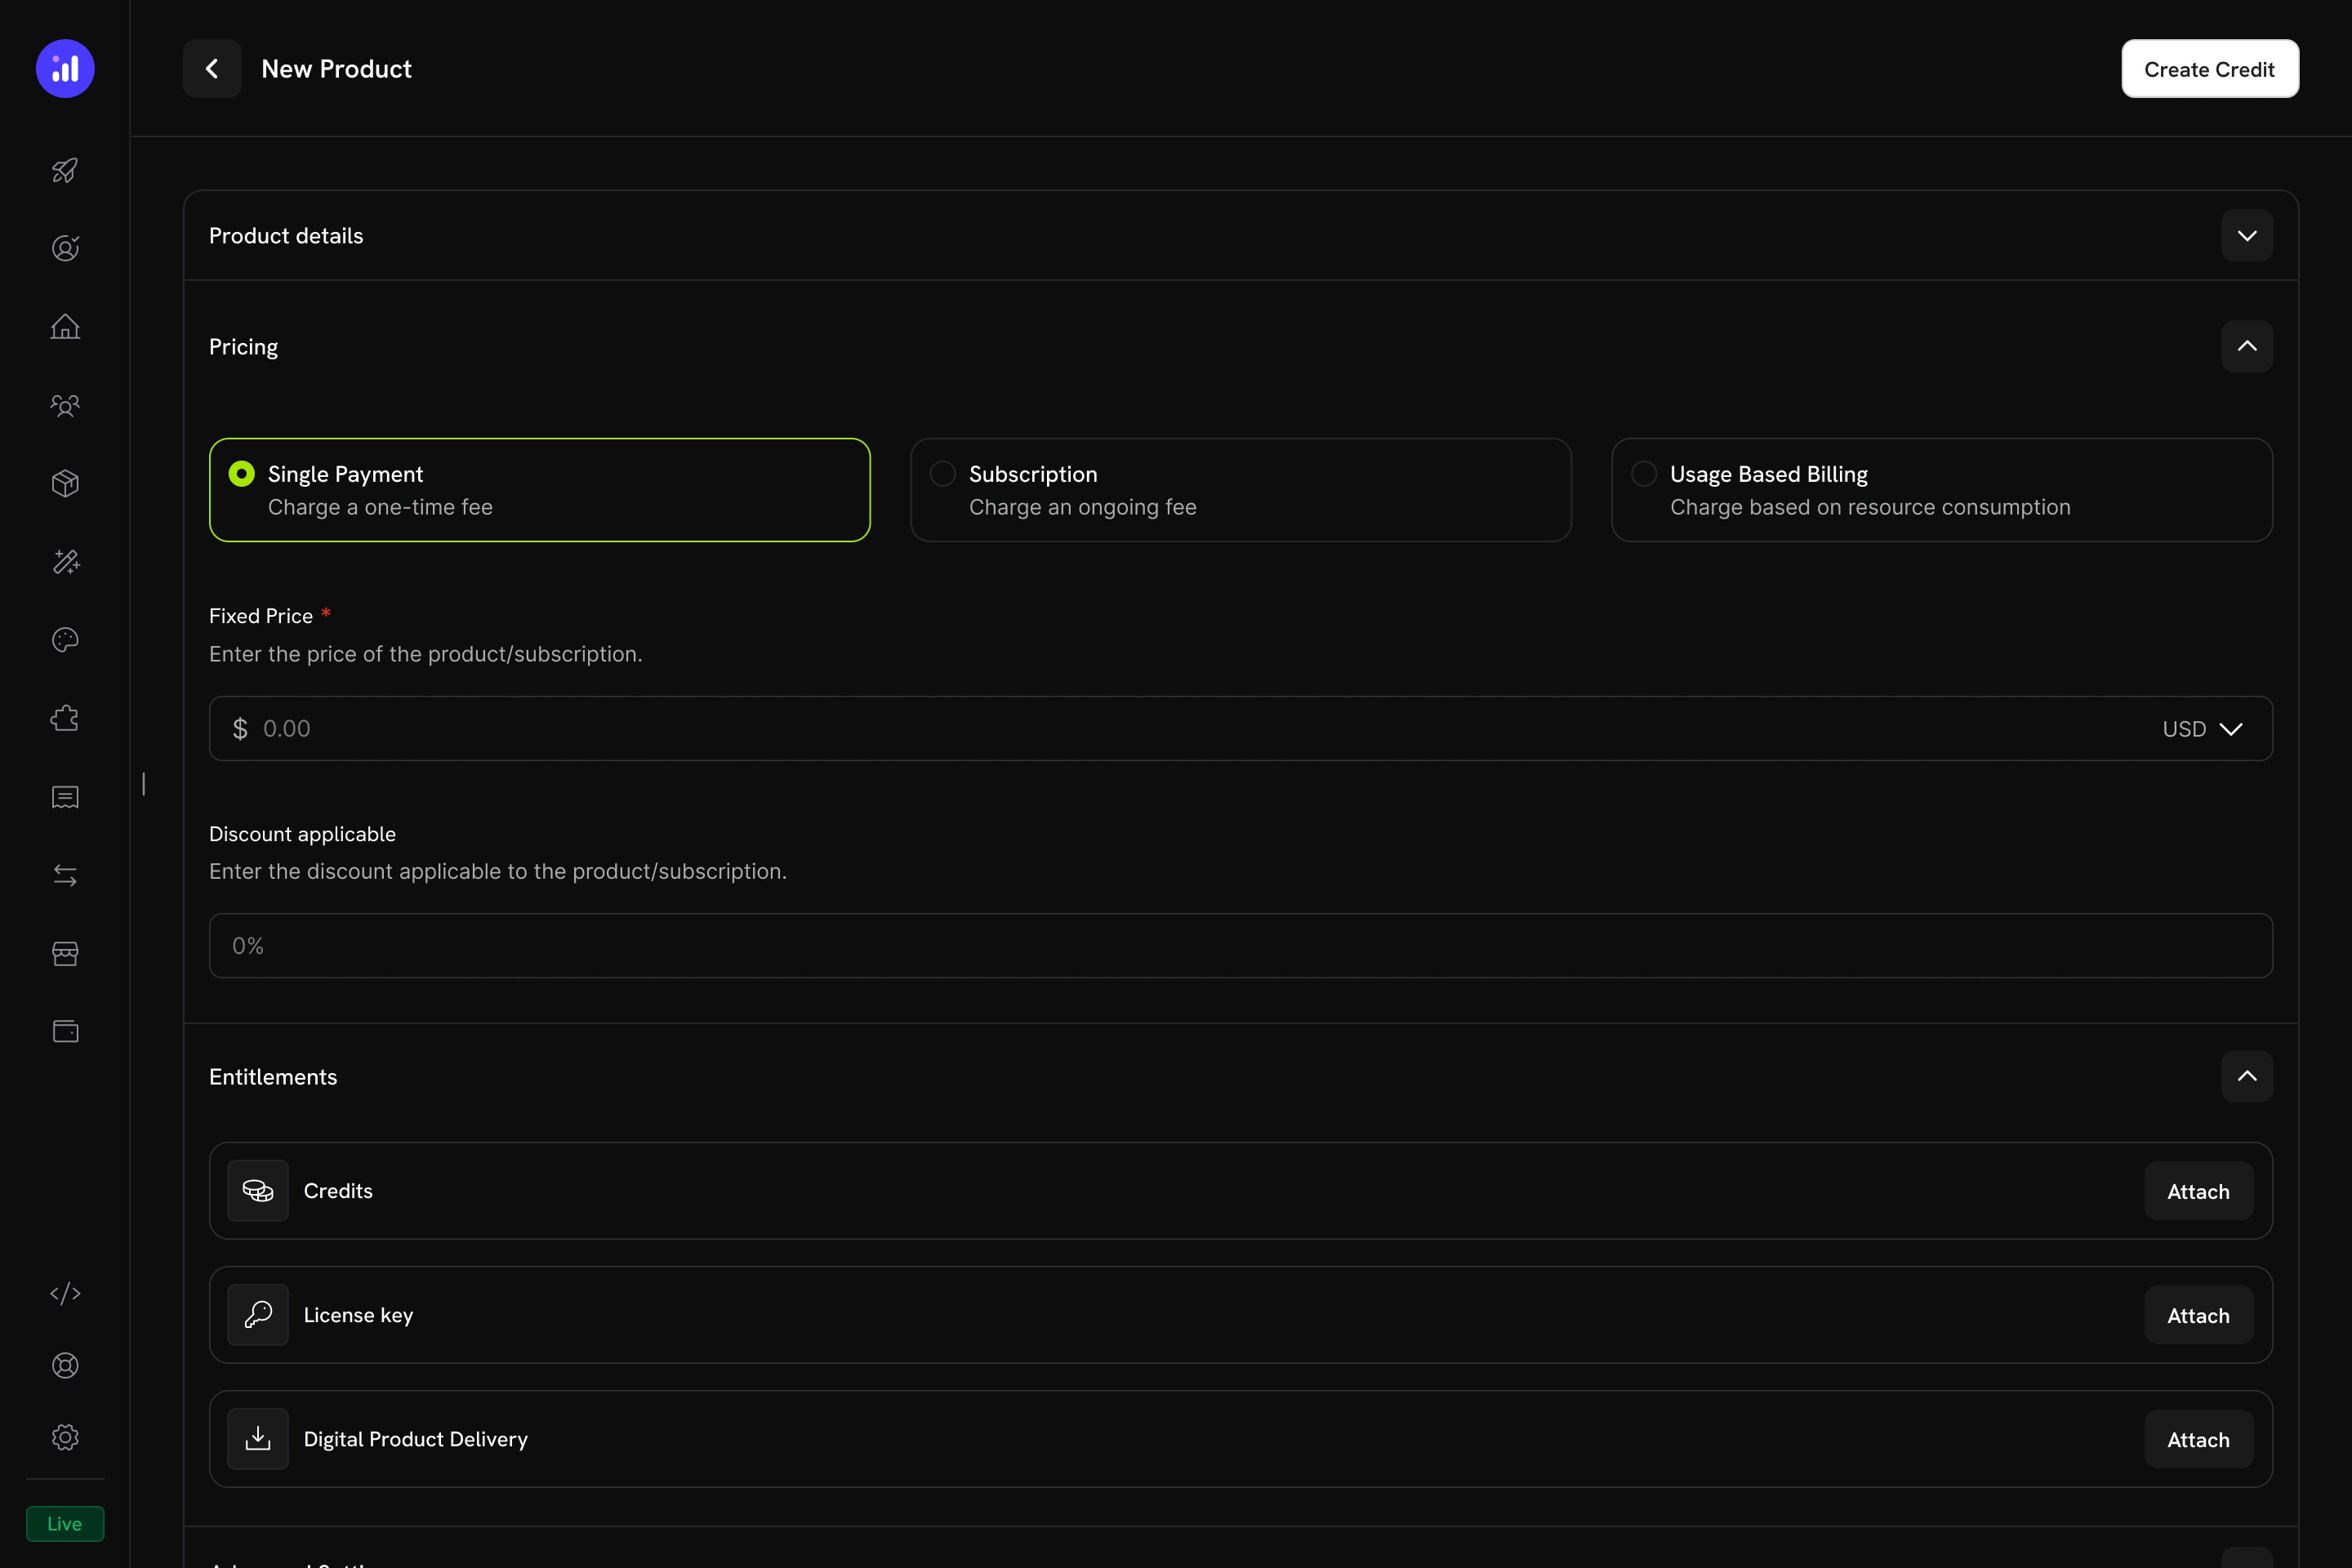
One-time pricing selected for a credit product.
Create a One-Time Product
- Go to Products and click Add Product.
- Under Pricing Type, select One Time.
- Enter these values:
Token Top-Up PackDescription: Add 5 million tokens to your NeuralAPI balance.Price: 19.00Currency: USDAttach the Token Credit
- In the Entitlements section, click Attach next to Credits.
- Select
API Tokens. - Set No of credits issued to
5000000. - Turn off Import Default Credit Settings to override the default 30-day expiry.
- Set Credit Expiry to Custom and enter
365days. - Save the product.
Step 5: Build the Backend
Build the Express server. It creates subscription and top-up checkouts, calls OpenAI and bills the tokens, reads balances, and receives credit webhook events.Set Up Your Project
tsconfig.json:package.json scripts:Set Up Environment Variables
.env with a test mode API key from Developer → API Keys and the IDs from the previous steps:DODO_PAYMENTS_WEBHOOK_KEY in Step 7, after you register the webhook endpoint.Implement the Server
src/server.ts. تستدعي نقطة نهاية الإكمال نموذج OpenAI gpt-6-luna، وهو مناسب للطلبات كبيرة الحجم. تعرض علامة التبويب package.json قائمة التبعيات الكاملة:How Deductions Happen
- يستدعي معالجك OpenAI ويقرأ
usage.total_tokens، مثلًا 1532. - تستوعب حدث استخدام واحدًا باستخدام
event_name: api.tokens_usedوmetadata: { tokens: 1532 }. - يجمع
Token Usage Meterالأحداث لكل عميل. يعالج عامل في الخلفية الأحداث الجديدة كل دقيقة. - بما أن العداد يفوتر
API Tokensمن الرصيد عبر Bill usage in credits، تخصم Dodo Payments 1532 رصيدًا، بدءًا من المنحة التي تنتهي صلاحيتها أولًا لدى العميل (FIFO). - إذا تم تمكين الاستخدام الزائد ونفد الرصيد، يتم تتبع العجز وفوترته في الفاتورة التالية.
الخطوة 6: إضافة واجهة أمامية تجريبية
أنشئpublic/index.html لاختبار كل تدفق في متصفحك. تحفظ الصفحة معرّف العميل في localStorage، ولذلك تشترك عمليات الاشتراك والتوليد والشحن في هوية واحدة، كما يحدث في تطبيق يسجل المستخدم الدخول إليه:
الخطوة 7: إعداد Webhook
تتيح لك Webhooks أن تجعل خادمك يستجيب لتغييرات الرصيد، مثل إرسال بريد إلكتروني إلى عميل أوشك رصيده على النفاد.Expose Your Local Server
ngrok-free.app.Register the Webhook in Dodo Payments
- في لوحة المعلومات، انتقل إلى Developer → Webhooks وانقر على Add endpoint.
- أدخل عنوان URL
https://your-tunnel.ngrok-free.app/webhooks/dodo، باستخدام مضيف النفق الخاص بك. - حدد هذه الأحداث على الأقل:
credit.addedcredit.deductedcredit.overage_charged
- انقر على Create endpoint، ثم انسخ سر التوقيع من علامة التبويب Overview لنقطة النهاية.
- الصقه في
.envباعتبارهDODO_PAYMENTS_WEBHOOK_KEY، ثم أعد تشغيلnpm run dev.
الخطوة 8: اختبار التدفق الكامل
Subscribe a Test Customer
- شغّل
npm run dev. - افتح
http://localhost:3000. - اختر Pro، وأدخل عنوان بريد إلكتروني واسمًا تجريبيين، ثم انقر على Get Checkout Link. أكمل عملية الدفع باستخدام بيانات بطاقة الاختبار.
- في لوحة المعلومات، انتقل إلى Customers، وافتح أحدث عميل، وانسخ معرّفه الذي يبدأ بـ
cus_. - الصق المعرّف في حقل Logged-in customer ID في العرض التجريبي، ثم انقر على Save.
Generate an AI Response
total_tokens الفعلي، ويستوعب حدث استخدام، ثم يعيد الاستجابة.Test the Top-Up Flow
credit.added.استكشاف الأخطاء وإصلاحها
Credits not deducting after usage events
Credits not deducting after usage events
- لا يتطابق اسم حدث العداد مع
event_nameالذي ترسله.api.tokens_usedحساس لحالة الأحرف. - العداد غير مرتبط برصيد
API Tokensفي المنتج. افتح إعدادات عداد المنتج وتأكد من تشغيل Bill usage in credits. - لا يتطابق مفتاح
metadata.tokensمع Over Property للعداد. - انتهت صلاحية منحة العميل. تحقق من سجل أرصدة العميل.
- في Products → Meters، افتح العداد وتأكد من أن مرفق المنتج يعرض اسم الرصيد المرتبط.
- افتح علامة التبويب Events للعداد. تظهر الأحداث المستوعبة هناك حتى قبل إجراء أي خصم.
- افتح العميل في Customers وحدد علامة التبويب Credits. تظهر إدخالات دفتر الأستاذ خلال دقيقة أو دقيقتين.
Balance always shows 0 or 'customer not found'
Balance always shows 0 or 'customer not found'
- لم يكمل العميل عملية الدفع. لا يتم إصدار الأرصدة إلا بعد نجاح الدفع.
- تستعلم باستخدام
customer_idغير صحيح. استخدم المعرّف الذي يبدأ بـcus_من لوحة المعلومات، وليس معرّفًا من قاعدة بياناتك الخاصة. - لا يتطابق
CREDIT_ENTITLEMENT_IDفي.envمع الرصيد المرتبط بالمنتج.
Overage not working for Pro plan customers
Overage not working for Pro plan customers
- لم يتم تمكين الاستخدام الزائد في مرفق رصيد منتج Pro. الإعداد الموجود على الرصيد هو مجرد إعداد افتراضي.
- العميل مشترك في Starter وليس Pro.
- تم تعيين Overage Limit إلى 0.
0.000005 ($5 لكل مليون رمز). تحقق من الأصفار البادئة: يقبل الحقل سعرًا لكل رمز، وليس لكل 1K رمز.Webhook verification failed in logs
Webhook verification failed in logs
- ترتيب تحليل النص: تم تشغيل
express.json()على/webhooks/dodoقبلexpress.raw(). يحتاج SDK إلى البايتات الخام للطلب، وليس JSON الذي تم تحليله. - يحتوي
DODO_PAYMENTS_WEBHOOK_KEYعلى سر توقيع غير صحيح. - يعيد وكيل عكسي كتابة رؤوس الطلب.
app.use('/webhooks/dodo', express.raw(...)) يأتي قبل app.use(express.json()) في server.ts.هل تحتاج إلى مساعدة؟
تهانينا! لقد أنشأت نظام فوترة قائمًا على الأرصدة لـ NeuralAPI
تقوم NeuralAPI الآن بالفوترة بالأرصدة بدءًا من الدفع وحتى الخصم:Token Credit Entitlement
Tiered Plans, One Credit
One-Time Top-Up Pack
Deduction Through a Meter
Live Balance API
Verified Webhook Pipeline
- أضف المصادقة إلى
/credits/:customerIdو/api/generate. بصيغتهما الحالية، يمكن لأي شخص استدعاؤهما باستخدام أي معرّف عميل. صادق على المستخدمين وابحث عن معرّف العميل على الخادم. - استخدم قيم
event_idمستقرة. يستخدم المثالDate.now()مع سلسلة عشوائية. في بيئة الإنتاج، استخدم معرّف طلبك حتى تكون عمليات إعادة المحاولة idempotent: تتجاهل Dodo Payments الحدث الذي سبق أن استوعبت قيمةevent_idالخاصة به. - خزّن الربط بين العميل والمستخدم. احفظ
customer_idفي قاعدة بياناتك بعد أول عملية دفع، حتى لا يضطر المستخدمون إلى لصقه يدويًا. - حدد ما يحدث عند انتهاء الاشتراك. تبقى أرصدة الخطة في دفتر أستاذ العميل حتى تنتهي صلاحيتها بعد 30 يومًا من إصدارها، وتظل أرصدة الشحن صالحة لمدة 365 يومًا. يتحقق
/api/generateفي البرنامج التعليمي من الرصيد فقط، وليس من حالة الاشتراك، ولذلك يمكن للعميل الملغى الاستمرار في استخدام رموزه المتبقية. هذا هو الإعداد الافتراضي الملائم للعميل. ولتطبيق وصول أكثر صرامة، إما (أ) استمع إلى webhook من نوعsubscription.cancelledوقيّد/api/generateبناءً على حالة الاشتراك، أو (ب) عند الإلغاء، اخصم أرصدة الخطة غير المستخدمة باستخدام Ledger API. تُخصم الديبتات من المنحة التي تنتهي صلاحيتها أولًا، ولذلك تُستخدم أرصدة الخطة ذات الصلاحية البالغة 30 يومًا قبل أرصدة الشحن ذات الصلاحية البالغة 365 يومًا. - راقب لوحة Usage Billing لاكتشاف حالات الخلل في القياس مبكرًا.