Products are the foundation of Dodo Payments. Whether you sell a one‑time download, a recurring subscription, or usage‑based access, you start by creating a product. Each product defines how it’s priced, presented at checkout, and fulfilled after purchase.
One‑Time
Charge once for lifetime access or a single deliverable.
Subscriptions
Bill on a schedule with trials, proration, and add‑ons.
Usage‑Based
Meter consumption and bill by actual usage.
Create a product
You can create products from the dashboard or via API. Choose the pricing model up‑front, One‑Time, Subscription, or Usage‑Based and then configure details. The pricing model can’t be changed later; create a new product if you need a different model.Name & description
Provide a clear title and a concise value‑oriented description. Markdown is supported in descriptions.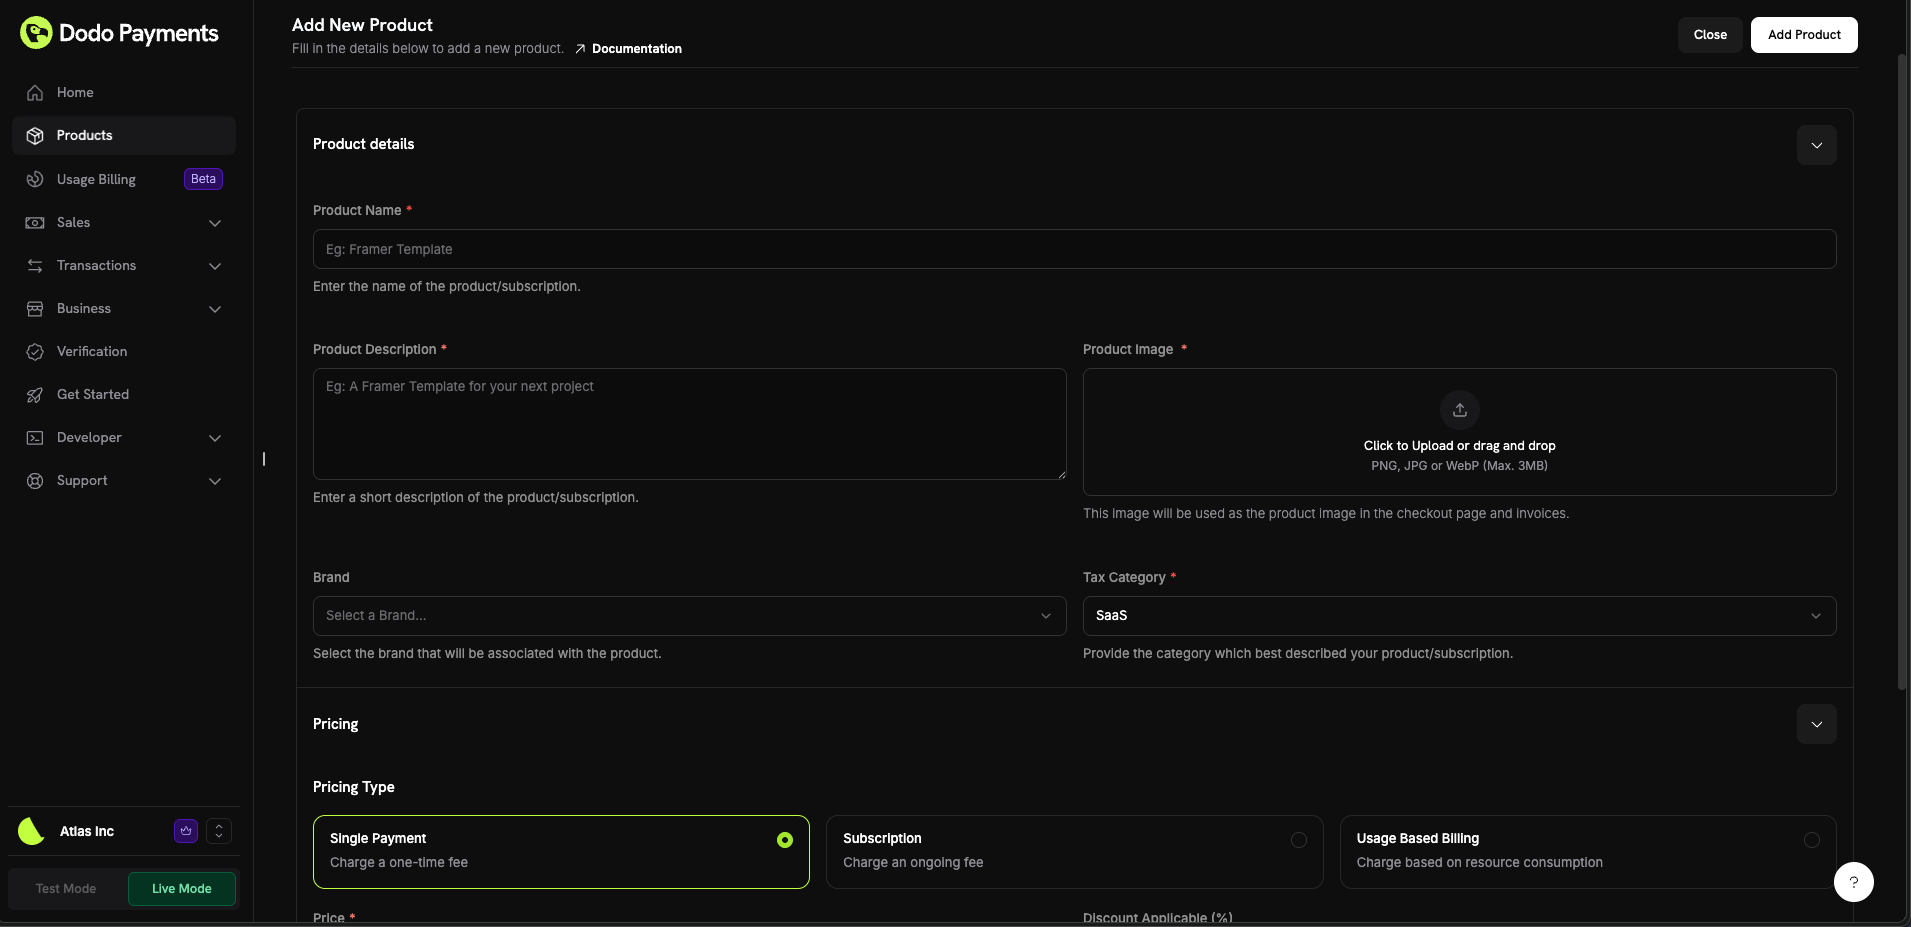
Pricing model & price
Select the pricing model:
- One‑Time: Fixed price paid once.
- Subscription: Recurring price with interval and optional trial.
- Usage‑Based: Price derived from metered events.
- Price: Base amount and currency.
- Discount (%): Optional inline discount shown in checkout and invoices.
- For subscriptions, set Repeat every (e.g., 1 month or 1 year) and Trial days if needed. The subscription price must be at least $1 (or the equivalent in your chosen currency); amounts below this minimum are not supported and the subscription will not work.
Product media
Upload images to showcase the product on checkout and invoices. Supported PNG/JPG/WebP up to 3 MB. Reorder or replace any time.
Automated entitlements (Under Advanced Settings)
Attach fulfillment that activates automatically after payment:
- License Keys: Issue and validate unique keys
- File Downloads: Grant secure file access
- Custom: Trigger your own entitlement logic via webhooks
Variants and pricing options
Instead of variants under one product, create separate products for each pricing option (for example, Monthly and Yearly). Then group them into a Product Collection to present all options in a single checkout and enable plan switching in the Customer Portal.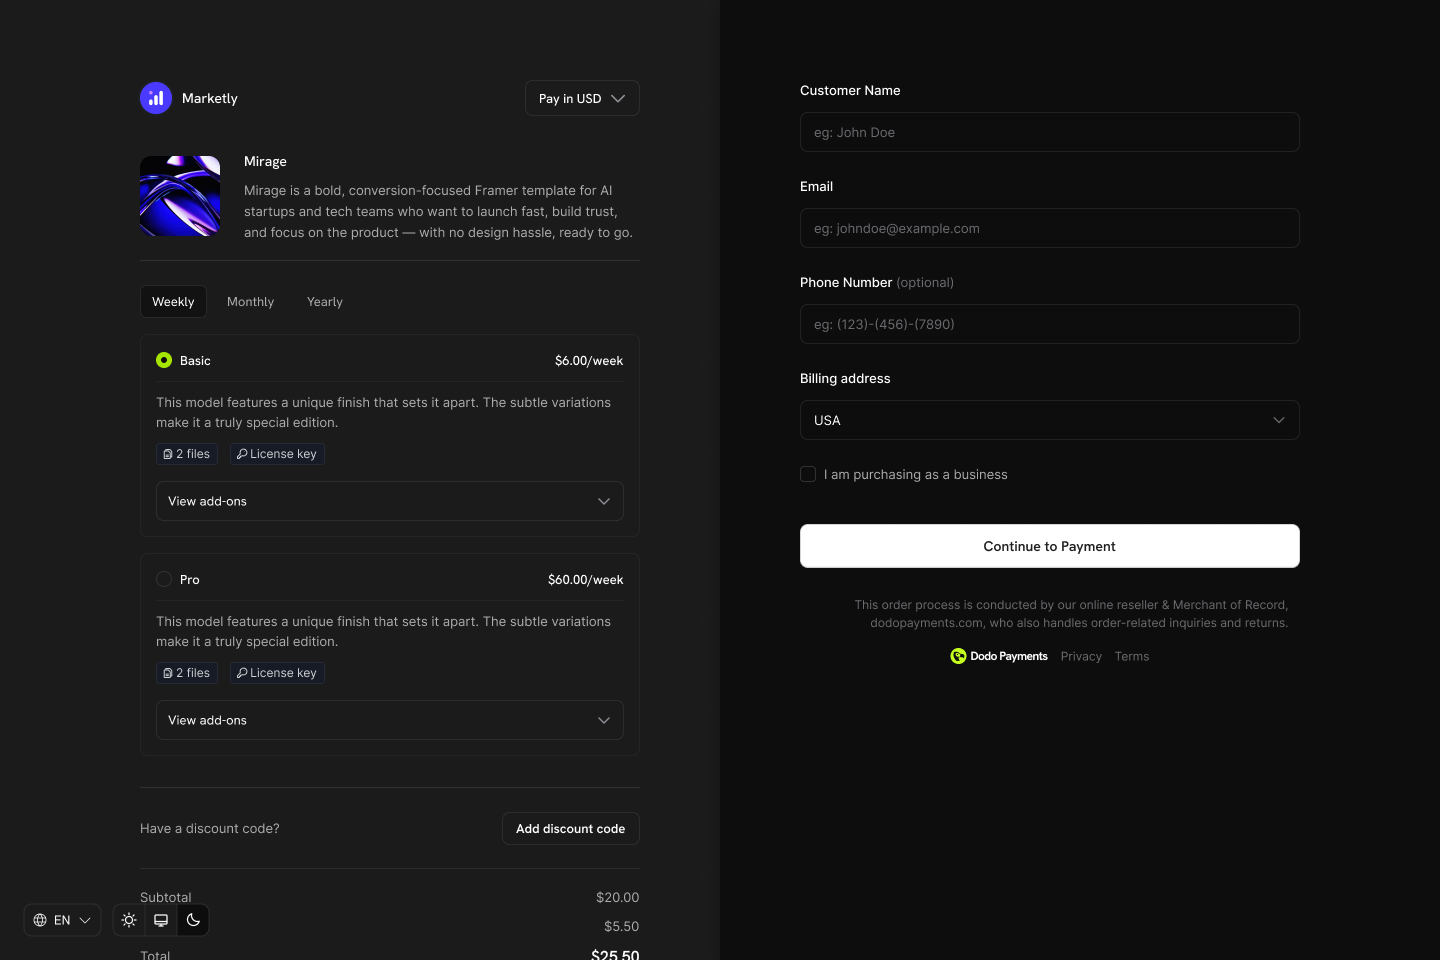
Why this approach?
- Clear pricing models: Each product has a single, well-defined pricing model (one-time, subscription, or usage-based)
- Predictable APIs: Simpler integrations without nested variant logic
- Easier reporting: Track revenue and metrics per product without variant aggregation
- Flexible checkout: Display multiple products side-by-side, letting customers compare and choose
How Product Collections work
- Create products: Set up individual products for each plan (e.g., Starter Monthly, Starter Annual, Pro Monthly, Pro Annual)
- Group into a collection: Add related products to a Product Collection
- Unified checkout: Customers see all options in one checkout and select their preferred plan
- Plan switching: Customers can upgrade or downgrade between products in the same collection via the Customer Portal
Product Collections
Group related products together for unified checkout experiences and seamless upgrade/downgrade paths.
Managing products
You can manage products through the dashboard or programmatically via API. The API provides full control over product creation, updates, retrieval, image uploads, and archiving.Dashboard Management
- Update: Edit name, description, images, price, fields, and benefits at any time (pricing model is immutable).
- Archive: Hide a product from new purchases without disrupting existing customers. You can unarchive later.
API Management
The following instructions allow you to create, update, manage, and retrieve products, including uploading images.Creating a Product
Creating a Product
A product can be a one-time item or a subscription-based service. To create a new product, send a
POST request to the /products endpoint with details such as name, description, price, currency, and whether it is a recurring product.For recurring products, set the price object to a recurring price (type: recurring_price) and specify payment_frequency_interval and subscription_period_interval (Day, Week, Month, or Year) along with their corresponding counts.Create Product API
View detailed request and response structure in the Create Product API documentation.
Updating a Product
Updating a Product
To modify an existing product, send a
PATCH request to the /products/{product_id} endpoint. You can update properties such as name, price, and description while keeping other details unchanged.Ensure that the product_id in the endpoint matches an existing product.Update Product API
View detailed request and response structure in the Update Product API documentation.
Retrieving Products
Retrieving Products
You can fetch a list of products stored in your account using a
GET request to the /products endpoint. This allows you to retrieve product details, including active and archived products.Retrieve Products API
View detailed request and response structure in the Retrieve Products API documentation.
Uploading Product Images
Uploading Product Images
You can associate an image with a product by uploading it to AWS S3 using a pre-signed URL provided by the API. First, request an image upload URL from the
/products/{product_id}/images endpoint, then use the provided URL to upload the image within 60 seconds.Once the pre-signed URL is received from the API, upload the image using the PUT method. This ensures secure and temporary access to AWS S3 for uploading the image.Supported libraries for uploading to S3:- Node.js:
axios,node-fetch - Python:
requests,boto3 - Go:
net/http - PHP:
GuzzleHttp - Ruby:
rest-client
200 OK status, indicating that the image has been stored successfully.Upload Product Image API
View detailed request and response structure in the Upload Product Image API documentation.
Archiving a Product
Archiving a Product
If you no longer wish to display or use a product, you can archive it using a
DELETE request to the /products/{id} endpoint. This action hides the product but does not delete it permanently.Archive Product API
View detailed request and response structure in the Archive Product API documentation.
Unarchiving a Product
Unarchiving a Product
If you need to restore an archived product, send a
POST request to the /products/{product_id}/unarchive endpoint. This will reactivate the product and make it available for use again.Unarchive Product API
View detailed request and response structure in the Unarchive Product API documentation.
Checkout & fulfillment
Checkout & fulfillment
Create payment or subscription flows from products, and fulfill automatically via benefits and webhooks.
Checkout Sessions
Create checkout sessions for one‑time or subscription purchases.
Payment Webhooks
React to payment lifecycle events.
Subscription Webhooks
Handle subscription created, renewed, and canceled events.
Best practices
- Start with clarity: Separate products for each pricing option (Monthly vs Yearly)
- Use trials thoughtfully: Pair trials with onboarding to drive activation
- Automate fulfillment: Use benefits and webhooks to deliver instantly
- Tag with metadata: Store your system IDs for reconciliation
You’re ready to create products and start selling - one‑time, recurring, or by usage.
Related
Product Analytics
Track revenue, customers, retention, subscribers, and MRR for each individual product.