 ## How It Works
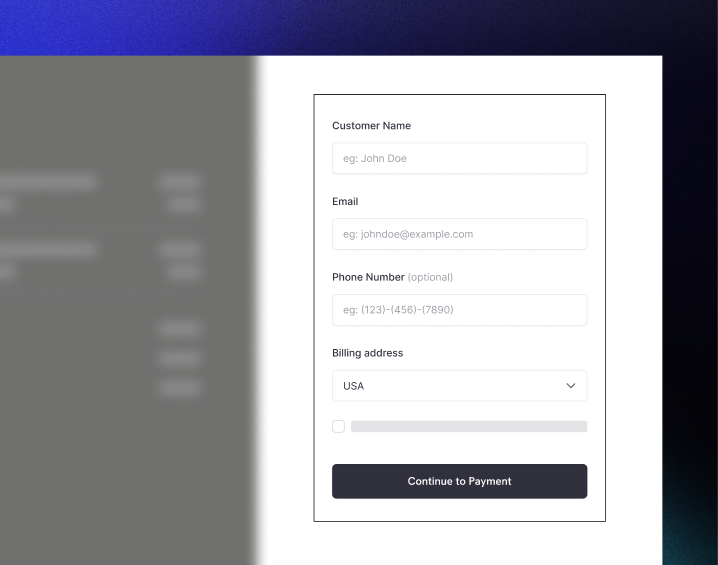
Inline checkout works by embedding a secure Dodo Payments frame into your website or app.
The checkout frame handles collecting customer information and capturing payment details. Your page displays the items list, totals, and options for changing what's on the checkout. The SDK lets your page and the checkout frame interact with each other.
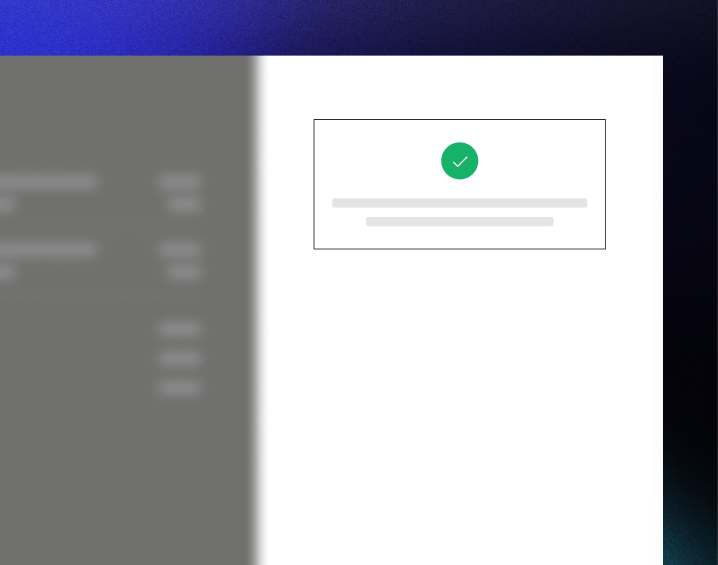
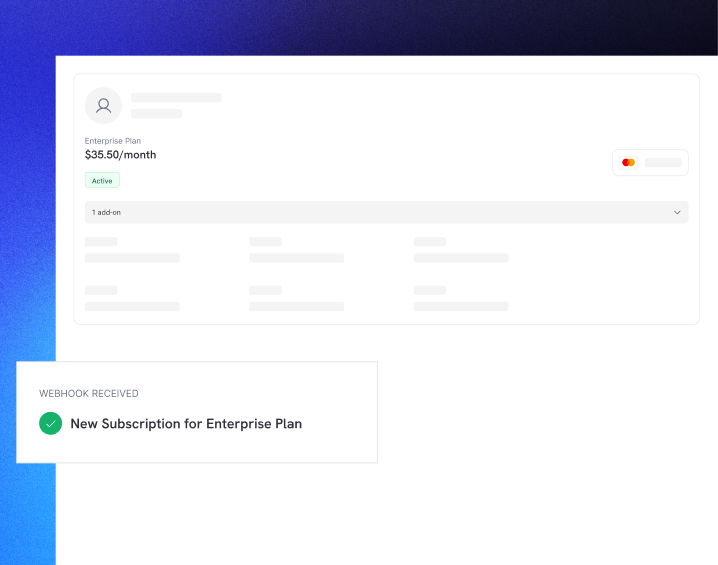
Dodo Payments automatically creates a subscription when a checkout completes, ready for you to provision.
## How It Works
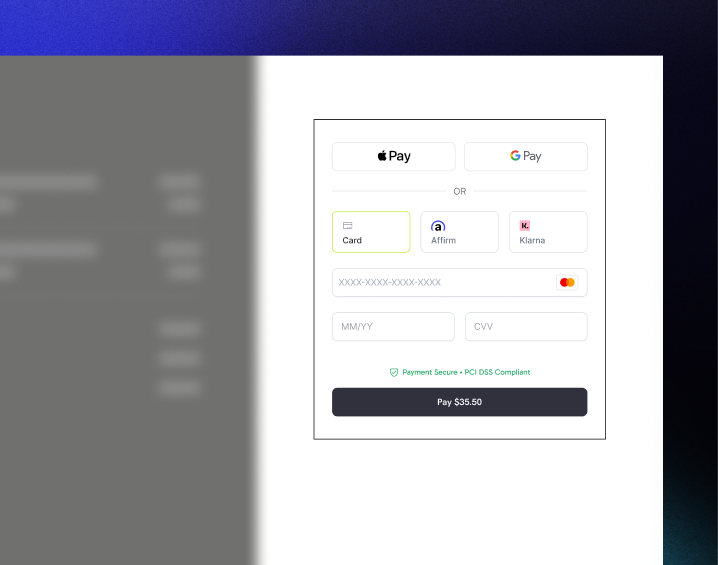
Inline checkout works by embedding a secure Dodo Payments frame into your website or app.
The checkout frame handles collecting customer information and capturing payment details. Your page displays the items list, totals, and options for changing what's on the checkout. The SDK lets your page and the checkout frame interact with each other.
Dodo Payments automatically creates a subscription when a checkout completes, ready for you to provision.
 1. **Recurring information**: If recurring, how often it recurs and the total to pay on renewal. If a trial, how long the trial lasts.
2. **Item descriptions**: A description of what's being purchased.
3. **Transaction totals**: Transaction totals, including subtotal, total tax, and grand total. Be sure to include the currency too.
4. **Dodo Payments footer**: The full inline checkout frame, including the checkout footer that has information about Dodo Payments, our terms of sale, and our privacy policy.
5. **Refund policy**: A link to your refund policy, if it differs from the Dodo Payments standard refund policy.
1. **Recurring information**: If recurring, how often it recurs and the total to pay on renewal. If a trial, how long the trial lasts.
2. **Item descriptions**: A description of what's being purchased.
3. **Transaction totals**: Transaction totals, including subtotal, total tax, and grand total. Be sure to include the currency too.
4. **Dodo Payments footer**: The full inline checkout frame, including the checkout footer that has information about Dodo Payments, our terms of sale, and our privacy policy.
5. **Refund policy**: A link to your refund policy, if it differs from the Dodo Payments standard refund policy.