> ## Documentation Index
> Fetch the complete documentation index at: https://docs.dodopayments.com/llms.txt
> Use this file to discover all available pages before exploring further.
# AutoSend
> Dodo Payments 거래, 환불 및 결제 이벤트에 대한 자동화된 트랜잭션 이메일을 보내기 위해 AutoSend의 이메일 API를 사용하는 방법을 알아보세요.
## 소개
AutoSend와 Dodo Payments 통합을 통해 성공적인 거래부터 실패한 시도 및 환불 확인까지 모든 결제 이벤트에 대한 실시간 이메일 알림을 자동으로 보낼 수 있습니다.
AutoSend의 강력한 이메일 API를 사용하여 결제 이벤트에 대한 트랜잭션 이메일을 보냅니다.
이 통합은 인증을 위해 AutoSend API 키가 필요합니다. AutoSend 대시보드의 설정 > API 키에서 API 키를 확인할 수 있습니다.
## 시작하기
Dodo Payments와 AutoSend를 통합하려면 다음 단계를 따르세요:
Dodo Payments 대시보드의 웹훅(Webhooks) 섹션으로 이동합니다.
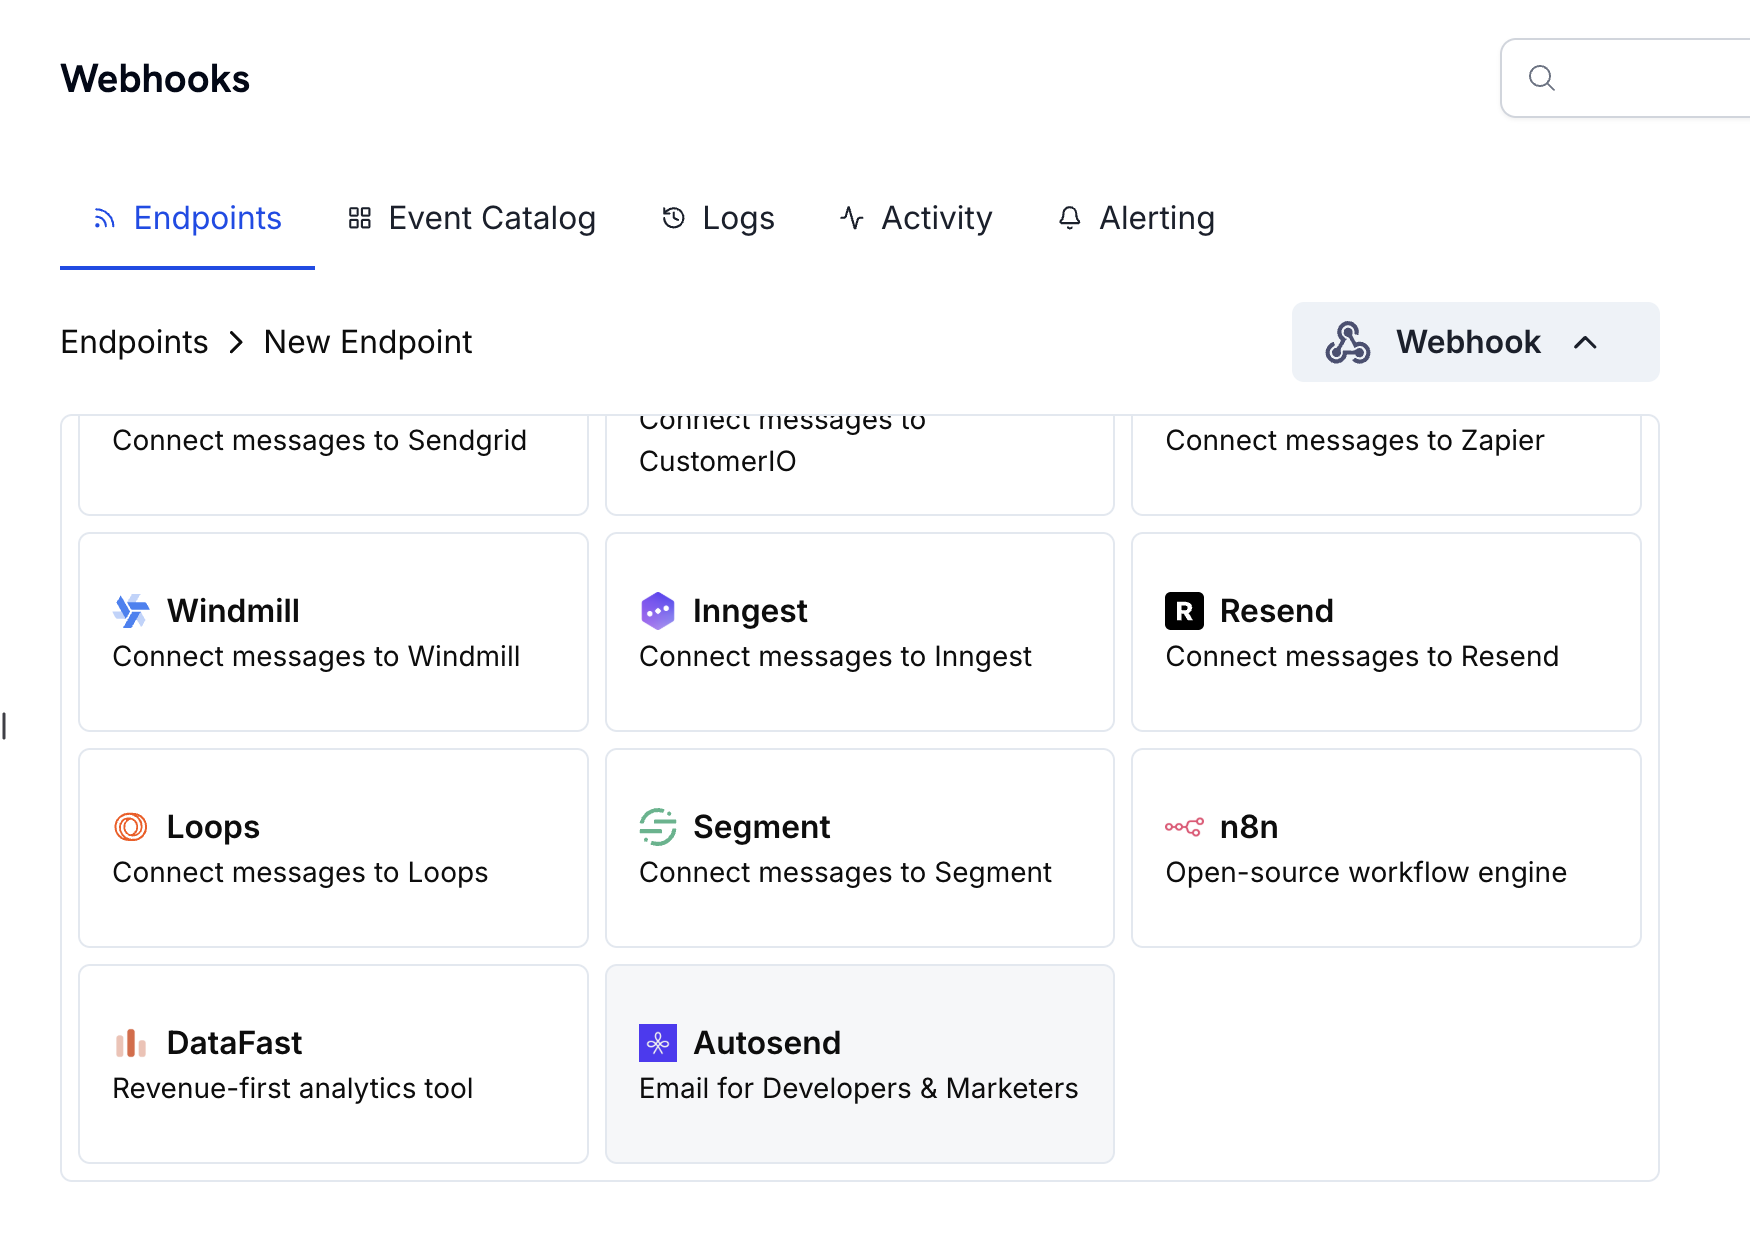 사용 가능한 통합 목록에서 AutoSend를 선택하세요.
인증을 위해 AutoSend API 키를 입력하세요. AutoSend 대시보드의 설정 > API 키에서 API 키를 확인할 수 있습니다.
AutoSend 문서를 방문하여 API 키 생성 및 관리를 위한 자세한 지침을 확인하세요.
결제 이벤트에 따라 이메일 콘텐츠를 맞춤화하기 위해 JavaScript 변환 핸들러를 설정하세요.
웹훅 구성을 테스트하여 이메일이 올바르게 전송되는지 확인한 후 통합을 생성하세요.
🎉 AutoSend 통합이 이제 활성화되었으며 구성된 결제 이벤트에 대해 자동으로 이메일을 전송합니다.
## 코드 예제
### 결제 확인 이메일
결제가 성공적으로 처리되었을 때 확인 이메일을 보냅니다:
```javascript payment_confirmation.js icon="js" expandable theme={null}
function handler(webhook) {
if (webhook.eventType === "payment.succeeded") {
const p = webhook.payload.data;
webhook.url = "https://api.autosend.com/v1/mails/send";
webhook.payload = {
to: {
email: p.customer.email,
name: p.customer.name,
},
from: {
email: "payments@mail.yourdomain.com",
name: "Your Company",
},
subject: "Payment Successful - Thank you for your purchase!",
templateId: "A-61522f2xxxxxxxxx",
dynamicData: {
customerName: p.customer.name,
amount: p.amount,
currency: p.currency,
paymentId: p.payment_id,
paymentDate: new Date(p.created_at).toLocaleDateString(),
},
replyTo: {
email: "support@yourdomain.com",
name: "Support Team",
},
};
}
return webhook;
}
```
### 구독 환영 이메일
새 구독이 생성되었을 때 환영 이메일을 보냅니다:
```javascript subscription_welcome.js icon="js" expandable theme={null}
function handler(webhook) {
if (webhook.eventType === "subscription.active") {
const s = webhook.payload.data;
webhook.url = "https://api.autosend.com/v1/mails/send";
webhook.payload = {
to: {
email: s.customer.email,
name: s.customer.name,
},
from: {
email: "subscriptions@mail.yourdomain.com",
name: "Your Company",
},
subject: "Welcome to your subscription!",
templateId: "A-61522f2xxxxxxxxx",
dynamicData: {
customerName: s.customer.name,
planName: s.plan.name,
billingInterval: s.billing_interval,
nextBillingDate: new Date(s.next_billing_at).toLocaleDateString(),
subscriptionId: s.subscription_id,
},
replyTo: {
email: "support@yourdomain.com",
name: "Support Team",
},
};
}
return webhook;
}
```
### 결제 실패 알림
결제가 실패했을 때 알림 이메일을 보냅니다:
```javascript payment_failure.js icon="js" expandable theme={null}
function handler(webhook) {
if (webhook.eventType === "payment.failed") {
const p = webhook.payload.data;
webhook.url = "https://api.autosend.com/v1/mails/send";
webhook.payload = {
to: {
email: p.customer.email,
name: p.customer.name,
},
from: {
email: "billing@mail.yourdomain.com",
name: "Your Company Billing",
},
subject: "Payment Failed - Action Required",
templateId: "A-61522f2xxxxxxxxx",
dynamicData: {
customerName: p.customer.name,
amount: p.amount,
currency: p.currency,
failureReason: p.failure_reason,
paymentId: p.payment_id,
retryUrl: `https://yourdomain.com/billing/retry/${p.payment_id}`,
},
replyTo: {
email: "billing@yourdomain.com",
name: "Billing Support",
},
};
}
return webhook;
}
```
## 모범 사례
* **발신자 도메인 확인**: 발신자 이메일 도메인이 AutoSend에서 확인되었는지 확인하여 배달 가능성을 높이고 인증 문제를 피하세요. 확인된 도메인은 이메일이 스팸 폴더에 들어가는 것을 방지하는 데 도움이 됩니다.
* **개인화에 동적 데이터를 사용하세요**: `dynamicData` 필드를 사용하여 이름, 결제 금액, 구독 세부 정보와 같은 고객별 정보를 포함한 이메일을 개인화하세요. 개인화된 이메일은 참여율이 더 높습니다.
* **명확한 제목 작성**: 이메일의 목적을 명확하게 나타내는 설명적인 제목을 작성하세요. 스팸 유발 단어를 피하고 제목을 간결하게 유지하세요(50자 이하).
* **생산 전에 테스트**: 이메일을 생산에 보내기 전에 항상 테스트하세요. 이렇게 하면 이메일 내용이 올바르게 렌더링되고 모든 동적 데이터가 제대로 매핑됩니다.
## API 참조
AutoSend API에 대한 모든 사용 가능한 매개변수 및 오류 코드에 대한 자세한 내용은 [AutoSend API 문서](https://docs.autosend.com/api-reference/mails/send)를 방문하세요.
## 문제 해결
* API 키가 올바르고 활성 상태인지 확인하세요
* AutoSend에서 발신자 도메인이 검증되었는지 확인하세요
* 수신자 이메일 주소가 유효한지 확인하세요
* AutoSend의 전송 제한 및 할당량을 검토하세요
* API 엔드포인트 URL이 정확한지 확인하세요: `https://api.autosend.com/v1/mails/send`
* 페이로드에 필요한 매개변수가 포함되어 있는지 확인하세요
* JSON 구조가 AutoSend API 형식과 일치하는지 검증하세요
* 필요한 모든 필드(`to`, `from`, `templateId` 또는 `html`/`text`)가 포함되었는지 확인하세요
* 이메일 주소가 올바르게 형식화되었는지 확인하세요
* 템플릿을 사용하는 경우 `templateId`가 유효한지 확인하세요
* `dynamicData` 키가 템플릿 변수와 일치하는지 확인하세요
* AutoSend에서 템플릿 ID가 정확하고 활성 상태인지 확인하세요
* `dynamicData` 키가 템플릿에서 사용하는 변수와 일치하는지 확인하세요
* 필요한 모든 템플릿 변수가 제공되었는지 확인하세요
* AutoSend 대시보드에서 템플릿을 개별적으로 테스트하세요
사용 가능한 통합 목록에서 AutoSend를 선택하세요.
인증을 위해 AutoSend API 키를 입력하세요. AutoSend 대시보드의 설정 > API 키에서 API 키를 확인할 수 있습니다.
AutoSend 문서를 방문하여 API 키 생성 및 관리를 위한 자세한 지침을 확인하세요.
결제 이벤트에 따라 이메일 콘텐츠를 맞춤화하기 위해 JavaScript 변환 핸들러를 설정하세요.
웹훅 구성을 테스트하여 이메일이 올바르게 전송되는지 확인한 후 통합을 생성하세요.
🎉 AutoSend 통합이 이제 활성화되었으며 구성된 결제 이벤트에 대해 자동으로 이메일을 전송합니다.
## 코드 예제
### 결제 확인 이메일
결제가 성공적으로 처리되었을 때 확인 이메일을 보냅니다:
```javascript payment_confirmation.js icon="js" expandable theme={null}
function handler(webhook) {
if (webhook.eventType === "payment.succeeded") {
const p = webhook.payload.data;
webhook.url = "https://api.autosend.com/v1/mails/send";
webhook.payload = {
to: {
email: p.customer.email,
name: p.customer.name,
},
from: {
email: "payments@mail.yourdomain.com",
name: "Your Company",
},
subject: "Payment Successful - Thank you for your purchase!",
templateId: "A-61522f2xxxxxxxxx",
dynamicData: {
customerName: p.customer.name,
amount: p.amount,
currency: p.currency,
paymentId: p.payment_id,
paymentDate: new Date(p.created_at).toLocaleDateString(),
},
replyTo: {
email: "support@yourdomain.com",
name: "Support Team",
},
};
}
return webhook;
}
```
### 구독 환영 이메일
새 구독이 생성되었을 때 환영 이메일을 보냅니다:
```javascript subscription_welcome.js icon="js" expandable theme={null}
function handler(webhook) {
if (webhook.eventType === "subscription.active") {
const s = webhook.payload.data;
webhook.url = "https://api.autosend.com/v1/mails/send";
webhook.payload = {
to: {
email: s.customer.email,
name: s.customer.name,
},
from: {
email: "subscriptions@mail.yourdomain.com",
name: "Your Company",
},
subject: "Welcome to your subscription!",
templateId: "A-61522f2xxxxxxxxx",
dynamicData: {
customerName: s.customer.name,
planName: s.plan.name,
billingInterval: s.billing_interval,
nextBillingDate: new Date(s.next_billing_at).toLocaleDateString(),
subscriptionId: s.subscription_id,
},
replyTo: {
email: "support@yourdomain.com",
name: "Support Team",
},
};
}
return webhook;
}
```
### 결제 실패 알림
결제가 실패했을 때 알림 이메일을 보냅니다:
```javascript payment_failure.js icon="js" expandable theme={null}
function handler(webhook) {
if (webhook.eventType === "payment.failed") {
const p = webhook.payload.data;
webhook.url = "https://api.autosend.com/v1/mails/send";
webhook.payload = {
to: {
email: p.customer.email,
name: p.customer.name,
},
from: {
email: "billing@mail.yourdomain.com",
name: "Your Company Billing",
},
subject: "Payment Failed - Action Required",
templateId: "A-61522f2xxxxxxxxx",
dynamicData: {
customerName: p.customer.name,
amount: p.amount,
currency: p.currency,
failureReason: p.failure_reason,
paymentId: p.payment_id,
retryUrl: `https://yourdomain.com/billing/retry/${p.payment_id}`,
},
replyTo: {
email: "billing@yourdomain.com",
name: "Billing Support",
},
};
}
return webhook;
}
```
## 모범 사례
* **발신자 도메인 확인**: 발신자 이메일 도메인이 AutoSend에서 확인되었는지 확인하여 배달 가능성을 높이고 인증 문제를 피하세요. 확인된 도메인은 이메일이 스팸 폴더에 들어가는 것을 방지하는 데 도움이 됩니다.
* **개인화에 동적 데이터를 사용하세요**: `dynamicData` 필드를 사용하여 이름, 결제 금액, 구독 세부 정보와 같은 고객별 정보를 포함한 이메일을 개인화하세요. 개인화된 이메일은 참여율이 더 높습니다.
* **명확한 제목 작성**: 이메일의 목적을 명확하게 나타내는 설명적인 제목을 작성하세요. 스팸 유발 단어를 피하고 제목을 간결하게 유지하세요(50자 이하).
* **생산 전에 테스트**: 이메일을 생산에 보내기 전에 항상 테스트하세요. 이렇게 하면 이메일 내용이 올바르게 렌더링되고 모든 동적 데이터가 제대로 매핑됩니다.
## API 참조
AutoSend API에 대한 모든 사용 가능한 매개변수 및 오류 코드에 대한 자세한 내용은 [AutoSend API 문서](https://docs.autosend.com/api-reference/mails/send)를 방문하세요.
## 문제 해결
* API 키가 올바르고 활성 상태인지 확인하세요
* AutoSend에서 발신자 도메인이 검증되었는지 확인하세요
* 수신자 이메일 주소가 유효한지 확인하세요
* AutoSend의 전송 제한 및 할당량을 검토하세요
* API 엔드포인트 URL이 정확한지 확인하세요: `https://api.autosend.com/v1/mails/send`
* 페이로드에 필요한 매개변수가 포함되어 있는지 확인하세요
* JSON 구조가 AutoSend API 형식과 일치하는지 검증하세요
* 필요한 모든 필드(`to`, `from`, `templateId` 또는 `html`/`text`)가 포함되었는지 확인하세요
* 이메일 주소가 올바르게 형식화되었는지 확인하세요
* 템플릿을 사용하는 경우 `templateId`가 유효한지 확인하세요
* `dynamicData` 키가 템플릿 변수와 일치하는지 확인하세요
* AutoSend에서 템플릿 ID가 정확하고 활성 상태인지 확인하세요
* `dynamicData` 키가 템플릿에서 사용하는 변수와 일치하는지 확인하세요
* 필요한 모든 템플릿 변수가 제공되었는지 확인하세요
* AutoSend 대시보드에서 템플릿을 개별적으로 테스트하세요