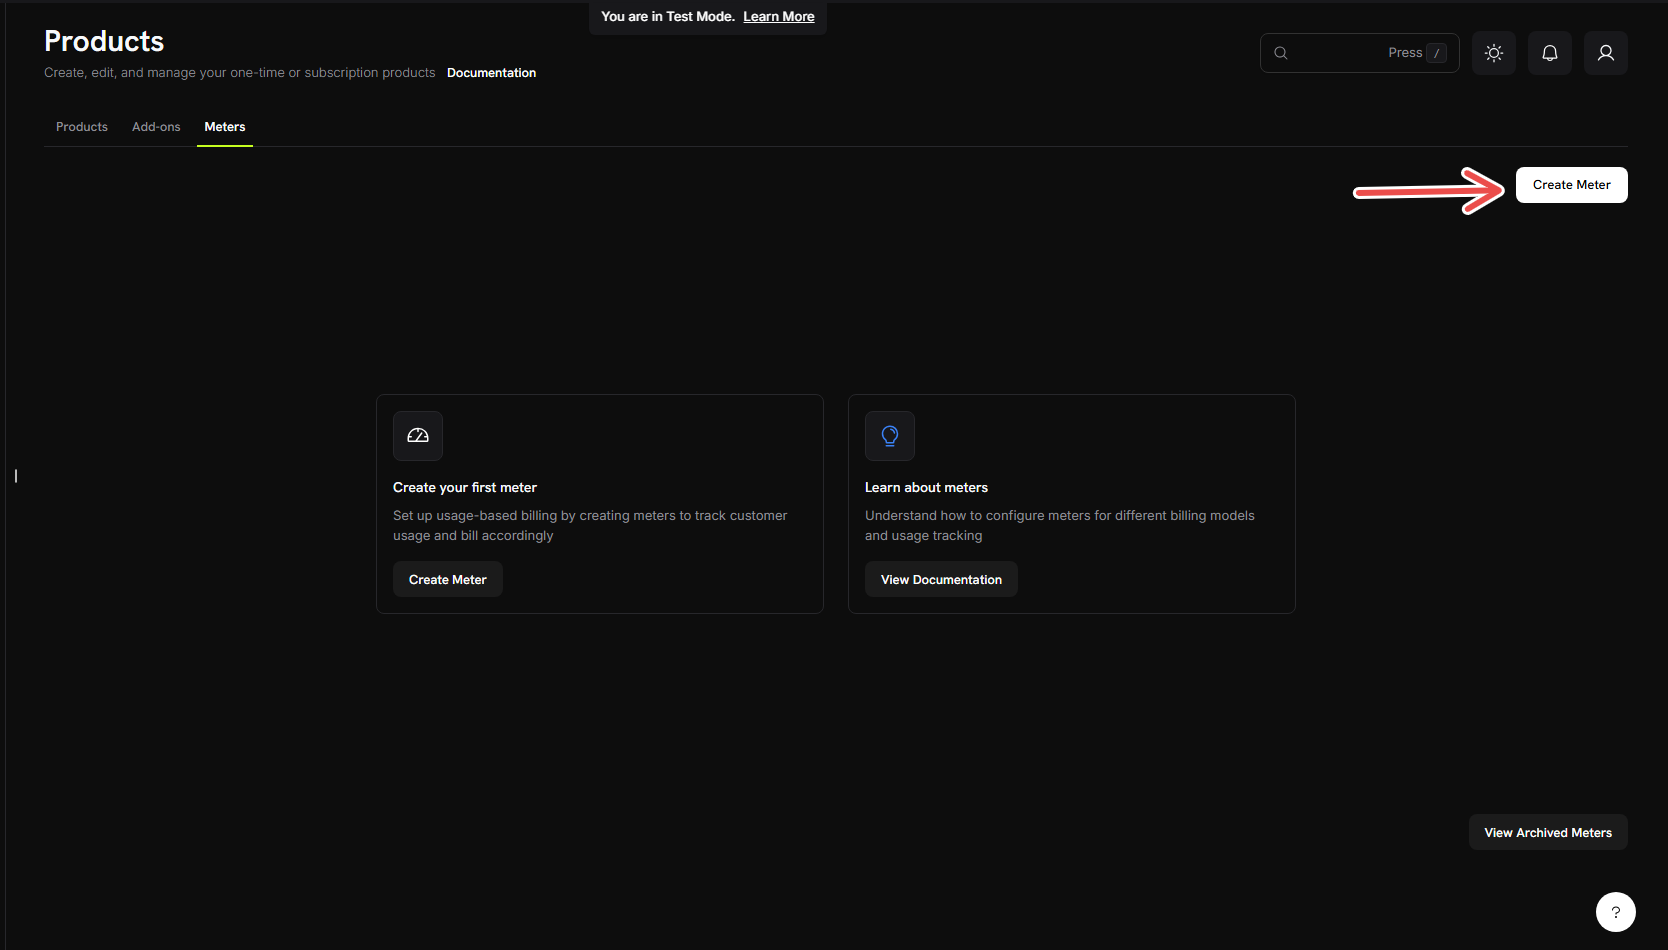
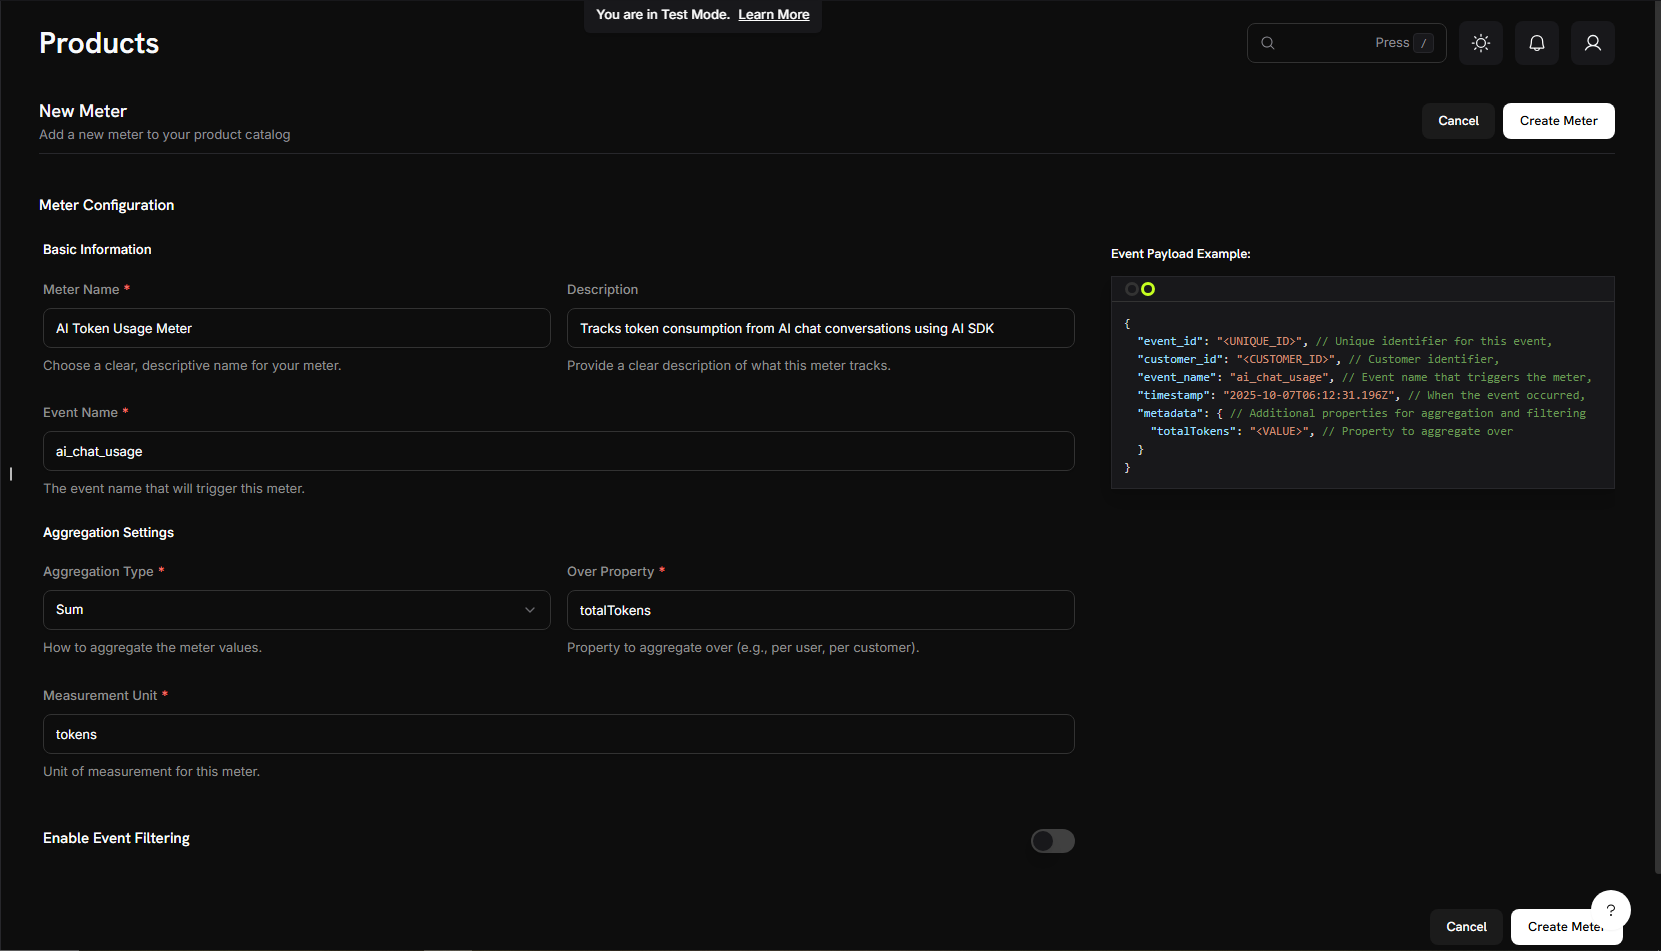
 폼이 나타나면 토큰 추적을 구성할 준비가 된 것입니다.
 ## 우리가 구축할 내용
AI 채팅 서비스를 이해하는 것부터 시작해봅시다:
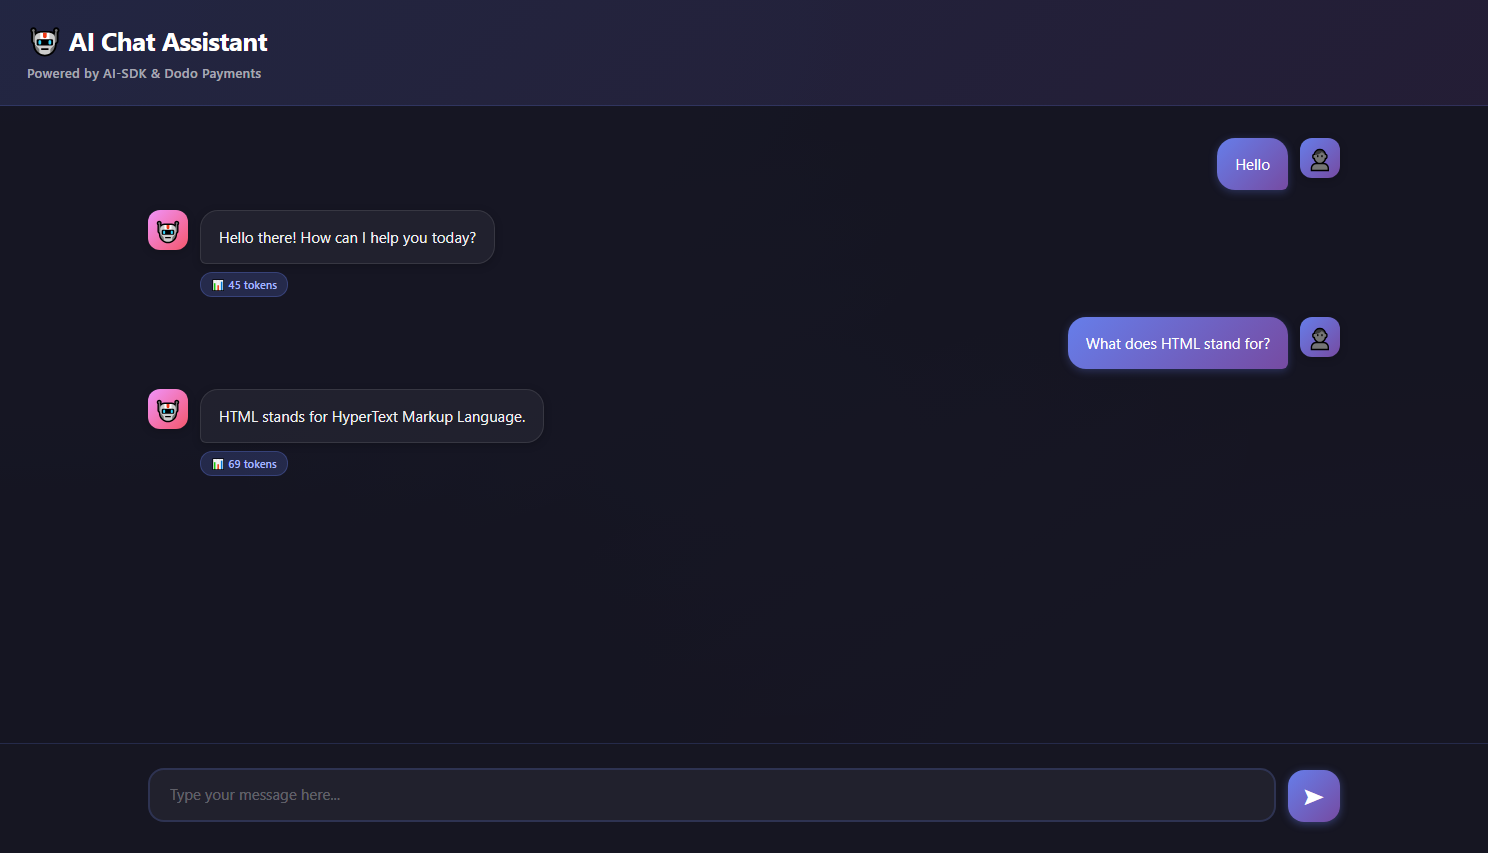
* **서비스**: Google Gemini(AI SDK)를 사용하는 AI 기반 채팅
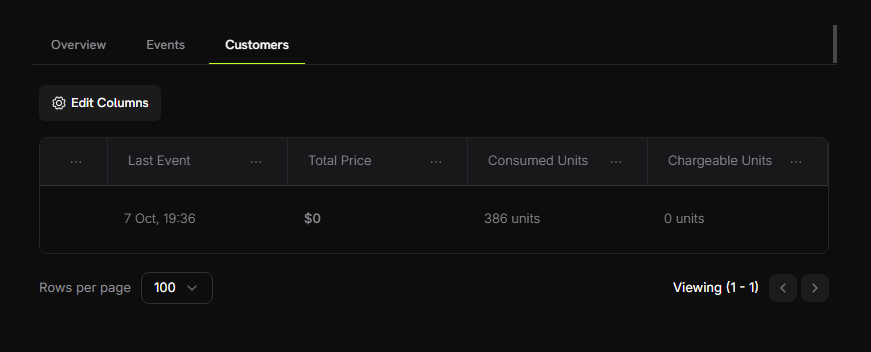
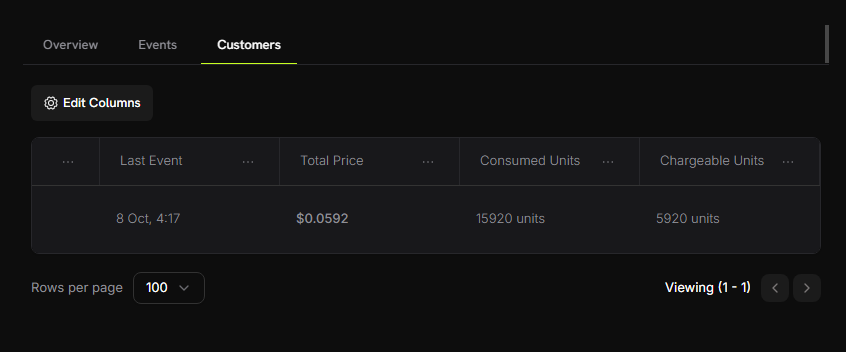
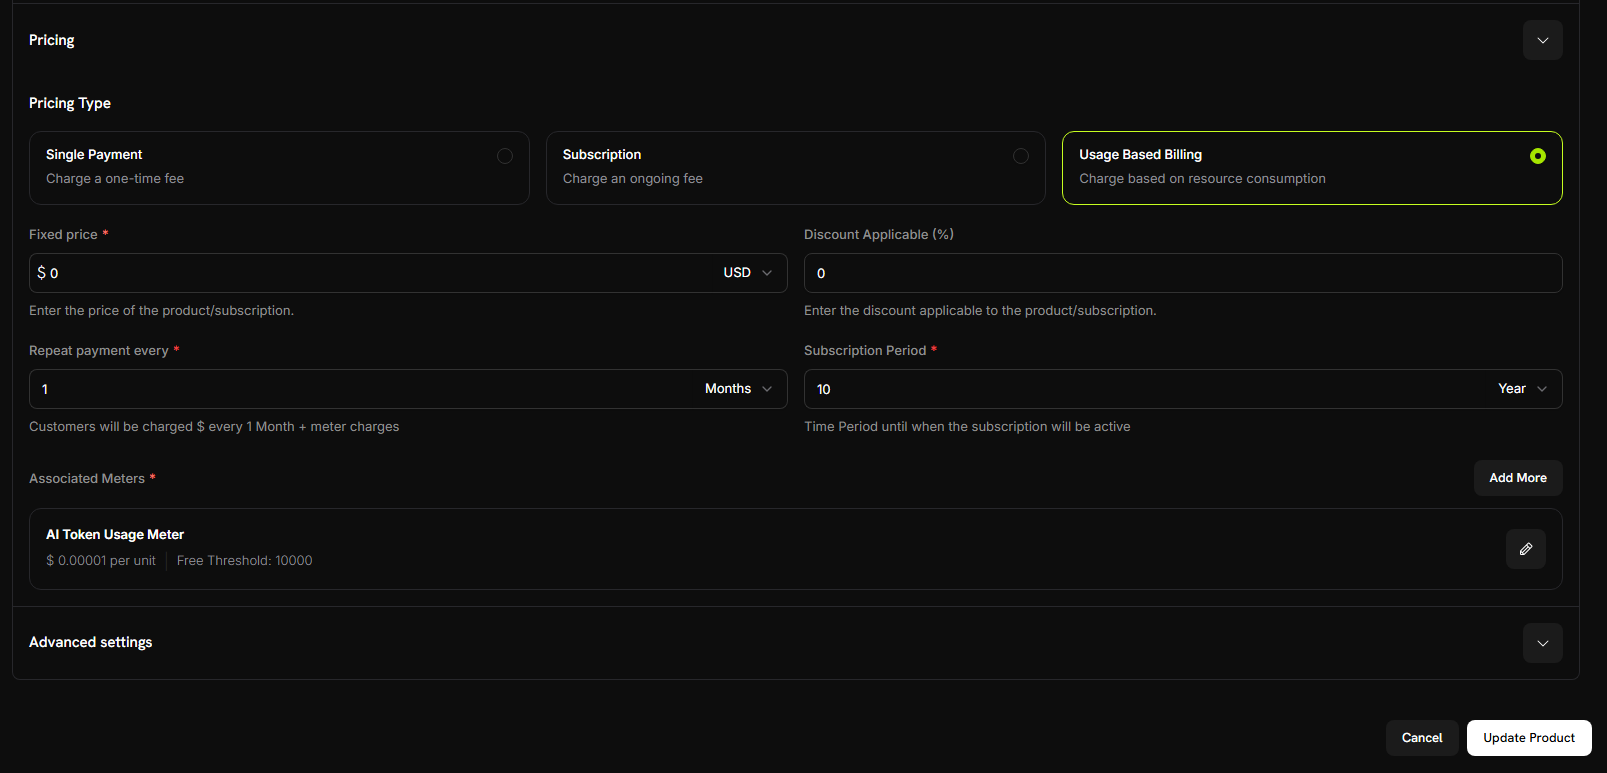
* **가격 모델**: 토큰당 요금(\$0.01 per 1,000 tokens)
* **무료 티어**: 고객당 월 10,000개의 무료 토큰
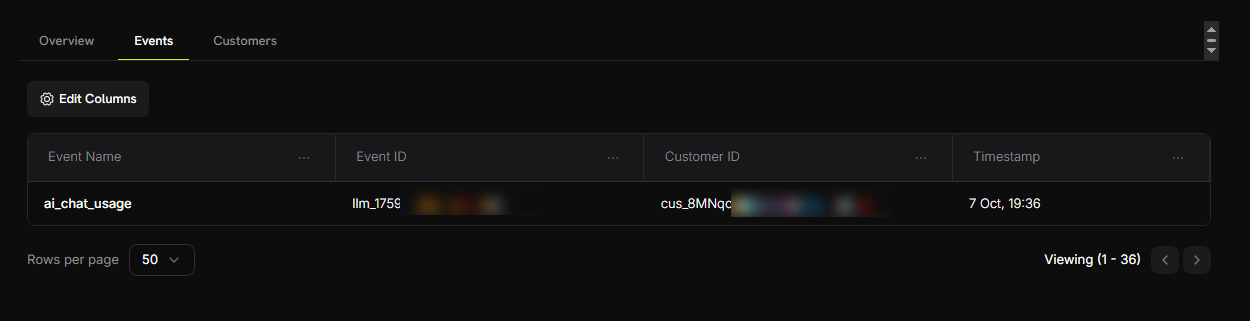
* **기능**: 대화 기록, 자동 토큰 추적
폼이 나타나면 토큰 추적을 구성할 준비가 된 것입니다.
## 우리가 구축할 내용
AI 채팅 서비스를 이해하는 것부터 시작해봅시다:
* **서비스**: Google Gemini(AI SDK)를 사용하는 AI 기반 채팅
* **가격 모델**: 토큰당 요금(\$0.01 per 1,000 tokens)
* **무료 티어**: 고객당 월 10,000개의 무료 토큰
* **기능**: 대화 기록, 자동 토큰 추적
폼이 나타나면 토큰 추적을 구성할 준비가 된 것입니다.
Powered by AI-SDK & Dodo Payments