> ## Documentation Index
> Fetch the complete documentation index at: https://docs.dodopayments.com/llms.txt
> Use this file to discover all available pages before exploring further.
# 크레딧 기반 과금과 함께 선불 이메일 서비스 구축하기
> 선불 이메일 크레딧이 포함된 트랜잭션 이메일 플랫폼, MailKit을 구축하세요. 월 구독 계획, 일회성 충전 팩, 전송 시 즉시 크레딧 차감, Resend 및 Dodo Payments가 제공하는 사전 잔액 부족 알림을 제공합니다.
Let Sentra write your integration code for you.
Use our AI assistant in VS Code, Cursor, or Windsurf to generate SDK/API code, webhook handlers, and more, just by describing what you want.
Try Sentra: AI-Powered Integration →
이 튜토리얼에서는 고객이 이메일 크레딧 풀에 대가를 미리 지불하는 트랜잭션 이메일 플랫폼 **MailKit**을 구축합니다. 이 계획은 매월 이메일 사용량을 허용하며, 고객이 크레딧이 부족할 경우 다음 주기를 기다리지 않고 충전 팩을 구매할 수 있습니다. 매 전송 시 크레딧 하나가 자동으로 차감됩니다.
이 튜토리얼에서는 이메일 공급자로 [Resend](https://resend.com)를 사용합니다. 무료 등급(월 3,000 이메일)은 유료 계정 없이 전체 흐름을 구축하고 테스트하기에 충분합니다. 이 패턴은 모든 공급자와 함께 작동하며, `resend.emails.send`를 SendGrid, Postmark, SES 또는 자체 SMTP 릴레이로 교체하십시오.
이 튜토리얼이 끝나면 다음과 같은 내용을 알 수 있습니다:
* 대시보드에서 맞춤형 크레딧 할당량(이메일) 생성
* 구독 계획 및 일회성 충전 제품에 크레딧 첨부
* Resend를 통해 실제 이메일을 전송하고 원장 항목을 통해 전송당 크레딧 1개 차감
* 프런트엔드에서 실시간 크레딧 잔액 쿼리
* Dodo 웹훅을 정확하게 검증하고 고객에게 0이 되기 전에 경고하는 `credit.balance_low` 처리
## 우리가 만들고 있는 것
MailKit의 가격 모델은 다음과 같습니다:
| Product | Price | Emails |
| ------------ | ------------ | ------------------ |
| MailKit Plan | \$19/month | 5,000 emails/cycle |
| Top-Up Pack | \$9 one-time | +5,000 emails |
단위는 **이메일 하나 = 크레딧 하나**입니다. 고객은 토큰, 배치, 가중 단위에 대해 생각할 필요가 없습니다. 그들은 단지 "이번 달에 4,231개의 이메일이 남아 있습니다"라고 표시됩니다.
시작하기 전에 다음을 확인하십시오:
* Dodo Payments 계정 (테스트 모드도 괜찮음)
* 무료 [Resend](https://resend.com) 계정과 API 키
* Node.js 18+ 및 기본 TypeScript에 대한 이해
## Step 1: Create Your Email Credit Entitlement
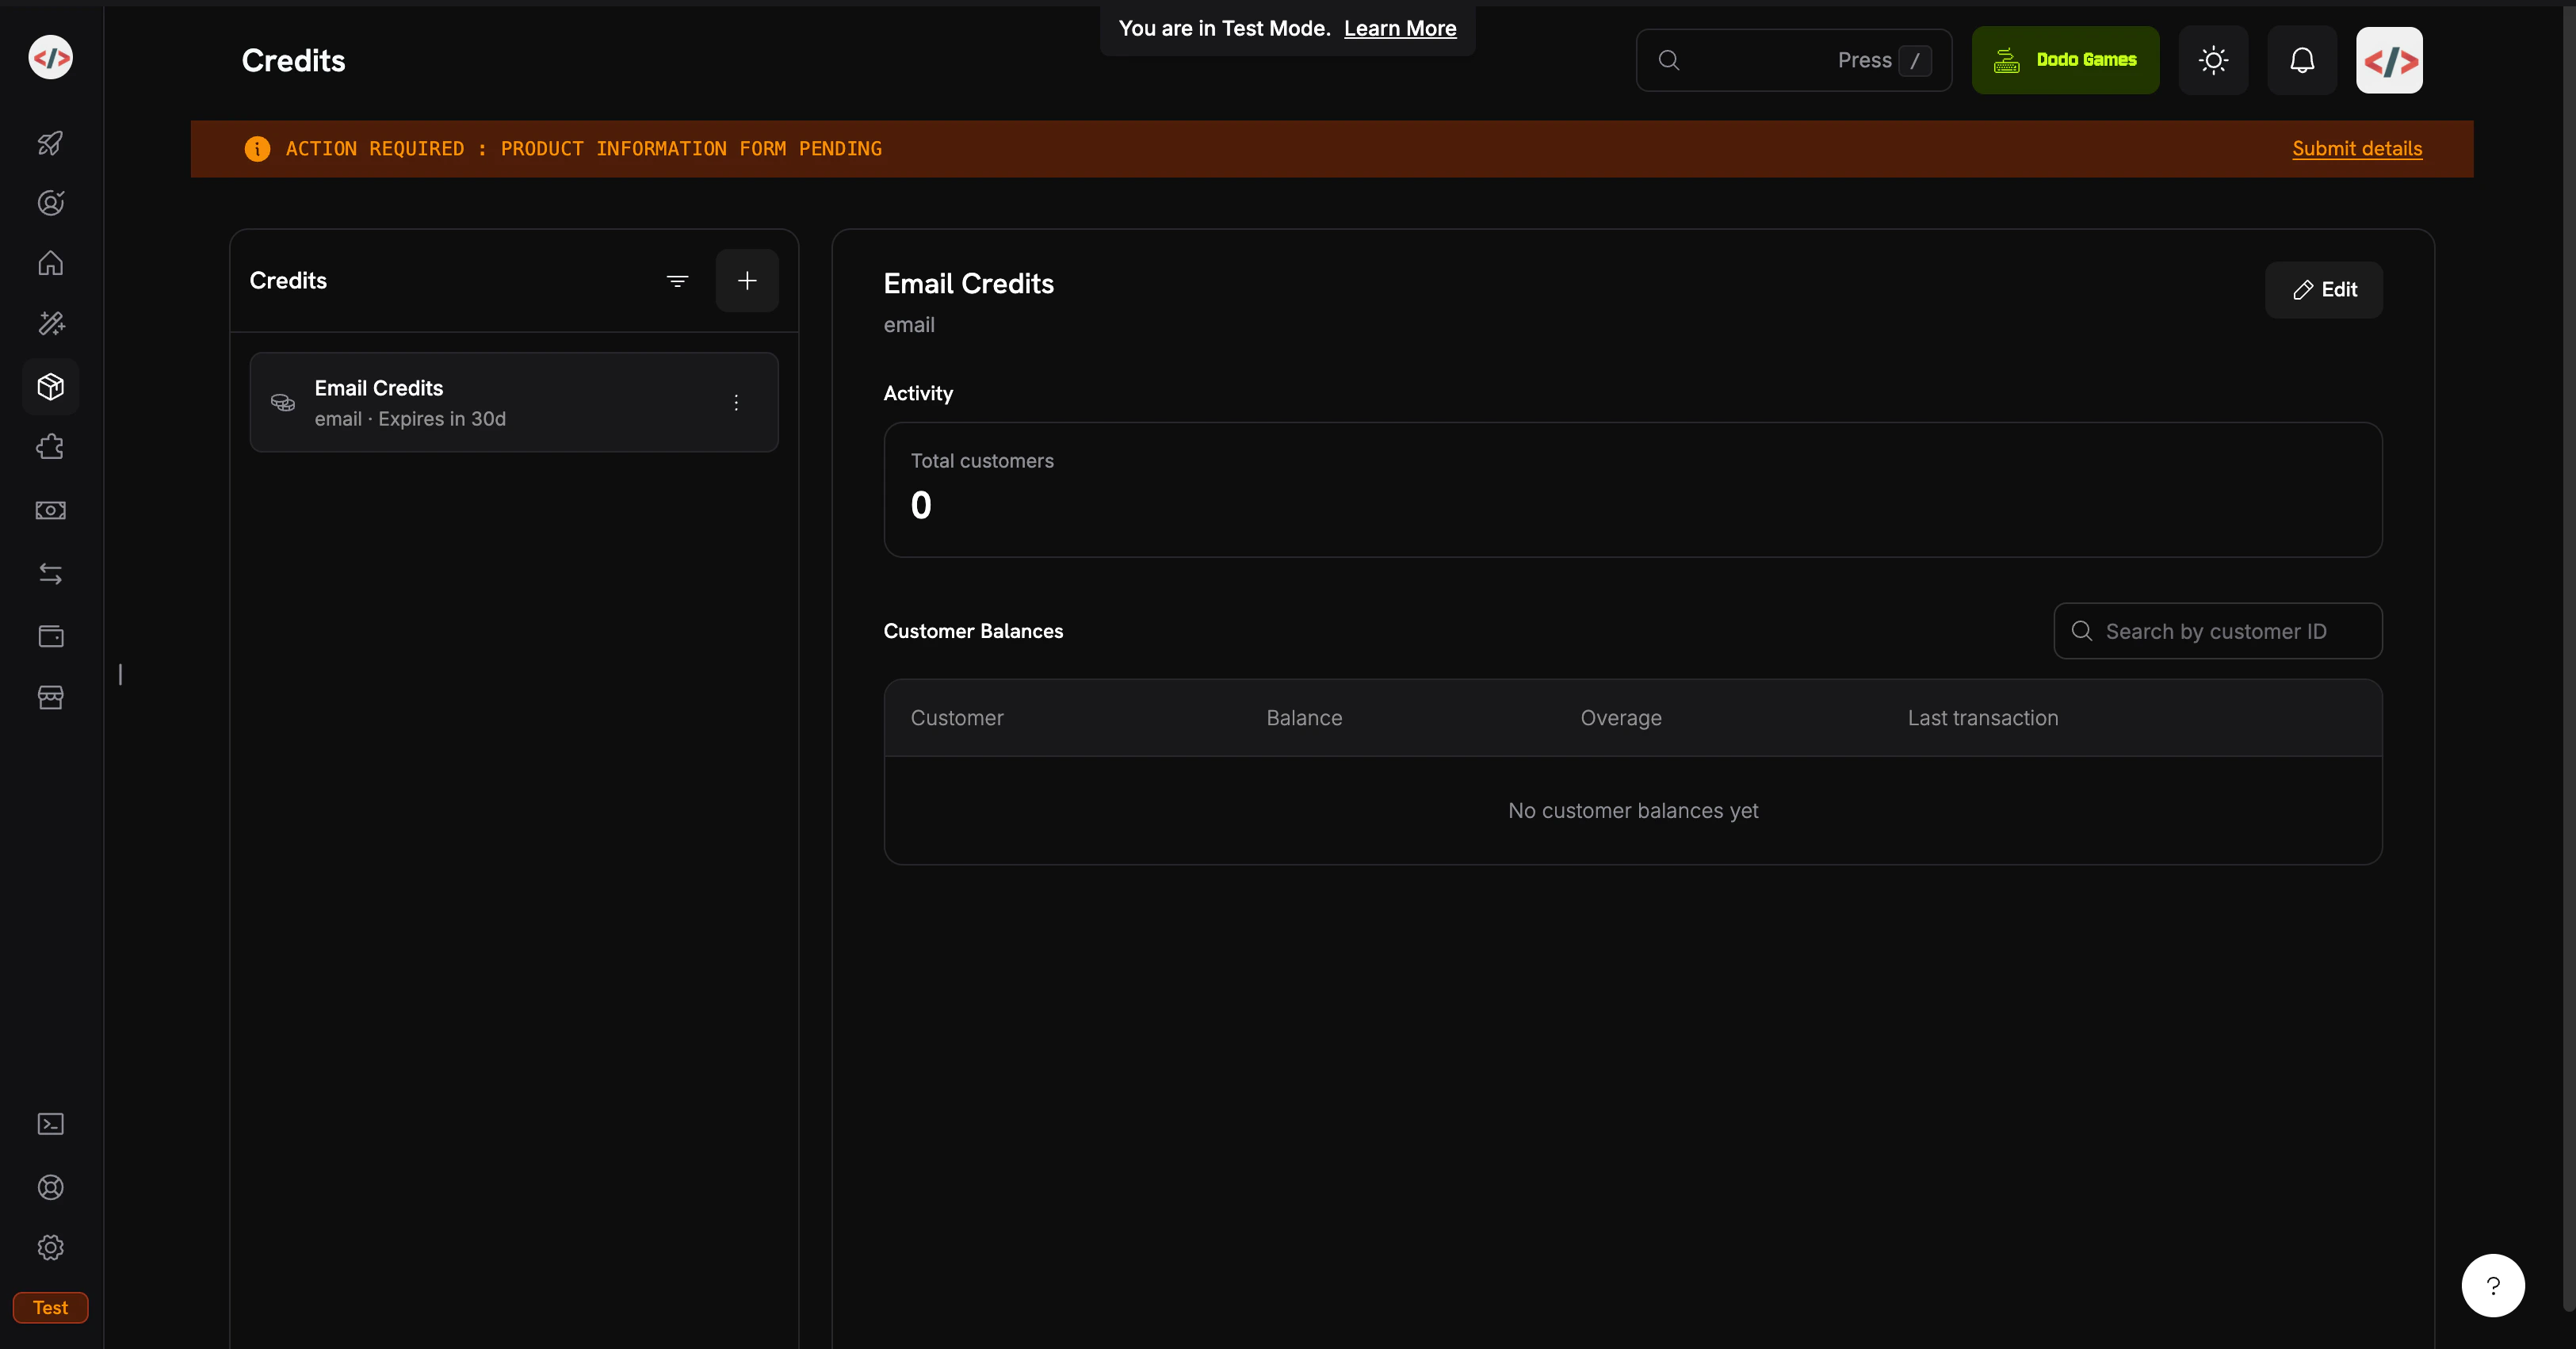
크레딧 할당량은 플랫폼이 판매하는 단위를 정의합니다: 이 경우 이메일 전송 하나.
1. Dodo Payments 대시보드에 로그인합니다.
2. 왼쪽 사이드바에서 **Products**를 클릭합니다.
3. **Credits** 탭을 선택합니다.
4. **Create Credit**을 클릭합니다.
크레딧 세부 정보를 입력합니다:
**Credit Name**: `Email Credits`
**Credit Type**: Select **Custom Unit**
**Unit Name**: `email`
**Precision**: `0` (이메일은 항상 전체 단위입니다; 반 이메일을 보낼 수 없습니다)
**Credit Expiry**: `30 days` (각 주기의 할당량이 재설정됩니다)
정밀도는 생성 후 변경할 수 없습니다. 이메일, 메시지 또는 세션과 같은 이산 단위의 경우 `0`가 적합합니다.
이 요리책에서는 롤오버 또는 초과 사용을 활성화하지 않습니다; 목표는 가능한 가장 간단한 CBB 흐름입니다. 나중에 크레딧 첨부에서 이를 다시 탐색할 수 있습니다.
**Create Credit**을 클릭합니다. 크레딧을 열고 ID를 복사합니다. 백엔드 잔액 쿼리에 필요합니다. 이는 `cent_xxxxxxxxxxxx`처럼 보입니다.
당신의 `Email Credits` 할당이 준비되었습니다. 다음: 고객에게 크레딧을 제공하는 제품입니다.
## Step 2: Create the Plan and Top-Up Pack
두 가지 제품을 만듭니다: 반복되는 **구독** 계획과 **일회성 결제** 충전. 계획은 각 주기에 5,000개의 이메일을 제공합니다; 충전은 요구에 따라 5,000개를 추가합니다. 둘 다 동일한 `Email Credits` 할당량을 연결합니다.
이 요리책에서는 사용량 기반 계량기가 아닌 직접 원장 항목으로 크레딧을 차감합니다. 원장 항목은 즉각적이며(잔액은 밀리초 단위로 업데이트됨), 추가 설정이 필요 없으며 한 사용자 액션이 정확히 하나의 크레딧인 경우 적합합니다. 인제스트된 사용 이벤트에서 자동 차감을 선호하는 경우("토큰" 또는 "처리된 MB"와 같은 가중치 단위에 유용함), 계량기 기반 패턴은 [크레딧 기반 과금 → 크레딧으로 사용량 과금](/features/credit-based-billing)을 참조하세요.
### MailKit Plan (\$19/month, 5,000 emails)
1. **Products → Create Product**로 이동
2. 제품 세부 정보를 입력합니다:
**Product Name**: `MailKit Plan`
**Description**: `5,000 transactional emails per month.`
3. 제품 유형으로 **Subscription**을 선택
4. 반복 가격 설정:
**Recurring Price**: `19.00`
**Billing Cycle**: `Monthly`
**Currency**: `USD`
Entitlements → Credits → Attach로 스크롤하고 구성합니다:
**Credit Entitlement**: `Email Credits`
**Credits issued per billing cycle**: `5000`
**Low Balance Threshold**: `20` (percent; 20% 이하로 떨어질 때 `credit.balance_low` 발생, 즉 1,000개의 이메일)
**Import Default Credit Settings**: enabled (Step 1의 30일 만료 사용)
**제품에 추가**를 클릭한 다음 **저장**합니다. 제품 ID(`pdt_xxxxxxxxxxxx`)를 복사합니다.
계획: \$19/month → 각 주기에 5,000개의 이메일이 새로고침됩니다.
### 충전 팩 (\$9 one-time, 5,000 emails)
1. **Products → Create Product**로 이동
2. 제품 세부 정보를 입력합니다:
**Product Name**: `Email Top-Up Pack`
**Description**: `Add 5,000 emails to your MailKit balance instantly.`
3. 제품 유형으로 **Single Payment**을 선택
4. 가격 설정:
**Price**: `9.00`
**Currency**: `USD`
Entitlements → Credits → Attach 에서:
* 크레딧 할당량: `Email Credits`
* 발행된 크레딧: `5000`
일회성 제품은 자체 만료가 있는 크레딧을 제공합니다(구매 후 30일, Step 1에 따라). 충전은 구독 크레딧에 추가됩니다; 이를 대체하지 않습니다.
저장하고 제품 ID를 복사합니다.
충전 팩: \$9 → +5,000개의 이메일, 즉시 사용 가능.
## Step 3: Set Up the Backend
이제 체크아웃, 전송, 잔액 쿼리, 웹훅을 처리하는 Express 서버를 구축합니다.
```bash theme={null}
mkdir mailkit && cd mailkit
npm init -y
npm install dodopayments resend express dotenv
npm install -D tsx @types/node @types/express
```
`package.json`에 개발 스크립트를 추가합니다:
```json theme={null}
{
"scripts": {
"dev": "tsx watch server.ts"
}
}
```
[`tsx`](https://tsx.is)은 빌드 단계나 `tsconfig.json` 없이 TypeScript를 직접 실행합니다, 이는 튜토리얼에 적합합니다. 프로덕션에서는 `tsconfig.json`와 `build` 스크립트를 추가하십시오.
`.env`를 생성합니다:
```bash .env theme={null}
# Dodo Payments
DODO_PAYMENTS_API_KEY=your_dodo_test_api_key
DODO_WEBHOOK_KEY=your_dodo_webhook_signing_key
CREDIT_ENTITLEMENT_ID=cent_xxxxxxxxxxxx
PLAN_PRODUCT_ID=pdt_xxxxxxxxxxxx
TOPUP_PRODUCT_ID=pdt_xxxxxxxxxxxx
# Resend
RESEND_API_KEY=re_xxxxxxxxxxxx
# App
BASE_URL=http://localhost:3000
PORT=3000
```
`DODO_WEBHOOK_KEY`는 엔드포인트를 생성한 후 4단계에서 채웁니다. Resend API 키는 [resend.com/api-keys](https://resend.com/api-keys)에서 가져옵니다.
`.env`를 `.gitignore`에 즉시 추가하십시오. API 키를 커밋하지 마십시오.
프로젝트 루트에 `server.ts`를 생성합니다:
```typescript server.ts expandable theme={null}
import 'dotenv/config';
import express, { Request, Response } from 'express';
import DodoPayments from 'dodopayments';
import { Resend } from 'resend';
const app = express();
const dodo = new DodoPayments({
bearerToken: process.env.DODO_PAYMENTS_API_KEY!,
webhookKey: process.env.DODO_WEBHOOK_KEY!,
environment: 'test_mode',
});
const resend = new Resend(process.env.RESEND_API_KEY!);
const CREDIT_ENTITLEMENT_ID = process.env.CREDIT_ENTITLEMENT_ID!;
const BASE_URL = process.env.BASE_URL!;
// ---------------------------------------------------------------
// Webhook endpoint MUST receive the raw body for signature
// verification. Register it BEFORE express.json().
// ---------------------------------------------------------------
app.post(
'/webhooks/dodo',
express.raw({ type: 'application/json' }),
async (req: Request, res: Response) => {
const headers = {
'webhook-id': req.headers['webhook-id'] as string,
'webhook-signature': req.headers['webhook-signature'] as string,
'webhook-timestamp': req.headers['webhook-timestamp'] as string,
};
let event: any;
try {
event = await dodo.webhooks.unwrap(req.body.toString('utf8'), { headers });
} catch (err) {
console.error('Webhook signature verification failed:', err);
return res.status(401).json({ error: 'invalid signature' });
}
switch (event.type) {
case 'credit.balance_low': {
const { customer_id, credit_entitlement_name, available_balance, threshold_percent } =
event.data;
console.log(
`[low-balance] ${customer_id} has ${available_balance} ${credit_entitlement_name} ` +
`left (under ${threshold_percent}%)`
);
await notifyCustomerLowBalance(customer_id, Number(available_balance));
break;
}
case 'credit.added':
console.log('[credit.added]', event.data);
break;
case 'credit.rolled_over':
console.log('[rolled_over]', event.data);
break;
}
res.json({ received: true });
}
);
// JSON parsing for everything else.
app.use(express.json());
// ---------------------------------------------------------------
// POST /checkout/subscribe → start the MailKit subscription.
// ---------------------------------------------------------------
app.post('/checkout/subscribe', async (req, res) => {
const { email, name } = req.body as { email: string; name: string };
const session = await dodo.checkoutSessions.create({
product_cart: [{ product_id: process.env.PLAN_PRODUCT_ID!, quantity: 1 }],
customer: { email, name },
return_url: `${BASE_URL}/?subscribed=1`,
});
res.json({ checkout_url: session.checkout_url });
});
// ---------------------------------------------------------------
// POST /checkout/topup → buy a 5,000-email top-up for an existing
// customer. In a real app, customer_id is resolved from the
// authenticated session, never trusted from request input.
// ---------------------------------------------------------------
app.post('/checkout/topup', async (req, res) => {
const { customer_id } = req.body as { customer_id: string };
const session = await dodo.checkoutSessions.create({
product_cart: [{ product_id: process.env.TOPUP_PRODUCT_ID!, quantity: 1 }],
customer: { customer_id },
return_url: `${BASE_URL}/?topped_up=1`,
});
res.json({ checkout_url: session.checkout_url });
});
// ---------------------------------------------------------------
// GET /credits/:customerId → live balance for the dashboard widget.
// ---------------------------------------------------------------
app.get('/credits/:customerId', async (req, res) => {
const balance = await dodo.creditEntitlements.balances.retrieve(req.params.customerId, {
credit_entitlement_id: CREDIT_ENTITLEMENT_ID,
});
res.json({ balance: balance.balance });
});
// ---------------------------------------------------------------
// POST /send → send an email via Resend, then write a ledger entry
// to debit 1 credit from the customer's balance. The deduction is
// instant; the next /credits call reflects it.
// ---------------------------------------------------------------
app.post('/send', async (req, res) => {
const { customer_id, to, subject, html } = req.body as {
customer_id: string;
to: string;
subject: string;
html: string;
};
// 1. Pre-flight balance check: refuse to send if the balance is at zero.
const balance = await dodo.creditEntitlements.balances.retrieve(customer_id, {
credit_entitlement_id: CREDIT_ENTITLEMENT_ID,
});
if (Number(balance.balance) <= 0) {
return res.status(402).json({
error: 'No email credits remaining. Buy a top-up pack or upgrade your plan.',
});
}
// 2. Send via Resend.
const { data, error } = await resend.emails.send({
from: 'MailKit ', // swap for your verified domain
to: [to],
subject,
html,
});
if (error) {
return res.status(500).json({ error: error.message });
}
// 3. Debit 1 credit. Resend's message id is the idempotency key, so if
// the client retries this request, Dodo deduplicates and the
// customer is only debited once for that send.
await dodo.creditEntitlements.balances.createLedgerEntry(customer_id, {
credit_entitlement_id: CREDIT_ENTITLEMENT_ID,
amount: '1',
entry_type: 'debit',
reason: `email send ${data!.id}`,
idempotency_key: data!.id,
});
res.json({ id: data!.id });
});
async function notifyCustomerLowBalance(customerId: string, available: number) {
// In production: send an email to the account owner, push a banner,
// open an in-app modal, etc. For the demo we just log.
console.log(`[NOTIFY] ${customerId}: ${available} emails left. Consider topping up.`);
}
app.use(express.static('public'));
const port = Number(process.env.PORT) || 3000;
app.listen(port, () => {
console.log(`MailKit running on http://localhost:${port}`);
});
```
**웹훅 본문은 원시여야 합니다.** `express.json()`는 본문을 파싱하고 다시 직렬화하여 서명 검증을 중단시킵니다. `/webhooks/dodo`를 `express.raw()` 전에 정의합니다.
백엔드 준비 완료: 구독, 충전, 잔액, 전송, 및 웹훅 핸들러가 모두 연결되었습니다.
`public/index.html`를 생성합니다:
```html public/index.html expandable theme={null}
MailKit Demo
MailKit
Prepaid transactional email, billed per send.
1. Subscribe to MailKit ($19/mo, 5,000 emails)
2. Check your balance
3. Send a transactional email
4. Run low? Buy a top-up pack
```
## Step 4: Wire Up the Webhook Endpoint
`credit.balance_low` 이벤트는 고객이 *다 쓰기 전에* 알림을 제공할 수 있게 해줍니다. 없으면, 그들이 문제를 처음 인지하는 것은 이메일이 전송되지 않을 때입니다.
웹훅은 공용 URL이 필요합니다. 개발 중에는 [ngrok](https://ngrok.com) (또는 다른 터널)을 사용하십시오:
```bash theme={null}
ngrok http 3000
```
HTTPS 포워딩 URL을 복사합니다(예: `https://1234abcd.ngrok-free.app`).
1. **Developers → Webhooks → Add Endpoint**로 이동
2. **URL**: `https://1234abcd.ngrok-free.app/webhooks/dodo`
3. **Events**: `credit.added`, `credit.balance_low`, `credit.rolled_over` 구독
4. 저장한 다음, **서명 키**를 `.env`에 `DODO_WEBHOOK_KEY`로 복사합니다.
5. 서버를 다시 시작합니다.
## Step 5: Test the Full Flow
```bash theme={null}
npm run dev
```
`MailKit running on http://localhost:3000`를 볼 수 있어야 합니다. 브라우저에서 엽니다.
1. 섹션 1에 테스트 이메일과 이름을 입력, **Get checkout link** 클릭
2. 링크를 열고 [테스트 카드](/miscellaneous/testing-process)로 체크아웃 완료
3. 결제가 완료된 후, 대시보드의 **Customers** 아래에서 `customer_id`를 찾습니다.
고객은 이제 잔액에 **5,000개의 이메일**을 가지고 있어야 합니다. **Customers → \[Customer] → Credits**를 확인하십시오.
1. SECTION 3에 `customer_id`를 붙여 넣습니다.
2. `to`를 `delivered@resend.dev`로 설정하여 두십시오 (Resend의 모든 것을 허용하는 샌드박스 인박스)
3. **Send**를 클릭합니다.
Resend 메시지 ID가 반환됩니다. 2단계에서 잔액을 새로 고치면 수량이 즉시 4,999로 감소합니다. 각 원장 차감은 기록되는 즉시 실시간 잔액에 반영됩니다.
임계값은 20%입니다 (5,000 이메일 할당량 중 1,000). 4,000개의 실제 이메일을 보내지 않고 이를 트리거하려면 대시보드에서 **잔액을 수동으로 차감**하십시오:
1. **Customers → \[Customer] → Credits → Email Credits**로 이동합니다.
2. **잔액 조정** 클릭 후 `4000`로 차감
3. 데모를 통해 이메일 하나 더 전송
서버는 몇 초 안에 다음을 로그해야 합니다:
```
[low-balance] cus_xxx has 999 Email Credits left (under 20%)
[NOTIFY] cus_xxx: 999 emails left. Consider topping up.
```
서버가 웹훅을 수신하고 검증했습니다. 프로덕션에서는 이것이 고객에게 이메일을 보내거나 앱 내부 배너를 표시하는 곳입니다.
1. 섹션 4에 `customer_id`를 붙여 넣습니다.
2. **Buy 5,000 emails** 클릭 후 테스트 체크아웃 완료
3. 잔액을 새로 고치면 5,000씩 증가합니다.
`credit.added` 이벤트가 `grant_source: one_time`와 함께 발생합니다. 충전이 구독 크레딧 위에 쌓입니다; 두 풀은 FIFO(최소 비사용 만료 보조금 우선)로 소비됩니다.
잔액을 수동으로 0으로 차감한 다음 이메일 하나를 더 보내보십시오. 다음을 얻을 것입니다:
```json theme={null}
{ "error": "No email credits remaining. Buy a top-up pack or upgrade your plan." }
```
그 402는 애플리케이션 수준의 강제입니다. Dodo 잔액 API는 진실의 근원입니다; 클라이언트에 캐시하지 마십시오.
## 문제 해결
서명은 원시 HTTP 본문을 통해 계산됩니다. `express.json()`는 페이로드를 파싱하고 다시 직렬화하여 HMAC를 중단시킵니다. `/webhooks/dodo`가 `app.use(express.json())` 줄 위에 등록되었는지, `DODO_WEBHOOK_KEY`가 엔드포인트 세부 페이지에 표시된 서명 키와 일치하는지 확인하십시오.
세 가지를 이 순서로 확인하십시오:
1. 고객이 **체크아웃을 완료했는지** (크레딧은 성공적인 결제 후 발급되며 세션 생성 시 발급되지 않음)
2. `CREDIT_ENTITLEMENT_ID`가 `.env`에서 제품에 연결된 크레딧과 일치하는지 (ID 불일치는 잘못된 크레딧에 조용히 기록됨)
3. 포함하고 있는 `customer_id`가 Dodo에서 온 것인지 (대시보드의 `customers` 테이블), 아니면 자체 데이터베이스에 있는 것인지 확인합니다.
샌드박스 발신자 `onboarding@resend.dev`은 Resend 계정의 이메일 또는 `delivered@resend.dev`로만 배달됩니다. 다른 사람에게 보내기 위해 [도메인 확인](https://resend.com/docs/dashboard/domains/introduction)하고 그 위에 `from` 주소를 사용하십시오.
## 당신이 만든 것
`Email Credits`는 한 번 정의하고 구독 계획과 충전 팩 모두에 첨부됩니다.
\$19/month는 주기당 5,000개의 이메일을 제공합니다. 고객은 그들이 무엇을 지불하는지 알고, 당신은 최악의 경우 비용을 알고 있습니다.
5,000개의 이메일을 제공하는 일회성 제품입니다. 계획 변경 없이 구독 크레딧 위에 추가됩니다.
각 전송 후 하나의 `createLedgerEntry` 호출. 계량기, 집계 지연 없음, Resend의 메시지 ID를 통한 재시도 시 멱등.
롤오버, 초과 사용 모드, 원장 관리 및 전체 API 표면에 대한 전체 CBB 문서를 읽으십시오.
도움이 필요하신가요?
* [Discord Community](https://discord.gg/bYqAp4ayYh)
* [support@dodopayments.com](mailto:support@dodopayments.com)
Need help?
* [Discord Community](https://discord.gg/bYqAp4ayYh)
* [support@dodopayments.com](mailto:support@dodopayments.com)