> ## Documentation Index
> Fetch the complete documentation index at: https://docs.dodopayments.com/llms.txt
> Use this file to discover all available pages before exploring further.
# WooCommerceプラグイン
> Dodo PaymentsをWooCommerceストアにシームレスに統合し、UPI、カードなどを通じてグローバルな支払いを受け入れます。
## はじめに
Dodo Payments WooCommerceプラグインは、あなたのストアとシームレスに統合され、UPI、カード、ネットバンキング、デジタルウォレットなど、複数の方法で支払いを受け入れることができます。この包括的なガイドでは、インストールと設定のプロセスを説明します。
## ステップバイステップのインストールガイド
1. WooCommerce支払いプラグインの最新のzipファイルをダウンロードします。
WooCommerceプラグインの最新バージョンを入手してください
または、WordPressプラグインディレクトリから直接インストールできます:
WordPress.orgからDodo Payments for WooCommerceをインストール
2. 管理者としてWordPressサイトにログインします(WooCommerceは既にセットアップ済みと仮定します)
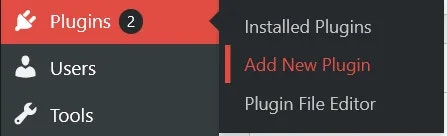
3. **Plugins → Add New Plugin** に移動します
 4. **Upload Plugin** ボタンをクリックするとファイル選択ダイアログが表示されます

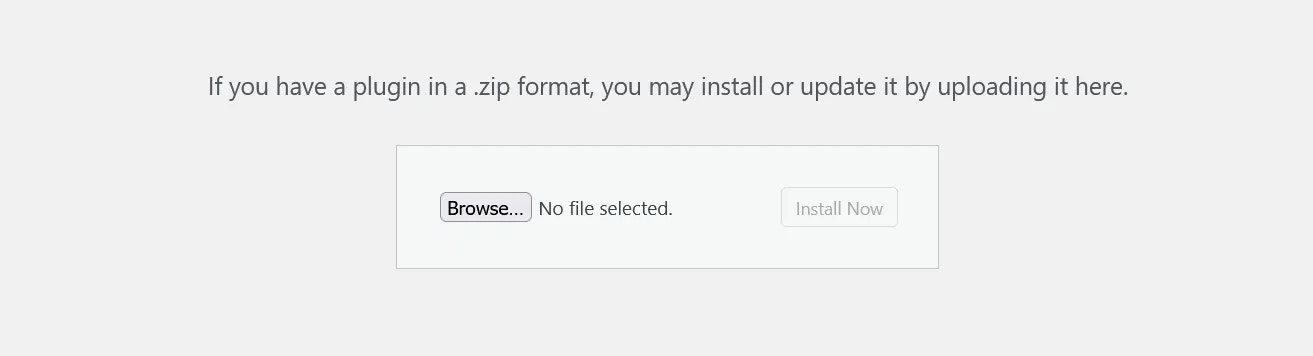 5. **Browse…** をクリックしてダウンロードしたzipファイルを選択します
6. **Install Now** ボタンをクリックしてインストールを開始します
5. **Browse…** をクリックしてダウンロードしたzipファイルを選択します
6. **Install Now** ボタンをクリックしてインストールを開始します
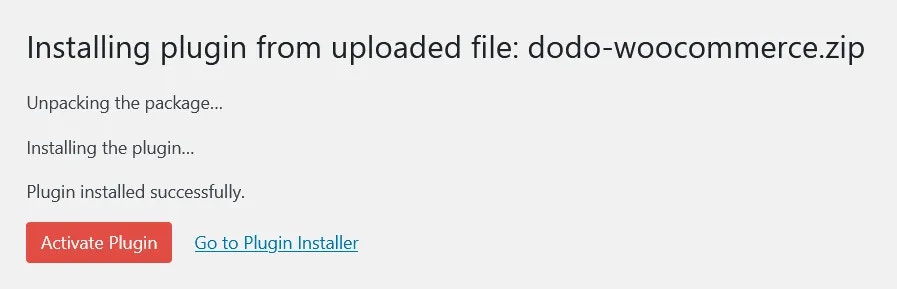
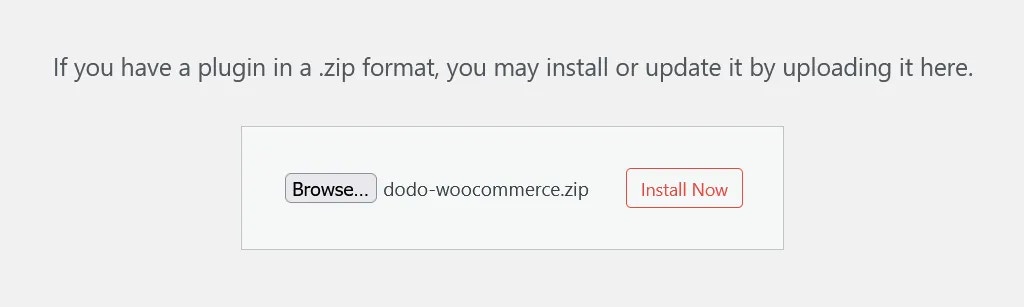 7. インストール完了後、**Activate Plugin** をクリックするか **Installed Plugins** セクションから有効化します
 8. プラグインはインストールされましたが、設定が必要です。以下のセットアップガイドを続けてください。
## 設定ガイド
### APIキーとWebhookの設定
1. **WooCommerce → Settings → Payments** に移動するか、WooCommerceメニュー項目の下にある左側のサイドバーの **Payments** ボタンをクリックします
8. プラグインはインストールされましたが、設定が必要です。以下のセットアップガイドを続けてください。
## 設定ガイド
### APIキーとWebhookの設定
1. **WooCommerce → Settings → Payments** に移動するか、WooCommerceメニュー項目の下にある左側のサイドバーの **Payments** ボタンをクリックします
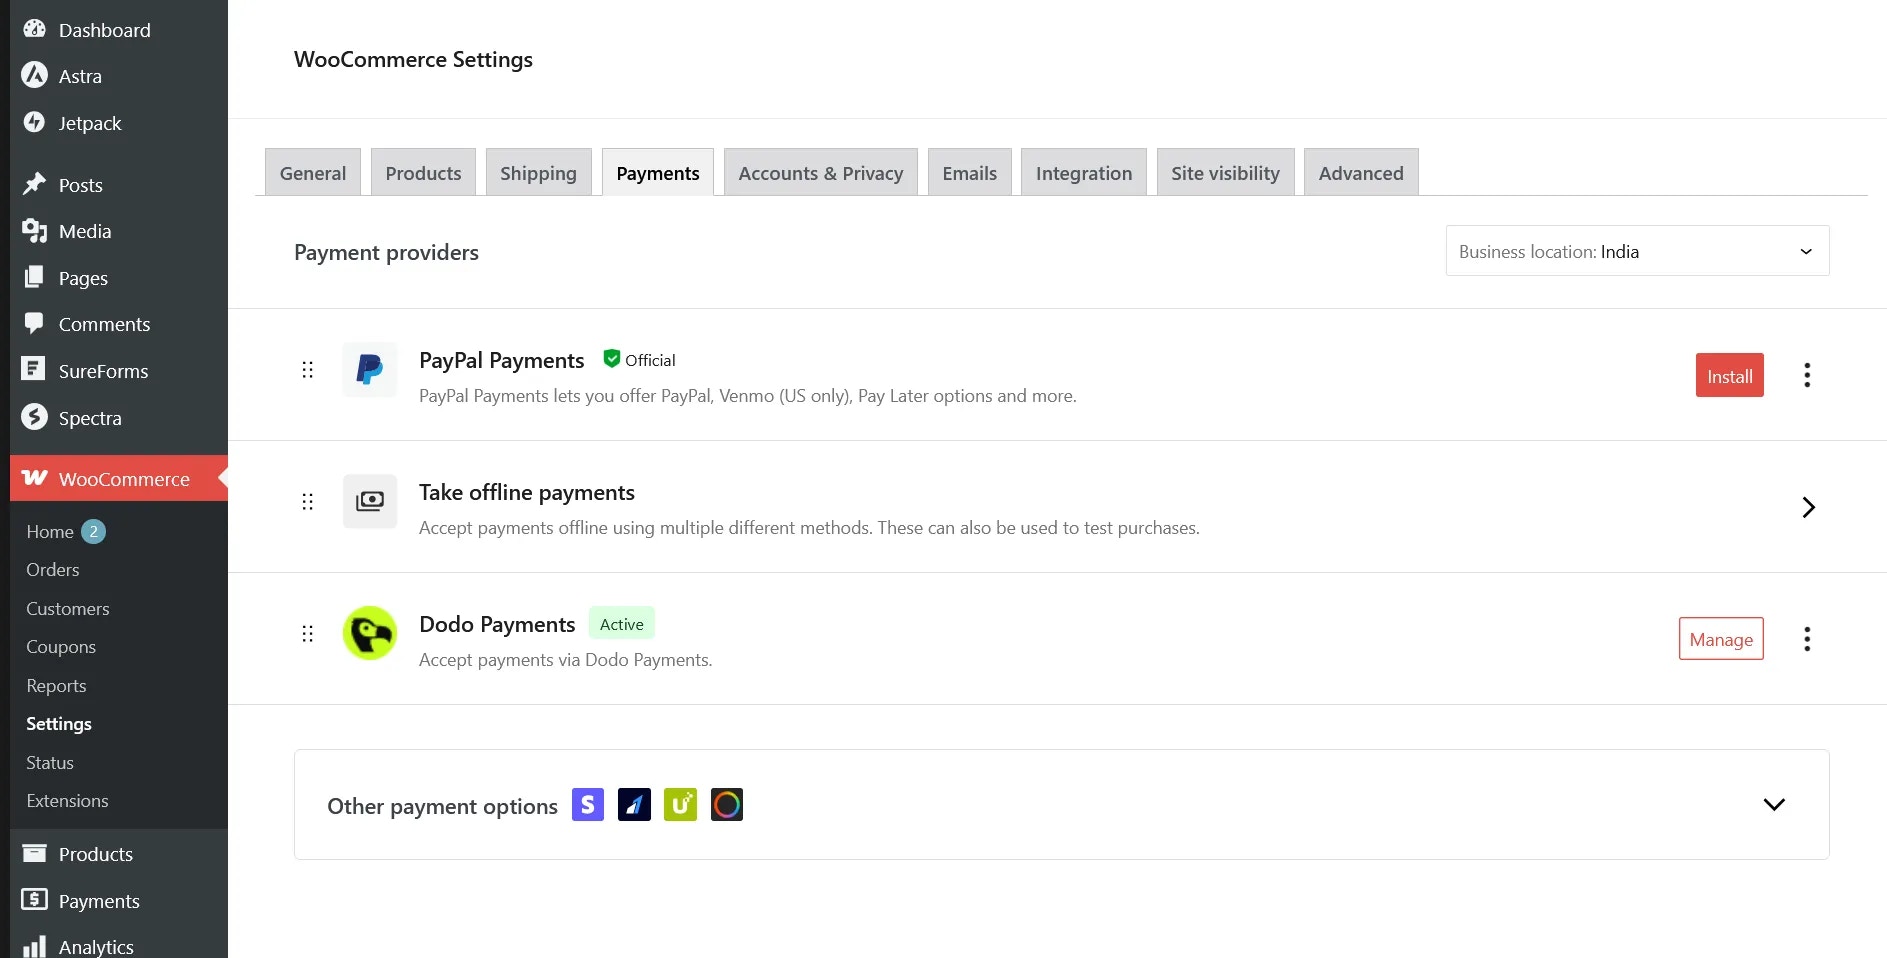
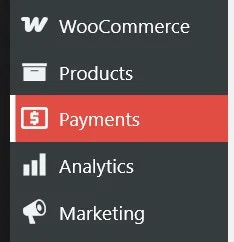 2. **Dodo Payments** 支払いプロバイダーがまだ有効でない場合は有効にし、**Manage** をクリックしてプラグインを設定します
3. 各設定項目には説明文があります。まずはLive API Keyの設定から始めます
2. **Dodo Payments** 支払いプロバイダーがまだ有効でない場合は有効にし、**Manage** をクリックしてプラグインを設定します
3. 各設定項目には説明文があります。まずはLive API Keyの設定から始めます
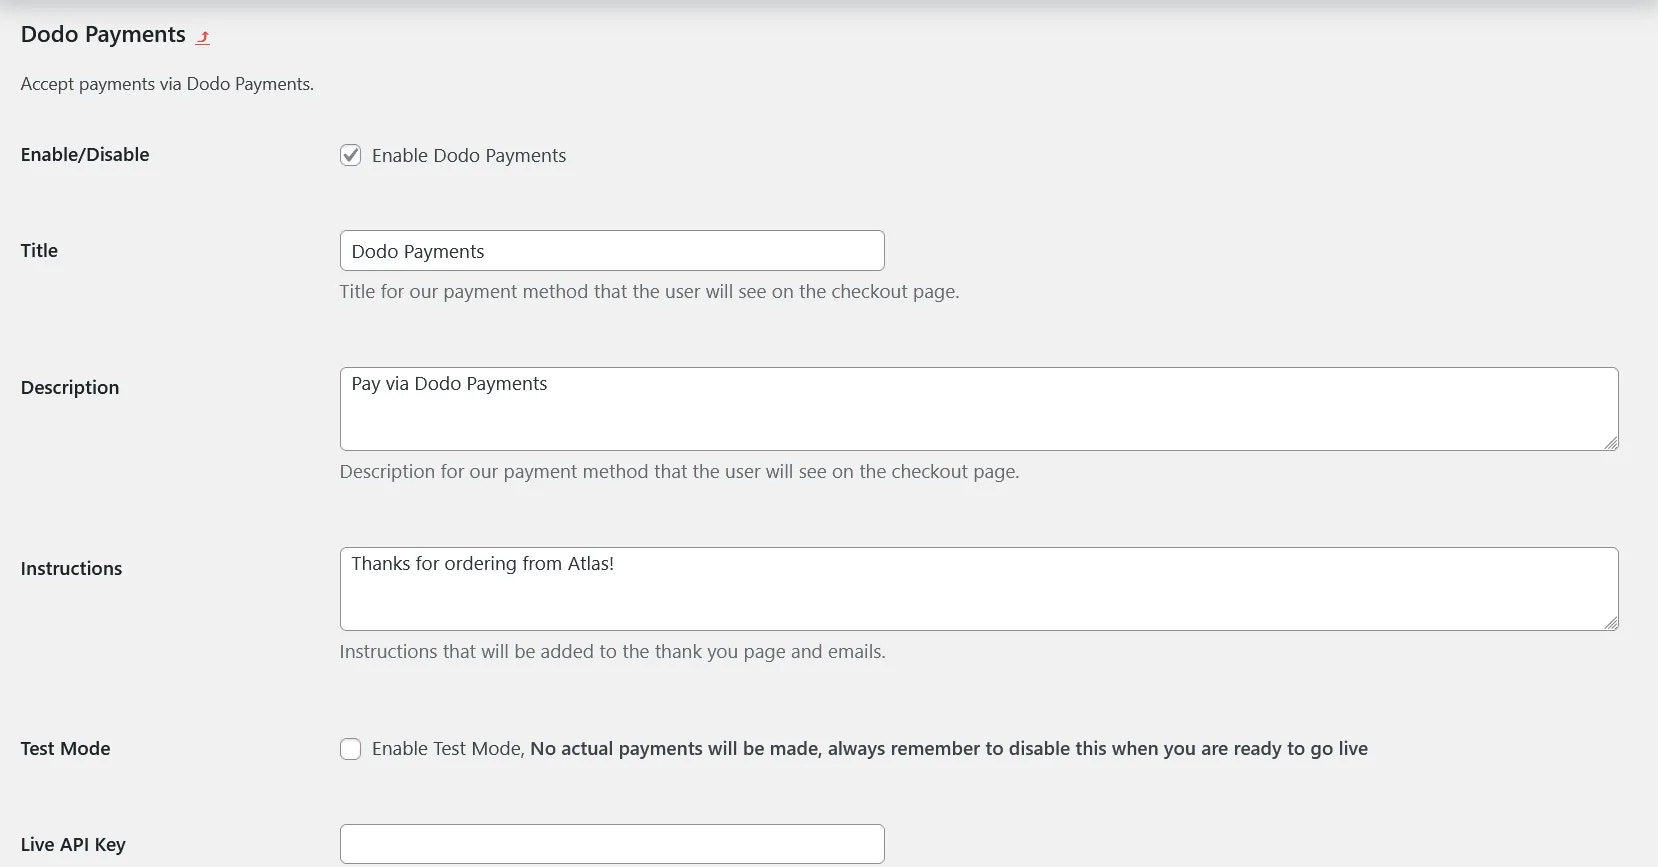 4. Live モードでDodo Paymentsダッシュボードにログインし、**Dodo Payments (Live Mode) > Developer > API Keys** に移動するか、[この直接リンク](https://app.dodopayments.com/developer/api-keys)にアクセスして **Add API Key** をクリックします
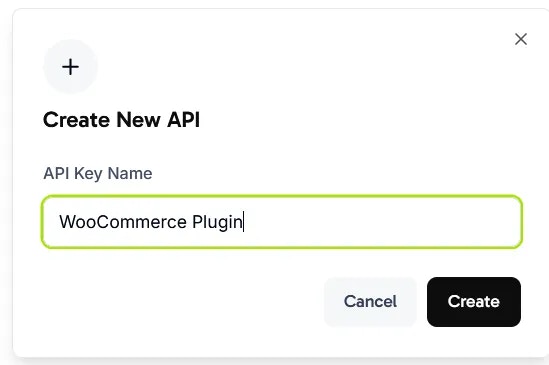
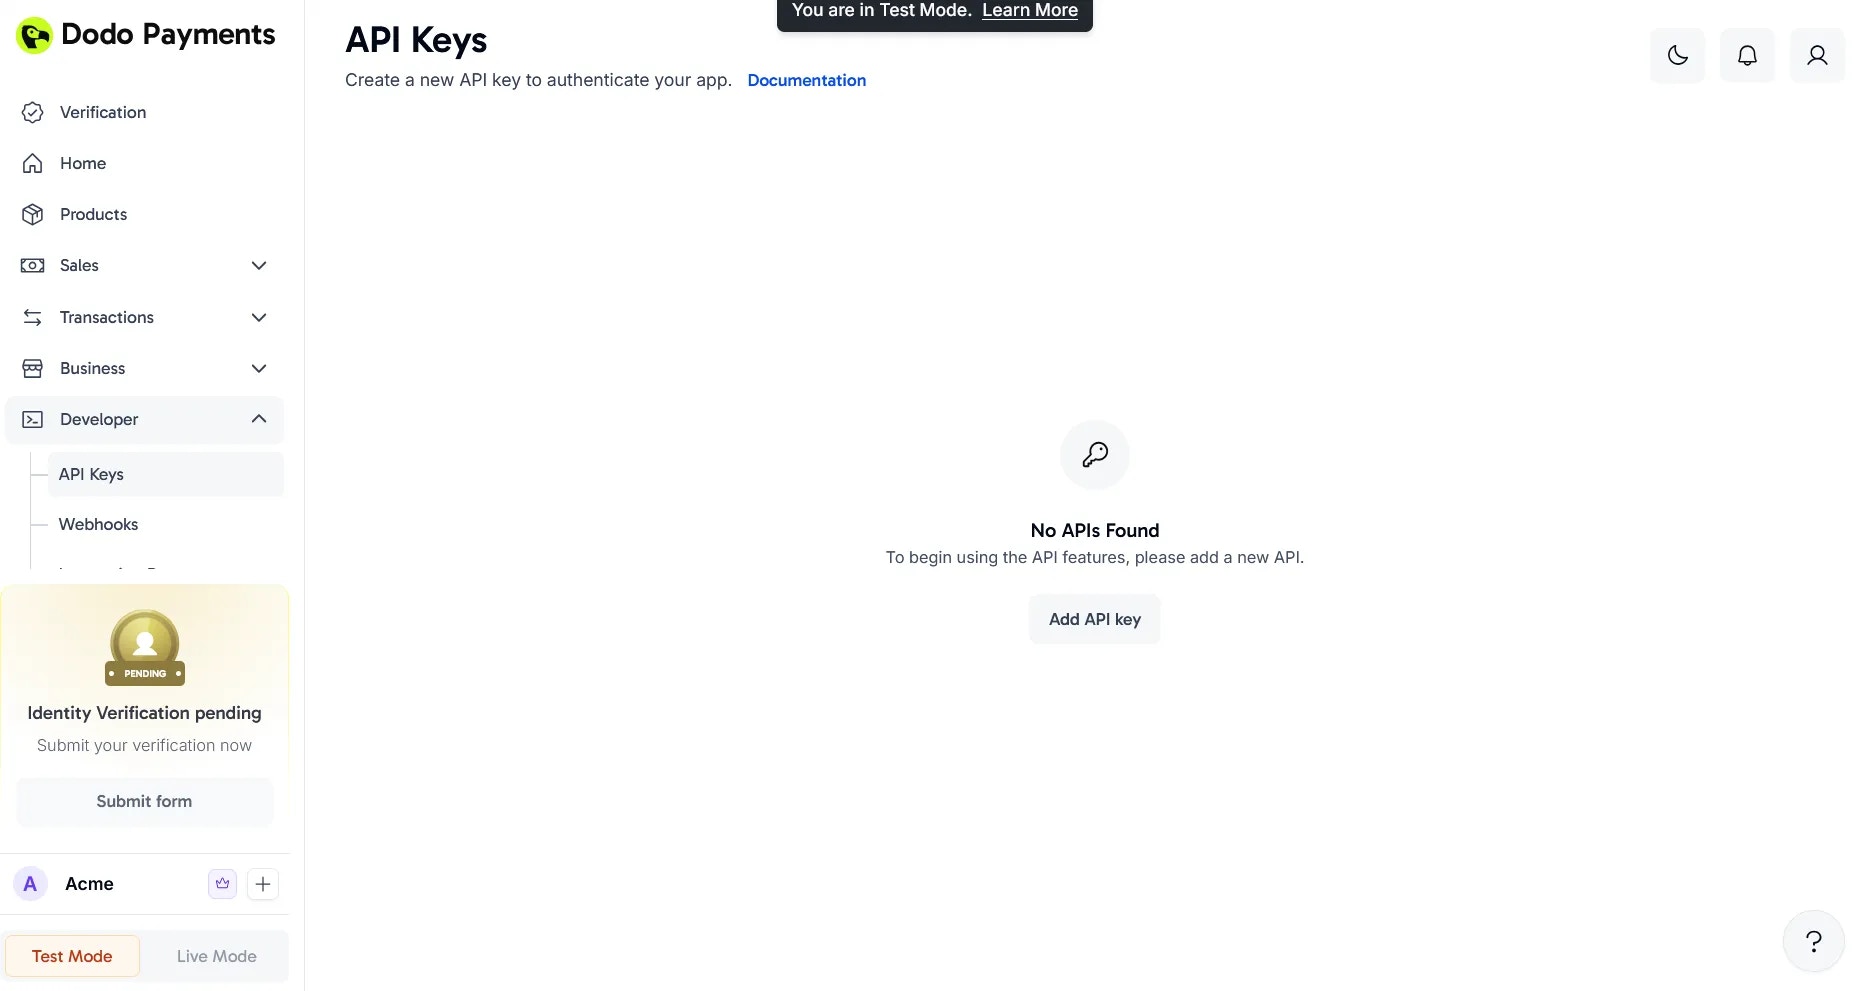 5. APIキーにわかりやすい名前を付けて **Create** をクリックします
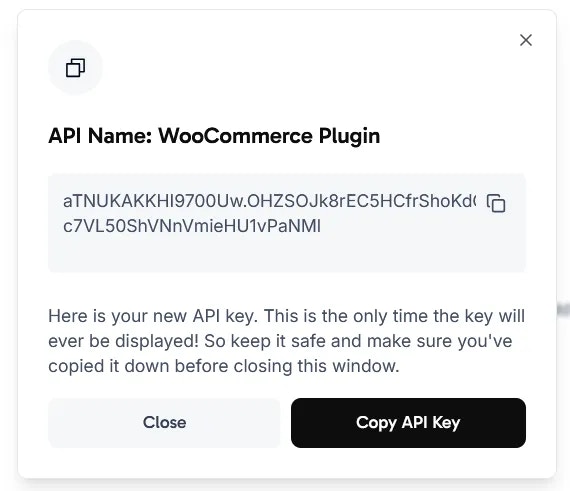
 6. 生成されたAPIキーをコピーし、WooCommerceプラグインの設定にある **Live API Key** フィールドに貼り付けます
 7. 次に、Dodo PaymentsとWooCommerce間で支払いステータスを同期させるためにWebhook Signing Keyを設定します
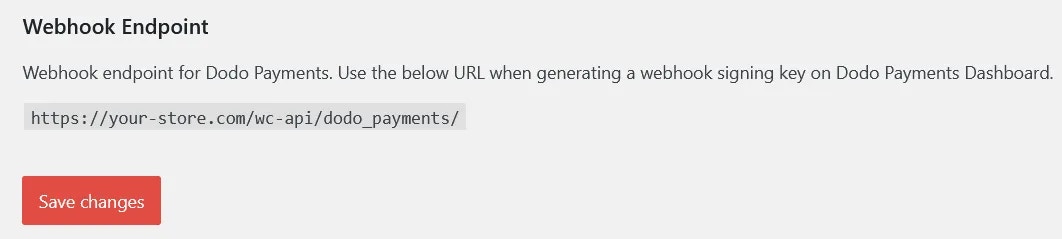
8. プラグイン設定ページの一番下までスクロールし、そこに表示されているWebhook URLをコピーします
7. 次に、Dodo PaymentsとWooCommerce間で支払いステータスを同期させるためにWebhook Signing Keyを設定します
8. プラグイン設定ページの一番下までスクロールし、そこに表示されているWebhook URLをコピーします
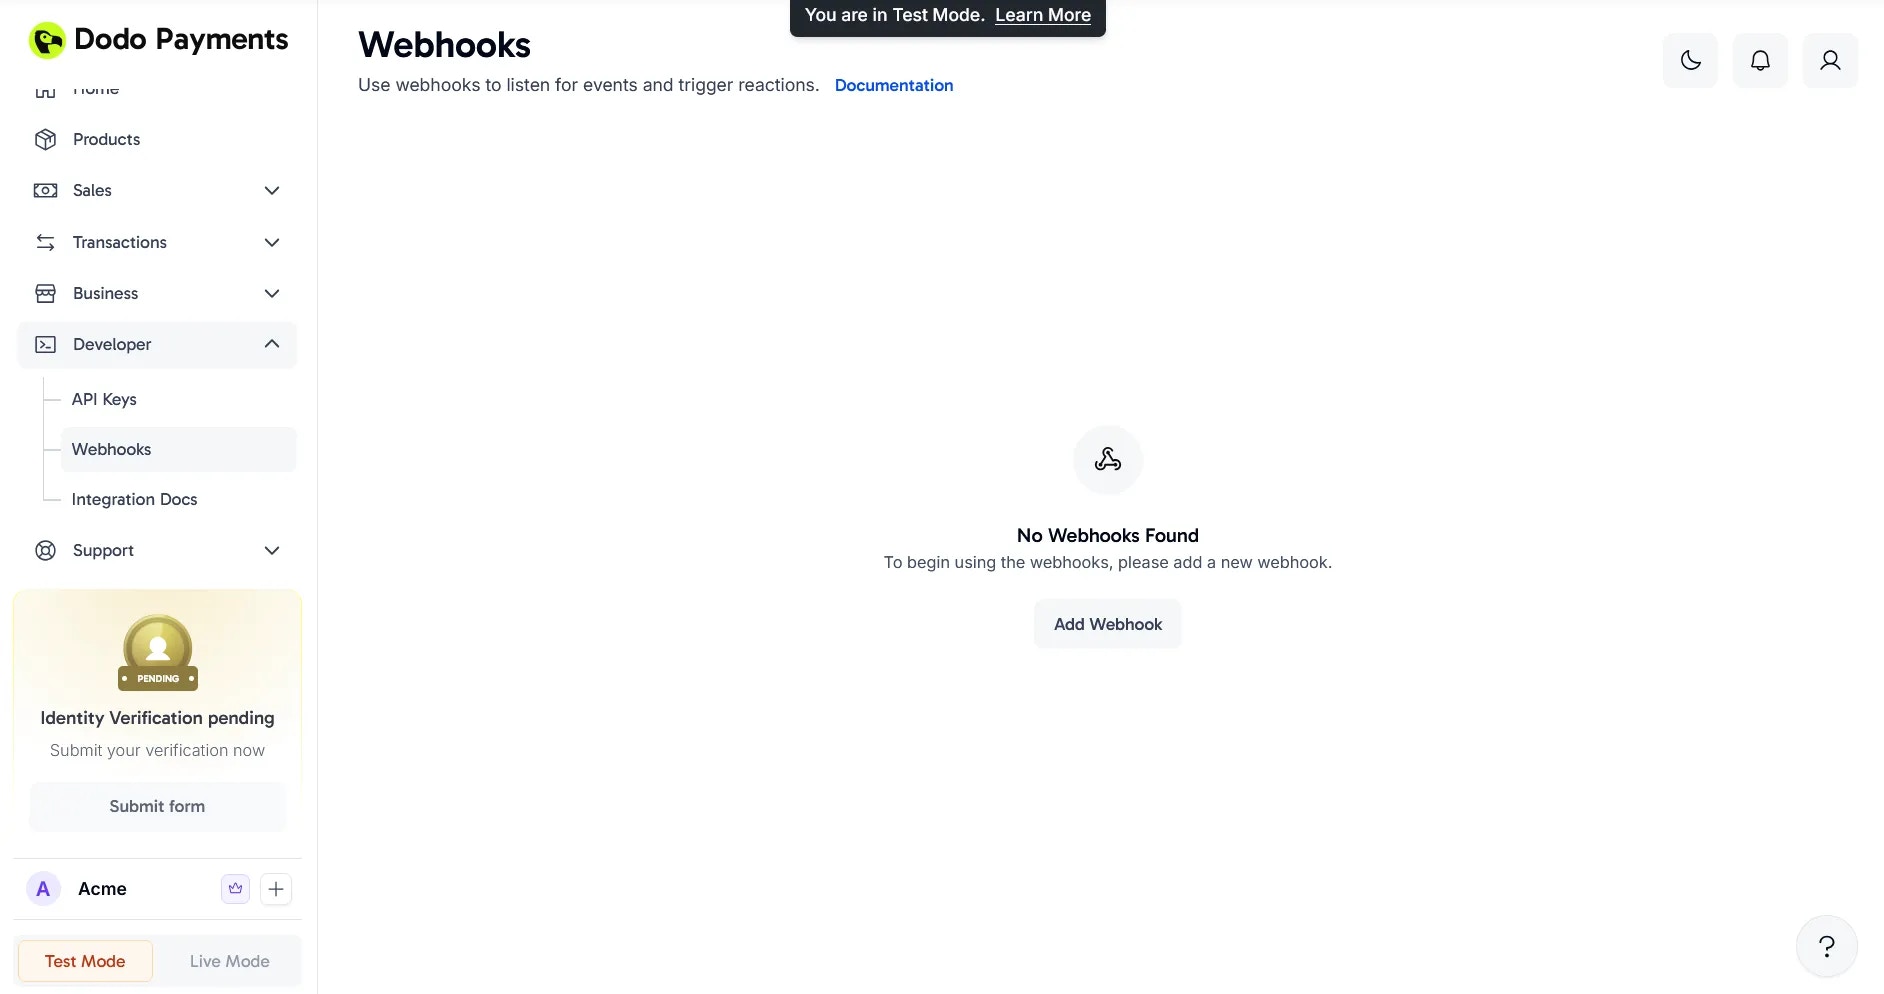
 9. Dodo Paymentsダッシュボードに戻り、**Dodo Payments (Live Mode) > Developer > Webhooks** に移動して **Add Webhook** をクリックします
 10. 手順8でコピーしたURLをダイアログに貼り付けて **Add Webhook** をクリックします
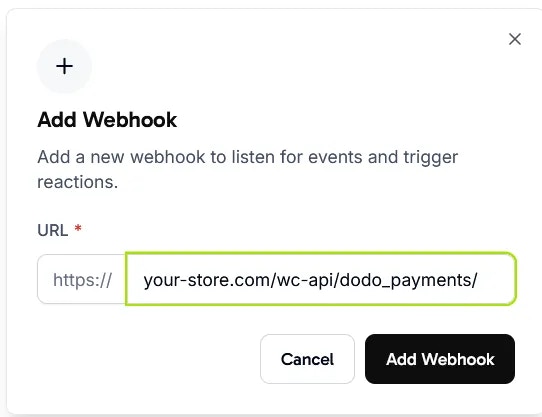 11. Webhookを作成したら、隠されている **Signing Key** の横にある目のアイコンをクリックして表示し、コピーします
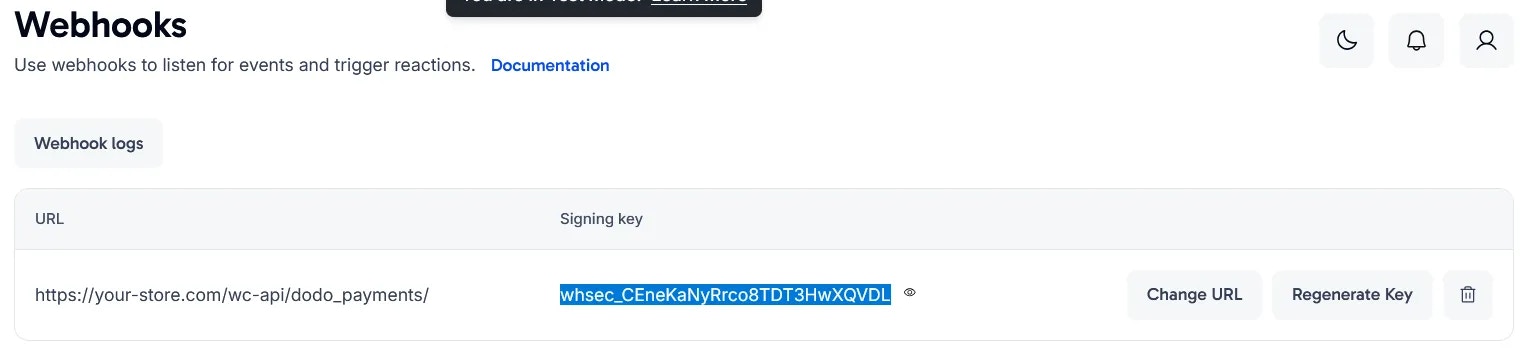 12. Signing Keyをプラグイン設定の **Live Webhook Signing Key** フィールドに貼り付けて変更を保存します
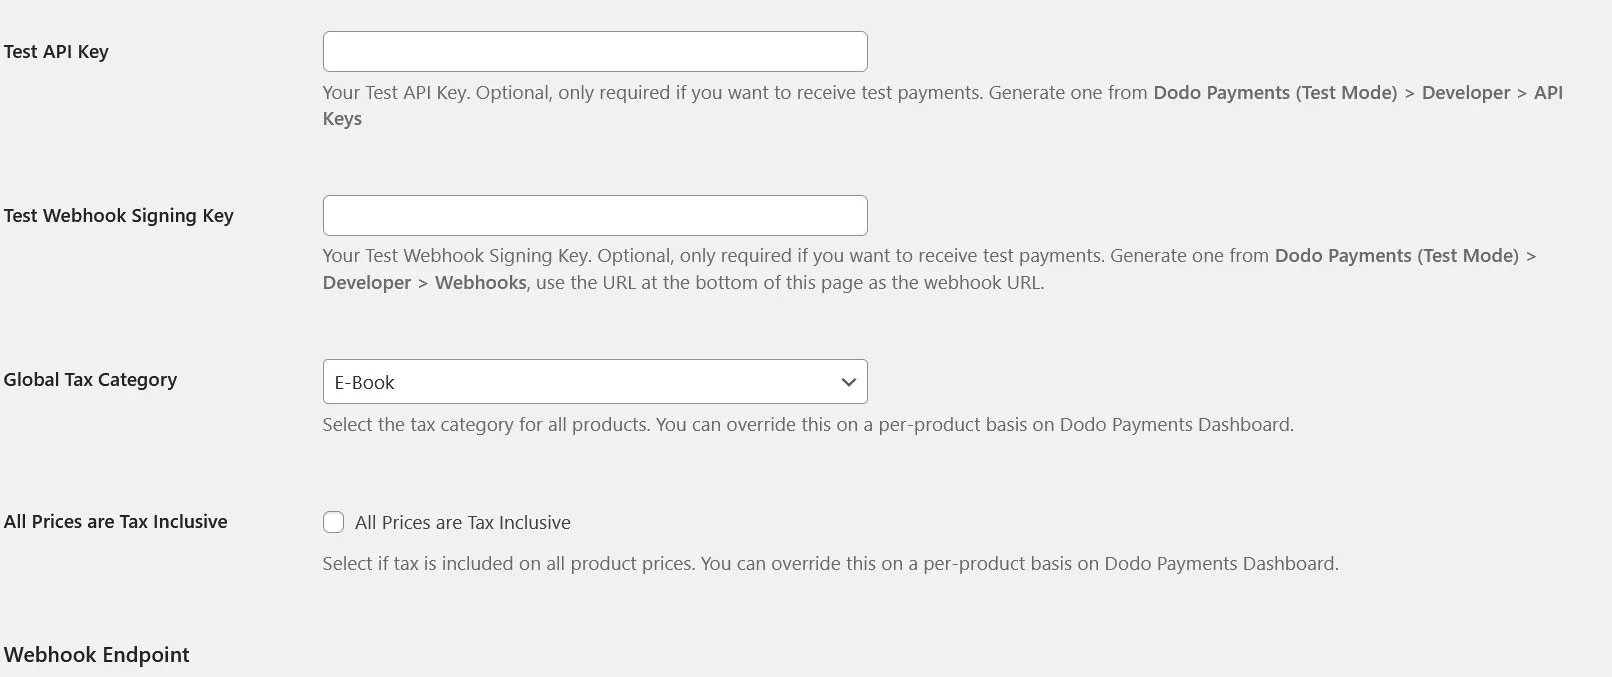
 13. **Global Tax Category** や **All Prices are Tax Inclusive** など残りの設定内容を確認してください。これらのオプションはWooCommerceからDodo Paymentsへの製品同期方法を決定します。**Test API Key** と **Test Webhook Signing Key** はテストモードを使用する場合のみ必要です
 ## すべての準備が整いました!
あなたのWooCommerceストアはDodo Paymentsと統合されました!顧客はチェックアウト時にDodo Paymentsを選択して、すべてのサポートされている支払い方法にアクセスできます。
## すべての準備が整いました!
あなたのWooCommerceストアはDodo Paymentsと統合されました!顧客はチェックアウト時にDodo Paymentsを選択して、すべてのサポートされている支払い方法にアクセスできます。
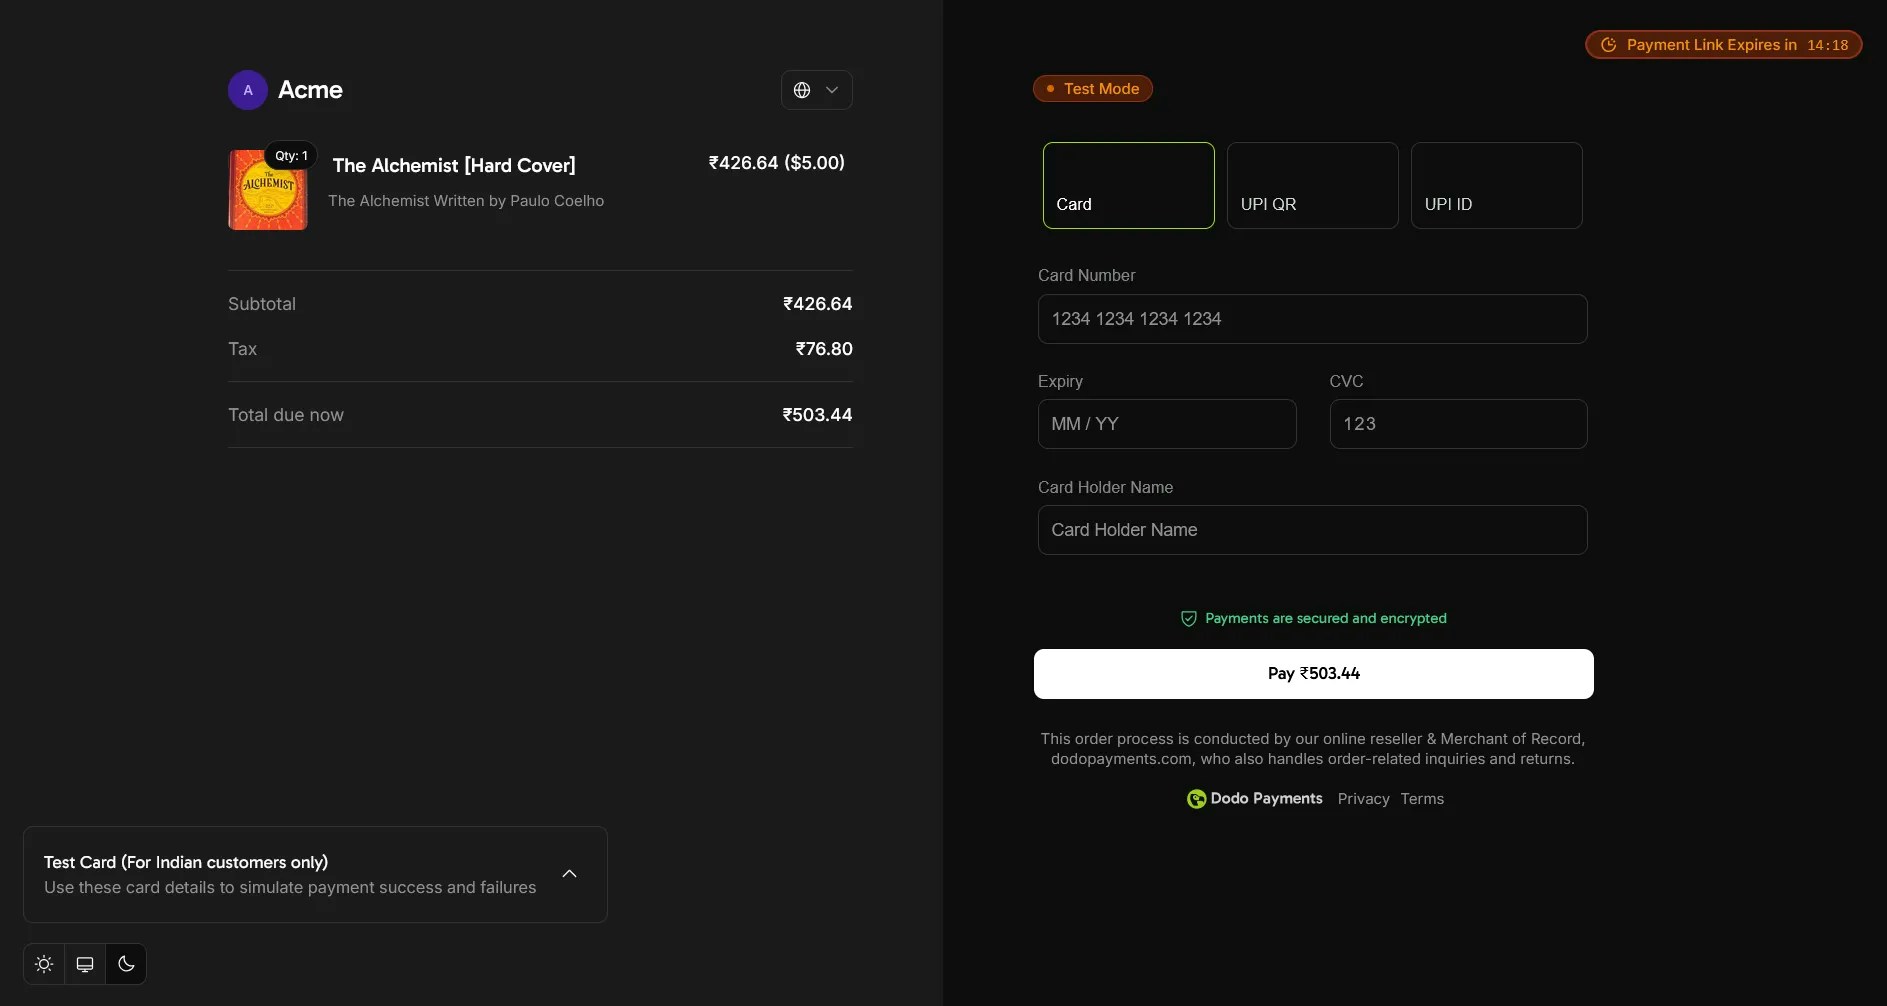
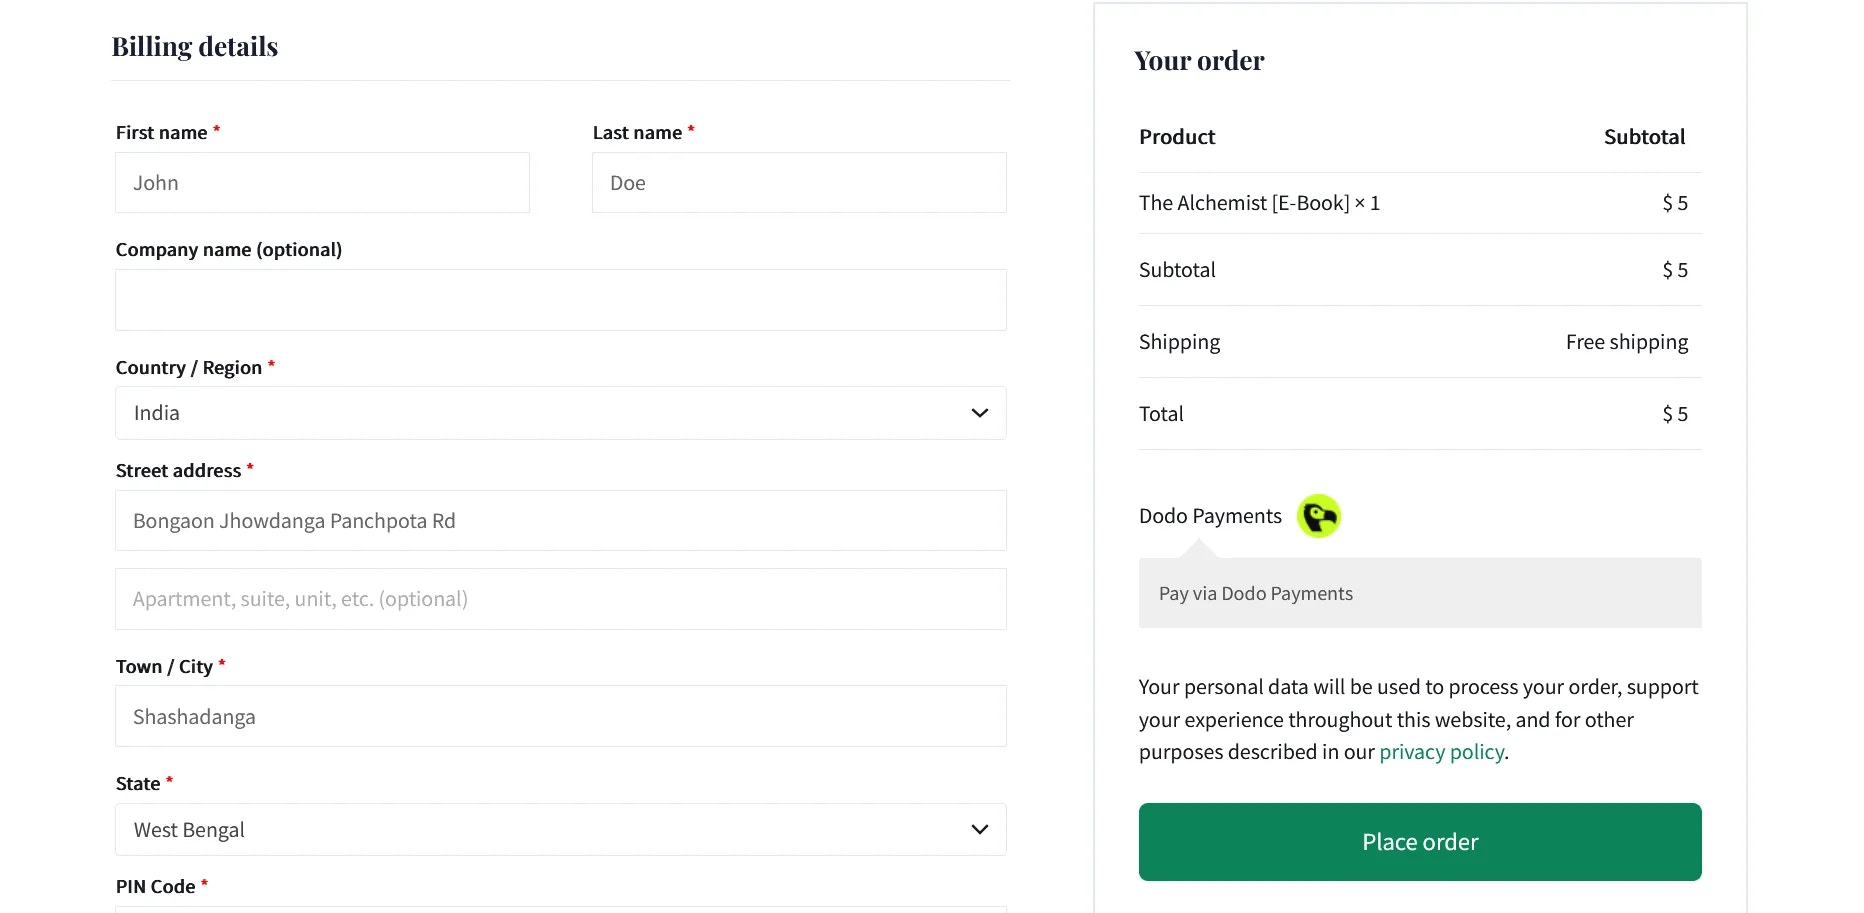 顧客がDodo Paymentsを選択すると、取引を完了するためにDodo Paymentsのチェックアウトページにシームレスにリダイレクトされます。
 ## 主な機能
* **シームレスなチェックアウト体験**: 顧客を安全で最適化されたチェックアウトページにリダイレクト
* **複数の支払い方法**: 様々なローカルおよび国際的な支払いオプションをサポート
* **リアルタイムのステータス更新**: Webhookを介した即時の注文ステータス同期
* **詳細な取引記録**: WooCommerceダッシュボードでの包括的な支払い履歴
* **多通貨サポート**: 複数の通貨での支払いを受け入れ
## トラブルシューティング
### 一般的な問題
1. **支払い処理の失敗**
* APIキーが正しく設定されていることを確認
* Webhook URLが正しく設定されていることを確認
* SSL証明書が有効であることを確認
2. **Webhook同期の問題**
* Webhook署名キーが一致していることを確認
* サーバーログを確認して潜在的なエラーを探す
* サーバーが受信Webhookリクエストを受け取れることを確認
### サポートリソース
追加の支援が必要な場合は:
* [support@dodopayments.com](mailto:support@dodopayments.com)までお問い合わせください
* [包括的なドキュメント](https://docs.dodopayments.com)を参照してください
## メンテナンスのベストプラクティス
1. セキュリティパッチや新機能のためにプラグインを定期的に更新します。
2. 本番取引を処理する前に、サンドボックスモードで全ての支払いフローをテストします。
3. WordPressとWooCommerceを最新バージョンに更新します。
4. 定期的なサイトバックアップを実施します。
5. 取引ログを監視して異常な活動を探します。
6. APIキーを安全に保管し、決して公開しないでください。
## 主な機能
* **シームレスなチェックアウト体験**: 顧客を安全で最適化されたチェックアウトページにリダイレクト
* **複数の支払い方法**: 様々なローカルおよび国際的な支払いオプションをサポート
* **リアルタイムのステータス更新**: Webhookを介した即時の注文ステータス同期
* **詳細な取引記録**: WooCommerceダッシュボードでの包括的な支払い履歴
* **多通貨サポート**: 複数の通貨での支払いを受け入れ
## トラブルシューティング
### 一般的な問題
1. **支払い処理の失敗**
* APIキーが正しく設定されていることを確認
* Webhook URLが正しく設定されていることを確認
* SSL証明書が有効であることを確認
2. **Webhook同期の問題**
* Webhook署名キーが一致していることを確認
* サーバーログを確認して潜在的なエラーを探す
* サーバーが受信Webhookリクエストを受け取れることを確認
### サポートリソース
追加の支援が必要な場合は:
* [support@dodopayments.com](mailto:support@dodopayments.com)までお問い合わせください
* [包括的なドキュメント](https://docs.dodopayments.com)を参照してください
## メンテナンスのベストプラクティス
1. セキュリティパッチや新機能のためにプラグインを定期的に更新します。
2. 本番取引を処理する前に、サンドボックスモードで全ての支払いフローをテストします。
3. WordPressとWooCommerceを最新バージョンに更新します。
4. 定期的なサイトバックアップを実施します。
5. 取引ログを監視して異常な活動を探します。
6. APIキーを安全に保管し、決して公開しないでください。