> ## Documentation Index
> Fetch the complete documentation index at: https://docs.dodopayments.com/llms.txt
> Use this file to discover all available pages before exploring further.
# WooCommerce Plugin
> Integrate Dodo Payments seamlessly with your WooCommerce store to accept global payments through UPI, cards, and more.
## Introduction
The Dodo Payments WooCommerce plugin provides a seamless integration with your store, enabling you to accept payments through multiple methods including UPI, cards, net banking, and digital wallets. This comprehensive guide will walk you through the installation and configuration process.
## Step-by-Step Installation Guide
1. Download the latest zip of the WooCommerce payment plugin.
Get the latest version of our WooCommerce plugin
Alternatively, you can install directly from the WordPress plugin directory:
Install Dodo Payments for WooCommerce from WordPress.org
2. Log in to your WordPress website as an administrator (we assume you already have WooCommerce set up)
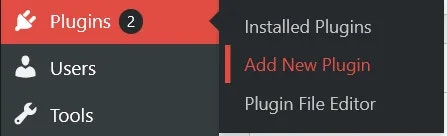
3. Navigate to **Plugins → Add New Plugin**
 4. Click on the **Upload Plugin** button and a file selection dialog will appear

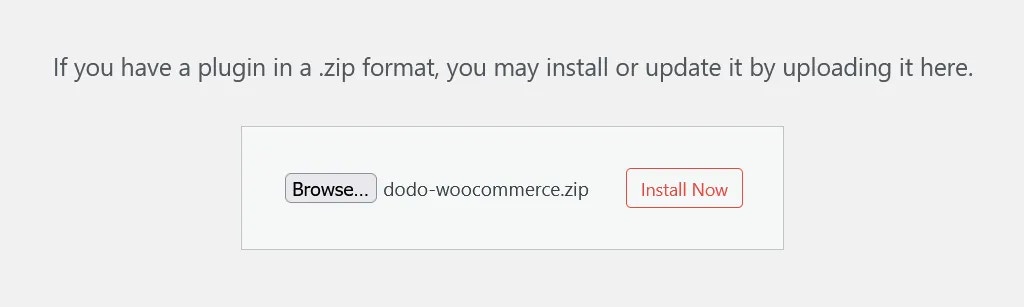
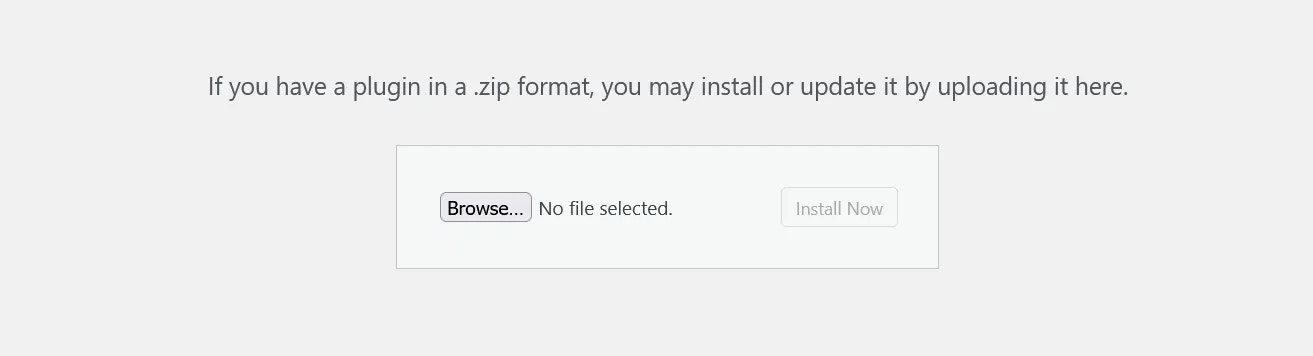 5. Click **Browse…** and select the zip file you downloaded
6. Click the **Install Now** button to begin the installation process
5. Click **Browse…** and select the zip file you downloaded
6. Click the **Install Now** button to begin the installation process
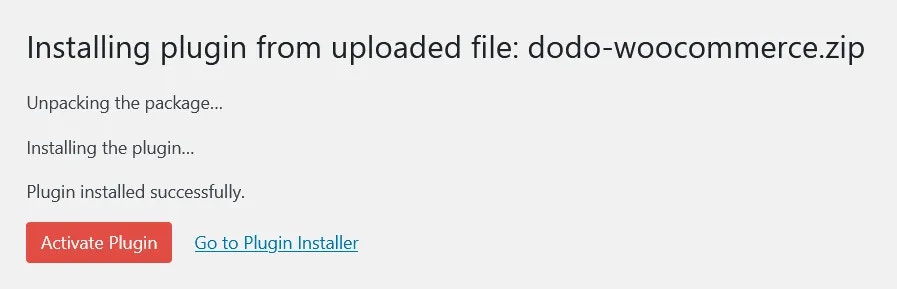
 7. After installation completes, click **Activate Plugin** or activate it from the **Installed Plugins** section
 8. The plugin is now installed, but configuration is still required. Continue to the setup guide below.
## Configuration Guide
### Setting Up API Keys and Webhooks
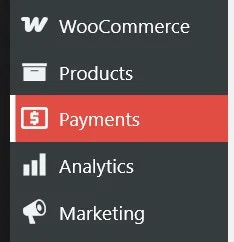
1. Navigate to **WooCommerce → Settings → Payments** or click the **Payments** button in the left sidebar below the WooCommerce menu item
8. The plugin is now installed, but configuration is still required. Continue to the setup guide below.
## Configuration Guide
### Setting Up API Keys and Webhooks
1. Navigate to **WooCommerce → Settings → Payments** or click the **Payments** button in the left sidebar below the WooCommerce menu item
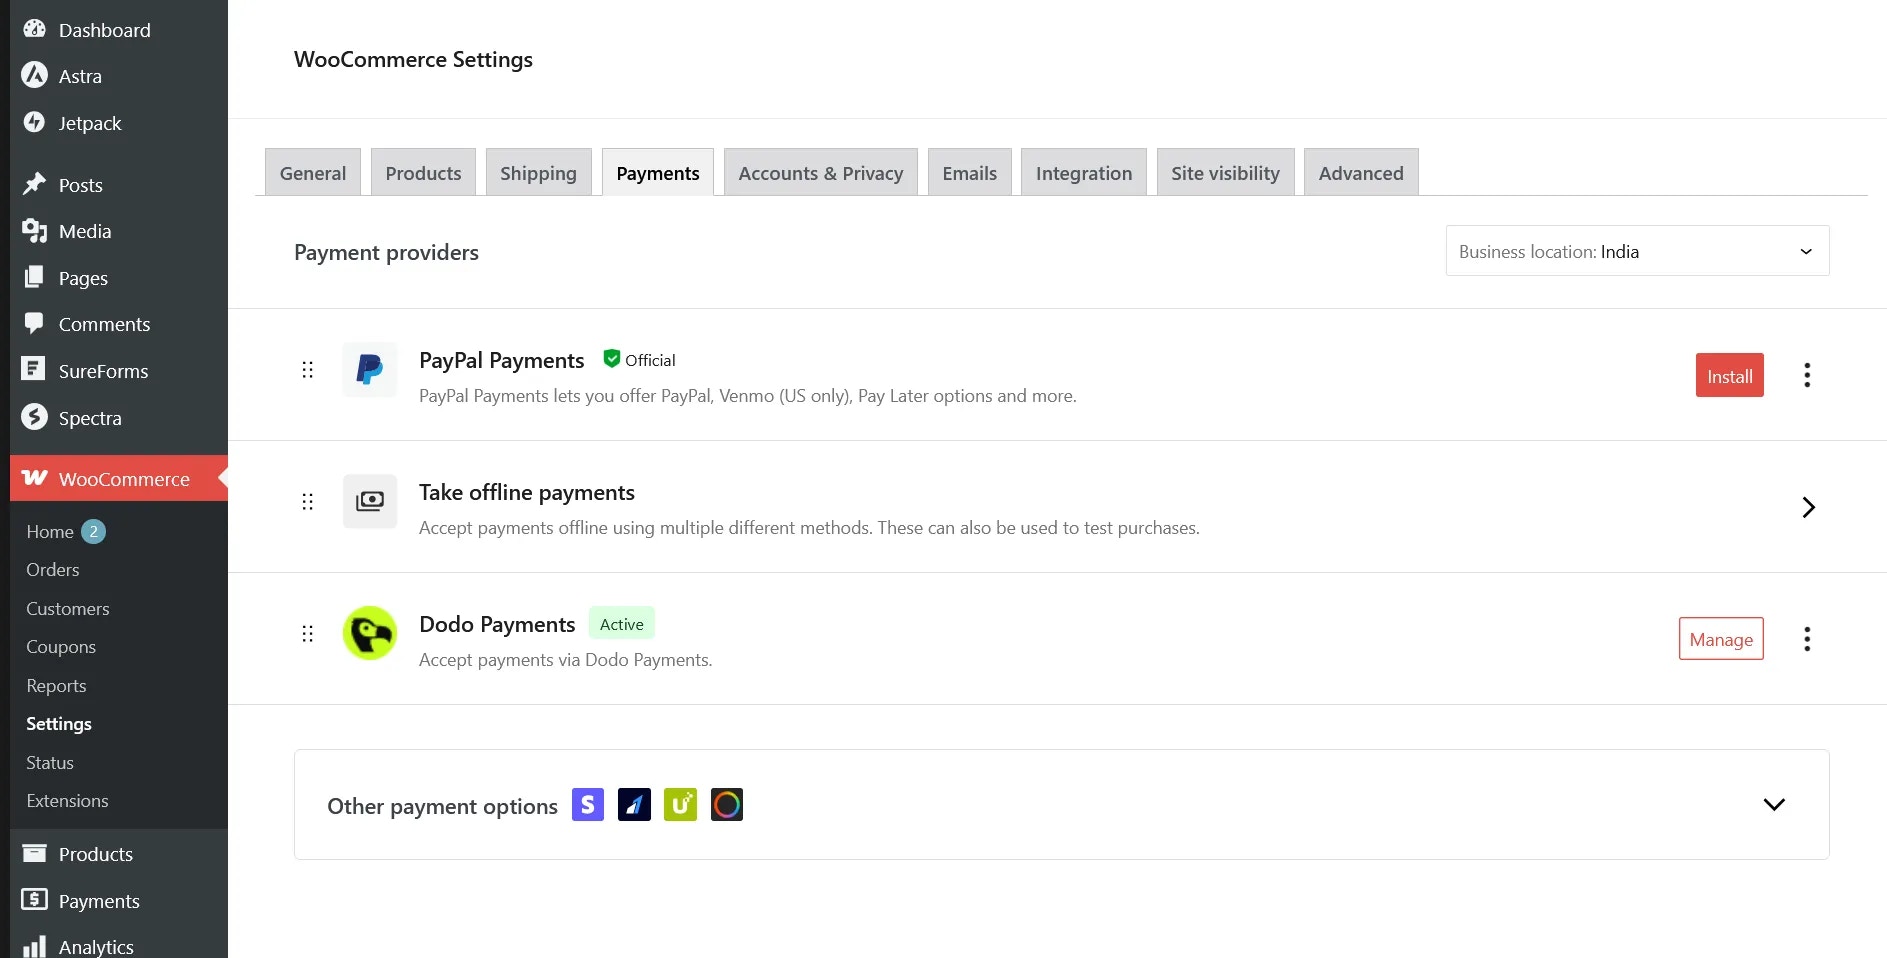
 2. Enable the **Dodo Payments** payment provider if not already enabled, then click **Manage** to configure the plugin
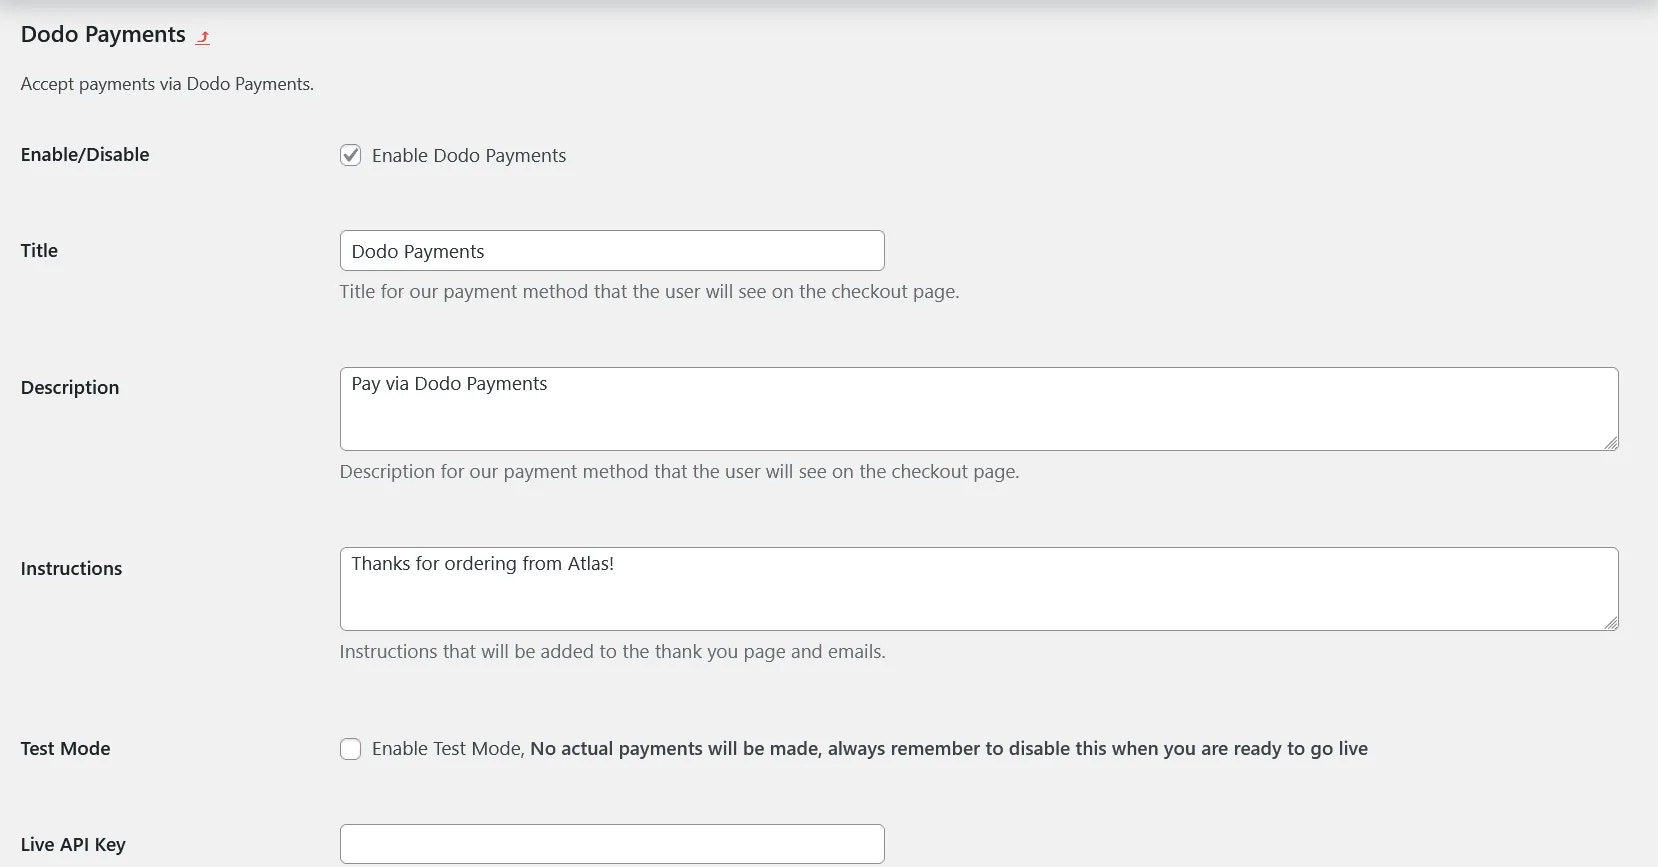
3. You'll see various configuration options, each with helpful explanatory text. Begin by setting up your Live API Key
2. Enable the **Dodo Payments** payment provider if not already enabled, then click **Manage** to configure the plugin
3. You'll see various configuration options, each with helpful explanatory text. Begin by setting up your Live API Key
 4. Log in to your Dodo Payments dashboard in **Live Mode**, then navigate to **Dodo Payments (Live Mode) > Developer > API Keys** or visit [this direct link](https://app.dodopayments.com/developer/api-keys) and click **Add API Key**
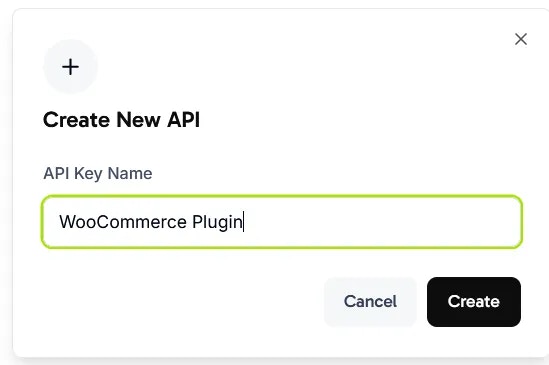
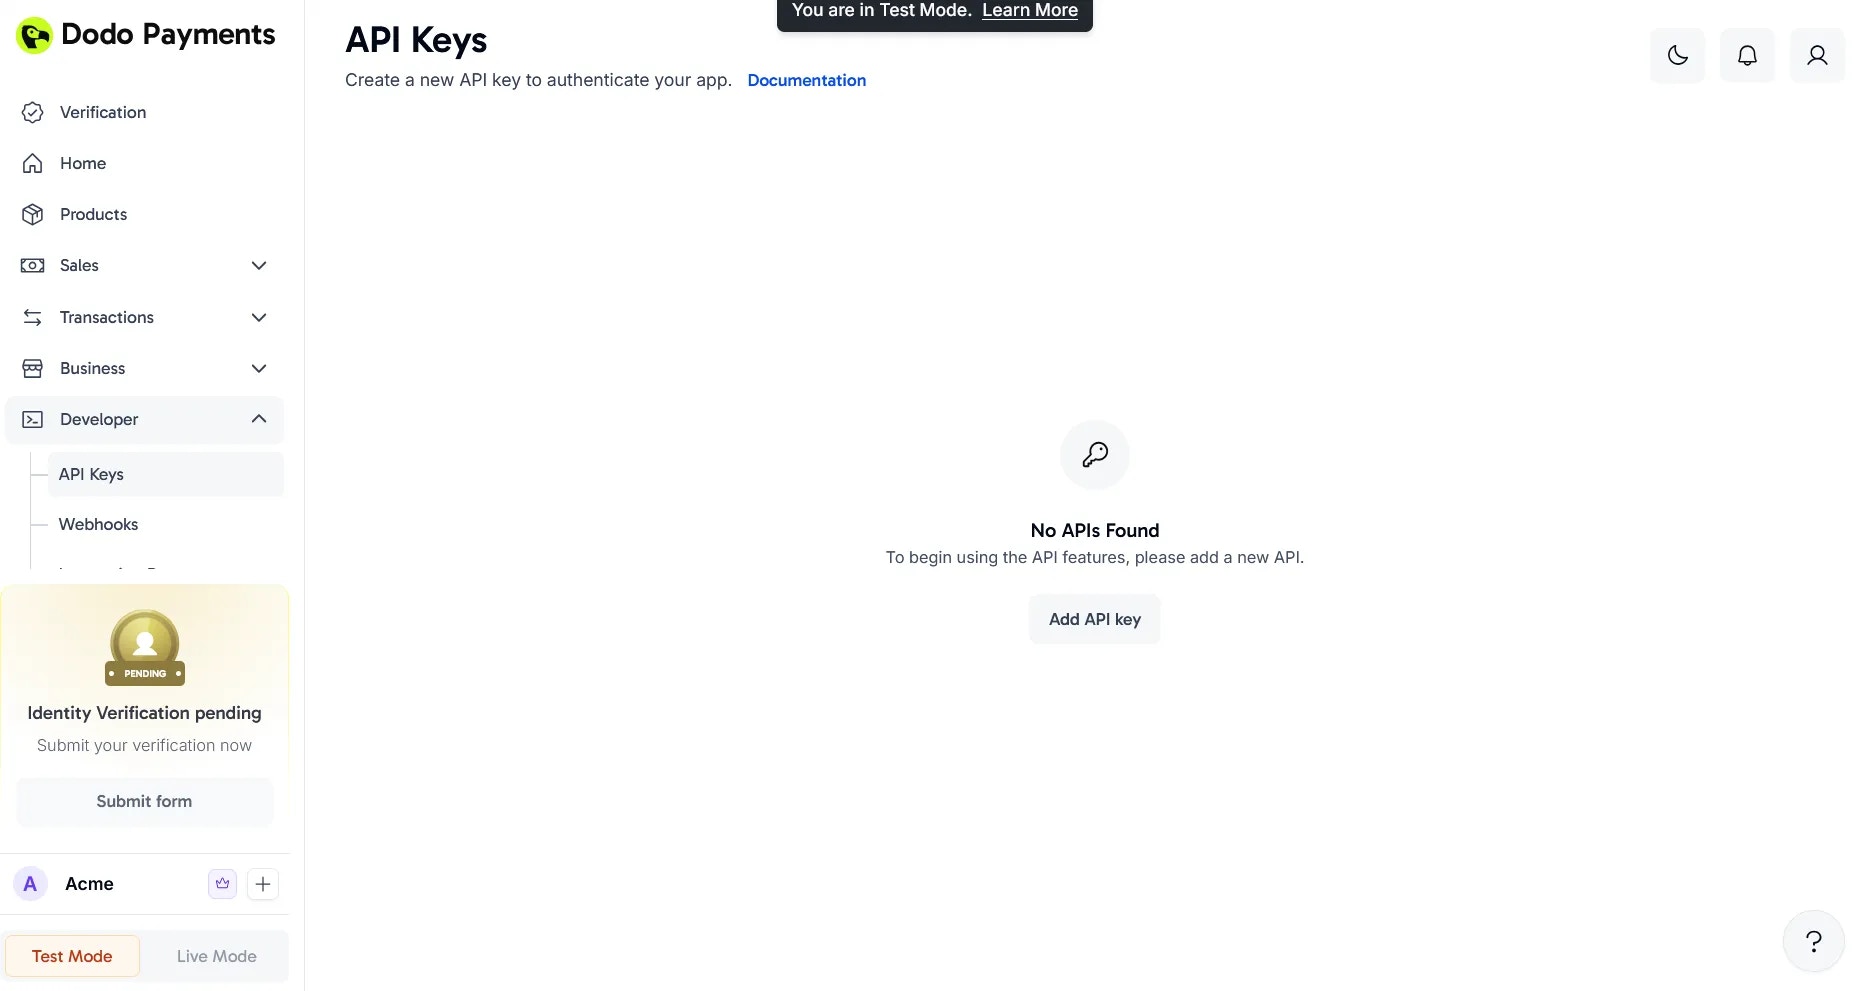 5. Give your API Key a descriptive name and click **Create**
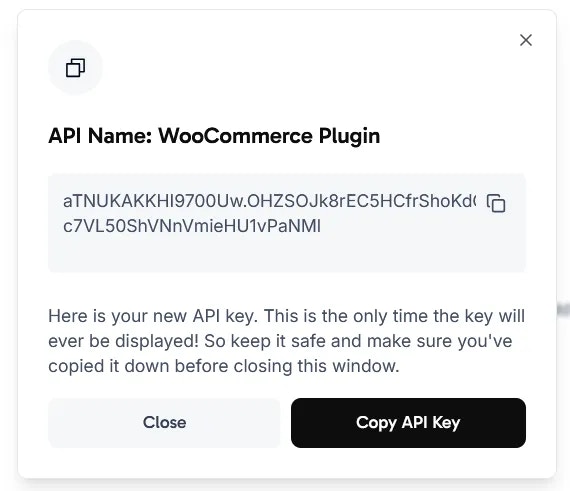
 6. Copy the generated API Key and paste it into the **Live API Key** field in your WooCommerce plugin settings
 7. Next, set up the Webhook Signing Key to enable payment status synchronization between Dodo Payments and WooCommerce
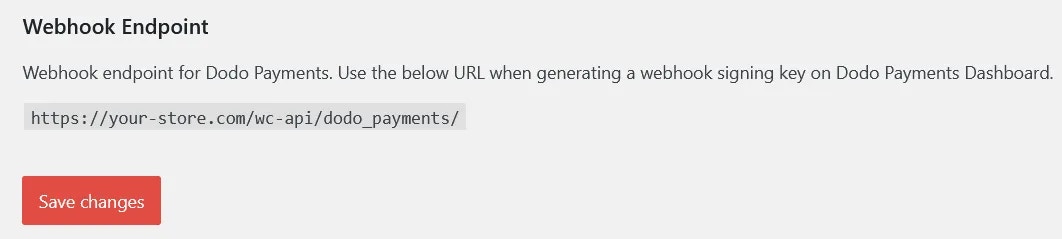
8. Scroll to the bottom of the plugin settings page and copy the webhook URL displayed there
7. Next, set up the Webhook Signing Key to enable payment status synchronization between Dodo Payments and WooCommerce
8. Scroll to the bottom of the plugin settings page and copy the webhook URL displayed there
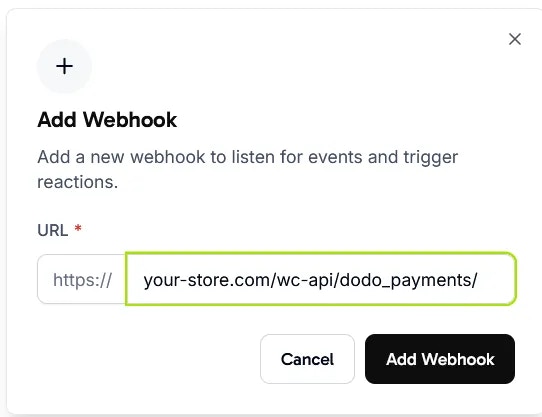
 9. Return to your Dodo Payments dashboard and navigate to **Dodo Payments (Live Mode) > Developer > Webhooks** and click **Add Webhook**
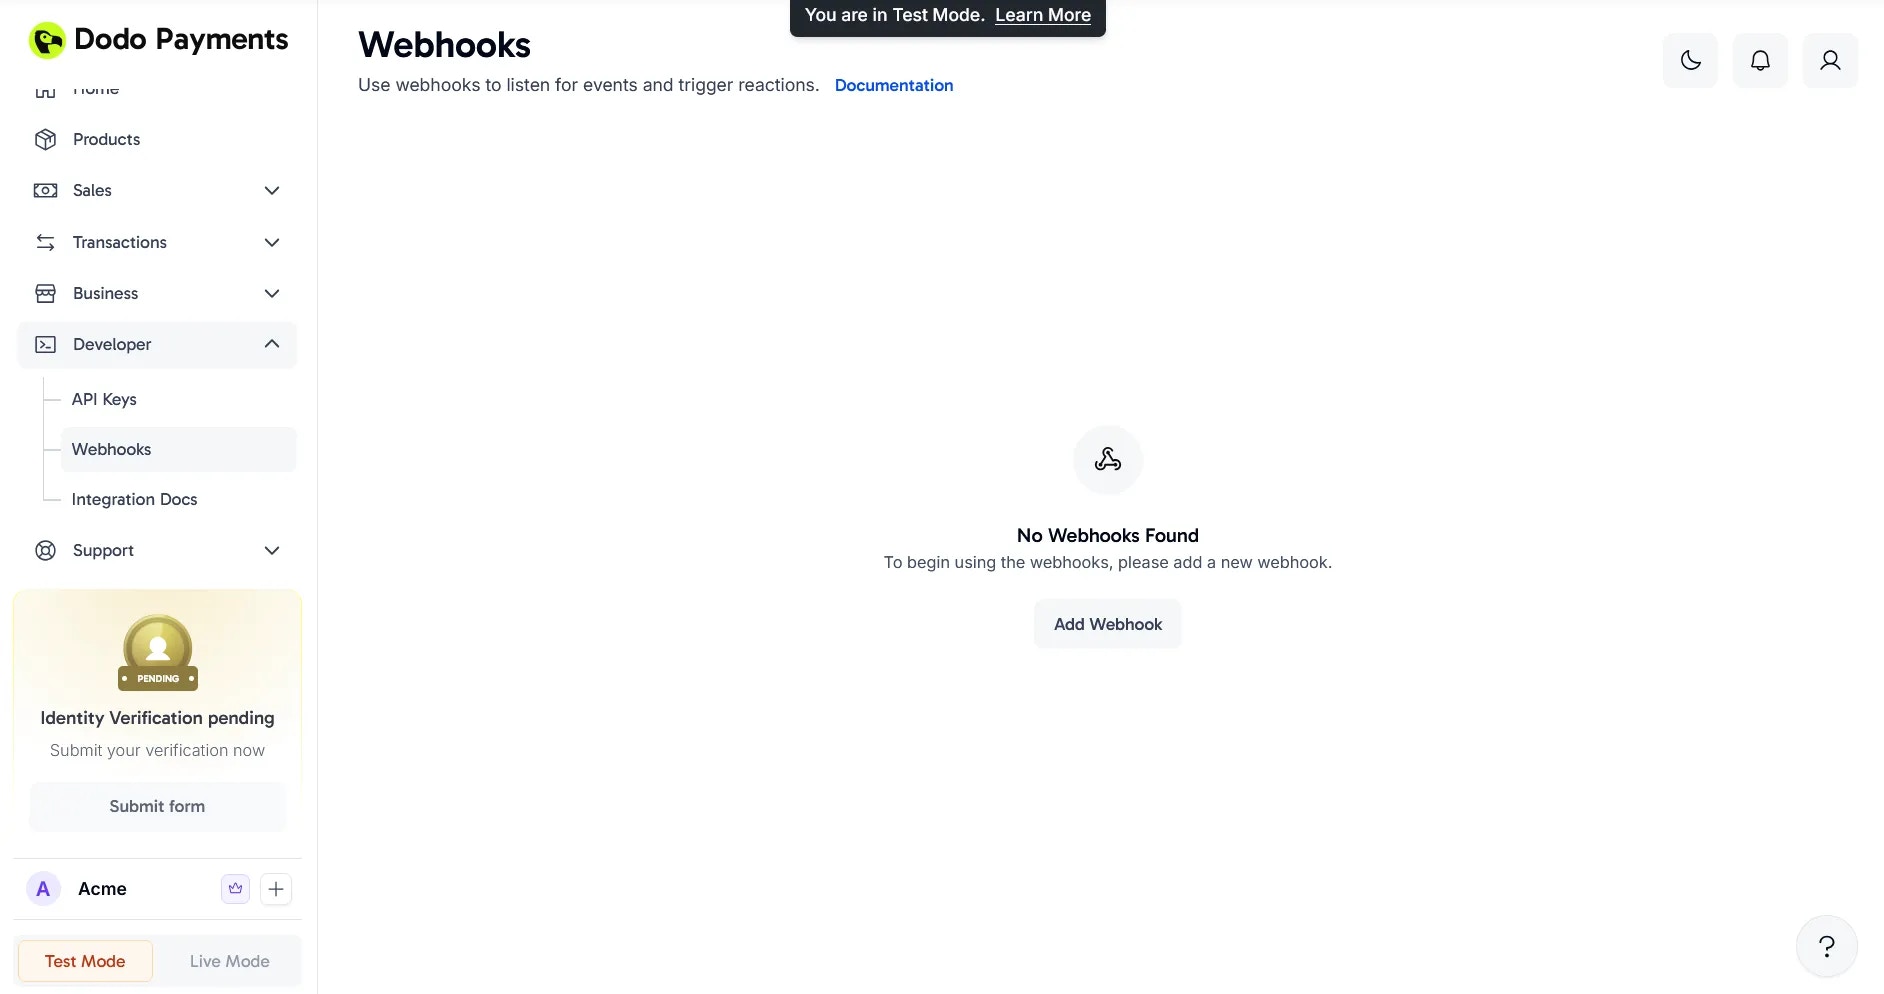 10. Paste the URL you copied in step 8 into the dialog and click **Add Webhook**
 11. After creating the webhook, click the eye icon next to the redacted **Signing Key** to reveal and copy it
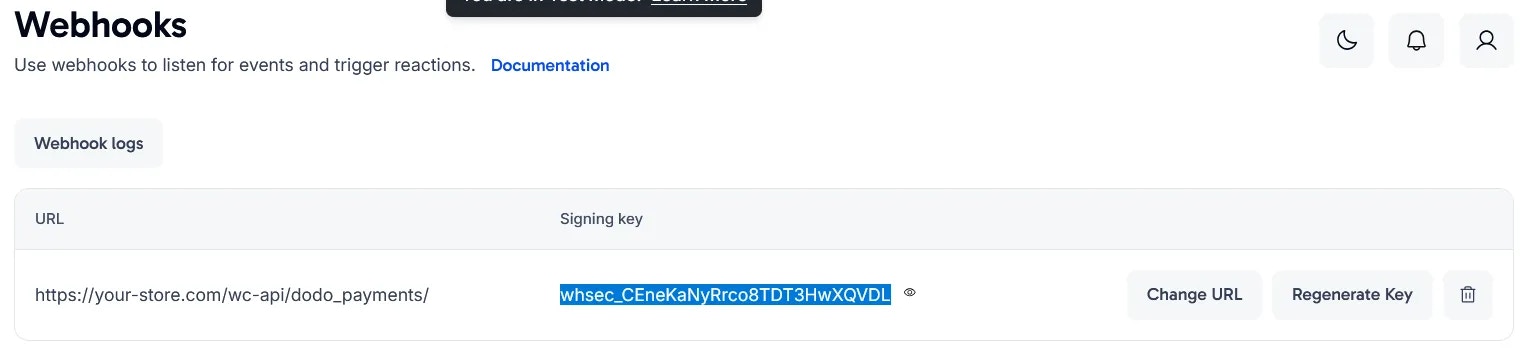 12. Paste the Signing Key into the **Live Webhook Signing Key** field in your plugin settings and save the changes
 13. Review the remaining settings such as **Global Tax Category** and **All Prices are Tax Inclusive**, as these options determine how products sync from WooCommerce to Dodo Payments. Note that **Test API Key** and **Test Webhook Signing Key** are only needed if you plan to use Test Mode
 ## You're All Set!
Your WooCommerce store is now integrated with Dodo Payments! Customers can select Dodo Payments at checkout to access all supported payment methods.
## You're All Set!
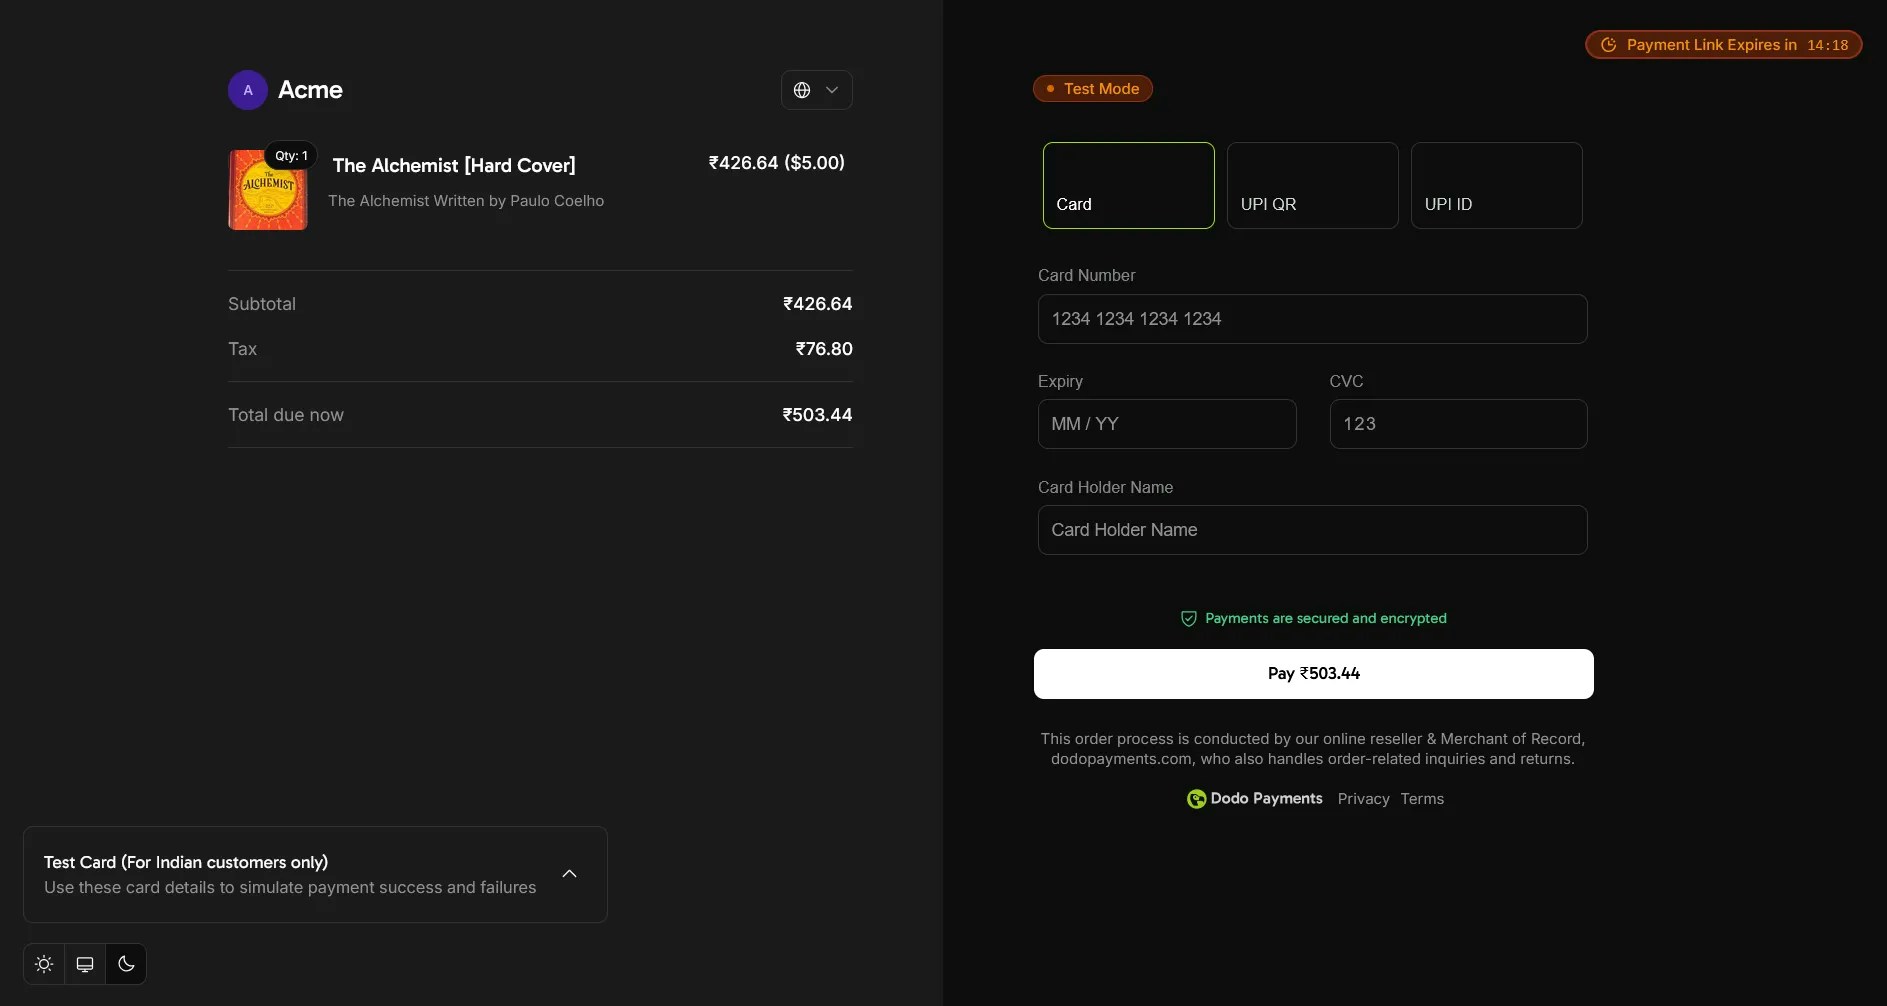
Your WooCommerce store is now integrated with Dodo Payments! Customers can select Dodo Payments at checkout to access all supported payment methods.
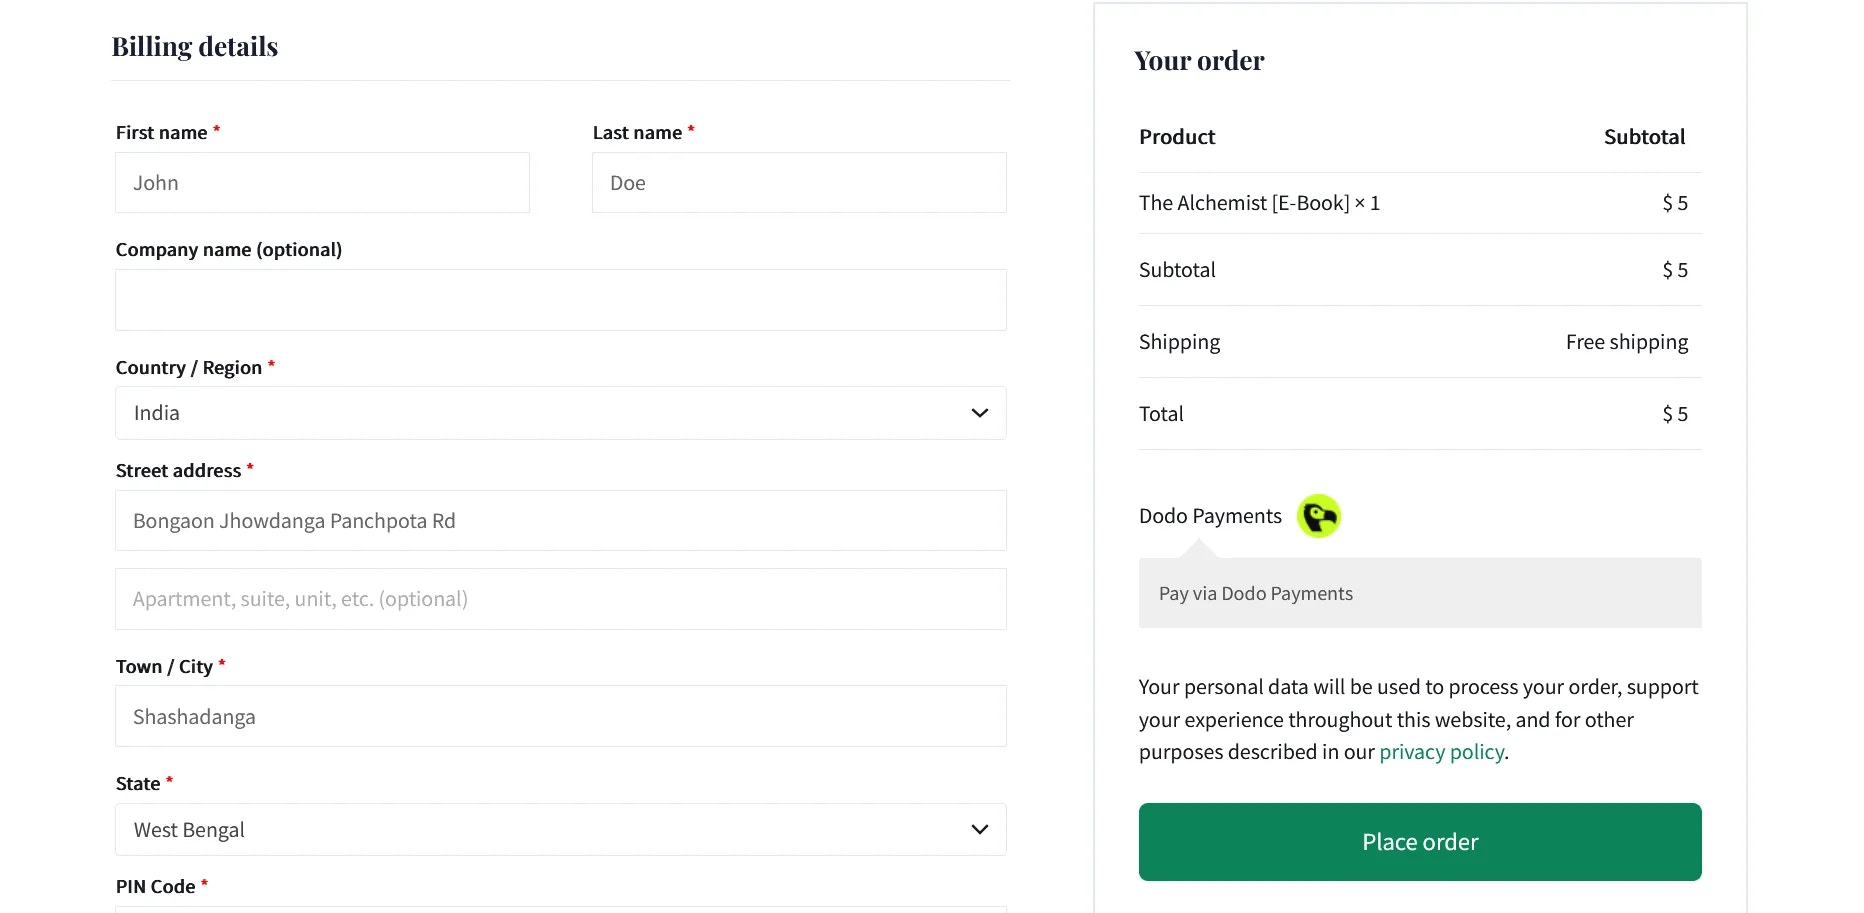 When customers choose Dodo Payments, they'll be seamlessly redirected to the Dodo Payments checkout page to complete their transaction.
 ## Key Features
* **Seamless Checkout Experience**: Redirect customers to a secure, optimized checkout page
* **Multiple Payment Methods**: Support for various local and international payment options
* **Real-time Status Updates**: Instant order status synchronization via webhooks
* **Detailed Transaction Records**: Comprehensive payment history in your WooCommerce dashboard
* **Multi-currency Support**: Accept payments in multiple currencies
## Troubleshooting
### Common Issues
1. **Payment Processing Failures**
* Verify API keys are correctly configured
* Ensure webhook URL is properly set up
* Check that your SSL certificate is valid
2. **Webhook Synchronization Problems**
* Confirm webhook signing key matches
* Review server logs for potential errors
* Verify your server can receive incoming webhook requests
### Support Resources
For additional assistance:
* Contact us at [support@dodopayments.com](mailto:support@dodopayments.com)
* Refer to our [comprehensive documentation](https://docs.dodopayments.com)
## Maintenance Best Practices
1. Regularly update the plugin for security patches and new features
2. Test all payment flows in sandbox mode before processing live transactions
3. Keep WordPress and WooCommerce updated to the latest versions
4. Implement regular site backups
5. Monitor transaction logs for any unusual activity
6. Store API keys securely and never share them publicly
## Key Features
* **Seamless Checkout Experience**: Redirect customers to a secure, optimized checkout page
* **Multiple Payment Methods**: Support for various local and international payment options
* **Real-time Status Updates**: Instant order status synchronization via webhooks
* **Detailed Transaction Records**: Comprehensive payment history in your WooCommerce dashboard
* **Multi-currency Support**: Accept payments in multiple currencies
## Troubleshooting
### Common Issues
1. **Payment Processing Failures**
* Verify API keys are correctly configured
* Ensure webhook URL is properly set up
* Check that your SSL certificate is valid
2. **Webhook Synchronization Problems**
* Confirm webhook signing key matches
* Review server logs for potential errors
* Verify your server can receive incoming webhook requests
### Support Resources
For additional assistance:
* Contact us at [support@dodopayments.com](mailto:support@dodopayments.com)
* Refer to our [comprehensive documentation](https://docs.dodopayments.com)
## Maintenance Best Practices
1. Regularly update the plugin for security patches and new features
2. Test all payment flows in sandbox mode before processing live transactions
3. Keep WordPress and WooCommerce updated to the latest versions
4. Implement regular site backups
5. Monitor transaction logs for any unusual activity
6. Store API keys securely and never share them publicly