> ## Documentation Index
> Fetch the complete documentation index at: https://docs.dodopayments.com/llms.txt
> Use this file to discover all available pages before exploring further.
# Team Members
> The Team feature enables you to add teammates to your Dodo Payments dashboard, granting them access based on customizable permissions. You can allow full modification rights or restrict access to view-only mode, ensuring secure and flexible collaboration.
 ## How to add a teammate?
 1. Go to Settings → Team.
2. Click on +**invite** button on the top right corner.
1. Go to Settings → Team.
2. Click on +**invite** button on the top right corner.
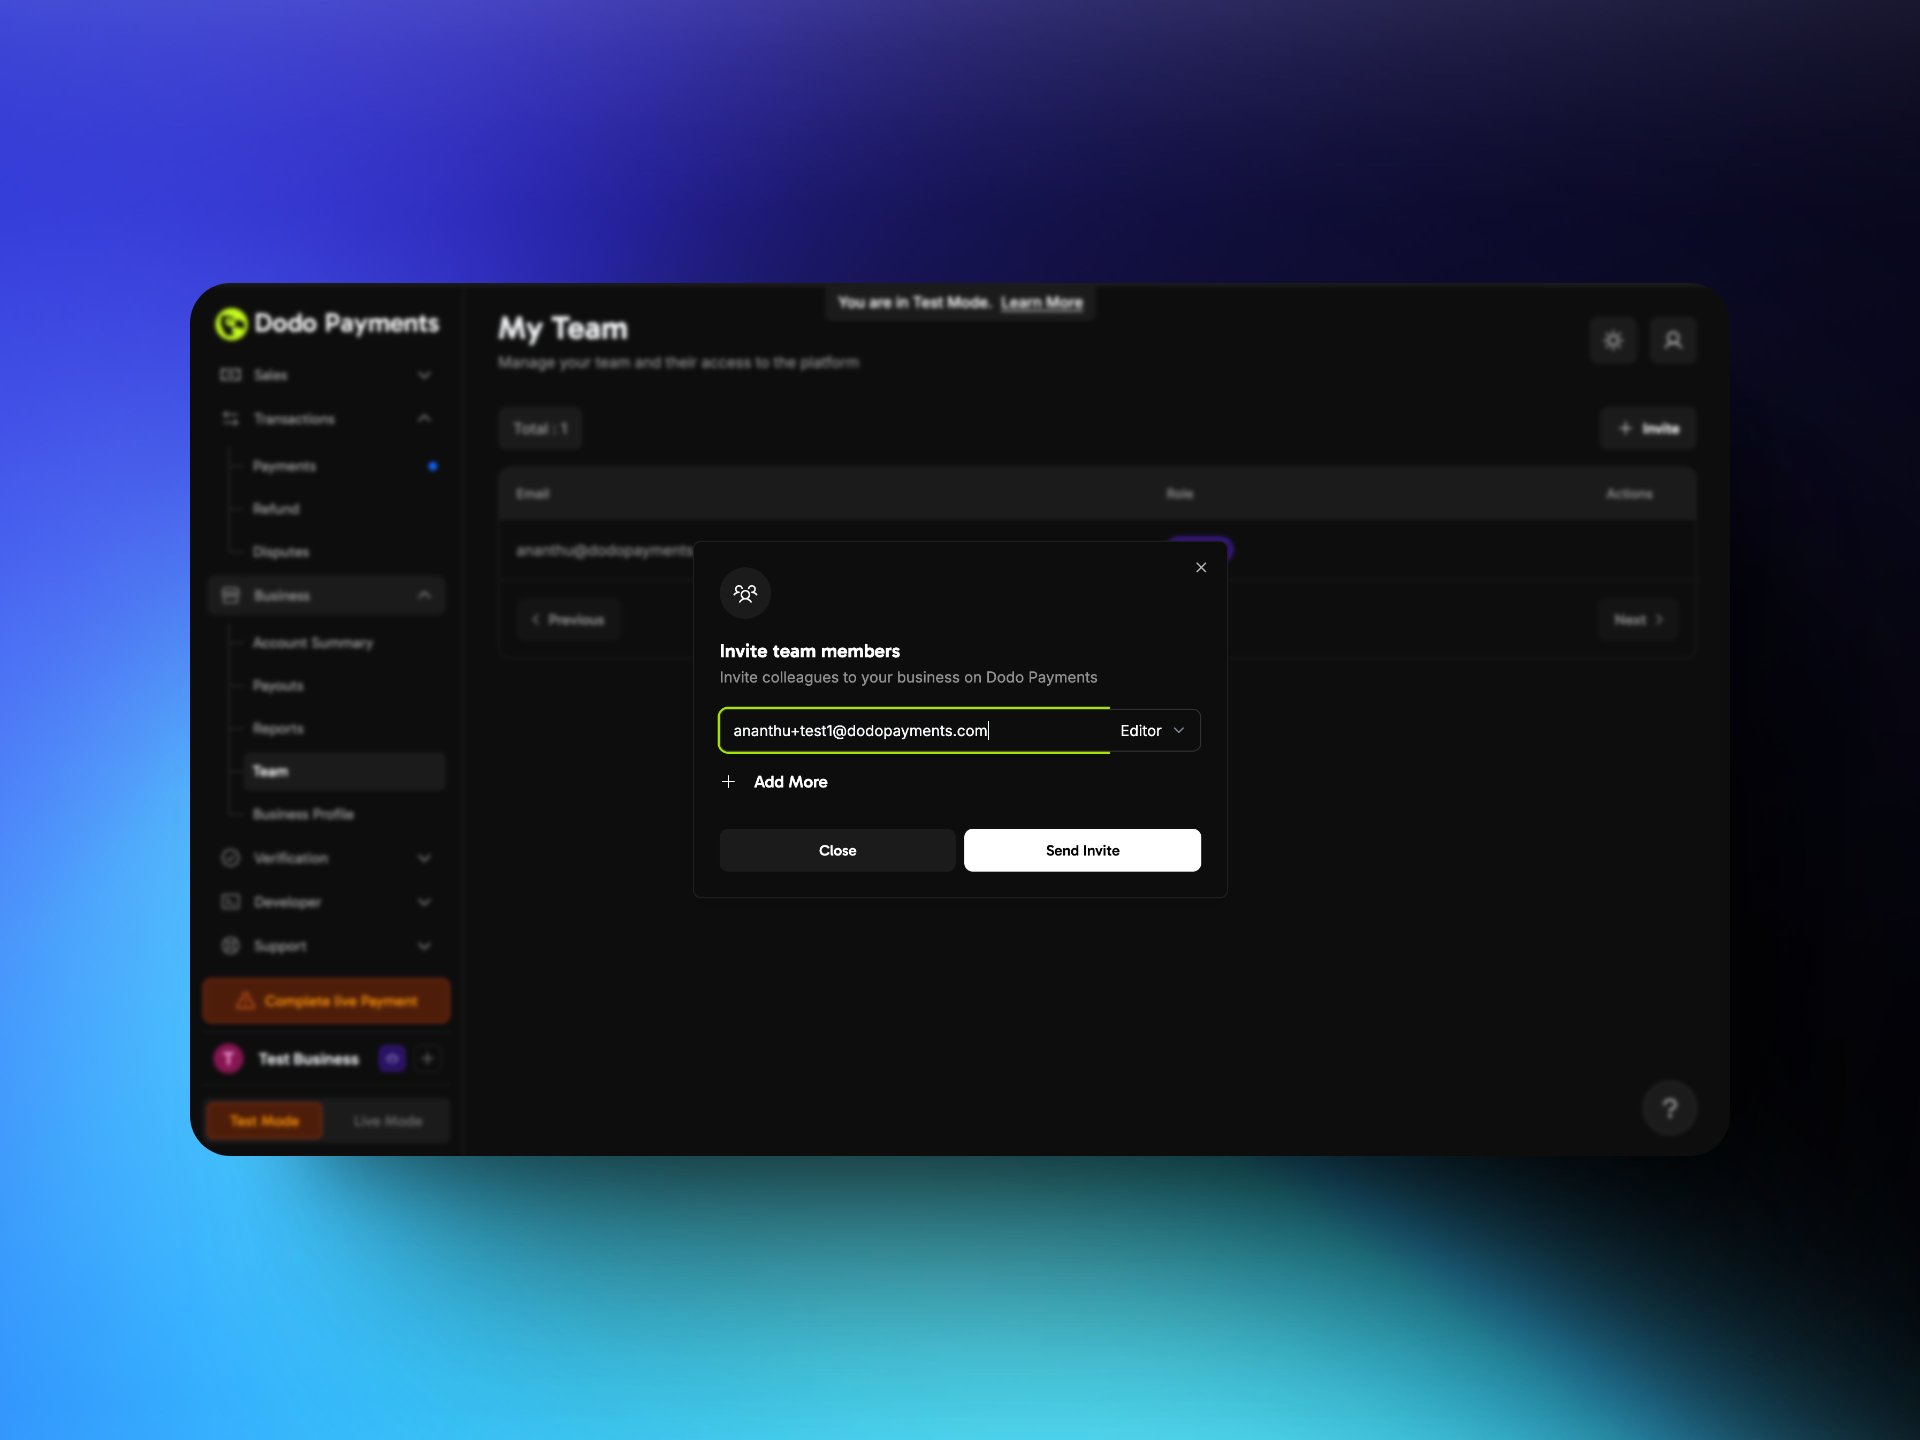 3. Provide the teammates email and assign a role to them.
4. Click on **Send Invite**.
## How can a teammate access the dashboard?
3. Provide the teammates email and assign a role to them.
4. Click on **Send Invite**.
## How can a teammate access the dashboard?
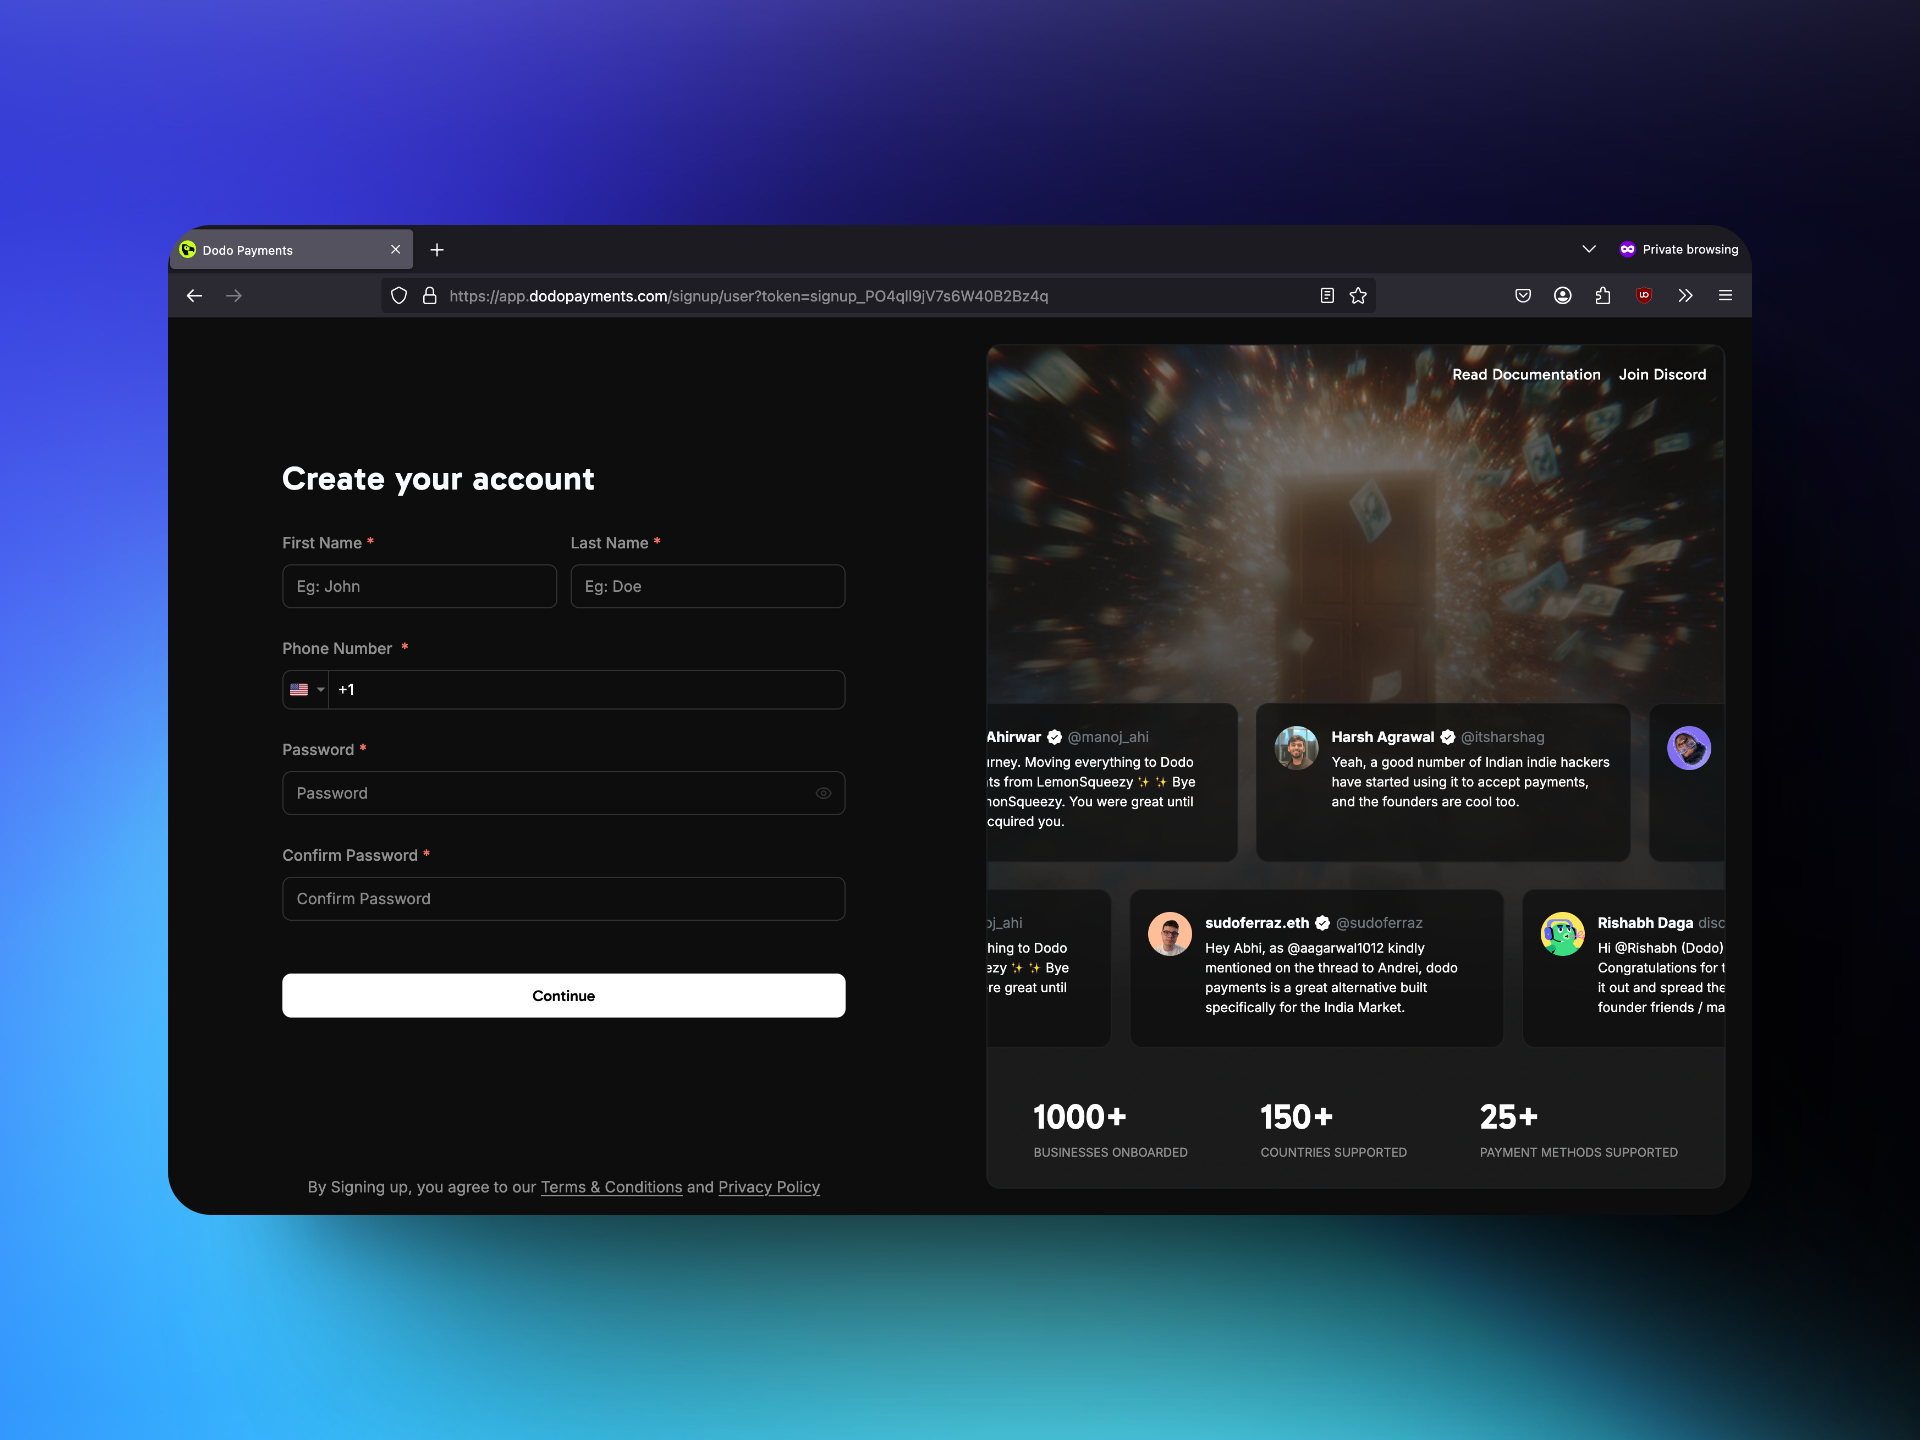 1. The teammate receives an invitation link via email and clicks on it.
2. If they do not have a Dodo Payments account, they are directed to the signup page where they need to provide the required details. If they already have a Dodo Payments account they can access the business through the business toggle on the bottom left.
3. After completing the signup process, they gain access to the dashboard.
## Roles and Permissions
1. The teammate receives an invitation link via email and clicks on it.
2. If they do not have a Dodo Payments account, they are directed to the signup page where they need to provide the required details. If they already have a Dodo Payments account they can access the business through the business toggle on the bottom left.
3. After completing the signup process, they gain access to the dashboard.
## Roles and Permissions
 The Dodo Dashboard has three types of user roles, each with different levels of access. The role icon of the user can be seen in the bottom left of the dashboard.
### 1. Owner
The **Owner** has the highest level of access and full control over the account. Only the account owner holds this role and has the exclusive ability to invite new users. The ownership of the account cannot be transferred.
### 2. Editor
Editors have almost the same permissions as the Owner, except they cannot invite new Editors. However, they can invite and remove users with the Viewer role. Additionally, they can create, edit, and delete products and make other modifications within the dashboard.
### 3. Viewer
Viewers have read-only access to the dashboard. They can view all information, including products, transactions, and reports, but cannot add, edit, or delete products or make any modifications.
The Dodo Dashboard has three types of user roles, each with different levels of access. The role icon of the user can be seen in the bottom left of the dashboard.
### 1. Owner
The **Owner** has the highest level of access and full control over the account. Only the account owner holds this role and has the exclusive ability to invite new users. The ownership of the account cannot be transferred.
### 2. Editor
Editors have almost the same permissions as the Owner, except they cannot invite new Editors. However, they can invite and remove users with the Viewer role. Additionally, they can create, edit, and delete products and make other modifications within the dashboard.
### 3. Viewer
Viewers have read-only access to the dashboard. They can view all information, including products, transactions, and reports, but cannot add, edit, or delete products or make any modifications.