> ## Documentation Index
> Fetch the complete documentation index at: https://docs.dodopayments.com/llms.txt
> Use this file to discover all available pages before exploring further.
# Checkout Features
> Conversion-optimized, globally compliant checkout with multi-currency, multi-language support, automatic tax calculation, discount codes, add-ons, and smart address collection.
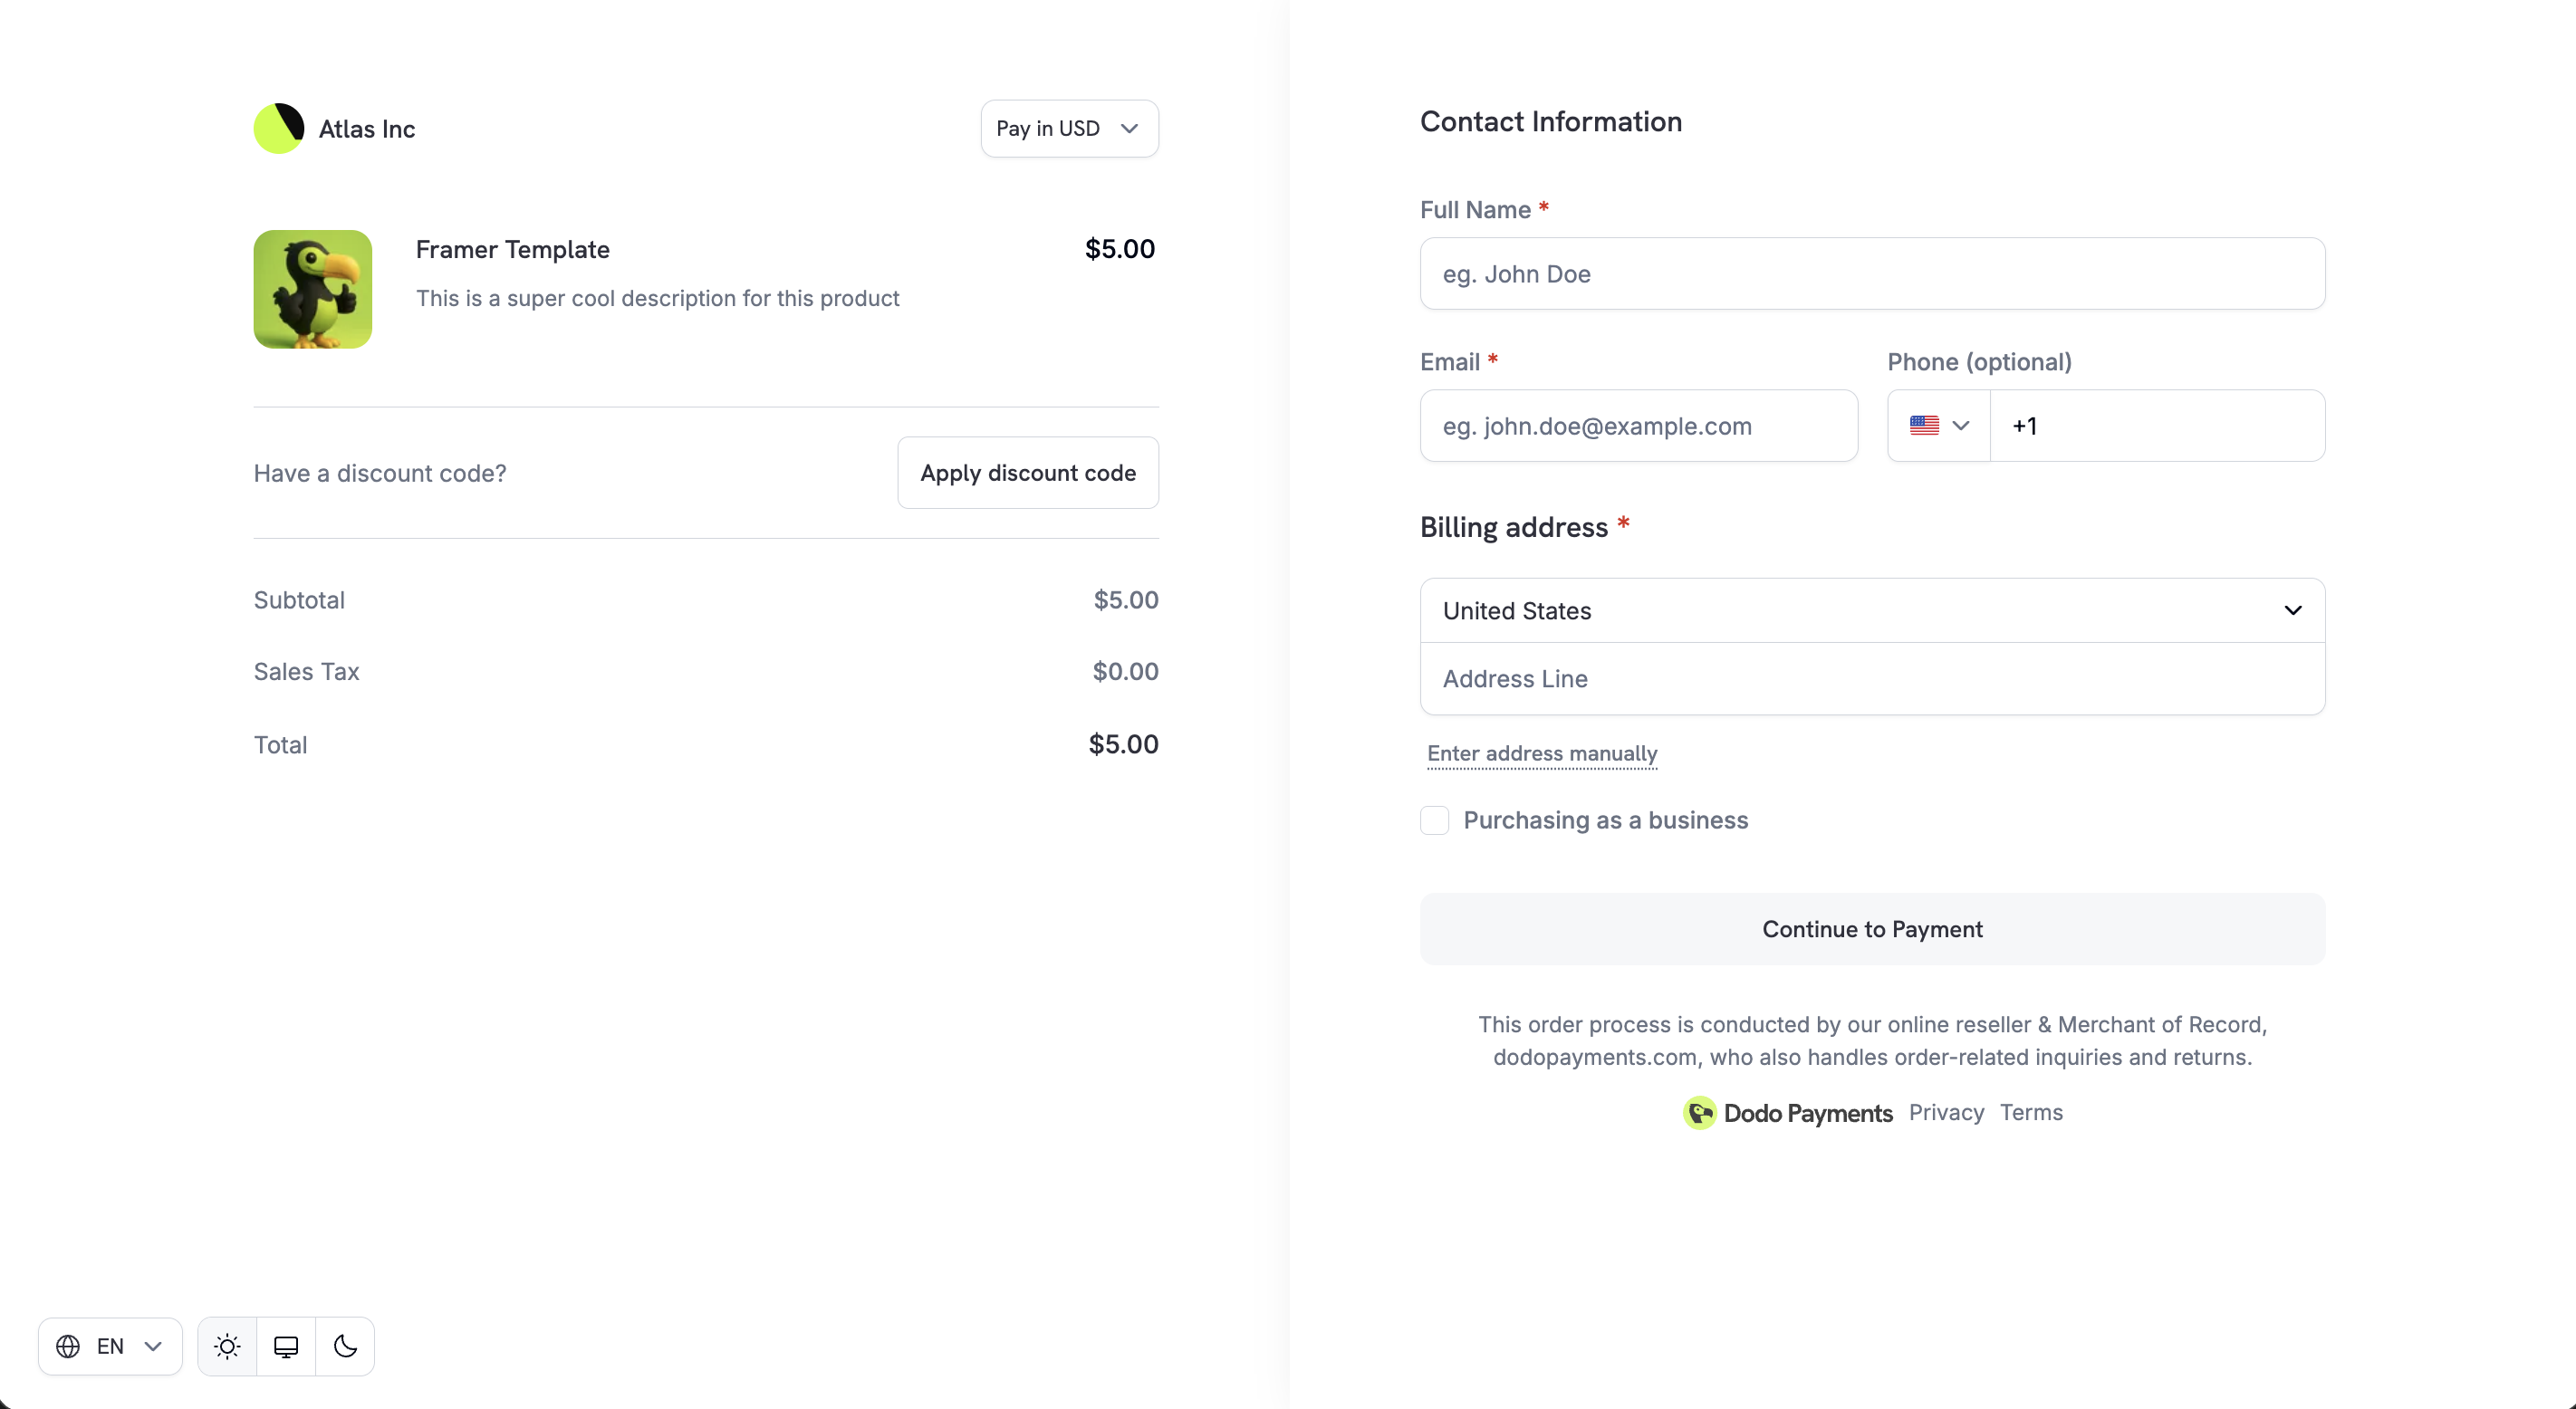 Dodo Payments checkout is a conversion-optimized, globally compliant checkout designed for digital products and SaaS businesses. It supports multiple currencies, languages, taxes, discounts, add-ons, and business-friendly compliance workflows.
Create hosted checkout sessions programmatically.
Calculate pricing and taxes before creating a session.
Supported payment methods and configuration options.
## Adaptive Currency
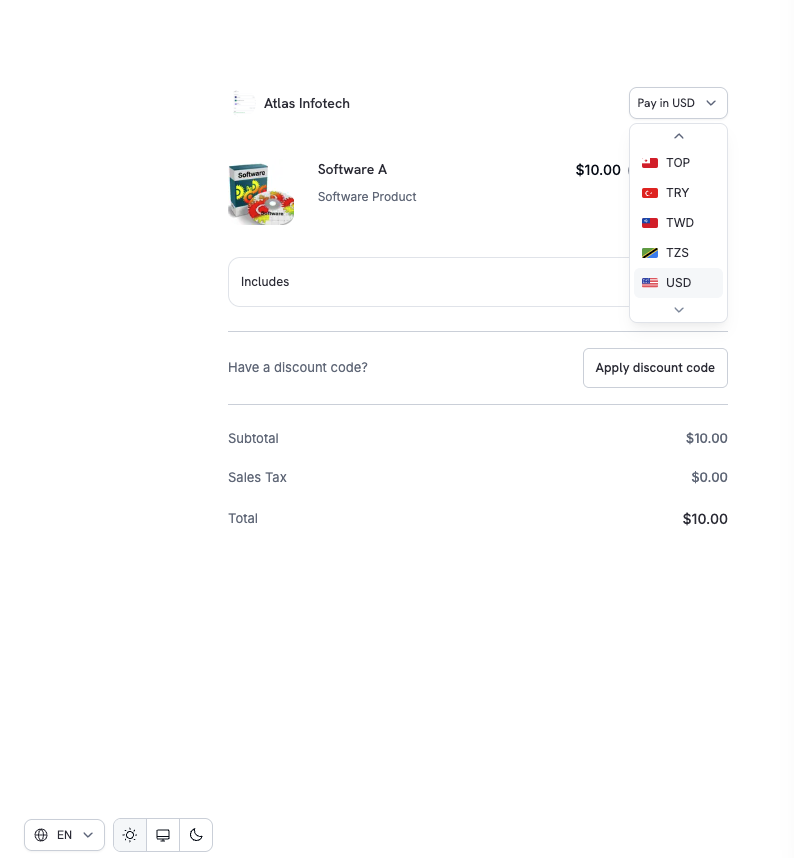
Adaptive Currency allows customers to pay in their preferred local currency, improving trust and conversion rates.
### How It Works
1. **Enable**: Enable Adaptive Currency from **Settings → Business**
2. **Select**: Customers can switch currencies directly on checkout
3. **Convert**: Prices are dynamically converted using real-time FX rates
4. **Display**: Final payable amount is shown transparently before payment
Dodo Payments checkout is a conversion-optimized, globally compliant checkout designed for digital products and SaaS businesses. It supports multiple currencies, languages, taxes, discounts, add-ons, and business-friendly compliance workflows.
Create hosted checkout sessions programmatically.
Calculate pricing and taxes before creating a session.
Supported payment methods and configuration options.
## Adaptive Currency
Adaptive Currency allows customers to pay in their preferred local currency, improving trust and conversion rates.
### How It Works
1. **Enable**: Enable Adaptive Currency from **Settings → Business**
2. **Select**: Customers can switch currencies directly on checkout
3. **Convert**: Prices are dynamically converted using real-time FX rates
4. **Display**: Final payable amount is shown transparently before payment
 Learn more about supported currencies, conversion fees, and refund handling.
## Multi-Language Checkout
Dodo Payments supports multiple languages on the checkout page, allowing customers to complete payments in a language they're comfortable with.
Learn more about supported currencies, conversion fees, and refund handling.
## Multi-Language Checkout
Dodo Payments supports multiple languages on the checkout page, allowing customers to complete payments in a language they're comfortable with.
 ### Key Highlights
* Language selector available directly on checkout
* UI text, labels, and system messages are localized
* Improves accessibility and international conversion
### Supported Languages
The checkout page supports 21 languages:
| Language | Code |
| ---------- | ---- |
| Arabic | `ar` |
| Catalan | `ca` |
| Chinese | `zh` |
| Dutch | `nl` |
| English | `en` |
| French | `fr` |
| German | `de` |
| Hebrew | `he` |
| Indonesian | `id` |
| Italian | `it` |
| Japanese | `ja` |
| Korean | `ko` |
| Malay | `ms` |
| Polish | `pl` |
| Portuguese | `pt` |
| Romanian | `ro` |
| Russian | `ru` |
| Spanish | `es` |
| Swedish | `sv` |
| Thai | `th` |
| Turkish | `tr` |
You can force a specific language on the checkout by setting the `force_language` parameter when creating a checkout session. See the [Checkout Sessions API](/developer-resources/checkout-session#14-forcing-a-language) for details.
## Automatic Tax Calculation
Taxes are automatically calculated based on the customer's billing location, ensuring compliance with GST, VAT, and sales tax requirements without manual setup.
### How Tax Calculation Works
Tax rules are applied based on the customer's country (and region where applicable).
Tax amount updates automatically when:
* Country changes
* Address is updated
Final tax breakdown is shown clearly before payment.
Tax calculation is fully automated. No manual configuration required for standard digital goods and SaaS products.
## Business Tax ID Support
For registered businesses, the checkout allows customers to enter their Business Tax ID (e.g., VAT/GST number).
### What Happens When a Tax ID Is Entered
* Tax eligibility is validated in real-time
* Applicable tax exemptions or reverse-charge rules are applied
* Tax amount updates instantly on checkout
### Key Highlights
* Language selector available directly on checkout
* UI text, labels, and system messages are localized
* Improves accessibility and international conversion
### Supported Languages
The checkout page supports 21 languages:
| Language | Code |
| ---------- | ---- |
| Arabic | `ar` |
| Catalan | `ca` |
| Chinese | `zh` |
| Dutch | `nl` |
| English | `en` |
| French | `fr` |
| German | `de` |
| Hebrew | `he` |
| Indonesian | `id` |
| Italian | `it` |
| Japanese | `ja` |
| Korean | `ko` |
| Malay | `ms` |
| Polish | `pl` |
| Portuguese | `pt` |
| Romanian | `ro` |
| Russian | `ru` |
| Spanish | `es` |
| Swedish | `sv` |
| Thai | `th` |
| Turkish | `tr` |
You can force a specific language on the checkout by setting the `force_language` parameter when creating a checkout session. See the [Checkout Sessions API](/developer-resources/checkout-session#14-forcing-a-language) for details.
## Automatic Tax Calculation
Taxes are automatically calculated based on the customer's billing location, ensuring compliance with GST, VAT, and sales tax requirements without manual setup.
### How Tax Calculation Works
Tax rules are applied based on the customer's country (and region where applicable).
Tax amount updates automatically when:
* Country changes
* Address is updated
Final tax breakdown is shown clearly before payment.
Tax calculation is fully automated. No manual configuration required for standard digital goods and SaaS products.
## Business Tax ID Support
For registered businesses, the checkout allows customers to enter their Business Tax ID (e.g., VAT/GST number).
### What Happens When a Tax ID Is Entered
* Tax eligibility is validated in real-time
* Applicable tax exemptions or reverse-charge rules are applied
* Tax amount updates instantly on checkout
 This is especially useful for B2B SaaS and digital services where business customers may be eligible for tax exemptions.
## Discount Codes
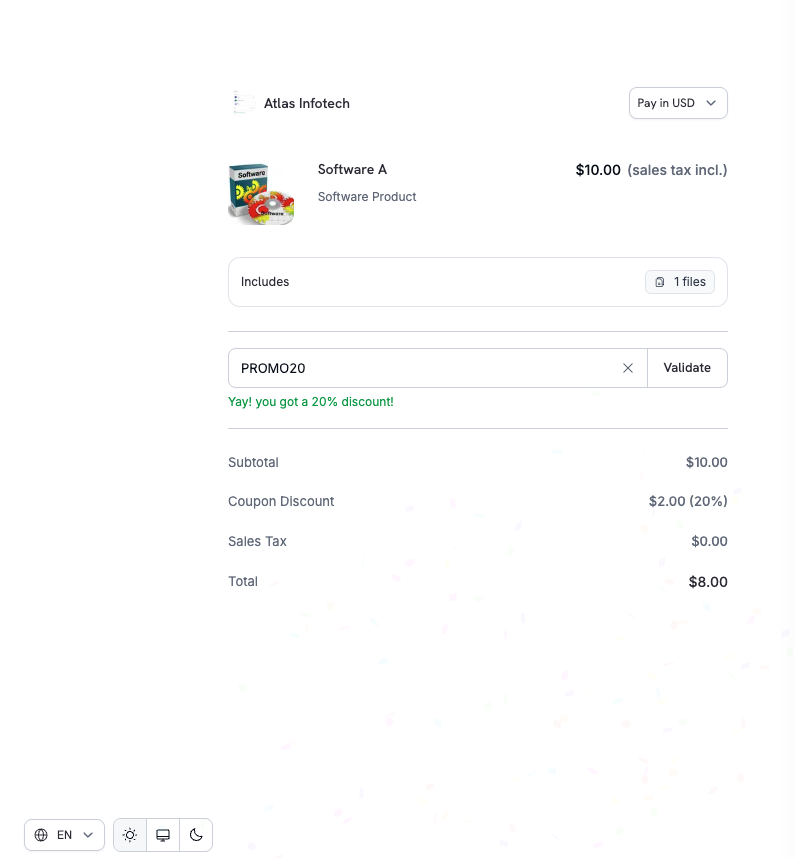
Customers can apply discount or promo codes you've created in the dashboard directly on the checkout page.
### Checkout Experience
1. Customer enters the discount code
2. Discount is validated instantly
3. Updated price and savings are shown clearly
This is especially useful for B2B SaaS and digital services where business customers may be eligible for tax exemptions.
## Discount Codes
Customers can apply discount or promo codes you've created in the dashboard directly on the checkout page.
### Checkout Experience
1. Customer enters the discount code
2. Discount is validated instantly
3. Updated price and savings are shown clearly
 ### API Integration
Pre-apply one or more stacked discount codes or enable the discount input field:
```typescript theme={null}
const session = await client.checkoutSessions.create({
product_cart: [
{ product_id: 'prod_abc', quantity: 1 }
],
discount_codes: ['WELCOME20'], // Pre-apply one or more codes (max 20, applied in order)
feature_flags: {
allow_discount_code: true // Show discount input field
},
return_url: 'https://yoursite.com/return'
});
```
`discount_codes` accepts an array of up to 20 codes that stack in order. The singular `discount_code` field is deprecated but still works — existing integrations don't need to change immediately. Migrate to `discount_codes` when convenient to use stacking and the richer response shape.
Learn how to create and manage discount codes.
Look up and validate discounts using code names.
## Smart Address Collection
The checkout supports flexible address entry for faster completion.
### Options Available
| Option | Description |
| --------------------------- | --------------------------------------------------------------------------------------------------------- |
| **Google Address Autofill** | Quick selection with autocomplete |
| **Manual Entry** | Full control for complete addresses |
| **Country Selection** | Drives tax and compliance logic |
| **Minimal Address** | Collect only country (and ZIP where required for tax) — see [Minimal Address Mode](#minimal-address-mode) |
Address collection balances speed, accuracy, and global coverage to maximize conversion while ensuring compliance.
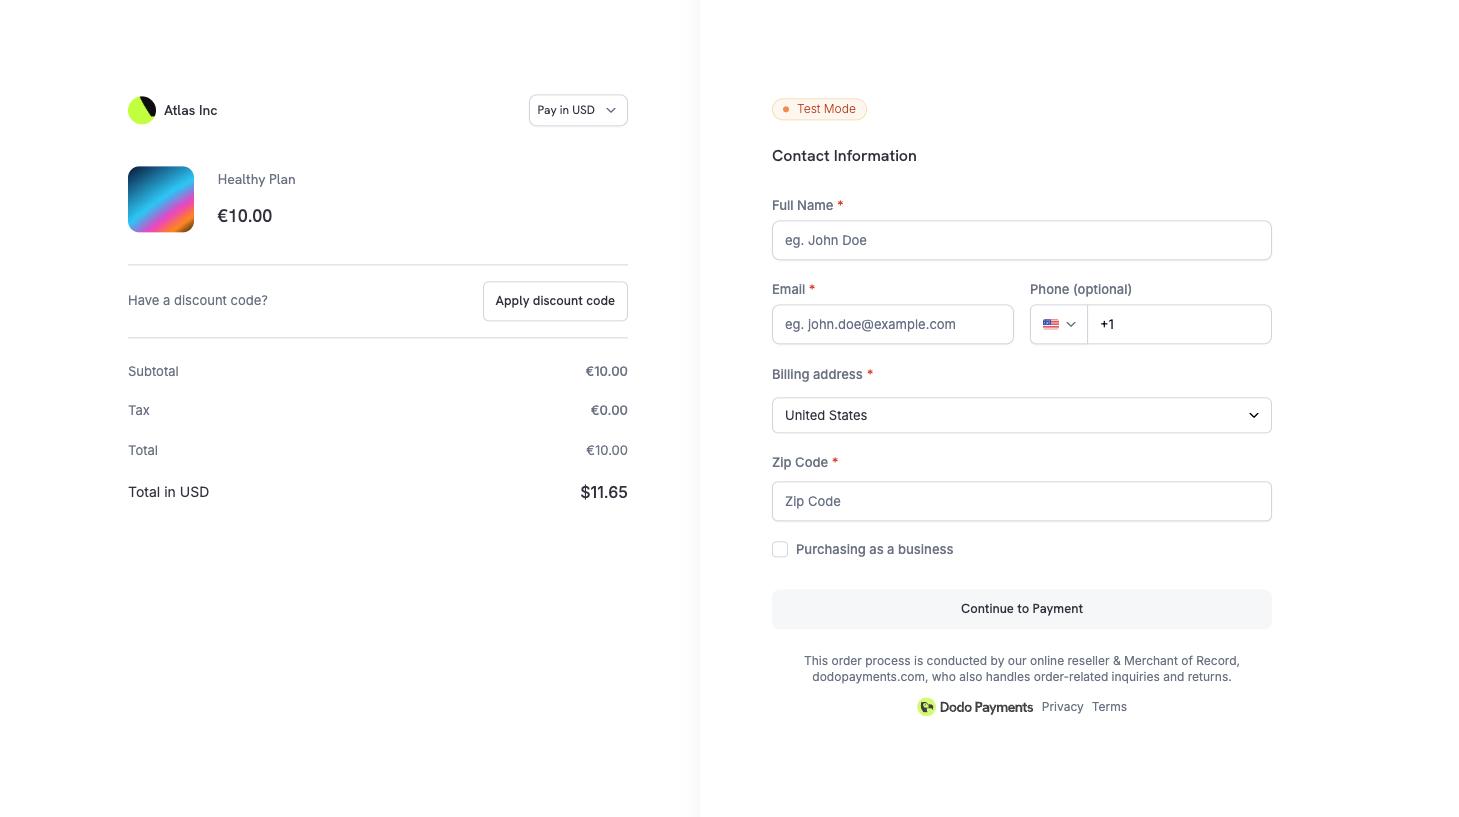
### Minimal Address Mode
For maximum conversion, enable minimal address collection to reduce checkout friction. When `minimal_address` is set to `true`, the checkout only collects:
* **Country** — always required for tax determination
* **ZIP/Postal code** — only in regions where it's necessary for sales tax, VAT, or GST calculation
All other address fields (street, city, state) are skipped, significantly speeding up checkout completion.
### API Integration
Pre-apply one or more stacked discount codes or enable the discount input field:
```typescript theme={null}
const session = await client.checkoutSessions.create({
product_cart: [
{ product_id: 'prod_abc', quantity: 1 }
],
discount_codes: ['WELCOME20'], // Pre-apply one or more codes (max 20, applied in order)
feature_flags: {
allow_discount_code: true // Show discount input field
},
return_url: 'https://yoursite.com/return'
});
```
`discount_codes` accepts an array of up to 20 codes that stack in order. The singular `discount_code` field is deprecated but still works — existing integrations don't need to change immediately. Migrate to `discount_codes` when convenient to use stacking and the richer response shape.
Learn how to create and manage discount codes.
Look up and validate discounts using code names.
## Smart Address Collection
The checkout supports flexible address entry for faster completion.
### Options Available
| Option | Description |
| --------------------------- | --------------------------------------------------------------------------------------------------------- |
| **Google Address Autofill** | Quick selection with autocomplete |
| **Manual Entry** | Full control for complete addresses |
| **Country Selection** | Drives tax and compliance logic |
| **Minimal Address** | Collect only country (and ZIP where required for tax) — see [Minimal Address Mode](#minimal-address-mode) |
Address collection balances speed, accuracy, and global coverage to maximize conversion while ensuring compliance.
### Minimal Address Mode
For maximum conversion, enable minimal address collection to reduce checkout friction. When `minimal_address` is set to `true`, the checkout only collects:
* **Country** — always required for tax determination
* **ZIP/Postal code** — only in regions where it's necessary for sales tax, VAT, or GST calculation
All other address fields (street, city, state) are skipped, significantly speeding up checkout completion.
 ```typescript theme={null}
const session = await client.checkoutSessions.create({
product_cart: [
{ product_id: 'prod_abc', quantity: 1 }
],
minimal_address: true,
return_url: 'https://yoursite.com/return'
});
```
Full address collection remains the default. Enable `minimal_address` for digital products and SaaS flows where complete billing details aren't required.
See the full `minimal_address` parameter reference in the Checkout Sessions API guide.
## Phone Number Collection
Control whether the phone number field appears on checkout — and whether it's required — using checkout session feature flags.
| Flag | Default | Behavior |
| ------------------------------- | ------- | ---------------------------------------------------------------------------------- |
| `allow_phone_number_collection` | `true` | Shows the phone number field on the checkout form |
| `require_phone_number` | `false` | Makes the phone number field required (form validation enforces a non-empty value) |
```typescript theme={null}
const session = await client.checkoutSessions.create({
product_cart: [{ product_id: 'prod_abc', quantity: 1 }],
feature_flags: {
allow_phone_number_collection: true,
require_phone_number: true
},
return_url: 'https://yoursite.com/return'
});
```
`require_phone_number: true` requires `allow_phone_number_collection: true`. The API rejects sessions where phone collection is disabled while phone number is required.
Use `require_phone_number` for B2B SaaS, regulated industries, or any flow where you need a verified contact channel for support, fraud review, or compliance.
## Custom Fields
Collect additional information from customers during checkout by defining custom form fields. This is useful for gathering data like company name, team size, referral source, or any other business-specific information.
### Available Field Types
| Type | Description |
| ---------- | ------------------------------ |
| `text` | Single-line text input |
| `number` | Numeric input |
| `email` | Email address with validation |
| `url` | URL with validation |
| `date` | Date picker |
| `dropdown` | Select from predefined options |
| `boolean` | Yes/No toggle |
### Example
```typescript theme={null}
const session = await client.checkoutSessions.create({
product_cart: [
{ product_id: 'prod_abc', quantity: 1 }
],
custom_fields: [
{
key: 'company_name',
label: 'Company Name',
field_type: 'text',
required: true
},
{
key: 'team_size',
label: 'Team Size',
field_type: 'dropdown',
required: true,
options: ['1-10', '11-50', '51-200', '200+']
}
],
return_url: 'https://yoursite.com/return'
});
```
Customer responses are automatically included in webhook payloads (`payment.succeeded`, `subscription.active`) and API responses via the `custom_field_responses` array. You can define up to 5 custom fields per checkout session.
Learn more about custom field configuration and accessing responses.
## Privacy Policy & Terms Acceptance
To ensure legal and compliance transparency:
* [Privacy Policy](https://dodopayments.com/privacy-policy) and [Buyer Terms](https://dodopayments.com/buyer-terms) links are clearly displayed on checkout
* Customers explicitly acknowledge these before completing payment
This helps meet global consumer protection and data privacy requirements including GDPR compliance.
## Collection Checkout
Product Collections enable a unified checkout experience where customers can view and select from multiple related products (e.g., Starter, Pro, Enterprise plans) in a single checkout.
### How It Works
1. **All products displayed**: Customers see every active product in the collection
2. **First product pre-selected**: The first product in the collection is automatically selected
3. **Compare options**: Customers can compare pricing and features before choosing
4. **Single selection**: After selecting a product, checkout proceeds with standard payment flow
### Creating a Collection Checkout
```typescript theme={null}
const session = await client.checkoutSessions.create({
product_collection_id: 'pdc_abc123',
product_cart: [], // Required: pass an empty array for collection checkout
return_url: 'https://yoursite.com/return'
});
```
When using `product_collection_id`, pass an empty `product_cart` array. Discount codes cannot be pre-applied at session creation.
Learn how to create and manage product collections for unified checkout experiences.
## Checkout Session Configuration
Control checkout behavior using the Checkout Sessions API:
```typescript theme={null}
const session = await client.checkoutSessions.create({
product_cart: [
{ product_id: 'prod_abc', quantity: 1 }
],
customer: {
email: 'customer@example.com',
name: 'Jane Doe'
},
billing_currency: 'EUR', // Set specific currency
discount_codes: ['PROMO10'],
feature_flags: {
allow_discount_code: true
},
return_url: 'https://yoursite.com/return',
cancel_url: 'https://yoursite.com/pricing', // Optional: where to redirect on cancel
metadata: {
order_ref: 'ORD-12345'
}
});
```
After payment, customers are redirected to your `return_url` with query parameters appended automatically -- including `payment_id` or `subscription_id`, `status`, `email`, and `license_key` (if applicable). See the [Checkout Sessions guide](/developer-resources/checkout-session#request-body) for the full list.
Complete API reference for checkout sessions.
Step-by-step guide to integrating checkout.
## Checkout Theme Customization
Customize the checkout page appearance to match your brand using the `customization.theme_config` parameter when creating a checkout session via the API. Configure colors, fonts, border radius, and button text for both light and dark modes.
```typescript theme={null}
const session = await client.checkoutSessions.create({
product_cart: [
{ product_id: 'prod_abc', quantity: 1 }
],
minimal_address: true,
return_url: 'https://yoursite.com/return'
});
```
Full address collection remains the default. Enable `minimal_address` for digital products and SaaS flows where complete billing details aren't required.
See the full `minimal_address` parameter reference in the Checkout Sessions API guide.
## Phone Number Collection
Control whether the phone number field appears on checkout — and whether it's required — using checkout session feature flags.
| Flag | Default | Behavior |
| ------------------------------- | ------- | ---------------------------------------------------------------------------------- |
| `allow_phone_number_collection` | `true` | Shows the phone number field on the checkout form |
| `require_phone_number` | `false` | Makes the phone number field required (form validation enforces a non-empty value) |
```typescript theme={null}
const session = await client.checkoutSessions.create({
product_cart: [{ product_id: 'prod_abc', quantity: 1 }],
feature_flags: {
allow_phone_number_collection: true,
require_phone_number: true
},
return_url: 'https://yoursite.com/return'
});
```
`require_phone_number: true` requires `allow_phone_number_collection: true`. The API rejects sessions where phone collection is disabled while phone number is required.
Use `require_phone_number` for B2B SaaS, regulated industries, or any flow where you need a verified contact channel for support, fraud review, or compliance.
## Custom Fields
Collect additional information from customers during checkout by defining custom form fields. This is useful for gathering data like company name, team size, referral source, or any other business-specific information.
### Available Field Types
| Type | Description |
| ---------- | ------------------------------ |
| `text` | Single-line text input |
| `number` | Numeric input |
| `email` | Email address with validation |
| `url` | URL with validation |
| `date` | Date picker |
| `dropdown` | Select from predefined options |
| `boolean` | Yes/No toggle |
### Example
```typescript theme={null}
const session = await client.checkoutSessions.create({
product_cart: [
{ product_id: 'prod_abc', quantity: 1 }
],
custom_fields: [
{
key: 'company_name',
label: 'Company Name',
field_type: 'text',
required: true
},
{
key: 'team_size',
label: 'Team Size',
field_type: 'dropdown',
required: true,
options: ['1-10', '11-50', '51-200', '200+']
}
],
return_url: 'https://yoursite.com/return'
});
```
Customer responses are automatically included in webhook payloads (`payment.succeeded`, `subscription.active`) and API responses via the `custom_field_responses` array. You can define up to 5 custom fields per checkout session.
Learn more about custom field configuration and accessing responses.
## Privacy Policy & Terms Acceptance
To ensure legal and compliance transparency:
* [Privacy Policy](https://dodopayments.com/privacy-policy) and [Buyer Terms](https://dodopayments.com/buyer-terms) links are clearly displayed on checkout
* Customers explicitly acknowledge these before completing payment
This helps meet global consumer protection and data privacy requirements including GDPR compliance.
## Collection Checkout
Product Collections enable a unified checkout experience where customers can view and select from multiple related products (e.g., Starter, Pro, Enterprise plans) in a single checkout.
### How It Works
1. **All products displayed**: Customers see every active product in the collection
2. **First product pre-selected**: The first product in the collection is automatically selected
3. **Compare options**: Customers can compare pricing and features before choosing
4. **Single selection**: After selecting a product, checkout proceeds with standard payment flow
### Creating a Collection Checkout
```typescript theme={null}
const session = await client.checkoutSessions.create({
product_collection_id: 'pdc_abc123',
product_cart: [], // Required: pass an empty array for collection checkout
return_url: 'https://yoursite.com/return'
});
```
When using `product_collection_id`, pass an empty `product_cart` array. Discount codes cannot be pre-applied at session creation.
Learn how to create and manage product collections for unified checkout experiences.
## Checkout Session Configuration
Control checkout behavior using the Checkout Sessions API:
```typescript theme={null}
const session = await client.checkoutSessions.create({
product_cart: [
{ product_id: 'prod_abc', quantity: 1 }
],
customer: {
email: 'customer@example.com',
name: 'Jane Doe'
},
billing_currency: 'EUR', // Set specific currency
discount_codes: ['PROMO10'],
feature_flags: {
allow_discount_code: true
},
return_url: 'https://yoursite.com/return',
cancel_url: 'https://yoursite.com/pricing', // Optional: where to redirect on cancel
metadata: {
order_ref: 'ORD-12345'
}
});
```
After payment, customers are redirected to your `return_url` with query parameters appended automatically -- including `payment_id` or `subscription_id`, `status`, `email`, and `license_key` (if applicable). See the [Checkout Sessions guide](/developer-resources/checkout-session#request-body) for the full list.
Complete API reference for checkout sessions.
Step-by-step guide to integrating checkout.
## Checkout Theme Customization
Customize the checkout page appearance to match your brand using the `customization.theme_config` parameter when creating a checkout session via the API. Configure colors, fonts, border radius, and button text for both light and dark modes.
 Configure themes visually from the dashboard with pre-built themes, typography, colors, and live preview.
This section covers the **server-side API** theme configuration using `customization.theme_config`. If you're using the **Checkout SDK** (overlay or inline checkout), see the theme customization sections in [Overlay Checkout](/developer-resources/overlay-checkout#theme-customization) or [Inline Checkout](/developer-resources/inline-checkout#theme-customization) which use camelCase properties (e.g., `bgPrimary` instead of `bg_primary`).
### Theme Configuration Options
| Property | Description |
| -------------------- | --------------------------------------------------------------------------- |
| `light` | Color configuration for light mode |
| `dark` | Color configuration for dark mode |
| `font_primary_url` | URL for the primary font |
| `font_secondary_url` | URL for the secondary font |
| `font_size` | Font size: `xs`, `sm`, `md`, `lg`, `xl`, `2xl` |
| `font_weight` | Font weight: `normal`, `medium`, `bold`, `extraBold` |
| `radius` | Border radius for UI elements (e.g., `4px`, `0.5rem`, `8px`) |
| `pay_button_text` | Custom text for the pay button (e.g., "Complete Purchase", "Subscribe Now") |
### Color Configuration (Light/Dark Mode)
Each mode (`light` and `dark`) supports the following color properties:
| Property | Description |
| ------------------------ | --------------------------------- |
| `bg_primary` | Background primary color |
| `bg_secondary` | Background secondary color |
| `text_primary` | Text primary color |
| `text_secondary` | Text secondary color |
| `text_placeholder` | Text placeholder color |
| `text_error` | Text error color |
| `text_success` | Text success color |
| `border_primary` | Border primary color |
| `border_secondary` | Border secondary color |
| `button_primary` | Primary button background color |
| `button_primary_hover` | Primary button hover color |
| `button_secondary` | Secondary button background color |
| `button_secondary_hover` | Secondary button hover color |
| `button_text_primary` | Primary button text color |
| `button_text_secondary` | Secondary button text color |
| `input_focus_border` | Input focus border color |
All color fields accept standard CSS color formats:
* Hex: `#fff`, `#ffffff`, `#ffffffff`
* RGB/RGBA: `rgb(255, 255, 255)`, `rgba(255, 255, 255, 0.5)`
* HSL/HSLA: `hsl(120, 100%, 50%)`, `hsla(120, 100%, 50%, 0.5)`
* Named colors: `red`, `blue`, `transparent`
### Example
```typescript theme={null}
const session = await client.checkoutSessions.create({
product_cart: [
{ product_id: 'prod_abc', quantity: 1 }
],
customization: {
theme_config: {
// Custom fonts
font_primary_url: 'https://fonts.googleapis.com/css2?family=Inter:wght@400;500;600&display=swap',
font_size: 'md',
font_weight: 'medium',
radius: '8px',
pay_button_text: 'Complete Purchase',
// Light mode colors
light: {
bg_primary: '#ffffff',
bg_secondary: '#f5f5f5',
text_primary: '#1a1a1a',
text_secondary: '#666666',
button_primary: '#0066ff',
button_primary_hover: '#0052cc',
button_text_primary: '#ffffff',
border_primary: '#e0e0e0'
},
// Dark mode colors
dark: {
bg_primary: '#1a1a1a',
bg_secondary: '#2d2d2d',
text_primary: '#ffffff',
text_secondary: '#a0a0a0',
button_primary: '#3385ff',
button_primary_hover: '#4d99ff',
button_text_primary: '#ffffff',
border_primary: '#404040'
}
}
},
return_url: 'https://yoursite.com/return'
});
```
You don't need to specify all color properties. Any unspecified properties will use the default theme values.
Configure themes visually from the dashboard with pre-built themes, typography, colors, and live preview.
This section covers the **server-side API** theme configuration using `customization.theme_config`. If you're using the **Checkout SDK** (overlay or inline checkout), see the theme customization sections in [Overlay Checkout](/developer-resources/overlay-checkout#theme-customization) or [Inline Checkout](/developer-resources/inline-checkout#theme-customization) which use camelCase properties (e.g., `bgPrimary` instead of `bg_primary`).
### Theme Configuration Options
| Property | Description |
| -------------------- | --------------------------------------------------------------------------- |
| `light` | Color configuration for light mode |
| `dark` | Color configuration for dark mode |
| `font_primary_url` | URL for the primary font |
| `font_secondary_url` | URL for the secondary font |
| `font_size` | Font size: `xs`, `sm`, `md`, `lg`, `xl`, `2xl` |
| `font_weight` | Font weight: `normal`, `medium`, `bold`, `extraBold` |
| `radius` | Border radius for UI elements (e.g., `4px`, `0.5rem`, `8px`) |
| `pay_button_text` | Custom text for the pay button (e.g., "Complete Purchase", "Subscribe Now") |
### Color Configuration (Light/Dark Mode)
Each mode (`light` and `dark`) supports the following color properties:
| Property | Description |
| ------------------------ | --------------------------------- |
| `bg_primary` | Background primary color |
| `bg_secondary` | Background secondary color |
| `text_primary` | Text primary color |
| `text_secondary` | Text secondary color |
| `text_placeholder` | Text placeholder color |
| `text_error` | Text error color |
| `text_success` | Text success color |
| `border_primary` | Border primary color |
| `border_secondary` | Border secondary color |
| `button_primary` | Primary button background color |
| `button_primary_hover` | Primary button hover color |
| `button_secondary` | Secondary button background color |
| `button_secondary_hover` | Secondary button hover color |
| `button_text_primary` | Primary button text color |
| `button_text_secondary` | Secondary button text color |
| `input_focus_border` | Input focus border color |
All color fields accept standard CSS color formats:
* Hex: `#fff`, `#ffffff`, `#ffffffff`
* RGB/RGBA: `rgb(255, 255, 255)`, `rgba(255, 255, 255, 0.5)`
* HSL/HSLA: `hsl(120, 100%, 50%)`, `hsla(120, 100%, 50%, 0.5)`
* Named colors: `red`, `blue`, `transparent`
### Example
```typescript theme={null}
const session = await client.checkoutSessions.create({
product_cart: [
{ product_id: 'prod_abc', quantity: 1 }
],
customization: {
theme_config: {
// Custom fonts
font_primary_url: 'https://fonts.googleapis.com/css2?family=Inter:wght@400;500;600&display=swap',
font_size: 'md',
font_weight: 'medium',
radius: '8px',
pay_button_text: 'Complete Purchase',
// Light mode colors
light: {
bg_primary: '#ffffff',
bg_secondary: '#f5f5f5',
text_primary: '#1a1a1a',
text_secondary: '#666666',
button_primary: '#0066ff',
button_primary_hover: '#0052cc',
button_text_primary: '#ffffff',
border_primary: '#e0e0e0'
},
// Dark mode colors
dark: {
bg_primary: '#1a1a1a',
bg_secondary: '#2d2d2d',
text_primary: '#ffffff',
text_secondary: '#a0a0a0',
button_primary: '#3385ff',
button_primary_hover: '#4d99ff',
button_text_primary: '#ffffff',
border_primary: '#404040'
}
}
},
return_url: 'https://yoursite.com/return'
});
```
You don't need to specify all color properties. Any unspecified properties will use the default theme values.