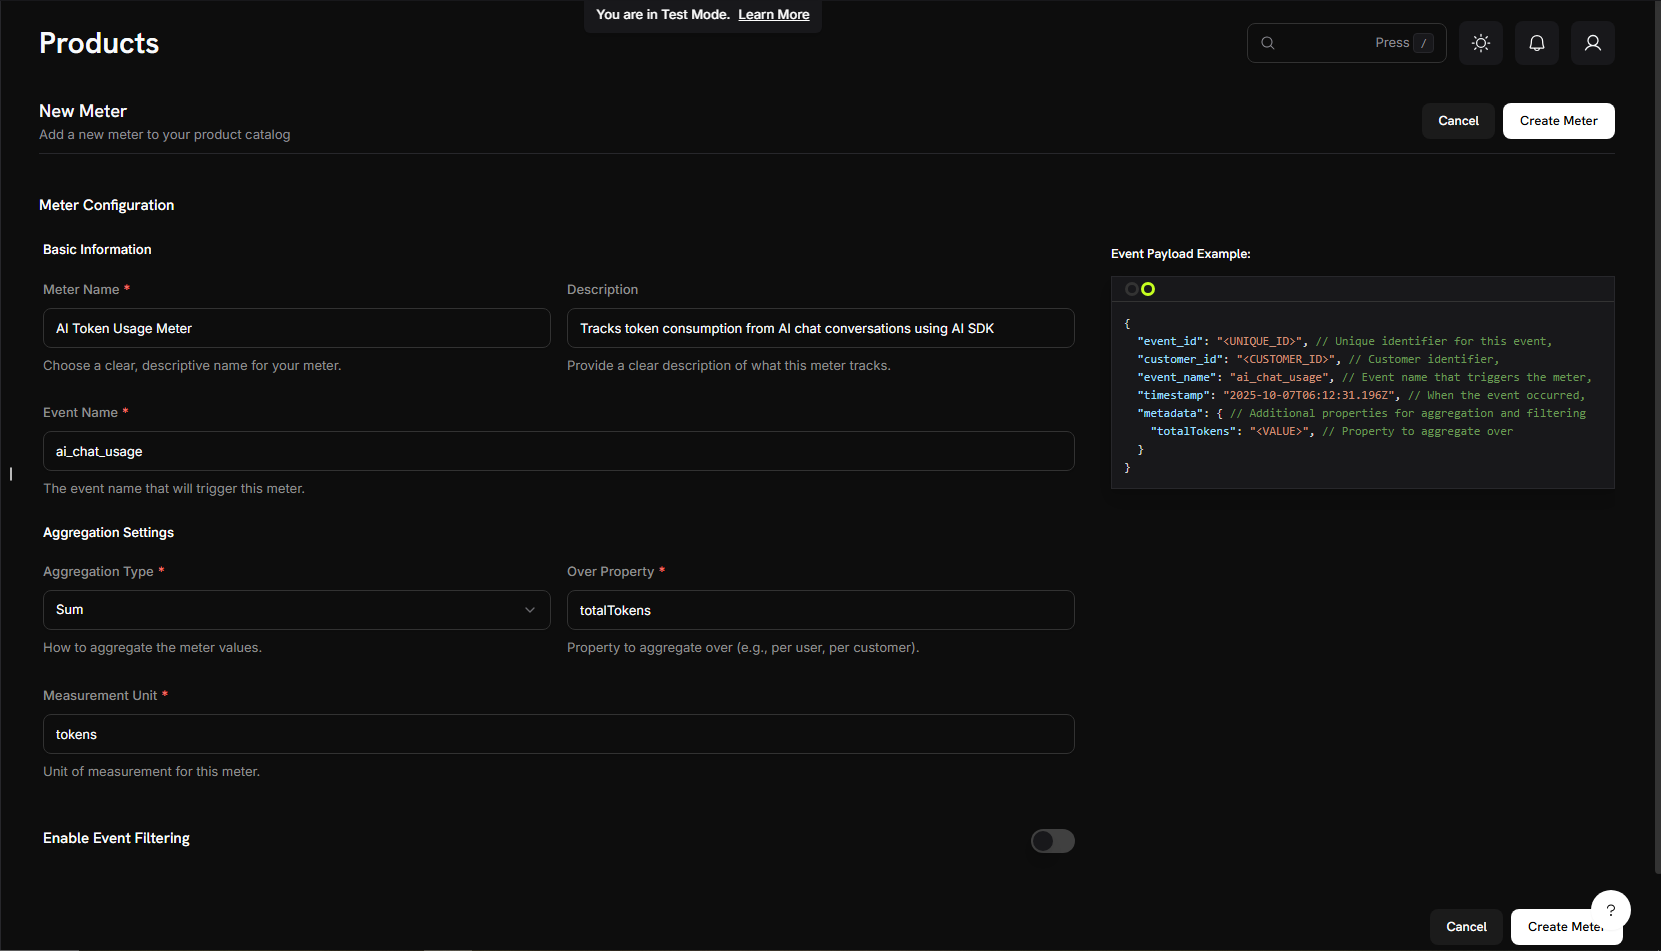
 You should see a form where we'll configure our token tracking.
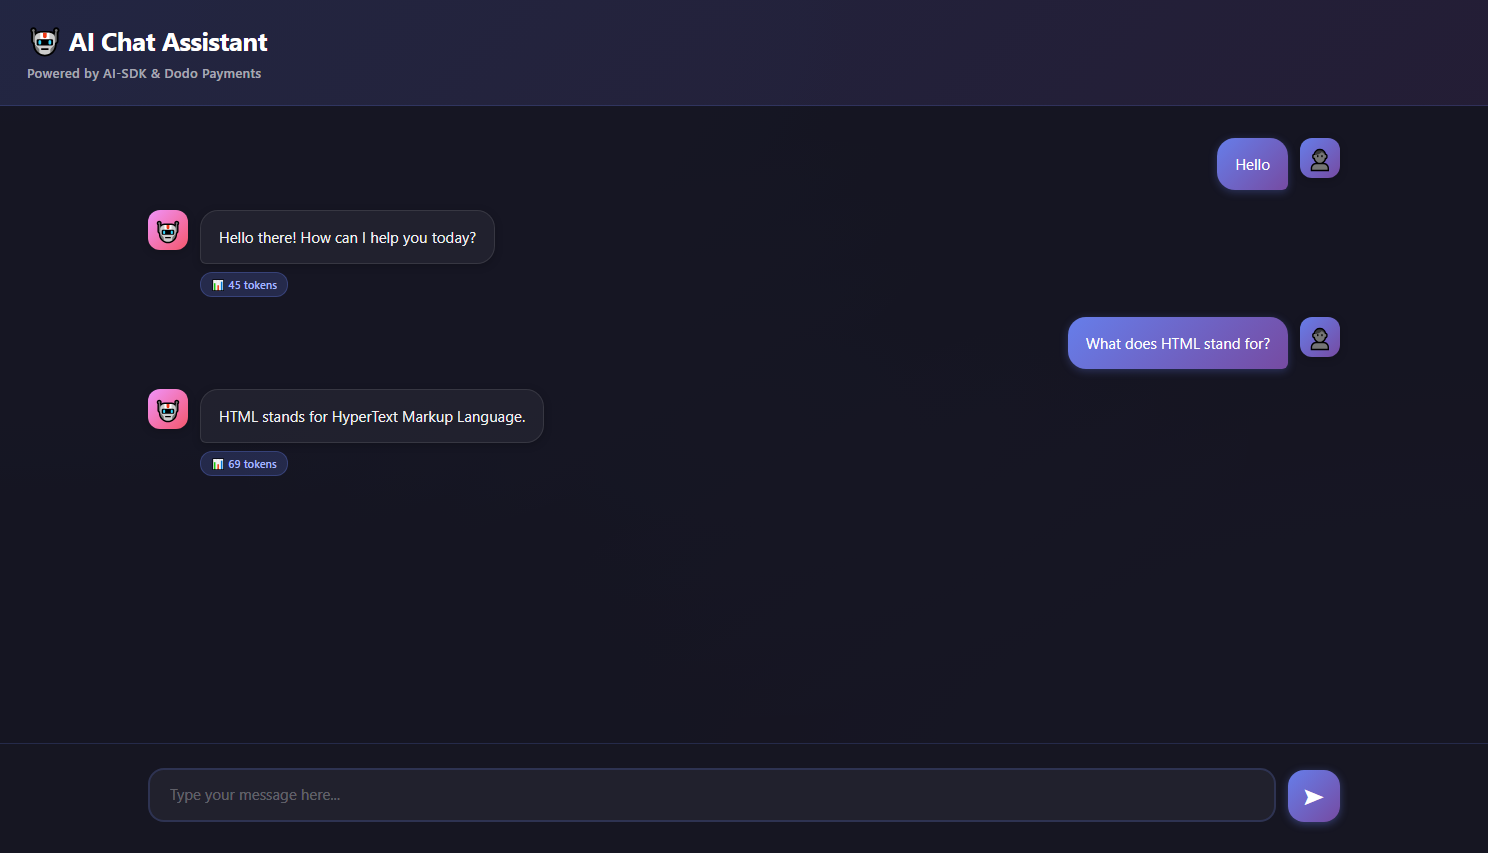 ## What We're Building
Let's start by understanding our AI chat service:
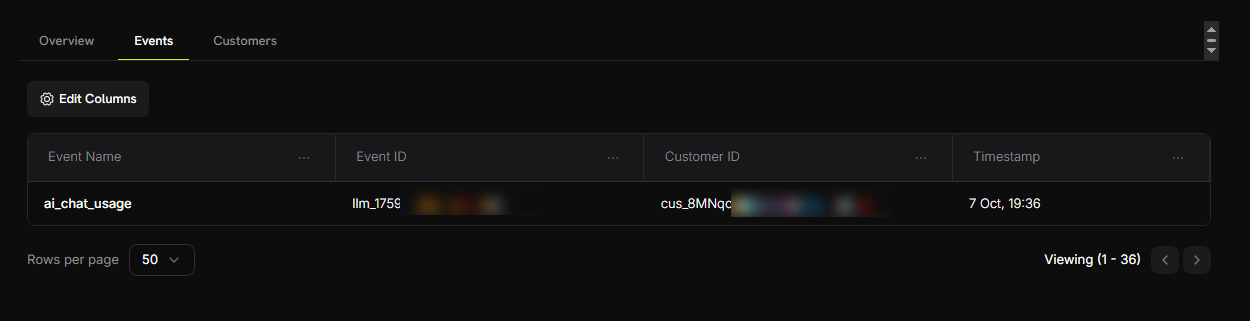
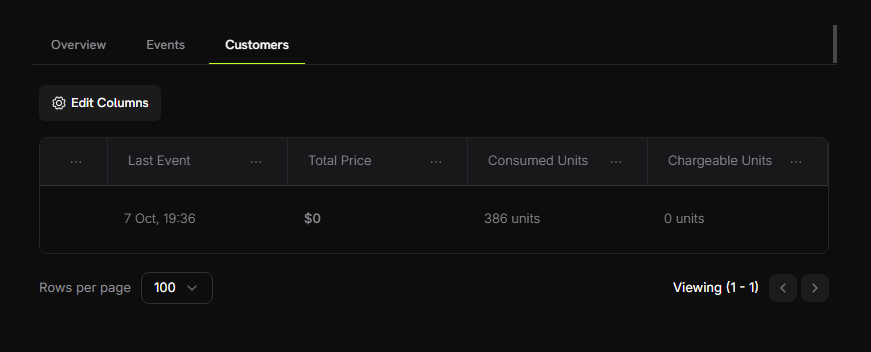
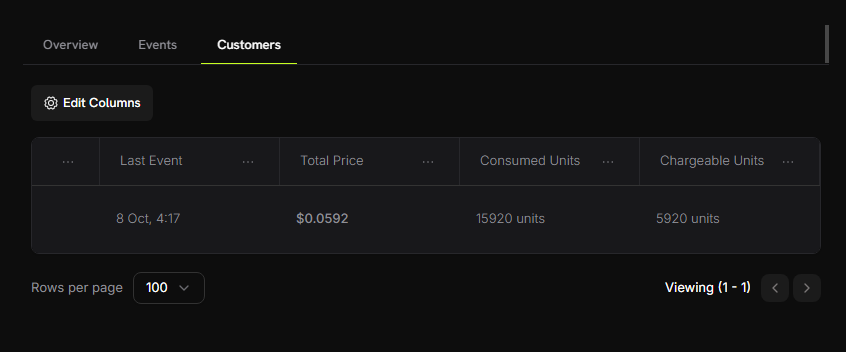
* **Service**: AI-powered chat using Google Gemini (AI SDK)
* **Pricing Model**: Pay-per-token (\$0.01 per 1,000 tokens)
* **Free Tier**: 10,000 free tokens per customer per month
* **Features**: Conversation history, automatic token tracking
You should see a form where we'll configure our token tracking.
## What We're Building
Let's start by understanding our AI chat service:
* **Service**: AI-powered chat using Google Gemini (AI SDK)
* **Pricing Model**: Pay-per-token (\$0.01 per 1,000 tokens)
* **Free Tier**: 10,000 free tokens per customer per month
* **Features**: Conversation history, automatic token tracking
You should see a form where we'll configure our token tracking.
Powered by AI-SDK & Dodo Payments